Adding an Online Reservation App to Your Site - Resort Page
This page describes the /resort sub-node in the Online Reservation App. The /resort sub-node is where a visitor to your website wishing to book a hotel room will choose the hotel building where they will stay. Please refer to the following pages for details about the other sub-nodes:
---
Having added a hotel room booking node to your website as described here, the next step is to specify the resorts that will be shown in the /resort sub-node. The /resort sub-node is the first page that browser users will see when they visit the hotel room booking node. It will include a drop-down menu where browser users will need to choose the resort where they wish to stay.
"Resort" is another term for "Room Location" i.e. it is an individual hotel building. Follow these steps:
- List the resorts in the Room Locations setting in the Hotel module:
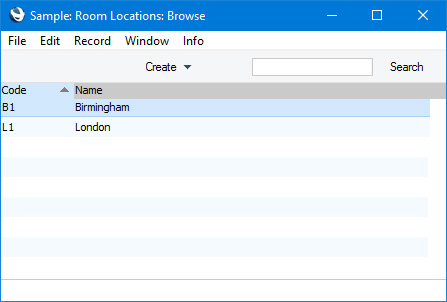
If you only one hotel building, you will still need to add a record for it to the Room Locations setting.
- After listing the resorts in the Room Locations setting, assign each Room Type and each Room to the appropriate Room Location.
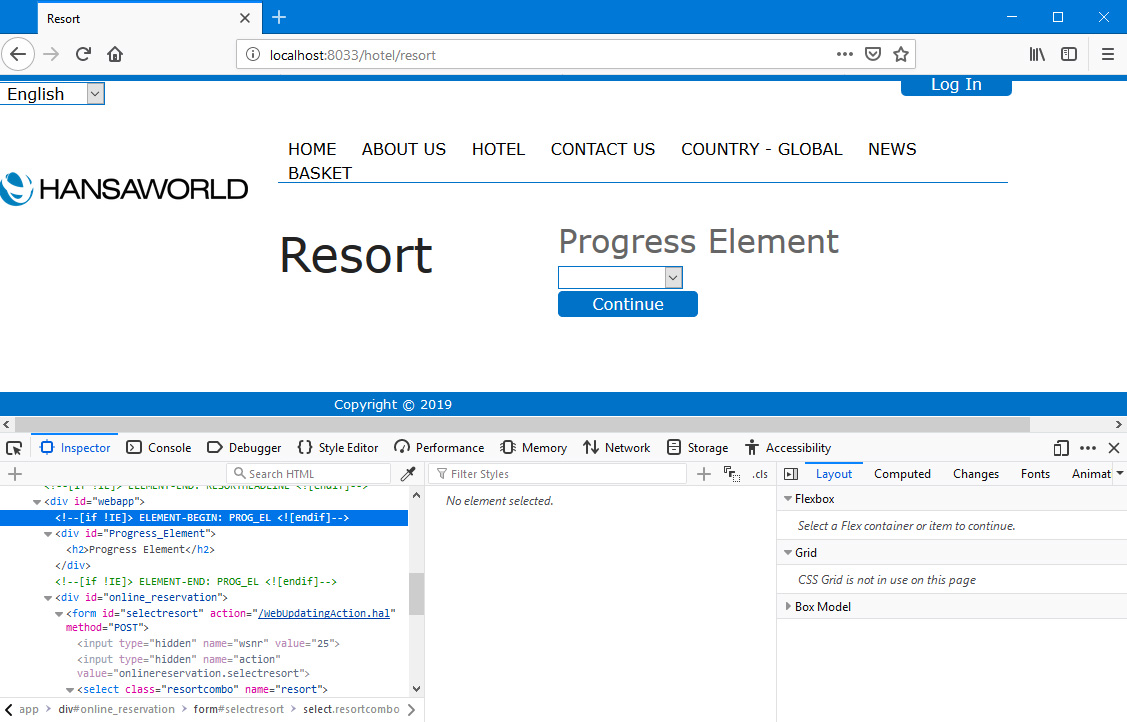
- When a browser user visits the /resort sub-node, the Hotel Area (i.e. the <div id="webapp">) will display a drop-down menu allowing the user to choose the resort where they wish to stay:
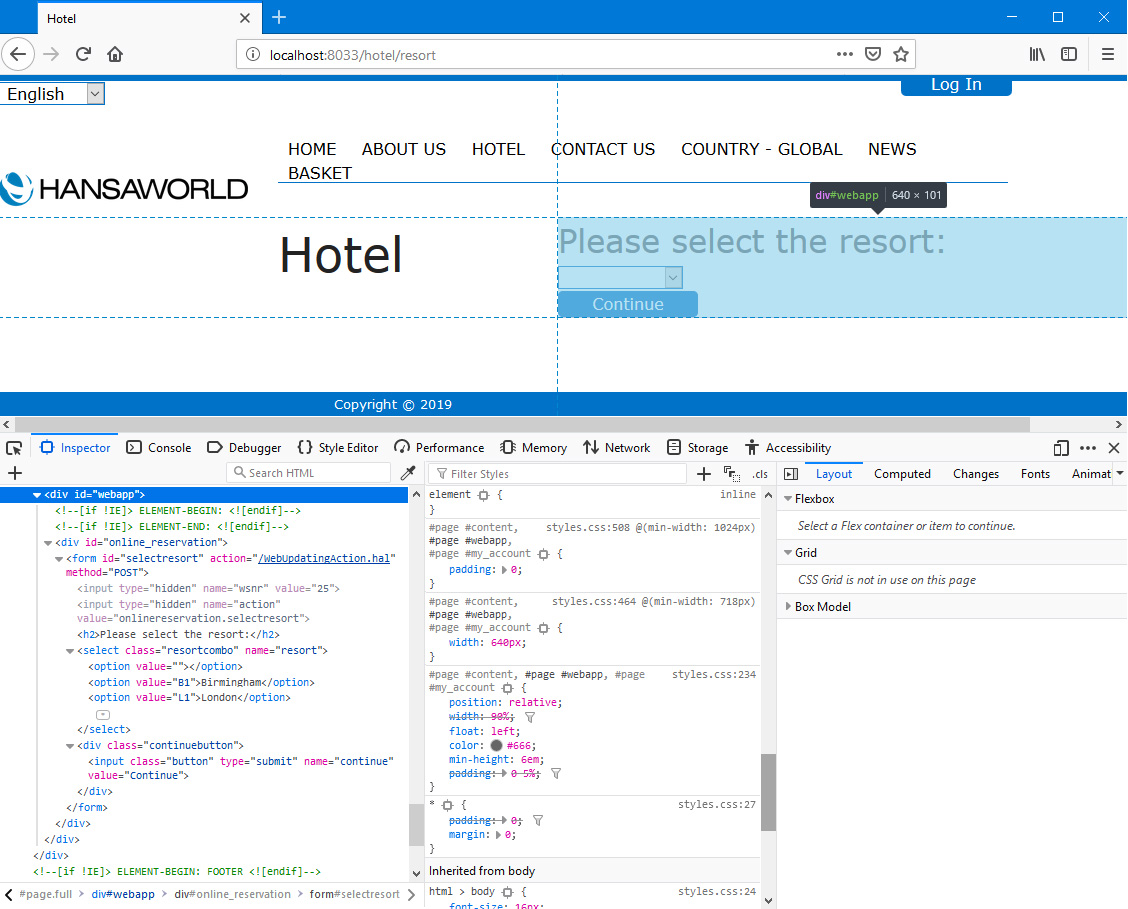
In the illustration above, the following attributes are assigned automatically by Standard ERP (i.e. you will not be able to change these attributes, but you will be able to apply styling to them in your .css file):
- <form id="selectresort"> inside <div id="online_reservation"> (used for the entire resort listing)
- <select class="resortcombo"> (used for the drop-down menu)
- <input class="button"> inside <div class="continuebutton"> (used for the [Continue] button (Web Text 25701))
In the example illustrated above, the browser page displaying the /resort sub-node is based on the Page specified in the Structure record for the
"Online Reservation App" Node. The
<div id="webapp"> occupies the "Content"
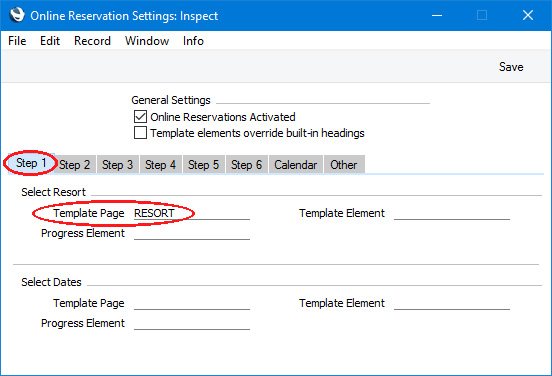
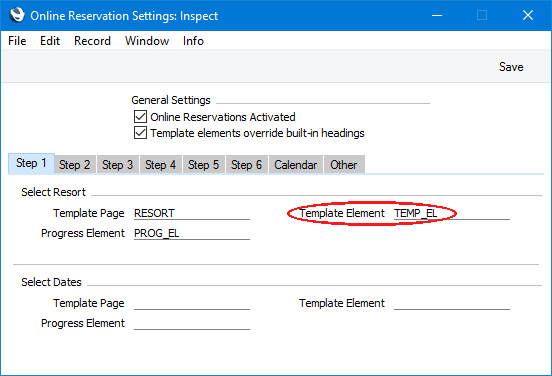
Rel. Position on this Page. An option that is available is to specify that any sub-node will be based on a different Page. For example, if you need the /resort sub-node to be based on a different Page, specify that Page in the Template Page on the 'Step 1' card in the Online Reservation Settings setting in the Hotel module:
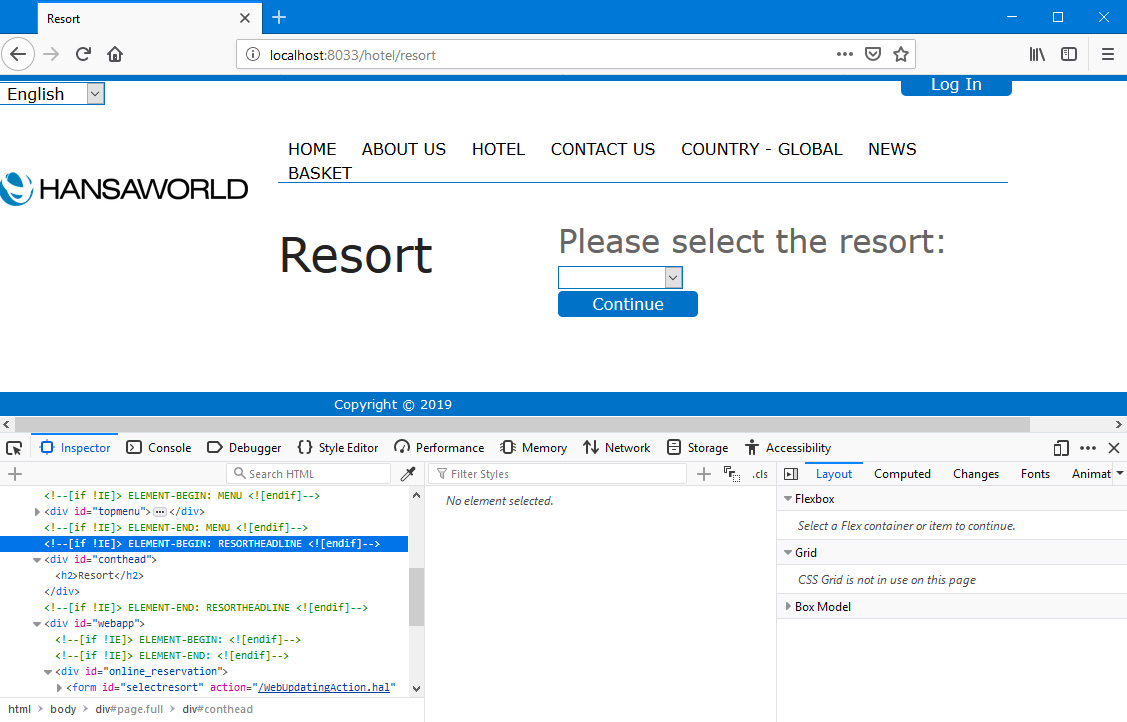
In the illustration below, we have specified a Template Page for the /resort sub-node in which the standard headline "Hotel" to the left of the
<div id="webapp"> that was supplied by the "HOTELHEADLINE" Element has been replaced by "Resort" from the "RESORTHEADLINE" Element that was included in the "RESORT" Web Page:
Although most of the content of
<div id="webapp"> is generated by the Online Reservation App, you can insert an Element at the start of the
<div>. This Element is known as a "Progress Element". Each sub-node can have a different Progress Element. Follow these steps:
- Create an Element with associated Translations:
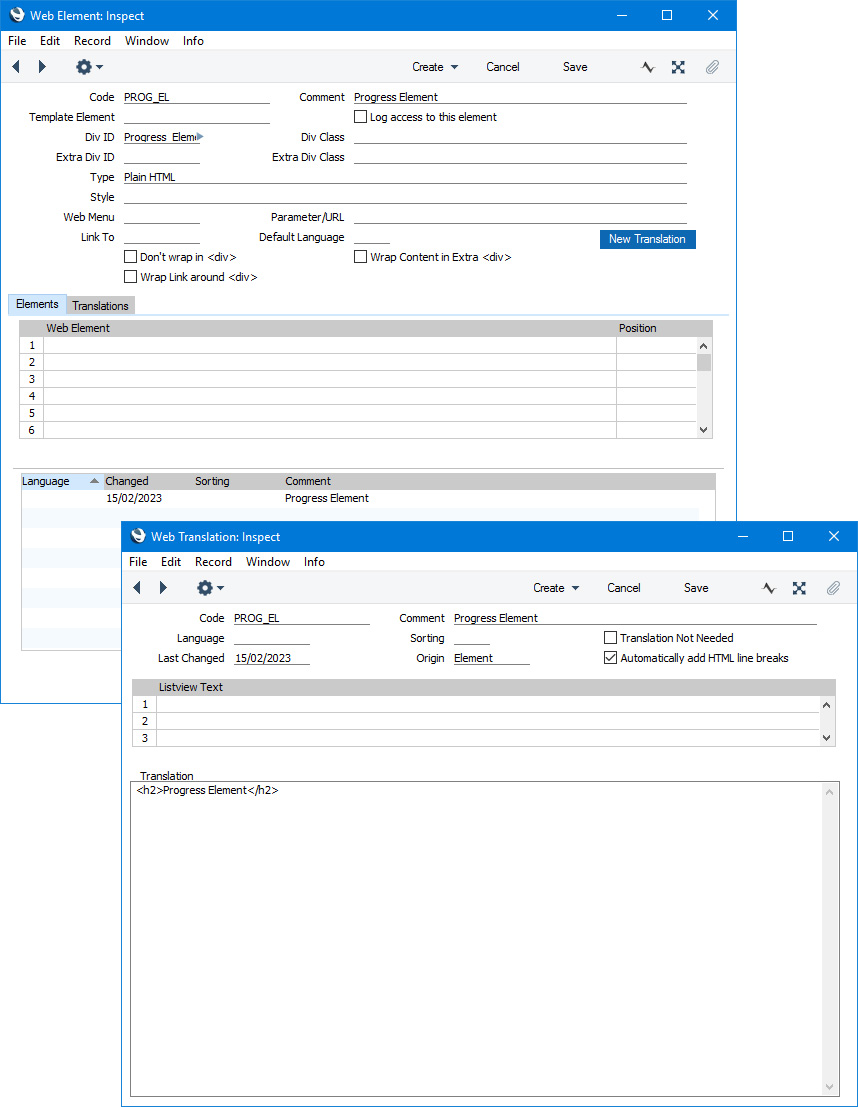
In this example, we have assigned <div id="Progress_Element"> to the Progress Element for illustrative purposes.
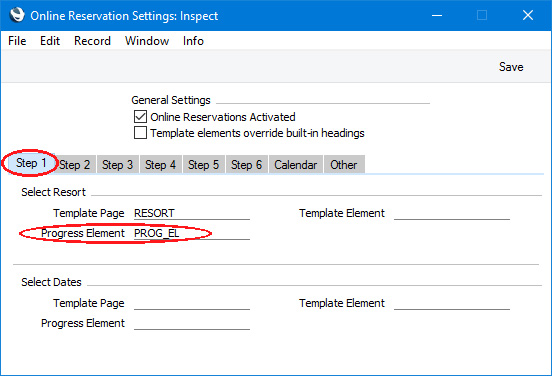
- Specify that the new Element is the Progress Element on the 'Step 1' card in the Online Reservation Settings setting:
This is the result in a browser:
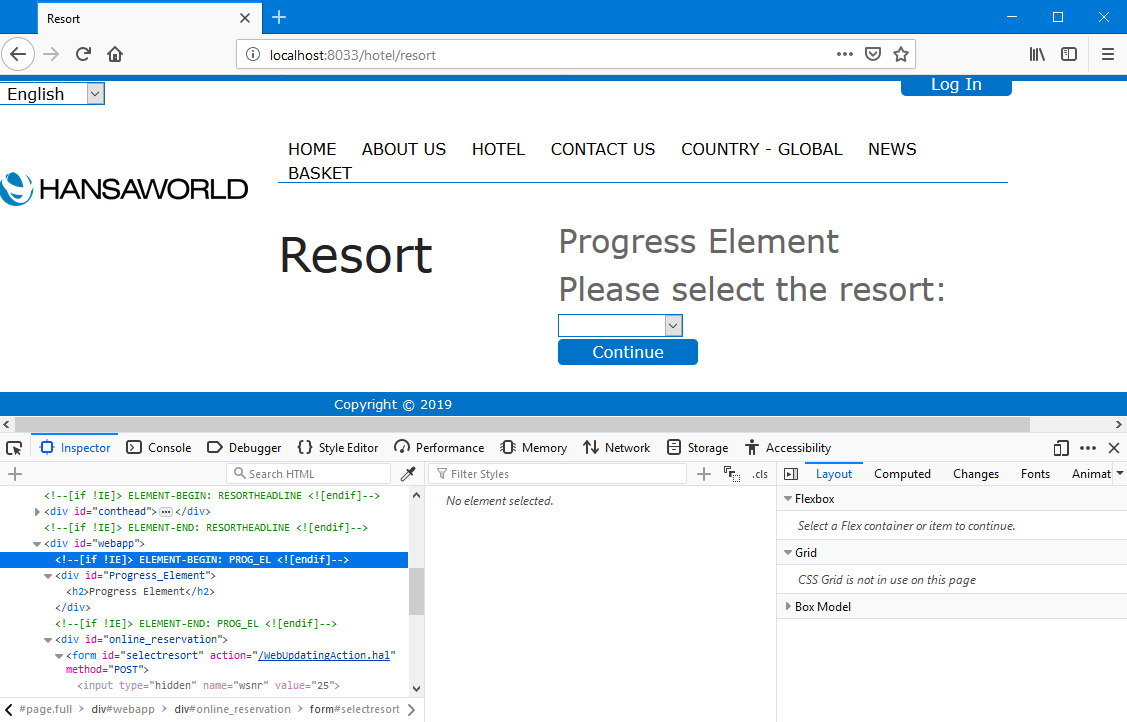
- In this example, we have used the Progress Element to add our own headline to <div id="webapp">. When using a Progress Element for this purpose, you might want to hide the "built-in" headline "Please select the resort: " (Web Text 25700). If so, select the Template elements override built-in headings option in the Online Reservation Settings setting:
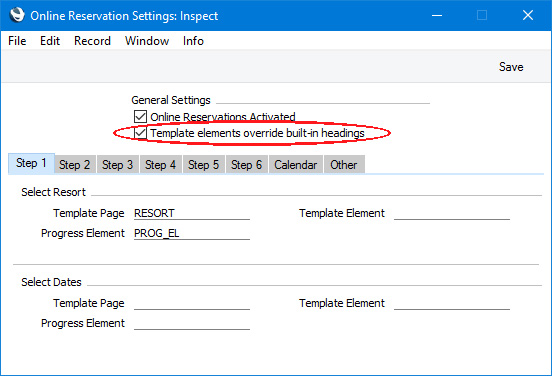
This option applies to all sub-nodes in the Online Reservation App, so if you select it you might need to specify Progress Elements and/or Template Elements (described in step 4 below) for each sub-node.
This is the result:
- You can also add a header and/or footer to be the first and last Elements in the <div id="webapp">. Each sub-node can have different headers and footers. If you also add a Progress Element, the Progress Element will be the first Element followed by the header. Follow these steps:
- Create separate Elements (with associated Translations) for the header and the footer:
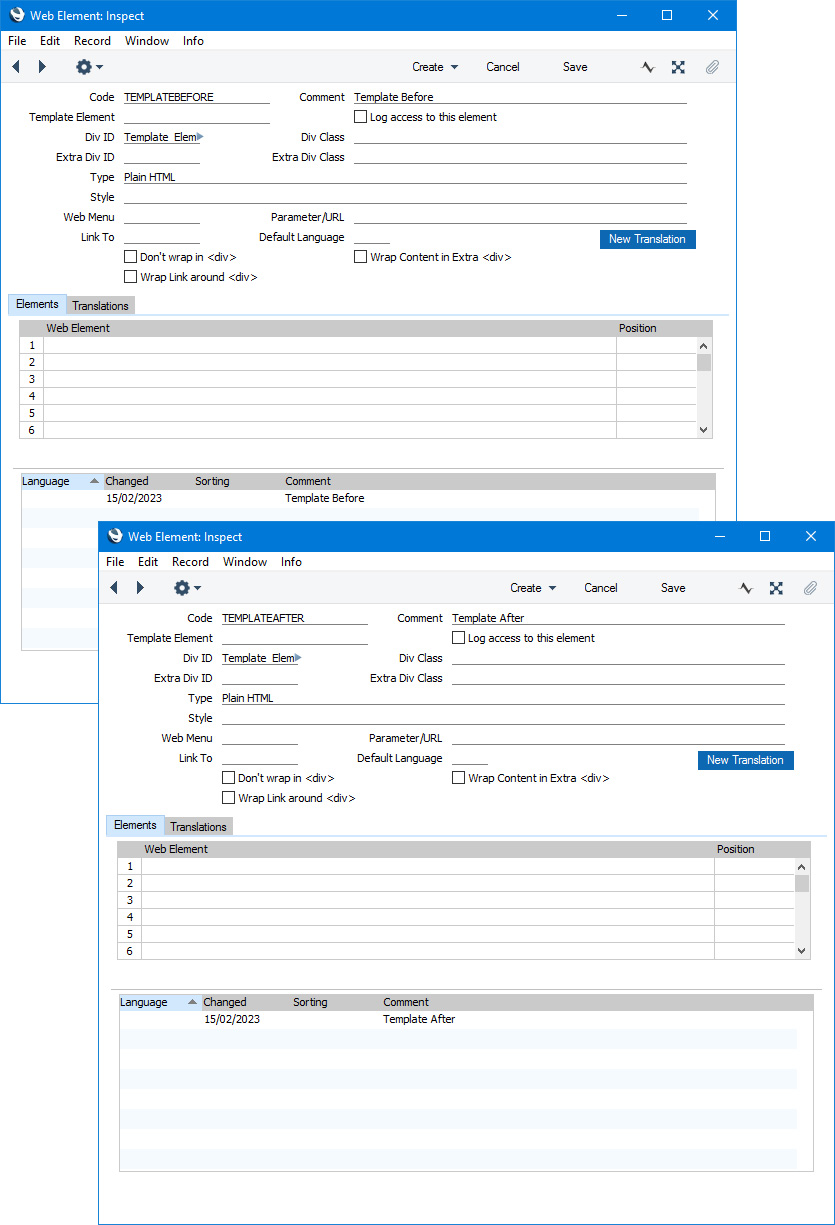
In this example, we have assigned <div id="Template_Element_Before"> to the header Element and <div id="Template_Element_After"> to the footer Element for illustrative purposes.
- Create a wrapper Element. In this wrapper Element, list the header and footer Elements from step 1 and place them in the "Before" and "After" Positions respectively:
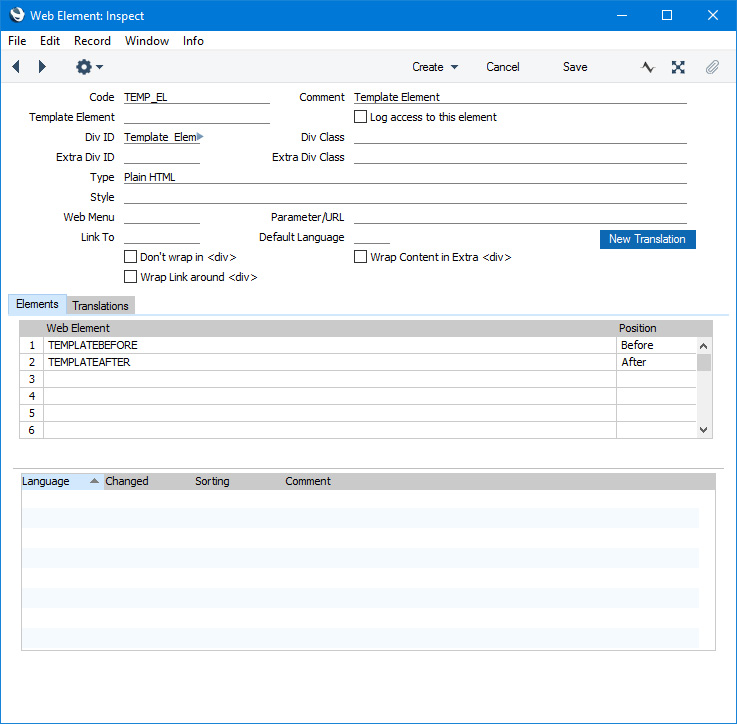
In this example, we have assigned <div id="Template_Element"> to the Template Element for illustrative purposes.
- Specify the wrapper Element in the Template Element field on the 'Step 1' card in the Online Reservations Settings setting:
This is the result in a browser:
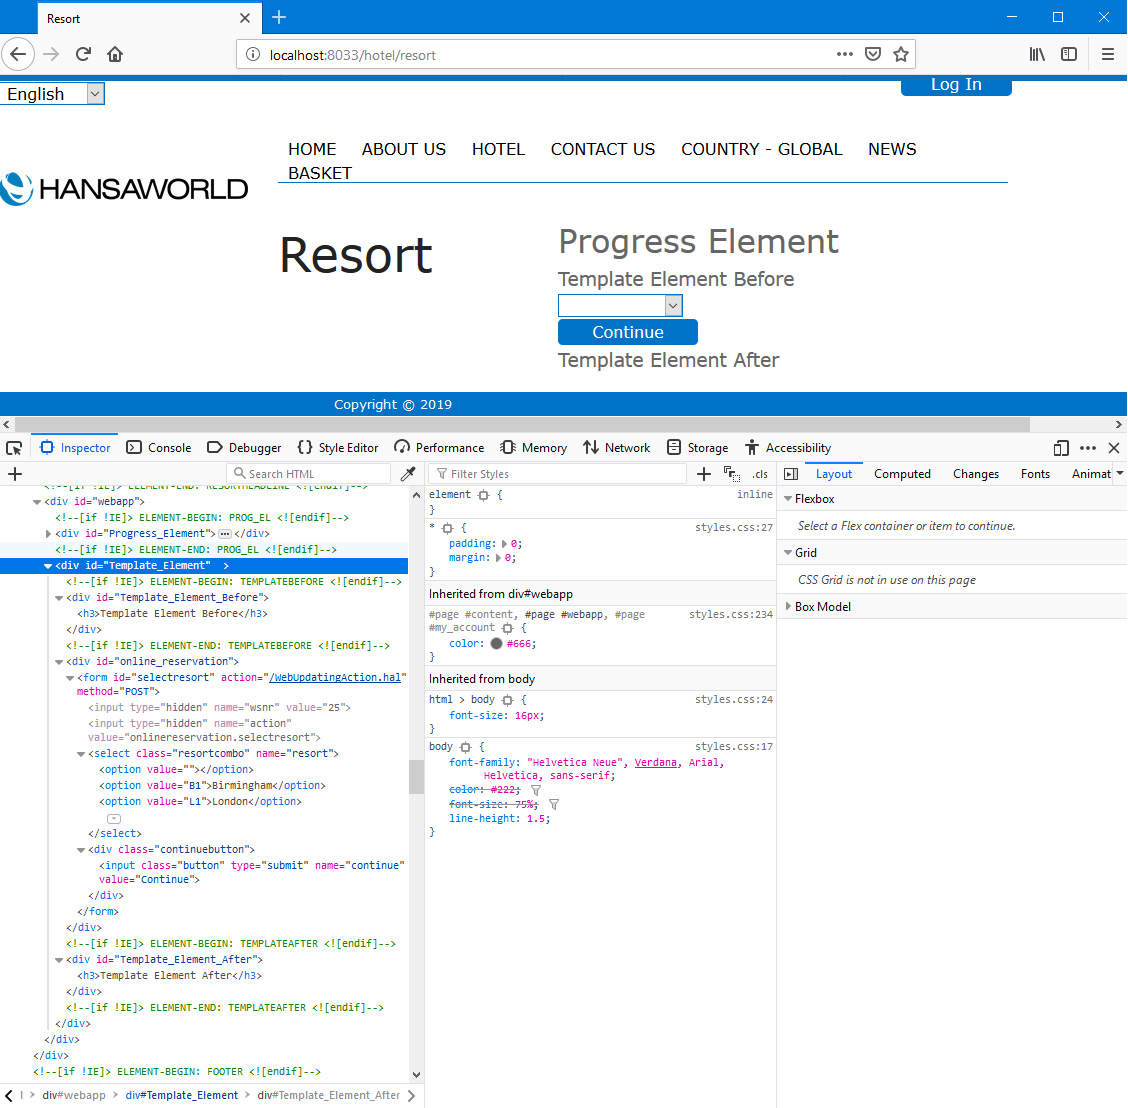
Note that the header, the footer and the <div id="online_reservation"> containing the entire resort listing are all inside the <div id="Template_Element"> specified in the Template Element. The header and footer are also enclosed in their dedicated <div>s.
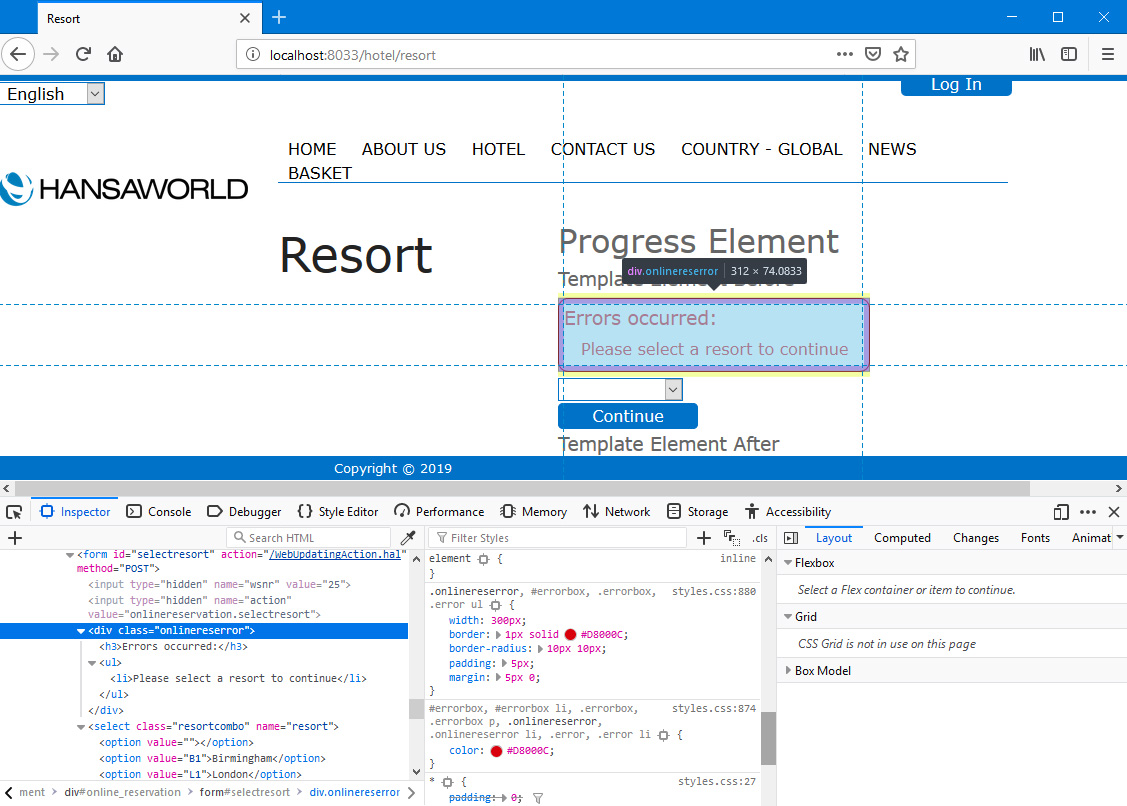
The user should choose a resort from the drop-down and then press the [Continue] (
Web Text 25701) button. They will then be taken to the /dates sub-node where they can specify the dates when they want to stay at the resort (described
here). The user must explicitly choose a resort even if there is only one. If the user presses [Continue] without choosing a resort, they will be taken back to the /resort sub-node where they will be shown an appropriate error message. The error message will be in
<div class="onlinereserror">:
You can use the
Web Texts setting to change the following texts:
| Node/Sub-Node | Default Text | Web Text Code |
| | |
| /resort | Please select the resort: [headline] | 25700 [include the colon if you need it] |
| /resort | Continue [button label] | 25701 |
| /resort | Errors occurred: | 25769 [include the colon if you need it] |
| /resort | Please select a resort to continue | 25770 |
The Online Reservation App in Standard ERP:
---
Go back to: