Adding an Online Reservation App to Your Site - Register Page
This page describes the /register sub-node in the Online Reservation App. The /register sub-node is where a visitor to your website wishing to book a hotel room can create a user account and have the booking assigned to the new account. Please refer to the following pages for details about the other sub-nodes:
---
When a browser user uses the Online Reservation App to book a hotel Room, they will need either to log in using an existing user account or create a new user account and then log in.
You can configure the webshop so that the user can reach the /summary sub-node without logging in. In this case, they will need to log in to progress further. However, if you have selected the Require login for this and all child nodes option in the Structure record for the "Online Reservation App" Node, the user will need to log in before beginning the booking process.
If a user reaches the /summary sub-node without logging in, they will need to proceed as follows:
- If they already have a user account, they should press the [Proceed] (Web Text 25735) button at the bottom of the /summary page. They will be passed to the standard Login Page as specified on flip C in the Sites setting, where they can log in. They will then be taken to the next sub-node in the Online Reservation App, /checkout.
- If they do not have a user account, they can also press the [Proceed] button as it is possible to create a new account from the standard Login Page. Alternatively, they can press "Save basket" (Web Text 25734) to be taken to the /register sub-node within the Online Reservation App. After registering, they will be taken to the standard Login Page and then back to /summary. Pressing [Proceed] will take them to /checkout.
When a user creates a user account, a new record will be created in the
Contact register in Standard ERP. The new Contact will be marked as a Customer (i.e. the
Customer check box will be ticked). Note that different information will be copied to the new Contact depending on whether they created their new account from the standard Login Page or by pressing "Save basket", as follows:
- in a Contact record created from the standard Login Page, default values (including the Customer Category) will be taken from the 'Registration' card in the My Account Settings setting in the Webshop and CMS module and from the Contact Settings setting (in the Sales Ledger and the CRM module).
- in a Contact record created by pressing "Save basket", the Customer Category will be taken from the 'Defaults Online' card in the Hotel Settings setting, and default values for Classification, Cost, Creditor and Credit On Account Accounts, Credit Limit, Delivery Terms and Delivery Mode, Discount Matrix, Interest Rate, Language, Payment Terms, Price List, Salesman and Sales Group, Sales Currency, Tags/Objects, VAT Code and VAT Zone will be taken from the Contact record for the Default Online Customer specified on the 'Defaults Online' card in the Hotel Settings setting. If there is no Default Online Customer, these fields will not contain default values.
When a browser user presses "Save basket" in the
/summary sub-node, they will be taken to the /register sub-node:
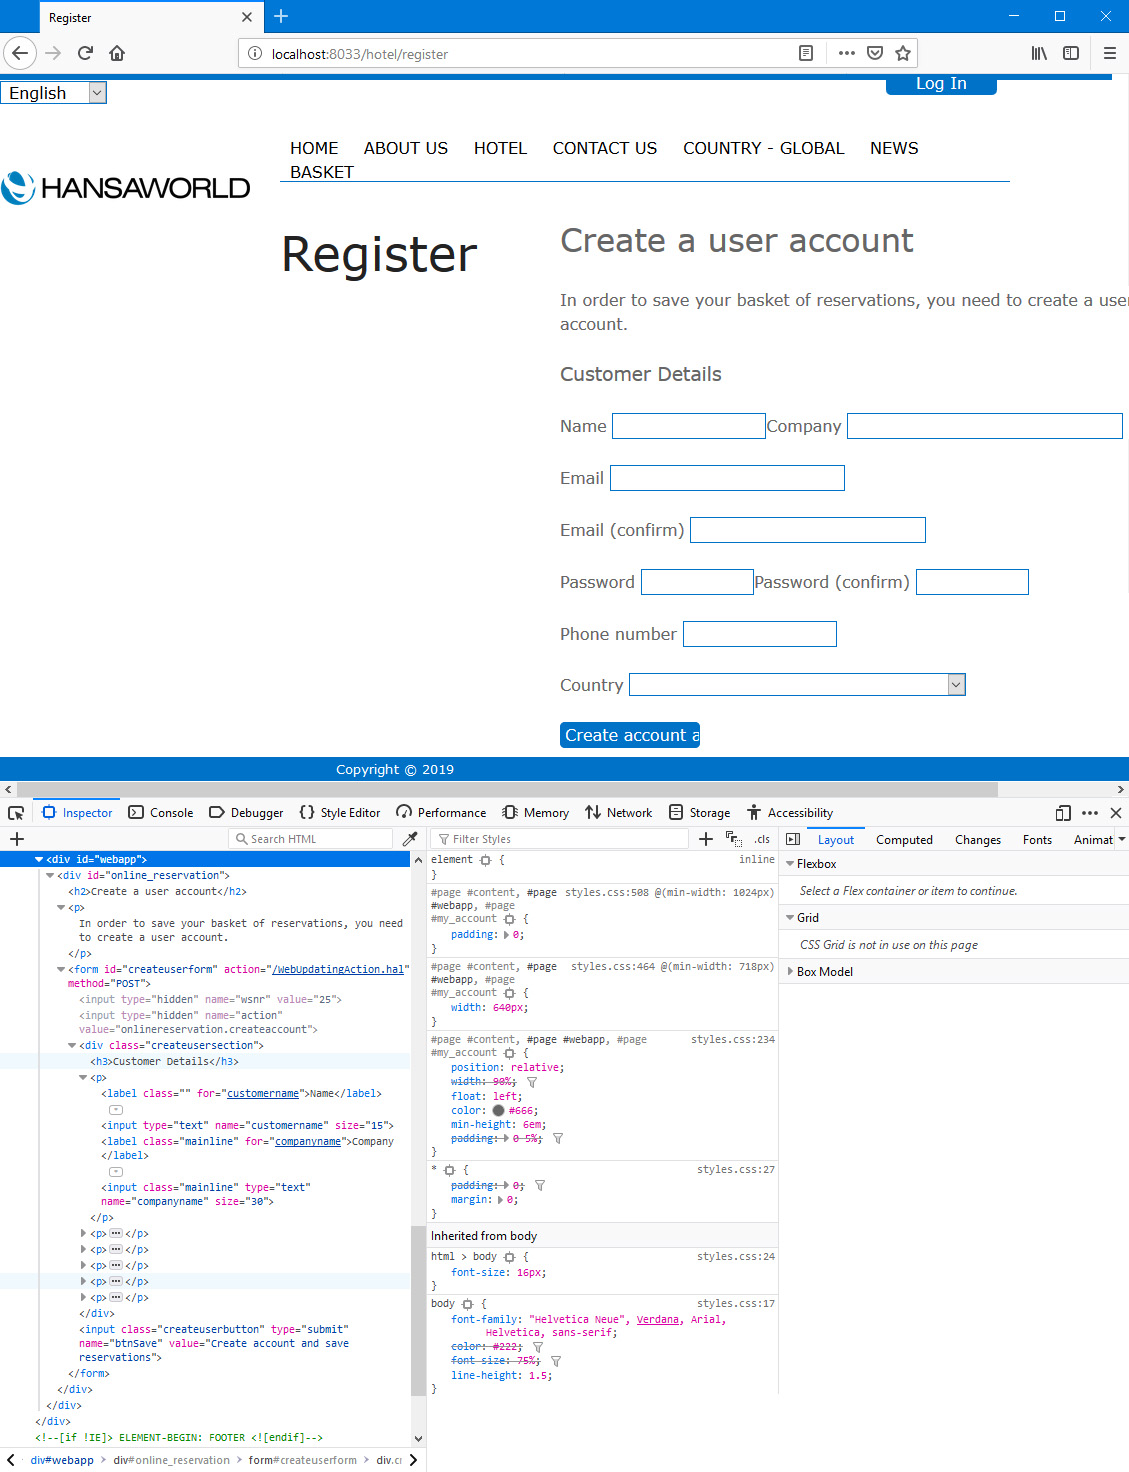
In the illustration above, the following attributes are assigned automatically by Standard ERP (i.e. you will not be able to change these attributes, but you will be able to apply styling to them in your .css file):
- <div id="online_reservation"> (used for the entire registration area)
- <form id="createuserform"> inside the previous <div> (used for the entire registration area except the first two lines)
- <div class="createusersection"> inside the previous <form> (used for the entire registration area except the first two lines and the button)
- <label class="mainline"> (used individually for the field labels)
- <input class="mainline"> (used individually for the fields. The field lengths are fixed)
- <input class="button"> below the previous <div class=" createusersection"> (used for the "Create account and save reservations" button)
You can use the following options to change the appearance of the /register sub-node:
- By default, the browser page displaying the /register sub-node will be based on the Page specified in the Structure record for the "Online Reservation App" Node. Specify a Template Page on the 'Other card in the Online Reservation Settings setting in the Hotel module if you would like it to be based on a different Page. In the illustration, we have specified a Template Page in the Online Reservations Settings setting so that the headline "Register" can be displayed to the left of the registration area.
- Using the Template Element field on the 'Other' card in the Online Reservation Settings setting, you can specify that a header and/or footer will be added to the beginning and end of <div id="webapp">. Please refer to step 4 on the 'Resort' page for an illustrated example.
- If you do not want the "Create a user account" <h2> heading, select the Template elements override built-in headings option in the Online Reservation Settings setting. This option applies to all sub-nodes in the Online Reservation App.
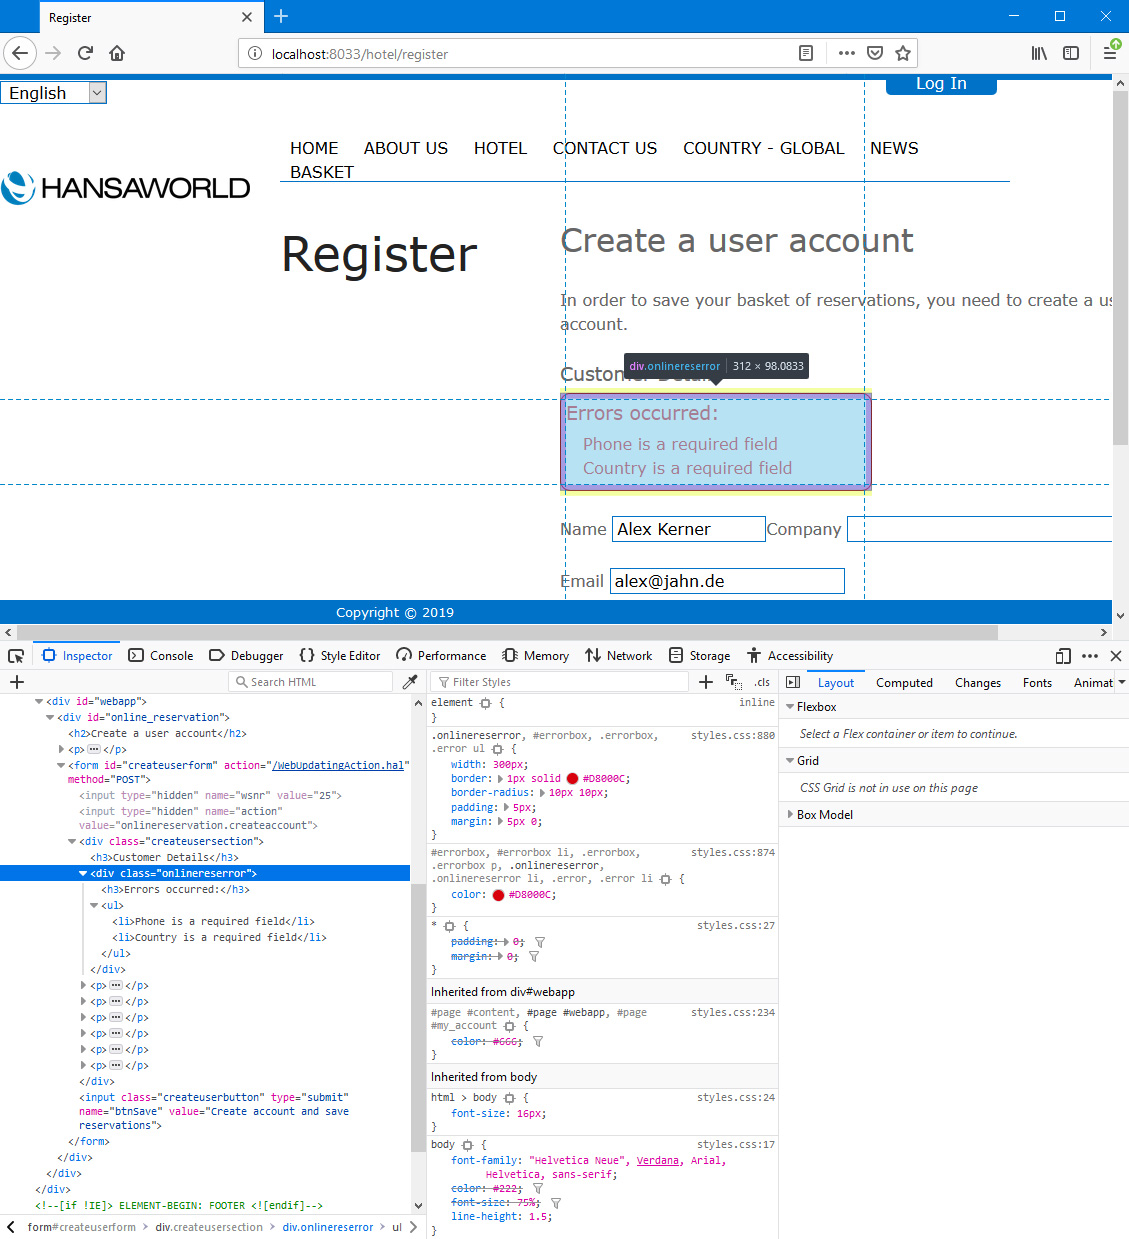
The user should fill in the fields and then press the [Create account and save reservations] button. All fields except Company are mandatory. If the user leaves a field empty, if the provided email addresses or passwords do not match or if there is already a Contact record with the provided email address, they will be taken back to the /register sub-node where they will be shown an appropriate error message. The error message will be in
<div class="onlinereserror">:
When the user presses [Create account and save reservations], there will be the following consequences:
- A new record for the user will be created in the Contact register. The Name in the new record will be the Company specified by the user, while the Primary Contact in the new record will be the Name specified by the user. If the user did not specify a Company, the Name in the new record will be the Name specified by the user, and the Primary Contact field will be left empty. The new record will be marked as a Customer.
- The Contact Number of the new record will be copied to the Customer field in the Reservations listed on the /summary sub-node. The Reservations will therefore now be in the user's name.
- The browser user will be taken to the /register/success sub-node which will confirm that their user account has been created and asking them to log in:
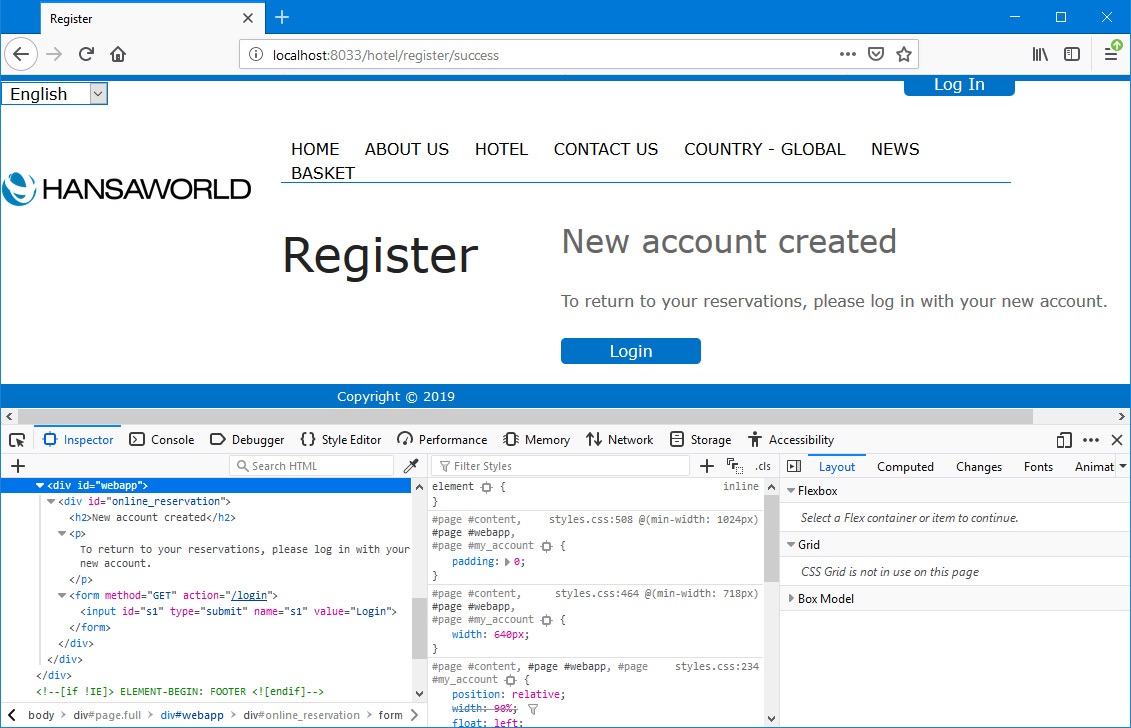
The /register/success sub-node inherits the following properties from /register:
- It will be based on the Template Page specified on the 'Other' card in the Online Reservation Settings setting in the Hotel module or, if you have not specified a Template Page there, on the Page specified in the Structure record for the "Online Reservation App" Node.
- It will use any Template Element that you may have specified on the 'Other' card in the Online Reservation Settings setting.
- The "New account created" <h2> heading will not be shown if you have selected the Template elements override built-in headings option in the Online Reservation Settings setting.
The user should now press [Login], which will take them to standard Login Page as specified on
flip C in the Sites setting, where they can log in. They can log in using their Customer Number or their email address. They will be taken back to
/summary, with the "Save basket" link now omitted. Pressing [Proceed] will take them to the next sub-node in the Online Reservation App, /checkout (described
here).
You can use the Web Texts setting to change the following texts:
| Node/Sub-Node | Default Text | Web Text Code |
| | |
| /register | Customer Details | 25758 |
| /register | Errors occurred: | 25769 [include the colon if you need it] |
The Online Reservation App in Standard ERP:
---
Go back to: