Creating a Report Generator Report - Printing the Report
This page describes printing a Report Generator report from the Report Definition record window. Please refer
here for details about printing a report from elsewhere in the system.
---
Having created a Report Generator report, specified the primary register, designed the appearance of the report, specified a print destination and set the page width of the report window, you can now print the report for the first time. Follow these steps:
- If you haven't already done so, enter a Code and a Name for the report in the fields in the header of the Report Definition record, and save. The Report Name will be used in the title bar of the report and in the report header (together with the date, time and company name).
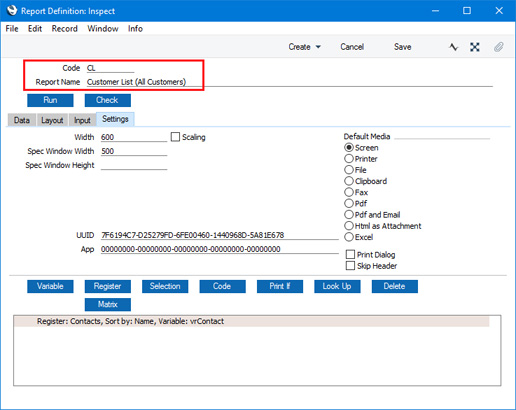
- Click the [Run] button in the header of the Report Definition record. A specification window opens: apart from the Media options, it's empty as you haven't defined any report search criteria yet.
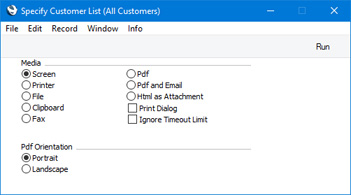
The Report Name specified in the Report Definition record ("Customer List (All Customers)" in this example, step 1 above) appears in the title bar of the specification window. The Media option chosen by default will be the one you specified on the 'Settings' card of the Report Definition window.
- Click the [Run] button to produce the report:
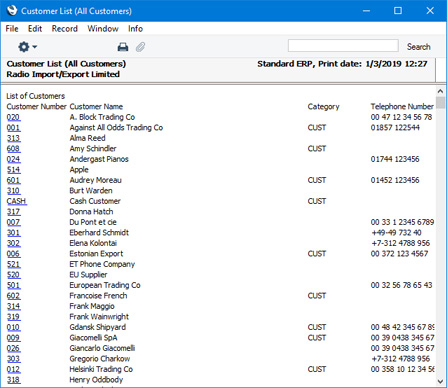
The Report Name ("Customer List (All Customers)") appears in the title bar of the report and in the report header.
In the report itself, the overall Report Header ("List of Customers") is followed by the column headings entered in the Contact Header section. The information from the Contact register in the database is then printed, using the fields that were specified in the Contact Before section. These fields are printed as many times as necessary (i.e. once for each record). The Contacts are sorted by Contact Name, as specified when adding the primary register to the 'Data' card of the Report Definition record.
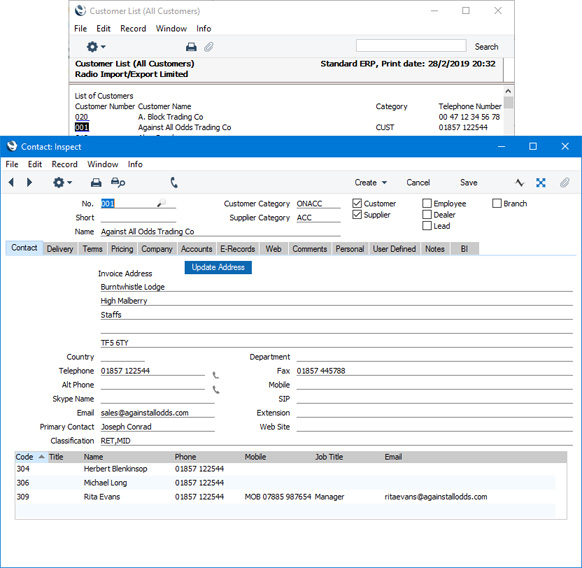
The Contact Numbers are underlined, signifying that drilling down is possible, as specified when the Contact Number field was placed in the report layout. Clicking once on a Contact Number will open the relevant Contact record:
After printing the report, please follow the links below for more details about:
---
Go back to: