Entering a Goods Receipt
This page describes adding a new record to the Goods Receipt register in the Stock module.
---
You can create Goods Receipts using the following methods:
- You can enter them directly to the Goods Receipt register. Open the 'Goods Receipts: Browse' window as described here and select 'New ' from the Create menu (Windows/macOS) or + menu (iOS/Android). You can also use the Ctrl-N (Windows) or ⌘-N (macOS) keyboard shortcuts. Alternatively, highlight a Goods Receipt similar to the one you want to enter and select 'Duplicate' from the same menu. The 'Goods Receipt: New' window will be opened, empty if you selected 'New' or containing a duplicate of the highlighted Goods Receipt. As the window title contains "New", the Goods Receipt won't have been saved yet.
- You can create Goods Receipts from Purchase Orders. First, open in a record window the Purchase Order against which the Items are being received. The Supplier's delivery note will usually contain your Purchase Order Number, enabling you to find the Purchase Order easily. Select 'Goods Receipt' from the Create menu (Windows/macOS) or + menu (iOS/Android). A new Goods Receipt will be created and opened for inspection and checking. The advantage of this method is that the purchase prices that you have agreed for the Items will be transferred from the Purchase Order to the Goods Receipt: this information will not normally be present on the Supplier's delivery note.
Note that a Goods Receipt created in this way will be presented in a 'Goods Receipt: Inspect' window. This means that the record will already have been created and saved into the register. To delete it you must choose 'Delete' on the Record menu (which has a 'cog' icon if you are using iOS or Android).
You can of course find the Purchase Order in the 'Purchase Orders: Browse' window and open it from there but if you have many Purchase Orders, it may be difficult to find unfulfilled Purchase Orders in the 'Purchase Orders: Browse' window. An alternative method is to produce an Outstanding Purchase Orders report, which only lists unfulfilled Purchase Orders. You can open an individual Purchase Order by drilling down from the report, and from there you can create a Goods Receipt using the method just described.
If you need to inspect an existing Goods Receipt, you can open it using the following methods:
- You can open it from the 'Goods Receipts: Browse' window.
- Each Goods Receipt will be attached to the originating Purchase Order. You can therefore open the originating Purchase Order, open the Link Manager and open the Goods Receipt from there.
In both cases, the 'Goods Receipt: New' and 'Goods Receipt: Inspect' windows will appear as follows:
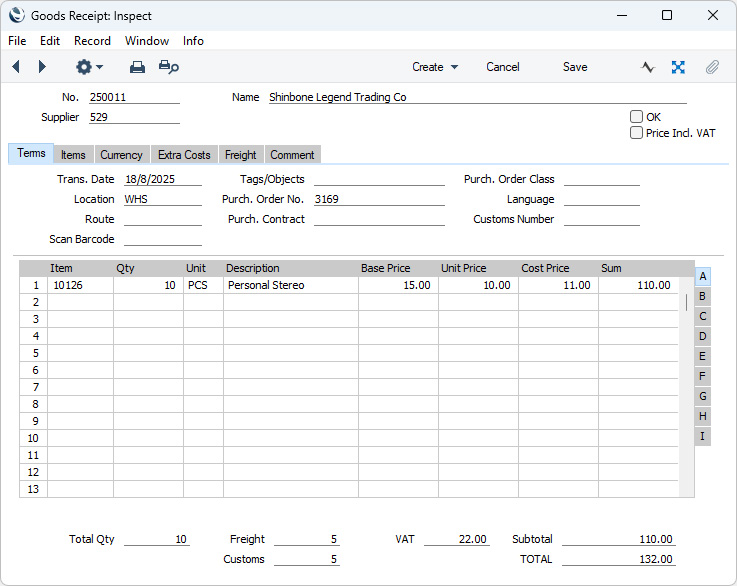
Since the amount of information stored about each Goods Receipt will not fit on a single screen, the Goods Receipt window has been divided into six cards. At the top of each is the header. This contains the Goods Receipt Number and the Supplier Number and Name. There are six named buttons ('tabs') in the header.

By clicking the tabs you can navigate between cards. The header is always visible, as a reminder of the Supplier whose Goods Receipt you are working with.
If you are using iOS or Android, there will only be two tabs, marked 'Items' and 'Details'. If you tap 'Details', you will see every card except 'Items' arranged vertically on screen. You can scroll down to see each one, or you can jump to any card by tapping on any tab and selecting the tab you want to go to.
Check the Goods Receipt, saving all changes using the [Save] button (Windows/macOS) or by tapping √ (iOS/Android).
After creating a Goods Receipt, you can proceed as follows:
Please refer to the following pages for details about the fields on each card in the Goods Receipt window:
---
The Goods Receipt register in Standard ERP:
Go back to:


 Introduction to the Goods Receipt Register
