
 Introduction to the Delivery Register
Entering a Delivery
Inspecting Deliveries, Marking as OK and Posting to the Nominal Ledger
Nominal Ledger Transactions From Deliveries
Deliveries from the Sales Ledger
Printing Picking Lists and Delivery Notes
Operations Menu - Deliveries
Create Menu - Deliveries
Row Menu - Deliveries Introduction to the Delivery Register
Entering a Delivery
Inspecting Deliveries, Marking as OK and Posting to the Nominal Ledger
Nominal Ledger Transactions From Deliveries
Deliveries from the Sales Ledger
Printing Picking Lists and Delivery Notes
Operations Menu - Deliveries
Create Menu - Deliveries
Row Menu - Deliveries
 Tutorials for Standard Accounts Tutorials for Standard Accounts
Search HansaManuals.com HansaManuals Home >> Standard ERP >> Stock >> Delivery Register Previous Next Entire Chapter in Printable Form Search This text refers to program version 2026-06-25 Introduction to the Delivery Register Using Standard ERP you can record every stage of the sales process in sequence from the Quotation through the Order and the Delivery to the Invoice and payment. You can begin the sequence at any stage (with the exception that a Delivery must be created from an Order).After you receive an Order from a Customer, you should create a Delivery from the Order to record the Items that you will ship or otherwise hand over to the Customer. A Delivery is always connected with a Sales Order: you cannot add Deliveries directly to the Delivery register. A Delivery can be a full (final) Delivery or a part Delivery. You cannot use Deliveries if you do not have the Sales Orders module. After you mark a Delivery as OK and save, you will be able to create an Invoice for the delivered Items. You can create the Invoice using the following methods:
As well as allowing ordered Items to be invoiced, marking a Delivery as OK and saving will cause stock levels of each Stocked Item in the Delivery to be updated. You can specify when Cost of Sales postings will be created in the Nominal Ledger, as follows:
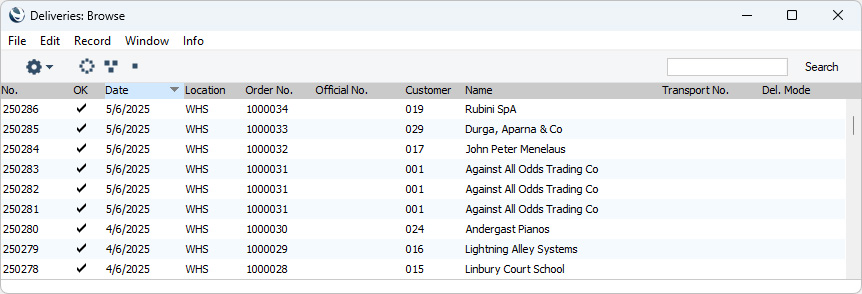
To open the Delivery register and view the Deliveries you have previously entered, ensure you are in the Stock module using the [Switch Module] button in the Home Screen, click (Windows/macOS) or tap (iOS/Android) the [Registers] button, also in the Home Screen, and double-click or tap 'Deliveries' in the resulting list. Once in the Stock module, you can also use the ⌘-1 (macOS) or Ctrl-1 (Windows) keyboard shortcuts. The 'Deliveries: Browse' window will be opened:
To search for a particular Delivery, first sort the list by the column that you want to use for the search. Then, enter the text that you want to find in the Search field in the top of the window (in the top right-hand corner if you are using Windows/macOS) and press the Return key (macOS) or Search (iOS/Android). The first record containing a match for your search string will be highlighted (if you are using Windows, a match will be highlighted as you type each character). For example, to search for a particular Customer Name, sort by Name before entering a Customer Name (or the first few characters) in the Search field. If you are using Windows or macOS, there will be three buttons in the top left-hand corner of the 'Deliveries: Browse' window. These are part of the Limited Access feature. You can use them as follows (Windows versions of the buttons illustrated on the left, macOS on the right):
Please refer to the page describing the 'Access' card of the Person register for full details about the Limited Access feature. The Delivery register in Standard ERP is described in detail on the following pages:
Go back to:
Previous Next Top Entire Chapter in Printable Form |