Creating a Report Generator Report - Adding White Space
This page describes using Lines in Report Generator reports to improve readability.
---
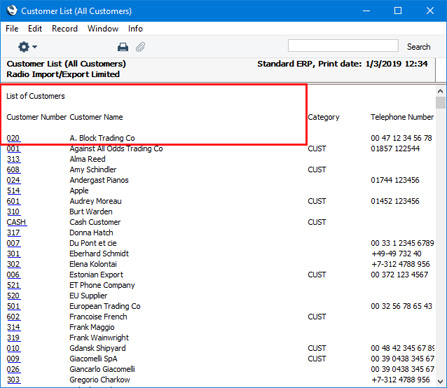
Printing a Report Generator report to screen for the first time will usually reveal that you need to format the output to make the report more attractive and readable.
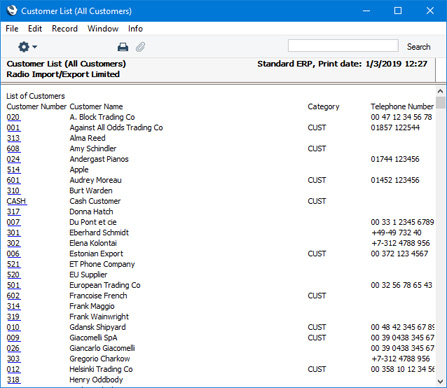
In this example, the
Report Header ("List of Customers") and the
column headings need to be given more space, so that they can be distinguished from the data more easily. To do this, follow these steps:
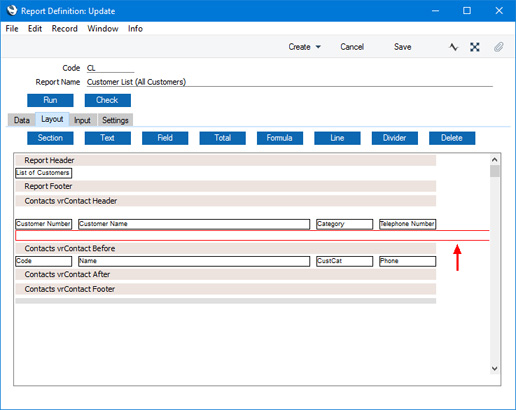
- Return to the Report Definition record and go to the 'Layout' card.
- To illustrate the process, click once anywhere in between the column headings in the Contact Before section (marked "Contacts vrContact Before" in the example): don't click on any of the column headings themselves. A red or black box (depending on the platform) is drawn around the column headings:
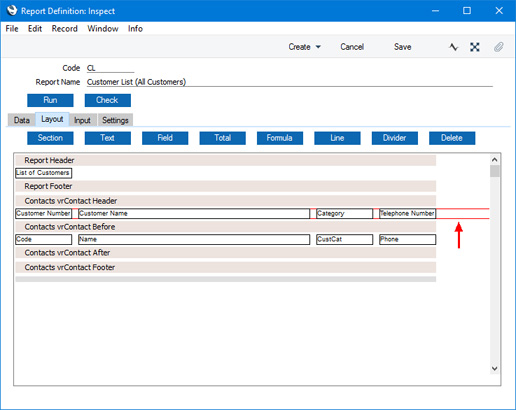
This box is called a "Line". When you place an element (e.g. text box or field) in a section for the first time, a Line will be placed in the section automatically. The Line sets the height of the section. The Line is usually invisible: the red or black box signifies that you have clicked on it to select it.
- Double-click anywhere in the Line, avoiding the four column headings. The 'Line' dialogue box opens:
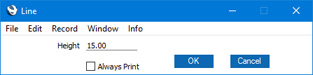
The default Line height is 15 pixels. Set this to 30 and click the [OK] button. This adds some white space above the column headings (i.e. between the overall Report Header and the column headings):
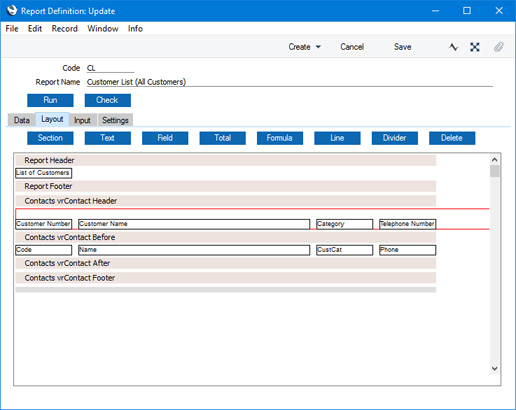
- Any elements inside a Line must be positioned at the bottom of the Line. So, if you want some white space underneath the column headings, you cannot drag them upwards within their Line. You have to place a second, empty, Line underneath the column headings instead. Click on the Contact Header section so that it changes to a darker shade of grey, and click the [Line] button above the report display area. The 'Line' dialogue box illustrated earlier appears: enter the Line height and select the Always Print option. If you do not select the Always Print option, the Line will not be printed if it is empty. In this case, the Line will always be empty, so you must select this option for the Line to be printed. The previous Line (step 3 above) will never be empty because it contains the column headings, so the Always Print option is irrelevant. Click [OK]. A new Line is added to the Contact Header section:
You can add Lines in two ways:
- If you highlight a section as described above, the new Line will be placed at the bottom of the section, below all existing Lines.
- If you highlight an existing Line, the new Line will be placed above the Line that you highlighted.
This is the result:
Note that we added the new Line to the Contact Header section. We did not increase the height of the Line containing the fields in the Contact Before section. If we had done this, the extra white space would have been printed between every Contact in the list, making the report less clear and too long.
Because the elements in a Line must be positioned at the bottom of the Line, you can only have one row of elements in a Line. If you want more than one row of elements in a section, add a new Line first. For example, if you want a second row of fields in the Contact Before section, first add a new Line to that section to hold the additional fields. Then, highlight the new Line before clicking the [Field] button: this will ensure the new fields are added to the correct Line. If you highlight the Contact Before section, the new fields may be added to the wrong Line.
If you remove a Line, every element in the Line will be removed as well. To remove a Line, click on it and then press the Backspace key, click the [Delete] button above the report display area or select 'Clear' from the Edit menu. Be careful as you cannot undo deletions.
Please follow the links below for more details about:
---
Go back to: