Creating a Report Generator Report - The Width of the Report Window
This page describes specifying the width of the window that is used to display a Report Generator report when you print it to screen.
---
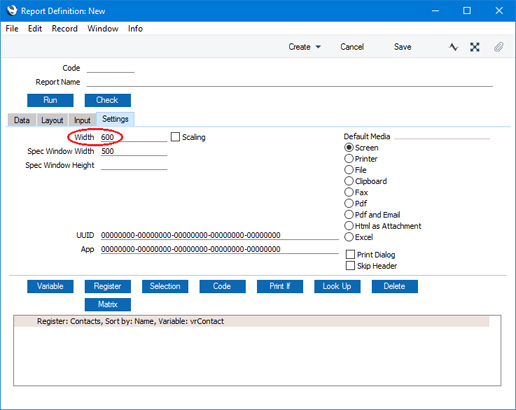
When designing a report using the Report Generator, you can specify the width of the window that will display the report when you print it to screen. To do this, open the Report Definition in a record window and change to the 'Settings' card. Use the Width field to set the width of the report window that will be used when the report is printed to screen. The figure is in pixels, and the default is 600. The width of the grey bars marking each section on the 'Layout' card will change to reflect the figure you enter here.
When you print a report to paper, it will be scaled so that it fits the width of the paper. The elements in the report will be stretched or shrunk proportionally. If they are shrunk, this may mean the text they contain will be printed on two or more lines. If you are designing the report with its printed output rather than its screen output in mind, you will want the 'Layout' card to reflect the printed output as closely as possible. In this case, set the Width to a figure around 418 pixels. This closely approximates the width of an A4 page and means there will be no need for the report to be scaled when printing.
When you print a report to screen, you will be able to change the width of the window containing the report by dragging its frame. By default, the elements in the report will remain in the same place and the same size. If you want the elements to be stretched or shrunk proportionally as you change the size of the window, select the Scaling option.
Having set the width of the report, please refer here for details about printing the report.
---
Creating a Report Generator Report:
Go back to: