Example Reports - Listing Sales Figures
The example on this page describes using the Report Generator to create a report listing sales figures for a particular period. You can base such a report on the Contact, Item, Item Group, Item Classification, or Person registers. The report will list the records in one of these registers together with sales figures. For this example, we will base the report on the Item Group register, adding the Item register later on. Follow these steps:
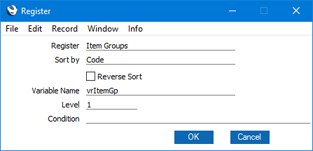
- Create a new record in the Report register and . For this example, the primary register is the Item Group register:
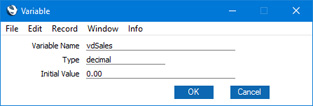
- Add a variable to hold the sales figures. This should be a decimal variable:
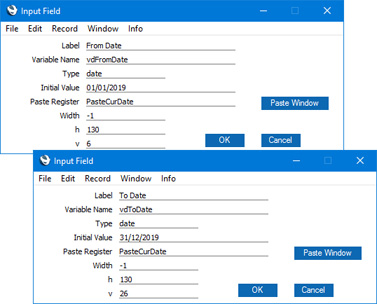
- Change to the 'Input' card and use the [Field] button to add two fields for the beginning and end of the report period. These should be date fields, and optionally you can specify default values. You can also add PasteCurDate if you would like users to be able to choose dates using 'Paste Special':
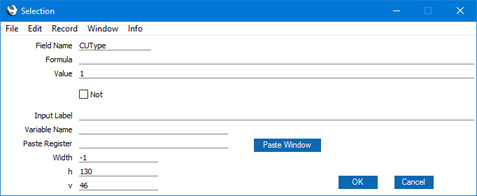
- Return to the 'Data' card. If the Contact register is the primary register, a report listing sales figures will need to include Customers and exclude Contacts of other types. To achieve this, click on the "Register: Contacts…" line and then use the [Selection] button to specify that the report should only list Contacts in which the Customer check box is ticked. "CUType" is the internal name for the Customer check box:
- The report will loop through the records in the primary register and for each record it will obtain and print a sales figure for the specified period. In this example, a sales figure for each Item will be printed in the report. In this step, we will add the function that will obtain the sales figures. This function is IVGetTurnover. The syntax for this function is:
- IVGetTurnover(customer number,item number,item group code,item class,branch,bar tab class, person signature,string variable,date1,date2)
In this example, as the Item Group register is the primary register, we can leave the customer number, item number, item class. branch, bar tab class, and person signature parameters all blank. As these are strings, we need to use empty sets of inverted commas for these parameters.
To add the IVGetTurnover function to the report, click on the "Register:…" line and then use the [Code] button:

The code is:
- vdSales = IVGetTurnover("","",vrItemGp.Code,"","","","","salesexclvat",FromDate,ToDate);
where:
- "vdSales" is the decimal variable from step 2 that will contain the sales figure.
- "vrItemGp.Code" is the third parameter. This expression includes "vrItemGp" (the name of the variable containing the Item Group register) and "Code", the internal name for the Item Group Code field in the Item Group register. The two parts are separated by a full stop. As the report loops through the records in the Item Group register, the vrItemGp variable will in turn contain each individual Item Group record. The "vrItemGp.Code" expression means "the Item Group Code of the Item Group record that is currently in the vrItemGp variable" i.e. "the Item Group Code of the current Item Group".
- "vdFromDate" and "vdToDate" are the fields from step 3 that will contain the report period.
Depending on the primary register, change the parameters as follows:
- Primary register = Contacts
- vdSales = IVGetTurnover(vrContact.Code,"","","","","","","salesexclvat",vdFromDate,vdToDate);
- "vrContact.Code", the Contact Number of the current Customer, should be the first parameter.
- Primary register = Items
- vdSales = IVGetTurnover("",vrItem.Code,"","","","","","salesexclvat",vdFromDate,vdToDate);
- "vrItem.Code", the Item Number of the current Item, should be the third parameter.
- Primary register = Item Classifications
- vdSales = IVGetTurnover("","","",vrItemClass.Code,"","","","salesexclvat",vdFromDate,vdToDate);
- "vrItemClass.Code" should be the fourth parameter.
- Primary register = Persons
- vdSales = IVGetTurnover("","","","","","",vrPerson.Code,"salesexclvat",vdFromDate,vdToDate);
- "vrPerson.Code" should be the seventh parameter.
You can also mix parameters. For example, the following code will display sales to Customer 001:
- vdSales = IVGetTurnover("001","",vrItemGp.Code,"","","","","salesexclvat",FromDate,ToDate);
As the Customer Number 001 is a string, it is placed in inverted commas "". In a complex report where you are looping through Customers and then Items you can of course use vrContact.Code as the first parameter, in which case do not place it in inverted commas.
If you specify a Branch as the fifth parameter, sales figures will be compiled from all Sales Invoices and from POS Invoices and Bar Tabs from the Branch. Similarly, if you specify a Bar Tab Class as the sixth parameter, sales figures will be compiled from all Sales and POS Invoices and from Bar Tabs with the Class.
IVGetTurnover can return one of four figures. This is determined by the eighth parameter. The available options for this parameter (which should be included in inverted commas) are:
- "salesexclvat"
- "salesinclvat"
- "grossprofit"
- "quant"
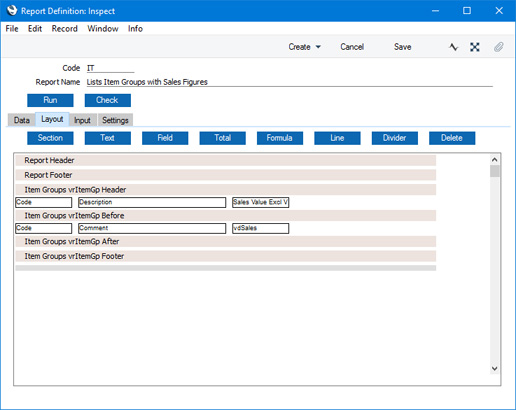
- Change to the 'Layout' card and design the report output. Use the [Formula] button to place the variable from step 2 (i.e. the variable containing the sales figures) in the Before section for the register:
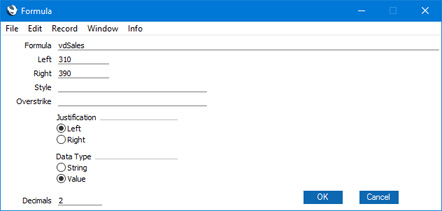
This is a simple example:
This is the output:
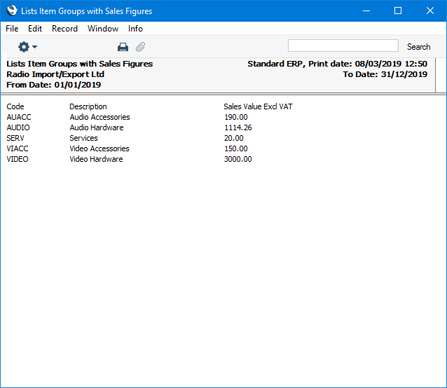
For clarity, in this example we added a "Print If" condition to the Item register that excludes Items with no sales (i.e. to exclude Items for which the "vdSales" variable holds a zero value):

- For this example, we will divide the Item Groups into broader categories and calculate totals for each category. We will need one total for audio Items as a whole, to include the sales figures for the "AUDIO" and "AUACC" Item Groups, and a second total for video Items as a whole, including the "VIDEO" and "VIACC" Item Groups. We will declare two more variables at the beginning of the report to hold the two category totals:
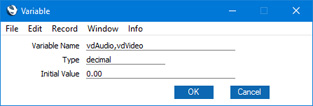
As the variables are both decimal variables and they will have the same initial value, we can declare them together in the same 'Variable' window, separating the two variable names with a comma. You must include at least two characters in a variable name, up to a maximum of 20.
- We will now use the [Code] button to add two lines of code to calculate the category totals. The first one will add the contents of the "vdSales" variable to the "vdAudio" variable if the current Item Group is "AUDIO" or "AUACC". The second will add the contents of the "vdSales" variable to the "vdVideo" variable if the current Item Group is "VIDEO" or "VIACC". These two lines must be placed after the call to IVGetTurnover to ensure that the "vdSales" variable will contain the correct value: to do this, click on the call to IVGetTurnover before clicking the [Code] button:
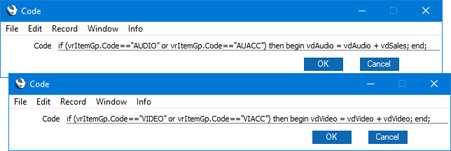
The first line of code is:
- if (vrItemGp.Code=="AUDIO" or vrItemGp.Code=="AUACC") then begin vdAudio = vdAudio + vdSales; end;
The value of vdAudio will therefore increase as the report is printed.
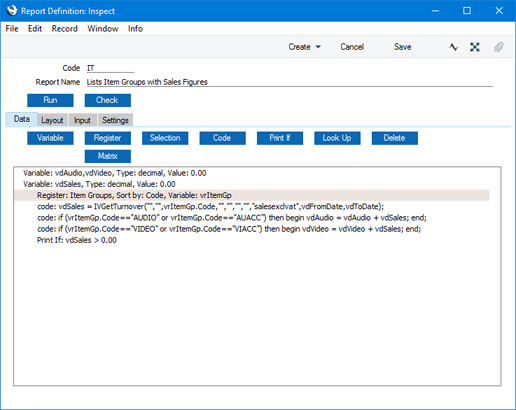
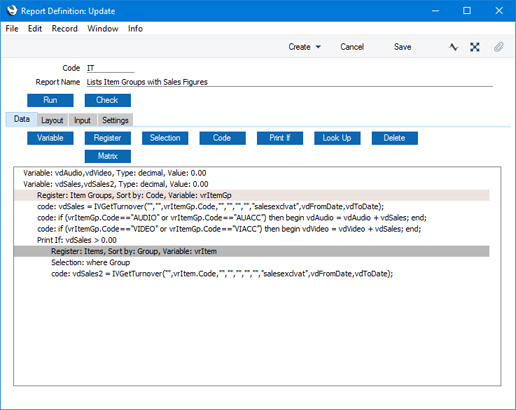
The 'Data' card of the report is now as follows:
- Change to the 'Layout' card and use the [Formula] button to place the two new variables in the Report Footer section:
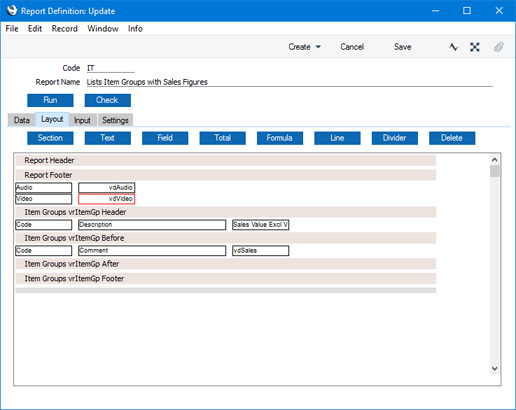
In this example, we used the [Line] button to add a second line to the Report Footer section so the variables will be printed on separate lines. We also added some identifying labels using the [Text] button.
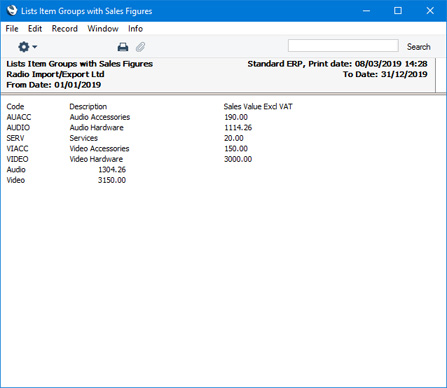
This is the output:
- If we need to list the Items in each Item Group individually, we can add the Item register as a secondary register. On the 'Data' card, click on the last line and then use the [Register] button to add the Item register:
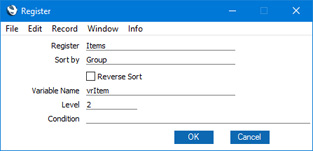
- In this step, we will use the [Selection] button to ensure that an Item Group will be printed in the report followed by the Items belonging to that Item Group. Click on the line in the report display area marked "Register: Items…" and then click the [Selection] button. Enter "Group" as the field name (this is the internal name for the Item Group field in the Item register) and "vrItemGp.Code" as the Formula:
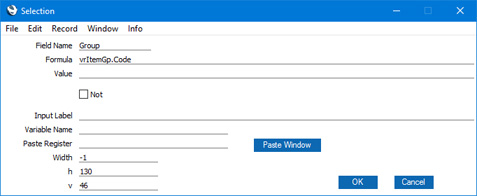
For more details, please refer to the Linking the Primary and Secondary Registers page.
- We will add a new decimal variable vdSales2 and use it together with the IVGetTurnover function to print the sales value of each Item. This requires us to use vrItem.Code as the second parameter, as mentioned in step 5:
- Change to the 'Layout' card and add fields and the vdSales2 variable to the report output:
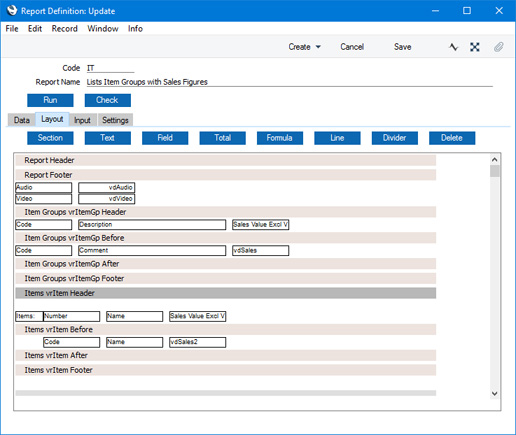
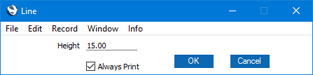
To add clarity and white space to the report, we indented the fields, we increased the size of the Line in the "Items vrItem Header" section as described on the Adding White Space page, and we added an empty Line to the "Items vrItem Footer" section in which we ticked the Always Print option:
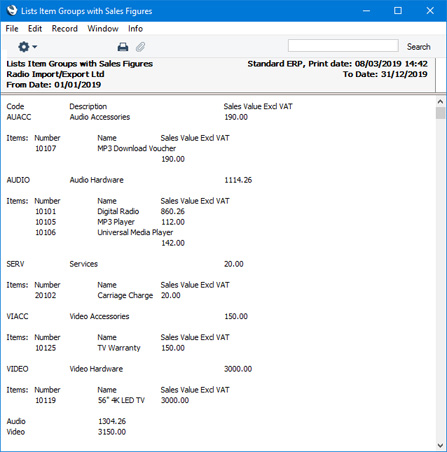
This is the report output:
---
Creating a Report Generator Report:
Go back to:
|