File Menu - Reports
Hansa can print
reports or
documents. Reports are used mostly in relation to your internal accounting and management.
Reporting in Hansa is non-destructive, i.e. you can make and print a report as many times as you wish. Some accounting programs are designed in such a way as to allow journal printing only directly in connection with the data entry. Hansa does not have this limitation.
When you select 'Reports' from the File menu or from the Master Control panel, a window is opened, containing a list of all available reports. The contents of this window vary with the selected module: the illustration below shows the reports in the Nominal Ledger module:
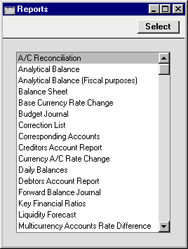
Choose a report by highlighting an item in the list in the Reports window. If you need to set the page size, number of copies and other printer options for the report, choose 'Page Setup' from the File menu. These settings will be used whenever the particular report is printed until you choose 'Page Setup' once again. Windows users can also use this function to choose the printer on which the report is to be printed.
Once you have done this, double-click the report name in the list. A specification window will open, where you can choose the information that you want to be shown in the report. For example, when producing a Balance Sheet, you can use its specification window (illustrated below) to choose the period that is to be covered by the report.
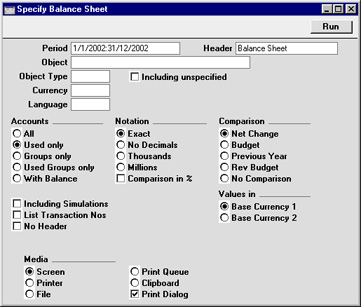
While the specification window is open, you can choose the destination of the printout by selecting one of the Media options at the bottom of the window. The available options are Screen, Printer, Hansa's internal
Print Queue, File and Clipboard. If you print to screen (the default setting), the report will be shown in a new window. You can subsequently send the report to a printer by clicking the Printer icon in the Button Bar of this window or by selecting 'Print' from the File menu.
If you are sending the report to a printer and you want a print dialogue to appear, check the Printer Dialog box (last of the Media options). You might do this if you want to print several copies of a report.
Once you have entered the reporting criteria and have chosen a print destination, click [Run] to produce the report.
Updating Reports
While a report is on screen, it may be that you change some of the information it contains. If so, there is no need to close and recreate the report. Simply select 'Recalculate' from the Operations menu (or use the Ctrl-Shift-R/⌘-Shift-R keyboard shortcut) to update the report. If you want to change the report criteria before recreating the report (e.g. you want to change the report period), choose 'Reopen Report Specification' instead.
Defining Reports
For some reports in the Nominal Ledger module, you can redefine the contents and layout of the report. To do this, use the Report Settings setting in the Nominal Ledger.
Export to other applications
It is very easy to export the contents of any report to another application program, e.g. Excel or Word. The specification window for each report contains a set of Media options, one option of which is 'File'. If you select this option, the report will be saved as a tab-separated text file on your hard disk. This can be used directly in Excel, for further calculations etc.
The following example shows a Customer Statistics report opened in Excel:
