Introduction to the Contact Register
The Contact register is where you store information about every company and private individual with whom you have contact, be they Customers, Suppliers, shipping companies, factoring or leasing companies, sales leads or individuals who work for those companies. Contact records do not necessarily represent firms that have purchased goods or services from your business, or sold goods or services to you, and in fact can represent any company that is a potential customer or supplier. You should also store information about individual persons in the Contact register: these can be private individuals or people who work for Customers or Suppliers. In the latter case, you will have separate records in the Contact register for the Customer or Supplier and for the individual Contact Person. The Contact Person and the Customer or Supplier will be linked using the Contact Relations register (described here).The register is accessible from the Sales and Purchase Orders modules, from the Sales and Purchase Ledgers, and from the Contract, Quotations, CRM and Service Orders modules if installed. To open the register, first use the [Switch Module] button in the Navigation Centre to enter one of these modules, Then click (Windows/macOS) or tap (iOS/Android) the [Registers] button, also in the Navigation Centre and double-click or tap 'Contacts' in the resulting list.
The 'Contacts: Browse' window will be opened, showing the Contacts that you have already entered.
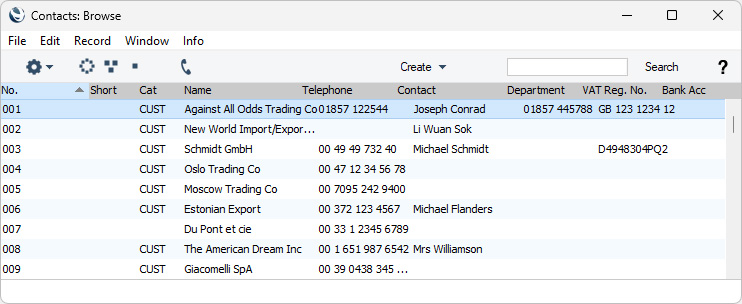
If you are using Windows or macOS, you can change the sort order by clicking on the headings. To reverse any sort, simply click once again on the column heading. The current sort order is marked by the column heading being coloured blue. If you are using iOS or Android, tap on the column heading and choose the sort order you need. Repeat the procedure to reverse the sort.
To search for a particular Contact, first sort the list by the column that you want to use for the search. Then, enter the text that you want to find in the Search field in the top of the window (in the top right-hand corner if you are using Windows/macOS) and press the Return key (macOS) or Search (iOS/Android). The first record containing a match for your search string will be highlighted (if you are using Windows, a match will be highlighted as you type each character). For example, to search for a particular Contact Name, sort by Name before entering a Contact Name (or the first few characters) in the Search field.
If you are using Windows or macOS, there will be three buttons in the top left-hand corner of the 'Contacts: Browse' window. These are part of the Limited Access feature. You can use them as follows (Windows versions of the buttons illustrated on the left, macOS on the right):

- Lists all Contacts.

- Lists Contacts where the Salesman field contains the Signature of a user who belongs to the same Sales Group as the current user.

- Lists Contacts where the Salesman field contains the Signature of the current user.
---
The Contact register in Standard ERP:
- Introduction
- Entering a Contact
- Editing a Contact
- Deleting a Contact
- Linking Contact Persons and Companies - The Contact Relations Register
- Operations menu
- Create menu
- Home page for Customers, Suppliers and Contact Persons manual
- Home page for Standard ERP manual
Entering a Contact
To enter a new record in the Contact register, open the 'Contacts: Browse' window as described above and select 'New' from the Create menu (Windows/macOS) or from the + menu (iOS/Android). You can also use the Ctrl-N (Windows) or ⌘-N (macOS) keyboard shortcut. Alternatively, highlight a record similar to the one you want to enter and select 'Duplicate' from the same menu. If you don't want to open the 'Contacts: Browse' window before creating a new record, you can also use the + menu in the Navigation Centre (all platforms).In most countries, the 'Contact: New' window will open, empty if you selected 'New' or containing a duplicate of the highlighted record. Complete the Contact record as appropriate and as described on the pages linked below, then save it by clicking the [Save] button (Windows/macOS) or by tapping √ (iOS/Android) and close the window by clicking the close box or by tapping <. Then, close the browse window using the close box or < again.
If the VAT Law in the Company in which you are working is set to "Estonian", "Finnish", "Latvian", "Lithuanian", "Polish" or "Default" and you selected 'New', a 'New Contact' window will open on top of the 'Contact: New' window:
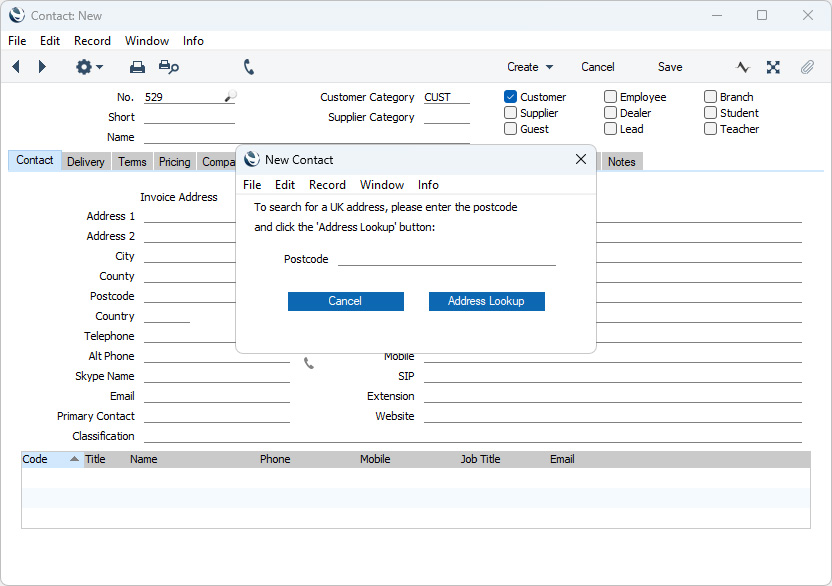
Address Lookup is a chargeable Cloud Service. To use it, you must have registered your database in Estonia, Finland, Latvia, Lithuania, Norway, Poland or the UK using the Automatic Internet Enabler method, as described on the Enabler Key page.
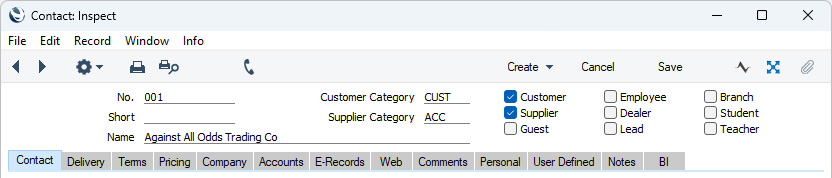
Since the amount of information stored about each Contact will not fit in a single window, the Contact screen has been divided into twelve cards (if you have access to the BI module, there will be thirteen cards). At the top of each is the header. This contains the Contact Number, Short Code, Customer and Supplier Categories, Name and the check boxes that indicate the type of Contact. There are twelve (or thirteen) named buttons ('tabs') in the header.

If you are using iOS or Android, the cards will be arranged vertically on screen. You can scroll down to see each one, or you can jump to any card by tapping on any tab and selecting the tab you want to go to.
Please refer to the following pages for details about the fields on each card in the Contact window:
- Header
- 'Contact' card
- 'Delivery' card
- 'Terms' card - Fields
- 'Terms' card - Check Boxes
- 'Pricing' card
- 'Company' card
- 'Accounts' card
- 'E-Records' card
- 'Web' card
- 'Comments' card
- 'Personal' card
- 'User Defined' card
- 'Notes' card
- 'BI' card
The Contact register in Standard ERP:
- Introduction
- Entering a Contact
- Editing a Contact
- Deleting a Contact
- Linking Contact Persons and Companies - The Contact Relations Register
- Operations menu
- Create menu
- Home page for Customers, Suppliers and Contact Persons manual
- Home page for Standard ERP manual
Entering a Contact - Header
This page describes the fields in the Header of the Contact record. Please follow the links below for descriptions of the other cards:- Header
- 'Contact' card
- 'Delivery' card
- 'Terms' card - Fields
- 'Terms' card - Check Boxes
- 'Pricing' card
- 'Company' card
- 'Accounts' card
- 'E-Records' card
- 'Web' card
- 'Comments' card
- 'Personal' card
- 'User Defined' card
- 'Notes' card
- 'BI' card
- No.
- Paste Special
Select from another Number Series
- Enter the unique code you are assigning to the Contact: this is the means by which this Contact will be identified elsewhere in Standard ERP.
- In most countries, a Contact Number can consist of up to 20 alpha-numeric characters. However, in Norway (i.e. if the VAT Law in the Company Info setting is "Norwegian") and if you have ticked the Customer box described below, you will only be able to use numbers, not alpha or other non-numeric characters. In Finland, if you have ticked the Customer box, you will only be able to use numbers and there will be a maximum of eight digits.
- A default will be offered, based on the Contact Number of the previous record entered. You can change the default, but not to a number that has already been used. If you have defined at least one number sequence in the Number Series - Contacts setting, the number you change to must be inside a valid number sequence.
- If you are working in a multi-user environment, the Contact Number will be assigned when you save the Contact for the first time.
After you have saved a Contact, you cannot change the Contact Number simply by typing into the field. If you need to change a Contact Number, use the Conversions - Master and Conversions - Contacts settings in the System module. These settings will change the Contact Number both here and in every other record where the Contact has been used.
- In most countries, a Contact Number can consist of up to 20 alpha-numeric characters. However, in Norway (i.e. if the VAT Law in the Company Info setting is "Norwegian") and if you have ticked the Customer box described below, you will only be able to use numbers, not alpha or other non-numeric characters. In Finland, if you have ticked the Customer box, you will only be able to use numbers and there will be a maximum of eight digits.
- Short
- Use this field if you need an alternative means of identifying a Contact - information that you enter here will appear in the Short column in the Contacts browse and 'Paste Special' windows. You can give the same Short Code to Contacts of a similar nature so that they will be grouped together in the browse and 'Paste Special' windows when you sort them by the Short column. The field holds up to ten letters and/or numbers.
- Customer Category
- Paste Special
Customer Categories setting, Sales Ledger
- Default taken from Contact Settings (Default Customer Category)
- Supplier Category
- Paste Special
Supplier Categories setting, Purchase Ledger
- If a Contact is a Customer, you can assign it to a Customer Category. If it is a Supplier, you can assign it to a Supplier Category.
- The Customer Category is a means of classifying Customers. Customers belonging to the same Category can use the same default Price List, Discount Matrix and Debtor Account, saving you the work of having to specify these for each Customer individually. If you have entered a Default Customer Category in the Contact Settings setting, it will be entered here automatically. If a Contact is a Customer, you must enter a Customer Category if you are using the Demand Customer Category option in the same setting.
- Similarly, Supplier Categories enable you to group similar Suppliers together. Suppliers belonging to the same Category can use the same default Creditor and On Account Accounts, saving you the work of having to specify these for each Supplier individually.
- The Customer Category is a means of classifying Customers. Customers belonging to the same Category can use the same default Price List, Discount Matrix and Debtor Account, saving you the work of having to specify these for each Customer individually. If you have entered a Default Customer Category in the Contact Settings setting, it will be entered here automatically. If a Contact is a Customer, you must enter a Customer Category if you are using the Demand Customer Category option in the same setting.
- Name
- Enter the Name of the Contact.
- If you want the Contact Name to be printed as part of the address in all documents, select the Organisation name option in the Form Settings setting in the System module.
- If you want the Contact Name to be printed as part of the address in all documents, select the Organisation name option in the Form Settings setting in the System module.
- Customer, Supplier
- Tick one or both of these boxes if the Contact you are entering is a potential or actual Customer or Supplier (or both). If the Contact is a Contact Person who works for a Customer or Supplier company, do not tick either of these boxes unless the Contact Person is also a Customer or Supplier in a private capacity.
- If you originally opened the Contact register in a sales-orientated module (e.g. Sales Ledger or Sales Orders module), the new record will be marked as a Customer automatically. If you originally opened the Contact register in a purchase-orientated module (e.g. Purchase Ledger or Purchase Orders module), the new record will be marked as a Supplier automatically. Similarly, if you created the new record by clicking the [New] button in the Contacts 'Paste Special' window, these check boxes will be set automatically depending on the context. For example, if you entered a Sales Order, activated 'Paste Special' from the Customer field and clicked [New], the new record will be marked as a Customer.
- If you have marked a Contact as a Customer only, you will be able to use it in all sales registers (e.g. Quotations, Sales Orders, Sales Invoices, Deliveries), but not in any purchase registers. Similarly, if you have marked it as a Supplier only, you will be able to use it in all purchase registers (e.g. Purchase Orders, Purchase Invoices, Goods Receipts), but not in any sales registers. You can use both Customers and Suppliers in Activities (i.e. in the Calendar and Task Manager), Customer Letters and Mails.
- Once you have marked a Contact as a Customer and you have issued at least one Sales Order or Invoice to that Contact, you will not be able to remove the tick from the Customer box. Similarly, if you have marked a Contact as a Supplier and you have received at least one Purchase Order or Invoice from that Contact, you will not be able to remove the tick from the Supplier box.
- Throughout this documentation, the term "Customer" has been used when referring to Contacts marked as Customers, and the term "Supplier" refers to Contacts marked as Suppliers.
- You can use Access Groups to prevent users from creating and/or modifying Customers and Suppliers. Assign them to Access Groups in which you have denied access to the 'Creating Customers', 'Creating Suppliers', 'Change Customer Details' and/or 'Change Suppliers' Actions as necessary.
- If you originally opened the Contact register in a sales-orientated module (e.g. Sales Ledger or Sales Orders module), the new record will be marked as a Customer automatically. If you originally opened the Contact register in a purchase-orientated module (e.g. Purchase Ledger or Purchase Orders module), the new record will be marked as a Supplier automatically. Similarly, if you created the new record by clicking the [New] button in the Contacts 'Paste Special' window, these check boxes will be set automatically depending on the context. For example, if you entered a Sales Order, activated 'Paste Special' from the Customer field and clicked [New], the new record will be marked as a Customer.
- Guest
- If you are using the Hotel module and a Contact is a hotel guest, tick this box. The Guest check box will only be visible if you are subscribing to the Hotel module.
- The Hotel module contains a Guest register, which is a subset of the Contact register. When you open the Guest register, the browse window will only contain those Contacts that have been marked as Guests. If you add a new record to the Guest register (or to the Contact register after opening it in the Hotel module), the new record will be marked as a Guest (and as a Customer) automatically. You must mark a Contact as a Guest if you need to list that Contact as a Guest in a Hotel Reservation. You must mark the Contact as a Customer as well if you will invoice them for the Room charge or for any Items that they have purchased or consumed.
- You can use Access Groups to prevent users from creating and/or modifying Guests. Assign them to Access Groups in which you have denied access to the 'Creating Hotel Guests' and/or 'Change Guests' Actions as necessary.
- The Hotel module contains a Guest register, which is a subset of the Contact register. When you open the Guest register, the browse window will only contain those Contacts that have been marked as Guests. If you add a new record to the Guest register (or to the Contact register after opening it in the Hotel module), the new record will be marked as a Guest (and as a Customer) automatically. You must mark a Contact as a Guest if you need to list that Contact as a Guest in a Hotel Reservation. You must mark the Contact as a Customer as well if you will invoice them for the Room charge or for any Items that they have purchased or consumed.
- Employee
- If a Contact is an Employee, tick this box.
- You should tick this box in a Contact record that is connected to a user's Person or Global User record.
- The Human Resources Management module contains an Employee register, which is a subset of the Contact register. When you open the Employee register, the browse window will only contain those Contacts that have been marked as Employees. If you add a new record to the Employee register (or to the Contact register after opening it in the Human Resources Management module), the new record will be marked as an Employee automatically. You must mark a Contact as an Employee if you need to use that Contact in an Employment Contract.
- You should tick this box in a Contact record that is connected to a user's Person or Global User record.
- Lead
- If a Contact is a Lead, tick this box.
- The CRM module contains a Leads setting, which is a subset of the Contact register. When you open the Leads setting, the browse window will only contain those Contacts that have been marked as Leads. If you add a new record to the Lead setting, the new record will be marked as a Lead automatically. You must mark a Contact as a Lead if you need to use that Contact in an Opportunity.
- The CRM module contains a Leads setting, which is a subset of the Contact register. When you open the Leads setting, the browse window will only contain those Contacts that have been marked as Leads. If you add a new record to the Lead setting, the new record will be marked as a Lead automatically. You must mark a Contact as a Lead if you need to use that Contact in an Opportunity.
- Student
- If the Contact is or will be a Student who will attend Courses in the Learning Management module, tick this box.
- For a Student to attend a Course you will need to create a record in the Student Courses setting to connect the Student to the Course. The 'Paste Special' list that you can use to select the Students will only list Contacts that you have marked as being Students.
- If you are using the Online Learning feature in the Learning Management module, Students will be able to log in online to see a list of Courses that they are booked in to (providing you have ticked the Allow Login box on the 'Terms' card and assigned passwords). Teachers and Learning Management administrators will also be able to log in online where they will be able to assign Students to Courses (thus creating records in the Student Courses setting remotely).
- For a Student to attend a Course you will need to create a record in the Student Courses setting to connect the Student to the Course. The 'Paste Special' list that you can use to select the Students will only list Contacts that you have marked as being Students.
- Teacher
- If the Contact is or will be a Teacher of Courses in the Learning Management module, tick this box.
- You will be able to assign Teachers to Courses when adding them or at a later time. The 'Paste Special' list that you can use to select the Teacher will only list Contacts that you have marked as being Teachers.
- If you are using the Online Learning feature in the Learning Management module, Teachers will be able to log in online to see a list of Courses that they are taking (providing you have ticked the Allow Login box on the 'Terms' card and assigned passwords). Here they will be able to carry out course administration, including assigning and removing Students. Students will also be able to log in online and will be able to search for Courses with particular Teachers.
- You will be able to assign Teachers to Courses when adding them or at a later time. The 'Paste Special' list that you can use to select the Teacher will only list Contacts that you have marked as being Teachers.
The Contact register in Standard ERP:
- Introduction
- Entering a Contact, including:
- Header
- 'Contact' card
- 'Delivery' card
- 'Terms' card - Fields
- 'Terms' card - Check Boxes
- 'Pricing' card
- 'Company' card
- 'Accounts' card
- 'E-Records' card
- 'Web' card
- 'Comments' card
- 'Personal' card
- 'User Defined' card
- 'Notes' card
- 'BI' card
- Header
- Editing a Contact
- Deleting a Contact
- Linking Contact Persons and Companies - The Contact Relations Register
- Operations menu
- Create menu
- Home page for Customers, Suppliers and Contact Persons manual
- Home page for Standard ERP manual
Entering a Contact - Contact Card
This page describes the fields on the 'Contact' card of the Contact record. Please follow the links below for descriptions of the other cards:- Header
- 'Contact' card
- 'Delivery' card
- 'Terms' card - Fields
- 'Terms' card - Check Boxes
- 'Pricing' card
- 'Company' card
- 'Accounts' card
- 'E-Records' card
- 'Web' card
- 'Comments' card
- 'Personal' card
- 'User Defined' card
- 'Notes' card
- 'BI' card
- Inv. Address
- Used as default in
Sales and Purchase Orders, Sales Invoices
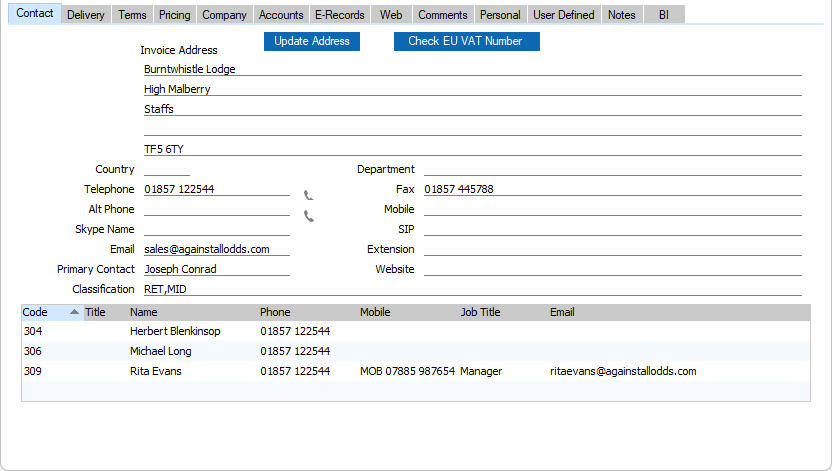
- Enter here the address to which Sales Invoices, statements, Purchase Orders and Payments are to be sent.
- If you want to give a name to each of the individual address lines, use the 'Address' card of the User Defined Fields - Contacts setting in the CRM module. This can be useful if, for example, you want to indicate that the town or city is always to be typed into the third line of the address:
The address line names that you specify in the User Defined Fields - Contacts setting will be used for this Invoice Address, for the Delivery Address on the 'Delivery' card and for the addresses in other records (e.g. in Quotations, Orders and Invoices).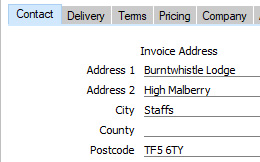
- In the UK, it is recommended that you use the fifth line of the address for the postcode. This will enable you to use the "Update Address" feature (described immediately below) and also the [Map] button in the 'Communication Centre' window.
- If you will be using Standard ERP to control the processing of credit and debit card payments and if your credit card provider will check that card holders' addresses are correct, use the fifth line of the address for postcodes (UK) or the fourth line of the address for the two-character state code (US). This will ensure the card holders' postcodes/state codes will be sent to the provider correctly. Please refer to the Processing credit and debit card payments through Standard ERP page for more details about credit card payments.
- If you want to give a name to each of the individual address lines, use the 'Address' card of the User Defined Fields - Contacts setting in the CRM module. This can be useful if, for example, you want to indicate that the town or city is always to be typed into the third line of the address:
- [Update Address] button
- Use the [Update Address] button when you need to use the Address Lookup Cloud Service to obtain the full address of a Contact. The [Update Address] button is located on the 'Contact' and 'Company' cards.
- Address Lookup is a chargeable Cloud Service. To use it, you must have registered your database in Estonia, Finland, Latvia, Lithuania, Norway, Poland, Sweden or the UK using the Automatic Internet Enabler method, as described on the Enabler Key page. Depending on where your database is registered, you may be able to start using the Address Lookup service straight away using the default pricing scheme. Please contact your local HansaWorld representative for more details.
- In Estonia you can use the [Update Address] button to obtain the Contact's Invoice Address from RIK. Enter the Contact's Company Registration Number in the Reg. No. 1 field on the 'Company' card and then press the [Update Address] button. A report listing possible matches will be printed to screen: click (Windows/macOS) or tap (iOS/Android) the [Insert Data] text link next to the address that you need. The Company Name, Invoice Address and other information will be brought in to the appropriate fields.
- In Finland, Latvia, Lithuania, Norway and Sweden you can obtain the Contact's Invoice Address from a central Company Registration Number database. Enter the Contact's Company Registration Number on the 'Company' card (in the Reg. No. 1 or the Reg. No. 2 fields with priority being given to Reg. No. 2) and then press the [Update Address] button. The Company Name, Invoice Address and other information depending on the country will be brought in to the appropriate fields. In Latvia and Lithuania, the Company Registration Number will be placed in the Reg. No. 1 field if it was previously in Reg. No. 2. In Finland, if the Contact is a Supplier a check will also be made to see if they have a valid prepayment registration from YTJ and if so the Prep. Reg. Check Date field will be updated with the current date.
- In Poland, enter the Contact's VAT Registration Number on the 'Company' card and then press the [Update Address] button. The Company Name, Invoice Address and other information will be brought in to the appropriate fields.
- In the UK, you can use this button to obtain the Contact's address from a central postcode database. Enter the Contact's postcode (with or without space) on the fifth line of the Invoice Address and then press this button. The street name will be placed in the first line of the address and other address details will be brought in as appropriate. A list of premises will also be opened, where you can select the correct building number, building name or company name by double-clicking (Windows/macOS) or tapping (iOS/Android). The company name will be copied to the Name field above if this is empty, and the building number or name (if any) will be incorporated into the first line of the address.
- If you are in Canada or the US and have registered an Avalara account in your Standard ERP database, you can use the [Update Address] button after entering an Invoice Address to check that the address is correct. If it is correct, the characters will be converted to uppercase, but if the address is not correct or is not recognised by Avalara, the characters will be left as they are.
- Address Lookup is a chargeable Cloud Service. To use it, you must have registered your database in Estonia, Finland, Latvia, Lithuania, Norway, Poland, Sweden or the UK using the Automatic Internet Enabler method, as described on the Enabler Key page. Depending on where your database is registered, you may be able to start using the Address Lookup service straight away using the default pricing scheme. Please contact your local HansaWorld representative for more details.
- [Check EU VAT Number] button
- The [Check EU VAT Number] button allows you to check that the VAT Registration Number of a company in the EU is valid. To use this button, follow these steps:
- Enter the company's VAT Registration Number on the 'Company' card.
- While on the 'Company' card, set the Type to "Company".
- On the 'Contact' card, specify the Country where the company is located. It is recommended that you specify the two-character ISO 3166 code for the Country in this field, but if not ensure that the Country is connected to a record in the Countries setting in the System module in which you have entered the two-character ISO 3166 code in the ISO Code field,
- Press the [Check EU VAT Number] button. Depending on the validity of the VAT Number, you will be told "VAT Number is valid" or "VAT Number is not valid". If the validity check cannot be carried out, you will be told "Check Country Code and VAT Number". This will usually be because you have not used the two-character ISO 3166 code for the Country or because the Country is not in the EU.
- Enter the company's VAT Registration Number on the 'Company' card.
- Country
- Paste Special
Countries setting, System module
- Enter the Country in which the Contact is located.
- When you specify a Country, the VAT Zone, Freight Code, Price List, Discount Matrix and Sales Tags/Objects will be brought in from the relevant record in the Countries setting. In Sweden (i.e. if the VAT Law in the Company Info setting is "Swedish"), the Payment Channel on the 'Accounts' card will be brought in as well.
- If you enter a VAT Registration Number on the 'Company' card, an automatic validation check will be made that it is in the correct format for the Country. This validation check requires you to have defined VAT Number formats for each Country in the VAT Reg. Number Masks setting in the System module.
- If you are in the UK and you will be using Standard ERP to control the processing of credit and debit card payments and if your credit card provider will check that card holders' addresses are correct, you must enter "GB" in this field. Providers expect "GB" and do not recognise "UK". Please refer to the Processing credit and debit card payments through Standard ERP page for more details about credit card payments.
- If you need to use the 'Intrastat Invoices' and 'Intrastat Purchase Invoices' Export functions in the Sales and Purchase Ledgers (e.g. in the UK: 'Intrastat Invoices (UK)' and 'Intrastat Purchase Invoices (UK)'), you should specify Countries in the Contact records for every Customer and Supplier. This includes domestic Customers and Suppliers: do not leave the field empty (if you are in the UK, enter "GB" not "UK" as previously mentioned). The Intrastat Export functions will use this Country when determining whether to include an Invoice in the Intrastat export file, and will also include it in the export file as the country to which the goods on an Invoice were exported or from where they were imported. Intrastat rules require you to use two-character ISO Country Codes: you can find a list published by HM Revenue and Customs in the UK in their Notice 60 document, available from https://www.gov.uk/government/publications/notice-60-intrastat-general-guide/notice-60-intrastat-general-guide.
- If you need the Country to be stored in one of the five lines of the Invoice Address, specify the Address line that you want to use in the Country Line field on the 'Address' card in the User Defined Fields - Contacts setting in the CRM module. You will then be able to use 'Paste Special' from that Address line to choose the Country, and default values from the relevant record in the Countries setting will be brought in to the new Contact record as described in the second paragraph. For example, if you have used the Country Line field to specify that you need to use the fifth line of the Address to store the Country, you will be able to specify the Country in the fifth line of the Address instead of the Country field.
- When you specify a Country, the VAT Zone, Freight Code, Price List, Discount Matrix and Sales Tags/Objects will be brought in from the relevant record in the Countries setting. In Sweden (i.e. if the VAT Law in the Company Info setting is "Swedish"), the Payment Channel on the 'Accounts' card will be brought in as well.
- Department
- You can record the name of a Department here. This might be necessary if you are dealing with several Departments in the same company.
- Alternatively, if your company has several departments, you can specify the one responsible for relations with this company here.
- You can use the Department as a search criterion when producing a Contact List report, and you can also specify that the Contacts listed in that report will be sorted by Department.
- Alternatively, if your company has several departments, you can specify the one responsible for relations with this company here.
- Telephone, Fax, Alt Phone, Mobile, Skype Name, SIP, Email, Extension
- Enter the Contact's main telephone, mobile and fax numbers, email and SIP addresses and Skype name in these fields. Use the Alt Phone field to record an alternative contact number such as home telephone or personal fax number.
- If you are using the Standard ERP Fax Server, the fax number will be used when faxing documents to the Contact. The Fax Server will not send faxes to numbers containing spaces, dashes or other non-numeric characters, so do not use these characters. You can use the 'Update Fax Numbers' Maintenance function in the Technics module to remove illegal characters from the Fax Numbers in Contact records.
- The email address will be used when you need to send Mails to the company, and when you need to send Customer Letters by email. If you do not want email addresses to be printed in the Birthday List, Contact List, Lead List, Resource Info and Unconfirmed Reservations reports or exported by the Contact List, Contact List to Palm3 and Contact Relations List export functions, select the Exclude All Contact emails from Reports option in the Mail and Conference Settings setting in the Email and Conferences module. If you need email addresses to be unique (i.e. if you want to be prevented from using the same email address in more than one Contact record), select the Email option on the 'Registration' card in the My Account Settings setting in the Webshop and CMS module.
- If you need to call the Contact, click or tap the [Communicate] button in the Button Bar:
The 'Communication Centre' window opens, showing the Contact's contact details in the area on the right: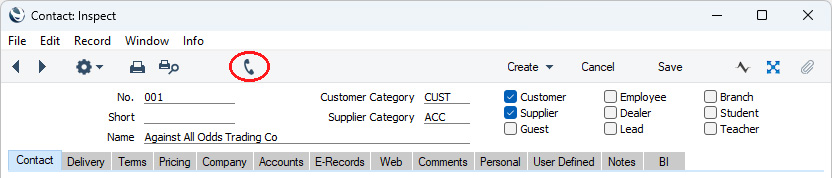
Subject to your computer or network having the suitable connection software and hardware and to your database being configured correctly, click on a contact method in the list, and then click the appropriate button. For more details, please refer here. If you will use the 'Communication Centre' window to communicate with the Contact, the Contact's telephone and mobile numbers can only contain numbers, spaces, dashes and the + sign. They must not contain other characters such as full stops, brackets or any alpha characters. You can use the List Invalid Phone Numbers report in the CRM module to check for illegal characters in the Telephone, Alt Phone, Fax and Mobile fields in each Contact.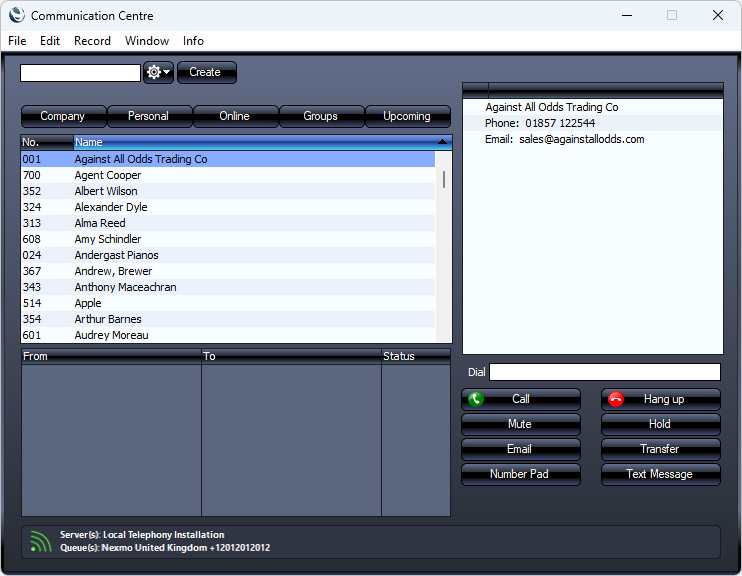
- You can also click or tap the telephone buttons in the individual fields:
If you have chosen a Preferred Call Method in the Local Machine setting in the User Settings module ('Integrations' card), a call will be initiated using that calling method to the number in the field whose telephone button you used. If you have not chosen a Preferred Call Method or your database has not been configured correctly for the selected Preferred Call Method, the 'Communication Centre' window will be opened. The Local Machine setting is specific to the machine you are using, so there can be different Preferred Call Methods on different machines.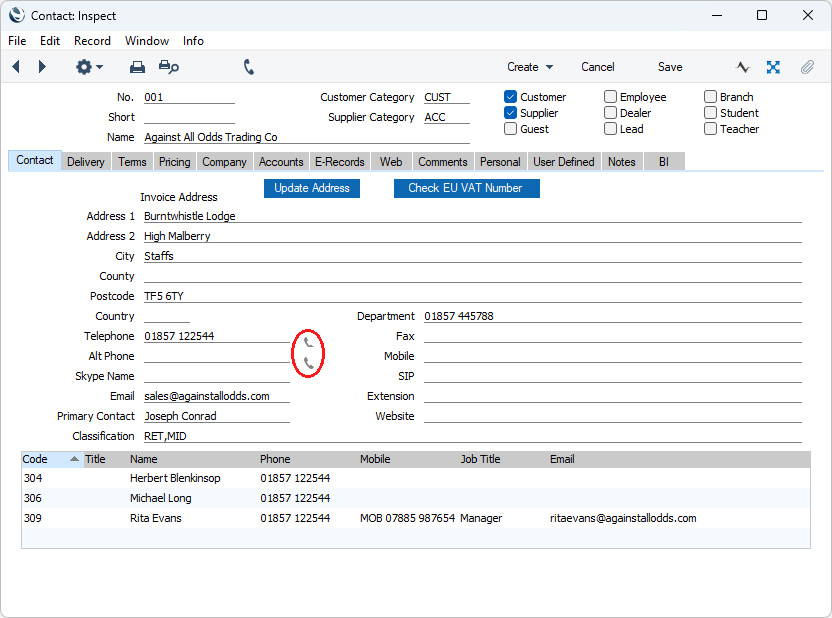
- If you are using the Standard ERP Fax Server, the fax number will be used when faxing documents to the Contact. The Fax Server will not send faxes to numbers containing spaces, dashes or other non-numeric characters, so do not use these characters. You can use the 'Update Fax Numbers' Maintenance function in the Technics module to remove illegal characters from the Fax Numbers in Contact records.
- Primary Contact
- Paste Special
Contact Persons in Contact register
- If a Contact is a company or organisation (i.e. not an individual person), use this field to record the name of your most important Contact Person in that company or organisation.
If you need to connect the company or organisation to other Contact Persons, use the 'Linked Contact Person' function on the Create menu (Windows/macOS) or + menu (iOS/Android) (if a Contact Person does not yet have their own record in the Contact register) or the 'Link Existing Contact' function on the Operations or Tools menu (if a Contact Person already has their own record in the Contact register). Please refer to the Linking Contacts and Companies page for more details about connecting a company or organisation to its Contact Persons.
- When you use the Contact record for the company or organisation in any transaction, the Primary Contact will be copied to that transaction as a default. For example, if you specify the company or organisation in a Sales Invoice as the Customer, its Primary Contact will be copied to the Attention field in that Invoice. You can of course change to another Contact Person in that Attention field. The 'Paste Special' list from that field will only contain Contact Persons that work for the Customer.
- If you will be sending documents by email to the company or organisation, use the Additional Email Recipients setting in the CRM module if you need to specify that particular documents will be sent to particular Contact Persons (e.g. that Invoices should be sent to one Contact Person and that statements should be sent to another Contact Person).
- When you use the Contact record for the company or organisation in any transaction, the Primary Contact will be copied to that transaction as a default. For example, if you specify the company or organisation in a Sales Invoice as the Customer, its Primary Contact will be copied to the Attention field in that Invoice. You can of course change to another Contact Person in that Attention field. The 'Paste Special' list from that field will only contain Contact Persons that work for the Customer.
- Web Site
- If the Contact has a website, enter its address (URL) here.
- Classification
- Paste Special
Contact Classifications setting, CRM module
- Together with Customer and Supplier Categories, you can use Contact Classifications to group Contacts of a similar type together. You can use the Classification as a reporting and mailing criterion in the CRM module and in the Sales Ledger. You can assign several Classifications to each Contact record, separated by commas.
- If you have assigned a Contact to a Customer Category in which you have specified some Classification Types, you must enter Classifications belonging to each of those Types in this field before you can save the Contact.
- Two Maintenance functions, 'Add Classification to Contacts' in the CRM module and 'Update Customer Classification' in the Sales Ledger, allow you to assign Classifications to Contacts based on various criteria such as the Items they have bought or not bought.
- In Argentina, you should enter a Classification representing the Customer type in each Contact record representing a Customer. When you issue an Invoice to a Customer, the selection of Official No. in that Invoice will depend on the Customer type. If a Customer is registered with the tax authority as a company, their Invoices should be given "A"-type Official Numbers. Invoices issued to end users or private individuals should be given "B"-type Official Numbers, while Invoices issued to Customers abroad should be given "E"-type Official Numbers. When you define number sequences for Official Numbers (using the Legal Record Numbers setting in the Sales Ledger), you should define sequences for "A", "B" and "E" Customers, separating them by specifying "A", "B" and "E" Classifications on flip B. After assigning the relevant Classification to each Customer, this connection will enable an Official Number of the correct type to be assigned to each Invoice, depending on the type of Customer. Usually you will also need to specify the Customer type in the Language field (on the 'Company' card), to ensure that Invoices for Customers of a particular type are printed using the correct Form Template.
- If you have assigned a Contact to a Customer Category in which you have specified some Classification Types, you must enter Classifications belonging to each of those Types in this field before you can save the Contact.
---
The Contact register in Standard ERP:
- Introduction
- Entering a Contact, including:
- Header
- 'Contact' card
- 'Delivery' card
- 'Terms' card - Fields
- 'Terms' card - Check Boxes
- 'Pricing' card
- 'Company' card
- 'Accounts' card
- 'E-Records' card
- 'Web' card
- 'Comments' card
- 'Personal' card
- 'User Defined' card
- 'Notes' card
- 'BI' card
- Header
- Editing a Contact
- Deleting a Contact
- Linking Contact Persons and Companies - The Contact Relations Register
- Operations menu
- Create menu
- Home page for Customers, Suppliers and Contact Persons manual
- Home page for Standard ERP manual
Entering a Contact - Delivery Card
This page describes the fields on the 'Delivery' card of the Contact record. Please follow the links below for descriptions of the other cards:- Header
- 'Contact' card
- 'Delivery' card
- 'Terms' card - Fields
- 'Terms' card - Check Boxes
- 'Pricing' card
- 'Company' card
- 'Accounts' card
- 'E-Records' card
- 'Web' card
- 'Comments' card
- 'Personal' card
- 'User Defined' card
- 'Notes' card
- 'BI' card
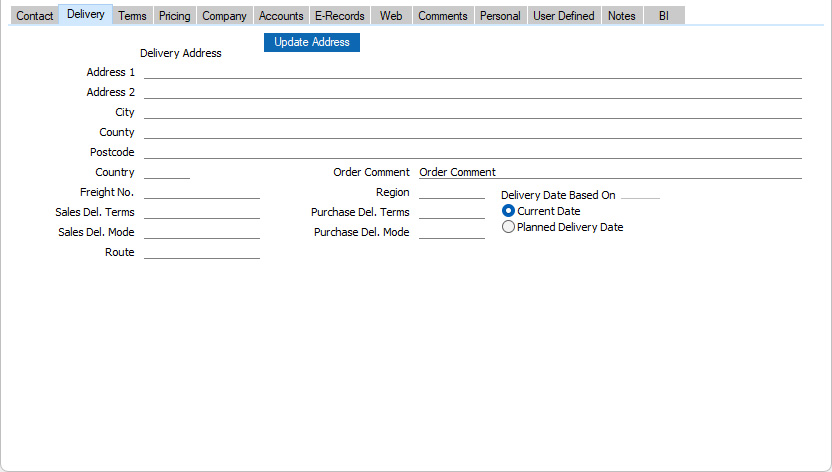
- Del. Address
- Used as a default in
Deliveries, Returned Goods to Supplier records
- Specify the Contact's usual delivery address here.
- If the Contact has several Delivery Addresses, record them in the Delivery Addresses setting in the Sales Orders module. You will then be able to select the appropriate one in Quotations, Sales Orders, Sales Invoices, Deliveries and Returned Goods to Supplier records as necessary.
- If you want to give a name to each of the individual address lines, use the 'Address' card of the User Defined Fields - Contacts setting in the CRM module. This can be useful if, for example, you want to indicate that the town is always to be typed into the third line of the address. This has been done in the illustration above.
- If the Contact has several Delivery Addresses, record them in the Delivery Addresses setting in the Sales Orders module. You will then be able to select the appropriate one in Quotations, Sales Orders, Sales Invoices, Deliveries and Returned Goods to Supplier records as necessary.
- Country
- Paste Special
Countries setting, System module
- The Country where the Delivery Address is located.
- If you need to use the 'Intrastat Invoices' Export functions in the Sales Ledger (e.g. in the UK: 'Intrastat Invoices (UK)'), you should specify a Country in every Delivery Address. This includes domestic Delivery Addresses: do not leave the field empty (if you are in the UK, enter "GB" not "UK"). The 'Intrastat Invoices' functions will use this Country when determining whether to include an Invoice in the Intrastat export file, and will also include it in the export file as the country to which the goods on an Invoice were exported. Intrastat rules require you to use two-character ISO Country Codes: you can find a list published by HM Revenue and Customs in the UK in their Notice 60 document, available from https://www.gov.uk/government/publications/notice-60-intrastat-general-guide/notice-60-intrastat-general-guide.
- If you need to use the 'Intrastat Invoices' Export functions in the Sales Ledger (e.g. in the UK: 'Intrastat Invoices (UK)'), you should specify a Country in every Delivery Address. This includes domestic Delivery Addresses: do not leave the field empty (if you are in the UK, enter "GB" not "UK"). The 'Intrastat Invoices' functions will use this Country when determining whether to include an Invoice in the Intrastat export file, and will also include it in the export file as the country to which the goods on an Invoice were exported. Intrastat rules require you to use two-character ISO Country Codes: you can find a list published by HM Revenue and Customs in the UK in their Notice 60 document, available from https://www.gov.uk/government/publications/notice-60-intrastat-general-guide/notice-60-intrastat-general-guide.
- [Update Address] button
- In the UK, you can use this button to obtain the Contact's delivery address from a central postcode database. Enter the Contact's postcode (with or without space) on the fifth line of the Delivery Address and then press this button. The street name will be placed in the first line of the address and other address details will be brought in as appropriate. A list of premises will also be opened, where you can select the correct building number, building name or company name by double-clicking. The building number or name (if any) will be incorporated into the first line of the address.
- Address Lookup is a chargeable Cloud Service. To use it, you must have registered your database in the UK using the Automatic Internet Enabler method, as described on the Enabler Key page. Please contact your local HansaWorld representative for more details about the Address Lookup service.
- If you are in Canada or the US and have registered an Avalara account in your Standard ERP database, you can use the [Update Address] button after entering a Delivery Address to check that the address is correct. If it is correct, the characters will be converted to uppercase, but if the address is not correct or is not recognised by Avalara, the characters will be left as they are.
- Address Lookup is a chargeable Cloud Service. To use it, you must have registered your database in the UK using the Automatic Internet Enabler method, as described on the Enabler Key page. Please contact your local HansaWorld representative for more details about the Address Lookup service.
- Order Comment
- If a Contact is a Customer, any text that you enter here will be copied to the Comment fields in their Quotations ('Price List' card), Sales Orders ('Price List' card), Contracts ('Del. Terms' card), Service Orders ('Terms' card) and Sales Invoices ('Price List' card).
- Freight No
- If a Contact is a Customer, in some countries you can allocate them a specific Freight Number, to be quoted in every Delivery. If you want Freight Numbers to be printed on delivery documents, include the "Customer Freight Number" field in your Form Template designs.
- Region
- Paste Special
Regions setting, Sales Ledger
- Default taken from Contact Settings (Default Region)
- The Region (e.g. the state, province or county) where the Contact is located. If a Contact is a Customer, this will be copied to the Region field in all Quotations, Orders, Invoices and Deliveries. This will be useful if you are situated in a country where sales taxes vary depending on where Customers are located. If a Contact is a Supplier, this Region will be copied to the Region field in Purchases Invoices. In Argentina this can affect the calculation of Withholding Taxes.
- The Region (e.g. the state, province or county) where the Contact is located. If a Contact is a Customer, this will be copied to the Region field in all Quotations, Orders, Invoices and Deliveries. This will be useful if you are situated in a country where sales taxes vary depending on where Customers are located. If a Contact is a Supplier, this Region will be copied to the Region field in Purchases Invoices. In Argentina this can affect the calculation of Withholding Taxes.
- Sales Del. Terms
- Paste Special
Delivery Terms setting, Sales Orders module
- Used as default in Quotations, Sales Orders, Sales Invoices
- Purch. Del. Terms
- Paste Special
Delivery Terms setting, Sales Orders module
- Used as default in Purchase Orders
- Use these two fields to specify the Delivery Terms that you will use when shipping goods to the Contact and that they will use when shipping goods to you. You will tend to use these fields for international companies: examples might be Cost, Insurance, Freight or Free On Board.
- You can specify translations in different Languages for each Delivery Term name: the Language in the Contact record (specified on the 'Company' card) will determine which translation will be printed on Delivery Notes, Purchase Orders and other documents.
- Use these two fields to specify the Delivery Terms that you will use when shipping goods to the Contact and that they will use when shipping goods to you. You will tend to use these fields for international companies: examples might be Cost, Insurance, Freight or Free On Board.
- Sales Del. Mode
- Paste Special
Delivery Modes setting, Sales Orders module
- Used as default in Quotations, Sales Orders, Sales Invoices
- Purch. Del. Mode
- Paste Special
Delivery Modes setting, Sales Orders module
- Used as default in Purchase Orders
- Enter the mode of shipping (i.e. shipping method) that you will tend to use when shipping goods to the Contact and that they will use when shipping goods to you. Examples might be Post or Courier, or the name of the courier that is most frequently used.
- You can specify translations in different Languages of each Delivery Mode name: the Language in the Contact record (specified on the 'Company' card) will determine which translation will be printed on Delivery Notes, Purchase Orders and other documents.
- Enter the mode of shipping (i.e. shipping method) that you will tend to use when shipping goods to the Contact and that they will use when shipping goods to you. Examples might be Post or Courier, or the name of the courier that is most frequently used.
- Delivery Date Based On
- If a Contact is a Customer, the Delivery Date in any Delivery that you issue to them can default to the current date or to the Planned Delivery Date in the Order from which the Delivery was issued. Specify here which option is to be used for a particular Contact.
- If you choose the Planned Delivery Date option, the current date will be used as the Delivery Date in a Delivery if the Planned Delivery Date in the originating Order is blank. The Planned Delivery Date field must use the Date format, which you should specify in the Planned Delivery setting in the Sales Orders module.
- The option that you choose here will not be used if you create Deliveries using the 'Create Deliveries from Orders' Maintenance function in the Sales Orders module. When you run the function, you will specify a Delivery Date that will be used in each Delivery that is created. If you don't specify a date when running the function, the Order Date of each Order will be used.
- If you choose the Planned Delivery Date option, the current date will be used as the Delivery Date in a Delivery if the Planned Delivery Date in the originating Order is blank. The Planned Delivery Date field must use the Date format, which you should specify in the Planned Delivery setting in the Sales Orders module.
- Route
- Paste Special Routes setting, Stock module
- You can use this field in the Contact records for Customers and Suppliers to organise them into zones (or "Routes") to provide a guide for delivery drivers. This will be most useful if you have a fleet of delivery vehicles, each of which repeats the same journey or "Route" every day.
- If a Contact is a Customer, the Route will be copied to Sales Orders, and from there to Deliveries. The Route is used by the Sorted Order List report in the Sales Order module (a list in Route order of Sales Orders with a particular Planned Delivery Date) and the Trip Sheet report in the Stock module (a list of the Deliveries on a particular Route that can be made on a specified date or during a specified period).
- If a Contact is a Supplier, the Route will be copied to Returned Goods to Supplier records. These records will also be shown in the Trip Sheet report.
- You can use this field in the Contact records for Customers and Suppliers to organise them into zones (or "Routes") to provide a guide for delivery drivers. This will be most useful if you have a fleet of delivery vehicles, each of which repeats the same journey or "Route" every day.
The Contact register in Standard ERP:
- Introduction
- Entering a Contact, including:
- Header
- 'Contact' card
- 'Delivery' card
- 'Terms' card - Fields
- 'Terms' card - Check Boxes
- 'Pricing' card
- 'Company' card
- 'Accounts' card
- 'E-Records' card
- 'Web' card
- 'Comments' card
- 'Personal' card
- 'User Defined' card
- 'Notes' card
- 'BI' card
- Header
- Editing a Contact
- Deleting a Contact
- Linking Contact Persons and Companies - The Contact Relations Register
- Operations menu
- Create menu
- Home page for Customers, Suppliers and Contact Persons manual
- Home page for Standard ERP manual
Entering a Contact - Terms Card - Fields
This page describes the fields on the 'Terms' card of the Contact record. Please follow the links below for descriptions of the other cards:- Header
- 'Contact' card
- 'Delivery' card
- 'Terms' card - Fields
- 'Terms' card - Check Boxes
- 'Pricing' card
- 'Company' card
- 'Accounts' card
- 'E-Records' card
- 'Web' card
- 'Comments' card
- 'Personal' card
- 'User Defined' card
- 'Notes' card
- 'BI' card
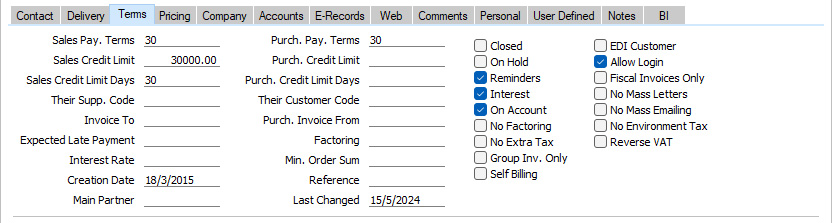
- Sales Pay. Terms
- Paste Special
Payment Terms setting, Sales/Purchase Ledger
- Default taken from Contact Settings (Default Payment Term)
- Used as default in Quotations, Sales Orders, Sales Invoices
- Used as default in Quotations, Sales Orders, Sales Invoices
- Purch. Pay. Terms
- Paste Special
Payment Terms setting, Sales/Purchase Ledger
- Used as default in Purchase Orders, Purchase Invoices
- Specify here the Payment Terms to be used with the Contact. These Terms will be copied to Sales and Purchase Invoices, where they will ensure that the Due Dates are calculated correctly. Payment Terms also allow you to configure a system of early settlement discounts.
- Specifying Sales or Purchase Payment Terms in each Invoice provide the basis for the debt chasing and credit management reports provided in Standard ERP.
- In the Baltic States, there are circumstances when cash Purchase Invoices should follow the same number sequence as that used by Payments, Personnel Payments and Cash Out records. If you need to use this feature, first define the number sequences using the right-hand From and To fields on flip C of the Payment Modes setting (define separate sequences for each Payment Mode that represents a cash payment). Then select the Common Number Series option in the Cash Book Settings setting in the Cash Book module. Finally, enter Payment Modes in the Purch. Pay. Terms field in the Contact records for cash Suppliers. When you enter such a Supplier in a Purchase Invoice, the Invoice Number will change to one in the correct sequence. When you mark the Invoice as OK and save, it will be treated as paid and no posting to a Creditor Account will be made. Instead, a credit posting will be made to the Account of the Payment Mode (i.e. a bank or cash Account).
- If you have entered a Default Payment Term in the Contact Settings setting, it will be entered to the Sales Pay. Terms field in each new Contact automatically.
- If you need to change the Sales Payment Terms in a group of Customers, an option that is available is to use the 'Update Contact Data' Maintenance function in the CRM module.
- Specify here the Payment Terms to be used with the Contact. These Terms will be copied to Sales and Purchase Invoices, where they will ensure that the Due Dates are calculated correctly. Payment Terms also allow you to configure a system of early settlement discounts.
- Sales Credit Limit
- Default taken from Contact Settings (Default Credit Limit)
- If a Contact is a Customer, specify here the Credit Limit that you have granted to them. This figure should be in your home Currency.
- If you have entered a record for the Contact in the Contact Credit Limits setting in the Sales Ledger, the Sales Credit Limit will be taken from there (i.e. the Credit Limit in this field will not be used).
- After setting Credit Limits for each Customer, use the Credit Limit setting in the Sales Ledger to control behaviour in sales transactions when Customers have exceeded their Credit Limits (e.g. to warn against or prevent the entering of Orders and Invoices) and to specify how it should be determined that a Customer has exceeded their Credit Limit.
- If you want to allow a company no credit at all, set their Sales Credit Limit to 0.00. Leave the field empty if you do not want to set a limit.
- If you need a list of Customers that compares their account status with their Credit Limits, produce a Customer Credit Status report (in the Sales Ledger). This information will also be shown for a particular Customer in the report produced by the 'Customer Status' Operations menu function, but only if there is a record in the Info in Customer Status Report setting in the CRM module for the user producing the report.
- You can prevent certain users from changing the Sales Credit Limit in any Contact using Access Groups (by denying them access to the 'Change Credit Limits' Action).
- If a Contact is a Customer, specify here the Credit Limit that you have granted to them. This figure should be in your home Currency.
- Sales Credit Limit Days
- Default taken from Contact Settings (Default Credit Limit Days)
- If a Contact is a Customer, you can use this field to specify the maximum number of days credit you will allow them.
- If you have specified a Sales Credit Limit Days for a Customer, that Customer will immediately be said to have exceeded their credit terms as soon as an Invoice of any value becomes outstanding for more than that number of days (measured from its Due Date). Please refer to the description of the Credit Limit setting for more details about determining when a Customer has exceeded their credit terms.
- If you have entered a record for the Contact in the Contact Credit Limits setting in the Sales Ledger, the Sales Credit Limit Days will be taken from there (i.e. the Credit Limit Days in this field will not be used).
- You can prevent certain users from changing the Sales Credit Limit Days field in any Contact using Access Groups (by denying them access to the 'Change Credit Limit Days' Action). Access Groups are described in the 'System Module' manual.
- If a Contact is a Customer, you can use this field to specify the maximum number of days credit you will allow them.
- Purch. Credit Limit
- If a Contact is a Supplier, specify the Credit Limit extended to your firm by them here. This is for information only: it will be shown for a particular Supplier in the report produced by the 'Supplier Status' Operations menu function. If you have entered a record for the Contact in the Contact Credit Limits setting in the Sales Ledger, the Purchase Credit Limit in the 'Supplier Status" report will be taken from there (i.e. the Credit Limit in this field will not be used).
- Purch. Credit Limit Days
- If a Contact is a Supplier, specify the maximum number of days credit extended to your firm by them here. This is for information only.
- Their Supp. Code
- If a Contact is a Customer, enter the Supplier Number that they are using for your firm in their database.
- Their Customer Code
- If a Contact is a Supplier, enter the Customer Number that they are using for your firm in their database. If you want this to be printed on Purchase Order, Purchase Order Contract, Purchase Order Quotation and Purchase Invoice documentation, include the "Own Customer Number" field in your Form Template designs. If you want it to be printed in Cheque Documents and Payment Forms, include the "Our Customer Number" field in your Form Template designs.
- Invoice To
- Paste Special
Customers and Suppliers in Contact register
- If a Contact is a Customer who will not be paying your Invoices themselves but may, for example, be purchasing through a leasing company, enter the Contact Number of that company here (that company must also be a Customer or a Supplier in the Contact register).
- When you raise Sales Invoices for the Customer from Sales Orders, they will be made out to the company specified here.
- When you raise Sales Invoices for the Customer from Sales Orders, they will be made out to the company specified here.
- Purch. Invoice From
- Paste Special
Suppliers in Contact register
- Use this field if the Contact is a Supplier to whom you will issue Purchase Orders for which you will receive Purchase Invoices from a different Supplier (the "Invoice From Supplier"). Enter the Contact Number of the Invoice From Supplier here (that company must also be a Supplier in the Contact register).
- For example, you might belong to a buying club. As a buying club has several members, it buys in bulk and therefore obtains better prices. You will then issue a Purchase Order to a Supplier, but receive the Purchase Invoice from the buying club. In this example, the buying club would be the Invoice From Supplier.
- When you use the Supplier in a Purchase Order, the Invoice From Supplier will be copied to the Invoice From field on the 'Comment' card of the Purchase Order. When you create a Purchase Invoice from the Purchase Order, the Supplier in that Purchase Invoice will be the Invoice From Supplier.
- If you specify an Invoice From Supplier, you are therefore expecting a Purchase Order and its related Purchase Invoice to have different Suppliers. Payment will go to the Invoice From Supplier. However, if a Purchase Order and its related Purchase Invoice will have the same Supplier, with only the Payment going to a different Supplier, do not use the Purch. Invoice From field and instead enter that Supplier in the Factoring field below.
- The Purch. Invoice From company is also used in the following circumstances:
- If you will be paying Purchase Invoices using Banking File export files and the Payment File Format you have chosen in the Bank Transfer setting in the Purchase Ledger is Lithuania - LITAS-ESIS 1.1. If a Supplier has a Purch. Invoice From company, address and bank branch details from the Purch. Invoice From company will be included in export files instead of those from the Supplier. However, the bank account number will be taken from each Payment row, which will have taken it from the Purchase Invoice/Supplier. So be sure to specify the correct Bank Account in the Supplier record.
- If you will be paying Purchase Invoices using the E-Payments Cloud Service, the Payment File Format you have chosen in the relevant Bank record is Estonia - Swedbank Gateway or Latvia - Telehansa and the Supplier is being paid using a Payment in which the Foreign Payment option has been selected. In this case, the bank account will be taken from the Payment row or, if that is blank, from the Purch. Invoice From company (Bank Account field).
- For example, you might belong to a buying club. As a buying club has several members, it buys in bulk and therefore obtains better prices. You will then issue a Purchase Order to a Supplier, but receive the Purchase Invoice from the buying club. In this example, the buying club would be the Invoice From Supplier.
- Expected Late Payment
- If a Contact is a Customer who will pay Invoices a specific number of days after they were issued, specify that number of days here.
- For example, if the Payment Term for a Customer is 30 days but they will usually pay an Invoice 15 days after its Due Date, enter "45" in this field. If they will usually pay an Invoice 10 days after its Invoice Date, enter "10" in this field.
- In each Invoice, the Exp. Clearing Date will be calculated to be the Invoice Date + this Expected Late Payment (i.e. 45 days after the Invoice Date and 10 days after the Invoice Date in the examples in the previous paragraph).
- For example, if the Payment Term for a Customer is 30 days but they will usually pay an Invoice 15 days after its Due Date, enter "45" in this field. If they will usually pay an Invoice 10 days after its Invoice Date, enter "10" in this field.
- Factoring
- Paste Special
Suppliers in Contact register
- If a Contact is a Supplier that uses a factoring company (to which Payments are to be sent), enter the Contact Number of that company here (that company must also be a Supplier in the Contact register).
- If a Supplier has a Factoring company, it is recommended that you leave the IBAN Code, Bank Account, and Bank Account 2 blank in that Supplier's Contact record. This will ensure that when you create a Purchase Invoice in the name of the Supplier, the Bank Account in that Purchase Invoice will be taken from the Factoring company. When you pay the Purchase Invoice, that Bank Account will be copied to the To Bank A/C field in the Payment row (flip H) and from there will be included in Banking File exports. The Bank Code and Sort Code will also be copied from the Factoring Supplier to the Purchase Invoice and from there to the Payment row.
- If a Supplier has a Factoring company, it is recommended that you leave the IBAN Code, Bank Account, and Bank Account 2 blank in that Supplier's Contact record. This will ensure that when you create a Purchase Invoice in the name of the Supplier, the Bank Account in that Purchase Invoice will be taken from the Factoring company. When you pay the Purchase Invoice, that Bank Account will be copied to the To Bank A/C field in the Payment row (flip H) and from there will be included in Banking File exports. The Bank Code and Sort Code will also be copied from the Factoring Supplier to the Purchase Invoice and from there to the Payment row.
- Interest Rate
- If a Contact is a Customer to whom you may be issuing Interest Invoices, enter here the annual rate of interest that is to be used when calculating interest charges.
- If you leave this field blank, the percentage will be taken from the Interest setting in the Sales Ledger. Wherever the percentage is taken from, the Sales Account and VAT Code for the interest will be taken from the Interest setting: you can also use that setting to specify any fee to be levied for the raising of Interest Invoices.
- Use the 'Create Interest Invoices' Maintenance function in the Sales Ledger to create Interest Invoices, which will only be raised for Customers whose Interest box has been ticked (described below).
- If you leave this field blank, the percentage will be taken from the Interest setting in the Sales Ledger. Wherever the percentage is taken from, the Sales Account and VAT Code for the interest will be taken from the Interest setting: you can also use that setting to specify any fee to be levied for the raising of Interest Invoices.
- Min. Order Sum
- If the Contact is a Supplier, record here the minimum order value they will accept. This is for information purposes only, although it can be shown in the Outstanding Purchase Orders report.
- Creation Date
- This field automatically records when a Contact record was added to your Standard ERP database and cannot be changed.
- You can use the Contact List report to list Contacts that were added or changed after a certain date.
- You can use the Contact List report to list Contacts that were added or changed after a certain date.
- Reference
- If a Contact is a Supplier, the Reference entered here will be copied to the Reference field on the 'Terms' card of any Purchase Invoices entered in the Supplier's name. From there, it will be copied to Payments (Bank Reference field on flip H). Depending on which Payment File Format you have chosen in the Bank Transfer setting in the Purchase Ledger, the Reference may also be included in Banking File exports.
- Main Partner
- Paste Special
Customers in Contact register
- If a Contact is a Customer and you cooperate in some way with a partner when working with them, specify the partner here. The partner should have their own Customer record in the Contact register.
- This is mainly for information only, but you can use the Main Partner as a search criterion in the Invoice Journal, Open Invoice Customer Statement, Periodic Customer Statement and Sales Ledger reports and the Open Invoice Customer Statement and Periodic Customer Statement forms.
- This is mainly for information only, but you can use the Main Partner as a search criterion in the Invoice Journal, Open Invoice Customer Statement, Periodic Customer Statement and Sales Ledger reports and the Open Invoice Customer Statement and Periodic Customer Statement forms.
- Last Changed
- This field will be updated automatically whenever you save the Contact record on screen.
The Contact register in Standard ERP:
- Introduction
- Entering a Contact, including:
- Header
- 'Contact' card
- 'Delivery' card
- 'Terms' card - Fields
- 'Terms' card - Check Boxes
- 'Pricing' card
- 'Company' card
- 'Accounts' card
- 'E-Records' card
- 'Web' card
- 'Comments' card
- 'Personal' card
- 'User Defined' card
- 'Notes' card
- 'BI' card
- Header
- Editing a Contact
- Deleting a Contact
- Linking Contact Persons and Companies - The Contact Relations Register
- Operations menu
- Create menu
- Home page for Customers, Suppliers and Contact Persons manual
- Home page for Standard ERP manual
Entering a Contact - Terms Card - Check Boxes
This page describes the check boxes on the 'Terms' card of the Contact record. Please follow the links below for descriptions of the other cards:- Header
- 'Contact' card
- 'Delivery' card
- 'Terms' card - Fields
- 'Terms' card - Check Boxes
- 'Pricing' card
- 'Company' card
- 'Accounts' card
- 'E-Records' card
- 'Web' card
- 'Comments' card
- 'Personal' card
- 'User Defined' card
- 'Notes' card
- 'BI' card
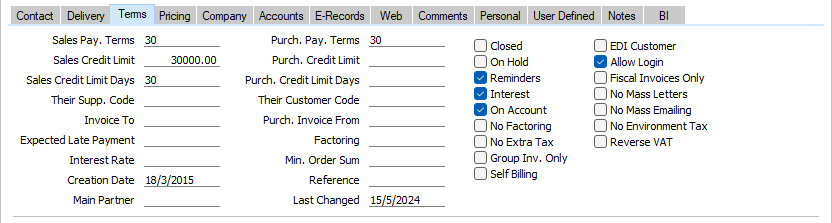
- Closed
- Tick this box if a Contact is no longer to be used (if a Contact is a Customer or Supplier, you will not be able to delete the record altogether if they have at least one Sales Order or Sales or Purchase Invoice). Closed Contacts will appear in the 'Contacts: Browse' window but not in the Contacts 'Paste Special' list. You will not be able to enter Sales Orders or Sales or Purchase Invoices for closed Customers or Suppliers. You can re-open a closed Contact at any time.
- If a Closed Contact is a Contact Person working for a Customer or Supplier company, they will still appear in the list of people working for that company at the bottom of the 'Contact' card, but a red line will be drawn through their name and details. They will not appear in the 'Paste Special' list of Contact Persons when you open it from the Primary Contact and Attention fields in various registers.
- You can mark several Customers or Suppliers as Closed at once using the 'Close Contacts' Maintenance function in the CRM module.
- If a Closed Contact is a Contact Person working for a Customer or Supplier company, they will still appear in the list of people working for that company at the bottom of the 'Contact' card, but a red line will be drawn through their name and details. They will not appear in the 'Paste Special' list of Contact Persons when you open it from the Primary Contact and Attention fields in various registers.
- EGO Customer
- The EGO Customer check box will only be visible in Denmark (i.e. when the VAT Law in the Company Info setting is "Danish"). This check box is designed for use in Denmark, where Invoices issued to some Customers are not printed out but are sent electronically to a third party such as the Post Office for processing. If a Contact is such a Customer, tick this box. Please refer to your local HansaWorld representative for full details.
- On Hold
- If a Contact is a Customer that you have put on hold, tick this box. You can raise Sales Invoices for Customers that are on hold, but you will not be able to mark them as OK (i.e. you won't be able to commit them to the Sales and Nominal Ledgers). You will be able to enter Orders for such Customers, but you won't be able to create Deliveries (ship any goods to them).
- Some Maintenance functions (e.g. 'Create Contract Invoices' in the Contracts module and 'Create Deliveries from Orders') will not create new records for Customers that are on hold.
- Some Maintenance functions (e.g. 'Create Contract Invoices' in the Contracts module and 'Create Deliveries from Orders') will not create new records for Customers that are on hold.
- EDI Customer
- The EDI (Electronic Data Interchange) module allows you to receive Sales Orders and issue Invoices electronically in particular formats. If you are using this module and a Contact is a Customer that uses this system, tick this box. You can only raise EDI Invoices for Customers for whom this box has been ticked. Please refer to your local HansaWorld representative for full details.
- Reminders
- Tick this box if a Contact is a Customer to whom you will need to send Reminders for late payment when appropriate.
- If you have ticked this box in the Contact record for a particular Customer, you can ensure that reminders will not be sent for individual Invoices by ticking the No Reminder box on the 'Delivery' card of the Invoice window.
- If you have not ticked this box in the Contact record for a Customer, Reminders will never be printed for that Customer. You can also specify that Open Invoice Customer Statements will not be printed for that Customer, by selecting the Customers with Reminders Only or Skip No Reminders options. The Skip No Reminders option will also exclude Invoices in which you have ticked the No Reminder box from the statements. When sending Open Invoice Customer Statements by email using the 'Create Open Invoice Customer Statement Email' Maintenance function, statements will never be sent to the Customer.
- If you have ticked this box in the Contact record for a particular Customer, you can ensure that reminders will not be sent for individual Invoices by ticking the No Reminder box on the 'Delivery' card of the Invoice window.
- Allow Login
- If you are using the Standard ERP Web Shop facility and wish to allow the Contact to be able to log in to your website, tick this box. They can use their Customer Number or email address as Login IDs, and you can allocate them a password using the 'Change Password' function on the Operations menu of the 'Contacts: Browse' window.
- Examples of when a Contact will need to be able to log in to your website include the following:
- The Contact is a Customer who will log in to place and pay for Orders in your webshop.
- The Contact is a Customer who will log in to place Reservations for hotel rooms.
- The Contact is a Teacher or Student who will log in to view or manage training courses.
- If you would like this check box to be ticked by default in new Contact records that you enter, select the Allow Login option in the Contact Settings setting.If you would like this check box to be ticked by default in new Contact records that are created online (i.e. by the Customers themselves), select the Allow Login option in the My Account Settings setting in the Webshop and CMS module.
- Examples of when a Contact will need to be able to log in to your website include the following:
- Interest
- Tick this box if a Contact is a Customer that is to be sent interest Invoices for late payments. Please refer here for full details about this feature.
- If you have ticked this box in the Contact record for a particular Customer, you can ensure interest will not be charged for individual Invoices by ticking the No Interest box on the 'Delivery' card of the Invoice screen.
- If you have ticked this box in the Contact record for a particular Customer, you can ensure interest will not be charged for individual Invoices by ticking the No Interest box on the 'Delivery' card of the Invoice screen.
- Fiscal Invoices Only
- If a Contact is a Customer, tick this box if their Invoices are to be classified as Fiscal Invoices. Fiscal Invoices should be printed on fiscal printers in some countries. Please refer to your local HansaWorld representative for more details.
- On Account
- Tick this box if a Contact is Customer from whom you want to be able to receive Prepayments and On Account Receipts (i.e. you want to allow them to pay before you have invoiced them) and/or the Contact is a Supplier to whom you want to be able to issue Prepayments and On Account Payments (i.e. to be able to pay them before you receive Invoices). Full details about the sales side can be found here and about the purchase side here.
- On the sales side, before you can enter Prepayments and On Account Receipts, you must specify an On Account A/C on the 'Debtors' card of the Account Usage S/L setting. Additionally, you can specify such an Account in the Debtors On Account A/C field in the Customer Category. This Account will be credited with the value of these Receipts.
- On the purchase side, before you can enter Prepayments and On Account Payments, you must specify an On Account A/C on the 'Creditors' card of the Account Usage P/L setting. Additionally, you can specify such an Account in the Supplier Category or in the individual Contact record (on the 'Accounts' card). This Account will be debited with the value of these Payments.
- If you would like this check box to be ticked by default in new Contact records, select the On Account option in the Contact Settings setting.
- On the sales side, before you can enter Prepayments and On Account Receipts, you must specify an On Account A/C on the 'Debtors' card of the Account Usage S/L setting. Additionally, you can specify such an Account in the Debtors On Account A/C field in the Customer Category. This Account will be credited with the value of these Receipts.
- No Mass Letters
- Tick this box if you do not want printed letters to be sent to the Contact from the Customer Letter register.
- Note that if you have included a Contact in a Mailing List that you have used in a Customer Letter, printed letters will be sent to the Contact from that Customer Letter even if this box is ticked.
- You can switch this option on or off for several Contacts at once using the 'Mass Emailing' Maintenance function in the CRM module. You can also switch this option on for every Contact belonging to a particular Customer Category using the 'Exclude customer category from mass mailing' Maintenance function in the same module. If you would like this check box to be ticked by default in new Contact records, select the No Mass Letters option in the Contact Settings setting.
- Note that if you have included a Contact in a Mailing List that you have used in a Customer Letter, printed letters will be sent to the Contact from that Customer Letter even if this box is ticked.
- No Factoring
- If you use a factoring company to pay your Sales Invoices, you will regularly use the 'Invoices for Factoring' Export function in the Sales Ledger to send your Invoices to the factoring company. If you want to receive payment from a particular Customer yourself and do not want that Customer's Invoices to be sent to the factoring company, tick this box.
- The 'Invoices for Factoring' Export function is capable of creating files in many different formats suitable for sending to many different banks. You should specify the format that you wish to use by choosing a Factoring Bank in the Factoring Export setting in the Sales Ledger. The 'Invoices for Factoring' function will not export Invoices issued to Customers in which the No Factoring box has been ticked if you are using one of the following Factoring Banks :
- Factoring Finans (NOR)
- Finvoice (FIN)
- Gjensidige Bank (NOR)
- Handelsbanken (FIN)
- Kredittstyring
- NORD finans
- NORD finans (DK)
- Nordea finans
- Nordea (FIN)
- Osuus Pankki (FIN)
- Sampo (FIN)
- SG Finans (NOR)
If you are using a Factoring Bank that is not listed above, the No Factoring check box will be ignored (i.e. a Customer's Invoices will be exported by the 'Invoices for Factoring' Export function even if you have ticked the No Factoring box for that Customer).
- If you are using the 'Finvoice' Export function in the Sales Ledger, you can again use the No Factoring box to prevent that function from exporting Invoices issued to a particular Customer. The 'Finvoice' Export function is only available in Finland (i.e. when the VAT Law in the Company Info setting is "Finnish").
- The 'Invoices for Factoring' Export function is capable of creating files in many different formats suitable for sending to many different banks. You should specify the format that you wish to use by choosing a Factoring Bank in the Factoring Export setting in the Sales Ledger. The 'Invoices for Factoring' function will not export Invoices issued to Customers in which the No Factoring box has been ticked if you are using one of the following Factoring Banks :
- No Mass Emailing
- Tick this box if you want do not emails to be sent to the Contact from the Customer Letter register.
- Note that if you have included a Contact in a Mailing List that you have used in a Customer Letter, letters will be emailed to the Contact from that Customer Letter even if this box is ticked.
- You can switch this option on or off for several Contacts at once using the 'Mass Emailing' Maintenance function in the CRM module. You can also switch this option on for every Contact belonging to a particular Customer Category using the 'Exclude customer category from mass mailing' Maintenance function in the same module. If you would like this check box to be ticked by default in new Contact records, select the No Mass Emailing option in the Contact Settings setting.
- Note that if you have included a Contact in a Mailing List that you have used in a Customer Letter, letters will be emailed to the Contact from that Customer Letter even if this box is ticked.
- No Extra Tax
- If a Contact is a Customer, tick this box if you do not want Extra Tax to be charged on their Invoices. Please refer to the description of flip B of the VAT Codes setting here for full details about this feature. If you want to charge Extra Tax to a Customer but at a discounted rate, use the Extra Tax Customer Discounts setting in the Sales Ledger.
- If a Contact is a Supplier, this check box will not apply. Extra Tax will always be calculated in Purchase Invoices at the full rate if the VAT Code has a Tax %.
- If a Contact is a Supplier, this check box will not apply. Extra Tax will always be calculated in Purchase Invoices at the full rate if the VAT Code has a Tax %.
- No Environment Tax
- If the Contact is a Customer, tick this box if you do not want environment tax to be charged on their Invoices. Please refer to the description of the Environment Tax setting here for full details about this feature.
- No Region Perceptions
- This option is only used in Argentina and will not be visible in many countries.
- If a Contact is a Customer, tick this box if you do not want Regional Perception Tax to be charged on their Invoices. If you want to charge Regional Perception Tax to a Customer but at a discounted rate, use the Regional Perception Customer Discounts setting in the Sales Ledger.
- If a Contact is a Customer, tick this box if you do not want Regional Perception Tax to be charged on their Invoices. If you want to charge Regional Perception Tax to a Customer but at a discounted rate, use the Regional Perception Customer Discounts setting in the Sales Ledger.
- Group Inv. Only
- Tick this box if a Contact is a Customer to whom Invoices can only be issued from Sales Orders using the 'Group Invoicing' Maintenance function in the Sales Orders module. Selecting this option will mean that you will not be able to create Invoices directly from Orders or Deliveries using the 'Invoice' function on the Create menu, and the 'Invoice Delivered Orders' Maintenance function will not create Invoices for the Customer. You will still be able to enter Invoices directly to the Invoice register.
- The 'Group Invoicing' Maintenance function includes an Only Group Invoice Customers option that you can use if you only want to issue Invoices to Customers for whom the Group Inv. Only box has been ticked.
- The 'Group Invoicing' Maintenance function includes an Only Group Invoice Customers option that you can use if you only want to issue Invoices to Customers for whom the Group Inv. Only box has been ticked.
- Reverse VAT
- This option will only be visible in Latvia, Lithuania, Poland and the UK (i.e. when the VAT Law in the Company Info setting is "Latvian", "Lithuanian", "Polish" or "Default").
- Tick this box if a Contact is a Customer in the Domestic VAT Zone to whom you will sell Items of any value on a reverse charge VAT basis. If you do not tick this box, you will still be able to sell Items on a reverse charge VAT basis, but only if the value of the sale falls between specified minimum and maximum figures. Please refer to the 'Reverse Charge VAT in Sales Invoices' page for more details about selling Items on a reverse charge VAT basis to a Customer in the Domestic VAT Zone.
- Tick this box if a Contact is a Customer in the Domestic VAT Zone to whom you will sell Items of any value on a reverse charge VAT basis. If you do not tick this box, you will still be able to sell Items on a reverse charge VAT basis, but only if the value of the sale falls between specified minimum and maximum figures. Please refer to the 'Reverse Charge VAT in Sales Invoices' page for more details about selling Items on a reverse charge VAT basis to a Customer in the Domestic VAT Zone.
- Self Billing
- Used as default in Invoices and Purchase Invoices
- A self-billing Invoice is an Invoice that a company issues to itself. For example, a company may have received goods from a Supplier on the agreement that invoicing will occur as it sells or consumes them. That company will create self-billing Purchase Invoices when necessary, notifying the Supplier as it does so. That Supplier should then create corresponding Sales Invoices. If you are the Supplier in a self-billing agreement, you can mark the Contact record for your Customer as self-billing using this check box. Similarly, if you are the Customer in a self-billing agreement, you can mark your Supplier as self-billing. When you create Sales or Purchase Invoices for the Customer or Supplier respectively, they will be marked as self-billing. Self-billing Invoices and Purchase Invoices are separately flagged when included in SAF-T exports in Portugal.
The Contact register in Standard ERP:
- Introduction
- Entering a Contact, including:
- Header
- 'Contact' card
- 'Delivery' card
- 'Terms' card - Fields
- 'Terms' card - Check Boxes
- 'Pricing' card
- 'Company' card
- 'Accounts' card
- 'E-Records' card
- 'Web' card
- 'Comments' card
- 'Personal' card
- 'User Defined' card
- 'Notes' card
- 'BI' card
- Header
- Editing a Contact
- Deleting a Contact
- Linking Contact Persons and Companies - The Contact Relations Register
- Operations menu
- Create menu
- Home page for Customers, Suppliers and Contact Persons manual
- Home page for Standard ERP manual
Entering a Contact - Pricing Card
This page describes the fields on the 'Pricing' card of the Contact record. Please follow the links below for descriptions of the other cards:- Header
- 'Contact' card
- 'Delivery' card
- 'Terms' card - Fields
- 'Terms' card - Check Boxes
- 'Pricing' card
- 'Company' card
- 'Accounts' card
- 'E-Records' card
- 'Web' card
- 'Comments' card
- 'Personal' card
- 'User Defined' card
- 'Notes' card
- 'BI' card

- Sales Currency
- Paste Special
Currency register, System module
- Used as default in Quotations, Sales Orders, Sales Invoices
- Purch. Currency
- Paste Special
Currency register, System module
- Used as default in Purchase Orders, Purchase Invoices, Goods Receipts
- Use these two fields to specify the Currencies that are to be used when selling to and buying from a Contact.
- When you enter a sales transaction, the Customer's Sales Currency will be brought in to that transaction automatically. If the Customer's Sales Currency is not your home Currency, prices of Items will be converted to the Sales Currency automatically using the latest Exchange Rates as you add them to the transaction.
- When you enter a Purchase Order manually, the Supplier's Purch. Currency will be brought in automatically. If the Supplier's Purch. Currency is not your home Currency, prices of Items will be converted to the Purch. Currency automatically using the agreed Exchange Rate. When you create Purchase Orders using the automated 'Create Purchase Orders' function, the Purch. Currency specified here and the latest Exchange Rate will be used. The Supplier's Purch. Currency will also be brought in automatically to Purchase Invoices.
- If you specify a Sales Currency for a Contact, you will not be able to use any other Currency in sales transactions with that Contact. Similarly, if you specify a Purch. Currency, you will not be able to use any other Currency in purchase transactions. If you need to be able to use more than one Currency with a particular Contact, leave these fields blank. The Default Base Currency that you have specified in the Base Currency setting in the System module will then be used in their transactions, but you will be able to change to any other Currency if necessary.
- Once you have specified a Sales Currency and have used the Contact in a sales transaction of any kind, you should not change the Sales Currency. Similarly, you should not change the Purch. Currency once you have used the Contact in a purchasing transaction.
- Use these two fields to specify the Currencies that are to be used when selling to and buying from a Contact.
- Price List
- Paste Special
Price List register, Pricing module
- Default taken from Countries setting, System module
- Used as default in Quotations, Sales Orders, Sales Invoices
- If a Contact is a Customer and you wish to assign a particular Price List to them, you can do so here. This Price List will determine the default prices in all sales transactions made out to the Customer.
- You can also assign Price Lists to Customer Categories. This makes it easy to allocate or change the Price List of a group of Customers in a single step. Any Price List specified for a Customer will override the one in the Customer Category (if any) to which the Customer belongs.
- If you use Loyalty Cards, you can assign a Price List to each Loyalty Card Membership Level. This will allow you to charge different prices depending on the level of the Loyalty Card that a Customer holds.
- Please refer to the Price List page for full details about Price Lists. If you need to use dated Price Lists, please refer also to the section below describing the Price Based On options.
- Used as default in Quotations, Sales Orders, Sales Invoices
- Discount Matrix
- Paste Special
Discount Matrix register, Pricing module
- Default taken from Countries setting, System module
- Used as default in Quotations, Sales Orders, Sales Invoices
- If a Contact is a Customer and you wish to assign a particular Discount Matrix to them, you can do so here. Discount Matrices allow you to set up quantity discount structures (i.e. to offer discounts based on the quantity, weight, volume or value sold). When you enter a sales transaction made out to the Customer, the Discount Matrix entered here will determine the default percentage discount for each Item, depending on the quantity, weight, volume or value in the sales transaction.
- You can also assign Discount Matrices to Customer Categories. This makes it easy to allocate or change the Discount Matrix of a group of Customers in a single step. Any Discount Matrix specified for a Customer will override the one in the Customer Category (if any) to which the Customer belongs.
- If you use Loyalty Cards, you can assign a Discount Matrix to each Loyalty Card Membership Level. This will allow you to offer different discounts depending on the level of the Loyalty Card that a Customer holds.
- Please refer to the Quantity Discounts page for full details about Discount Matrices. If you need to use dated Discount Matrices, please refer also to the section below describing the Price Based On options.
- Used as default in Quotations, Sales Orders, Sales Invoices
- Supp. Disc. Matrix
- Paste Special
Discount Matrix register, Pricing module
- Used as default in Purchase Quotation Requests, Purchase Orders
- If a Contact is a Supplier and they have assigned a Discount Matrix to your company, you can specify that Discount Matrix here. Discount Matrices allow you to set up quantity discount structures (i.e. to take advantage of discounts based on the quantity, weight, volume or value purchased). When you enter a Purchase Quotation Request or a Purchase Order in the name of the Supplier, the Discount Matrix entered here will determine the default percentage discount for each Item, depending on the quantity, weight, volume or value in the transaction.
- If a Contact is a Supplier and they have assigned a Discount Matrix to your company, you can specify that Discount Matrix here. Discount Matrices allow you to set up quantity discount structures (i.e. to take advantage of discounts based on the quantity, weight, volume or value purchased). When you enter a Purchase Quotation Request or a Purchase Order in the name of the Supplier, the Discount Matrix entered here will determine the default percentage discount for each Item, depending on the quantity, weight, volume or value in the transaction.
- Salesman
- Paste Special
Person register, System module and Global User register, Technics module
- Used as default in Quotations, Sales Orders, Sales Invoices, Purchase Invoices
- Enter the Signature of the salesman responsible for the Contact's account. When you enter any transaction (e.g. a Sales or Purchase Order or a Sales or Purchase Invoice) in the name of the Contact, this Signature will be brought in to the Salesman field in that transaction as a default .
- This field is also used by the Limited Access module: please refer to the description of the Sales Group field (below) for details.
- If you would like the current user's Signature to be placed in this field in each new Contact record, select the Set Current User as Default Salesman option in the Contact Settings setting. If the current user belongs to a Sales Group, that Sales Group will be brought in to the field below as well.
- Enter the Signature of the salesman responsible for the Contact's account. When you enter any transaction (e.g. a Sales or Purchase Order or a Sales or Purchase Invoice) in the name of the Contact, this Signature will be brought in to the Salesman field in that transaction as a default .
- Sales Group
- Paste Special
Sales Groups setting, System module
- Default taken from Salesman
- When you specify a Salesman in the field above, the Sales Group will be brought in to this field from their Person record. If you have the Limited Access module, you can use this field to prevent a user from seeing all Contacts in the 'Contacts: Browse' and Contact 'Paste Special' windows by restricting their view to their own Contacts or to those of their Sales Group.
- Please refer to the page describing the Person register for full details about the Limited Access module.
- When you specify a Salesman in the field above, the Sales Group will be brought in to this field from their Person record. If you have the Limited Access module, you can use this field to prevent a user from seeing all Contacts in the 'Contacts: Browse' and Contact 'Paste Special' windows by restricting their view to their own Contacts or to those of their Sales Group.
- Default Items
- Paste Special
Default Items setting, Sales Ledger
- The Default Items setting allows you to define sets of Items that will always be added to Sales Invoices issued to certain Customers. If a Contact is a Customer, specify here if necessary the Default Item record that contains the set of Items that are always to be added to their Invoices. When you enter an Invoice, the default Items will be added when you enter the Customer Number. They will also be added to Sales Invoices created from Orders (although they will not appear in the Orders themselves or in Deliveries) and to those created in batches using the 'Group Invoicing' Maintenance function in the Sales Orders module. They will not appear in Interest Invoices.
- Price Based On
- If you are using dated Price Lists and/or Discount Matrices, the date that determines which Price List and Discount Matrix will be used in a Sales Order can be the Order Date, the Planned Delivery Date or the Despatch Date. Specify here which option is to be used for the Contact, if it is a Customer.
- If you choose the Planned Delivery Date option, the standard Price List and Discount Matrix will be used if the Planned Delivery Date in the Sales Order is blank or in the wrong format. The Planned Delivery Date field must use the Date format, which you should set using the Planned Delivery setting in the Sales Orders module.
- If you choose the Despatch Date option, the standard Price List and Discount Matrix will be used if the Despatch Date in the Sales Order is blank. The standard Price List and Discount Matrix are those specified for the Customer in the fields above, or those in the Customer Category.
- When you enter Invoices directly to the Invoice register, Price List and Discount Matrix selection will always depend on the Invoice Date. Similarly, when you enter Quotations, Price List and Discount Matrix selection will always depend on the Quotation Date, and in Purchase Orders, Discount Matrix selection will depend on the Order Date.
- Dated Price Lists are described here, with an example here. Dated Discount Matrices are described here, with an example here.
- If you choose the Planned Delivery Date option, the standard Price List and Discount Matrix will be used if the Planned Delivery Date in the Sales Order is blank or in the wrong format. The Planned Delivery Date field must use the Date format, which you should set using the Planned Delivery setting in the Sales Orders module.
The Contact register in Standard ERP:
- Introduction
- Entering a Contact, including:
- Header
- 'Contact' card
- 'Delivery' card
- 'Terms' card - Fields
- 'Terms' card - Check Boxes
- 'Pricing' card
- 'Company' card
- 'Accounts' card
- 'E-Records' card
- 'Web' card
- 'Comments' card
- 'Personal' card
- 'User Defined' card
- 'Notes' card
- 'BI' card
- Header
- Editing a Contact
- Deleting a Contact
- Linking Contact Persons and Companies - The Contact Relations Register
- Operations menu
- Create menu
- Home page for Customers, Suppliers and Contact Persons manual
- Home page for Standard ERP manual
Entering a Contact - Company Card
This page describes the fields on the 'Company' card of the Contact record. Please follow the links below for descriptions of the other cards:- Header
- 'Contact' card
- 'Delivery' card
- 'Terms' card - Fields
- 'Terms' card - Check Boxes
- 'Pricing' card
- 'Company' card
- 'Accounts' card
- 'E-Records' card
- 'Web' card
- 'Comments' card
- 'Personal' card
- 'User Defined' card
- 'Notes' card
- 'BI' card
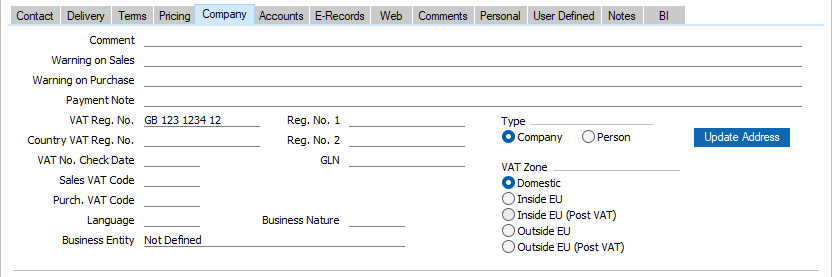
- Comment
- Any comment that you enter here will be printed in the Contact List, Customer Status and Supplier List reports. If a Contact is a Supplier, this comment will also be copied to the Comment field in all their Purchase Invoices ('Comment' card).
- Warning on Sales
- If a Contact is a Customer, text entered here will be shown as a warning message whenever you enter a sales transaction (e.g. a Quotation, Sales Order or Sales Invoice) in their name. It will also be included in the Contact List and Customer Status reports.
- Warning on Purchase
- If a Contact is a Supplier, text entered here will be shown as a warning message whenever you enter a purchase transaction (e.g. a Purchase Order or Purchase Invoice) in their name. It will also be included in the Supplier List report.
- Payment Note
- If a Contact is a Supplier, text that you enter here will be copied to the Payment Note field on the 'Payment Planning' card in each Purchase Invoice that you enter in their name.
- VAT Reg. No.
- It is important that you record the Contact's VAT Number here if they are in the "Within EU" Zone as this information is required for EU VAT reporting purposes.
- If you enter a VAT Number that you have already used in another Contact record, a warning will appear when you save the record (the record will still be saved). The warning will contain the Contact Number of the other company. If you do not need this warning, select the No Warning For Duplicate VAT Reg. No. option on the 'VAT & Tax' card of the Account Usage S/L setting.
- If you need VAT Numbers to be validated when you save Contact records (i.e. to be checked that they are in the correct format for the Country specified on the 'Contact' card), define the correct formats in the VAT Reg. Number Masks setting in the System module. If the Country on the 'Contact' card is blank, the check will be made using the Country from the Company Info setting (i.e. your own country). If that is blank, no validation check will be made.
- If you need a VAT Number to be specified for every Contact that is a Customer or a Supplier, select the Require VAT Reg. No. option in the Contact Settings setting.
- If you enter a VAT Number that you have already used in another Contact record, a warning will appear when you save the record (the record will still be saved). The warning will contain the Contact Number of the other company. If you do not need this warning, select the No Warning For Duplicate VAT Reg. No. option on the 'VAT & Tax' card of the Account Usage S/L setting.
- Reg. No. 1
- If the Contact is a limited company, enter their Company Registration Number here.
- When you save the record, there will be a check that you have not already used the Company Registration Number in another Contact record. If you have, you will be warned, but you will still be able to save the record. The warning will contain the Contact Number of the other company. If you do not want this check to take place, select the No Warning For Duplicate VAT Reg. No. option on the 'VAT & Tax' card of the Account Usage S/L setting.
- The Customer Status report contains a [Credit History] text link that will open a separate report showing the Customer's credit history. This is a chargeable Cloud Service: to use it you must have entered a Reg. No. 1 in this field for the Customer whose credit history you are interested in, and you must have registered your database in Estonia using the Automatic Internet Enabler method, as described on the Enabler Key page.
- When you save the record, there will be a check that you have not already used the Company Registration Number in another Contact record. If you have, you will be warned, but you will still be able to save the record. The warning will contain the Contact Number of the other company. If you do not want this check to take place, select the No Warning For Duplicate VAT Reg. No. option on the 'VAT & Tax' card of the Account Usage S/L setting.
- Reg. No. 2
- Paste Special
Registration Defaults setting, Sales Ledger
- This field is used in Finland, where companies have two registration numbers.
- In Argentina, you should use this field for two purposes:
- You can use 'Paste Special' from this field to connect each Customer or Supplier to a row in the Registration Defaults setting. This connection will provide Official Tax Codes to the reports that will be sent to the tax authority. Please refer to the description of the Registration Defaults setting for more details.
- You should create records for each client machine in the Receipt Printer Texts per Machine in the Point of Sales module. In the matrix on the 'Defaults' card, enter a separate row for each row in the Registration Defaults setting, specifying the Customer VAT Responsibility for each one. When you enter an Order, Invoice or POS Invoice, the Reg. No. 2 in the Contact record for the Customer will be connected to the relevant row in the Receipt Printer Texts per Machine record for the till you are using. If the VAT Responsibility is Exempt, Not Responsible, End Consumer or Responsible Professional, then prices in the Order, Invoice or POS Invoice will include VAT. In addition, if you are using fiscal printers, the correct code representing the Customer VAT Responsibility can be printed on the Invoice by the fiscal printer. Please refer to step 10 here for more information.
- Elsewhere, you can use the 'Paste Special' link to the Registration Defaults setting to bring in default Sales and Purchase VAT Codes and Language.
- In Argentina, you should use this field for two purposes:
- VAT No. Check Date
- Paste Special Choose date
- If a Contact is a Customer of Supplier, use this field to record the date when you last checked the validity of their VAT registration number. This is for information only.
- If a Contact is a Customer of Supplier, use this field to record the date when you last checked the validity of their VAT registration number. This is for information only.
- GLN
- If a Contact is a Customer, enter the GLN (Global Location Number) of their Invoice address here. It will be copied to Sales Orders entered in the name of the Customer, and from there to Invoices.
- Sales VAT Code
- Paste Special
VAT Codes setting, Nominal Ledger
- Purch. VAT Code
- Paste Special
VAT Codes setting, Nominal Ledger
- If a Contact is a Customer, the Sales VAT Code will determine the rate at which VAT will be charged in sales to the Contact and the Output VAT Account to be credited.
- When you create sales transactions (e.g. Quotations, Sales Orders or Sales Invoices) for the Customer, this Sales VAT Code will take precedence over the VAT Codes specified in the Customer's Price List, in the Item and the Item Group and on the 'Sales' card of the Account Usage S/L setting in the Sales Ledger. Usually, you should only specify a Sales VAT Code here for an individual Customer if for some reason your usual VAT accounting method does not apply to them. Please refer here for more details about how a VAT Code will be chosen in sales transactions.
- If a Contact is a Supplier, the Purch. VAT Code will determine the rate at which VAT will be charged to you by the Contact and the Input VAT Account to be debited.
- When you enter Purchase Invoices for the Supplier directly to the Purchase Invoice register, this Purch. VAT Code will take precedence over the VAT Codes specified in the Account record and in the Account Usage P/L setting in the Purchase Ledger.
- Similarly, when you create Purchase Invoices for the Supplier from Goods Receipts, this Purch. VAT Code will take precedence over the VAT Codes specified in the Item and the Item Group and in the setting in the Purchase Ledger, but will be overridden by the VAT Code specified for the Item(s).
- When you create sales transactions (e.g. Quotations, Sales Orders or Sales Invoices) for the Customer, this Sales VAT Code will take precedence over the VAT Codes specified in the Customer's Price List, in the Item and the Item Group and on the 'Sales' card of the Account Usage S/L setting in the Sales Ledger. Usually, you should only specify a Sales VAT Code here for an individual Customer if for some reason your usual VAT accounting method does not apply to them. Please refer here for more details about how a VAT Code will be chosen in sales transactions.
- Sales Tax Temp.
- Paste Special
Tax Templates setting, Nominal Ledger
- Purch. Tax Temp.
- Paste Special
Tax Templates setting, Nominal Ledger
- In some countries, Tax Templates are used instead of VAT Codes. VAT Codes should be used where each sales and purchase transaction is taxed at a single rate, while Tax Templates should be used where different taxes and/or several tax rates are applied to one transaction.
- If you need to use Tax Templates, you should select the Use Tax Templates for Tax Calculation option in the Transaction Settings setting in the Nominal Ledger. Wherever a VAT Code field would appear, this option will cause a Tax Template field to appear instead. You should also enter your Tax Templates in the Tax Templates setting that is again in the Nominal Ledger. Please then refer here for details about how the Tax Template in each sales transaction row (e.g. in each Quotation, Order or Invoice row) will be chosen, and here for some examples.
- If you need to use Tax Templates, you should select the Use Tax Templates for Tax Calculation option in the Transaction Settings setting in the Nominal Ledger. Wherever a VAT Code field would appear, this option will cause a Tax Template field to appear instead. You should also enter your Tax Templates in the Tax Templates setting that is again in the Nominal Ledger. Please then refer here for details about how the Tax Template in each sales transaction row (e.g. in each Quotation, Order or Invoice row) will be chosen, and here for some examples.
- [Update Address] button
- This is a duplicate of the [Update Address] button on the 'Contact' card: please refer to the description of that card here for details.
- Language
- Paste Special
Languages setting, System module
- Enter the Language spoken by the Contact here. Whenever you use the Contact in another record (e.g. in a Quotation, Sales or Purchase Order or Invoice), the Language will be copied to that record, with the following consequences:
- You can also use the Language to determine the Form Template that will be used when you print the record. In other words, you can design different versions of documents such as Invoices, Purchase Orders and Delivery Notes, to be printed in different Languages depending on the Language of the Contact. Please refer here for details about Form Templates, and here for details about using the Language to specify which Form Template will be used when printing a record.
- In some registers and settings (for example, the Item and Item Group registers, and the Delivery Modes, Delivery Terms, ,Payment Terms and Units settings, each record contains a matrix where you can enter translations of the name (e.g. of the Item Description or the Payment Term Text). When printing a record, the appropriate translation for the Language of the record will be printed. You can also enter separate records in the Values in Text setting for each Language. This will ensure that when you need amounts to be printed in words rather than figures (for example, when printing cheques), they will be printed in the correct Language.
- You can also use the Language to determine the Form Template that will be used when you print the record. In other words, you can design different versions of documents such as Invoices, Purchase Orders and Delivery Notes, to be printed in different Languages depending on the Language of the Contact. Please refer here for details about Form Templates, and here for details about using the Language to specify which Form Template will be used when printing a record.
- Business Nature
- Paste Special
Nature of Business setting, System module
- Use this field to note the nature of the Contact's business. This is for information only.
- Business Entity
- Paste Special
Choices of possible entries
- If a Contact is a business, specify its Business Entity type here.
- In Sweden (i.e. if the VAT Law in the Company Info setting is set to "Swedish"), if a Contact is a Customer, if you will send Invoices to them as E-Invoices and if you have not left this field empty, you must also specify a VAT Reg. No., a Reg. No. 1 and/or a Reg. No. 2. If all three registration number fields are empty, you will not be able to save Invoices that you have marked as OK.
- In Brazil (i.e. if the VAT Law is "Brazilian"), if you have registered an Avalara account in your Standard ERP database, you must specify a Business Entity in each Contact record. This will be used when you use Avalara to calculate taxes in Sales and Purchase Invoices, Sales Orders and Quotations.
- In Sweden (i.e. if the VAT Law in the Company Info setting is set to "Swedish"), if a Contact is a Customer, if you will send Invoices to them as E-Invoices and if you have not left this field empty, you must also specify a VAT Reg. No., a Reg. No. 1 and/or a Reg. No. 2. If all three registration number fields are empty, you will not be able to save Invoices that you have marked as OK.
- Type
- Use these options to specify whether the Contact is a company or an individual person. This information will be used in the official reports that will be sent to the tax authorities in various countries, and will also affect the check that the VAT Number is correct in Argentina and Paraguay.
- VAT Zone
- Default taken from
Countries setting, System module
- Used as default in Quotations, Sales and Purchase Orders, Sales and Purchase Invoices
- If a Contact is a Customer or Supplier, use these options to select a VAT Zone. The VAT Zone will be used in sales and purchase transactions to control VAT calculation and accounting. You can assign separate default sales VAT Codes and Sales Accounts to each Zone on the 'Sales' card of the Account Usage S/L setting in the Sales Ledger, and you can assign separate default purchase VAT Codes to each Zone on the 'VAT' card of the Account Usage P/L setting in the Purchase Ledger.
- On the sales side, it is important that you record the VAT Numbers (see above) of Customers in the "Within EU" Zone.
- When you raise Sales Invoices for Customers in the "Within EU" and "Outside EU" Zones, VAT will not be charged, irrespective of the VAT Code specified for those Zones in the Account Usage S/L setting. If you want VAT to be calculated and credited to the Output Account from the VAT Code in the normal way, place these Customers in the "Inside EU (Post VAT)" and "Outside EU (Post VAT)" Zones.
- Similarly, on the Purchase side, VAT will not be calculated on Purchase Invoices received from Suppliers in the "Outside EU" Zone. If the Supplier is in the "Inside EU" Zone, VAT from Purchase Invoices will be posted on a "reverse charge" bases and so will be debited to the Input Account from the VAT Code and credited to the Output Account from the VAT Code. For this reason, it is recommended that you use a dedicated VAT Code for VAT on EU Acquisitions, with Input and Output Accounts that are not used in any other VAT Code. The Invoice TOTAL will exclude VAT. If you want VAT to be calculated in the normal way, with no posting to the Output Account and with the TOTAL including VAT, place your Suppliers in the "Inside EU (Post VAT)" and "Outside EU (Post VAT)" Zones. Please refer here for more details about posting VAT from Purchase Invoices.
- You can change the names of two of these options if they are not suitable. Using the VAT Zone Label setting in the Sales Ledger, you can replace the string "EU" with your own string (for example "SACU" in South Africa).
- If a Contact is a Customer or Supplier, use these options to select a VAT Zone. The VAT Zone will be used in sales and purchase transactions to control VAT calculation and accounting. You can assign separate default sales VAT Codes and Sales Accounts to each Zone on the 'Sales' card of the Account Usage S/L setting in the Sales Ledger, and you can assign separate default purchase VAT Codes to each Zone on the 'VAT' card of the Account Usage P/L setting in the Purchase Ledger.
The Contact register in Standard ERP:
- Introduction
- Entering a Contact, including:
- Header
- 'Contact' card
- 'Delivery' card
- 'Terms' card - Fields
- 'Terms' card - Check Boxes
- 'Pricing' card
- 'Company' card
- 'Accounts' card
- 'E-Records' card
- 'Web' card
- 'Comments' card
- 'Personal' card
- 'User Defined' card
- 'Notes' card
- 'BI' card
- Header
- Editing a Contact
- Deleting a Contact
- Linking Contact Persons and Companies - The Contact Relations Register
- Operations menu
- Create menu
- Home page for Customers, Suppliers and Contact Persons manual
- Home page for Standard ERP manual
Entering a Contact - Accounts Card
This page describes the fields on the 'Accounts' card of the Contact record. Please follow the links below for descriptions of the other cards:- Header
- 'Contact' card
- 'Delivery' card
- 'Terms' card - Fields
- 'Terms' card - Check Boxes
- 'Pricing' card
- 'Company' card
- 'Accounts' card
- 'E-Records' card
- 'Web' card
- 'Comments' card
- 'Personal' card
- 'User Defined' card
- 'Notes' card
- 'BI' card

- Creditor A/C
- Paste Special
Account register, Nominal Ledger/System module
- If a Contact is a Supplier and you want their Purchase Invoices to be posted to a particular Creditor Account, specify that Account here.
- If you leave this field empty, the Creditor Account will be taken from the Supplier Category to which the Contact belongs, from the Customer Category if the Supplier Category field is empty or from the Creditor Account on the 'Creditors' card of the Account Usage P/L setting.
- If you leave this field empty, the Creditor Account will be taken from the Supplier Category to which the Contact belongs, from the Customer Category if the Supplier Category field is empty or from the Creditor Account on the 'Creditors' card of the Account Usage P/L setting.
- IBAN Code
- If a Contact has an IBAN (International Bank Account Number), enter it here (including two-character country prefix). When you save the Contact record, a validation check will be carried out to ensure the prefix is valid and the number of digits is correct for the prefix.
- IBAN is a standard account number format, permitting cross border payments in Europe. This information will be used when necessary by the electronic payment and payment export functions in Standard ERP.
- If the Contact is a Supplier, the IBAN Code will be transferred to any MAILLINK(HW0202PURCHINV_Entering_Identifiers_Card,Purchase Invoices) and Payments (flip H) entered in their name, being given priority over the Bank Account and Bank Account 2 below. (In Sweden (i.e. if the VAT Law in the Company Info setting is "Swedish") and if the Payment Channel of the Supplier is "Bankgiro" or "Postgiro", the Bank Account will be given priority over the IBAN Code and Bank Account 2.)
- In Finland, each Purchase Invoice carries a barcode, containing information such as the IBAN Code of the Supplier's bank account or the Supplier's bank account number, the total Invoice amount, a unique reference number and the Due Date. When entering a Purchase Invoice with a barcode to the Purchase Invoice register, you can enter or scan this barcode into the Barcode field on the 'Accounts' card. The Supplier (and all connected details such as Name, Address, Bank Account details and Payment Term), TOTAL, Reference and Due Date will be brought into the Purchase Invoice automatically. The Supplier will be found by searching the Contact register for the record with the IBAN Code or the bank account number contained in the barcode. If no Supplier with the relevant IBAN Code or bank account number is found, the other details (TOTAL, Reference and Due Date) will not be brought in from the barcode. So, if you will be using this feature, it is recommended that you keep the IBAN Codes and bank account numbers in the Contact records for your Suppliers up to date.
- It will usually be the case that the IBAN Code entered here and the SWIFT code in the Bank record quoted in the Account Operator field below should both refer to the same bank.
- IBAN is a standard account number format, permitting cross border payments in Europe. This information will be used when necessary by the electronic payment and payment export functions in Standard ERP.
- Cost A/C
- Paste Special
Account register, Nominal Ledger/System module
- If a Contact is a Supplier, you can determine that a particular Cost Account (i.e. Purchase Account) will be offered as a default in the first Purchase Invoice row when you enter a new Purchase Invoice. This can be particularly useful in the cases of specialist Suppliers and of Suppliers of services such as electricity or telephone services, whose Purchase Invoices are usually debited to the same Account. If you want to set a default Cost Account for a Supplier, specify that Account here.
- You must specify a Cost Account for a Supplier here if you intend to create Purchase Invoices in that Supplier's name from Purchase Orders and you are using the Consolidate Items to Supplier Cost Account or Consolidate by Items and Project options in the Purchase Invoice Settings setting. If you are using the Consolidate Items to Supplier Cost Account option, the cost of each Item on each Purchase Order will be debited to the Cost Account specified here.
- You must specify a Cost Account for a Supplier here if you intend to create Purchase Invoices in that Supplier's name from Purchase Orders and you are using the Consolidate Items to Supplier Cost Account or Consolidate by Items and Project options in the Purchase Invoice Settings setting. If you are using the Consolidate Items to Supplier Cost Account option, the cost of each Item on each Purchase Order will be debited to the Cost Account specified here.
- BIC (SWIFT)
- If a Contact is a Supplier, you can as an option enter the BIC (SWIFT) of their bank account here.
- If you will be paying the Supplier's Purchase Invoices using 'Banking File' export files using the Finland - SEPA pain 003 Payment File Format or any of the Norwegian or Swedish ISO20022 Payment File Formats, this BIC (SWIFT) will be included in the export files. If you do not specify a BIC (SWIFT) here, it will be taken from the record in the Banks setting that represents the Supplier's bank (specified in the Account Operator field below). In Norway and Sweden, a BIC (SWIFT) here or in the Bank record is required if the bank account number is in IBAN format.
- If you will be paying the Supplier's Purchase Invoices using 'Banking File' export files using the Finland - SEPA pain 003 Payment File Format or any of the Norwegian or Swedish ISO20022 Payment File Formats, this BIC (SWIFT) will be included in the export files. If you do not specify a BIC (SWIFT) here, it will be taken from the record in the Banks setting that represents the Supplier's bank (specified in the Account Operator field below). In Norway and Sweden, a BIC (SWIFT) here or in the Bank record is required if the bank account number is in IBAN format.
- Cred. On Acc. A/C
- Paste Special
Account register, Nominal Ledger/System module
- If a Contact is a Supplier and you need to be able to issue Prepayments or On Account Payments to them without reference to a specific Invoice, you may want to use a special Account for such Payments. Specify that Account here, and tick the On Account check box on the 'Terms' card.
- When you issue a Prepayment or On Account Payment, it will be debited to this Account. Subsequently, when you receive the Invoice and connect it to that Payment, the same Account will be credited in place of the default Creditor Account. Please refer to the On Account Payments and Prepayments page for full details about this process.
- The Account that you specify here will override any such Accounts that you have specified for the Supplier Category to which the Supplier belongs or in the Account Usage P/L setting ( card).
- On the sales side, it is not possible to specify a Debtor On Account A/C at Customer level. The Debtor On Account A/C will always be taken from the Customer Category or from the Account Usage S/L setting.
- When you issue a Prepayment or On Account Payment, it will be debited to this Account. Subsequently, when you receive the Invoice and connect it to that Payment, the same Account will be credited in place of the default Creditor Account. Please refer to the On Account Payments and Prepayments page for full details about this process.
- Account Operator
- Paste Special
Banks setting, Purchase Ledger
- Enter the name of each Contact's bank or building society here. If a Contact is a Supplier, their bank information will be transferred to any Purchase Invoices ('Accounts' card) and Payments (flip H) entered in their name, facilitating payment by the transfer of funds between banks. In particular, a Supplier's Account Operator will be copied to the Bank Code field in each Purchase Invoice.
- Payment Code
- Paste Special
Payment Codes setting, Purchase Ledger
- This field is used in Norway and Sweden, where every payment to a beneficiary domiciled outside the country in any currency that exceeds a value stipulated by the tax authorities must be reported to the authorities by the intermediary bank. Included in the report should be a Payment Code, a two-digit (Norway) or three-digit (Sweden) code representing a category (e.g. export/import, services etc.).
- If a Contact is a Supplier, you can specify the Payment Code to be used with that Supplier here. This is only necessary if the Contact is a Supplier whom you will pay using the "SEPA" (Norway), "SEPA Foreign" (Sweden) or "Foreign" (both) Payment Channels.
- The Payment Code specified here will be transferred to any Purchase Invoices ('Accounts' card) and Payment rows (flip H) entered in the Supplier's name.
- From a Payment row that uses the "SEPA"/"SEPA Foreign" or "Foreign" Payment Channels (shown on flip K of the Payment row), the Payment Code (and its Description from the Payment Codes setting) will be included in a Banking File export if the Payment File Format you have specified in the Bank Transfer setting in the Purchase Ledger is one of the Norwegian ISO20022 or Swedish ISO20022 banks.
- From a Payment row, the Payment Code will be included in a Banking File export if you produce it using the Foreign Country Payment option and if the Payment File Format you have specified in the Bank Transfer setting is Sweden - Handelsbanken.
- If a Contact is a Supplier, you can specify the Payment Code to be used with that Supplier here. This is only necessary if the Contact is a Supplier whom you will pay using the "SEPA" (Norway), "SEPA Foreign" (Sweden) or "Foreign" (both) Payment Channels.
- Bank Account
- Enter each Contact's main bank account number here. If a Contact is a Supplier and providing they do not also have an IBAN Code (above), this bank account number will be transferred to any Purchase Invoices and Payments (flip H) entered in the Supplier's name, facilitating payment by the transfer of funds between banks.
- If the Payment File Format you have specified in the Bank Transfer setting in the Purchase Ledger is UK - BACS and the Contact is a Supplier, then their Bank Account must consist of eight digits. When the Payment File Format is UK - BACS, the 'Banking File' export function will take bank account and sort code information from the Contact records for each Supplier, not from Payment rows.
- In Finland, each Purchase Invoice carries a barcode, containing information such as the IBAN Code of the Supplier's bank account or the Supplier's bank account number, the total Invoice amount, a unique reference number and the Due Date. When entering a Purchase Invoice with a barcode to the Purchase Invoice register, you can enter or scan this barcode into the Barcode field on the 'Accounts' card. The Supplier (and all connected details such as Name, Address, Bank Account details and Payment Term), TOTAL, Reference and Due Date will be brought into the Purchase Invoice automatically. The Supplier will be found by searching the Contact register for the record with the IBAN Code or the bank account number contained in the barcode. If no Supplier with the relevant IBAN Code or bank account number is found, the other details (TOTAL, Reference and Due Date) will not be brought in from the barcode. So, if you will be using this feature, it is recommended that you keep the IBAN Codes and bank account numbers in the Contact records for your Suppliers up to date. You should also ensure bank account numbers use the correct format (six digits followed by a dash followed by eight digits).
- Use this field and leave the IBAN Code field empty if the Payment File Format you have specified in the Bank Transfer setting is one of the Swedish ISO20022 banks and the Payment Channel that you will use with a Supplier is "Bankgiro" or "Postgiro". In the case of "Bankgiro", enter the Supplier's Bankgiro number here. In the case of "Postgiro", enter their bank account number in non-IBAN format.
- Leave this field empty and use the Bank Account 2 field below instead in the following circumstances:
- The Payment File Format you have specified in the Bank Transfer setting is Sweden - Handelsbanken, the Contact is a Supplier and they have a Handelsbanken account.
- The Payment File Format is Sweden - PlusGirot, the Contact is a Supplier and they have a PlusGiro account.
- The Payment File Format is Sweden - SE-Banken, the Contact is a Supplier and they have a Handelsbanken account.
- The Payment File Format is Sweden - Swedbank and the, the Contact is a Supplier and they have a Swedbank account.
- If the Payment File Format you have specified in the Bank Transfer setting in the Purchase Ledger is UK - BACS and the Contact is a Supplier, then their Bank Account must consist of eight digits. When the Payment File Format is UK - BACS, the 'Banking File' export function will take bank account and sort code information from the Contact records for each Supplier, not from Payment rows.
- Sales Tags/Objects
- Paste Special
Tag/Object register, Nominal Ledger/System module
- Default taken from Countries setting, System module
- Used as default in Quotations, Sales Orders, Sales Invoices
- Used as default in Quotations, Sales Orders, Sales Invoices
- Purch. Tags/Objects
- Paste Special
Tag/Object register, Nominal Ledger/System module
- You can assign up to 20 Tags/Objects in each of these fields, separated by commas. You might define separate Tags/Objects to represent different departments, cost centres or product types. This provides a flexible method of analysis that can be used in Nominal Ledger reports.
- If a Contact is a Customer, the Sales Tags/Objects will be used as defaults in their Sales Orders, Sales Invoices and other sales transactions. In the Nominal Ledger Transactions that are generated from Sales Invoices, these Tags/Objects will be will be assigned to the credit posting(s) to the Sales Account(s), to the Cost of Sales postings, to the debit posting to the Debtor Account (if you are using the
Tags/Objects on Debtors Account option in the Account Usage S/L setting) and to the credit posting(s) to the Output VAT Account(s) (if you are using the Tags/Objects on VAT Account option in the same setting ('VAT / Tax' card)).
- If a Contact is a Supplier, the Purch. Tags/Objects will be copied to the Tags/Objects field on the 'Terms' card of each Purchase Invoice, providing you are using the Tags/Objects on Creditor Account option in the Account Usage P/L setting. In the Nominal Ledger Transaction generated from a Purchase Invoice, these Tags/Objects will be assigned to the debit posting to the Purchase Account(s) and, if you are using the Tags/Objects on Creditor Account option, to the credit posting to the Creditor Account.
- When a Nominal Ledger Transaction is generated from a Goods Receipt, the Purch. Tags/Objects will be assigned to the credit posting to the Purchase Accruals Account. If you are using the Supplier Tag/Object on Stock A/C option on the 'Creditors' card of the Account Usage P/L setting, they will be assigned to the debit posting to the Stock Account as well.
- If you would like Sales and/or Purchase Tag/Objects to be created automatically from and assigned to Customers and Suppliers when you save them for the first time, select the Automatically Create Sales Tags/Objects on Contacts and/or Automatically Create Purchase Tags/Objects on Contacts options in the Contact Settings setting. You can also use the 'Tags/Objects' function on the Create menu in a Contact that you have already saved. If you need the new Tags/Objects to be assigned to Tag/Object Types, specify those Tag/Object Types in the Contact Settings setting. Tags/Objects will only be created from Customers and Suppliers, not from other types of Contact.
- If a Contact is a Customer, the Sales Tags/Objects will be used as defaults in their Sales Orders, Sales Invoices and other sales transactions. In the Nominal Ledger Transactions that are generated from Sales Invoices, these Tags/Objects will be will be assigned to the credit posting(s) to the Sales Account(s), to the Cost of Sales postings, to the debit posting to the Debtor Account (if you are using the
- Bank Account 2
- This field will usually only be used in Sweden for Contacts who are Suppliers. You should enter their main bank account number here and leave the Bank Account field above blank in the following circumstances:
- The Payment File Format you have specified in the Bank Transfer setting in the Purchase Ledger is Sweden - Handelsbanken and the Supplier has a Handelsbanken account.
- The Payment File Format is Sweden - PlusGirot and the Supplier has a PlusGiro account.
- The Payment File Format is Sweden - SE-Banken and the Supplier has an SE-Banken account.
- The Payment File Format is Sweden - Swedbank and the Supplier has a Swedbank account.
- If the Bank Account and IBAN Code above are empty, this bank account number will be transferred to any Purchase Invoices and Payments (flip H) entered in the Supplier's name, facilitating payment by the transfer of funds between banks.
- If the Payment File Format is Sweden - Handelsbanken, Sweden - PlusGirot, Sweden - SE-Banken or Sweden - Swedbank, the 'Banking File' export function will export information in different formats, depending on where the Supplier you are paying holds their bank account. For example, if the Payment File Format is Sweden - PlusGirot and a Supplier has a Bank Account 2, the export format will be correct for PlusGiro accounts, but if the Supplier has a Bank Account, the export format will be correct for accounts with other banks.
- This field is used by the 'Banking File' Export function. Please refer to your local HansaWorld representative for details.
- The Payment File Format you have specified in the Bank Transfer setting in the Purchase Ledger is Sweden - Handelsbanken and the Supplier has a Handelsbanken account.
- Sort Code
- Enter the Sort Code (branch number) of each Contact's bank here. If a Contact is a Supplier, their Sort Code will be transferred to any Purchase Invoices ('Accounts' card) and Payments (flip H) entered in the Supplier's name, facilitating payment by the transfer of funds between banks.
- If the Payment File Format you have specified in the Bank Transfer setting in the Purchase Ledger is UK - BACS and the Contact is a Supplier, then the Sort Code must be made up of six digits. When the Payment File Format is UK - BACS, the 'Banking File' export function will take bank account and sort code information from the Contact records for each Supplier, not from the Payment rows.
- If the Payment File Format you have specified in the Bank Transfer setting in the Purchase Ledger is UK - BACS and the Contact is a Supplier, then the Sort Code must be made up of six digits. When the Payment File Format is UK - BACS, the 'Banking File' export function will take bank account and sort code information from the Contact records for each Supplier, not from the Payment rows.
- Post Receipt VAT
- This set of options will only be visible if the VAT Law in the Company Info setting is "Croatian", "Hungarian", "Polish", "Serbian", "Slovakian" or "Slovenian".
- If a Contact is a Customer, use these options if the default Post Receipt VAT option set in the Account Usage S/L setting is not to be applied to the Customer's Invoices and Receipts.
- In general, you should use the Post Receipt VAT option when you need your output VAT liability to be calculated from your Receipts, not from your Invoices.
- If you are in Croatia, Hungary, Serbia, Slovakia or Slovenia and you are using the Post Receipt VAT option, the Outp A/C in each VAT Code will be treated as a preliminary Output VAT Account, to be credited whenever you mark an Invoice as OK. When the Invoice is paid, the Transaction from the Receipt will include an extra VAT element in which the VAT is moved from the Outp A/C to the VAT Code's O/P A/C. The O/P A/C will therefore become the final Output VAT Account.
- Moving away from the default Post Receipt VAT option requires some careful configuration. In this situation, the Outp A/C will contain two types of VAT:
- VAT resulting from sales to Post Receipt VAT Customers. This VAT is waiting for the Customers to pay, when it will be moved to the O/P A/C. You are not yet liable to pay this VAT to the tax authorities.
- VAT resulting from sales to non-Post Receipt VAT Customers. This VAT will not be moved to the O/P A/C and so you are liable to pay this VAT to the tax authorities.
You therefore need to be able to separate the two types of VAT in the Outp A/C. You can do this as follows:
- Create a Tag/Object to be used with Customers who will not use the default Post Receipt VAT option, and assign this Tag/Object to those Customers (in the Sales Tag/Object field).
- Select the Tags/Objects on VAT Account option in the Account Usage S/L setting.
This will allow you to calculate your VAT liability from the O/P A/C and from the relevant portion of the Outp A/C, and you will be able to adjust the definition of the VAT Report (or other report) accordingly.
- If you are in Poland and you are using the Post Receipt VAT option, you should specify an Outp A/C Corr. Account for each VAT Code (on flip C). The Outp A/C Corr. Account will be treated as a preliminary Output VAT Account, to be credited whenever you mark an Invoice as OK. When the Invoice is paid, the Transaction from the Receipt will include an extra VAT element in which the VAT is moved from the Outp A/C Corr. Account to the VAT Code's Outp A/C. The Outp A/C will therefore be used as the final Output VAT Account (as it is when the Post Receipt VAT option is not being used). VAT resulting from sales to non-Post Receipt VAT Customers will be posted directly to the Outp A/C. Therefore, in Poland there will be no need to separate different types of VAT using Tags/Objects.
- If a Contact is a Customer, use these options if the default Post Receipt VAT option set in the Account Usage S/L setting is not to be applied to the Customer's Invoices and Receipts.
- Post Payment VAT
- This set of options will only be visible if the VAT Law in the Company Info setting is "Croatian", "Hungarian", "Polish", "Serbian", "Slovakian" or "Slovenian".
- If a Contact is a Supplier, use these options if the default Post Payment VAT option set in the Account Usage P/L setting is not to be applied to the Supplier's Purchase Invoices and Payments.
- In general, you should use the Post Payment VAT option when you need the value of the input VAT that you can reclaim to be calculated from your Payments, not from your Purchase Invoices. In this case, the Inp A/C in each VAT Code will be treated as a preliminary Input VAT Account, to be debited whenever you mark a Purchase Invoice as OK. When you pay the Purchase Invoice, the Transaction from the Payment will include an extra VAT element in which the VAT is moved from the Inp A/C to the VAT Code's I/P A/C. The I/P A/C will therefore become the final Input VAT Account.
- Moving away from the default Post Payment VAT option requires some careful configuration. In this situation, the Inp A/C will contain two types of VAT:
- VAT resulting from purchases from Post Payment VAT Suppliers. This VAT is waiting for you to pay the Suppliers, when it will be moved to the I/P A/C. You are not yet able to reclaim this VAT from the tax authorities.
- VAT resulting from purchases from non-Post Payment VAT Suppliers. This VAT will not be moved to the I/P A/C and so you are able to reclaim this VAT from the tax authorities.
You therefore need to be able to separate the two types of VAT in the Inp A/C. You can do this as follows:
- Create a Tag/Object to be used with Suppliers who will not use the default Post Payment VAT option, and assign this Tag/Object to those Suppliers (in the Purch. Tag/Object field).
- Select the Tags/Objects on VAT Account option in the Account Usage P/L setting.
This will allow you to calculate how much VAT you can reclaim using the I/P A/C and from the relevant portion of the Inp A/C, and you will be able to adjust the definition of the VAT Report (or other report) accordingly.
- If a Contact is a Supplier, use these options if the default Post Payment VAT option set in the Account Usage P/L setting is not to be applied to the Supplier's Purchase Invoices and Payments.
The Contact register in Standard ERP:
- Introduction
- Entering a Contact, including:
- Header
- 'Contact' card
- 'Delivery' card
- 'Terms' card - Fields
- 'Terms' card - Check Boxes
- 'Pricing' card
- 'Company' card
- 'Accounts' card
- 'E-Records' card
- 'Web' card
- 'Comments' card
- 'Personal' card
- 'User Defined' card
- 'Notes' card
- 'BI' card
- Header
- Editing a Contact
- Deleting a Contact
- Linking Contact Persons and Companies - The Contact Relations Register
- Operations menu
- Create menu
- Home page for Customers, Suppliers and Contact Persons manual
- Home page for Standard ERP manual
Entering a Contact - E-Records Card
This page describes the fields on the 'E-Records' card of the Contact record. Please follow the links below for descriptions of the other cards:- Header
- 'Contact' card
- 'Delivery' card
- 'Terms' card - Fields
- 'Terms' card - Check Boxes
- 'Pricing' card
- 'Company' card
- 'Accounts' card
- 'E-Records' card
- 'Web' card
- 'Comments' card
- 'Personal' card
- 'User Defined' card
- 'Notes' card
- 'BI' card
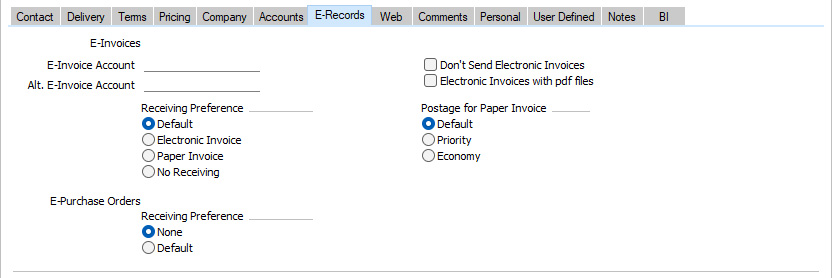
In some countries and depending on configuration, you can have Invoices sent electronically automatically when you mark them as OK and save. You can also receive Purchase Invoices that have been sent to you electronically.
Sending and receiving Invoices electronically are both chargeable Cloud Services: please refer to your local HansaWorld representative for details.
If you are sending Invoices electronically, use the 'E-Records' card to specify how Invoices should be sent to particular Customers. If you are receiving Invoices, use the 'E-Records' card to specify how Invoices from particular Suppliers will be sent to you.
The options that are available on the 'E-Records' card and the configuration that is required will depend on your country of operation. Again, please refer to your local HansaWorld representative for details.
---
The Contact register in Standard ERP:
- Introduction
- Entering a Contact, including:
- Header
- 'Contact' card
- 'Delivery' card
- 'Terms' card - Fields
- 'Terms' card - Check Boxes
- 'Pricing' card
- 'Company' card
- 'Accounts' card
- 'E-Records' card
- 'Web' card
- 'Comments' card
- 'Personal' card
- 'User Defined' card
- 'Notes' card
- 'BI' card
- Header
- Editing a Contact
- Deleting a Contact
- Linking Contact Persons and Companies - The Contact Relations Register
- Operations menu
- Create menu
- Home page for Customers, Suppliers and Contact Persons manual
- Home page for Standard ERP manual
Entering a Contact - Web Card
This page describes the fields on the 'Web' card of the Contact record. Please follow the links below for descriptions of the other cards:- Header
- 'Contact' card
- 'Delivery' card
- 'Terms' card - Fields
- 'Terms' card - Check Boxes
- 'Pricing' card
- 'Company' card
- 'Accounts' card
- 'E-Records' card
- 'Web' card
- 'Comments' card
- 'Personal' card
- 'User Defined' card
- 'Notes' card
- 'BI' card

- Parent Product Category
- Paste Special
Product Categories setting, Webshop and CMS module
- If a Contact is a Customer and if you are using the Standard ERP Webshop, you can specify here that the Customer will see a list of Products belonging to a particular Product Category when they go to the webshop after logging in. Please refer to step 4 on the Customer-Specific Options (Display on the Web setting) page for more details.
- Display on the Web
- Paste Special
Display on the Web setting, Webshop and CMS module
- If you are using the Standard ERP Webshop, you can use the Display on the Web setting to specify how much information about stock levels will be shown to visitors to the webshop, which payment methods will be shown, and whether Delivery Modes will be displayed.
- If a Contact is a Customer and you specify a Display on the Web record in this field, it will control the information that will be shown to the Customer after they have logged in. You can also specify Display on the Web records at the Customer Category level. If you do not specify a Display on the Web record at the Category level or at the Customer level, information will be displayed as follows:
- Stock information will be controlled by the Show Item Stock Levels options in the Webshop Settings setting.
- Payment methods will be controlled by the Web Payment Methods setting.
- Delivery Modes will be controlled by the Show Delivery Modes option in the Webshop Company Settings setting.
- If a Contact is a Customer and you specify a Display on the Web record in this field, it will control the information that will be shown to the Customer after they have logged in. You can also specify Display on the Web records at the Customer Category level. If you do not specify a Display on the Web record at the Category level or at the Customer level, information will be displayed as follows:
- Freight Code
- Paste Special
Web Freight setting, Webshop module
- Default taken from Countries setting, System module
- If you are using the Standard ERP Webshop, you may wish to define various methods that are to be used to calculate freight charges for Orders placed over the web (e.g. for local, national and international delivery). Use the Web Freight setting in the Webshop module to define these calculation methods, also known as "Freight Codes".
- When a Customer places an Order over the web, the Freight Code will be chosen as follows:
- If you have chosen in the Display on the Web record specified in the field above or in the Customer Category to which the Customer belongs or in the Webshop Company Settings setting that Delivery Modes will be displayed on the web, the Freight Code will be taken from the Delivery Mode chosen by the Customer.
- If no Delivery Modes are displayed on the web and if a Country has been specified on the 'Delivery' card of the Contact record for the Customer (i.e. as part of the Delivery Address for the Customer), the Freight Code will be taken from the record for that Country in the Countries setting in the System module.
- If a Country has not been specified on the 'Delivery' card of the Contact record for the Customer but a Country has been specified on the 'Contact' card (i.e. as part of the Invoice Address for the Customer), the Freight Code will be taken from the record for that Country in the Countries setting.
- If steps 1, 2 and 3 cannot provide a Freight Code , the Freight Code in this field will be used.
- The Freight Code will be taken from the Webshop Company Settings setting in the Webshop and CMS module (Default Freight field).
- If you are using the Standard ERP Webshop, you may wish to define various methods that are to be used to calculate freight charges for Orders placed over the web (e.g. for local, national and international delivery). Use the Web Freight setting in the Webshop module to define these calculation methods, also known as "Freight Codes".
The Contact register in Standard ERP:
- Introduction
- Entering a Contact, including:
- Header
- 'Contact' card
- 'Delivery' card
- 'Terms' card - Fields
- 'Terms' card - Check Boxes
- 'Pricing' card
- 'Company' card
- 'Accounts' card
- 'E-Records' card
- 'Web' card
- 'Comments' card
- 'Personal' card
- 'User Defined' card
- 'Notes' card
- 'BI' card
- Header
- Editing a Contact
- Deleting a Contact
- Linking Contact Persons and Companies - The Contact Relations Register
- Operations menu
- Create menu
- Home page for Customers, Suppliers and Contact Persons manual
- Home page for Standard ERP manual
Entering a Contact - Comments Card
This page describes the fields on the 'Comments' card of the Contact record. Please follow the links below for descriptions of the other cards:- Header
- 'Contact' card
- 'Delivery' card
- 'Terms' card - Fields
- 'Terms' card - Check Boxes
- 'Pricing' card
- 'Company' card
- 'Accounts' card
- 'E-Records' card
- 'Web' card
- 'Comments' card
- 'Personal' card
- 'User Defined' card
- 'Notes' card
- 'BI' card
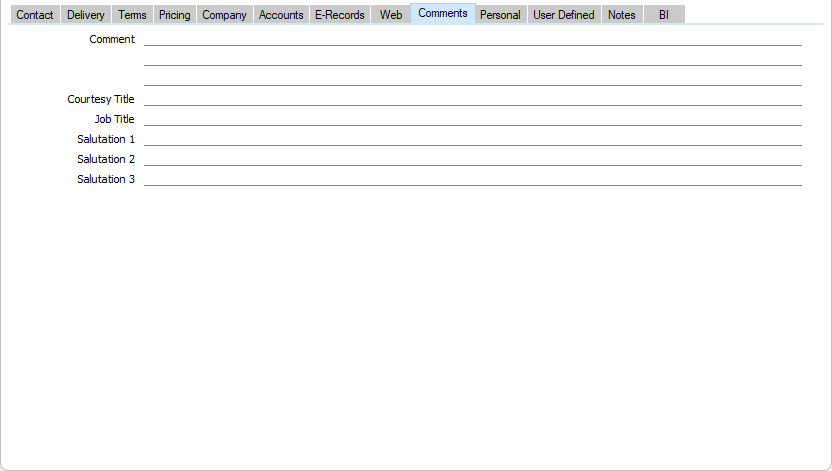
- Comment
- If a Contact is a Contact Person, any comment that you enter here will be printed in the Contact List report, if you print it using the Include All Contact Persons and Detailed options. For all Contacts, the first line of this Comment will be printed in the Telephone List report if you print it using the Overview with Work Details option.
- Courtesy Title
- Paste Special
Courtesy Titles setting, CRM/HRM module
- If a Contact is a Contact Person, enter their Title (e.g. Mr., Mrs., Miss, Ms., Dr., Prof., etc.). If you want this information to be printed on your Customer Letters, include the "Contact Person Title" field in your Form Template design. The Courtesy Title will also be shown in the 'Paste Special' list that you will use to specify a Contact Person in the Attention or Contact field in any transaction (e.g. Quotations, Orders or Invoices).
- Job Title
- Paste Special
Job Titles setting, CRM/HRM module
- If a Contact is a Contact Person, use this field to describe the role of the person within their company.
- Salutation 1, 2 and 3
- If a Contact is a Contact Person, use these fields to record greetings with various degrees of formality. It is recommended that you enter Salutations in all three fields, even if they are the same.
- When you design the Form Templates that will be used to print Customer Letters, you can include the "Salutation 1", "Salutation 2" or "Salutation 3" fields depending on the formality of the letter. You can also include these fields in the Form Templates that will be used to print Contact Labels and Invoices.
The Contact register in Standard ERP:
- Introduction
- Entering a Contact, including:
- Header
- 'Contact' card
- 'Delivery' card
- 'Terms' card - Fields
- 'Terms' card - Check Boxes
- 'Pricing' card
- 'Company' card
- 'Accounts' card
- 'E-Records' card
- 'Web' card
- 'Comments' card
- 'Personal' card
- 'User Defined' card
- 'Notes' card
- 'BI' card
- Header
- Editing a Contact
- Deleting a Contact
- Linking Contact Persons and Companies - The Contact Relations Register
- Operations menu
- Create menu
- Home page for Customers, Suppliers and Contact Persons manual
- Home page for Standard ERP manual
Entering a Contact - Personal Card
This page describes the fields on the 'Personal' card of the Contact record. Please follow the links below for descriptions of the other cards:- Header
- 'Contact' card
- 'Delivery' card
- 'Terms' card - Fields
- 'Terms' card - Check Boxes
- 'Pricing' card
- 'Company' card
- 'Accounts' card
- 'E-Records' card
- 'Web' card
- 'Comments' card
- 'Personal' card
- 'User Defined' card
- 'Notes' card
- 'BI' card
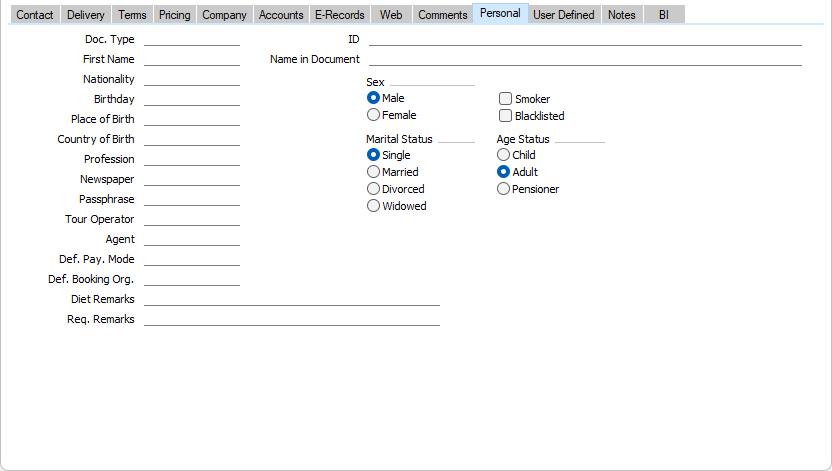
- Doc. Type
- Paste Special
Contact Document Types setting, Sales Ledger
- You can use the Doc. Type field for one of two purposes, as follows:
- If a Contact is a Hotel Guest, use the Doc. Type field to record the type of ID document that the Guest shows when they check in. Example values might be "passport" or "driving licence".
- In Argentina, if a Contact is a Customer or a Supplier, the Doc. Type field should contain a code representing the type of ID document that the Contact has. For example, if the Contact is registered with the tax authority as a company, the type of the ID document will usually be "80", but if the Contact is a private individual, it might be "86" or "96". This code will be used in e-invoicing and tax exports.
- If a Contact is a Hotel Guest, use the Doc. Type field to record the type of ID document that the Guest shows when they check in. Example values might be "passport" or "driving licence".
- Birthday
- Paste Special
Choose date
- If a Contact is a Contact Person or a Guest, you can record their date of birth here. This cannot be a date in the future.
- You can use the Birthday List report in the CRM module to list Contacts with a particular birthday (date and month) or with birthdays in a specified period.
- You can use the Birthday List report in the CRM module to list Contacts with a particular birthday (date and month) or with birthdays in a specified period.
- Def. Booking Org.
- Paste Special
Booking Origins setting, Hotel module
- If you will use a Contact as a Customer or Agent in Reservations and Reservation Quotations, you can specify a Booking Origin here. It will be copied as a default to each Reservation and Reservation Quotation.
The Contact register in Standard ERP:
- Introduction
- Entering a Contact, including:
- Header
- 'Contact' card
- 'Delivery' card
- 'Terms' card - Fields
- 'Terms' card - Check Boxes
- 'Pricing' card
- 'Company' card
- 'Accounts' card
- 'E-Records' card
- 'Web' card
- 'Comments' card
- 'Personal' card
- 'User Defined' card
- 'Notes' card
- 'BI' card
- Header
- Editing a Contact
- Deleting a Contact
- Linking Contact Persons and Companies - The Contact Relations Register
- Operations menu
- Create menu
- Home page for Customers, Suppliers and Contact Persons manual
- Home page for Standard ERP manual
Entering a Contact - User Defined Card
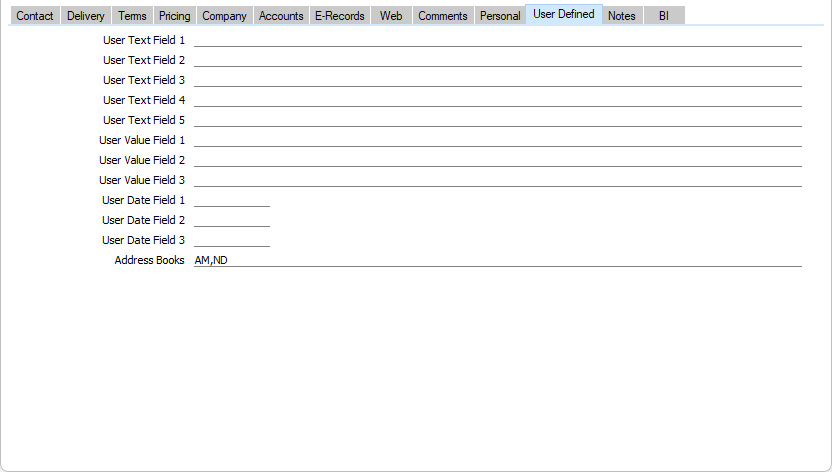
- Address Books
- The upper left area of the 'Communication Centre' window displays a list of the records in the Contact register in your current Company. By default, the list will show every record in the Contact register. You can restrict the list so that it only shows your Personal Contacts. To do this, press the 'Personal' button above the list:
Press the [Company] button if you need to change the list back so that it shows every record. A Personal Contact is one where you are the Salesman, or one with your Signature in this Address Books field. The Address Books field can contain the Signatures of more than one Person separated by commas, so a Contact can be the Personal Contact of more than one Person.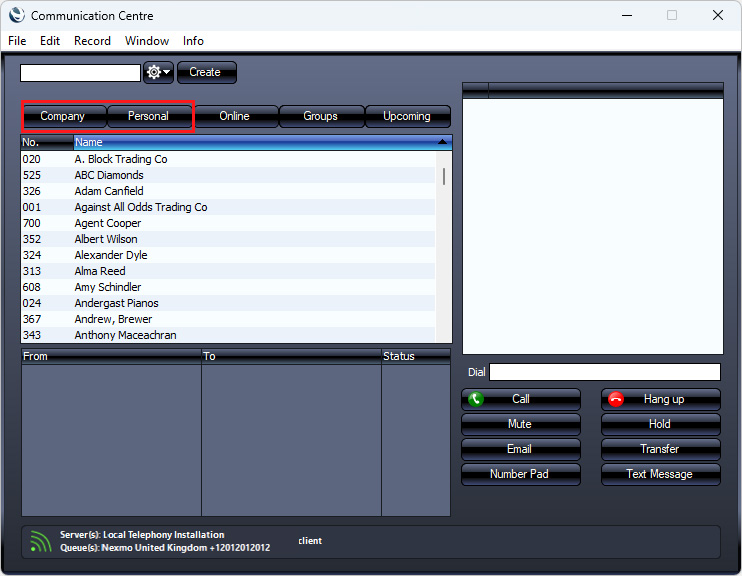
The Contact register in Standard ERP:
- Introduction
- Entering a Contact, including:
- Header
- 'Contact' card
- 'Delivery' card
- 'Terms' card - Fields
- 'Terms' card - Check Boxes
- 'Pricing' card
- 'Company' card
- 'Accounts' card
- 'E-Records' card
- 'Web' card
- 'Comments' card
- 'Personal' card
- 'User Defined' card
- 'Notes' card
- 'BI' card
- Header
- Editing a Contact
- Deleting a Contact
- Linking Contact Persons and Companies - The Contact Relations Register
- Operations menu
- Create menu
- Home page for Customers, Suppliers and Contact Persons manual
- Home page for Standard ERP manual
Entering a Contact - Notes Card
This page describes the fields on the 'Notes' card of the Contact record. Please follow the links below for descriptions of the other cards:- Header
- 'Contact' card
- 'Delivery' card
- 'Terms' card - Fields
- 'Terms' card - Check Boxes
- 'Pricing' card
- 'Company' card
- 'Accounts' card
- 'E-Records' card
- 'Web' card
- 'Comments' card
- 'Personal' card
- 'User Defined' card
- 'Notes' card
- 'BI' card
---
The Contact register in Standard ERP:
- Introduction
- Entering a Contact, including:
- Header
- 'Contact' card
- 'Delivery' card
- 'Terms' card - Fields
- 'Terms' card - Check Boxes
- 'Pricing' card
- 'Company' card
- 'Accounts' card
- 'E-Records' card
- 'Web' card
- 'Comments' card
- 'Personal' card
- 'User Defined' card
- 'Notes' card
- 'BI' card
- Header
- Editing a Contact
- Deleting a Contact
- Linking Contact Persons and Companies - The Contact Relations Register
- Operations menu
- Create menu
- Home page for Customers, Suppliers and Contact Persons manual
- Home page for Standard ERP manual
Entering a Contact - BI Card
This page describes the fields on the 'BI' card of the Contact record. Please follow the links below for descriptions of the other cards:- Header
- 'Contact' card
- 'Delivery' card
- 'Terms' card - Fields
- 'Terms' card - Check Boxes
- 'Pricing' card
- 'Company' card
- 'Accounts' card
- 'E-Records' card
- 'Web' card
- 'Comments' card
- 'Personal' card
- 'User Defined' card
- 'Notes' card
- 'BI' card
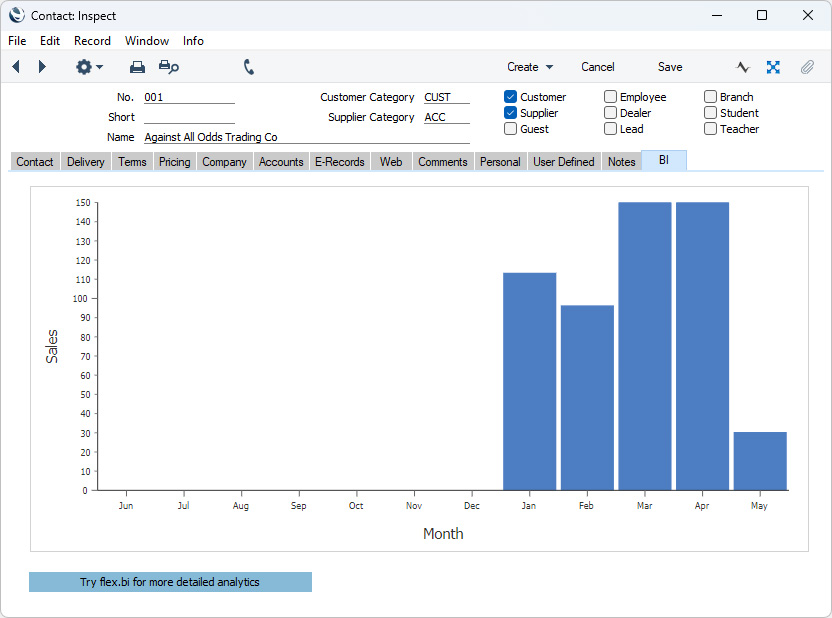
---
The Contact register in Standard ERP:
- Introduction
- Entering a Contact, including:
- Header
- 'Contact' card
- 'Delivery' card
- 'Terms' card - Fields
- 'Terms' card - Check Boxes
- 'Pricing' card
- 'Company' card
- 'Accounts' card
- 'E-Records' card
- 'Web' card
- 'Comments' card
- 'Personal' card
- 'User Defined' card
- 'Notes' card
- 'BI' card
- Header
- Editing a Contact
- Deleting a Contact
- Linking Contact Persons and Companies - The Contact Relations Register
- Operations menu
- Create menu
- Home page for Customers, Suppliers and Contact Persons manual
- Home page for Standard ERP manual
Editing a Contact
This page describes editing a record in the Contact register.---
If you need to edit a Contact record and you are using Windows or macOS, follow these steps :
- Check the Navigation Centre to make sure you are in a module that contains the Contact register (e.g. the Sales or Purchase Orders modules, the Sales or Purchase Ledgers, or the Contract, Quotations, CRM and Service Orders modules if installed). If you are in a different module, click the [Switch Module] button in the Navigation Centre or use the Ctrl-0 (zero) (Windows) or ⌘-0 (macOS) keyboard shortcut. Double-click any of the modules mentioned above in the subsequent list.
- Open the Contact register by clicking the [Registers] button in the Navigation Centre and double-clicking 'Contacts' in the resulting list.
- The 'Contacts: Browse' window opens, listing the Contacts in Contact Number order. You can change the sort order by clicking on one of the column headings. The heading will be coloured blue to show the current sort order.
- To search for a particular Contact, first sort the list by the column that you want to use for the search. Then, enter the text that you want to find in the Search field in the top right-hand corner of the window. If you are using Windows, a match will be highlighted as you type each character. If you are using macOS, press the Return key to search. For example, to search for a particular Contact Name, sort by Name before entering a Contact Name (or its first few characters) in the Search field.
- To modify a Contact record, double-click it in the browse window or highlight it and press the Enter key. The record will be opened in a window entitled 'Contact: Inspect'. The fields in this window are the same as those in the 'Contact: New' window: please refer here for a detailed description of each field.
- Edit the fields as necessary. Use the Tab, Return or Enter keys to move from field to field. You will not be able to change the Contact Number.
- Click the [Save] button when you are ready to save changes or [Cancel] if you want to leave the record unchanged.
- You can also edit a Contact from another register. For example, when entering an Invoice, you might realise that your information about the Customer is out of date (they might have changed their address or telephone number, for example). Place the insertion point in the Customer field in the Invoice and press F2 (Windows) or ⌘-Shift-V (macOS). The Contact record for the Customer opens, allowing you to make the necessary changes. You can also do this from the 'Paste Special' list, when you are choosing the Customer for the Invoice.
- Check the Navigation Centre to make sure you are in a module you are in a module that contains the Contact register (e.g. the Sales or Purchase Orders modules, the Sales or Purchase Ledgers, or the Contract, Quotations, CRM and Service Orders modules if installed). If you are in a different module, tap the [Switch Module] button in the Navigation Centre. Tap any of the modules mentioned above in the subsequent list.
- To open the Contact register, tap the [Registers] button in the Navigation Centre and then tap 'Contacts' in the resulting list.
- The 'Contacts: Browse' window opens, listing the Contacts in Contact Number order. Change the sort order by tapping on any of the column headings and then choosing an option in the resulting pop-up. The current sort column is marked by a dark grey heading.
- To search for a particular Contact, first sort the list by the column that you want to use for the search. Then, enter the text that you want to find in the Search field and press Search. For example, to search for a particular Contact Name, sort by Name before entering a Contact Name (or its first few characters) in the Search field.
- To modify a Contact record, tap it in the browse window. The record will be opened in a window entitled 'Contact: Inspect'. The fields in this window are the same as those in the 'Contact: New' window: please refer please refer here for a detailed description of each field.
- Edit the fields as necessary. You will not be able to change the Contact Number.
- Tap √ in the Button Bar when you are ready to save changes. If you want to leave the record unchanged, select 'Cancel' from the Record menu (with 'cog' icon) or tap <. If you tap <, you will be asked to confirm the cancellation.
The Contact register in Standard ERP:
- Introduction
- Entering a Contact
- Editing a Contact
- Deleting a Contact
- Linking Contact Persons and Companies - The Contact Relations Register
- Operations menu
- Create menu
- Home page for Customers, Suppliers and Contact Persons manual
- Home page for Standard ERP manual
Deleting a Contact
This page describes the permanent deletion of records from the Contact register.---
You can only delete a Contact if you have not used it in any transaction (e.g. in a Sales or Purchase Order or Invoice). Follow these steps:
- Open the Contact register as described here.
- In the 'Contacts: Browse' window, find the Contact you want to remove and open it by double-clicking (Windows/macOS) or tapping (iOS/Android).
- Select 'Delete' from the Record menu (which has a 'cog' icon if you are using iOS or Android).
The Item will be deleted, and the window will now show the preceding Contact.
- Close the window using the close box (Windows/macOS) or by tapping < (iOS/Android).
! | You cannot undo the deletion of a Contact record. |
When you use the 'Delete' command, you will usually not be asked if you are sure you want to go ahead with the deletion. If you would like such a warning to appear, select the Prompt When Deleting option in the Local Machine setting in the User Settings module. In a multi-user system, you will need to choose this option separately on each client machine.
You can prevent certain users from deleting records using Access Groups (by denying access to the 'Delete Records' and/or 'Deleting Records from Shared Registers' Actions).
You cannot delete a Contact if you have used it in any transaction. If you want to prevent such a Contact from being used in the future, open it in a record window and tick the Closed box.
---
The Contact register in Standard ERP:
- Introduction
- Entering a Contact
- Editing a Contact
- Deleting a Contact
- Linking Contact Persons and Companies - The Contact Relations Register
- Operations menu
- Create menu
- Home page for Customers, Suppliers and Contact Persons manual
- Home page for Standard ERP manual
Linking Contact Persons and Companies - The Contact Relations Register
Customers, Suppliers and Contact Persons are all stored in the Contact register. On this page, we describe linking Contact Persons to the company they work for.- The first step is to enter a Contact record representing the company. Mark the company as a Customer or Supplier or both, as appropriate. Remember that marking the company as a Customer or Supplier does not necessarily mean it has purchased goods or services from your business, or sold goods or services to you: the company can also be a potential customer or supplier to your business. Marking the company as a Customer or Supplier makes it available to the various sales or purchase registers respectively. Ensure you save this record before moving to step 2.
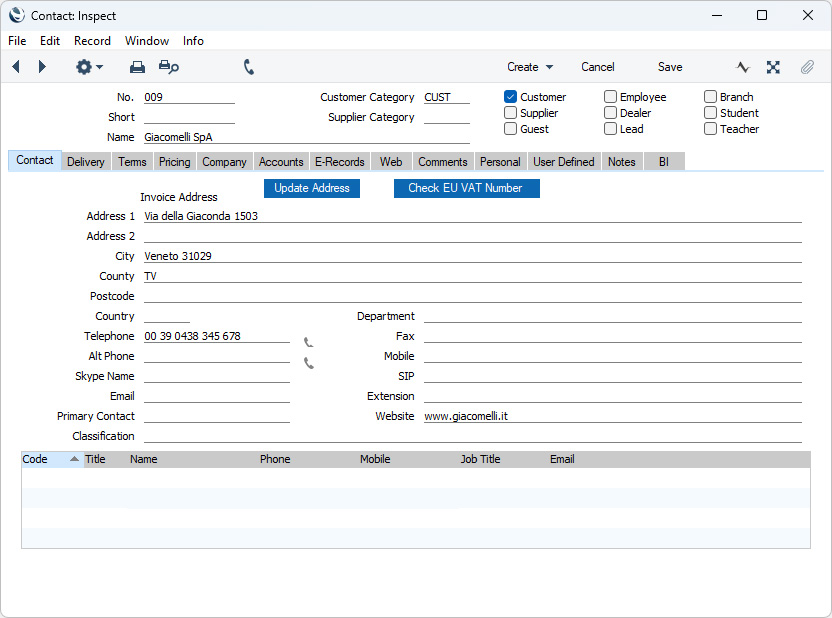
- The next step is to enter a Contact record representing a person working for the company (i.e. a Contact Person). Choose 'Linked Contact Person' from the Create menu (Windows/macOS) or + menu (iOS/Android). A new record will be created in the Contact register and will be opened in a new window entitled 'Contact: Inspect'. This means the record has already been saved and is being opened to allow you to enter the Contact Person's name and contact details if these are different to those of the parent company:
The address details, telephone and fax will be copied from the parent company. Enter the Contact Person's name and appropriate contact information. As the Contact Person works for a company that has been marked as a Customer or a Supplier, you should not tick these boxes in the Contact Person record (unless the Contact Person is also a Customer or Supplier in a private capacity).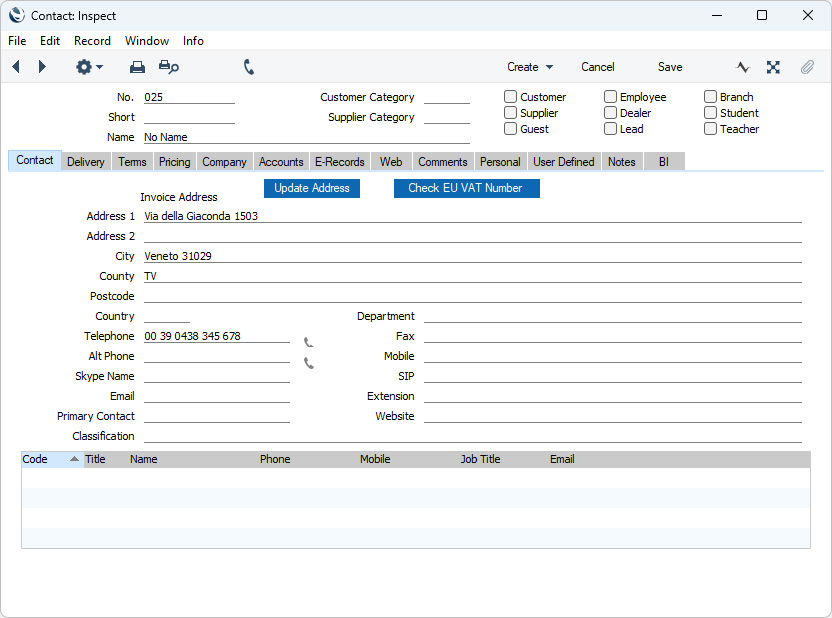
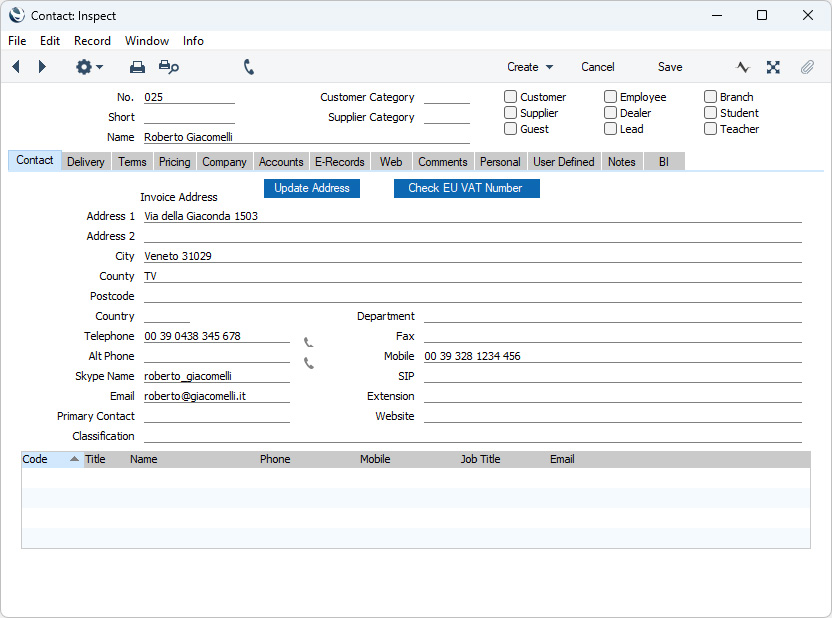
- Save the Contact Person and close the record by clicking the close box (Windows/macOS) or by tapping < (iOS/Android). The Contact Person will have been added to the list at the bottom of the 'Contact' card of the parent company's Contact record:
This list will contain all the Contact Persons working for the Customer or Supplier. As with all lists in Standard ERP, you can sort this one by clicking (Windows/macOS) or tapping (iOS/Android) on a column heading. If you need to open the Contact record of a Contact Person, double-click or tap a line in this list.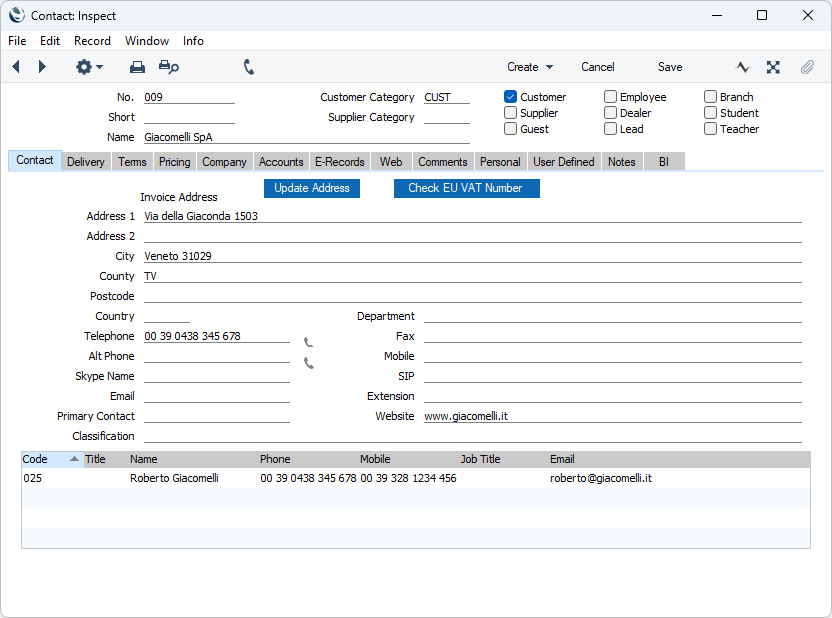
- The 'Linked Contact Person' function just described will create a new record in the Contact register for a Contact Person, and will connect this new Contact Person to the Customer or Supplier. If, however, there already is a record for the Contact Person in the Contact register, you can use the 'Link Existing Contact' function instead. When you select this function from the Operations menu (Windows/macOS) or Tools menu (iOS/Android) of the parent company's Contact record, the 'Add Contact' window will appear:
Enter the Contact Number of the Contact Person or choose it using 'Paste Special' and press [Save]. The Contact Person will be added to the list at the bottom of the 'Contact' card of the parent company's Contact record. If the Contact Person was already connected to another Customer or Supplier, that relationship will not be disturbed, so the Contact Person will now be connected to two parent companies.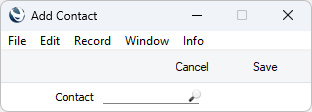
- The 'Linked Contact Person' and 'Link Existing Contact' functions are the easiest ways to add a Contact Person to a Customer or Supplier, but you can also use a more manual method. First, enter a new record to the Contact register for the Contact Person. No address, telephone or mobile information will be offered, so you will need to enter this information yourself (unless you duplicate an existing Contact Person):
Now, you need to connect the Contact Person to the Customer or Supplier. The Contact Relations register in the CRM module provides this connection. The 'Linked Contact Person' and 'Link Existing Contact' functions described in the previous step will both create records in the Contact Relations register automatically, connecting a Contact Person to a Customer or Supplier. In this case, as you created the Contact Person manually, you also need to create the connecting Contact Relations record yourself. To do this, ensure you are in the CRM module, open the Contact Relations register and create a new record: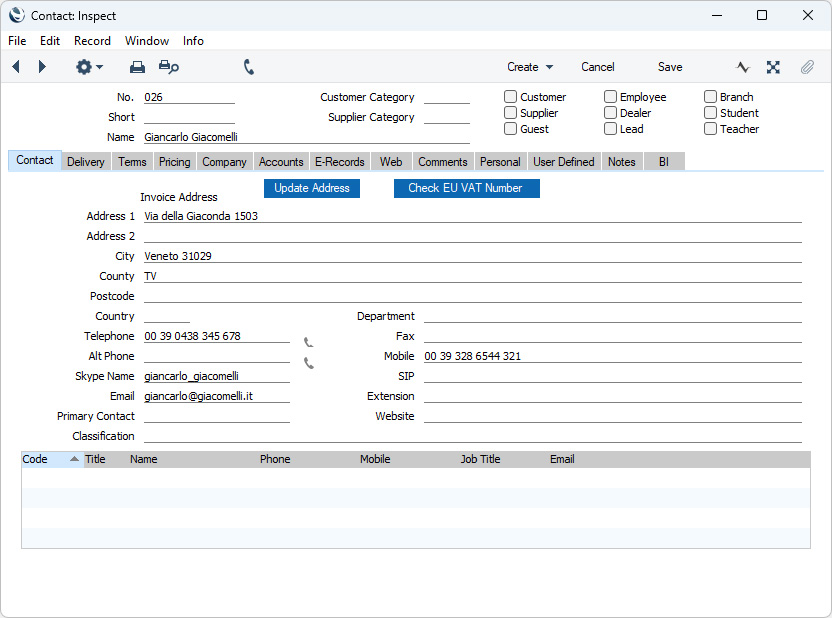
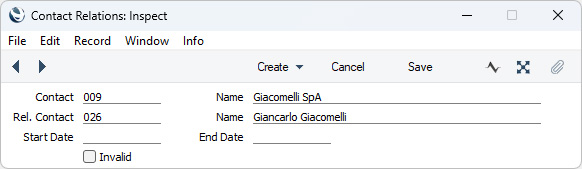
- Customer
- Paste Special
Customers, Suppliers and Contact Persons in Contact register
- Specify the Customer or Supplier for whom the Contact Person works.
- Contact
- Paste Special
Contact Persons in Contact register
- Specify the Contact Person.
- Start Date
- Paste Special
Choose date
- Enter the date when the Contact Person started working for the Customer or Supplier. This is for information only.
- End Date
- Paste Special
Choose date
- If appropriate, enter the date when the Contact Person stopped working for the Customer or Supplier. This is for information only.
- Invalid
- If the Contact Person stops working for the Customer or Supplier, you can mark the Contact Relations record as Invalid. This is described in step 9 below.
When you save the Contact Relations record, the Contact Person will be added to the list at the bottom of the 'Contact' card of the Customer or Supplier:
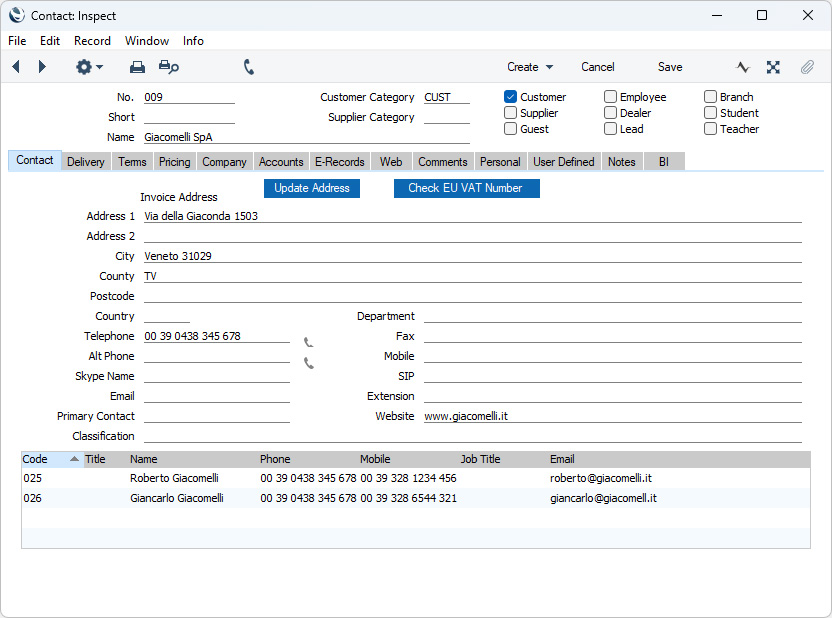
- Customer
- The Contact Relations register allows a Contact Person to work for more than one company. Simply enter as many records to the Contact Relations register as necessary, linking the Contact Person to the companies they work for:
The Contact Person will be listed in the Contact records for both companies: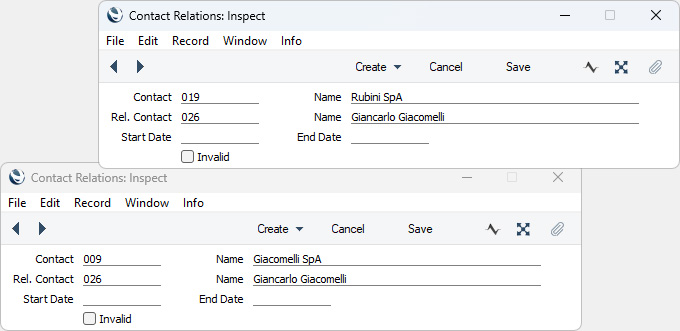
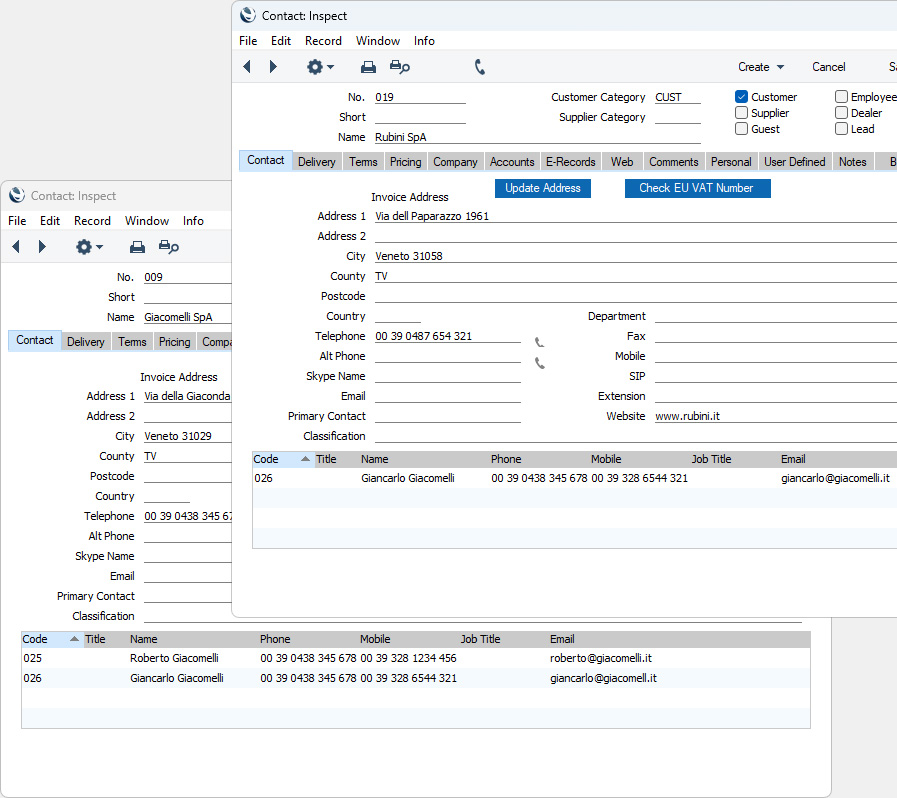
- The information shown in the list at the bottom of the 'Contact' card of the Customer or Supplier is stored in the Contact Relations register. If you edit a Contact Person, the connected Contact Relations record will be updated immediately, making the change visible in the list in the Customer or Supplier record. For example, if you change a Contact Person's Email Address, the Email Address in the relevant Contact Relations record will be updated and so the new Email Address will be visible in the list in the Customer or Supplier record immediately.
If a Contact Person works for more than one Customer or Supplier, that Contact Person will have more than one Contact Relations record. It is likely that such a Contact Person will have different contact details for each company.
When you connect a Contact Person to a second Customer or Supplier (as was done at the end of step 6), it is likely that their contact details for the second Customer or Supplier will not be correct and so you will need to change the contact details in the relevant Contact Relations record. To do this, open the Contact record for the second Customer or Supplier, highlight the Contact Person in the list at the bottom of the 'Contact' card and select 'Edit Linked Contact Data' from the Operations menu. The relevant Contact Relations record will open:
When you open the Contact Relations record in this way, the window will contain fields related to contact details that are not visible when opening the record in other ways (e.g. as shown in the illustrations in step 7). Update the record in the usual way. After doing so, the Contact Person will be listed in the Contact records for the Customers or Suppliers, with different contact details: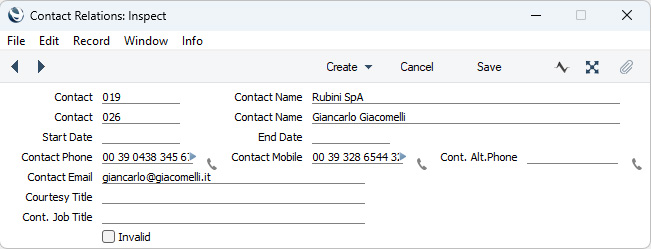
As mentioned at the beginning of this step, if you change the contact details in the Contact record for a Contact Person, those changes will be fed through to the related Contact Relations record automatically. However, if a Contact Person has more than one Contact Relations record, changes to their Email Address, Courtesy Title and/or Job Title will not be fed through to the Contact Relations records because these details are likely to be different in each one.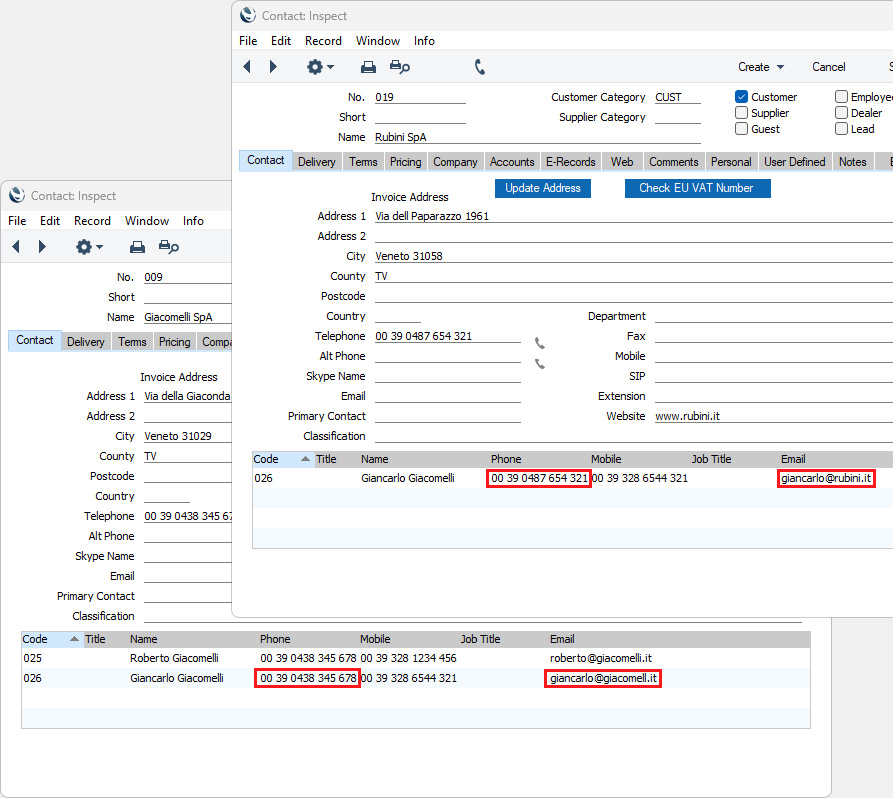
The 'Edit Linked Contact Data' function cannot be used on iOS or Android.
- If you change the Invoice Address in the Contact record for a Customer or Supplier and you need the change to be copied to the connected Contact Persons, save the changes to the Customer or Supplier and then select 'Update Contact Persons' from the Operations or Tools menu.
- If a Contact Person stops working for a Customer or Supplier, you can do one of the following:
- You can delete the relevant Contact Relations record. This will break the link between the Contact Person and the Customer or Supplier. Alternatively, if the Contact Person moves to another Customer or Supplier, you can enter the new Customer or Supplier in the Contact Relations record.
- You can mark the relevant Contact Relations record as Invalid. The link between the Contact Person and the Customer or Supplier will remain, but the Contact Person will no longer appear in 'Paste Special' lists or in the list in the Customer or Supplier record:
You can use this method if you want to remember that the Contact Person once worked for the Customer or Supplier, between the dates recorded in the Contact Relations record. If the Contact Person moves to another Customer or Supplier, you can create a new Contact Relations record.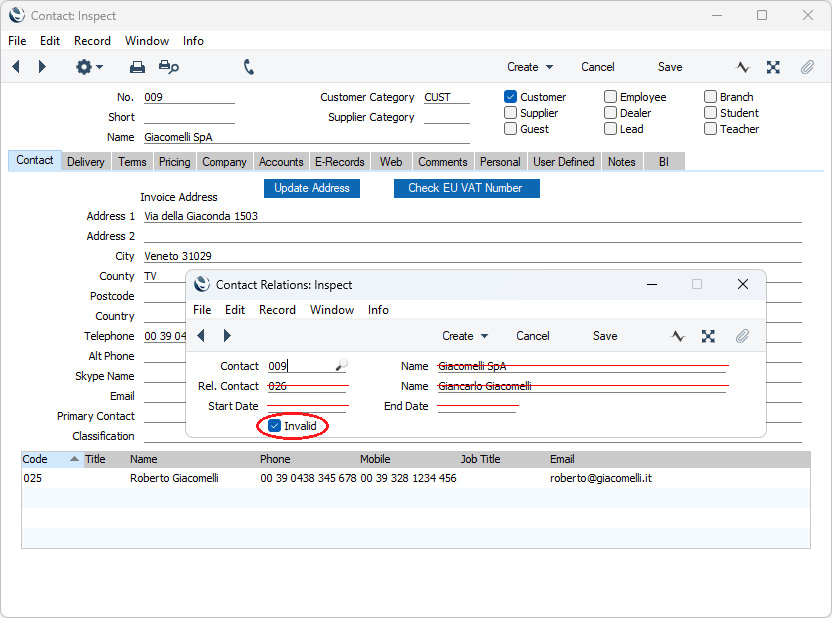
- You can open the Customer or Supplier record, highlight the Contact Person in the list at the bottom of the window and select 'Remove Linked Contact' from the Operations menu. This function will mark the relevant Contact Relations record as Invalid and is therefore similar to option (ii) but means you do not need to find the Contact Relations record. This method cannot be used on iOS or Android.
- You can mark the Contact Person as Closed (on the 'Terms' card of their Contact record). All Contact Relations records for the Contact Person will be marked as Invalid automatically. The Contact Person will no longer appear in 'Paste Special' lists. This option will not be suitable if the Contact Person moves to another Customer or Supplier, or works for more than one at the same time. It closes the Contact Person as a whole, so they will not appear in 'Paste Special' lists of Contact Persons belonging to the new or second companies.
- You can delete the Contact Person record altogether. This option is not recommended if you want to keep your Contact History with the Contact Person. All Contact Relations records for the Contact Person will be deleted automatically.
- You can delete the relevant Contact Relations record. This will break the link between the Contact Person and the Customer or Supplier. Alternatively, if the Contact Person moves to another Customer or Supplier, you can enter the new Customer or Supplier in the Contact Relations record.
- Once you have entered a Customer or Supplier and all its Contact Persons, you can work with them quickly and easily. For example, when you enter a Sales Invoice, the 'Paste Special' list from the Customer field will only list Customers:
When you enter a Purchase Invoice, the 'Paste Special' list from the Supplier field will only list Suppliers: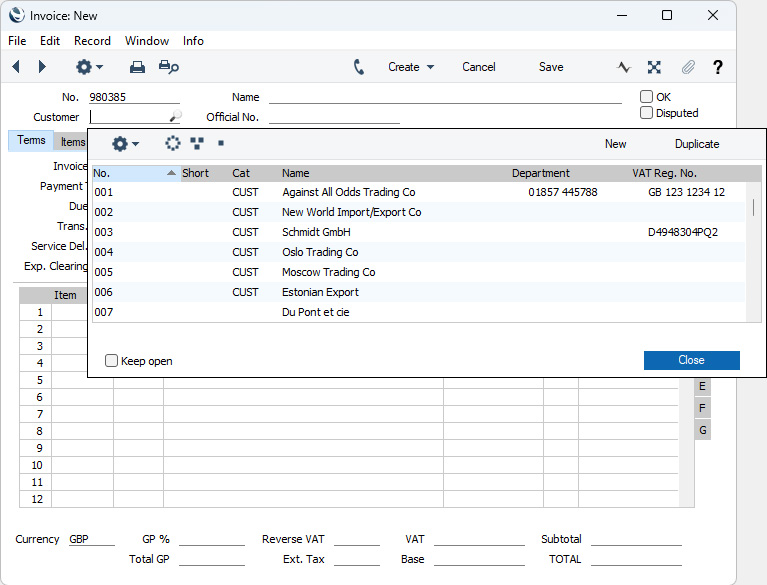
In some cases (e.g. Activities, Customer Letters), you can specify Customers and Suppliers. When you open the 'Paste Special' list from the Customer field, it will list Customers, but if you are using Windows or macOS there will be a [Suppliers] button at the top of the list, allowing you to choose a Supplier if necessary: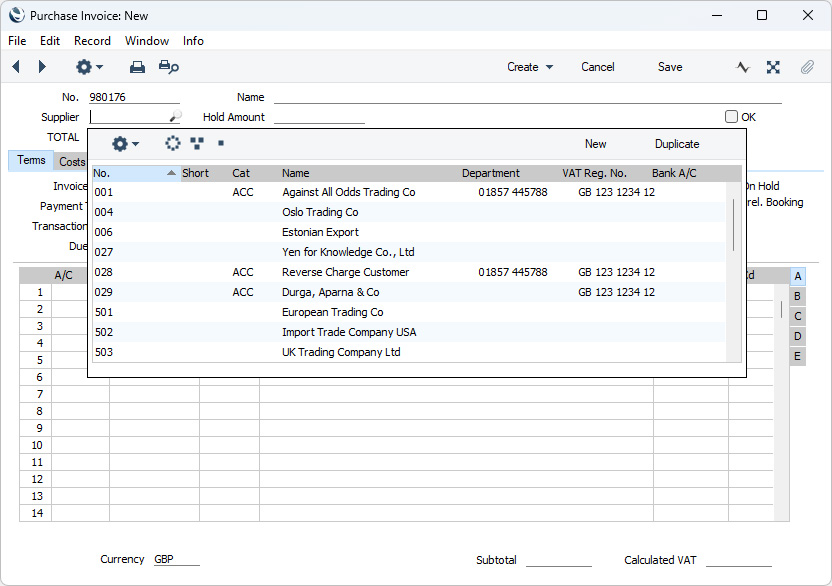
In many records, you can choose a Contact Person as well as a Customer or Supplier. The Primary Contact from the 'Contact' card of the Customer or Supplier will be brought in as a default. To choose a different Contact Person, activate 'Paste Special' from the Contact or Attention field (the name of this field varies depending on the register):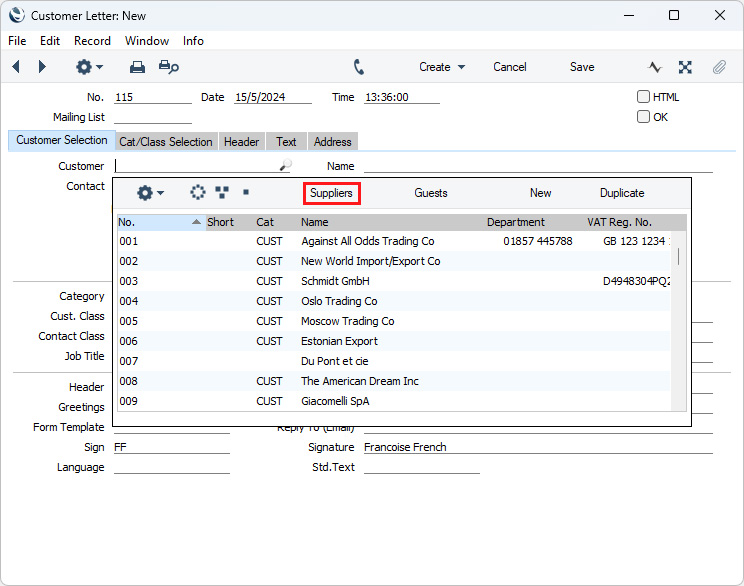
This list will only contain Contact Persons that work for the Customer or Supplier. Closed Contact Persons will not be included in the list. The Primary Contact from the 'Contact' card of the Customer or Supplier will be included in the list, but will not be listed twice if you have a separate Contact record for that Person. Note that the Title of each Contact Person is shown in the list, so you should record this information if you have it (on the 'Comments' card of the Contact record), to make selection of the correct Contact Person easier.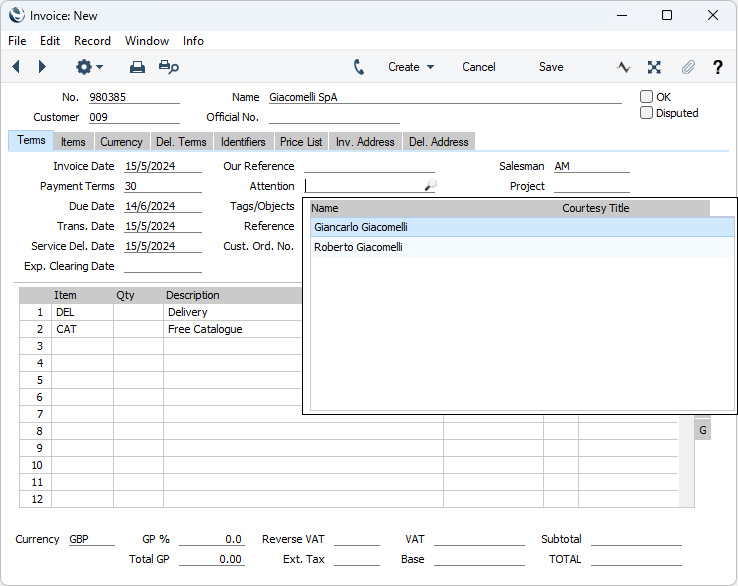
- If you will be sending documents by email to a Customer or Supplier, use the Additional Email Recipients setting in the CRM module if you need to specify that particular documents will be sent to particular Contact Persons (e.g. that Invoices should be sent to one Contact Person and that statements should be sent to another Contact Person). Please refer to the description of that setting here for details.
The Contact register in Standard ERP:
- Introduction
- Entering a Contact
- Editing a Contact
- Deleting a Contact
- Linking Contact Persons and Companies - The Contact Relations Register
- Operations menu
- Create menu
- Home page for Customers, Suppliers and Contact Persons manual
- Home page for Standard ERP manual
Operations Menu - Contacts
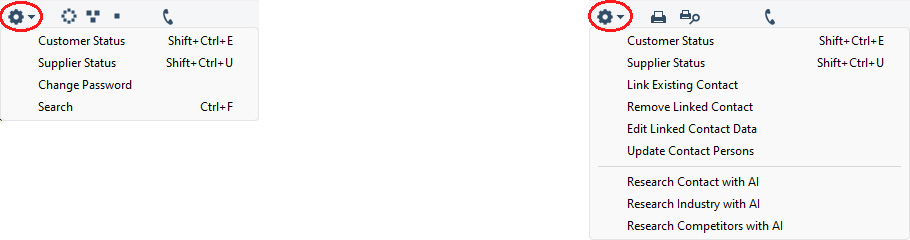
If you are using Windows or macOS, you can open the Operations menu by clicking the button with the 'cog' icon (shown highlighted in the illustration above). If you are using iOS or Android, you can access the Operations menu functions through the Tools menu (with 'wrench' icon).
Before using the functions on the Operations menu in the 'Contacts: Browse' window, you should highlight a record in the browse window. The function will then be applied to that record. If you are using iOS or Android, you can highlight a record in the browse window by searching for it.
Note that in Standard ERP version 8.0, some functions that were previously on the Operations menu were moved to the Create menu.
Please follow the links below for details about each function on the Operations menu:
- Customer Status
- Supplier Status
- Change Password
- Search
- Link Existing Contact
- Remove Linked Contact
- Edit Linked Contact Data
- Update Contact Persons
- Introduction
- Entering a Contact
- Editing a Contact
- Deleting a Contact
- Linking Contact Persons and Companies - The Contact Relations Register
- Operations menu
- Create menu
- Home page for Customers, Suppliers and Contact Persons manual
- Home page for Standard ERP manual
Operations Menu - Contacts - Customer Status
This page describes the 'Customer Status' function on the Operations menu in the Contact browse and record windows. If you are using iOS or Android, the 'Customer Status' function is on the Tools menu (with 'wrench' icon).---
When you are reviewing the Contact record for a Customer, you can check their current account status using the 'Customer Status' function. When you select the function, a Customer Status report will be printed to screen.
If you are using Windows or macOS, you can include several Customers in the report. Simply highlight a number of Contacts in the 'Contacts: Browse' window and select 'Customer Status' from the Operations menu. To highlight a range of Contacts, click the top one in the range and then hold down the Shift key and click the last one.
If you are using iOS or Android, you can only highlight a single Contact at a time, by searching for it, so you can only produce a Customer Status report for a single Customer.
On all platforms, you can also open the Contact record for a Customer in a record window and produce a Customer Status report by selecting 'Customer Status' from the Operations menu (Windows/macOS) or Tools menu (iOS/Android).
In its basic form, this report will first show the Customer Number, Name and telephone number. This information will be followed by a list of the Customer's Contact Classifications. The five most recently paid Invoices will then be listed, as will all open (unpaid) Invoices.
You can have much more information shown in the report, such as lists of recent Activities, Contract Quotations, Contracts, Quotations and Orders, and monthly sales figures for the past year. To have this extra information shown in the report, create a record for yourself in the Info in Customer Status Report setting in the CRM module. As you can create separate records in this setting for each user, you can control how much of this additional information will be shown to different users. You can effectively give each user a different report definition.
Simply creating a record for yourself in the Info in Customer Status Report setting will add the Customer's address, Warning on Sales if there is one, Credit Limit and turnover for the first period in the Reporting Periods setting to the top of the report. The remainder of the report will then follow the specification in your Info in Customer Status Report record. If you are using the Open Invoices until Due Date only (Suspend on Overdue) option in the Credit Limit setting and a Customer has at least one overdue Invoice, their Credit Limit will be shown to be 0.00 in the report.
If the appearance of the Customer Status report is not as you expect (i.e. the Customer's address, Warning on Sales if there is one, Credit Limit and turnover are not shown, and the report only lists Invoices), the probable cause is you do not have a record in the Info in Customer Status Report setting.
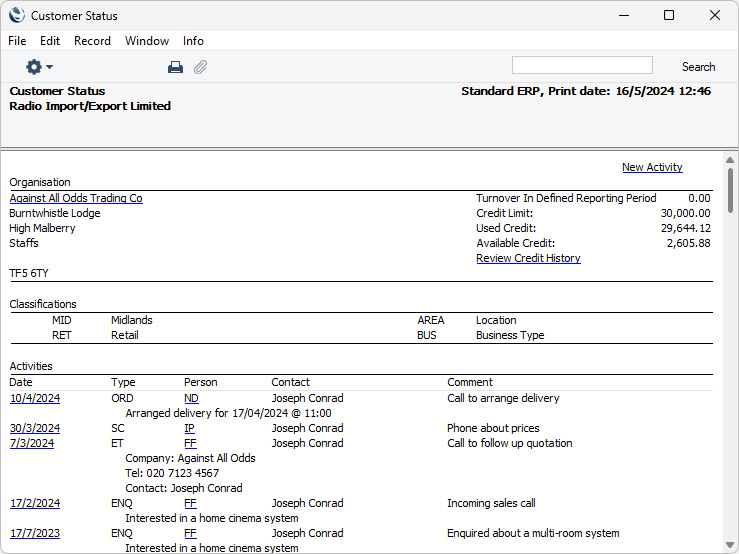
The Customer Status report has the Standard ERP Drill-down feature. You can open many records such as Contact Persons, Activities, Quotations and Invoices from the report by clicking (Windows/macOS) or tapping (iOS/Android) in the appropriate places (i.e. on Contact Person names, on Activity Dates and on Quotation and Invoice Numbers). You can also click or tap on a Person's Signature to open an Activities, Persons report for that Person. Text with the drill-down feature is shown underlined in the report. If you have a record in the Info in Customer Status Report setting, the report will also contain a [New Activity] text link that you can click or tap to create an empty new Activity and a [Credit History] text link that will open a separate report showing the Customer's credit history. This is a chargeable Cloud Service: to use it you must have registered your database in Estonia using the Automatic Internet Enabler method, as described on the 'Enabler Key' page. You must also have entered a Reg. No. 1 on the 'Company' card of the Contact record for the Customer whose credit history you are interested in.
As previously mentioned, this function will print to screen a Customer Status report for the Customer currently on screen or for those Customers highlighted in the browse window. If you run the function for a Contact Person, it will produce a Customer Status report for the Customer for whom the Contact Person works (i.e. the Customer that is linked to the Contact Person in the Contact Relations register). The function will have no effect if you try to use it with other Contacts (e.g. with Suppliers).
As well as using the 'Customer Status' function described here, you can also produce a Customer Status report using the following methods:
- Activate 'Paste Special' from the Customer Number field in a record such as an Order or Invoice, highlight a Customer in the list and choose 'Customer Status' from the Operations menu (Windows/macOS only);
- Open an Activity where the Customer field contains a Customer (not a Supplier) and choose 'Customer Status' from the Operations or Tools menu;
- Open a Contract, Invoice, Quotation or Service Order in which a Customer has been specified and choose 'Customer Status' from the Operations or Tools menu (in the case of Contracts and Service Orders, you can also choose 'Customer Status' from the browse window);
- Open the 'Communication Centre' window, highlight one or more Customers in the Contact List and click the [Customer Status] button (Windows/macOS only); and
- In the Sales Ledger, click (Windows/macOS) or tap (iOS/Android) the [Reports] button in the Navigation Centre and choose to produce the Customer Status report.
---
The Contact register in Standard ERP:
- Introduction
- Entering a Contact
- Editing a Contact
- Deleting a Contact
- Linking Contact Persons and Companies - The Contact Relations Register
- Operations menu, including:
- Customer Status
- Supplier Status
- Change Password
- Search
- Link Existing Contact
- Remove Linked Contact
- Edit Linked Contact Data
- Update Contact Persons
- Customer Status
- Create menu
- Home page for Customers, Suppliers and Contact Persons manual
- Home page for Standard ERP manual
Operations Menu - Contacts - Supplier Status
This page describes the 'Supplier Status' function on the Operations menu in the Contact browse and record windows. If you are using iOS or Android, the 'Supplier Status' function is on the Tools menu (with 'wrench' icon).---
When you are reviewing the Contact record for a Supplier, you can check their current account status using the 'Supplier Status' function. When you select the function, a Supplier Status report will be printed to screen.
If you are using Windows or macOS, you can include several Suppliers in the report. Simply highlight a number of Contacts in the 'Contacts: Browse' window and select 'Supplier Status' from the Operations menu. To highlight a range of Contacts, click the top one in the range and then hold down the Shift key and click the last one.
If you are using iOS or Android, you can only highlight a single Contact at a time, by searching for it, so you can only produce a Supplier Status report for a single Supplier.
On all platforms, you can also open the Contact record for a Supplier in a record window and produce a Supplier Status report by selecting 'Supplier Status' from the Operations menu (Windows/macOS) or Tools menu (iOS/Android).
The function will have no effect if you try to use it with a Contact that is not marked as a Supplier.
In its basic form, this report will first show the Supplier's Name and Address together with your Credit Limit and turnover for the first period in the Reporting Periods setting. This information will be followed by a list of the Supplier's Contact Classifications. The five most recently paid Invoices will then be listed, as will all open (unpaid) Invoices.
You can have additional information can also be shown in the report, such as lists of recent Activities, Goods Receipts and Purchase Orders and monthly purchasing figures for the past year. To have this extra information shown in the report, create a record for yourself in the Info in Supplier Status Report setting in the CRM module. As you can create separate records in this setting for each user, you can control how much of this additional information will be shown to different users. You can effectively give each user a different report definition.
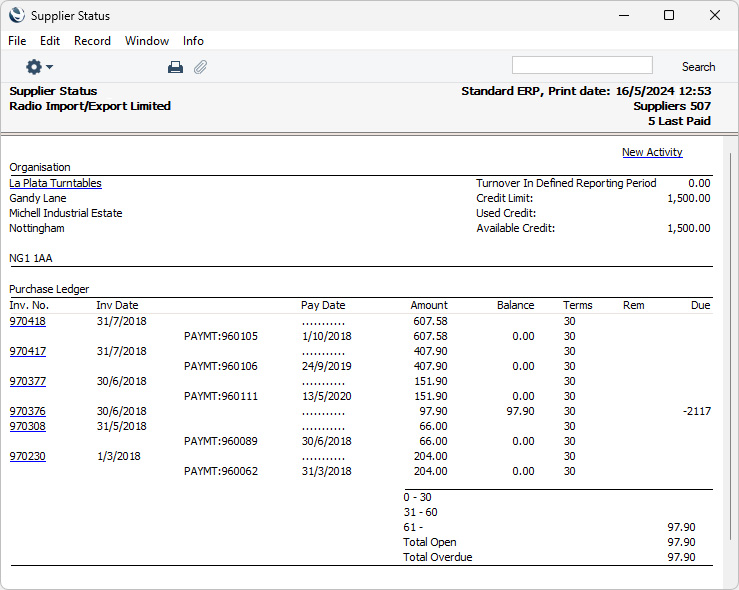
If you are using Windows or macOS, an alternative method that you can use to produce a Supplier Status report is to activate 'Paste Special' from the Supplier Number field in a record such as a Purchase Order or Purchase Invoice, highlight a Supplier in the list and choose 'Supplier Status' from the Operations menu.
---
The Contact register in Standard ERP:
- Introduction
- Entering a Contact
- Editing a Contact
- Deleting a Contact
- Linking Contact Persons and Companies - The Contact Relations Register
- Operations menu, including:
- Customer Status
- Supplier Status
- Change Password
- Search
- Link Existing Contact
- Remove Linked Contact
- Edit Linked Contact Data
- Update Contact Persons
- Customer Status
- Create menu
- Home page for Customers, Suppliers and Contact Persons manual
- Home page for Standard ERP manual
Operations Menu - Contacts - Change Password
This page describes the 'Change Password' function on the Operations menu in the Contact browse window. If you are using iOS or Android, the 'Change Password' function is on the Tools menu (with 'wrench' icon).---
If you are using the Standard ERP Webshop facility and a Contact is a Customer who will be placing Orders over the web, you should use this function to give them a password. You should also tick the Allow Login box on the 'Terms' card of the Customer's Contact record. The Contact will be able to use their Contact Number or email address as Login IDs.
You will usually use this function with Customers whose records you have entered to the Contact register yourself, in order to allow those Customers access to your Webshop. Customers will also be able to register themselves in the Webshop, in which case they will be asked to choose their own password and the Allow Login box will be ticked automatically.
To set a password for a Customer, highlight their name in the 'Contacts: Browse' window and select 'Change Password' from the Operations menu (Windows/macOS) or Tools menu (iOS/Android). The following window will be opened:
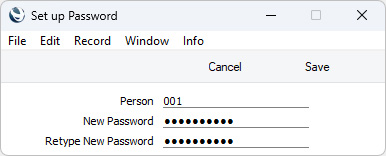
If you want create a random password and send it to the Customer in a Mail, open the Contact record and select 'Random Password Mail' from the Create menu (Windows/macOS) or + menu (iOS/Android).
If you want to set rules for passwords (e.g. to impose a minimum number of characters, or to require at least one alpha or numeric character), use the Password Security setting in the System module.
You can use Access Groups to prevent certain users from using the 'Change Password' function, by denying them access to the 'Change Passwords' Action.
---
The Contact register in Standard ERP:
- Introduction
- Entering a Contact
- Editing a Contact
- Deleting a Contact
- Linking Contact Persons and Companies - The Contact Relations Register
- Operations menu, including:
- Customer Status
- Supplier Status
- Change Password
- Search
- Link Existing Contact
- Remove Linked Contact
- Edit Linked Contact Data
- Update Contact Persons
- Customer Status
- Create menu
- Home page for Customers, Suppliers and Contact Persons manual
- Home page for Standard ERP manual
Operations Menu - Contacts - Search
This page describes the 'Search' function on the Operations menu in the Contact browse window. If you are using iOS or Android, the 'Search' function is on the Tools menu (with 'wrench' icon).---
You can use the 'Search' function to search for Contacts containing a certain word or phrase. You can open Contact records from the search results, so this function is an alternative to searching for Contacts in the 'Contacts: Browse' window. To use the 'Search' function, open the 'Contacts: Browse' window and select 'Search' from the Operations menu (Windows/macOS) or Tools menu (iOS/Android). The following window opens:
- Search for
- Enter here the word or phrase that you are looking for.
- Search in
- Choose the field where you want to search for the word or phrase.
---
The Contact register in Standard ERP:
- Introduction
- Entering a Contact
- Editing a Contact
- Deleting a Contact
- Linking Contact Persons and Companies - The Contact Relations Register
- Operations menu, including:
- Customer Status
- Supplier Status
- Change Password
- Search
- Link Existing Contact
- Remove Linked Contact
- Edit Linked Contact Data
- Update Contact Persons
- Customer Status
- Create menu
- Home page for Customers, Suppliers and Contact Persons manual
- Home page for Standard ERP manual
Operations Menu - Contact - Link Existing Contact
Please refer to the Linking Contact Persons and Companies - The Contact Relations Register page for details about the 'Link Existing Contact' function.---
The Contact register in Standard ERP:
- Introduction
- Entering a Contact
- Editing a Contact
- Deleting a Contact
- Linking Contact Persons and Companies - The Contact Relations Register
- Operations menu, including:
- Customer Status
- Supplier Status
- Change Password
- Search
- Link Existing Contact
- Remove Linked Contact
- Edit Linked Contact Data
- Update Contact Persons
- Customer Status
- Create menu
- Home page for Customers, Suppliers and Contact Persons manual
- Home page for Standard ERP manual
Operations Menu - Contact - Remove Linked Contact
Please refer to the Linking Contact Persons and Companies - The Contact Relations Register page for details about the 'Remove Linked Contact' function.---
The Contact register in Standard ERP:
- Introduction
- Entering a Contact
- Editing a Contact
- Deleting a Contact
- Linking Contact Persons and Companies - The Contact Relations Register
- Operations menu, including:
- Customer Status
- Supplier Status
- Change Password
- Search
- Link Existing Contact
- Remove Linked Contact
- Edit Linked Contact Data
- Update Contact Persons
- Customer Status
- Create menu
- Home page for Customers, Suppliers and Contact Persons manual
- Home page for Standard ERP manual
Operations Menu - Contact - Edit Linked Contact Data
Please refer to the Linking Contact Persons and Companies - The Contact Relations Register page for details about the 'Edit Linked Contact Data' function.---
The Contact register in Standard ERP:
- Introduction
- Entering a Contact
- Editing a Contact
- Deleting a Contact
- Linking Contact Persons and Companies - The Contact Relations Register
- Operations menu, including:
- Customer Status
- Supplier Status
- Change Password
- Search
- Link Existing Contact
- Remove Linked Contact
- Edit Linked Contact Data
- Update Contact Persons
- Customer Status
- Create menu
- Home page for Customers, Suppliers and Contact Persons manual
- Home page for Standard ERP manual
Operations Menu - Contact - Update Contact Persons
This page describes the 'Update Contact Persons' function on the Operations menu in the Contact record window. If you are using iOS or Android, the 'Update Contact Persons' function is on the Tools menu (with 'wrench' icon).---
If a Contact is a Customer or Supplier, you can use the 'Update Contact Persons' function when you need to update all its Contact Persons with the latest Invoice Address details. After changing the Invoice Address in the Contact record for a Customer or Supplier, save the record and then select this function from the Operations menu(Windows/macOS) or Tools menu (iOS/Android). The new Invoice Address will be copied to all connected Contact Persons. Other contact details (e.g. telephone number, mobile, Delivery Address etc) will not be copied as Contact Person records are likely to contain personal numbers (e.g. extension numbers).
Please refer to the Linking Contact Persons and Companies - The Contact Relations Register page for more details about working with Customers and Suppliers and their connected Contact Persons.
---
The Contact register in Standard ERP:
- Introduction
- Entering a Contact
- Editing a Contact
- Deleting a Contact
- Linking Contact Persons and Companies - The Contact Relations Register
- Operations menu, including:
- Customer Status
- Supplier Status
- Change Password
- Search
- Link Existing Contact
- Remove Linked Contact
- Edit Linked Contact Data
- Update Contact Persons
- Customer Status
- Create menu
- Home page for Customers, Suppliers and Contact Persons manual
- Home page for Standard ERP manual
Create Menu - Contacts
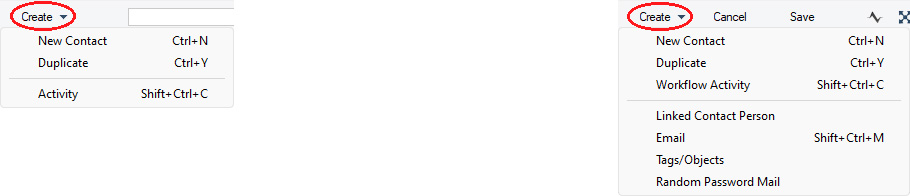
'New' and 'Duplicate' are standard functions that are provided on every Create and + menu. Use these functions to create new records, in this case in the Contact register. Please follow the links below for details about the other functions:
- Introduction
- Entering a Contact
- Editing a Contact
- Deleting a Contact
- Linking Contact Persons and Companies - The Contact Relations Register
- Operations menu
- Create menu
- Home page for Customers, Suppliers and Contact Persons manual
- Home page for Standard ERP manual
Create Menu - Contact - Workflow Activity
This page describes the 'Activity' function on the Create menus in the Contact browse window and the 'Workflow Activity' function on the Create menu in the Contact record window. If you are using iOS or Android, these functions are on the + menu.---
Creating Activities from Contacts can be useful when you need to schedule a follow-up task related to a Contact, such as calling a new sales lead.
You can create an Activity from a Contact using the following methods:
- Highlight the Contact in the 'Contacts: Browse' window and select 'Activity' from the Create menu (Windows/macOS) or + menu (iOS/Android). If you are using iOS or Android, you can highlight a Contact by searching for it.
- Open the Contact in a record window and select 'Workflow Activity' from the Create or + menu. Save any changes you have made to the Contact before selecting the function.
- Open the Contact in a record window and then open the 'Workflow Manager' window. Click or tap the [+] button in this window to create a new Activity.
- From a Contact record, print the Customer Status or Supplier Status report to screen and click or tap the [New Activity] text link at the top of the report. The Task Type of the new Activity will be To Do, and the Symbol will be Other. The Start Date and Start Time in the new Activity will be the current date and time.
If the [New Activity] text link is missing from the Customer Status report, the probable causes are:
- You produced the Customer Status report from the 'Reports' list in the Sales Ledger or CRM modules. For the [New Activity] text link to be included in the report, produce it by opening the Contact record for a Customer and choosing 'Customer Status' from the Operations menu; or
- You do not have your own record in the Info in Customer Status Report setting in the CRM module.
The [New Activity] text link will always be visible in the Supplier Status report.
- You produced the Customer Status report from the 'Reports' list in the Sales Ledger or CRM modules. For the [New Activity] text link to be included in the report, produce it by opening the Contact record for a Customer and choosing 'Customer Status' from the Operations menu; or
- If you call a Contact from the 'Communication Centre' window, a new Activity window will be opened when the call is answered, allowing you to record the details of the conversation immediately. When the call ends, click the [End Activity] button in the Activity: this will bring an End Time and Cost (Time) in to the Activity and will also save the Activity.
Similarly, if one of your Contacts calls you using SIP and your Standard ERP database is open, a new Activity window will be opened when you answer the call, again allowing you to record the details of the conversation. The Task Type of these Activities will be To Do, the Calendar Type will be Don't Show and the Symbol will be Call.
The new Activity will contain the following information:
- If you created the Activity from a Customer or Supplier, the Customer or Supplier Number and Name, Primary Contact and Phone Number will be brought in automatically to the fields on the 'Contact' card of the Activity. If you created the Activity from a Contact Person, their Name and Phone Number and the Number and Name of the Customer or Supplier they work for will be brought in to the 'Contact' card. If the Contact Person works for more than one Customer or Supplier, the one with the lowest No. will be used.
- No default Activity Type will be offered.
- The Task Type will be To Do.
- The Calendar Type will be Don't Show.
- The Symbol will be Other.
- The Start Date and Time of the Activity will be the current date and time.
- The Person will be the current user. As the Task Type will be To Do, the Activity will be placed in the current user's Task Manager.
The Contact and the Activity will be connected to each other through the Link Manager and Workflow Manager. When reviewing the Activity, you can return to the Contact quickly and easily using the Link Manager in the Activity, while you can open the Activity from the Contact using the Workflow Manager.
You must save a Contact record at least once before you can create an Activity from it. This is to ensure that the links mentioned in the previous paragraph can be established.
The 'Activity: Inspect' window is fully described here.
---
The Contact register in Standard ERP:
- Introduction
- Entering a Contact
- Editing a Contact
- Deleting a Contact
- Linking Contact Persons and Companies - The Contact Relations Register
- Operations menu
- Create menu, including:
- Workflow Activity
- Linked Contact Person
- Email
- Tags/Objects
- Random Password Mail
- Workflow Activity
- Home page for Customers, Suppliers and Contact Persons manual
- Home page for Standard ERP manual
Create Menu - Contact - Linked Contact Person
Please refer to the Linking Contact Persons and Companies - The Contact Relations Register page for details about the 'Linked Contact Person' function.---
The Contact register in Standard ERP:
- Introduction
- Entering a Contact
- Editing a Contact
- Deleting a Contact
- Linking Contact Persons and Companies - The Contact Relations Register
- Operations menu
- Create menu, including:
- Workflow Activity
- Linked Contact Person
- Email
- Tags/Objects
- Random Password Mail
- Workflow Activity
- Home page for Customers, Suppliers and Contact Persons manual
- Home page for Standard ERP manual
Create Menu - Contact - Email
This page describes the 'Email' function on the Create menu in the Contact record window. If you are using iOS or Android, the 'Email' function is on the + menu.---
The 'Email' function allows you to send an email to a Contact. To do so, first open the Contact in a record window and then select 'Email' from the Create menu(Windows/macOS) or + menu (iOS/Android). The window shown below will appear, where you can create a new Mail.
If the function does not create a Mail, the probable causes are:
- The current user does not have a Mailbox.
- The Contact does not have an email address.
- The Contact has not been saved.
---
The Contact register in Standard ERP:
- Introduction
- Entering a Contact
- Editing a Contact
- Deleting a Contact
- Linking Contact Persons and Companies - The Contact Relations Register
- Operations menu
- Create menu, including:
- Home page for Customers, Suppliers and Contact Persons manual
- Home page for Standard ERP manual
Create Menu - Contact - Tags/Objects
This page describes the 'Tags/Objects' function on the Create menu in the Contact record window. If you are using iOS or Android, the 'Tags/Objects' function is on the + menu.---
If you need to create Tags/Objects that are specific to each Contact, there are two methods that you can use:
- You can have a Tag/Object created automatically whenever you save a Contact for the first time. To use this method, select the Automatically Create Sales Tags/Objects on Contacts and/or Automatically Create Purchase Tags/Objects on Contacts options in the Contact Settings setting.
- After saving a Contact, you can create a Tag/Object by selecting this 'Tags/Objects' function from the Create menu (Windows/macOS) or + menu (iOS/Android).
- If the Contact is a Customer, the new Tag/Object will be placed in the Sales Tags/Objects field.
- If the Contact is a Supplier, the new Tag/Object will be placed in the Purch. Tags/Objects field.
- If the Contact is both a Customer and a Supplier, the new Tag/Object will be placed in the Sales Tags/Objects and in the Purch. Tags/Objects fields.
The Contact Number will be used as the Code of the new Tag/Object. For example, Tag/Object 001 will be created from Contact 001.
If you need the new Tag/Objects to be assigned to Tag/Object Types, specify those Tag/Object Types in the Sales Tag/Object Type and Purchase Tag/Object Type fields in the Contact Settings setting. If you need the Sales Tag/Object and Purchase Tag/Object to be assigned to different Tag/Object Types, you should specify Start Strings in those Tag/Object Types so that Tags/Objects with different Codes can be created. This will allow you to avoid the issue that Tag/Object 001 cannot be assigned to two Tag/Object Types, an issue that would otherwise arise if a Contact is both a Customer and a Supplier. If you have specified Lengths (maximum numbers of characters) in each Tag/Object Type, take care that these are sufficient for Tag/Object Codes to be constructed from the Start Str. and Contact Numbers.
The two methods will only create Tags/Objects from Contacts that are Customers or Suppliers, not from other Contacts such as Contact Persons. So, if you are using the automatic method, be sure to mark a new Contact as a Customer or Supplier before saving for the first time.
---
The Contact register in Standard ERP:
- Introduction
- Entering a Contact
- Editing a Contact
- Deleting a Contact
- Linking Contact Persons and Companies - The Contact Relations Register
- Operations menu
- Create menu, including:
- Workflow Activity
- Linked Contact Person
- Email
- Tags/Objects
- Random Password Mail
- Workflow Activity
- Home page for Customers, Suppliers and Contact Persons manual
- Home page for Standard ERP manual
Create Menu - Contact - Random Password Mail
This page describes the 'Random Password Mail' function on the Create menu in the Contact record window. If you are using iOS or Android, the 'Random Password Mail' function is on the + menu.---
If you are using the Standard ERP Webshop facility and a Contact is a Customer who will be placing Orders over the web, you can use this function to generate a password for them. You should also tick the Allow Login box on the 'Terms' card of the Customer's Contact record. The Contact will be able to use their Contact Number or email address as Login IDs.
You will usually use this function with Customers whose records you have entered to the Contact register yourself, in order to allow those Customers access to your Webshop. Customers will also be able to register themselves in the Webshop, in which case they will be asked to choose their own password and the Allow Login box will be ticked automatically.
To set a password for a Contact, open their Contact record in a record window and select 'Random Password Mail' from the Create menu (Windows/macOS) or + menu (iOS/Android). The window shown below appears, where you can create a new Mail.
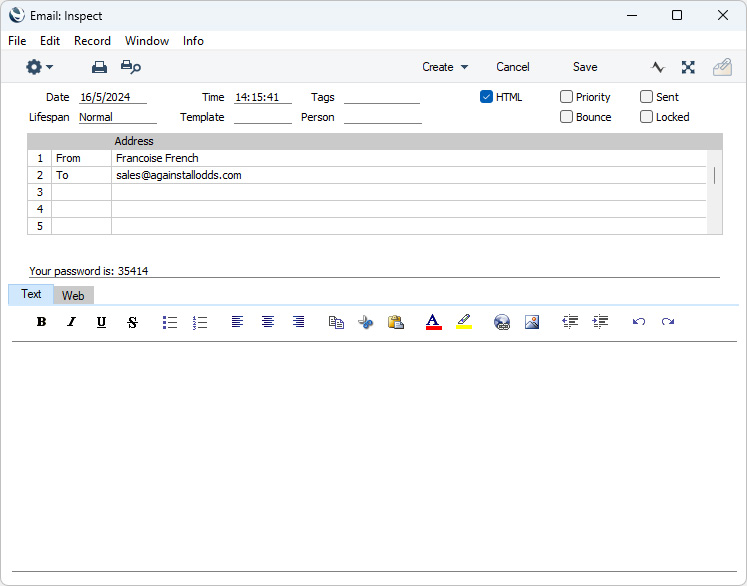
If the function does not create a Mail, the probable causes are:
- The current user does not have a Mailbox.
- The Contact does not have an email address.
- The Contact has not been saved.
---
The Contact register in Standard ERP:
- Introduction
- Entering a Contact
- Editing a Contact
- Deleting a Contact
- Linking Contact Persons and Companies - The Contact Relations Register
- Operations menu
- Create menu, including:
- Workflow Activity
- Linked Contact Person
- Email
- Tags/Objects
- Random Password Mail
- Workflow Activity
- Home page for Customers, Suppliers and Contact Persons manual
- Home page for Standard ERP manual