Introduction to Settings in the CRM Module
Settings concerned with the contact and time management tools in Standard ERP are located in the CRM module. To edit a setting when you are using Windows or Mac OS X, use the [Switch Module] button in the Navigation Centre to enter the CRM module and then click the [Settings] button, also in the Navigation Centre. To edit a setting when you are using iOS or Android, ensure you are in the CRM module using the [Switch Module] button in the Navigation Centre. Select ‘Settings’ from the Tools menu (with ‘wrench’ icon). In both cases, the 'Settings' list will open, listing the settings to be found in the CRM module: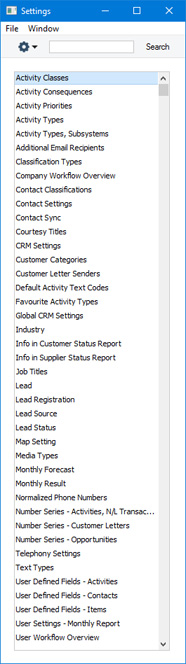
---
Please follow the links below for details about each setting:
- Introduction
- Activity Classes
- Activity Consequences
- Activity Priorities
- Activity Types
- Activity Types, Subsystems
- Additional Email Recipients
- Classification Types
- Company Workflow Overview
- Contact Classifications
- Contact Settings
- Courtesy Titles
- CRM Settings
- Customer Categories
- Default Activity Text Codes
- Favourite Activity Types
- Global CRM Settings
- Industries
- Info in Customer Status Report
- Info in Supplier Status Report
- Job Titles
- Leads
- Lead Sources
- Lead Status
- Map Setting
- Normalized Phone Numbers
- Number Series - Activities, N/L Transactions
- Number Series - Customer Letters
- Number Series - Opportunites
- Opportunity Classes
- Telephony Settings
- Text Types
- User Defined Fields - Activities
- User Defined Fields - Contacts
- User Defined Fields - Items
- User Workflow Overview
- Home page for CRM module manual
- Home page for Standard ERP manual
Activity Classes
This page describes the Activity Classes setting in the CRM module.---
The Activity Class is a broad method of classifying Activities. Each time you enter an Activity, you should give it an Activity Type, which should represent a specific job or task (e.g. sales call, sales appointment or internal meeting). In turn, you can group Activity Types of a broadly similar nature together by assigning each one to the same Activity Class. For example, every Activity Type connected with sales should belong to the same Activity Class, and every Activity Type connected with administration should belong to a different Activity Class.
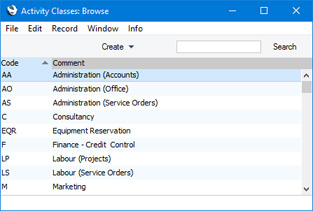
To work with the Activity Classes setting, first ensure you are in the CRM module using the [Switch Module] button in the Navigation Centre. Then, if you are using Windows or Mac OS X, click the [Settings] button, also in the Navigation Centre or use the Ctrl-S/⌘-S keyboard shortcuts and then double-click 'Activity Classes' in the 'Settings' list. If you are using iOS or Android, select 'Settings' from the Tools menu (with 'wrench' icon) and tap 'Activity Classes' in the 'Settings' list. The 'Activity Classes: Browse' window opens:
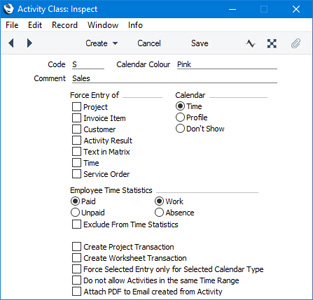
- Code
- This is the unique code that identifies each Activity Class. It can consist of up to five alphanumeric characters.
- Calendar Colour
- Paste Special
Choices of possible entries
- Every Activity with an Activity Type belonging to the same Activity Class will appear in the same colour in the Calendar. Choose that colour using this field.
- Comment
- Assign a descriptive name to the Activity Class, to be shown in the 'Activity Classes: Browse' window and the 'Paste Special' list.
- Force Entry of
- These options allow you to specify that certain information must be entered in every Activity that has an Activity Type belonging to the Activity Class. For example, select the Project option if you need a Project to be specified in every Activity.
- If you also select the Force Selected Entry only for Selected Calendar Type option below, these options will only apply to Activities in which the Calendar Type is Time. Continuing the example, you will only need to specify a Project in a Time Activity. It won't be necessary to specify a Project in an Activity in which the Calendar Type is Profile or Don't Show.
- Selecting the Project option will mean that you will need to specify both a Project and an Invoice Item in each Activity.
- Selecting the Activity Result option will mean that you will only need to specify Results in Activities that have been marked as Done.
- Selecting the Time option will mean that you will need to specify a Start Time, End Time and Cost (Time) in each Activity.
- If you also select the Force Selected Entry only for Selected Calendar Type option below, these options will only apply to Activities in which the Calendar Type is Time. Continuing the example, you will only need to specify a Project in a Time Activity. It won't be necessary to specify a Project in an Activity in which the Calendar Type is Profile or Don't Show.
- Calendar Type
- Use these options to control how Activities with Activity Types belonging to the Activity Class will be shown in the Calendar.
- When you assign an Activity Type belonging to the Activity Class to an Activity, the Calendar Type in the Activity will be set to the option that you choose here. The option that you choose here will therefore be used as the default Calendar Type in these Activities.
- Please refer to the description of the 'Time' card of the Activity record for details about each option.
- When you assign an Activity Type belonging to the Activity Class to an Activity, the Calendar Type in the Activity will be set to the option that you choose here. The option that you choose here will therefore be used as the default Calendar Type in these Activities.
- Employee Time Statistics
- These options control how Activities with Activity Types belonging to the Activity Class will be displayed in the Employee Time Statistics report.
- Paid, Unpaid, Work, Absence
- All Calendar Activities (except those with Activity Types belonging to an Activity Class in which you have selected the Exclude from Time Statistics option below) will be included in the main section of the Employee Time Statistics report and in the main totals for each employee.
- In addition, in the Detailed, Per Type and Per Class versions of the report, separate totals for time spent carrying out Activities with Activity Types belonging to Activity Classes with the Paid/Absence, Unpaid/Absence and Unpaid/Work combinations will be shown for each employee.
- In the Overview and the Per Display Group report, Paid (i.e. Paid/Work and Paid/Absence) and Unpaid (i.e. Unpaid/Work and Unpaid/Absence) Activities will be shown without distinction and without separate totals.
- When you produce the Employee Time Statistics report, you will be able to choose to exclude Paid or Unpaid Activities from all versions of the report altogether.
- In addition, in the Detailed, Per Type and Per Class versions of the report, separate totals for time spent carrying out Activities with Activity Types belonging to Activity Classes with the Paid/Absence, Unpaid/Absence and Unpaid/Work combinations will be shown for each employee.
- Exclude from Time Statistics
- Select this option if you do not want Activities with Activity Types belonging to the Activity Class to be included in the Employee Time Statistics report at all.
- Paid, Unpaid, Work, Absence
- Create Project Transaction
- Select this option if you would like Project Transactions to be created from Activities with Activity Types belonging to the Activity Class. The Project Transactions will be created when you save the Activities after marking them as Done.
- This will be useful if you will be using Activities as an alternative to Time Sheets for time recording purposes (to record work carried out against Projects). The Project Transaction register instructs the invoicing routine how to charge the time to each Customer.
- If you have selected this option in a particular Activity Class, it is recommended that you also choose to Force Entry of Time and Project using the options above, and that you choose Time as the Calendar Type (above). Project Transactions will be created from Time Activities (with any Task Type except Project), but not from Profile or Don't Show Activities.
- This will be useful if you will be using Activities as an alternative to Time Sheets for time recording purposes (to record work carried out against Projects). The Project Transaction register instructs the invoicing routine how to charge the time to each Customer.
- Create Work Sheet Transaction
- Select this option if you would like Work Sheet Transactions to be created from Activities with Activity Types belonging to the Activity Class. The Work Sheet Transactions will be created when you save the Activities after marking them as Done.
- This will be useful if you will be using Activities as an alternative to Work Sheets for time recording purposes (to record work carried out against Service and Work Orders). The Work Sheet Transaction register instructs the invoicing routine how to charge the time to each Customer.
- If you have selected this option in a particular Activity Class, it is recommended that you also choose to Force Entry of Time and Service Order using the options above, and that you choose Time as the Calendar Type (above). Work Sheet Transactions will be created from Time Activities (with any Task Type except Project), but not from Profile or Don't Show Activities.
- This will be useful if you will be using Activities as an alternative to Work Sheets for time recording purposes (to record work carried out against Service and Work Orders). The Work Sheet Transaction register instructs the invoicing routine how to charge the time to each Customer.
- Force Selected Entry only for Selected Calendar Type
- This option works with Force Entry and Calendar Type above. It disables the Force Entry options if the Calendar Type in an Activity is Profile or Don't Show.
- For example, you have chosen the Force Entry of Project option in an Activity Class. When you use an Activity Type belonging to this Activity Class in an Activity, you will not be able to save the Activity until you have specified a Project. If you are using this option, you will not have to specify a Project if you set the Calendar Type in the Activity to Profile or Don't Show. This can be useful if you know in advance that you will be working on a Project, but you don't yet know which one. You can enter a Profile Activity to book that time, without specifying a Project. After doing the work, you can then enter a Time Activity with a Project.
- For example, you have chosen the Force Entry of Project option in an Activity Class. When you use an Activity Type belonging to this Activity Class in an Activity, you will not be able to save the Activity until you have specified a Project. If you are using this option, you will not have to specify a Project if you set the Calendar Type in the Activity to Profile or Don't Show. This can be useful if you know in advance that you will be working on a Project, but you don't yet know which one. You can enter a Profile Activity to book that time, without specifying a Project. After doing the work, you can then enter a Time Activity with a Project.
- Do not allow Activities in the same Time Range
- Use this option if you want to prevent double-booking in the Calendar. You must also select the Force Entry of Time option above.
- The double-booking check will be made whenever you enter a Time Activity with an Activity Type belonging to the Activity Class. You will not be able to save the new Activity if it clashes with an existing Time Activity with any Activity Type (i.e. not necessarily one belonging to the same Class) and with the same Person.
- For example, you have recorded a Time Activity that starts at 09:00 and ends at 12:00. You will not be able to save a second Activity if its Start and/or End Time are between these times. The End Time of the earlier Activity and the Start Time of the later one can be the same, so in this example the second Activity can begin at 12:00 (but not 11:59:59).
- The double-booking check will be made whenever you enter a Time Activity with an Activity Type belonging to the Activity Class. You will not be able to save the new Activity if it clashes with an existing Time Activity with any Activity Type (i.e. not necessarily one belonging to the same Class) and with the same Person.
- Attach PDF to Email created from Activity
- You can create a Mail from an Activity by opening the Activity in a record window and selecting 'Email' from the Create menu (Windows/Mac OS X) or + menu (iOS/Android). Select this option if you would like a PDF version of the Activity to be attached to each Mail created in this way.
- Creating a PDF version of an Activity requires you to have assigned a Form Template to the Activity Form using the 'Define Form' function. When you design the Form Template, you may need to use Styles that will embed fonts in PDF files (this will depend on the fonts you use). You may also need to choose a code page and page setup, which you can do in the Form Template Properties. Please refer here for details about designing Form Templates and here for a list of the fields you can include in the Form Template used by the Activity Form.
Settings in the CRM module:
- Introduction
- Activity Classes
- Activity Consequences
- Activity Priorities
- Activity Types
- Activity Types, Subsystems
- Additional Email Recipients
- Classification Types
- Company Workflow Overview
- Contact Classifications
- Contact Settings
- Courtesy Titles
- CRM Settings
- Customer Categories
- Default Activity Text Codes
- Favourite Activity Types
- Global CRM Settings
- Industries
- Info in Customer Status Report
- Info in Supplier Status Report
- Job Titles
- Leads
- Lead Sources
- Lead Status
- Map Setting
- Normalized Phone Numbers
- Number Series - Activities, N/L Transactions
- Number Series - Customer Letters
- Number Series - Opportunites
- Opportunity Classes
- Telephony Settings
- Text Types
- User Defined Fields - Activities
- User Defined Fields - Contacts
- User Defined Fields - Items
- User Workflow Overview
- Home page for CRM module manual
- Home page for Standard ERP manual
Activity Consequences
This page describes the Activity Consequences setting in the CRM module.---
Activity Consequences allow you to specify that new follow-up Activities will be created automatically from existing Activities when you mark them as Done. The creation of the new Activities and the Activity Types and Persons in the new Activities will depend on the combinations of Activity Types and Results in the existing Activities.
This can be useful when, for example, you make a sales call but find that the person you are calling is on holiday. To cater for this situation, you can set up an Activity Consequence record that will automatically create a new Activity to remind you to call them again a few days later. The feature can also be useful for credit controllers using the Activity register to organise debt-chasing calls.
You can also use Activity Consequences to have Service Orders created automatically from certain Activities, or to change the Status of Resources after Activities have been carried out.
To work with the Activity Consequences setting, first ensure you are in the CRM module using the [Switch Module] button in the Navigation Centre. Then, if you are using Windows or macOS, click the [Settings] button, also in the Navigation Centre or use the Ctrl-S/⌘-S keyboard shortcuts and then double-click 'Activity Consequences' in the 'Settings' list. If you are using iOS or Android, select 'Settings' from the Tools menu (with 'wrench' icon) and tap 'Activity Consequences' in the 'Settings' list. The 'Activity Consequences: Browse' window will open, listing the available records. To enter a new record, select 'New' from the Create menu (Windows/macOS) or + menu (iOS/Android). The 'Activity Consequence: New' window appears, as shown below. Enter the details as described and click the [Save]button (Windows/macOS) or tap √ (iOS/Android) to save the new record.
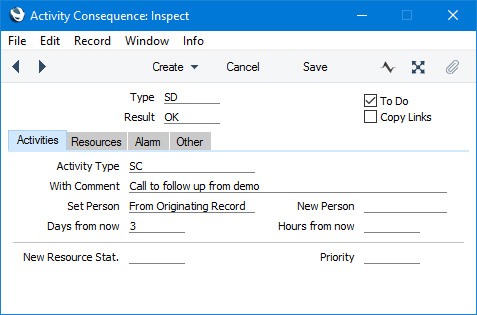
The Activity Consequence shown in the example illustration above will mean that whenever you mark an Activity of Type "SD" (for "Sales Demonstration") and Result of "OK" as Done and save, a new Activity will automatically be created for three days' time with a Type of "SC" (for "Sales Telephone Call"). The Private check box in the new Activity will have the same setting as in the old Activity. The old and new Activities will be linked to each other through the Workflow Manager facility.
Please follow the links below for details about each card in the Activity Consequences window:
- Header
- 'Activities' card
- 'Resources' card
- 'Alarm' card
- 'Other' card
Go back to:
- Home page for Settings in the CRM module
- Home page for CRM module manual
- Home page for Standard ERP manual
Activity Consequences - Header
This page describes the fields in the header of the Activity Consequence record. Please follow the links below for descriptions of the other cards:- Introduction
- Header
- 'Activities' card
- 'Resources' card
- 'Alarm' card
- 'Other' card
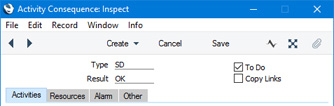
- Type, Result
- Paste Special
Activity Types setting, CRM module
- An Activity Consequence record will cause follow-up Activities to be created whenever you mark existing Activities with a particular combination of Activity Types and Results as Done and save.
- Use these two fields to specify the Activity/Result combination that will trigger the creation of follow-up Activities.
- You can only enter a single Activity Consequence record for each Activity Type/Result combination.
- Use these two fields to specify the Activity/Result combination that will trigger the creation of follow-up Activities.
- To Do
- Select this option if you would like the Task Type in the follow-up Activities to be To Do. Otherwise, the Task Type in the follow-up Activities will be Calendar.
- Copy Links
- Check this box if you would like the old Activity's Attachments to be copied to the new one. Attachments in the old Activity's Link Manager and Document Manager will be copied to the new follow-up Activity.
Settings in the CRM module:
- Introduction
- Activity Classes
- Activity Consequences, including:
- Header
- 'Activities' card
- 'Resources' card
- 'Alarm' card
- 'Other' card
- Header
- Activity Priorities
- Activity Types
- Activity Types, Subsystems
- Additional Email Recipients
- Classification Types
- Company Workflow Overview
- Contact Classifications
- Contact Settings
- Courtesy Titles
- CRM Settings
- Customer Categories
- Default Activity Text Codes
- Favourite Activity Types
- Global CRM Settings
- Industries
- Info in Customer Status Report
- Info in Supplier Status Report
- Job Titles
- Leads
- Lead Sources
- Lead Status
- Map Setting
- Normalized Phone Numbers
- Number Series - Activities, N/L Transactions
- Number Series - Customer Letters
- Number Series - Opportunites
- Opportunity Classes
- Telephony Settings
- Text Types
- User Defined Fields - Activities
- User Defined Fields - Contacts
- User Defined Fields - Items
- User Workflow Overview
- Home page for CRM module manual
- Home page for Standard ERP manual
Activity Consequences - Activities Card
This page describes the fields on the 'Activities' card of the Activity Consequence record. Please follow the links below for descriptions of the other cards:- Introduction
- Header
- 'Activities' card
- 'Resources' card
- 'Alarm' card
- 'Other'
card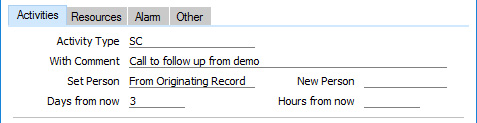
- New Activity
- Paste Special
Activity Types setting, CRM module
- Specify here the Activity Type that is to be used in the follow-up Activities.
- Each Activity Type can in turn belong to an Activity Class. This Activity Class will determine the Calendar Type that will be selected by default in the follow-up Activities.
- If you do not specify an Activity Type in this field, the Activity Consequence record will not create follow-on Activities. In some circumstances, it can be useful to enter an Activity Consequence record without an Activity Type. For example, you may use Activities to schedule the cleaning of rooms. Carrying out such an Activity will mean that the Status of the Resource representing a room should be changed from dirty to clean. This can be done automatically when the Activity is marked as Done, if you specify a New Resource Stat. on the 'Resources' card of the Activity Consequence record. After cleaning a room, a follow-up Activity may not be required.
- Similarly, you can use Activity Consequences to cause Service Orders to be created from Activities. Service Orders will be created even if you do not specify an Activity Type in this field (i.e. if you do not need follow-up Activities to be created). Please refer to the description of the 'Other' card here for more details.
- Each Activity Type can in turn belong to an Activity Class. This Activity Class will determine the Calendar Type that will be selected by default in the follow-up Activities.
- With Comment
- Any Comment that you enter here will be copied to the Text field in the header of the follow-up Activities. If you leave this field empty, the Text in the originating Activities will be copied to the follow-up Activities.
- Set Person
- Paste Special
Choices of possible entries
- New Person
- Paste Special
Person register, System module and Global User register, Technics module
- Use the Set Person and New Person fields to specify the Person to whom the follow-up Activities will be assigned.
- From the Set Person field, use 'Paste Special' to choose an option as follows:
- Specified Person
- Select this option if the follow-up Activities are to be assigned to a particular Person. Enter that Person's Signature in the New Person field.
- This might be useful for example when the chasing of a debt reaches the stage where it needs to be handed over to a more senior member of personnel.
- This might be useful for example when the chasing of a debt reaches the stage where it needs to be handed over to a more senior member of personnel.
- From Originating Record
- Select this option if the old and new Activities are to be carried out by the same Person. The Person(s) in the originating Activities will be copied to the follow-up Activities. Leave the New Person field empty.
- From the Set Person field, use 'Paste Special' to choose an option as follows:
- Days from now
- Use this field to determine the Start and End Dates in each follow-up Activity. These dates will be calculated by adding the number of days that you enter here to the Start and End Dates in the original Activity.
- Hours from now
- Use this field to determine the Start and End Times in each follow-up Activity. These times will be calculated by adding the number of hours that you enter here to the Start and End Times in the original Activity. Enter a negative number of hours if you need the follow-up Activities to be carried out at an earlier time. You can only enter a whole number of hours.
Go back to:
- Home page for Settings in the CRM module
- Home page for CRM module manual
- Home page for Standard ERP manual
Activity Consequences - Resources Card
This page describes the fields on the 'Resources' card of the Activity Consequence record. Please follow the links below for descriptions of the other cards:- Introduction
- Header
- 'Activities' card
- 'Resources' card
- 'Alarm' card
- 'Other' card
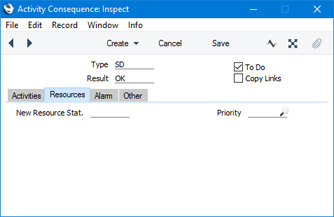
- New Resource State
- Paste Special
Resource Status setting, Resource Planning module
- If the original Activity has a Resource or Room specified on its 'Resources' card, you can have the Status of the Resource or Room updated automatically when the Activity is carried out. Enter the new Resource or Room Status here. This new Status will be copied to the Resource or Room record when the original Activity is marked as Done and saved.
- For example, if an Activity records the cleaning of a Room, the Status of the Resource representing the Room could be changed from dirty to clean when the room cleaner marks the Activity as Done and saves. The Resource Status will be updated even if no follow-up Activity is needed (i.e. if you do not specify an Activity Type on the 'Activities' card).
- Note for clarity: Resources and Rooms are stored in the same register. In the Resources module, this register is named "Resources", while in the Hotel module it is named "Rooms". Similarly, the Resource Status setting is named "Room Status" in the Hotel module.
- For example, if an Activity records the cleaning of a Room, the Status of the Resource representing the Room could be changed from dirty to clean when the room cleaner marks the Activity as Done and saves. The Resource Status will be updated even if no follow-up Activity is needed (i.e. if you do not specify an Activity Type on the 'Activities' card).
- Priority
- Paste Special
Activity Priorities setting, CRM module
- Specify the Priority that is to be assigned to each follow-up Activity. If you leave this field empty, no Priority will be assigned to follow-up Activities (i.e. any Priority in the originating Activities will not be copied).
- You can enter any value in this field, not necessarily one that has been recorded in the Activity Priorities setting. You can use the Activity Priorities setting as a guide to help you use standard Priority codes, but it is not mandatory to use those codes.
Settings in the CRM module:
- Introduction
- Activity Classes
- Activity Consequences, including:
- Header
- 'Activities' card
- 'Resources' card
- 'Alarm' card
- 'Other' card
- Header
- Activity Priorities
- Activity Types
- Activity Types, Subsystems
- Additional Email Recipients
- Classification Types
- Company Workflow Overview
- Contact Classifications
- Contact Settings
- Courtesy Titles
- CRM Settings
- Customer Categories
- Default Activity Text Codes
- Favourite Activity Types
- Global CRM Settings
- Industries
- Info in Customer Status Report
- Info in Supplier Status Report
- Job Titles
- Leads
- Lead Sources
- Lead Status
- Map Setting
- Normalized Phone Numbers
- Number Series - Activities, N/L Transactions
- Number Series - Customer Letters
- Number Series - Opportunites
- Opportunity Classes
- Telephony Settings
- Text Types
- User Defined Fields - Activities
- User Defined Fields - Contacts
- User Defined Fields - Items
- User Workflow Overview
- Home page for CRM module manual
- Home page for Standard ERP manual
Activity Consequences - Alarm Card
This page describes the fields on the 'Alarm' card of the Activity Consequence record. Please follow the links below for descriptions of the other cards:- Introduction
- Header
- 'Activities' card
- 'Resources' card
- 'Alarm' card
- 'Other' card
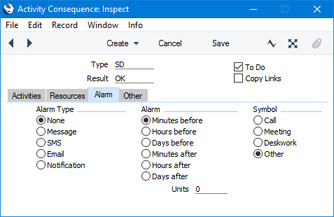
- Alarm Type, Alarm
- Use these sets of options to specify Alarm instructions that will be copied to the 'Alarm' card of the follow-up Activities.
- The options on the 'Alarm' card of an Activity allow reminders about the Activity to be sent to every Person in the Persons field in the Activity. Please refer to the description of the 'Alarm' card here for full details.
- The options on the 'Alarm' card of an Activity allow reminders about the Activity to be sent to every Person in the Persons field in the Activity. Please refer to the description of the 'Alarm' card here for full details.
- Symbol
- Specify the Symbol that is to be used in each follow-up Activity. The Symbol is an image that will be shown next to the Activity in the Task Manager.
Settings in the CRM module:
- Introduction
- Activity Classes
- Activity Consequences, including:
- Header
- 'Activities' card
- 'Resources' card
- 'Alarm' card
- 'Other' card
- Header
- Activity Priorities
- Activity Types
- Activity Types, Subsystems
- Additional Email Recipients
- Classification Types
- Company Workflow Overview
- Contact Classifications
- Contact Settings
- Courtesy Titles
- CRM Settings
- Customer Categories
- Default Activity Text Codes
- Favourite Activity Types
- Global CRM Settings
- Industries
- Info in Customer Status Report
- Info in Supplier Status Report
- Job Titles
- Leads
- Lead Sources
- Lead Status
- Map Setting
- Normalized Phone Numbers
- Number Series - Activities, N/L Transactions
- Number Series - Customer Letters
- Number Series - Opportunites
- Opportunity Classes
- Telephony Settings
- Text Types
- User Defined Fields - Activities
- User Defined Fields - Contacts
- User Defined Fields - Items
- User Workflow Overview
- Home page for CRM module manual
- Home page for Standard ERP manual
Activity Consequences - Other Card
This page describes the fields on the 'Other' card of the Activity Consequence record. Please follow the links below for descriptions of the other cards:- Introduction
- Header
- 'Activities' card
- 'Resources' card
- 'Alarm' card
- 'Other' card
- Generate Service Order
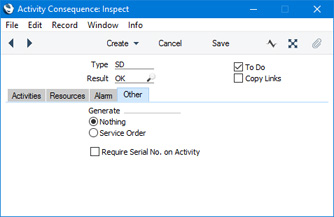
- Use this option if you would like Service Orders to be created from Activities with a particular Activity Type/Result combination. In order for a Service Order to be created from an Activity, you must have entered a Serial Number and an Item on the 'Service' card of that Activity.
- The Customer details will be copied from the Activity to the new Service Order, and the Item details from the 'Service' card of the Activity will be copied to the first Service Order row. The Text from the Activity header and the first three lines of text on the 'Text' card will be copied to the 'Comment' card of the Service Order. The Service Order Number will be copied back to the Activity. The Activity and the Service Order will be connected to each other through the Workflow Manager and Link Manager.
- The Service Order will be created even if no follow-up Activity is needed (i.e. if you do not specify an Activity Type on the 'Activities' card).
- The Customer details will be copied from the Activity to the new Service Order, and the Item details from the 'Service' card of the Activity will be copied to the first Service Order row. The Text from the Activity header and the first three lines of text on the 'Text' card will be copied to the 'Comment' card of the Service Order. The Service Order Number will be copied back to the Activity. The Activity and the Service Order will be connected to each other through the Workflow Manager and Link Manager.
- Require Serial No. on Activity
- Select this option if you need a Serial Number to specified in every Activity that has a particular Activity Type/Result combination. You will not be able to save such an Activity if you have not specified a Serial Number, even if you have not yet marked the Activity as Done.
- You will usually need to select this option if you are also using the Generate Service Order option described above (because a Service Order will not be created from an Activity if you forget to specify a Serial Number), but it will be active if you are not using the Generate Service Order option.
Settings in the CRM module:
- Introduction
- Activity Classes
- Activity Consequences, including:
- Header
- 'Activities' card
- 'Resources' card
- 'Alarm' card
- 'Other' card
- Header
- Activity Priorities
- Activity Types
- Activity Types, Subsystems
- Additional Email Recipients
- Classification Types
- Company Workflow Overview
- Contact Classifications
- Contact Settings
- Courtesy Titles
- CRM Settings
- Customer Categories
- Default Activity Text Codes
- Favourite Activity Types
- Global CRM Settings
- Industries
- Info in Customer Status Report
- Info in Supplier Status Report
- Job Titles
- Leads
- Lead Sources
- Lead Status
- Map Setting
- Normalized Phone Numbers
- Number Series - Activities, N/L Transactions
- Number Series - Customer Letters
- Number Series - Opportunites
- Opportunity Classes
- Telephony Settings
- Text Types
- User Defined Fields - Activities
- User Defined Fields - Contacts
- User Defined Fields - Items
- User Workflow Overview
- Home page for CRM module manual
- Home page for Standard ERP manual
Activity Priorities
This page describes the Activity Priorities setting in the CRM module.---
The Activity Priorities setting allows you to construct a list of Priorities that you can use when entering Activities. This list will become a look-up table that you can access from the Priority field when entering Activities and when working in the Workflow Overview window.
To open the Activity Priorities setting, first ensure you are in the CRM module. Then, if you are using Windows or Mac OS X, click the [Settings] button in the Navigation Centre or use the Ctrl-S/⌘-S keyboard shortcuts and then double-click 'Activity Priorities' in the 'Settings' list. If you are using iOS or Android, select 'Settings' from the Tools menu (with 'wrench' icon) and tap 'Activity Priorities' in the 'Settings' list. The window illustrated below will open.
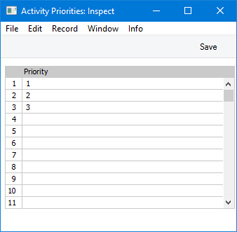
It is recommended that you enter Activity Priorities in numerical or alphabetical order, as shown in the illustration. You can insert a new Activity Priority in the correct place in the list by clicking on a row number and pressing the Return key (Windows/Mac OS X) or long tapping on a row number and selecting 'Insert Row' (iOS/Android). When you enter a new Activity and use 'Paste Special' to choose a Priority, the Activity Priorities will be listed in the same order as they are listed in this setting. If they are in numerical or alphabetical order, you will be able to find the correct one quickly and easily.
---
Settings in the CRM module:
- Introduction
- Activity Classes
- Activity Consequences
- Activity Priorities
- Activity Types
- Activity Types, Subsystems
- Additional Email Recipients
- Classification Types
- Company Workflow Overview
- Contact Classifications
- Contact Settings
- Courtesy Titles
- CRM Settings
- Customer Categories
- Default Activity Text Codes
- Favourite Activity Types
- Global CRM Settings
- Industries
- Info in Customer Status Report
- Info in Supplier Status Report
- Job Titles
- Leads
- Lead Sources
- Lead Status
- Map Setting
- Normalized Phone Numbers
- Number Series - Customer Letters
- Number Series - Opportunites
- Opportunity Classes
- Telephony Settings
- Text Types
- User Defined Fields - Activities
- User Defined Fields - Contacts
- User Defined Fields - Items
- User Workflow Overview
- Home page for CRM module manual
- Home page for Standard ERP manual
Activity Types
This page describes the Activity Types setting in the CRM module.---
Activity Types allow you to classify Activities. Each Activity Type should represent a specific job or task (e.g. sales call, sales appointment or internal meeting). You should assign the same Activity Type to every Activity that records the same task. You can use the Activity Type as a search criterion in many of the reports in the CRM module.
When adding Activity Types, you should define some that can be used for Results, allowing you to classify the outcomes of Activities. This is particularly important if you are using Activity Consequences.
You should try to keep the number of Activity Types as small as possible, while taking great care to make them mutually exclusive. You can group Activity Types of a broadly similar nature (e.g. all those to do with sales, or all those to do with administration) together by assigning each one to the same Activity Class.
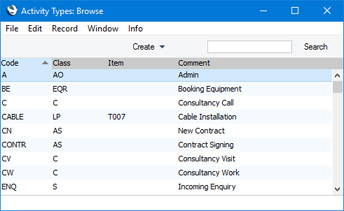
To work with the Activity Types setting, first ensure you are in the CRM module using the [Switch Module] button in the Navigation Centre. Then, if you are using Windows or Mac OS X, click the [Settings] button, also in the Navigation Centre or use the Ctrl-S/⌘-S keyboard shortcuts and then double-click 'Activity Types' in the 'Settings' list. If you are using iOS or Android, select 'Settings' from the Tools menu (with 'wrench' icon) and tap 'Activity Types' in the 'Settings' list. The 'Activity Types: Browse' window opens:
- Code
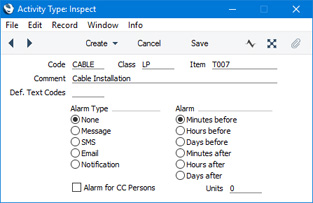
- The unique code that identifies each Activity Type. It can consist of up to five alphanumeric characters.
- It is recommended that the Codes of Activity Types belonging to the same Activity Class begin with the same character. This will mean that similar Activity Types will appear together in the 'Paste Special' list, making selection of the correct one easy.
- After you have saved an Activity Type, you cannot change the Code simply by typing into the field. If you need to change an Activity Type Code, use the Conversions - Master and Conversions - Activity Types settings in the System module. These settings will change the Activity Type Code both in the Activity Code record and in every other record in all registers where the Activity Type has been used.
- It is recommended that the Codes of Activity Types belonging to the same Activity Class begin with the same character. This will mean that similar Activity Types will appear together in the 'Paste Special' list, making selection of the correct one easy.
- Class
- Paste Special
Activity Classes setting, CRM module
- You can group Activity Types of a broadly similar nature together by assigning them to the same Activity Class. For example, every Activity Type connected with sales should belong to the same Activity Class, and every Activity Type connected with administration should belong to a different Activity Class
- Activities with Activity Types belonging to the same Activity Class will appear in the same colour in the Calendar. You can also use Activity Classes to ensure that information such as a Project, Contact, Result and/or Cost (Time) will be entered in every Activity.
- Activities with Activity Types belonging to the same Activity Class will appear in the same colour in the Calendar. You can also use Activity Classes to ensure that information such as a Project, Contact, Result and/or Cost (Time) will be entered in every Activity.
- Item
- Paste Special
Item register
- If you need an Item to be copied to the Invoice Item field in every Activity with the Activity Type, specify that Item here. This will be useful if Project Transactions or Work Sheet Transactions are to be created from those Activities.
- For example, if the Activity Type represents a particular type of work carried out on Projects or Service Orders, enter the Item Number of the Item representing the appropriate type of labour. This will ensure the correct Item will appear correctly in every Activity from where it will be copied to a Project Transaction or Work Sheet Transaction. This in turn will ensure the Customer is invoiced correctly.
- The Item must be a Service Item.
- A Project Transaction or Work Sheet Transaction will be created from an Activity when you mark it as Done and save, providing its Calendar Type is Time and providing it has an Activity Type that belongs to an Activity Class in which the Create Project Transaction or Create Work Sheet Transaction option respectively has been selected.
- For example, if the Activity Type represents a particular type of work carried out on Projects or Service Orders, enter the Item Number of the Item representing the appropriate type of labour. This will ensure the correct Item will appear correctly in every Activity from where it will be copied to a Project Transaction or Work Sheet Transaction. This in turn will ensure the Customer is invoiced correctly.
- Comment
- Assign a descriptive name to the Activity Type. This will be shown in the 'Activity Types: Browse' window and the 'Paste Special' list, so it should be descriptive enough to make the selection of the correct Activity Type easy for all users.
- Def. Text Codes
- Paste Special
Default Activity Text Codes setting, CRM module
- You can use the Default Activity Text Codes setting to define sets of Text Types that will be added to Activities automatically when you specify the Activity Type. Use this field to connect an Activity Type to a Default Activity Text Code record (i.e. to a particular set of Text Types).
- Alarm Type, Alarm
- Use these sets of options to set defaults for the Alarm instructions on the 'Alarm' card of new Activities. These defaults will be copied to the new Activity when you specify the Activity Type.
- The options on the 'Alarm' card of an Activity allow reminders about the Activity to be sent to every Person in the Persons field in the Activity. Please refer to the description of the 'Alarm' card here for full details.
- The options on the 'Alarm' card of an Activity allow reminders about the Activity to be sent to every Person in the Persons field in the Activity. Please refer to the description of the 'Alarm' card here for full details.
- Alarm for CC Persons
- As mentioned for the Alarm Type and Alarm options above, the options on the 'Alarm' card of an Activity allow reminders about the Activity to be sent to every Person in the Persons field in the Activity. Select this option if the reminders are to be sent to every Person in the Cc field in the Activity instead.
Choosing Activity Types using Paste Special
Three versions of the 'Paste Activity Type' window are available. To choose the one that you want to use, open the Local Machine setting in the User Settings module and select an Activity Type Paste Special option: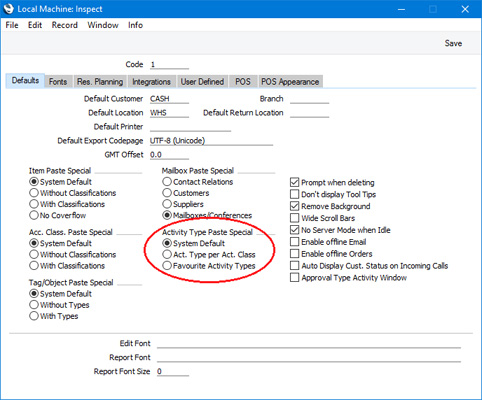
The three options are:
- System Default
- This option is the standard 'Paste Special' list.
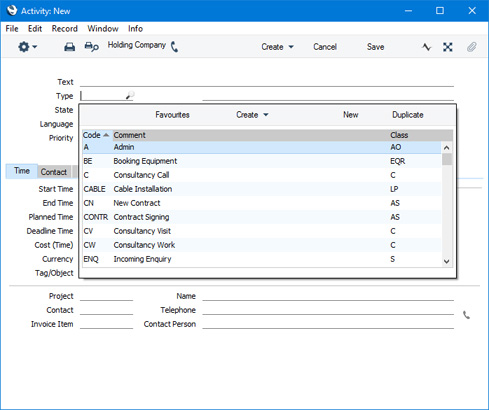
- If you need to see the Favourite Activity Types 'Paste Special' window described below, press the [Favourites] button above the list.
- If you need to see the Favourite Activity Types 'Paste Special' window described below, press the [Favourites] button above the list.
- Act. Type per Act. Class
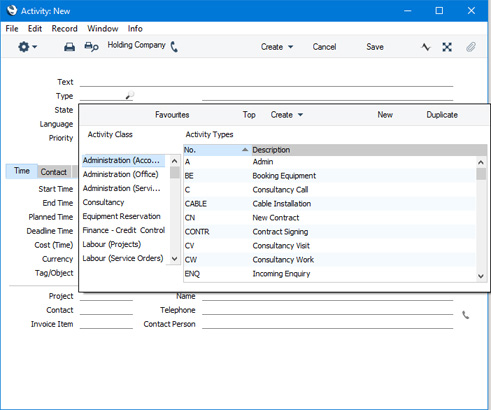
- For this option, the 'Paste Special' list is divided into two columns. The left-hand column lists the Activity Classes, while the right-hand column lists the Activity Types. When you open the window, every Activity Type will be listed in the right-hand column. If you double-click an Activity Class on the left, the Activity Types belonging to that Class will be listed on the right. If you need to return to the list showing every Activity Type, press the [Top] button above the list.
- If you need to see the Favourite Activity Types 'Paste Special' window described below, press the [Favourites] button above the list.
- If you need to see the Favourite Activity Types 'Paste Special' window described below, press the [Favourites] button above the list.
- Favourite Activity Types
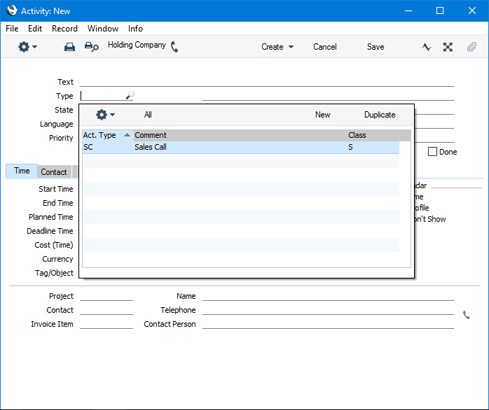
- This option is similar to the System Default, but it only lists Activity Types that you have marked as being favourites.
- You can mark an Activity Type as a favourite using the following methods:
- Highlight an Activity Type in the System Default or Act. Type per Act. Class 'Paste Special' windows and select 'Add to Favourites' from the Create menu:
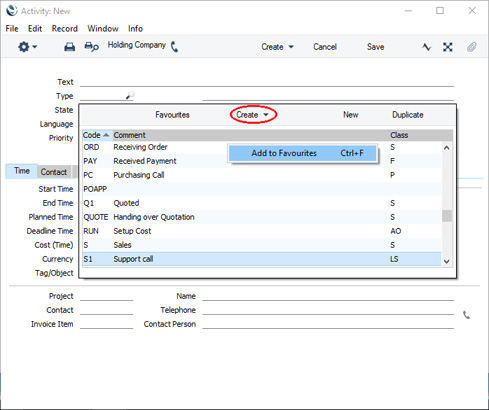
- Add a record to the Favourite Activity Types setting in the CRM module.
To remove an Activity Type from your favourites, use the following methods:
- Highlight an Activity Type in the Favourite Activity Types 'Paste Special' window and select 'Remove from Favourites' from the Operations menu:
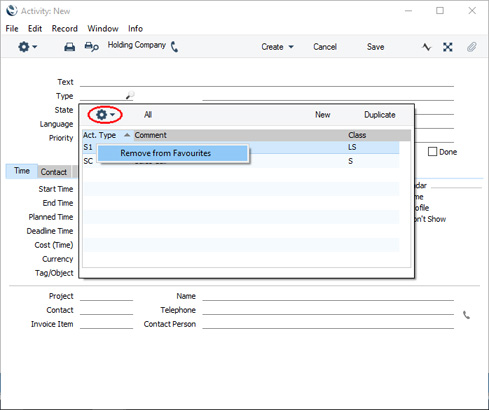
- Delete the record from the Favourite Activity Types setting.
If you are using the Favourite Activity Types 'Paste Special' window as your main 'Paste Special' window and you need to see the System Default 'Paste Special' window described above, press the [All] button above the list.
- If you are using one of the other 'Paste Special' windows as your main 'Paste Special' window and you have pressed the [Favourites] button to arrive at the Favourite Activity Types 'Paste Special' window, press the [All] button above the list to return to your main 'Paste Special' window.
- You can mark an Activity Type as a favourite using the following methods:
---
Settings in the CRM module:
- Introduction
- Activity Classes
- Activity Consequences
- Activity Priorities
- Activity Types
- Activity Types, Subsystems
- Additional Email Recipients
- Classification Types
- Company Workflow Overview
- Contact Classifications
- Contact Settings
- Courtesy Titles
- CRM Settings
- Customer Categories
- Default Activity Text Codes
- Favourite Activity Types
- Global CRM Settings
- Industries
- Info in Customer Status Report
- Info in Supplier Status Report
- Job Titles
- Leads
- Lead Sources
- Lead Status
- Map Setting
- Normalized Phone Numbers
- Number Series - Activities, N/L Transactions
- Number Series - Customer Letters
- Number Series - Opportunites
- Opportunity Classes
- Telephony Settings
- Text Types
- User Defined Fields - Activities
- User Defined Fields - Contacts
- User Defined Fields - Items
- User Workflow Overview
- Home page for CRM module manual
- Home page for Standard ERP manual
Activity Types, Subsystems
This page describes the Activity Types, Subsystems setting in the CRM module.---
You can create Activities and Tasks from almost anywhere in the Standard ERP system. In particular, you can create them from any record in the system, without needing to open the Activity register, Calendar or Task Manager first.
You can use the following methods to create Activities from other records:
- After creating, viewing or modifying a record, save changes and then select 'Workflow Activity' from the Create menu (Windows/Mac OS X) or + menu (iOS/Android).
- After creating, viewing or modifying a record, save changes and then open the ‘Workflow Manager’ window. Click or tap the [+] button in this window to create a new Activity.
- You can have Activities created automatically from some records, usually when you mark them as OK and save.
- You can have Activities created automatically from Sales and Purchase Orders when you save them for the first time.
- In many cases, the Activity Types, Subsystems setting can provide the Activity Type that will be used in the new Activities.
- The Activity Types, Subsystems setting contains the options that allow you to specify whether Activities will be created automatically from various records.
- You can also use the Activity Types, Subsystems setting to specify whether Activities created from other records will be marked as Done automatically.
When the setting is complete, click the [Save] button (Windows/Mac OS X) or tap √ (iOS/Android) to save changes and close the window. To close the window without saving changes, click the close box (Windows/Mac OS X) or tap < (iOS/Android).
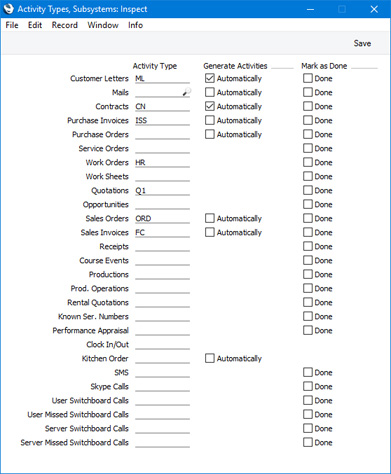
- Activity Type
- Paste Special
Activity Types setting, CRM module
- Use this column to specify the Activity Type that is to be used in Activities when they are created from records of various kinds. This Activity Type will be used in Activities created using the 'Workflow Activity' function and in Activities that are created automatically.
- If you use the 'Workflow Activity' function from a record that is not mentioned in the Activity Types, Subsystems setting, the new Activity will not be given an Activity Type.
- If you use the 'Workflow Activity' function from a Sales or Purchase Order, the Activity Type in the new Activity will be taken from the Order Class or Purchase Order Class to which the Order belongs. If you have not specified an Activity Type in the Order Class, or the Order does not belong to an Order Class, the Activity Type will be taken from this setting.
- If you use the 'Workflow Activity' function from a record that is not mentioned in the Activity Types, Subsystems setting, the new Activity will not be given an Activity Type.
- Generate Activities
- Use this column to specify whether Activities are to be created automatically from records of various kinds.
- For Letters, Contracts, Mails and Purchase and Sales Invoices, an Activity will be created whenever you mark a record as OK (or Sent in the case of Mails) and save, providing you have ticked the relevant Generate Activities option and providing you have specified an Activity Type in the column to the left.
- For Kitchen Orders, an Activity will be created when you save a record for the first time, again providing you have ticked the relevant Generate Activities option and providing you have specified an Activity Type in the column to the left.
- For Sales Orders and Purchase Orders, selecting the Generate Activities option will again cause an Activity to be created when you save a record for the first time. However, with these records the Generate Activities option will only apply to Orders that do not belong to an Order Class or a Purchase Order Class. If an Order belongs to an Order Class, the Activity from Order options in the Order Class will determine whether an Activity will be created when you save an Order for the first time.
- For Letters, Contracts, Mails and Purchase and Sales Invoices, an Activity will be created whenever you mark a record as OK (or Sent in the case of Mails) and save, providing you have ticked the relevant Generate Activities option and providing you have specified an Activity Type in the column to the left.
- Mark as Done
- Use this column to specify whether new Activities will be marked as Done when they are created from a particular register. This applies both to Activities created using the 'Workflow Activity' function and to Activities that are created automatically.
Settings in the CRM module:
- Introduction
- Activity Classes
- Activity Consequences
- Activity Priorities
- Activity Types
- Activity Types, Subsystems
- Additional Email Recipients
- Classification Types
- Company Workflow Overview
- Contact Classifications
- Contact Settings
- Courtesy Titles
- CRM Settings
- Customer Categories
- Default Activity Text Codes
- Favourite Activity Types
- Global CRM Settings
- Industries
- Info in Customer Status Report
- Info in Supplier Status Report
- Job Titles
- Leads
- Lead Sources
- Lead Status
- Map Setting
- Normalized Phone Numbers
- Number Series - Activities, N/L Transactions
- Number Series - Customer Letters
- Number Series - Opportunites
- Opportunity Classes
- Telephony Settings
- Text Types
- User Defined Fields - Activities
- User Defined Fields - Contacts
- User Defined Fields - Items
- User Workflow Overview
- Home page for CRM module manual
- Home page for Standard ERP manual
Additional Email Recipients
This page describes the Additional Email Recipients setting in the CRM module.---
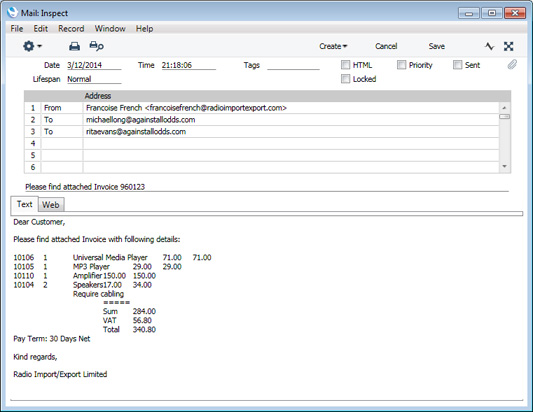
The Additional Email Recipients setting allows you to specify the Contact Persons in Customer or Supplier companies who should receive forms of various kinds when they are sent by email. For example, you can specify that every Invoice you send to a particular Customer by email will be sent to a particular person or persons.
You can use the following methods to create Mails to send specific documents or forms to Customers and Suppliers:
- You can create individual Mails from many records, such as Quotations, Sales Orders, Purchase Orders and Invoices. To create Mails from such records, simply open them and select 'E-Mail' from the Create menu (in versions prior to 8.0, use 'Create E-Mail' from the Operations menu). A pdf version of the record (e.g. the Quotation, Sales Order, Purchase Order or Invoice) will be attached to the Mail.
- You can create Mails in batches using various Maintenance functions. For example, the Sales Ledger contains Maintenance functions that you can use to send Invoices, Open Invoice Customer Statements and Periodic Customer Statements by email, while the Purchase Ledger contains a function that allows you to mail Periodic Supplier Statements to Suppliers. Again, pdf versions of the relevant form will be attached to each Mail.
- Use the Mail Texts setting in the Email and Conferences module to determine how the Subject and Text will be chosen. Please refer to the ‘Mail’ manual for details.
- Use the Additional Email Recipients setting in the CRM module to determine how the recipients will be chosen, as described below.
- If the Customer or Supplier has a record in this Additional Email Recipients setting, the Mail will be sent to the Contact Persons listed with the relevant Form Type in that record. For example, when you create a Mail from an Invoice, it will be sent to the Contact Persons with the "Invoice" Form Type in the Additional Email Recipients record.
- If the Customer or Supplier does not have a record in the Additional Email Recipients setting or its record in that setting has no Contact Persons with the relevant Form Type, the Mail will be sent to the Email Address of the Contact Person quoted in the Attention field in the record being mailed.
- If the Contact Person quoted in the Attention field in the record does not have an Email Address or there is no Contact Person in the Attention field, the Mail will be sent to the Email Address specified in the Contact record for the Customer or Supplier.
- If the above points are not satisfied, no Mail will be created.
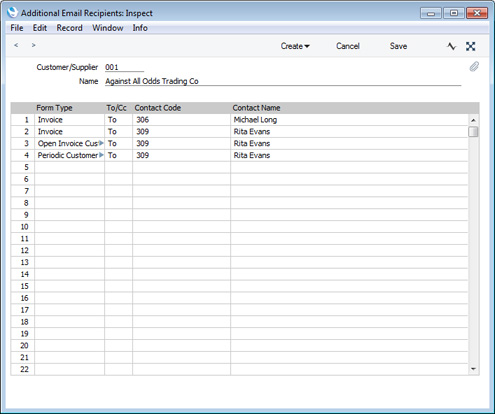
- Customer/Supplier
- Paste Special
Customers, Suppliers and Contact Persons in Contact register
- Specify the Customer or Supplier for whom you are entering email recipients.
- Name
- The Customer or Supplier Name will appear here when you specify a Contact Number in the field above.
- Form Type
- Paste Special
Choices of possible entries
- Using 'Paste Special', choose the form for which you will specify a recipient in the field to the right.
- To/Cc
- Paste Special
Choices of possible entries
- Specify the address format that is to be used when sending emails to the recipient. Possible entries are "To:", "Cc:" and "Bcc:"
- Contact Code
- Paste Special
Contact Persons in Contact register
- Specify the Contact Person to whom all forms specified in the field to the left are to be emailed. The record for the Contact Person in the Contact register must contain an Email Address in order for them to be sent Mails.
- The 'Paste Special' list will only contain Contact Persons connected to the Customer or Supplier specified in the header.
- The 'Paste Special' list will only contain Contact Persons connected to the Customer or Supplier specified in the header.
- Contact Name
- The Contact Person Name will appear here when you specify a Contact Number in the field on the left.
Settings in the CRM module:
- Introduction
- Activity Classes
- Activity Consequences
- Activity Types
- Activity Types, Subsystems
- Additional Email Recipients
- Classification Types
- Company Workflow Overview
- Contact Classifications
- Contact Settings
- Courtesy Titles
- CRM Settings
- Customer Categories
- Global CRM Settings
- Industries
- Info in Customer Status Report
- Info in Supplier Status Report
- Job Titles
- Leads
- Lead Sources
- Lead Status
- Map Setting
- Normalized Phone Numbers
- Number Series - Customer Letters
- Number Series - Opportunites
- Opportunity Classes
- Telephony Settings
- Text Types
- User Defined Fields - Activities
- User Defined Fields - Contacts
- User Defined Fields - Items
- User Workflow Overview
- Home page for CRM module manual
- Home page for Standard ERP manual
Classification Types
Please refer here for details about the Classification Types setting.---
Settings in the CRM module:
- Introduction
- Activity Classes
- Activity Consequences
- Activity Priorities
- Activity Types
- Activity Types, Subsystems
- Additional Email Recipients
- Classification Types
- Company Workflow Overview
- Contact Classifications
- Contact Settings
- Courtesy Titles
- CRM Settings
- Customer Categories
- Default Activity Text Codes
- Favourite Activity Types
- Global CRM Settings
- Industries
- Info in Customer Status Report
- Info in Supplier Status Report
- Job Titles
- Leads
- Lead Sources
- Lead Status
- Map Setting
- Normalized Phone Numbers
- Number Series - Activities, N/L Transactions
- Number Series - Customer Letters
- Number Series - Opportunites
- Opportunity Classes
- Telephony Settings
- Text Types
- User Defined Fields - Activities
- User Defined Fields - Contacts
- User Defined Fields - Items
- User Workflow Overview
- Home page for CRM module manual
- Home page for Standard ERP manual
Company Workflow Overview
Please click here for details about the Company Workflow Overview setting in the CRM module.---
Settings in the CRM module:
- Introduction
- Activity Classes
- Activity Consequences
- Activity Types
- Activity Types, Subsystems
- Additional Email Recipients
- Classification Types
- Company Workflow Overview
- Contact Classifications
- Contact Settings
- Courtesy Titles
- CRM Settings
- Customer Categories
- Global CRM Settings
- Industries
- Info in Customer Status Report
- Info in Supplier Status Report
- Job Titles
- Leads
- Lead Sources
- Lead Status
- Map Setting
- Normalized Phone Numbers
- Number Series - Customer Letters
- Number Series - Opportunites
- Opportunity Classes
- Telephony Settings
- Text Types
- User Defined Fields - Activities
- User Defined Fields - Contacts
- User Defined Fields - Items
- User Workflow Overview
- Home page for CRM module manual
- Home page for Standard ERP manual
Contact Classifications
Please refer here for details about the Contact Classifications setting.
---
Settings in the CRM module:
- Introduction
- Activity Classes
- Activity Consequences
- Activity Priorities
- Activity Types
- Activity Types, Subsystems
- Additional Email Recipients
Contact Classifications
- Contact Settings
- Courtesy Titles
- CRM Settings
- Customer Categories
- Default Activity Text Codes
- Favourite Activity Types
- Global CRM Settings
- Industries
- Info in Customer Status Report
- Info in Supplier Status Report
- Job Titles
- Leads
- Lead Sources
- Lead Status
- Map Setting
- Normalized Phone Numbers
- Number Series - Activities, N/L Transactions
- Number Series - Customer Letters
- Number Series - Opportunites
- Opportunity Classes
- Telephony Settings
- Text Types
- User Defined Fields - Activities
- User Defined Fields - Contacts
- User Defined Fields - Items
- User Workflow Overview
- Home page for CRM module manual
- Home page for Standard ERP manual
Contact Settings
Please refer here for details about the Contact Settings setting.---
Settings in the CRM module:
- Introduction
- Activity Classes
- Activity Consequences
- Activity Priorities
- Activity Types
- Activity Types, Subsystems
- Additional Email Recipients
- Contact Classifications
- Contact Settings
- Courtesy Titles
- CRM Settings
- Customer Categories
- Default Activity Text Codes
- Favourite Activity Types
- Global CRM Settings
- Industries
- Info in Customer Status Report
- Info in Supplier Status Report
- Job Titles
- Leads
- Lead Sources
- Lead Status
- Map Setting
- Normalized Phone Numbers
- Number Series - Activities, N/L Transactions
- Number Series - Customer Letters
- Number Series - Opportunites
- Opportunity Classes
- Telephony Settings
- Text Types
- User Defined Fields - Activities
- User Defined Fields - Contacts
- User Defined Fields - Items
- User Workflow Overview
- Home page for CRM module manual
- Home page for Standard ERP manual
Courtesy Titles
The Courtesy Titles setting can also be found in the Human Resources Management. module. Please refer here for details.---
Settings in the CRM module:
- Introduction
- Activity Classes
- Activity Consequences
- Activity Priorities
- Activity Types
- Activity Types, Subsystems
- Additional Email Recipients
- Contact Classifications
- Contact Settings
- Courtesy Titles
- CRM Settings
- Customer Categories
- Default Activity Text Codes
- Favourite Activity Types
- Global CRM Settings
- Industries
- Info in Customer Status Report
- Info in Supplier Status Report
- Job Titles
- Leads
- Lead Sources
- Lead Status
- Map Setting
- Normalized Phone Numbers
- Number Series - Activities, N/L Transactions
- Number Series - Customer Letters
- Number Series - Opportunites
- Opportunity Classes
- Telephony Settings
- Text Types
- User Defined Fields - Activities
- User Defined Fields - Contacts
- User Defined Fields - Items
- User Workflow Overview
- Home page for CRM module manual
- Home page for Standard ERP manual
CRM Settings
This page describes the CRM Settings setting in the CRM module.---
The CRM Settings setting contains some miscellaneous options controlling the behaviour of Activities.
To open the CRM Settings setting, first ensure you are in the CRM module. Then, if you are using Windows or Mac OS X, click the [Settings] button in the Navigation Centre or use the Ctrl-S/⌘-S keyboard shortcuts and then double-click 'CRM Settings' in the 'Settings' list. If you are using iOS or Android, select 'Settings' from the Tools menu (with 'wrench' icon) and tap 'CRM Settings' in the 'Settings' list. The 'CRM Settings: Inspect' window will open:
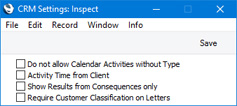
- Do not allow Calendar Activities without Type
- Select this option if you want every Activity to be given an Activity Type. This only applies to Time Activities (Activities where the Task Type is Calendar and the Calendar Type is Time).
- Activity Time from Client
- You can use this option in a multi-user system where the server is in a different time zone to the client machines.
- If you are using this option, the date and time in a new Activity will be taken from the clock on the client machine on which it was created. If you are not using this option, the date and time will be taken from the clock on the server.
- This option applies when the date and time in a new Activity is the current date and time. It does not apply in other situations (e.g. if you create an Activity from a Quotation, the date in the Activity will be the Make Contact Date or the Quotation Date from the Quotation).
- If you are using this option, the date and time in a new Activity will be taken from the clock on the client machine on which it was created. If you are not using this option, the date and time will be taken from the clock on the server.
- Show Results from Consequences only
- When you specify a Result in an Activity, mark the Activity as Done and save it, a new follow-up Activity will be created automatically if there is a record in the Activity Consequences setting for the Activity Type/Result combination.
- This option makes it easy to find the Results that will cause follow-up Activities to be created i.e. the Results that have been connected to the specified Activity Type in the Activity Consequences setting.
- By default, when you use 'Paste Special' to choose a Result in an Activity, every possible Result will be listed. However, if you are using this option, only Results that will cause follow-up Activities to be created will be listed.
- For example, if the Activity Type in an Activity is "A" and there are records in the Activity Consequences setting with "A" as the Activity Type and with Results "X", "Y" and "Z", using this option will mean that only "X", "Y" and "Z" will be shown in the 'Paste Special' list when opened from the Result field. If the Activity Type is "B" and there are no records in the Activity Consequences setting with this Activity Type, the 'Paste Special' list will be empty.
- This option makes it easy to find the Results that will cause follow-up Activities to be created i.e. the Results that have been connected to the specified Activity Type in the Activity Consequences setting.
- Require Customer Classification on Letters
- Select this option if you would like it to be mandatory to specify a Cust. Class in a Customer Letter in which you have entered * in the Customer field.
- Entering * in the Customer field in a Customer Letter means that all Contacts will be mailed, subject to their satisfying any requirements entered in the other fields in the Customer Letter. Making it mandatory to specify a Cust. Class when the Customer is * reduces the risk of printing letters to too many Contacts by mistake.
---
Settings in the CRM module:
- Introduction
- Activity Classes
- Activity Consequences
- Activity Priorities
- Activity Types
- Activity Types, Subsystems
- Additional Email Recipients
- Classification Types
- Company Workflow Overview
- Contact Classifications
- Contact Settings
- Courtesy Titles
- CRM Settings
- Customer Categories
- Default Activity Text Codes
- Favourite Activity Types
- Global CRM Settings
- Industries
- Info in Customer Status Report
- Info in Supplier Status Report
- Job Titles
- Leads
- Lead Sources
- Lead Status
- Map Setting
- Normalized Phone Numbers
- Number Series - Activities, N/L Transactions
- Number Series - Customer Letters
- Number Series - Opportunites
- Opportunity Classes
- Telephony Settings
- Text Types
- User Defined Fields - Activities
- User Defined Fields - Contacts
- User Defined Fields - Items
- User Workflow Overview
- Home page for CRM module manual
- Home page for Standard ERP manual
Customer Categories
The Customer Categories setting can also be found in the Sales Ledger: please refer here for details.---
Settings in the CRM module:
- Introduction
- Activity Classes
- Activity Consequences
- Activity Priorities
- Activity Types
- Activity Types, Subsystems
- Additional Email Recipients
- Classification Types
- Company Workflow Overview
- Contact Classifications
- Contact Settings
- Courtesy Titles
- CRM Settings
- Customer Categories
- Default Activity Text Codes
- Favourite Activity Types
- Global CRM Settings
- Industries
- Info in Customer Status Report
- Info in Supplier Status Report
- Job Titles
- Leads
- Lead Sources
- Lead Status
- Map Setting
- Normalized Phone Numbers
- Number Series - Activities, N/L Transactions
- Number Series - Customer Letters
- Number Series - Opportunites
- Opportunity Classes
- Telephony Settings
- Text Types
- User Defined Fields - Activities
- User Defined Fields - Contacts
- User Defined Fields - Items
- User Workflow Overview
- Home page for CRM module manual
- Home page for Standard ERP manual
Default Activity Text Codes
This page describes the Default Activity Text Codes setting in the CRM module.---
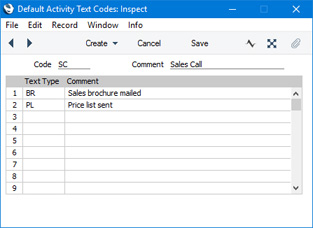
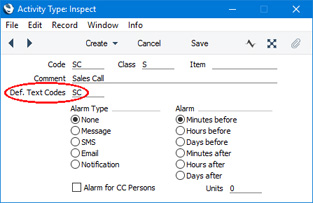
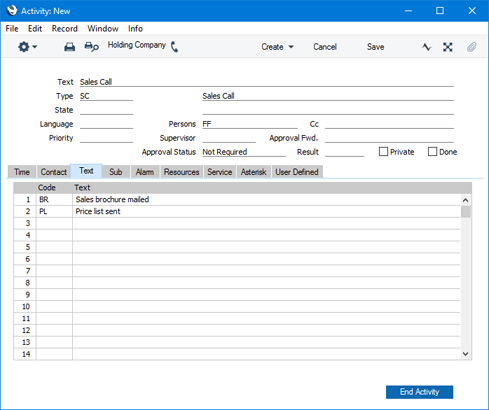
The Default Activity Text Codes setting in the CRM module allows you to define sets of Text Types which will then be added automatically to new Activities when you specify the Activity Code. You can allocate one set of Default Activity Text Codes to each Activity Code (using the Def. Text Codes field).
To open the setting, first change to the CRM module using the [Switch Module] button in the Navigation Centre. Then, if you are using Windows or Mac OS X, click the [Settings] button, also in the Navigation Centre or use the Ctrl-S/⌘-S keyboard shortcuts and then double-click 'Default Activity Text Codes' in the 'Settings' list. If you are using iOS or Android, select 'Settings' from the Tools menu (with 'wrench' icon) and tap 'Default Activity Text Codes' in the 'Settings' list. The 'Default Activity Text Codes: Browse' window is displayed, showing all Default Activity Text Code records previously entered.
To enter a new record, select 'New' from the Create menu (Windows/Mac OS X) or + menu (iOS/Android). The 'Default Activity Text Code: New' window appears: enter the details as appropriate and click the [Save] button (Windows/Mac OS X) or tap √ (iOS/Android) to save the new record.
After saving a Default Activity Text Code record, assign it to an Activity Type or Activity Types as necessary:
Settings in the CRM module:
- Introduction
- Activity Classes
- Activity Consequences
- Activity Priorities
- Activity Types
- Activity Types, Subsystems
- Additional Email Recipients
- Classification Types
- Company Workflow Overview
- Contact Classifications
- Contact Settings
- Courtesy Titles
- CRM Settings
- Customer Categories
- Default Activity Text Codes
- Favourite Activity Types
- Global CRM Settings
- Industries
- Info in Customer Status Report
- Info in Supplier Status Report
- Job Titles
- Leads
- Lead Sources
- Lead Status
- Map Setting
- Normalized Phone Numbers
- Number Series - Activities, N/L Transactions
- Number Series - Customer Letters
- Number Series - Opportunites
- Opportunity Classes
- Telephony Settings
- Text Types
- User Defined Fields - Activities
- User Defined Fields - Contacts
- User Defined Fields - Items
- User Workflow Overview
- Home page for CRM module manual
- Home page for Standard ERP manual
Favourite Activity Types
This page describes the Favourite Activity Types setting in the CRM module.---
Whenever you need to choose an Activity Type using 'Paste Special' (e.g. when entering Activities and when producing reports), you can reduce the 'Paste Special' list so that it only shows your favourite Activity Types. To do this, open the 'Paste Special' window and press the [Favourites] button at the top of the list (this button will not be visible if you are using iOS or Android).
If you want to specify that the 'Paste Special' list only shows your favourite Activity Types when it opens, open the Local Machine setting in the User Settings module and select "Favourite Activity Types" as the Activity Type Paste Special option. In this case, the 'Paste Special' list will contain an [All] button that you can use if you want to see every Activity Type (again, the [All] button will not be visible if you are using iOS or Android)
To mark an Activity Type as a favourite, highlight it in the 'Paste Special' window when that window is showing every Activity Type and select 'Add to Favourites' from the Create menu. Behind the scenes, the 'Add to Favourites' function will create a record in the Favourite Activity Types setting in the CRM module.
To remove an Activity Type from your favourites, highlight it in the 'Paste Special' window when that window is showing your favourite Activity Types and select 'Remove from Favourites' from the Operations menu. Behind the scenes, the 'Remove from Favourites' function will delete the relevant record from the Favourite Activity Types setting.
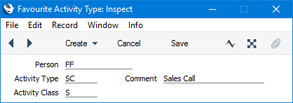
As well as using the 'Add to Favourites' and 'Remove from Favourites' functions to manage your favourite Activity Types, you can work directly in the Favourite Activity Types setting, adding and deleting records as necessary.
- Person
- Paste Special
Person register, System module and Global User register, Technics module
- Enter the Signature of a user to assign a Favourite Activity Type to that user. If an Activity Type is a favourite of more than one user, you will need to enter separate records in this setting for each user.
- Activity Type
- Paste Special
Activity Types setting, CRM module
- Enter the Activity Type that is a favourite of the user specified above.
- Comment
- The Comment of the Activity Type will appear here when you enter the Activity Type in the field above.
- Activity Class
- The Class to which the Activity Type belongs will appear here when you enter the Activity Type in the field above.
Settings in the CRM module:
- Introduction
- Activity Classes
- Activity Consequences
- Activity Priorities
- Activity Types
- Activity Types, Subsystems
- Additional Email Recipients
- Classification Types
- Company Workflow Overview
- Contact Classifications
- Contact Settings
- Courtesy Titles
- CRM Settings
- Customer Categories
- Default Activity Text Codes
- Favourite Activity Types
- Global CRM Settings
- Industries
- Info in Customer Status Report
- Info in Supplier Status Report
- Job Titles
- Leads
- Lead Sources
- Lead Status
- Map Setting
- Normalized Phone Numbers
- Number Series - Activities, N/L Transactions
- Number Series - Customer Letters
- Number Series - Opportunites
- Opportunity Classes
- Telephony Settings
- Text Types
- User Defined Fields - Activities
- User Defined Fields - Contacts
- User Defined Fields - Items
- User Workflow Overview
- Home page for CRM module manual
- Home page for Standard ERP manual
Global CRM Settings
The Global CRM Settings setting contains three options that will help you manage the creation of Activities and the viewing of the Calendar and Task Manager in a database that contains more than one Company. These options will be useful if you are using Global Users. The setting also contains a fourth option that will enable HTML formatting in Customer Letters.The Global CRM Settings setting is stored in Company 0, a partition of the database that stores information at database level (i.e. information that is available to every Company). This means that you can be working in any Company when you edit the setting, and the changes that you make will apply to every Company.
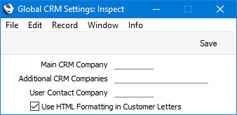
To open the Global CRM Settings setting, first ensure you are in the CRM or Technics modules. Then, if you are using Windows or Mac OS X, click the [Settings] button in the Navigation Centre or use the Ctrl-S/⌘-S keyboard shortcuts and then double-click 'Global CRM Settings' in the 'Settings' list. If you are using iOS or Android, select 'Settings' from the Tools menu (with 'wrench' icon) and tap 'Global CRM Settings' in the 'Settings' list. The 'Global CRM Settings: Inspect' window will open:
The following three fields will only be useful if you have more than one Company in your database and you are controlling access to those Companies using Global Users:
- Main CRM Company
- If you are using Global Users, you should specify a Main CRM Company in each Global User record. Specifying a Main CRM Company for a Global User has two main purposes:
- By default, each Activity saved by the Global User will be stored in their Main CRM Company, irrespective of the Company the Global User is working in at the time.
- When the Global User or anyone else opens the Global User's Calendar or Task Manager, they will be shown a list of the Global User's Activities stored in the Global User's Main CRM Company (again irrespective of the Company being worked in at the time).
- The purpose of this field is only to set a default to be used in new Global User records. It will not be used as a fallback Main CRM Company if the Main CRM Company field in a particular Global User record is blank.
- Activities created from Asterisk calls may be saved in the Company specified here if the calls came through Menus or Queues in which the Company field is empty..
- By default, each Activity saved by the Global User will be stored in their Main CRM Company, irrespective of the Company the Global User is working in at the time.
- Additional CRM Companies
- If a Global User will save Activities in several Companies, you can specify a Main CRM Company for that Global User and several Additional CRM Companies, separated by commas.
- As with the Main CRM Company field above, you can use this field to specify the Additional CRM Companies that will be copied to each new Global User record as defaults. However, unlike the Main CRM Company field, the Additional CRM Companies will be used as fallbacks if the Additional CRM Companies field in a particular Global User record is empty. Therefore, you should only use this field for Additional CRM Companies to which every user has access.
- As with the Main CRM Company field above, you can use this field to specify the Additional CRM Companies that will be copied to each new Global User record as defaults. However, unlike the Main CRM Company field, the Additional CRM Companies will be used as fallbacks if the Additional CRM Companies field in a particular Global User record is empty. Therefore, you should only use this field for Additional CRM Companies to which every user has access.
- User Contact Company
- The User Contact Company is the Company in which you will enter the Contact records that will be connected to the Global User records. If you leave this field blank, you should enter such a Contact record in a Global User's Main CRM Company.
The following option will be useful in any database:
- Use HTML Formatting in Customer Letters
- Check this box if you want to use HTML formatting in Customer Letters. Please refer here for more details.
Settings in the CRM module:
- Introduction
- Activity Classes
- Activity Consequences
- Activity Priorities
- Activity Types
- Activity Types, Subsystems
- Additional Email Recipients
- Classification Types
- Company Workflow Overview
- Contact Classifications
- Contact Settings
- Courtesy Titles
- CRM Settings
- Customer Categories
- Default Activity Text Codes
- Favourite Activity Types
- Global CRM Settings
- Industries
- Info in Customer Status Report
- Info in Supplier Status Report
- Job Titles
- Leads
- Lead Sources
- Lead Status
- Map Setting
- Normalized Phone Numbers
- Number Series - Activities, N/L Transactions
- Number Series - Customer Letters
- Number Series - Opportunities
- Opportunity Classes
- Telephony Settings
- Text Types
- User Defined Fields - Activities
- User Defined Fields - Contacts
- User Defined Fields - Items
- User Workflow Overview
- Home page for CRM module manual
- Home page for Standard ERP manual
Industries
This page describes the Industries setting in the CRM module.---
The Industries setting allows you to construct a list of industries or economic sectors that you can use when entering Leads. This list will become a look-up table that you can access from the Industry field on the 'Status' card of the Lead window.
To open the Industries setting, first ensure you are in the CRM module. Then, if you are using Windows or Mac OS X, click the [Settings] button in the Navigation Centre or use the Ctrl-S/⌘-S keyboard shortcuts and then double-click 'Industry' in the 'Settings' list. If you are using iOS or Android, select 'Settings' from the Tools menu (with 'wrench' icon) and tap 'Industry' in the 'Settings' list. The 'Industries: Browse' window will open, listing the Industries that you have previously entered.
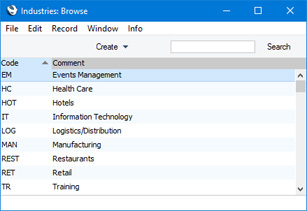
---
Settings in the CRM module:
- Introduction
- Activity Classes
- Activity Consequences
- Activity Priorities
- Activity Types
- Activity Types, Subsystems
- Additional Email Recipients
- Classification Types
- Company Workflow Overview
- Contact Classifications
- Contact Settings
- Courtesy Titles
- CRM Settings
- Customer Categories
- Default Activity Text Codes
- Favourite Activity Types
- Global CRM Settings
- Industries
- Info in Customer Status Report
- Info in Supplier Status Report
- Job Titles
- Leads
- Lead Sources
- Lead Status
- Map Setting
- Normalized Phone Numbers
- Number Series - Activities, N/L Transactions
- Number Series - Customer Letters
- Number Series - Opportunities
- Opportunity Classes
- Telephony Settings
- Text Types
- User Defined Fields - Activities
- User Defined Fields - Contacts
- User Defined Fields - Items
- User Workflow Overview
- Home page for CRM module manual
- Home page for Standard ERP manual
Customer Status Report
Please refer here for details about this setting.---
Settings in the CRM module:
- Introduction
- Activity Classes
- Activity Consequences
- Activity Priorities
- Activity Types
- Activity Types, Subsystems
- Additional Email Recipients
- Classification Types
- Company Workflow Overview
- Contact Classifications
- Contact Settings
- Courtesy Titles
- CRM Settings
- Customer Categories
- Default Activity Text Codes
- Favourite Activity Types
- Global CRM Settings
- Industries
- Info in Customer Status Report
- Info in Supplier Status Report
- Job Titles
- Leads
- Lead Sources
- Lead Status
- Map Setting
- Normalized Phone Numbers
- Number Series - Activities, N/L Transactions
- Number Series - Customer Letters
- Number Series - Opportunites
- Opportunity Classes
- Telephony Settings
- Text Types
- User Defined Fields - Activities
- User Defined Fields - Contacts
- User Defined Fields - Items
- User Workflow Overview
- Home page for CRM module manual
- Home page for Standard ERP manual
Supplier Status Report
Please refer here for details about this setting.---
Settings in the CRM module:
- Introduction
- Activity Classes
- Activity Consequences
- Activity Priorities
- Activity Types
- Activity Types, Subsystems
- Additional Email Recipients
- Classification Types
- Company Workflow Overview
- Contact Classifications
- Contact Settings
- Courtesy Titles
- CRM Settings
- Customer Categories
- Default Activity Text Codes
- Favourite Activity Types
- Global CRM Settings
- Industries
- Info in Customer Status Report
- Info in Supplier Status Report
- Job Titles
- Leads
- Lead Sources
- Lead Status
- Map Setting
- Normalized Phone Numbers
- Number Series - Activities, N/L Transactions
- Number Series - Customer Letters
- Number Series - Opportunites
- Opportunity Classes
- Telephony Settings
- Text Types
- User Defined Fields - Activities
- User Defined Fields - Contacts
- User Defined Fields - Items
- User Workflow Overview
- Home page for CRM module manual
- Home page for Standard ERP manual
Job Titles
The Job Titles setting can also be found in the Human Resources Management. module. Please refer here for details.---
Settings in the CRM module:
- Introduction
- Activity Classes
- Activity Consequences
- Activity Priorities
- Activity Types
- Activity Types, Subsystems
- Additional Email Recipients
- Classification Types
- Company Workflow Overview
- Contact Classifications
- Contact Settings
- Courtesy Titles
- CRM Settings
- Customer Categories
- Default Activity Text Codes
- Favourite Activity Types
- Global CRM Settings
- Industries
- Info in Customer Status Report
- Info in Supplier Status Report
- Job Titles
- Leads
- Lead Sources
- Lead Status
- Map Setting
- Normalized Phone Numbers
- Number Series - Activities, N/L Transactions
- Number Series - Customer Letters
- Number Series - Opportunites
- Opportunity Classes
- Telephony Settings
- Text Types
- User Defined Fields - Activities
- User Defined Fields - Contacts
- User Defined Fields - Items
- User Workflow Overview
- Home page for CRM module manual
- Home page for Standard ERP manual
Leads
This page describes the Leads setting in the CRM module.---
The Leads setting is a means of storing and viewing sales leads. This setting is a subset of the Contact register, so Leads are stored together with Customers, Suppliers and Contact Persons in the same register. A Lead record is a record in the Contact register in which you have ticked the Lead check box (visible in the header of the Contact window, but not shown in the Lead window).
When you open the Contact register in a module such as the Sales or Purchase Ledger, the browse window will contain every Contact record including Leads (subject to the Limited Access feature). When you open the Leads setting in the CRM module, the browse window will only contain those Contacts that have been marked as Leads.
As the Leads setting is a subset of the Contact register, you can open a Lead record or create a new one from both the 'Contacts: Browse' and 'Leads: Browse' windows. However, the Lead record window only contains fields that are relevant to Leads, including several that are not shown in the Contact record window.
If you create a new Lead record using the Leads setting in the CRM module, the new record will be marked as a Lead automatically. If you can create a Lead record using the Contact register in any other module, you will need to tick the Lead check box in the header of the Contact window yourself.
You can use both Leads and Customers in Opportunities. However, you can only use Customers in Quotations, Orders and Invoices. So, if you create an Opportunity in the name of a Lead and you then create a Quotation, Order or Invoice from that Opportunity, you will need to "upgrade" the Lead to Customer status (i.e. tick the Customer check box in the header of the relevant Contact record) before proceeding further.
The Leads setting is described below. The Contact register is described here.
To open the Leads setting, first change to the CRM module using the [Switch Module] button in the Navigation Centre. Then, if you are using Windows or Mac OS X, click the [Settings] button, also in the Navigation Centre or use the Ctrl-S/⌘-S keyboard shortcuts and then double-click 'Lead' in the 'Settings' list. If you are using iOS or Android, select 'Settings' from the Tools menu (with 'wrench' icon) and tap 'Leads: Browse' window is displayed, the Lead records that you have previously entered.
To enter a new record, select 'New' from the Create menu (Windows/Mac OS X) or + menu (iOS/Android). The 'Lead: New' window appears: enter the details as appropriate and click the [Save] button (Windows/Mac OS X) or tap √ (iOS/Android) to save the new record.
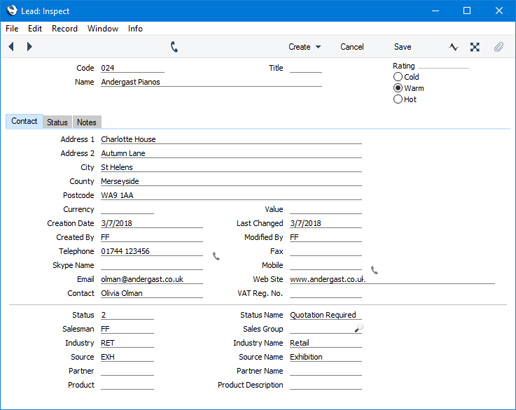
- Header
- Enter the unique Code for each Lead, and the Name, Rating and Title. The Title field is the equivalent of the Courtesy Title field on the 'Comments' card in the Contact window, so you can use 'Paste Special' to choose from the Courtesy Titles setting.
- Contact Card
- Here you can enter address and other contact details for the Lead. The Currency field is the equivalent of the Sales Currency field on the 'Pricing' card in the Contact window.
- Status Card
- On the 'Status' card you can enter information about the Lead, such as the Industry they are in and the source of the Lead.
- Notes Card
- The 'Notes' card contains a text field that you can use to record comments about the Lead.
Settings in the CRM module:
- Introduction
- Activity Classes
- Activity Consequences
- Activity Priorities
- Activity Types
- Activity Types, Subsystems
- Additional Email Recipients
- Classification Types
- Company Workflow Overview
- Contact Classifications
- Contact Settings
- Courtesy Titles
- CRM Settings
- Customer Categories
- Default Activity Text Codes
- Favourite Activity Types
- Global CRM Settings
- Industries
- Info in Customer Status Report
- Info in Supplier Status Report
- Job Titles
- Leads
- Lead Sources
- Lead Status
- Map Setting
- Normalized Phone Numbers
- Number Series - Activities, N/L Transactions
- Number Series - Customer Letters
- Number Series - Opportunities
- Opportunity Classes
- Telephony Settings
- Text Types
- User Defined Fields - Activities
- User Defined Fields - Contacts
- User Defined Fields - Items
- User Workflow Overview
- Home page for CRM module manual
- Home page for Standard ERP manual
Lead Sources
This page describes the Lead Sources setting in the CRM module.---
The Lead Sources setting allows you to construct a list of sources that you can use when entering Leads. This list will become a look-up table that you can access from the Source field on the 'Status' card of the Lead window.
To open the Lead Sources setting, first ensure you are in the CRM module. Then, if you are using Windows or Mac OS X, click the [Settings] button in the Navigation Centre or use the Ctrl-S/⌘-S keyboard shortcuts and then double-click 'Lead Source' in the 'Settings' list. If you are using iOS or Android, select 'Settings' from the Tools menu (with 'wrench' icon) and tap 'Lead Source' in the 'Settings' list. The 'Lead Sources: Browse' window will open, listing the Lead Sources that you have previously entered.
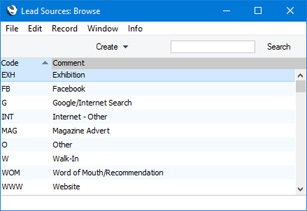
---
Settings in the CRM module:
- Introduction
- Activity Classes
- Activity Consequences
- Activity Priorities
- Activity Types
- Activity Types, Subsystems
- Additional Email Recipients
- Classification Types
- Company Workflow Overview
- Contact Classifications
- Contact Settings
- Courtesy Titles
- CRM Settings
- Customer Categories
- Default Activity Text Codes
- Favourite Activity Types
- Global CRM Settings
- Industries
- Info in Customer Status Report
- Info in Supplier Status Report
- Job Titles
- Leads
- Lead Sources
- Lead Status
- Map Setting
- Normalized Phone Numbers
- Number Series - Activities, N/L Transactions
- Number Series - Customer Letters
- Number Series - Opportunities
- Opportunity Classes
- Telephony Settings
- Text Types
- User Defined Fields - Activities
- User Defined Fields - Contacts
- User Defined Fields - Items
- User Workflow Overview
- Home page for CRM module manual
- Home page for Standard ERP manual
Lead Status
This page describes the Lead Status setting in the CRM module.---
The Lead Status setting allows you to construct a list of Lead Status records that you can use when entering Leads. This list will become a look-up table that you can access from the Status field on the 'Status' card of the Lead window.
To open the Lead Status setting, first ensure you are in the CRM module. Then, if you are using Windows or Mac OS X, click the [Settings] button in the Navigation Centre or use the Ctrl-S/⌘-S keyboard shortcuts and then double-click 'Lead Status' in the 'Settings' list. If you are using iOS or Android, select 'Settings' from the Tools menu (with 'wrench' icon) and tap 'Lead Status' in the 'Settings' list. The 'Lead Status: Browse' window will open, listing the Lead Status records that you have previously entered.
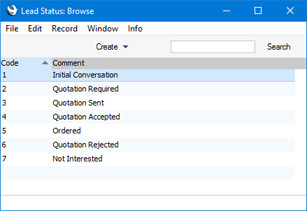
---
Settings in the CRM module:
- Introduction
- Activity Classes
- Activity Consequences
- Activity Priorities
- Activity Types
- Activity Types, Subsystems
- Additional Email Recipients
- Classification Types
- Company Workflow Overview
- Contact Classifications
- Contact Settings
- Courtesy Titles
- CRM Settings
- Customer Categories
- Default Activity Text Codes
- Favourite Activity Types
- Global CRM Settings
- Industries
- Info in Customer Status Report
- Info in Supplier Status Report
- Job Titles
- Leads
- Lead Sources
- Lead Status
- Map Setting
- Normalized Phone Numbers
- Number Series - Activities, N/L Transactions
- Number Series - Customer Letters
- Number Series - Opportunities
- Opportunity Classes
- Telephony Settings
- Text Types
- User Defined Fields - Activities
- User Defined Fields - Contacts
- User Defined Fields - Items
- User Workflow Overview
- Home page for CRM module manual
- Home page for Standard ERP manual
Map Setting
If you need to see a map showing a Contact’s location, open the 'Communication Centre' window from the Contact record and then press the [Map] button. A new browser window will open in your default browser. By default, the Contact’s location will be shown using maps.google.com, but you can use this setting to specify that bing.com/maps will be used instead. You can also specify that Google will be used for addresses in some countries and Bing in others. Please refer here for more details.---
Settings in the CRM module:
- Introduction
- Activity Classes
- Activity Consequences
- Activity Priorities
- Activity Types
- Activity Types, Subsystems
- Additional Email Recipients
- Classification Types
- Company Workflow Overview
- Contact Classifications
- Contact Settings
- Courtesy Titles
- CRM Settings
- Customer Categories
- Default Activity Text Codes
- Favourite Activity Types
- Global CRM Settings
- Industries
- Info in Customer Status Report
- Info in Supplier Status Report
- Job Titles
- Leads
- Lead Sources
- Lead Status
- Map Setting
- Normalized Phone Numbers
- Number Series - Activities, N/L Transactions
- Number Series - Customer Letters
- Number Series - Opportunites
- Opportunity Classes
- Telephony Settings
- Text Types
- User Defined Fields - Activities
- User Defined Fields - Contacts
- User Defined Fields - Items
- User Workflow Overview
- Home page for CRM module manual
- Home page for Standard ERP manual
Normalized Phone Numbers
Please refer to the Asterisk page for details about the Normalized Phone Numbers setting.---
Settings in the CRM module:
- Introduction
- Activity Classes
- Activity Consequences
- Activity Priorities
- Activity Types
- Activity Types, Subsystems
- Additional Email Recipients
- Classification Types
- Company Workflow Overview
- Contact Classifications
- Contact Settings
- Courtesy Titles
- CRM Settings
- Customer Categories
- Favourite Activity Types
- Global CRM Settings
- Industries
- Info in Customer Status Report
- Info in Supplier Status Report
- Job Titles
- Leads
- Lead Sources
- Lead Status
- Map Setting
- Normalized Phone Numbers
- Number Series - Activities, N/L Transactions
- Number Series - Customer Letters
- Number Series - Opportunites
- Opportunity Classes
- Telephony Settings
- Text Types
- User Defined Fields - Activities
- User Defined Fields - Contacts
- User Defined Fields - Items
- User Workflow Overview
- Home page for CRM module manual
- Home page for Standard ERP manual
Number Series - Activities, N/L Transactions
This page describes the Number Series - Activities, N/L Transactions setting in the CRM module.---
If you use Activities to post time to Projects, you can have that time posted to Work in Progress Accounts in the Nominal Ledger. In order for an Activity to post time to Work in Progress Accounts, that Activity must cause the creation of a Nominal Ledger Transaction. This will occur if the following conditions are met:
- You post time to a Project in which the Use WIP option has been selected; and
- You have specified in the Sub Systems setting in the Nominal Ledger that Transactions can be created from Activities.
To solve this issue, Activities have two unique identifying numbers: the Activity Number and the Activity Transaction Number. Every Activity has an Activity Number, but an Activity will only be given an Activity Transaction Number if it is one that has caused a Nominal Ledger Transaction to be created. This allows Transactions created from Activities to follow a sequential number series. The Activity Number and the Activity Transaction Number are not visible in the interface.
By default, the Activity Transaction Number sequence will begin at 1. If you would like it to begin elsewhere, use the Number Series - Activities, N/L Transactions setting to define the sequence that is to be used. Usually, you will only need to define a single number sequence for each year. This is because you won't be able to change the Activity Transaction Number in an individual Activity to one from another Number Series since the Activity Transaction Number is not visible.
To open the Number Series - Activities, N/L Transactions setting, ensure you are in the CRM module and double-click (Windows/Mac OS X) or tap (iOS/Android) 'Number Series - Activities, N/L Transactions' in the 'Settings' list. The following window will appear:
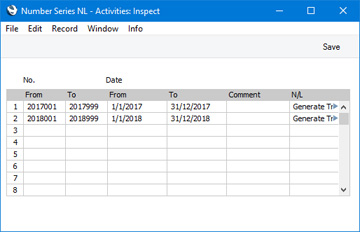
When the setting is complete, click the [Save] button (Windows/Mac OS X) or tap √ (iOS/Android) in the Button Bar to save the changes. To close the window without saving changes, click the close box (Windows/Mac OS X) or tap < (iOS/Android).
Please refer to the description of the Project and Invoice Item fields on the 'Contact' card of an Activity here for more details about using Activities to post time to Projects.
---
Settings in the CRM module:
- Introduction
- Activity Classes
- Activity Consequences
- Activity Priorities
- Activity Types
- Activity Types, Subsystems
- Additional Email Recipients
- Classification Types
- Company Workflow Overview
- Contact Classifications
- Contact Settings
- Courtesy Titles
- CRM Settings
- Customer Categories
- Favourite Activity Types
- Global CRM Settings
- Industries
- Info in Customer Status Report
- Info in Supplier Status Report
- Job Titles
- Leads
- Lead Sources
- Lead Status
- Map Setting
- Normalized Phone Numbers
- Number Series - Activities, N/L Transactions
- Number Series - Customer Letters
- Number Series - Opportunites
- Opportunity Classes
- Telephony Settings
- Text Types
- User Defined Fields - Activities
- User Defined Fields - Contacts
- User Defined Fields - Items
- User Workflow Overview
- Home page for CRM module manual
- Home page for Standard ERP manual
Number Series - Customer Letters
This page describes the Number Series - Customer Letters setting in the CRM module.---
Whenever you enter a new Customer Letter, it will be given its own unique identifying number, based on a sequential series.
You can have more than one sequential number series running at the same time, or at different times. For example, you may want to use different sequences to represent different departments or branches, or you may want to use different sequences to represent different fiscal or financial years.
The Number Series - Customer Letters setting allows you to take advantage of this feature. Here you can define the number sequences that you would like to use with Customer Letters.
To open the Number Series - Customer Letters setting, first ensure you are in the CRM module. Then, if you are using Windows or Mac OS X, click the [Settings] button in the Navigation Centre. If you are using iOS or Android, select 'Settings' from the Tools menu (with 'wrench' icon). Double-click (Windows/Mac OS X) or tap (iOS/Android) 'Number Series - Customer Letters' in the resulting list. The following window appears:
When you double-click 'Number Series - Customer Letters' in the 'Settings' list in the CRM module, the following window appears:
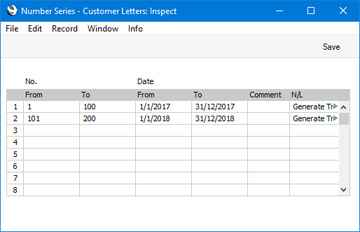
When the setting is complete, click the [Save] button (Windows/Mac OS X) or tap √ (iOS/Android) to save the changes. To close the window without saving changes, click the close box (Windows/Mac OS X) or tap < (iOS/Android).
When you enter a Customer Letter, the next number in the first valid Number Series entered to this setting will be used as a default; change to the first unused number in any other valid Number Series using 'Paste Special'.
If you leave the setting empty, Customer Letter Numbers will start at 1 and continue consecutively. If you want to start from another number, simply specify it in a new Customer Letter record before saving.
---
Settings in the CRM module:
- Introduction
- Activity Classes
- Activity Consequences
- Activity Priorities
- Activity Types
- Activity Types, Subsystems
- Additional Email Recipients
- Classification Types
- Company Workflow Overview
- Contact Classifications
- Contact Settings
- Courtesy Titles
- CRM Settings
- Customer Categories
- Default Activity Text Codes
- Favourite Activity Types
- Global CRM Settings
- Industries
- Info in Customer Status Report
- Info in Supplier Status Report
- Job Titles
- Leads
- Lead Sources
- Lead Status
- Map Setting
- Normalized Phone Numbers
- Number Series - Activities, N/L Transactions
- Number Series - Customer Letters
- Number Series - Opportunites
- Opportunity Classes
- Telephony Settings
- Text Types
- User Defined Fields - Activities
- User Defined Fields - Contacts
- User Defined Fields - Items
- User Workflow Overview
- Home page for CRM module manual
- Home page for Standard ERP manual
Number Series - Opportunities
This page describes the Number Series - Opportunities setting in the CRM module.---
Whenever you enter a new Opportunity, it will be given its own unique identifying number, based on a sequential number series.
You can have more than one sequential number series running at the same time, or at different times. For example, you may want to use different sequences to represent different departments, or you may want to use different sequences to represent different fiscal or calendar years.
The Number Series - Opportunities setting allows you to take advantage of this feature. Here you can define the number sequences that you would like to use with Opportunities.
To open the Number Series - Opportunities setting, ensure you are in the CRM module and double-click (Windows/macOS) or tap (iOS/Android) 'Number Series - Opportunities' in the 'Settings' list. The following window will appear:
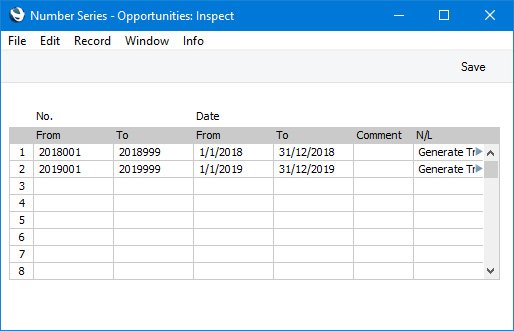
The N/L field common to all Number Series settings is not used in this instance.
When the setting is complete, click the [Save] button (Windows/macOS) or tap √ (iOS/Android) to save the changes. To close the window without saving changes, click the close box or tap <.
Once you have defined number sequences for Opportunities, you can set a universal default sequence in the Number Series Defaults setting, in the System module. When you enter a new Opportunity, its Opportunity Number will be the first unused number in that specific sequence. If you do not set a universal default, Opportunity Numbers will be taken from the first valid Number Series in this setting. You will be able to change to the first unused number in any other valid Number Series using 'Paste Special'.
If you leave the Number Series - Opportunities setting empty, Opportunity Numbers will all be taken from the same sequence, starting at 1 and continuing consecutively. If you want to start from another number, simply specify it in a new Opportunity before saving.
---
Go back to:
- Home page for Settings in the CRM module
- Home page for CRM module manual
- Home page for Standard ERP manual
Opportunity Classes
This page describes the Opportunity Classes setting in the CRM module.---
The Opportunity Class is a means of analysing Opportunities for prioritising. When entering an Opportunity, you can assign it to an Opportunity Class. This will be visible in the 'Opportunities: Browse' window.
If you are using the Workflow Overview to monitor the progress of Opportunities, you will be able to display the Open Opportunities belonging to each Class in separate columns.
If you want to ensure every Opportunity is assigned to an Opportunity Class, select the Require Quotation Class option in the Quotation Settings setting.
To open the Opportunity Classes setting, first ensure you are in the CRM module. Then, if you are using Windows or Mac OS X, click the [Settings] button in the Navigation Centre or use the Ctrl-S/⌘-S keyboard shortcuts and then double-click 'Opportunity Classes' in the 'Settings' list. If you are using iOS or Android, select 'Settings' from the Tools menu (with 'wrench' icon) and tap 'Opportunity Classes' in the 'Settings' list. The 'Opportunity Classes: Browse' window will open, listing the Opportunity Classes that you have previously entered.
To add a new Opportunity Class, click in the first blank row. To remove an Opportunity Class, click on the row number on the left of the row containing the record and press the Backspace key. To insert a row, click on the row number where the insertion is to be made and press Return. If you are using iOS or Android, you can add rows by tapping the + button below the matrix. To remove a row, long tap on the row number on the left of the row and select 'Delete Row' from the resulting menu. To insert a row, long tap on the row number where the insertion is to be made and select 'Insert Row' from the resulting menu.
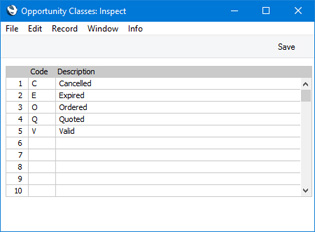
- Code
- Enter the Code for the Opportunity Class in this field. The code can contain up to five characters, and you may freely mix letters and numbers.
- Description
- To make it easier to remember what the different codes stand for, you can enter a short descriptive text here.
Click the [Save] button (Windows/Mac OS X) or tap √ (iOS/Android) to save the changes. To close the window without saving changes, click the close box or tap <.
---
Settings in the CRM module:
- Introduction
- Activity Classes
- Activity Consequences
- Activity Priorities
- Activity Types
- Activity Types, Subsystems
- Additional Email Recipients
- Classification Types
- Company Workflow Overview
- Contact Classifications
- Contact Settings
- Courtesy Titles
- CRM Settings
- Customer Categories
- Default Activity Text Codes
- Favourite Activity Types
- Global CRM Settings
- Industries
- Info in Customer Status Report
- Info in Supplier Status Report
- Job Titles
- Leads
- Lead Sources
- Lead Status
- Map Setting
- Normalized Phone Numbers
- Number Series - Activities, N/L Transactions
- Number Series - Customer Letters
- Number Series - Opportunities
- Opportunity Classes
- Telephony Settings
- Text Types
- User Defined Fields - Activities
- User Defined Fields - Contacts
- User Defined Fields - Items
- User Workflow Overview
- Home page for CRM module manual
- Home page for Standard ERP manual
Telephony Settings
Please refer to the Asterisk page for details about the Telephony Settings setting.---
Settings in the CRM module:
- Introduction
- Activity Classes
- Activity Consequences
- Activity Priorities
- Activity Types
- Activity Types, Subsystems
- Additional Email Recipients
- Classification Types
- Company Workflow Overview
- Contact Classifications
- Contact Settings
- Courtesy Titles
- CRM Settings
- Customer Categories
- Favourite Activity Types
- Global CRM Settings
- Industries
- Info in Customer Status Report
- Info in Supplier Status Report
- Job Titles
- Leads
- Lead Sources
- Lead Status
- Map Setting
- Normalized Phone Numbers
- Number Series - Activities, N/L Transactions
- Number Series - Customer Letters
- Number Series - Opportunites
- Opportunity Classes
- Telephony Settings
- Text Types
- User Defined Fields - Activities
- User Defined Fields - Contacts
- User Defined Fields - Items
- User Workflow Overview
- Home page for CRM module manual
- Home page for Standard ERP manual
Text Types
This page describes the Text Types setting in the CRM module.---
When you enter Activities, you can record notes and comments in the grid on the 'Text' card. If you define various standard texts in this setting, you can access them from the grid in the Activity record using 'Paste Special', reducing the typing load.
To open the Text Types setting, first ensure you are in the CRM module. Then, if you are using Windows or Mac OS X, click the [Settings] button in the Navigation Centre or use the Ctrl-S/⌘-S keyboard shortcuts and then double-click 'Text Types' in the 'Settings' list. If you are using iOS or Android, select 'Settings' from the Tools menu (with 'wrench' icon) and tap 'Text Types' in the 'Settings' list.
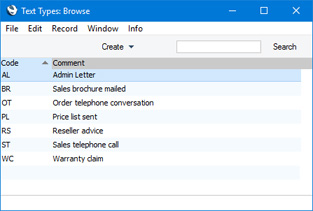
If you need particular Text Types always to be used in Activities in combination with a particular Activity Type, list those Text Types in a record in the Default Activity Text Codes setting and then assign that record to the Activity Type using the Def. Text Codes field.
---
Settings in the CRM module:
- Introduction
- Activity Classes
- Activity Consequences
- Activity Priorities
- Activity Types
- Activity Types, Subsystems
- Additional Email Recipients
- Classification Types
- Company Workflow Overview
- Contact Classifications
- Contact Settings
- Courtesy Titles
- CRM Settings
- Customer Categories
- Default Activity Text Codes
- Favourite Activity Types
- Global CRM Settings
- Industries
- Info in Customer Status Report
- Info in Supplier Status Report
- Job Titles
- Leads
- Lead Sources
- Lead Status
- Map Setting
- Normalized Phone Numbers
- Number Series - Activities, N/L Transactions
- Number Series - Customer Letters
- Number Series - Opportunites
- Opportunity Classes
- Telephony Settings
- Text Types
- User Defined Fields - Activities
- User Defined Fields - Contacts
- User Defined Fields - Items
- User Workflow Overview
- Home page for CRM module manual
- Home page for Standard ERP manual
User Defined Fields - Activities
This page describes the User Defined Fields - Activities setting in the CRM module.---
The Activity record is capable of storing a sufficient quantity of information to cater for most requirements. However, in some circumstances, it might be necessary to store additional information for which no fields have been provided. The User Defined Fields - Activities setting allows you to add your own fields to each Activity record for this purpose. The new fields will be visible on the 'User Defined' card of each Activity record.
To open the User Defined Fields - Activities setting, first use the [Switch Module] button in the Navigation Centre to enter the CRM module. Then, if you are using Windows or Mac OS X, click the [Settings] button in the Navigation Centre or use the Ctrl-S/⌘-S keyboard shortcuts and then double-click 'User Defined Fields - Activities' in the resulting list. If you are using iOS or Android, select 'Settings' from the Tools menu (with 'wrench' icon) and tap 'User Defined Fields - Activities' in the 'Settings' list. The 'User Defined Field Labels - Activities: Inspect' window will open. Make changes as required and then click the [Save] button (Windows/Mac OS X) or tap √ (iOS/Android) to save those changes and close the window. To close the window without saving changes, click the close box (Windows/Mac OS X) or tap < (iOS/Android).
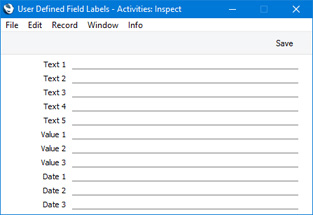
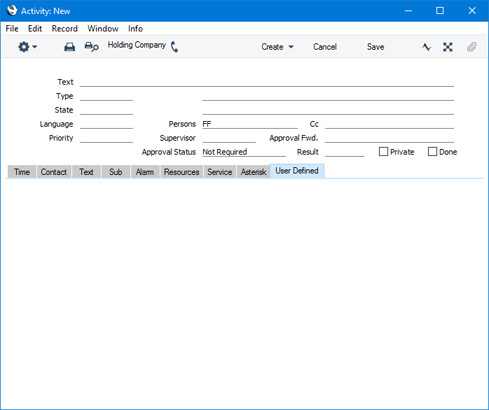
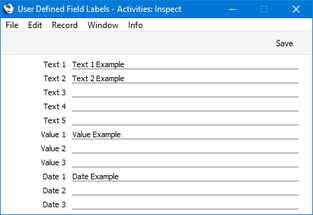
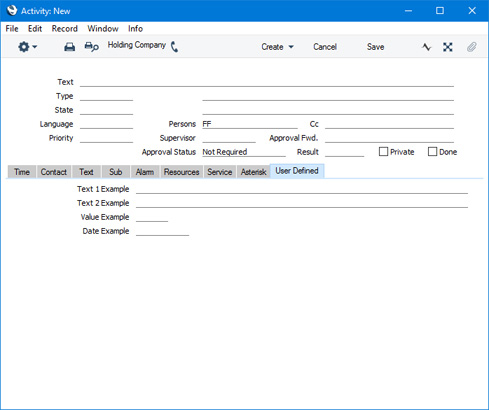
Settings in the CRM module:
- Introduction
- Activity Classes
- Activity Consequences
- Activity Priorities
- Activity Types
- Activity Types, Subsystems
- Additional Email Recipients
- Classification Types
- Company Workflow Overview
- Contact Classifications
- Contact Settings
- Courtesy Titles
- CRM Settings
- Customer Categories
- Default Activity Text Codes
- Favourite Activity Types
- Global CRM Settings
- Industries
- Info in Customer Status Report
- Info in Supplier Status Report
- Job Titles
- Leads
- Lead Sources
- Lead Status
- Map Setting
- Normalized Phone Numbers
- Number Series - Activities, N/L Transactions
- Number Series - Customer Letters
- Number Series - Opportunites
- Opportunity Classes
- Telephony Settings
- Text Types
- User Defined Fields - Activities
- User Defined Fields - Contacts
- User Defined Fields - Items
- User Workflow Overview
- Home page for CRM module manual
- Home page for Standard ERP manual
Omakirjeldatud väljad - kliendid
Antud seadistus on sarnane eespool kirjeldatud seadistusele Omakirjeldatud väljad – tegevused. Siin saad lisada oma välju Kliendikaartidele. Palun loe täpsemalt juhendist „Kliendid ja hankijad“.User Defined Fields - Items
This page describes the User Defined Fields - Items setting in the CRM module.---
The Item record is capable of storing a sufficient quantity of information to cater for most requirements. However, in some circumstances, it might be necessary to store additional information for which no fields have been provided. The User Defined Fields - Items setting allows you to add your own fields to each Item record for this purpose. The new fields will be visible on the 'User Values' card of each Item record.
To open the User Defined Fields - Items setting, first use the [Switch Module] button in the Navigation Centre to enter the CRM module. Then, if you are using Windows or Mac OS X, click the [Settings] button, also in the Navigation Centre or use the Ctrl-S/⌘-S keyboard shortcuts and then double-click 'User Defined Fields - Items' in the resulting list. If you are using iOS or Android, select 'Settings' from the Tools menu (with 'wrench' icon) and tap 'User Defined Fields - Items' in the 'Settings' list. The 'User Defined Field Labels - Items: Inspect' window will open. Make changes as required and then click the [Save] button (Windows/Mac OS X) or tap √ (iOS/Android) to save the change and close the window. To close the window without saving changes, click the close box (Windows/Mac OS X) or tap < (iOS/Android).
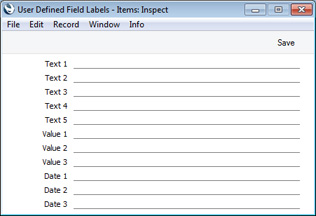
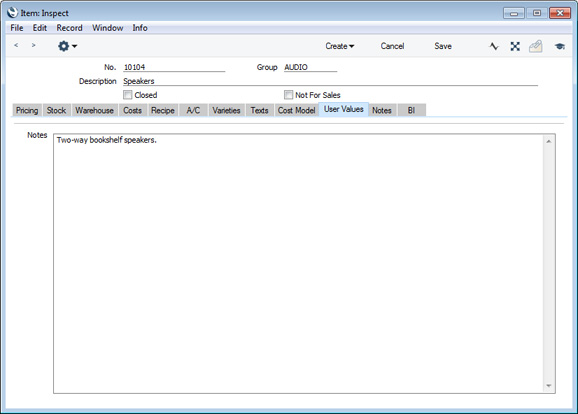
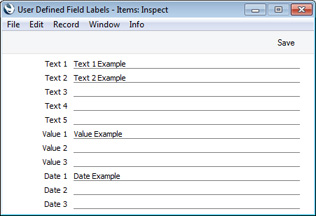
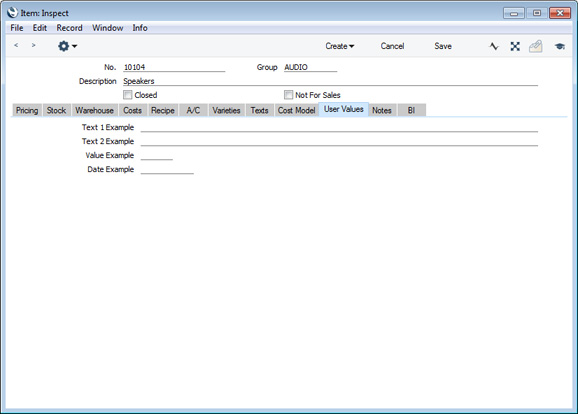
Settings in the CRM module:
- Introduction
- Activity Classes
- Activity Consequences
- Activity Types
- Activity Types, Subsystems
- Additional Email Recipients
- Classification Types
- Company Workflow Overview
- Contact Classifications
- Contact Settings
- Courtesy Titles
- CRM Settings
- Customer Categories
- Global CRM Settings
- Industries
- Info in Customer Status Report
- Info in Supplier Status Report
- Job Titles
- Leads
- Lead Sources
- Lead Status
- Map Setting
- Normalized Phone Numbers
- Number Series - Customer Letters
- Number Series - Opportunites
- Opportunity Classes
- Telephony Settings
- Text Types
- User Defined Fields - Activities
- User Defined Fields - Contacts
- User Defined Fields - Items
- User Workflow Overview
- Home page for CRM module manual
- Home page for Standard ERP manual
User Workflow Overview
Please click here for details about the User Workflow Overview setting in the CRM module.---
Settings in the CRM module:
- Introduction
- Activity Classes
- Activity Consequences
- Activity Types
- Activity Types, Subsystems
- Additional Email Recipients
- Classification Types
- Company Workflow Overview
- Contact Classifications
- Contact Settings
- Courtesy Titles
- CRM Settings
- Customer Categories
- Global CRM Settings
- Industries
- Info in Customer Status Report
- Info in Supplier Status Report
- Job Titles
- Leads
- Lead Sources
- Lead Status
- Map Setting
- Normalized Phone Numbers
- Number Series - Customer Letters
- Number Series - Opportunites
- Opportunity Classes
- Telephony Settings
- Text Types
- User Defined Fields - Activities
- User Defined Fields - Contacts
- User Defined Fields - Items
- User Workflow Overview
- Home page for CRM module manual
- Home page for Standard ERP manual