Working with Companies
A Standard ERP database can contain more than one Company. This feature can be useful if your business is one where there are separate departments or subsidiary companies that keep separate accounts. Their data can be stored in a single database, in separate partitions known as "Companies".You should only use this feature to differentiate between different departments if you intend to account for each of them separately. If you keep a single set of accounts covering your whole organisation, you only need have a single Company in your database.
Companies are stored in the Company register in the System module. You can add new Companies at any time: this process is described on the Changing and Adding Companies page. Adding a new Company will mean that you will have to apply for a new Enabler Key.
If you have more than one Company in your Company register, it is recommended that you specify a Short Code for each one:
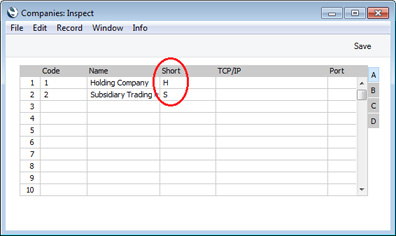
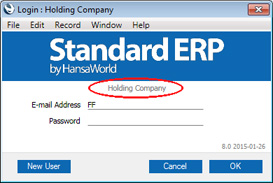
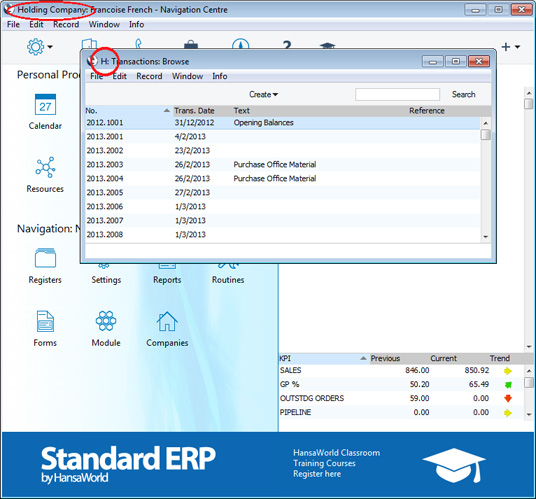
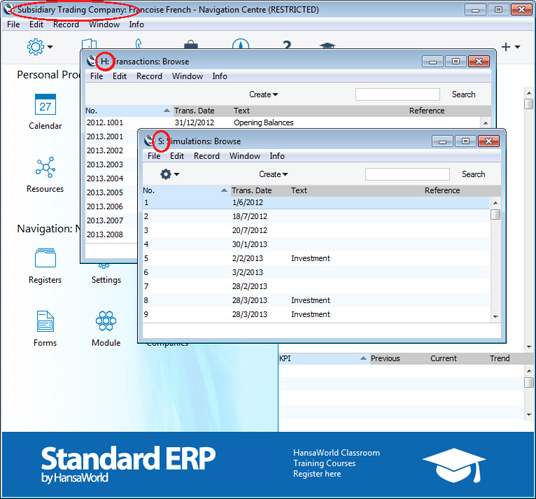
Once you have logged in, the Short Code of the Company ("H" in the example illustrated) will be included in the title of every window, while the full Company Name will be included in the title of the Navigation Centre:
Note that if you are logged into two Companies as described here, you will take up two user "slots". For example, if you have purchased ten users, this means that ten employees can be logged in to your Standard ERP system at any one time. However, if one employee is logged in to two Companies at the same time, this will count as two of those ten log-ins.
Usually, each Company will be completely separate: there will be no common information. If you want to copy information from one Company to another, you can do so using one of two methods:
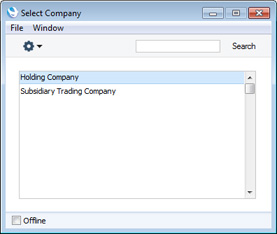
- By dragging and dropping. For example, to copy a Contact record from one Company to another, open the 'Contacts: Browse' window in the first Company, change to the second Company using the [Companies] button in the Navigation Centre or the Ctrl-O/⌘-O keyboard shortcut, and open the 'Contacts: Browse' window in that Company as well. Then click on the relevant Contact record and drag it from one browse window to the other. This method is suitable for copying individual records. The Payment Terms used in the copied Contact must exist in both Companies.
- Using the export and import functions in the System module. This method is suitable for transferring the entire contents of a register or setting from one Company to another.
---
In this chapter:
- Working with Companies
- Shared Registers
- Home page for Working Environment manual
- Home page for Standard ERP manual
Shared Registers
You can choose to make the information in certain registers available to every Company in your database. Such registers are termed "Shared Registers".For example, you may choose to make the Contact register a Shared Register so that you use the same Contact list in all your Companies. This will mean that all Contacts will be available to all Companies. You will not be able to isolate a particular single Contact so that it can only be used by a particular single Company. However, you will be able to make the same Contact list available to four of your Companies and have a completely separate Contact list in a fifth Company.
If you are using Global Users, it is strongly recommended that you share the Access Groups setting, to make the same Access Groups available to every Company. The Global Users feature allows Users to log in to several Companies using the same Signature and password and is described in more detail here.
To set up a Shared Register, follow these steps:
- Working in any Company, enter the Technics module by selecting 'Technics' using the [Switch Module] button in the Navigation Centre. To be able to do this, you should have logged in as a Person that has access to the Technics module: this is controlled using Access Groups.
- Open the 'Settings' list by clicking the [Settings] button in the Navigation Centre or using the Ctrl-S/⌘-S keyboard shortcut. In a multi-user system, you should be the only user logged in.
- Double-click 'Shared Registers' in the list. The following window opens:

- List the registers that you want to be shared in the Registers column. Use the 'Paste Special' feature (Ctrl-Enter/⌘-Enter) to ensure each register is spelt correctly (an incorrect spelling will mean that the register will not be shared).
- Use the For Companies column to specify the Companies that will be able to use the shared register: enter the Codes of each Company that will share the register, separated by commas.
In the example illustrated above, Companies 1 and 2 will share the Contact register, while Companies 1, 2 and 3 will share the Item register. Company 3 will have its own, separate, Contact register. When you enter a new Contact in Company 1, for example, it will immediately be made available for use in Company 2. When you enter a new Item in Company 2, it will immediately be made available for use in Companies 1 and 3.
If you leave the For Companies field empty for a particular register, that register will be made available to every Company. This is the case for the Access Groups setting in the example illustrated above.
- Use the In Company column to specify the Company in which the shared register will be stored.
In the example illustrated above, the shared Contact and Item registers will be stored in Company 1. Note that you cannot store the shared Contact register in Company 3, because that Company will have its own Contact register.
If you leave the In Company field empty for a particular register, that register will be stored in Company 0. Company 0 is a partition of the database usually used to store information that is available to every Company (Mails, Mailboxes and Conferences are always stored in Company 0). This is the case for the Access Groups setting in the example illustrated above.
- Click the [Save] button to save and close the window, or click the close box if you don't want to save changes. Any changes will be implemented immediately: there's no need to restart.
If you share the Account register, only the static information in the Account register (e.g. Account Number and Name, Account Type and so on) will be shared. There will not be a single balance for each Account made up from the Transactions in all Companies. Separate account balances will be maintained for each Account in each Company. If you want there to be a single balance for each Account made up from the Transactions in all Companies, use the Consolidation module.
It is possible to remove a register from the Shared Registers setting, you should proceed with care. Before doing so, you may want to copy the records in the shared register to the separate Companies. To do this, use the 'Unshare Registers' Maintenance function in the Technics module. You will need to log in to every Company first. For example, the Contact register stored in Company 1 is shared between Companies 1, 2 and 3, and the Contact register stored in Company 4 is shared between Companies 4 and 5. The 'Unshare Registers' function will copy the Contacts in Company 1 to Companies 2 and 3, and the Contacts in Company 4 to Company 5. Attachments will be copied as well including links to other records if those records are in registers that are also shared. After running this function, you can then remove the register from the Shared Registers setting, and you should then restart Standard ERP. If you remove the register from the Shared Registers setting without running the 'Unshare Registers' function first, you will no longer be able to use any records entered since you first shared the register, but you will regain access to any records that were previously in each Company.
You can also share blocks. There are two types of block: the setting that is a set of fields and check boxes (e.g. Account Usage S/L, Account Usage P/L, Locking); and the setting that is a series of rows (e.g. Payment Modes, VAT Codes). To do this, use the Shared Blocks setting in the Technics module, following the same steps as described above for the Shared Registers setting. You cannot apply the 'Unshare Registers' function to a block.
---
In this chapter:
- Working with Companies
- Shared Registers
- Home page for Working Environment manual
- Home page for Standard ERP manual