Introduction to the Payment Register
This register is used to issue Payments to creditors. Keeping the Purchase Invoice and Payment registers up to date will allow you to operate an efficient system for paying your Suppliers and will help you to predict your cash flow accurately.Entering a Payment
In the Purchase Ledger or Cash Book module, select 'Payments' from the Registers menu, or click the [Payments] button in the Master Control panel.The 'Payments: Browse' window is opened, showing Payments already entered.
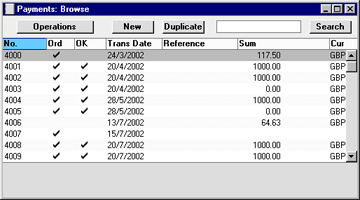
To enter a new Payment, click [New] in the Button Bar or use the Ctrl-N (Windows and Linux) or ⌘-N (Macintosh) keyboard shortcut. Alternatively, highlight a Payment similar to the one you want to enter and click [Duplicate] on the Button Bar.
The 'Payment: New' window is opened, empty if you clicked [New] or containing a duplicate of the highlighted Payment.
The principle for entering a Payment is that you know the following facts:
- How much has actually been withdrawn; and
- any extra fees charged by the bank.
Hansa provides several shortcuts to simplify your work entering Payments. You may for example enter the current date into a date field using 'Paste Special' (Windows and Linux users should press Ctrl-Enter, Macintosh users ⌘-Enter). The 'Paste Special' function is always available to simplify the entering of Account Numbers, Supplier Numbers, Payment Modes etc. When a transaction window is open for data entry, you also have the Operations menu available to the right in the menu bar. This menu is described here.
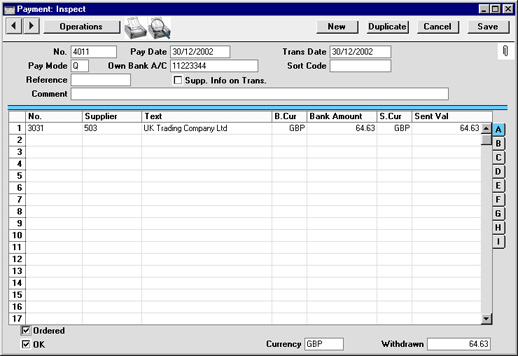
- No.
- Paste Special
Select from another Number Series
- The serial number of the Payment: Hansa will enter the next unused number from the number sequence allocated on the 'Ser Nos' card of the user's Person record or from the Number Series - Payments setting. You may change this number, but not to one that has already been used.
- If you have used the Payment Modes setting to define separate number sequences for each Payment Mode, the Payment Number will be determined by the default Payment Mode and will change if the Payment Mode is changed. Number sequences defined in the Payment Modes setting are not shown in the 'Paste Special' list.
- If you have used the Payment Modes setting to define separate number sequences for each Payment Mode, the Payment Number will be determined by the default Payment Mode and will change if the Payment Mode is changed. Number sequences defined in the Payment Modes setting are not shown in the 'Paste Special' list.
- Pay. Date
- Paste Special
Current Date
- The date when you want the Payment to be executed.
- Once a Payment has been Ordered, it is still possible to change the Payment Date. When the Payment has been approved, however, no further changes are possible.
- Once a Payment has been Ordered, it is still possible to change the Payment Date. When the Payment has been approved, however, no further changes are possible.
- Trans. Date
- The date of the Nominal Ledger Transaction resulting from this Payment. This date is always the same as the Payment Date and cannot be changed independently.
- Pay. Mode
- Paste Special
Payment Modes setting, Sales/Purchase Ledger
- The Payment Mode determines the Nominal Ledger Account to be credited by the Payment.
- On a single Payment record it is possible to enter payments to different Suppliers against different Invoices. It is also possible to enter payments across Payment Modes: specifying a Payment Mode for any of the individual payments in the grid will override that entered here.
- If you have used the Payment Modes setting to define separate number sequences for each Payment Mode, the Payment Number will be determined by the default Payment Mode and will change if the Payment Mode is changed.
- On a single Payment record it is possible to enter payments to different Suppliers against different Invoices. It is also possible to enter payments across Payment Modes: specifying a Payment Mode for any of the individual payments in the grid will override that entered here.
- Own Bank No.
- The number for the bank account you want to use for the Payment. This information will be brought in from the Payment Mode record.
- Sort Code
- The Sort Code (branch number) of the bank where the account is held.
- Reference
- This field can be used if you need to identify the Payment by any means other than the Payment Number (e.g. a bank reference in the case of credit transfers or BACS payments).
- The Reference is shown in the 'Payments: Browse' window, allowing you to search for a Payment with a particular Reference. The Payment Journal report can also be used to list Payments with a particular Reference. This Reference will be copied to the Reference field of any Nominal Ledger Transaction generated from this Payment.
- The Reference is shown in the 'Payments: Browse' window, allowing you to search for a Payment with a particular Reference. The Payment Journal report can also be used to list Payments with a particular Reference. This Reference will be copied to the Reference field of any Nominal Ledger Transaction generated from this Payment.
- Supp. Info. on Trans.
- When a Nominal Ledger Transaction is generated automatically from this Payment, use this option if you would like to have the Payment Number, Payment Date and Supplier shown on flip E of the Transaction. This applies to the posting to the Creditor Account only.
- The check box will be on by default if you are using the Supp. Info. on Trans. option on card 1 of the Account Usage P/L setting.
- The check box will be on by default if you are using the Supp. Info. on Trans. option on card 1 of the Account Usage P/L setting.
- Comment
- Default taken from
Payment Mode
- The text for the Payment Mode. This text may be changed.
If you need Hansa to print a remittance advice and/or a cheque, separate such forms will be printed for each Supplier included in the Payment record.
Each record in the Payment register results in one Nominal Ledger Transaction, with bank or other institution as credit Account.
Flip A
- No.
- Paste Special
Open, approved Purchase Invoices, Purchase Invoice register
- The number of the Purchase Invoice being paid. On entering an Invoice Number, the Currency, if any, of the Invoice will be brought in and, if the Invoice qualifies for an early settlement discount, a discount row is inserted automatically, together with a suggested discount amount. This is calculated using the formula specified for the appropriate Payment Terms record.
- Note that when using 'Paste Special' only unpaid Purchase Invoices will appear in the selection list. However, Purchase Invoices against which an unapproved Payment has been entered are treated as unpaid (unless the Payment's Ordered box is checked) and thus will be listed. Sorting the 'Paste Special' selection by Supplier will allow you to find the Invoice that is being paid quickly and easily.
- If the Payment is a Prepayment or On Account Payment to a Supplier with whom you have an account (marked using the On Account box on the 'Terms' card of the Supplier screen) for which an Invoice has not yet been received, this field should be left blank. An entry can be made to the Prepayment Number field on flip E instead. This is fully described on the On Account Payments and Prepayments page.
- Note that when using 'Paste Special' only unpaid Purchase Invoices will appear in the selection list. However, Purchase Invoices against which an unapproved Payment has been entered are treated as unpaid (unless the Payment's Ordered box is checked) and thus will be listed. Sorting the 'Paste Special' selection by Supplier will allow you to find the Invoice that is being paid quickly and easily.
- Supplier
- Paste Special
Supplier register
- Default taken from Purchase Invoice or Purchase Order
- Entered by Hansa when the Invoice Number is entered (or when a Prepayment Number that is also a Purchase Order Number is entered on flip E).
- Entered by Hansa when the Invoice Number is entered (or when a Prepayment Number that is also a Purchase Order Number is entered on flip E).
- Text
- The Supplier's Name is entered by Hansa, from the Supplier register. You may change this if you wish. It will appear in the Text field of the Nominal Ledger Transaction.
- B. Cur
- Paste Special
Currency register, System module
- Default taken from Sent Currency
- The Bank Currency: enter the Currency of the amount as issued from the bank.
- So far as the accounting of the Bank Amount is concerned, it does not matter whether the Sent Currency, the home Currency or the Currency of the Bank Account (specified in the Account register in the System module) is entered here, since the resulting Nominal Ledger Transaction will contain values in all appropriate Currencies. However, it is recommended that all rows on the same Payment use the same Bank Currency so that a total amount is shown in the Withdrawn field and in the 'Payments: Browse' window. In smaller companies, this can help maintain a mental picture of the cash flow situation.
- If there are any bank charges attached to this particular payment, they should be entered to the Bank Fee field on flip I in the Currency specified here.
- The Bank Currency: enter the Currency of the amount as issued from the bank.
- Bank Amount
- Default taken from
Sent Value
- The amount paid, expressed in the Bank Currency. If the Currency is changed, the Bank Amount is converted using the current conversion rates: these cannot be modified for an individual payment. Do not use this field to subtract bank fees from the amount paid: the Bank Fee field on flip I is provided for this purpose.
- In normal circumstances, you should not change the Bank Amount and Currency. In the case of partial payments or overpayments, change the Sent Value (described below) and the Bank Amount will be altered automatically by Hansa, taking exchange rates into account if necessary. If you change the Bank Amount, the Sent Value will not be updated automatically, so such an alteration should only be made in exceptional circumstances. Examples might be when you know that the exchange rate that will be levied by the bank is different to the latest rate in Hansa, or when you know the exact amount of the Payment as deducted from your bank account. Changing the Bank Amount is therefore effectively the same as changing the exchange rate for a single Payment row.
- In normal circumstances, you should not change the Bank Amount and Currency. In the case of partial payments or overpayments, change the Sent Value (described below) and the Bank Amount will be altered automatically by Hansa, taking exchange rates into account if necessary. If you change the Bank Amount, the Sent Value will not be updated automatically, so such an alteration should only be made in exceptional circumstances. Examples might be when you know that the exchange rate that will be levied by the bank is different to the latest rate in Hansa, or when you know the exact amount of the Payment as deducted from your bank account. Changing the Bank Amount is therefore effectively the same as changing the exchange rate for a single Payment row.
- S. Cur
- Paste Special
Currency register, System module
- Default taken from Purchase Invoice
- The Payment Currency: enter the Currency you intend to use in paying the Supplier. The default is to the Currency used on the Purchase Invoice: any other Currency can be used if necessary. If the Currency is changed, the Sent Value is converted using the current conversion rates: these cannot be modified for an individual payment.
- If you want to ensure that all rows on a particular Payment have the same Sent Currency, check the Do not allow Payment rows with different Sent Currencies box in the Payment Settings setting.
- The Payment Currency: enter the Currency you intend to use in paying the Supplier. The default is to the Currency used on the Purchase Invoice: any other Currency can be used if necessary. If the Currency is changed, the Sent Value is converted using the current conversion rates: these cannot be modified for an individual payment.
- Sent Val
- Default taken from
Outstanding amount on Invoice or Purchase Order total
- The amount paid, expressed in the Sent Currency. The default can be changed, in the event of partial payments or overpayments. If the Currency is changed, the Sent Value is converted using the current conversion rates: these cannot be modified for an individual payment. If the amount is altered before the Currency, the conversion will apply to the altered amount.
- When a Prepayment Number that is also a Purchase Order Number is entered on flip E, the Order total will appear here.
- PI. Cur
- The Purchase Invoice Currency is the Currency used on the Invoice being paid. This field cannot be changed.
- Open Inv. Value
- The outstanding amount of the Invoice being paid, in the Purchase Invoice Currency. This field cannot be changed.
- PInv Val
- The amount being paid, in the Purchase Invoice Currency.
- Objects
- Paste Special
Object register, System module
- Default taken from Purchase Invoice ('Other' card) or Supplier
- Up to 20 Objects, separated by commas, can be assigned to this Payment and all transactions generated from it. You might define separate Objects to represent different departments, cost centres or product types. This provides a flexible method of analysis that can be used in Nominal Ledger reports.
- Any Objects specified here will be assigned to the debit posting to the Creditor Account in the Nominal Ledger Transaction generated from this Payment. Objects assigned to the credit posting to the Bank or Cash Account will be taken from the Payment Mode.
- If a Purchase Invoice Number is specified on flip A, the Objects will be taken from the ('Other' card of that Purchase Invoice. If no Purchase Invoice Number is specified (i.e. it is an On Account Payment or a Prepayment), the Objects will be taken from the 'Accounts' card of the Supplier if the Objects on On Account A/C option on card 1 of the Account Usage P/L setting is being used.
- Up to 20 Objects, separated by commas, can be assigned to this Payment and all transactions generated from it. You might define separate Objects to represent different departments, cost centres or product types. This provides a flexible method of analysis that can be used in Nominal Ledger reports.
- P. Mode
- Paste Special
Payment Modes setting, Sales/Purchase Ledger
- Enter a Payment Mode, if different from the Payment Mode entered in the header. This allows different payments on the same Payment to be credited to different Bank Accounts.
- Cheque No.
- Record the number of the cheque used for the Payment here.
- To generate a Cheque Number automatically, ensure the cursor is in the appropriate row and choose 'Assign Cheque Number' from the Operations menu. The next number after that in the last Payment entered will be placed in this field.
- If a cheque is printed using the 'Cheque Documents' or 'Payment Forms' options of the 'Documents' function, the cheque number will be recorded here automatically.
- If the Type of the Payment Mode is "Own Cheques", this field cannot be left blank. It should contain the Serial Number of a record in the Own Cheques register: use 'Paste Special' to ensure the correct record is specified.
- To generate a Cheque Number automatically, ensure the cursor is in the appropriate row and choose 'Assign Cheque Number' from the Operations menu. The next number after that in the last Payment entered will be placed in this field.
- Order No.
- Paste Special
Purchase Order register
- If the payment is a deposit against a Purchase Order, you can enter the number of the Purchase Order to this field or to the Prepayment Number field immediately to the right. If you enter it here, the Supplier on flip A will be changed to that of the Order, the Bank Amount and Sent Value will be changed to the Order total, and the Order Number will be copied to the Prepayment Number field. Please refer to the description of the Prepayment Number field below for full details.
- Prepay. No
- Paste Special
Purchase Order register
- If the payment is a Prepayment (i.e. one where it is not possible to specify an Invoice Number on flip A), an entry should be made to this field. This can be a number of your own generation, a reference given to the prepayment by the Supplier or, preferably, the number of the Purchase Order against which the deposit has been issued. If a Purchase Order number is used, the Supplier on flip A will be changed to that of the Purchase Order, and the Bank Amount and Sent Value will be changed to the Order total.
- When the Invoice to be set against the Prepayment is received, the two can be connected using the 'Connect to Prepayment' function on the Operations menu of the Purchase Invoice screen. This is fully described on the On Account Payments and Prepayments page. If a deposit or prepayment exists without a Prepayment Number, it will not be listed in the 'Paste Special' window available from that field and connecting it to an Invoice will be more difficult. Prepayments that do not have a Prepayment Number will not be shown in the Prepayment History report.
- It is not compulsory to make an entry to this field if the Invoice Number field on flip A is blank. If you would like to make it so, turn on the Use Prepayments, not On Account option on card 1 of the Account Usage S/L setting. This will also apply to the equivalent field on flip C of the Receipt screen in the Sales Ledger.
- It is not necessary to enter a unique number to this field. This allows you to issue more than one deposit against an individual Purchase Order. However, using a Prepayment Number more than once may make the Prepayment History report difficult to understand, and may make it difficult to link a particular Prepayment to an Invoice using the 'Connect to Prepayment' function. Therefore you may wish to use the Force Unique Prepayment Numbers option, on card 1 of the Account Usage P/L setting. This will mean that once a Prepayment Number has been used in an approved Prepayment, you will not be able to use it again.
- When the Invoice to be set against the Prepayment is received, the two can be connected using the 'Connect to Prepayment' function on the Operations menu of the Purchase Invoice screen. This is fully described on the On Account Payments and Prepayments page. If a deposit or prepayment exists without a Prepayment Number, it will not be listed in the 'Paste Special' window available from that field and connecting it to an Invoice will be more difficult. Prepayments that do not have a Prepayment Number will not be shown in the Prepayment History report.
- VAT, V-Cd
- These fields are provided to satisfy a requirement of users in Latvia, where it can be necessary to post VAT on Payment. This is also the case for users of the Cash VAT scheme in the UK. If the Book Payment VAT option in the Account Usage P/L setting is being used, the VAT Code and VAT Amount will be brought in automatically from the Invoice (the VAT Code comes from the first row of the Invoice). When the Payment is approved, the VAT amount will be moved from the temporary VAT Input Account to the final one (the I/P Account), as specified in the VAT Codes setting in the Nominal Ledger.
- If you would like VAT to be posted from Prepayments, you should check the Book Prepayment VAT box on card 1 of the Account Usage P/L setting. When you enter a Prepayment Number (on flip E) that is also a Purchase Order Number, the VAT Code and VAT Value will be brought in automatically from the Order (the VAT Code comes from the first row of the Order) . If you enter a Prepayment Number that is not a Purchase Order Number, you should enter a VAT Code manually. The VAT Value will then be calculated from the Sent Value. In both cases, the VAT Value will be credited to the On Account VAT Account and debited to the Prepayment VAT Account specified on card 2 of the Account Usage P/L setting.
- Take care with these fields when entering On Account Payments. VAT will not be posted from On Account Payments (Payments that do not have an Invoice Number or a Prepayment Number). Therefore, if you are using the Cash VAT scheme, you should not use On Account Payments. Instead, you should enter a VAT Code manually and specify a Prepayment Number that is not a Purchase Order Number, as described in the previous paragraph. If you leave the VAT Code blank, the Nominal Ledger Transaction resulting from the Prepayment will not have a VAT element.
- If you would like VAT to be posted from Prepayments, you should check the Book Prepayment VAT box on card 1 of the Account Usage P/L setting. When you enter a Prepayment Number (on flip E) that is also a Purchase Order Number, the VAT Code and VAT Value will be brought in automatically from the Order (the VAT Code comes from the first row of the Order) . If you enter a Prepayment Number that is not a Purchase Order Number, you should enter a VAT Code manually. The VAT Value will then be calculated from the Sent Value. In both cases, the VAT Value will be credited to the On Account VAT Account and debited to the Prepayment VAT Account specified on card 2 of the Account Usage P/L setting.
- To Bank A/C.
- The number of the Supplier's bank account receiving the Payment is brought in from the 'Other' card of the Purchase Invoice or from the 'Accounts' card of the Supplier record.
- Sort Code
- The branch number of the bank holding the Supplier's bank account is brought in from the 'Other' card of the Purchase Invoice or from the 'Accounts' card of the Supplier record.
- Bank Fee
- Enter any fee charged by the bank for this payment. This figure should be in the Bank Currency. Bank fees will be debited to the Bank Fee Account specified on card 1 of the Account Usage P/L setting. In calculating the value of the credit posting to the Bank Account specified in the Payment Mode, the Bank Fee will be added to the Sent Value. The Sent Value will be debited to the Creditor Account.
- Note that this field allows you to specify a Bank Fee for each row (or for a single particular row) on the Payment, remembering that each row can have a different Payment Mode and therefore a different credit (Bank) account. If you want to record a single Bank Fee for the entire Payment, use the 'New Fee' function on the Operations menu.
- Note that this field allows you to specify a Bank Fee for each row (or for a single particular row) on the Payment, remembering that each row can have a different Payment Mode and therefore a different credit (Bank) account. If you want to record a single Bank Fee for the entire Payment, use the 'New Fee' function on the Operations menu.
- B. Cur. 1
- The amount paid, expressed in Base Currency 1.
- In normal circumstances, the Bank Amount and Sent Value fields on flip A are sufficient to express the value of the Payment. If the Sent Currency and Bank Currency are different, the Nominal Ledger Transaction resulting from the Payment will contain values in all appropriate Currencies, converted using the latest Exchange and Base Rates.
- If you know the exact amount of the Payment in Base Currency 1 as withdrawn from your bank account (i.e. you know the exchange rate that will be levied by the bank), you can either change the Bank Amount or you can enter the exact figure in Base Currency 1 here. The first of these choices will post to the Bank Rate Gain or Loss Account (specified on card 2 of the Account Usage P/L setting), while the second will post to the Rate Gain or Loss Account. Please click here for full details and an example.
- This field must contain a value if so specified for the Payment Mode (using the Force field on flip D).
- In normal circumstances, the Bank Amount and Sent Value fields on flip A are sufficient to express the value of the Payment. If the Sent Currency and Bank Currency are different, the Nominal Ledger Transaction resulting from the Payment will contain values in all appropriate Currencies, converted using the latest Exchange and Base Rates.
- B. Cur. 2
- The amount sent, expressed in Base Currency 2.
- This field must contain a value if so specified for the Payment Mode (using the Force field on flip D).
- Ordered
- The Ordered and OK check boxes are provided to allow for the delay between the issuing of a Payment and the clearing of the funds from your company's bank account. Checking the Ordered box indicates that a Payment has been issued, while checking the OK box indicates that the funds have been cleared. The Ordered box must therefore be checked before the OK box.
- When a Payment is saved with its Ordered box checked, the Invoice being paid is no longer treated as open, even if the OK box is not checked.
- If, once a Payment has been issued, it transpires that the funds are not cleared from your company's bank account (perhaps because the cheque bounced or was lost), highlight each row in the Payment in turn by clicking the row number. Then, press the Backspace key. A red line is drawn through the row, re-opening the Purchase Invoice.
- When a Payment is saved with its Ordered box checked, the Invoice being paid is no longer treated as open, even if the OK box is not checked.
- OK
- Payments are approved by clicking this check box. On clicking [Save] to save the Payment, if so determined in the Sub Systems setting in the Nominal Ledger, a Transaction will be generated crediting the Bank Account specified for the Payment Mode and debiting the Creditor Control Account of the Invoice being paid.
- References in these web pages to approved Payments are to Payments whose OK check box has been switched on.
- References in these web pages to approved Payments are to Payments whose OK check box has been switched on.
- Currency
- If the Bank Currency for all rows on the Payment is the same, that Currency is additionally shown here so that it can be displayed in the 'Payments: Browse' window.
- Withdrawn
- The sum of the Bank Amounts: the total for this Payment. This field only contains a value if all rows on the Payment feature the same Bank Currency.
Entering a Payment - Header
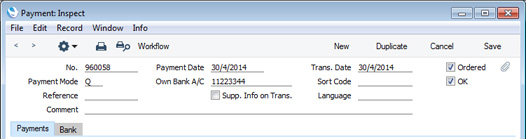
- No.
- Paste Special
Select from another Number Series
- The unique identifying number of the Payment. The default will be chosen as follows:
- It will be taken from the number sequence allocated to the current user on the 'Number Series' card of their Person record.
- It will be taken from the number sequence specified in the Number Series Defaults setting in the System module.
- It will be taken from the first valid row in the Number Series - Payments setting.
- It will be the next number following on from the last Payment entered.
- You will not be able to save a Payment if the No. does not belong to a valid number sequence. A valid number sequence is one for the period in which the Transaction Date of the Payment falls and with unused numbers, so this problem will most usually occur at the beginning of a new calendar or financial year. If you change number sequences each year, remember to update your Person records and Number Series Defaults setting if you are using them (steps 1 and 2 above) so that they refer to the new number sequences.
- If you are working in a multi-user environment, the Payment Number will be assigned when you save the Payment for the first time, chosen as described above and providing you have not already specified a number yourself.
- If you have used the Payment Modes setting to define separate number sequences for each Payment Mode and are using the Common Number Series option in the Cash Book Settings setting, the Payment Number will be determined by the default Payment Mode and will change if you change the Payment Mode. Number sequences defined in the Payment Modes setting are not shown in the 'Paste Special' list.
- It will be taken from the number sequence allocated to the current user on the 'Number Series' card of their Person record.
- Payment Mode
- Paste Special
Payment Modes setting, Sales/Purchase Ledger
- The Payment Mode is the method of payment (e.g. cheque, credit card or cash). It determines the Nominal Ledger Account that will be credited by the Payment.
- You can enter payments to different Suppliers against different Invoices in a single Payment record. You can also enter payments with different Payment Modes by specifying Payment Modes in the individual Payment rows (flip C). If a Payment row has its own Payment Mode, the Nominal Ledger Account in that Payment Mode will be credited from that row.
- If you have used the Payment Modes setting to define separate number sequences for each Payment Mode and are using the Common Number Series option in the Cash Book Settings setting, the Payment Number will be determined by the default Payment Mode and will change if you change the Payment Mode.
- If you pay a Supplier using cash, you can record your payment as a Payment using an appropriate Payment Mode (one that credits the Cash Account), or you can use the Cash Out register in the Cash Book module ('Payments' card).
- If the Payment Mode is one in which you have specified a Form in the Document field on flip B, this Form will be used when you print the Payment, in place of the Form specified in the 'Form Definition' window for the Payment Form document.
- You can enter payments to different Suppliers against different Invoices in a single Payment record. You can also enter payments with different Payment Modes by specifying Payment Modes in the individual Payment rows (flip C). If a Payment row has its own Payment Mode, the Nominal Ledger Account in that Payment Mode will be credited from that row.
- Reference
- You can use this field if you need to identify the Payment by any means other than the Payment Number. This Reference will be copied to the Reference field in the Nominal Ledger Transaction generated from the Payment.
- The Reference will be shown in the 'Payments: Browse' window, allowing you to search for a Payment with a particular Reference. You can also use the Payment Journal report to list Payments with a particular Reference.
- The Reference will be included in Banking File export files when you are using the following Payment File Formats:
- Australia - ABA
- Denmark - Midtbank
- All New Zealand banks (especially ASB and Westpac).
- The Reference will be shown in the 'Payments: Browse' window, allowing you to search for a Payment with a particular Reference. You can also use the Payment Journal report to list Payments with a particular Reference.
- Comment
- Default taken from
Payment Mode
- This text will be taken from the Payment Modes setting and will be copied to the Text field in the header of the Nominal Ledger Transaction that will result from the Payment. You can change it if necessary.
- Payment Date
- Paste Special
Choose date
- The date when you want the Payment to be executed.
- Once you have Ordered a Payment, you can still change the Payment Date. After marking it as OK and saving, however, no further changes will be possible.
- Once you have Ordered a Payment, you can still change the Payment Date. After marking it as OK and saving, however, no further changes will be possible.
- Own Bank A/C
- Default taken from
Payment Mode
- The number of the bank account from where you will issue the Payment. This information will be brought in from the Payment Mode.
- The bank account specified here will in most cases be quoted in Banking File export files as the payer bank account. This will be the case even if you specify a Payment Mode with a different Bank A/C No. in an individual Payment row. So, if you use Banking File exports, it is not recommended that you specify Payment Modes in individual Payment rows, because your bank may not take the payment from the account that you are expecting.
- The bank account specified here will in most cases be quoted in Banking File export files as the payer bank account. This will be the case even if you specify a Payment Mode with a different Bank A/C No. in an individual Payment row. So, if you use Banking File exports, it is not recommended that you specify Payment Modes in individual Payment rows, because your bank may not take the payment from the account that you are expecting.
- Supp. Info. on Trans.
- When a Nominal Ledger Transaction is generated automatically from a Payment, this option will cause the Purchase Invoice Number, Payment Date and Supplier to be copied to flip E of the Transaction row(s) posting to the Creditor Account.
- You should use this option if you want to use the Creditors Account report in the Nominal Ledger. This report lists debit and credit postings to the Creditor Account, organised by Supplier. In order to provide this analysis, the report needs the Supplier Number to be copied to flip E of each Transaction row posting to the Creditor Account.
- This option will be selected by default if you are using the Supp. Info. on Trans. option on the 'Creditors' card of the Account Usage P/L setting.
- You should use this option if you want to use the Creditors Account report in the Nominal Ledger. This report lists debit and credit postings to the Creditor Account, organised by Supplier. In order to provide this analysis, the report needs the Supplier Number to be copied to flip E of each Transaction row posting to the Creditor Account.
- Trans. Date
- This date will be used as the Transaction Date in the Nominal Ledger Transaction that will result from the Payment. This date is always the same as the Payment Date and cannot be changed independently.
- Sort Code
- Default taken from
Payment Mode
- The Sort Code (branch number) of the bank where the account from where you will issue the Payment is held.
- Language
- Paste Special
Languages setting, System module
- You can use the Language to determine the Form that will be used when you print the Payment, and the printer that will be used to print it. This can include sending the document to a fax machine, if your hardware can support this feature. Do this in the 'Form Definition' window for the Payment Forms document, as described here.
- You can also use the Language to determine the text that will appear in Mails created from Payments. Please refer to the description of the 'Create E-Mail' Operations menu function for details.
- You can also use the Language to determine the text that will appear in Mails created from Payments. Please refer to the description of the 'Create E-Mail' Operations menu function for details.
- Ordered
- The Ordered and OK check boxes are provided to allow for the delay between the issuing of a Payment and the clearing of the funds from your company's bank account. Checking the Ordered box indicates that you have issued a Payment, while checking the OK box indicates that the funds have been cleared. You must therefore check the Ordered box before the OK box.
- When you save a Payment with its Ordered box checked, the Invoice(s) being paid will no longer be treated as open, even if you have not checked the OK box.
- If, once you have issued a Payment, it transpires that the funds were not cleared from your company's bank account (perhaps because the cheque bounced or was lost), highlight each row in the Payment in turn by clicking the row number. Then, press the Backspace key. A red line will be drawn through the row, invalidating it and re-opening the Purchase Invoice. You can also invalidate an entire Payment by selecting 'Invalidate' from the Record menu.
- You can use Access Groups to control who can mark Payments as Ordered. To do this, deny access to the 'Order Payment' Action.
- If you need Payments to pass through an approval process before you can mark them as Ordered, you can configure such a process using the Approval Rules register in the Business Alerts module. The same approval process will also control access to the OK box i.e. after a Payment has passed through the same approval process, you will be able to tick both the Ordered and OK check boxes. Please refer to the description of the Approval Status options on the 'Bank' card for brief details about the approval process and here for full details.
- When you save a Payment with its Ordered box checked, the Invoice(s) being paid will no longer be treated as open, even if you have not checked the OK box.
- OK
- When you tick this box and click [Save] to save the Payment, a Nominal Ledger Transaction will be generated, if you have so determined in the Sub Systems setting in the Nominal Ledger and in the Number Series - Payments setting. This Transaction will credit the Bank Account specified for the Payment Mode and debit the Creditor Control Account(s) of the Invoice(s) being paid. No further modifications to the Payment will be possible.
- You can use Access Groups to control who can mark Payments as OK. To do this, deny access to the 'OK Payments' Action.
- If you would like a warning to appear every time you save a Payment that you have not marked as OK, please refer to the Global Warnings on UnOKed Records setting in the System module.
- If you need Payments to pass through an approval process before you can mark them as OK, you can configure such a process using the Approval Rules register in the Business Alerts module. Please refer to the description of the Approval Status options on the 'Bank' card for brief details about the approval process and here for full details.
- You can use Access Groups to control who can mark Payments as OK. To do this, deny access to the 'OK Payments' Action.
In this chapter:
- Introduction
- Entering a Payment, including:
- Header
- 'Payments' card Part 1 (Flips A-E)
- 'Payments' card Part 2 (Flips F-J and Footer)
- 'Bank' card
- Header
- Entering a Payment - Example
- Payments in Currency
- Reconciling Payments, Marking as OK and Posting to the Nominal Ledger
- Nominal Ledger Transactions from Payments
- Printing Payment Forms and Cheques
- Invalidating Payments
- Prepayments and On Account Payments
- Correcting Mistakes in Payments
- Withholding Taxes in the Purchase Ledger
- Operations menu
- Home page for Purchase Ledger manual
- Home page for HansaWorld Enterprise manual
Entering a Payment - Payments Card Part 1 (Flips A-E)
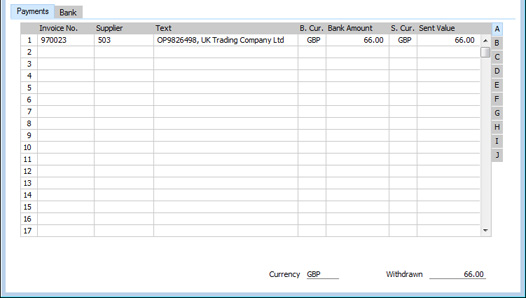
If you need to print a remittance advice and/or a cheque, separate documents will be printed for each Supplier included in the Payment record.
Each record in the Payment register results in one Nominal Ledger Transaction, with bank or other institution as credit Account (taken from the Payment Mode). If a Payment has several rows, there will usually be a single credit posting, unless you are using the Separate Row per Payment Row on Bank A/C option in the Account Usage P/L setting.
To add a row to a Payment, click in any field in the first blank row and enter appropriate text. To remove a row, click on the row number on the left of the row and press the Backspace key. To insert a row, click on the row number where the insertion is to be made and press Return.
You can bring several Purchase Invoices into a Payment by opening the 'Purchase Invoices: Browse' or 'Paste Special' windows, selecting a range of Purchase Invoices by clicking while holding down the Shift key, and then dragging them to the No. field in the first empty Payment row. You can also copy a list of Purchase Invoice Numbers from a spreadsheet or word processor and paste them in the No. field in the first empty row.
Flip A
- Invoice No.
- Paste Special
Open Purchase Invoices
- The number of the Purchase Invoice being paid. This must be a Purchase Invoice that has been marked as OK.
- When you enter an Invoice Number, the Open Invoice Value (the amount outstanding) will be brought in to the Sent Value field as a default, and this figure will also be shown in the Open Inv. Value field on flip B. The Currency, if any, of the Invoice will be brought in to the Sent Currency field.
- If the Invoice qualifies for an early settlement discount, a discount row will be added to the Payment automatically, together with a suggested discount amount. This will be taken from the Sett. Discount field in the Purchase Invoice. If you want to add an ad hoc settlement discount, use the 'Add Settlement Discount' function on the Operations menu.
- If the Invoice is payable in instalments, go to flip G and enter the instalment being paid in the Instalment field, using 'Paste Special'.
- The 'Paste Special list will only include open (unpaid) Purchase Invoices. If you have saved a Payment without marking it as Ordered or OK, the Purchase Invoice(s) in that Payment will continue to be treated as unpaid and so will still be included in the 'Paste Special' list. It is therefore recommended that you do not leave Payments for too long without marking them as Ordered or OK, to minimise the risk of quoting Purchase Invoices in Payments more than once.
- You cannot pay a Purchase Invoice in a Payment whose Transaction Date is earlier than the Invoice and Transaction Dates of the Invoice.
- You can make a Payment without reference to a specific Invoice (e.g. a deposit that you pay to a Supplier before you have received a Purchase Invoice from them). Such a Payment is known as a "Prepayment" or an "On Account Payment". Leave this field blank when entering Prepayments and On Account Payments, and specify the Supplier as normal in the field to the right. In the case of Prepayments, enter a Prepayment Number on flip D as well. The Supplier must be one with a Contact record in which you have selected the On Account option on the 'Terms' card. Please refer to the Prepayments and On Account Payments page for more details.
- When you enter an Invoice Number, the Open Invoice Value (the amount outstanding) will be brought in to the Sent Value field as a default, and this figure will also be shown in the Open Inv. Value field on flip B. The Currency, if any, of the Invoice will be brought in to the Sent Currency field.
- Supplier
- Paste Special
Suppliers in Contact register
- Default taken from Purchase Invoice or Purchase Order
- The Supplier Number will be placed here automatically when you enter an Invoice Number (or when you enter a Prepayment Number that is also a Purchase Order Number on flip D).
- If you are entering an On Account Payment, choose a Supplier using 'Paste Special'.
- The Supplier Number will be placed here automatically when you enter an Invoice Number (or when you enter a Prepayment Number that is also a Purchase Order Number on flip D).
- Text
- The Supplier's Name will appear here when you enter the Purchase Invoice or Supplier Number (in the former case, the Supplier's Invoice Number will appear here as well, separated from the Name by a comma). You may change this if you wish.
- B. Cur.
- Paste Special
Currency register, System module
- Default taken from Account specified in the Payment Mode, or Base Currency 1
- The Currency of the bank account.
- If you have specified a Currency in the bank or cash Account (i.e. the Account specified in the Payment Mode), you can only use that Currency. Otherwise, you can use any Currency.
- If every row in a Payment uses the same Bank Currency, the total amount paid will be shown in the Withdrawn field in the footer and in the 'Payments: Browse' window. In smaller companies, this can help maintain a mental picture of the cash flow situation.
- If there are any bank charges attached to a particular payment, you should enter them to the Bank Fee field on flip I or using the 'Add Bank Fee' function on the Operations menu, in the Currency specified here.
- The Currency of the bank account.
- Bank Amount
- Default taken from
Sent Value
- The amount paid, expressed in the Bank Currency. If you change the Currency, the Bank Amount will be converted using the exchange rate applying on the Transaction Date. Do not use this field to subtract bank fees from the amount paid: the Bank Fee field on flip I and the 'Add Bank Fee' function on the Operations menu are provided for this purpose.
- In normal circumstances, you should not change the Bank Amount and Currency. If you need to register a partial payment or an overpayment, you should change the Sent Value (described below). The Bank Amount will then be altered automatically, taking exchange rates into account if necessary.
- If you change the Bank Amount, the Sent Value will not be updated automatically. You should only make such an alteration in exceptional circumstances, such as when you know that the exchange rate that will be levied by the bank is different to the rate in Enterprise by HansaWorld, or when you know the exact amount deducted from your bank account by the Payment. Changing the Bank Amount is therefore effectively the same as changing the exchange rate in a particular Payment row. In the resulting Nominal Ledger Transaction, a posting to the value of the difference between the original Bank Amount and your amended figure will be made to the Bank Rate Gain or Loss Accounts specified in the Account Usage P/L setting.
- If you need to change the amount deducted from your bank account by the Payment row, but you need the difference to be posted to the Rate Gain or Loss Accounts (also as specified in the Account Usage P/L setting), do not change the figure in this field but instead enter the amount in the B. Cur. 1 V. field on flip I.
- If you know the exchange rate that will be levied by the bank, you can enter it in the Coef. Value field on flip I. The Bank Amount will be recalculated by dividing the Sent Value by the Coef. Value.
- In normal circumstances, you should not change the Bank Amount and Currency. If you need to register a partial payment or an overpayment, you should change the Sent Value (described below). The Bank Amount will then be altered automatically, taking exchange rates into account if necessary.
- S. Cur.
- Paste Special
Currency register, System module
- Default taken from Purchase Invoice
- The Payment Currency: enter the Currency you intend to use in paying the Supplier. The default is to the Currency used in the Purchase Invoice: you can use any other Currency if necessary. If you change the Sent Currency, the Sent Value will be converted using the exchange rate applying on the Transaction Date.
- If you want to ensure that every row in a particular Payment has the same Sent Currency, check the Do not allow Payment rows with different Sent Currencies box in the Payment Settings setting.
- The Payment Currency: enter the Currency you intend to use in paying the Supplier. The default is to the Currency used in the Purchase Invoice: you can use any other Currency if necessary. If you change the Sent Currency, the Sent Value will be converted using the exchange rate applying on the Transaction Date.
- Sent Value
- Default taken from
Outstanding amount on Invoice (less any Hold Amount) or Purchase Order total
- The amount paid, expressed in the Sent Currency. You can change the default figure, in the event of partial payments or overpayments. If you change the Sent Currency, the Sent Value will be converted using the exchange rate applying on the Transaction Date. If you change the amount before changing the Currency, the conversion will apply to the altered amount.
- If you are using the Disallow over-pay Invoice option in the Account Usage P/L setting, you will not be able to enter a Sent Value that is greater than the value outstanding on the Purchase Invoice.
- When you enter a Prepayment Number that is also a Purchase Order Number on flip D, the Order total will appear here.
- You can use Access Groups to prevent the saving of Payments in which there is at least one row with a negative Sent Value. To do this, deny access to the 'Negative Amount on Payment' Action.
- If you are using the Disallow over-pay Invoice option in the Account Usage P/L setting, you will not be able to enter a Sent Value that is greater than the value outstanding on the Purchase Invoice.
- I. Cur
- The Purchase Invoice Currency is the Currency used in the Invoice being paid. This field cannot be changed.
- Open Inv. Value
- The outstanding amount of the Invoice being paid, in the Purchase Invoice Currency. This value cannot be changed.
- Invoice Value
- The amount being paid, in the Purchase Invoice Currency.
- P. Mode
- Paste Special
Payment Modes setting, Sales/Purchase Ledger
- Enter a Payment Mode, if different from the Payment Mode entered in the header. This allows different payments on the same Payment to be credited to different Bank Accounts.
- If you use Banking File exports, it is not recommended that you specify a Payment Mode in an individual Payment row. Banking File export files will usually quote the Own Bank A/C in the Payment header as the payer bank account. If you specify a Payment Mode in an individual Payment row, the Bank A/C No. in that Payment Mode will not be copied to the export file as the payer bank account.
- If you use Banking File exports, it is not recommended that you specify a Payment Mode in an individual Payment row. Banking File export files will usually quote the Own Bank A/C in the Payment header as the payer bank account. If you specify a Payment Mode in an individual Payment row, the Bank A/C No. in that Payment Mode will not be copied to the export file as the payer bank account.
- Cheque No.
- Record the number of the cheque used for the Payment here.
- If you have specified a Payment Mode whose Type is "Own Cheques" (either in a particular Payment row or in the Payment header), this will signify that you wish to issue payment using a cheque that you have recorded in the Own Cheque register in the Cheques module. Enter here the Serial Number (i.e. not the Cheque Number) of the Own Cheque record that you wish to use. You can use the following methods to choose the Own Cheque:
- You can click in the Payment row and select 'Prepare Cheque' from the Operations menu. This function will try to find a blank Own Cheque that it can use. Failing that, it will create a new one. In both cases, it will copy the Supplier Number and Name and the Bank Currency and Amount to the Own Cheque. If there are several Payment rows paying the same Supplier, the total Bank Amount from all these rows will be copied to the Own Cheque. The Serial Number of the Own Cheque will be copied to each Payment row. In this context, a blank Own Cheque is one that is Unused, with a matching or blank Supplier, Bank Account and Bank Code, and with no Amount. To create an Own Cheque with no Amount, use the 'Create Own Cheques' Maintenance function in the Cheques module.
- You can highlight several Payments in the 'Payments: Browse' window and choose 'Cheque Run' from the Operations menu. This function will find blank Own Cheques and connect them to the Payment rows in the highlighted Payments. It will copy the Supplier Numbers and Names and the Bank Currencies and Amounts to the Own Cheques, and copy the Serial Numbers of the Own Cheques to the relevant Payment rows. If there are several Payment rows in a particular Payment paying the same Supplier, the total Bank Amount from these rows will be copied to the corresponding Own Cheque. It is therefore similar to running 'Prepare Cheque' for several Payments at once. It will not create new Own Cheques, but it can print the cheques as well as connecting them to Payments. Do not mark Payments as Ordered if you wish to use the 'Cheque Run' function as it will only assign cheque numbers to Payments that have not been marked as Ordered. It will also mark them as Ordered automatically.
- In some companies, it can be normal practice for a bookkeeper to create Own Cheques with Amounts (i.e. to create cheques to pay specific Purchase Invoices), and for another person to enter the Payments. This person cannot use 'Prepare Cheque' because this function won't connect Payment rows to Own Cheques with Amounts. Instead, they should use 'Paste Special' from the Cheque Number field to choose the appropriate Own Cheque. If they choose an Own Cheque with an Amount greater than the outstanding value of the Invoice being paid, the cheque number will be copied to any following row(s) with the same Supplier until the Cheque Amount is used up. If there is still some of the Cheque Amount remaining, a new row will be added to the Payment, so that the remainder of the Cheque Amount can be treated as an On Account Payment or a Prepayment. If the Own Cheque Amount is lower than the outstanding value of the Invoice being paid, the Sent Value and Bank Amount will be changed to the Cheque Amount and a new row will be added to the Payment for the remainder of the outstanding value on the Invoice. This allows the assigning of another Own Cheque, or the removal of the row to issue a partial payment.
- When you enter a Payment in which the Type of the Payment Mode is "Own Cheques", you can leave the Cheque No. field in each row blank when you first save the Payment. However, when you mark the Payment as Ordered, you will then need to specify cheque numbers before you will be able to save again. On marking the Payment as OK and saving, the Status of the relevant Own Cheques will be changed to Issued (or Cancelled in the case of Own Cheques connected to Payment rows that you have invalidated).
- In some countries in South America, it is possible to pay Purchase Invoices by forwarding cheques received from Customers. If you wish to pay a Purchase Invoice in this way, choose a Payment Mode whose Type is "Received Cheques", either in the Payment header or in a particular Payment row. Then, enter the Serial Number (i.e. not the Cheque Number) of a record in the Open Cheque register (i.e. of a Cheque whose Status is Accepted). In this case, you will need to use 'Paste Special' to choose the Open Cheque (the 'Prepare Cheque' and 'Cheque Run' functions only work with Own Cheques, not Open Cheques). As it is unlikely that the Amount in an Open Cheque will match exactly the outstanding amount on a Purchase Invoice. the Open Cheque Amount will be distributed to the Payment row(s) as described in point 3 above. As with Own Cheques, you must specify cheque numbers after marking a Payment as Ordered.
- If the Type of the Payment Mode is not "Own Cheques" or "Received Cheques", the 'Paste Special' feature will not be available, and the cheque number that you specify need not refer to a record in the Own Cheque or Open Cheque registers. In this case, you can generate a Cheque Number by choosing 'Assign Cheque Number' from the Operations menu. This function will place a cheque number in this field in each Payment row, calculated by incrementing by the one the cheque number in the last Payment with a Payment Mode whose Type is "Free".
- You can also have cheque numbers placed in this field when you print cheques using the Cheque Documents or Payment Forms documents, incremented from the cheque number that you specify in the specification window before printing.
- If you have specified a Payment Mode whose Type is "Own Cheques" (either in a particular Payment row or in the Payment header), this will signify that you wish to issue payment using a cheque that you have recorded in the Own Cheque register in the Cheques module. Enter here the Serial Number (i.e. not the Cheque Number) of the Own Cheque record that you wish to use. You can use the following methods to choose the Own Cheque:
- Order No.
- Paste Special
Purchase Order register
- If the payment is a deposit against a Purchase Order, you can enter the number of the Purchase Order to this field or to the Prepayment Number field immediately to the right. If you enter it here, the Supplier on flip A will be changed to that of the Order, the Bank Amount and Sent Value will be changed to the Order total, and the Order Number will be copied to the Prepayment Number field. Please refer to the description of the Prepayment Number field immediately below for full details.
- You can use Access Groups to ensure that Prepayments are only issued against Purchase Orders that have been marked as OK. To do this, grant Full access to the 'Disallow Prepayment for not OKed Purchase Order' Action. It will then not be possible to save a Payment if this field contains the Purchase Order Number of a Purchase Order that has not been marked as OK.
- You can use Access Groups to ensure that Prepayments are only issued against Purchase Orders that have been marked as OK. To do this, grant Full access to the 'Disallow Prepayment for not OKed Purchase Order' Action. It will then not be possible to save a Payment if this field contains the Purchase Order Number of a Purchase Order that has not been marked as OK.
- Prepayment No
- Paste Special
Open Prepayments
- If the payment is a Prepayment (i.e. one where it is not possible to specify an Invoice Number on flip A), you should enter a Prepayment Number here. This can be a number of your own generation, a reference given to the prepayment by the Supplier or, preferably, the number of the Purchase Order against which you are paying the deposit has been issued. If you enter a Purchase Order Number in the field immediately to the left, it will be copied here.
- When you receive a Purchase Invoice to be set against the Prepayment, you can connect the two using the 'Connect to Prepayment' function on the Operations menu of the Purchase Invoice window. This is fully described on the Prepayments page. If a deposit or prepayment exists without a Prepayment Number, it will not be made available to that function and connecting it to an Invoice will be more difficult. Prepayments that do not have a Prepayment Number will not be shown in the Prepayment History P/L report.
- It is not compulsory to make an entry to this field if the Invoice Number field on flip A is blank. If you would like to make it so, select the Use Prepayments, not On Account option on the 'Debtors' card of the Account Usage S/L setting. This option applies to both the Sales and Purchase Ledgers.
- It is not necessary to enter a unique number to this field. This allows you to issue more than one deposit against an individual Purchase Order. However, using a Prepayment Number more than once may make the Prepayment History P/L report difficult to understand, and may make it difficult to link a particular Prepayment to an Invoice using the 'Connect to Prepayment' function. Therefore you may wish to use the Force Unique Prepayment Numbers option, on 'Creditors' card of the Account Usage P/L setting. This will mean that once you have used a Prepayment Number in an approved Prepayment, you will not be able to use it again (except when reversing the Prepayment i.e. except when the Sent Value is negative).
- When you receive a Purchase Invoice to be set against the Prepayment, you can connect the two using the 'Connect to Prepayment' function on the Operations menu of the Purchase Invoice window. This is fully described on the Prepayments page. If a deposit or prepayment exists without a Prepayment Number, it will not be made available to that function and connecting it to an Invoice will be more difficult. Prepayments that do not have a Prepayment Number will not be shown in the Prepayment History P/L report.
- V-Cd, VAT Value
- These fields are provided to satisfy a requirement of users in Latvia, where it can be necessary to post VAT on Payment. This is also the case for users of the Cash VAT scheme in the UK, and for some users in Poland.
- A VAT Code and VAT Amount will be brought in to these fields automatically when you enter a Purchase Invoice Number on flip A (the VAT Code will be taken from the first row of the Invoice). If you are using the Post Payment VAT option in the Account Usage P/L setting, when you approve and save the Payment, the VAT amount will be moved from the temporary Input VAT Account to the final one (the I/P Account), as specified for the VAT Code in the VAT Codes setting in the Nominal Ledger.
- If the Purchase Invoice being paid contains rows with different VAT Codes (possibly with different Input VAT and I/P Accounts), you may need this to be reflected in the VAT posting from the Payment. If so, you can remove the VAT Code and VAT Value from these fields, or you can use the Do not paste VAT Code to Payments option in the Account Usage P/L setting to have these fields left blank in every Payment. If these fields are empty, there will be separate postings for each VAT Code used in the Purchase Invoice being paid.
- The Post Payment VAT option also adds a VAT element to On Account Payments. Once again, the I/P Account for the VAT Code will be debited and the Input Account for the VAT Code will be credited with the VAT amount.
- Take care with these fieldswhen entering On Account Payments. As an On Account Payment does not have an Invoice Number or a Prepayment Number, you must enter a VAT Code manually if you are using the Cash VAT scheme (i.e. if you are using the Post Payment VAT option). The VAT Value will then be calculated from the Sent Value. The Nominal Ledger Transaction resulting from the Payment will not have a VAT element if the VAT Code or VAT Value is blank.
- If you would like VAT to be posted from Prepayments, you should use one of the Post Prepayment VAT options on the 'VAT' card of the Account Usage P/L setting. When you enter a Purchase Order Number in the Order No. field on flip D, the VAT Code will be brought in automatically from the first row of the Order and the VAT Value will calculated, depending on which Post Prepayment VAT option you are using. If you enter a Prepayment that is not connected to a Purchase Order (i.e. you leave the Order No. field empty and instead specify a Prepayment No.), you should enter a VAT Code manually. The VAT Value will then be calculated from the Sent Value. In both cases, the Nominal Ledger Transaction will depend on the Prepayment amount excluding VAT option in the Account Usage P/L setting. If you are not using this option, the full Prepayment amount including VAT will be debited to the On Account A/C, and the VAT Value will be credited to the On Account VAT Account and debited to the I/P Account for the VAT Code. If you are using this option, the Prepayment amount excluding VAT will be debited to the On Account A/C and the VAT Value will be debited to the I/P Account for the VAT Code.
- In all cases except the On Account Payment, if a particular VAT Code does not have an I/P Account, the Prepayment VAT Account from the 'VAT' card of the Account Usage P/L setting will be used instead. An On Account Payment requires an I/P Account.
- In the Nominal Ledger Transaction generated from the Payment, by default this VAT Code will not be assigned to the postings to the VAT Accounts described above. If you want it assigned to these postings, use the Add VAT Code to VAT A/C rows option in the Transaction Settings setting in the Nominal Ledger.
- A VAT Code and VAT Amount will be brought in to these fields automatically when you enter a Purchase Invoice Number on flip A (the VAT Code will be taken from the first row of the Invoice). If you are using the Post Payment VAT option in the Account Usage P/L setting, when you approve and save the Payment, the VAT amount will be moved from the temporary Input VAT Account to the final one (the I/P Account), as specified for the VAT Code in the VAT Codes setting in the Nominal Ledger.
---
In this chapter:
- Introduction
- Entering a Payment, including:
- Header
- 'Payments' card Part 1 (Flips A-E)
- 'Payments' card Part 2 (Flips F-J and Footer)
- 'Bank' card
- Header
- Entering a Payment - Example
- Payments in Currency
- Reconciling Payments, Marking as OK and Posting to the Nominal Ledger
- Nominal Ledger Transactions from Payments
- Printing Payment Forms and Cheques
- Invalidating Payments
- Prepayments and On Account Payments
- Correcting Mistakes in Payments
- Withholding Taxes in the Purchase Ledger
- Operations menu
- Home page for Purchase Ledger manual
- Home page for HansaWorld Enterprise manual
Entering a Payment - Payments Card Part 2 (Flips F-J and Footer)
Flips A-E of the 'Payments' card are described in Part 1 here.Flip F- Objects
- Paste Special
Object register, Nominal Ledger/System module
- Default taken from Purchase Invoice ('Terms' card) or Contact record for the Supplier (Purch. Objects)
- You can assign up to 20 Objects, separated by commas, to a Payment row and all transactions generated from it. You might define separate Objects to represent different departments, cost centres or product types. This provides a flexible method of analysis that can be used in Nominal Ledger reports.
- In the Nominal Ledger Transaction generated from a Payment, the Objects specified here will be assigned as follows:
- By default, they will be assigned to the debit posting to the Creditor Account.
- If you are using the Objects on Bank A/C option in the Account Usage P/L setting, they will be assigned to the credit posting to the Bank or Cash Account. Any Objects specified in the Payment Mode will always be assigned to the Bank or Cash Account.
- If you are using the Objects on VAT Account option in the same setting ('VAT' card) together with the Post Payment VAT and/or Post Prepayment VAT options, they will be assigned to all VAT postings.
- If you specify a Purchase Invoice Number on flip A, Objects will be copied here from the ('Terms' card of that Purchase Invoice, providing you are using the Objects on Creditors Account option in the Account Usage P/L setting.
- In the case of On Account Payments and Prepayments, Objects will be copied here if you are using the Objects on On Account A/C option, also in the Account Usage P/L setting. When you enter a Supplier Number for an On Account Payment or for a Prepayment that is not connected to a Purchase Order, the Purch. Objects specified on the 'Accounts' card of the Contact record for the Supplier will be copied here. When you enter a Purchase Order Number in the Order No. field on flip D for a Prepayment for a Prepayment that is connected to a Purchase Order, the Objects specified on the 'Terms' card of the Purchase Order will be copied here.
- You can assign up to 20 Objects, separated by commas, to a Payment row and all transactions generated from it. You might define separate Objects to represent different departments, cost centres or product types. This provides a flexible method of analysis that can be used in Nominal Ledger reports.
- Round Off A/C, Round Off
- These fields will be used in the situation where a Purchase Invoice is to be treated as fully paid if the Sent Value is slightly different to the amount that is outstanding, providing that the difference is within an allowable margin. The difference is effectively written off.
- For example, if the allowable margin is 0.50 and you issue a cheque underpaying an Invoice by 0.35, the 0.35 will be written off (posted to a write-off Account) and the Invoice will be treated as fully paid. When you save the Payment in this example, 0.35 will be placed automatically in the Round Off field, and the write-off Account will be placed in the Round Off A/C field. But, if the cheque underpays the Invoice by 0.65, that amount will remain outstanding. In this case, the Round Off and Round Off A/C fields will remain empty.
- If you want to use this feature, set the allowable margin in the Automatic Round Off Limit and Automatic Write Off Limit fields on the 'Round Off' card of Currency record for the Sent Currency. The Write Off Limit will be used when the Sent Currency is the same as the Currency in the Invoice being paid, while the Round Off Limit will be used when the Sent Currency is different to the Invoice Currency. The remaining outstanding amount on an Invoice will be written off if it is less than the Write Off or Round Off Limit when expressed in the Invoice Currency.
- The Round Off A/C will be taken from the 'Rate' card of the Account Usage P/L setting on the following basis:
- Write Off Round Off
- Used when the Sent Currency is the same as the Invoice Currency, and it is not a member of the EMU;
- Rate Round Off
- Used when the Sent Currency is different to the Invoice Currency, and the Sent Currency is not a member of the EMU;
- EMU Rate Round Off
- Used when the Sent Currency is different to the Invoice Currency, and the Sent Currency is a member of the EMU;
- EMU Rate Write Off
- Used when the Sent Currency is the same as the Invoice Currency, and it is a member of the EMU.
- If you set Write Off and Round Off Limits in a Currency record, the same limits will be used in both the Sales and Purchase Ledgers. You will therefore be implementing the feature in both Ledgers.
- You can set Write Off and Round Off Limits in the record representing your home Currency, meaning you can use this feature as an easy way of automatically writing off small outstanding amounts in domestic Invoices (i.e. those in your home Currency).
- For example, if the allowable margin is 0.50 and you issue a cheque underpaying an Invoice by 0.35, the 0.35 will be written off (posted to a write-off Account) and the Invoice will be treated as fully paid. When you save the Payment in this example, 0.35 will be placed automatically in the Round Off field, and the write-off Account will be placed in the Round Off A/C field. But, if the cheque underpays the Invoice by 0.65, that amount will remain outstanding. In this case, the Round Off and Round Off A/C fields will remain empty.
- Instalment
- Paste Special
Open (unpaid) Instalments
- If an Invoice is payable in instalments, specify the instalment being paid here. An Invoice is payable in instalments if it has a Payment Term that refers to a record in the Instalments setting.
- If you have specified a Purchase Invoice Number on flip A, the 'Paste Special' function will only list the open instalments for that Purchase Invoice. If you have not specified a Purchase Invoice Number, the 'Paste Special' function will list the open instalments for all Invoices.
- When you choose an instalment, the Bank and Sent Values will change to the open instalment value and, if the relevant fields were previously blank, other related information such as Supplier Number and Purchase Invoice Number will be brought in as well.
- If you have specified a Purchase Invoice Number on flip A, the 'Paste Special' function will only list the open instalments for that Purchase Invoice. If you have not specified a Purchase Invoice Number, the 'Paste Special' function will list the open instalments for all Invoices.
- W. Tax, W. Tax Base
- These fields will show the Withholding Tax regime and the Base amount (i.e. the amount on which Withholding Tax was calculated) in rows that will be added to the Payment when you run the 'Calculate Withholding Taxes' function on the Operations menu. Please refer to the ' Withholding Tax from Payments - Per Invoice Basis' example here below for details.
- Reference Number
- This field can be used in Estonia by certain state companies to record the RK Reference for each Payment row. This reference will be generated automatically depending on how you have configured the RiigiTarkvara setting in the Nominal Ledger (only available in Estonia i.e. if the VAT Law in the Company Info setting is "Estonian").
- In Estonia and some other countries, the Reference Number will be included in some Banking File export files and electronic payments.
- Creditors A/C
- Paste Special
Account register, Nominal Ledger/System module
- This field shows the Creditor Account that will be debited from the Payment row, when you mark the Payment as OK and save it.
- If you enter a Purchase Invoice Number on flip A, the Creditor Account from the Purchase Invoice will be brought in.
- If you leave the Purchase Invoice Number blank and enter a Supplier Number, the relevant On Account A/C for that Supplier will be brought in.
- In both cases, you can change the Account if necessary.
- If you enter a Purchase Invoice Number on flip A, the Creditor Account from the Purchase Invoice will be brought in.
- Bank Reference
- Default taken from
Purchase Invoice (Reference field)
- The Bank Reference will be brought in from the Purchase Invoice being paid and will be printed on the Payment Form document provided you have included the "Our Reference (ourref)" field in your Form design.
- Depending on the Payment File Format you have chosen in the Bank Transfer setting in the Purchase Ledger, this Reference may be included in Banking File exports and electronic payments. For this reason, a Reference is mandatory in Purchase Invoices in some countries e.g. Finland and Norway so that it will always be copied to this field.
- The Bank Reference will be included in Banking File export files when you are using the following Payment File Formats:
- Australia - ABA
- Finland - SEPA
- All Norwegian banks
- Spain - SEPA
- Sweden - Handelsbanken (foreign country payments).
- Depending on the Payment File Format you have chosen in the Bank Transfer setting in the Purchase Ledger, this Reference may be included in Banking File exports and electronic payments. For this reason, a Reference is mandatory in Purchase Invoices in some countries e.g. Finland and Norway so that it will always be copied to this field.
- To Bank A/C.
- Paste Special
Bank Accounts of the Supplier
- The number of the Supplier's bank account that will receive the Payment is brought in from the 'Accounts' cards of the Purchase Invoice or the Contact record for the Supplier. If it is taken from the Contact record for the Supplier (e.g. in the case of On Account and Prepayment Payments), it will be chosen from the following fields and in the following order:
- The IBAN Code will be used.
- The Bank Account
- The Bank Account 2
- The IBAN Code will be used.
- Sort Code
- The branch number of the bank holding the Supplier's bank account will be brought in from the 'Accounts' cards of the Purchase Invoice or the Contact record for the Supplier.
- P. Code
- Paste Special
Payment Codes setting, Purchase Ledger
This field is used in Sweden, where every payment to a beneficiary domiciled outside Sweden (in a foreign currency or in Swedish kronor) that exceeds a counter value stipulated by the National Tax Board (Riksskatteverket) must be reported to the Tax Board by the intermediary bank. Included in the report should be a Payment Code, a three-digit code representing a category (i.e. export/import, services etc.).
- The Payment Code will be brought in from the 'Accounts' card of the Purchase Invoice. It will be included in Banking File exports if you produce them using the Foreign Country Payment option and if the Payment File Format you have specified in the Bank Transfer setting in the Purchase Ledger is Sweden - Handelsbanken.
- Bank Fee
- Enter any fee charged by the bank for the payment. This figure should be in the Bank Currency. Bank fees will be debited to the Bank Fee Account specified on the 'Creditors' card of the Account Usage P/L setting. The Sent Value plus the Bank Fee will be credited to the Bank Account specified in the Payment Mode. The Sent Value will be debited to the Creditor Account.
- Note that this field allows you to specify a Bank Fee for each row (or for a single particular row) in a Payment, remembering that each row can have a different Payment Mode and therefore a different credit (Bank) account. If you want to record a single Bank Fee for the entire Payment, use the 'Add Bank Fee' function on the Operations menu.
- Note that this field allows you to specify a Bank Fee for each row (or for a single particular row) in a Payment, remembering that each row can have a different Payment Mode and therefore a different credit (Bank) account. If you want to record a single Bank Fee for the entire Payment, use the 'Add Bank Fee' function on the Operations menu.
- To B. Cur. 1
- This field is also on flip J and is described below.
- B. Cur. 1 V.
- The amount paid, expressed in Base Currency 1.
- In normal circumstances, the Bank Amount and Sent Value fields on flip A are sufficient to express the value of the Payment. If the Sent Currency and Bank Currency are different, the Nominal Ledger Transaction resulting from the Payment will contain values in all appropriate Currencies, converted using the Exchange and Base Rates applying on the Transaction Date.
- If you know the exact value of the Payment in Base Currency 1 as withdrawn from your bank account, you can either change the Bank Amount or you can enter the exact figure in Base Currency 1 here. The first of these choices will post the difference between the original Bank Amount and your amended figure to the Bank Rate Gain or Loss Account (specified on the 'Rate' card of the Account Usage P/L setting), while the second will post the rate differences to the Rate Gain or Loss Account specified in the same setting. Please refer here for full details and an example.
- If you don't know the value of the Payment in Base Currency 1, but you do know the exchange rate, you can use the fields on flip J to enter that exchange rate. A calculated value will then be placed in this field.
- This field must contain a value if so specified for the Payment Mode (using the Force field on flip D).
- In normal circumstances, the Bank Amount and Sent Value fields on flip A are sufficient to express the value of the Payment. If the Sent Currency and Bank Currency are different, the Nominal Ledger Transaction resulting from the Payment will contain values in all appropriate Currencies, converted using the Exchange and Base Rates applying on the Transaction Date.
- B. Cur. 2 V.
- The amount sent, expressed in Base Currency 2.
- This field must contain a value if so specified for the Payment Mode (using the Force field on flip D).
- This field must contain a value if so specified for the Payment Mode (using the Force field on flip D).
- Coef. Value
- The Bank Amount on flip A will be calculated automatically from the Sent Value, taking exchange rates into account if necessary. If you then change the Bank Amount, this will be interpreted as changing the exchange rate. In the resulting Nominal Ledger Transaction, a posting to the value of the difference between the original Bank Amount and your amended figure will be made to the Bank Rate Gain or Loss Accounts specified on the 'Rate' card of the Account Usage P/L setting.
- If you change the Bank Amount in this way, it will be because you know the exact amount that will be deducted from your bank account by the Payment. If you don't know this figure, but you do know the exchange rate that will be levied by the bank, you can enter that exchange rate in this field. The Bank Amount will recalculated by dividing the Sent Value by this Coef. Value. In other words, you should enter the number of units of the Sent Currency that will buy one unit of the Bank Currency. For example, if the Sent Currency is USD and 1.8 USD will buy 1.00 in the Bank Currency, enter 1.8 here.
- Rate, To B. Cur. 1, To B. Cur. 2
- In a Payment where the Sent Currency and Bank Currency are different and you know the exact value of the Payment in Base Currency 1, you can enter that value in the B. Cur. 1 V. field on flip I. Please refer to the description of that field above for the implications.
- If you don't know the value of the Payment in Base Currency 1, but you do know the exchange rate, you can use these fields to enter that exchange rate. If the Bank Currency is Base Currency 1, this means the exchange rate between the Sent Currency and Base Currency 1. If the Bank Currency is not Base Currency 1, this means the exchange rate between the Bank Currency and Base Currency 1. A calculated value will then be placed in the B. Cur. 1 V. field (and in the Bank Amount field if the Bank Currency is Base Currency 1).
- Each of these fields corresponds to one of the fields in the Exchange Rate record, as shown in the illustration below:
If you make an entry in one of these fields, you are effectively overriding the corresponding field in the Exchange Rate record. For example, the Exchange Rate in the illustration states that 1 USD will buy 0.6 in Base Currency 1. 0.7 has been entered in the To B. Cur. 1 field in the Payment row, changing the exchange rate for that row to 1:0.7 (the Rate and To B. Cur. 2 fields are blank in the Payment row, signifying that these figures are still to be taken from the corresponding fields in the Exchange Rate record).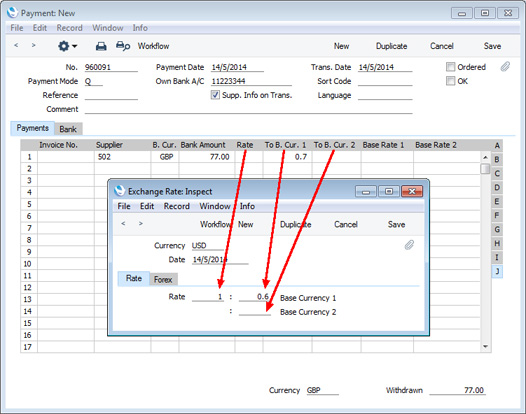
- If you have entered your Exchange Rates so that they express how many units of the foreign Currency will be bought by one unit of Base Currency 1, you will have an Exchange Rate of 1.6666:1 instead of 1:0.6. To make the equivalent change in a particular Payment row, enter 1.42857 in the Rate field to change to 1.42857:1. In this case, you may need to enter 1 in the To B. Cur. 1 field as well, to force the calculation of the B. Cur. 1 V. value.
- As changing the exchange rate will cause a calculated value to be placed in the B. Cur. 1 V. field, the difference between the original Bank Amount and your amended figure will be posted to the Rate Gain or Loss Account (specified on the 'Rate' card of the Account Usage P/L setting).
- If you don't know the value of the Payment in Base Currency 1, but you do know the exchange rate, you can use these fields to enter that exchange rate. If the Bank Currency is Base Currency 1, this means the exchange rate between the Sent Currency and Base Currency 1. If the Bank Currency is not Base Currency 1, this means the exchange rate between the Bank Currency and Base Currency 1. A calculated value will then be placed in the B. Cur. 1 V. field (and in the Bank Amount field if the Bank Currency is Base Currency 1).
- Base Rate 1, Base Rate 2
- If you are using the Dual-Base Currency conversion system, you can use these two fields to set the exchange rate between your two Base Currencies for a particular Payment row.
- Where the Rate, To B. Cur. 1, To B. Cur. 2 fields described immediately above each correspond to a field in the Exchange Rate record, in a similar manner these fields both correspond to a field in the Base Currency Rates record, as shown in the illustration below. If you enter a figure in one of these fields, you will overrule the figure in the corresponding field in the Base Currency Rates record.
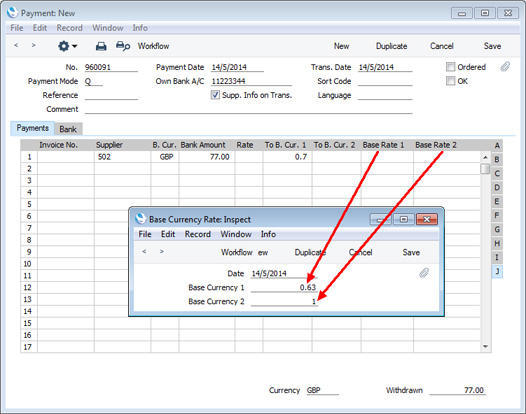
- Where the Rate, To B. Cur. 1, To B. Cur. 2 fields described immediately above each correspond to a field in the Exchange Rate record, in a similar manner these fields both correspond to a field in the Base Currency Rates record, as shown in the illustration below. If you enter a figure in one of these fields, you will overrule the figure in the corresponding field in the Base Currency Rates record.
- Currency
- If every row in a Payment has the same Bank Currency, that Currency will additionally be shown here so that it can be displayed in the 'Payments: Browse' window.
- Withdrawn
- The sum of the Bank Amounts: the total for the Payment. This field will only contain a value if every row in the Payment has the same Bank Currency.
In this chapter:
- Introduction
- Entering a Payment, including:
- Header
- 'Payments' card Part 2 (Flips A-E)
- 'Payments' card Part 2 (Flips F-J and Footer)
- 'Bank' card
- Header
- Entering a Payment - Example
- Payments in Currency
- Reconciling Payments, Marking as OK and Posting to the Nominal Ledger
- Nominal Ledger Transactions from Payments
- Printing Payment Forms and Cheques
- Invalidating Payments
- Prepayments and On Account Payments
- Correcting Mistakes in Payments
- Withholding Taxes in the Purchase Ledger
- Operations menu
- Home page for Purchase Ledger manual
- Home page for HansaWorld Enterprise manual
Entering a Payment - Bank Card
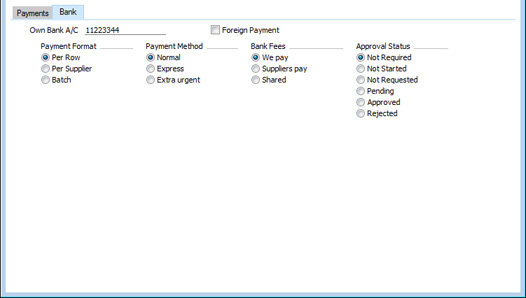
- Own Bank A/C
- This field is also in the header. Please refer here for details.
- Foreign Payment
- If you will pay the Payment using the E-Payments Cloud Service, you should mark it as a Foreign Payment if it is to be sent to a bank outside your country. E-payment file files containing international payments have different formats compared to those containing domestic payments.
- You can use this option together with the following Payment File Formats:
- Estonia - SEB
- Estonia - Swedbank Gateway
- Estonia - Telehansa
- Latvia - Telehansa
- You can use this option together with the following Payment File Formats:
- Payment Format
- If you will pay the Payment using the E-Payments Cloud Service and if a Payment record contains more than one row paying the same Supplier, you can use this option if you would like those rows to be treated as a single payment in the e-payment file (i.e. issuing a single payment order to the bank).
- You can use this option together with the following Payment File Formats:
- Estonia - Riigikassa
- Estonia - SEB (do not use "Per Batch" if the Payment has been marked as a Foreign Payment)
- Estonia - Swedbank Gateway
- Estonia - Telehansa
- Latvia - Telehansa
- Finland - SEPA (the "Per Supplier" option will only be used if you do not select the Foreign Country Payment option in the specification window when you run the export)
- All New Zealand banks
- Poland - BPH
- Spain - SEPA (the "Per Supplier" option will only be used if you do not select the Foreign Country Payment option in the specification window when you run the export)
- UK - BACS
- You can use this option together with the following Payment File Formats:
- Payment Method
- If you will pay the Payment using the E-Payments Cloud Service, you can use these options to insert a flag into the e-payment file that signifies the urgency of the payments in that file.
- You can use this option together with the following Payment File Formats:
- Estonia - Riigikassa
- Estonia - SEB
- Estonia - Swedbank Gateway
- Estonia - Telehansa
- Latvia - Telehansa
You can also set the Payment Method to "Express" or "Extra Urgent" in the specification window when you run the export, in which case the appropriate flag will be included in the export file for all exported Payments.
- You can use this option together with the following Payment File Formats:
- Bank Fees
- Default taken from
Payment Settings setting, Purchase Ledger
- If you will pay the Payment using the E-Payments Cloud Service, you can use these options to insert a flag into the e-payment file that signifies who will pay any bank fees incurred when processing the Payment.
- You can use this option together with the following Payment File Formats:
- Estonia - Riigikassa
- Estonia - Swedbank Gateway
- Estonia - Telehansa
- Latvia - Telehansa
- You can use this option together with the following Payment File Formats:
- Approval Status
- You can use the Approval Rules register in the Business Alerts module to configure an approval process that Payments must pass through before you can mark them as Ordered or OK. For example, particular managers may need to check and approve every Payment in which the Withdrawn figure is greater than a certain value. If you are using such an approval process, these options will display the stage in the process that a particular Payment has reached.
- If a Payment needs to pass through an approval process, the following functions will be disabled until the approval process has been completed:
- Marking the Payment as Ordered.
- Marking the Payment as OK.
- Printing the Payment.
- Not Required
- The Payment does not need to pass through an approval process, so the functions listed above will be available immediately.
- Not Started
- If you have a configured an approval process for Payments, the Approval Status in new unsaved Payments will be Not Started. When you save a Payment for the first time, the Status will change to Not Required (if the Payment does not need to pass through the approval process, which will usually be because its value is too low), or to Not Requested. The Approval Status will be re-assessed each time you save the Payment.
- Not Requested
- The Payment does need to pass through an approval process, and you have not yet started that process. To start the process, save any changes and then choose 'Send for Approval' from the Operations menu. After doing this, you will no longer be able to modify the Payment.
- Pending
- The Payment has been entered into the approval process, and is waiting to be approved or rejected. If you need to check the progress of the approval process, select 'Payment Status' from the Operations menu.
- Approved
- The approval process has been completed and the Payment has been approved. You can now mark it as OK (although this may have been done automatically, depending on how you have configured the approval process).
- Rejected
- The approval process has been completed and the Payment has been rejected. If you have configured the approval process to allow rejected Payments to be modified before re-submission, you must set the Approval Status back to Not Requested and then save the record before you can modify the Payment.
- If a Payment needs to pass through an approval process, the following functions will be disabled until the approval process has been completed:
In this chapter:
- Introduction
- Entering a Payment, including:
- Header
- 'Payments' card Part 1 (Flips A-E)
- 'Payments' card Part 2 (Flips F-J and Footer)
- 'Bank' card
- Header
- Entering a Payment - Example
- Payments in Currency
- Reconciling Payments, Marking as OK and Posting to the Nominal Ledger
- Nominal Ledger Transactions from Payments
- Printing Payment Forms and Cheques
- Invalidating Payments
- Prepayments and On Account Payments
- Correcting Mistakes in Payments
- Withholding Taxes in the Purchase Ledger
- Operations menu
- Home page for Purchase Ledger manual
- Home page for HansaWorld Enterprise manual
Entering a Payment - Example
We shall now show how to enter a Payment with the help of a few examples.Open the Payment register using the Master Control panel or the Registers menu in the Purchase Ledger. When the 'Payments: Browse' window appears, click the [New] button. The 'Payments: New' window is shown with a Payment Number already entered. Press Enter to move the insertion point to the Payment Date field. Enter the date when you want the Payment to go out.
The next field is Payment Mode. You can choose between the various modes you have entered in Settings. Hansa will automatically enter the details such as the Bank account number.
Press Return again to move the insertion point to the Number field, the top left-hand field in the Payment rows grid. For each line, enter the Purchase Invoice Number from your Purchase Ledger. Ctrl-Enter (Windows and Linux) or ⌘-Enter (Macintosh) will activate the 'Paste Special' function, showing all open (unpaid) Supplier invoices.
Select a Purchase Invoice by double-clicking. Press Return to bring in information such as the Supplier Number and Name. Enter the amount you want to pay. Check the Ordered box to order a payment. When this is done you may print a Remittance Advice by using the 'Print Forms' function on the Operations menu or by clicking the Printer icon. This can also serve as your documentation for the person writing the cheques. If necessary, the Remittance Advice form can be designed to incorporate a cheque.
Payments in Currency
If you are paying Purchase Invoices in a foreign Currency, it may be necessary to calculate a rate loss or gain. By the time the payment in currency is made, it may convert to a different amount in your home Currency compared to the Invoice. So, in order for the debit posting to the Creditor Account to be balanced by the credit posting to the bank, a rate loss (or gain) must be credited (or debited) to a third Account (for Exchange Rate losses and gains). In fact it is possible to have separate Accounts for rate losses and rate gains. These Accounts are specified on card 2 of the Accounts Usage P/L setting. It is usually against the exchange rate that the balancing must take place:bank fees and the amount paid are not usually changeable.In the Nominal Ledger Transaction created from a Payment in Currency, that Currency together with the Exchange Rate used will be noted in the Text field.
More details about Payments in Currency can be found here.
Reconciling and Approving Payments
When paying Purchase Invoices by cheque, there will be a delay between the ordering of the Payment and the clearing of the funds from your company's bank account.In such a situation, when the cheque is issued, enter the Payment in the usual way and check the Ordered box but not the OK box. Then click [Save]. This will ensure the Purchase Invoice(s) being paid will no longer be treated as open (due). You can order several Payments at once by highlighting them in a browse window and selecting 'Order' from the Operations menu.
When you receive a statement from the bank, you can reconcile it with the ordered Payments. Payments that agree with your bank statement should be approved by clicking the OK check box. If so defined in the Sub System setting in the Nominal Ledger, Nominal Ledger Transactions will be generated, debiting the Creditor Control Account of the Invoice(s) being paid and crediting the Bank Account. Please refer here for full details of these Transactions. You can approve several Payments at once by highlighting them in a browse window and selecting 'OK' from the Operations menu.
! | After approving a Payment, it cannot be altered. |
If an Ordered Payment is not included on the statement (perhaps because the cheque bounced or was lost), highlight each row in the Payment in turn by clicking the row number. Then, press the Backspace key. A red line is drawn through the row, re-opening the Purchase Invoice. When the Payment is approved, rows with red lines will not be included in the resulting Nominal Ledger Transaction.
Nominal Ledger Transactions from Payments
When you mark a Payment as OK and save it, a Nominal Ledger Transaction will be generated automatically if you have so determined in the Sub Systems setting in the Nominal Ledger and in the Number Series - Payments setting. Please refer to here for full details of this Transaction.Once the Transaction has been generated, you can look at it straight away using the 'Open NL Transaction' function on the Operations menu (subject to access rights).
---
In this chapter:
- Introduction
- Entering a Payment
- Entering a Payment - Example
- Payments in Currency
- Reconciling Payments, Marking as OK and Posting to the Nominal Ledger
- Nominal Ledger Transactions from Payments
- Printing Payment Forms and Cheques
- Invalidating Payments
- Prepayments and On Account Payments
- Correcting Mistakes in Payments
- Withholding Taxes in the Purchase Ledger
- Operations menu
- Home page for Purchase Ledger manual
- Home page for HansaWorld Enterprise manual
Printing Payment Forms and Cheques
It is often necessary to print certain documents associated with the Payment. These may be remittance advices, cheques or documents used to gain internal authorisation for the Payment.If you want to print a remittance advice and a cheque together, you can do so, providing some set-up work has been carried out in advance. Follow this procedure:
- Using the Form register in the System module, design the remittance advice and the cheque and name them "REM_ADVICE" and "CHEQUE". Use the 'Properties' function on the Operations menu to assign a Document Type of "Payment" (in the former case) and "Payment Cheques". A sample "REM_ADVICE" is supplied with Hansa: this can be modified to suit your requirements.
- Select the Purchase Ledger using the Modules menu.
- Click [Documents] in the Master Control panel. The 'Documents' list window is opened showing a list of available documents. Highlight 'Payment Forms'.
- Select 'Define Document' from the Operations menu.
- The Sequence column in the subsequent window is used to determine the order in which the Forms will be printed. If, for example, you need a remittance advice to be printed first, on the first line enter "1" as the Sequence Number and "REM_ADVICE" as the Form (you can use 'Paste Special' from the Form field to ensure the spelling is correct). On the second line, enter "2" as the Sequence Number and "CHEQUE" as the Form. The Printer column can be used to print the Forms on different printers if necessary: you may have a dedicated printer for your cheque stationery. You can, of course, specify on a third line that an internal authorisation document is also to be printed.
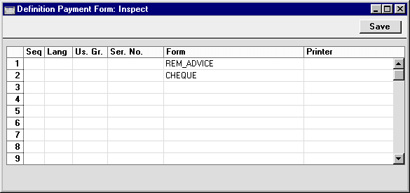
- Click [Save] to save the Payment Form definition. From now on, whenever the Payment Form is printed, the remittance advice and the cheque will be printed, on different printers.
The Payment Form can be printed using one of three methods:
- When viewing an individual Payment record, by selecting 'Print Form' from the Operations menu.
- When viewing an individual Payment record, by clicking the Printer icon. If you want to print to screen, click the Preview icon.
- By selecting 'Documents' from the File menu or by clicking [Documents] in the Master Control panel and selecting 'Payment Forms' from the subsequent list.
Invalidating Payments
In some circumstances it can be appropriate to invalidate a Payment using the 'Invalidate' command on the Record menu. This function will remove the Payment from the Purchase Ledger and re-open the Purchase Invoices listed in the Payment. Any associated Nominal Ledger Transaction will be removed from the Nominal Ledger as well. An invalidated Payment is easily distinguished because all fields have red lines drawn through them. These red lines are also shown in the 'Payments: Browse' window.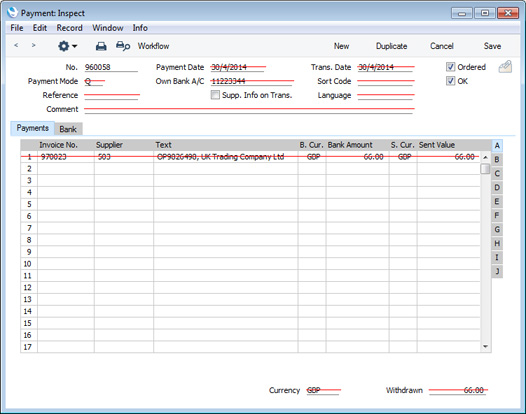
You can use Access Groups to control who can invalidate Payments. To do this, deny access to the 'Invalidate Payments' Action.
You can also invalidate individual rows in a Payment. To do this, simply highlight the row by clicking the row number and press the Backspace key on your keyboard. This will re-open the Purchase Invoice quoted in the row. You can only invalidate individual rows in Payments that have been marked as Ordered but not marked as OK.
If the Type of the Payment Mode in a Payment is "Own Cheques", it is recommended that you only invalidate individual rows and that you do not use the 'Invalidate' command on the Record menu. If you then mark the Payment as OK and save, the Own Cheques connected to the invalidated Payment rows will be marked as Cancelled automatically. If you use the 'Invalidate' command on the Record menu, you will need to mark the Own Cheques as Cancelled yourself.
---
In this chapter:
- Introduction
- Entering a Payment
- Entering a Payment - Example
- Payments in Currency
- Reconciling Payments, Marking as OK and Posting to the Nominal Ledger
- Nominal Ledger Transactions from Payments
- Printing Payment Forms and Cheques
- Invalidating Payments
- Prepayments and On Account Payments
- Correcting Mistakes in Payments
- Withholding Taxes in the Purchase Ledger
- Operations menu
- Home page for Purchase Ledger manual
- Home page for HansaWorld Enterprise manual
On Account Payments and Prepayments
On Account Payments and Prepayments can be used when you issue payments to Suppliers without reference to specific Invoices (usually before you have received the Invoices). These can be entered to the Payment register without specifying a Purchase Invoice Number on flip A. In the case of a Prepayment, a Prepayment Number is specified on flip E instead. In the case of an On Account Payment, both the Invoice Number and the Prepayment Number are left blank. Please click for full details of Prepayments and On Account Payments.On Account Payments and Prepayments - Prepayments
A Prepayment Payment is usually used where a Supplier has been paid a deposit against a Purchase Order, before an Invoice has been received for that deposit.For each Supplier to whom you are likely to pay deposits, switch on the On Account check box on the 'Terms' card. Then specify the control or suspense Account number on card 2 of the Account Usage P/L setting, using the On Account A/C field. You can also specify a separate suspense Account for each Supplier Category or even each Supplier if you wish.
A Prepayment issued by your company to the Supplier is entered as a Payment, but leave the Purchase Invoice Number blank. Instead, a Prepayment Number should be specified on flip E. This can be a number of your own generation, the number allocated to the prepayment by the Supplier or, preferably, the number of the Purchase Order against which the deposit has been issued. Using 'Paste Special" from this field will open a list of Purchase Orders from which the correct one can be chosen. If a Purchase Order Number is used, the Supplier Number on flip A will change to that from the Purchase Order and the Sent Value will be changed to the Order value. Change this to the value of the deposit if this is different:
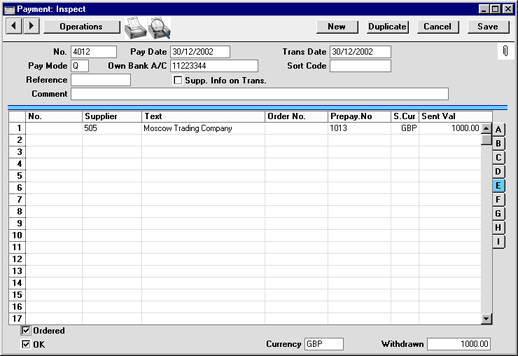
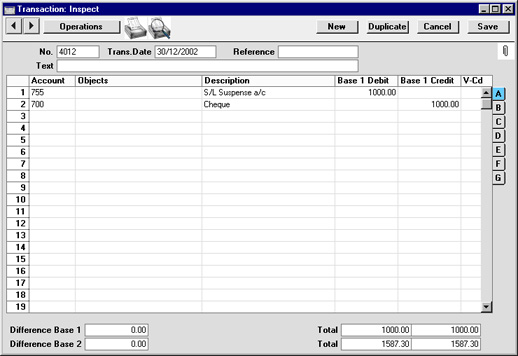
If you used a Purchase Order Number as the Prepayment Number, it is likely that you will create the Purchase Invoice from the Purchase Order screen using the 'Invoice' Operations menu function. When the 'Purchase Invoice: Inspect' window is opened, you will be warned that an open Prepayment (i.e. one that has not yet been allocated to an Invoice) exists in the Supplier's name. This will remind you to allocate the Prepayment to the Purchase Invoice. If you enter the Invoice directly to the Purchase Invoice register, the same warning will appear when you enter the Supplier Number. In this case, complete the grid area in the usual way.
When you are certain that the Purchase Invoice is complete, select 'Connect to Prepayment' from the Operations menu. A new row is inserted as the first row of the grid area, containing a reference to the Prepayment. Enter the Prepayment Number of the Payment row representing the Prepayment, using 'Paste Special' if necessary to bring up a list of open (unallocated) Prepayments. This list shows open Payment rows with a Prepayment Number and without an Invoice Number. Payment rows that do not have a Prepayment Number or an Invoice Number will not be in this list: please refer to the On Account Payments page for details of allocating these to Purchase Invoices.
Select a Prepayment from the list by double-clicking. The Prepayment Number is shown in the special Prepayment row. An amount will also be shown. This will be the whole open value of the Prepayment, or the Invoice TOTAL (from the Purchase Invoice header) whichever is the lower. This figure will be debited to the Creditor Account when the Purchase Invoice is approved and saved, so the Invoice will be treated as paid to that extent.
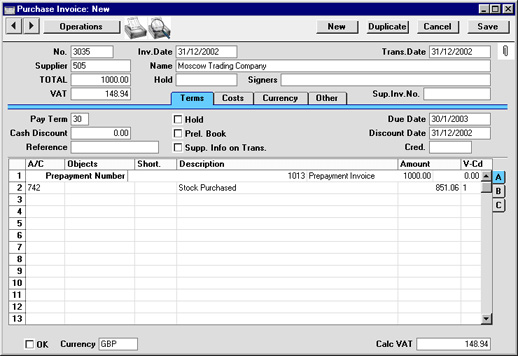
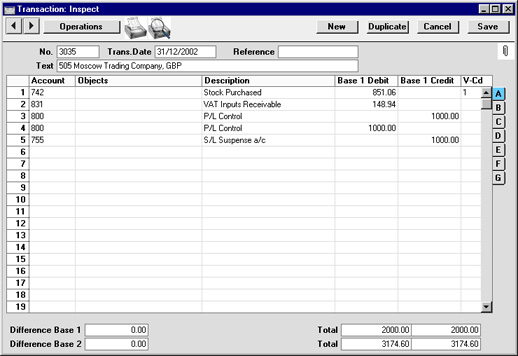
- if the Purchase Invoice value is the same as the whole open value of the Prepayment, the Purchase Invoice is treated as paid and will not appear in any reports showing Open Purchase Invoices. The Prepayment is fully used up by the Purchase Invoice, so it is no longer regarded as open;
- if the Purchase Invoice value is less than the whole open value of the Prepayment, the Purchase Invoice is treated as paid and will not appear in any reports showing Open Purchase Invoices. The Prepayment is not fully used up by the Purchase Invoice, so the remaining outstanding amount is still regarded as open; or
- if the Purchase Invoice value is more than the whole open value of the Prepayment, the Purchase Invoice is treated as part-paid. The Prepayment is fully used up by the Purchase Invoice, so it is no longer regarded as open.
If you select 'Connect to Prepayment' before the Purchase Invoice is complete (it may be that a late change is required) you can either change the amount shown in the special Prepayment row or you can delete the special Prepayment row and use 'Connect to Prepayment' once again. If you choose the former option, you will be prevented from entering an amount that is greater than the open value of the Prepayment, or greater than the Purchase Invoice total.
! | Ensure the TOTAL of the Purchase Invoice is correct before using 'Connect to Prepayment'. |
If you have used 'Connect to Prepayment' and you are unable to save the Invoice, the probable reason is that the date of the Prepayment is later than that of the Invoice. The date of the Prepayment must be the same as or earlier than that of the Invoice.
On Account Payments and Prepayments - On Account Payments
An On Account Payment is one with no Purchase Invoice Number and with no Prepayment Number. It is possible to connect an On Account Payment to a subsequent Purchase Invoice, but the 'Connect to Prepayment' function cannot be used. Instead, the Purchase Invoice is first entered and approved without reference to the On Account Payment. It must then be registered as having been paid by the On Account Payment. This is done in a Payment record as a two-step process: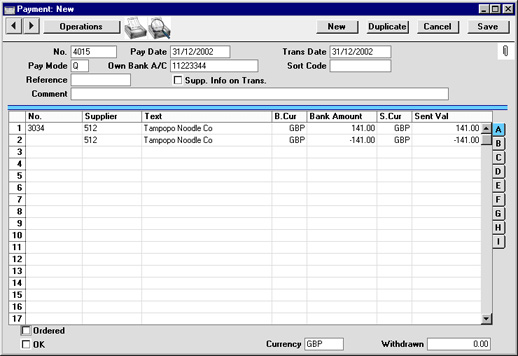
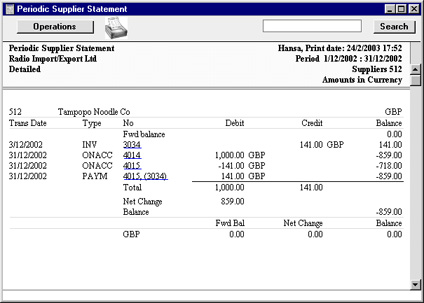
Correcting Mistakes in Payments
Even with the tightest quality control, it is probable that the occasional mistake will be made when entering Payments. Once a Payment has been approved, it cannot be changed, but mistakes can nevertheless be rectified easily using the following procedure. It is important that this procedure be followed, so that the Supplier's history remains correct.- In the 'Payments: Browse' window, highlight the Payment containing the error.
- Click [Duplicate]. A new Payment record is created, an exact copy of the Payment with the error.
- Insert a minus sign in front of the Sent Value, ensuring the Sent Value figure itself remains unchanged.
- Click the OK check box and save the Payment.
- Enter a new, correct, Payment.
Withholding Taxes in the Purchase Ledger
In some countries, it is necessary to calculate and apply a Withholding Tax when paying some or all Purchase Invoices. The Withholding Tax amount will be subtracted from the outstanding Purchase Invoice total and paid directly to the tax authority or other government institution.Enterprise by HansaWorld offers three methods for calculating and accounting for Withholding Tax:
- Withholding Tax can be calculated in and posted to the Nominal Ledger from Purchase Invoices. The calculation can be manual or automatic.
- Withholding Tax can be calculated in and posted to the Nominal Ledger from Payments with manual intervention. If you use this method, after you list Purchase Invoices in a Payment, you will need to select 'Calculate Withholding Taxes' from the Operations menu. This will add extra rows to the Payment for the Withholding Tax payments. When you approve the Payment, records will be created in the Withholding Certificates setting. You will be able to print Withholding Certificates and send them to your Suppliers with payments. This method should be used in Argentina.
- Withholding Tax can be calculated in and posted to a temporary Account in the Nominal Ledger from Purchase Invoices. When you approve Payments, Withholding Tax will be moved from the temporary Account to a final Account. This method can only be used in Mexico and is only briefly mentioned in this manual.
- If you would like Withholding Tax to be calculated automatically in Purchase Invoices, specify a Withholding Tax Account in the Account Usage P/L setting, and choose the Calculate Withholding Tax option in the Purchase Invoice Settings setting.
Do not complete this step if you will be adding Withholding Tax manually to Purchase Invoices or if you will be posting it from Payments.
- Use the Withholding Calculation Formulae setting to define the formulae that will be used to calculate Withholding Tax amounts.
- In the Withholding Taxes setting, configure the various Withholding Tax regimes that you will use. In a particular tax regime, you should specify a Calculation Formula, the Nominal Ledger Account to which the Withholding Tax amounts will be posted, the Form that will be used when you print a Withholding Certificate and various other attributes.
- In the Supplier Withholdings setting, connect each Supplier to one of the Withholding Tax regimes created in step 2.
If you will be adding Withholding Tax manually to Purchase Invoices, you only need complete step 3.
---
In this chapter:
- Introduction
- Entering a Payment
- Entering a Payment - Example
- Payments in Currency
- Reconciling Payments, Marking as OK and Posting to the Nominal Ledger
- Nominal Ledger Transactions from Payments
- Printing Payment Forms and Cheques
- Invalidating Payments
- On Account Payments and Prepayments
- Correcting Mistakes in Payments
- Withholding Taxes in the Purchase Ledger, including:
- Withholding Calculation Formulae
- Withholding Taxes
- Supplier Withholdings
- Withholding Certificates
- Workflow and Examples
- Withholding Calculation Formulae
- Operations menu
Go back to:
- Home page for Purchase Ledger manual
- Home page for HansaWorld Enterprise manual
Withholding Taxes in the Purchase Ledger - Withholding Calculation Formulae
The Withholding Calculation Formulae setting allows you to define the formulae that will be used to calculate Withholding Tax amounts.To define a new Withholding Calculation Formula, first move into the Purchase Ledger using the [Module] button in the Master Control panel. Then click the [Settings] button, also in the Master Control panel, or use the Ctrl-S/⌘-S keyboard shortcut. Double-click 'Withholding Calculation Formulae' in the list. The 'Withholding Calculation Formulae: Browse' window will be opened, showing all Withholding Calculation Formulae records previously entered. Double-click a record in the list to edit it, or add a new record by clicking the [New] button in the Button Bar. When the record is complete, save it by clicking the [Save] button in the Button Bar or by clicking the close box and choosing to save changes. To close it without saving changes, click the close box.
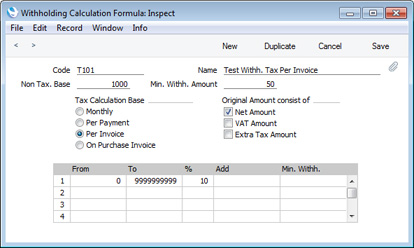
- Code
- Enter the unique Code by which the record is to be identified from elsewhere in Enterprise by HansaWorld. The Code can consist of up to ten characters.
- Name
- Enter a descriptive name for the record. This will be shown in the 'Paste Special' list, so should be detailed enough to ensure the correct record is always chosen.
- Non Tax. Base
- If there is a minimum base value for Withholding Tax to be calculated, enter that value here.
- For example, in the illustration, the Non Tax. Base is 1000.00. In essence, Withholding Tax will not be payable on the first 1000.00 of any Payment. In detail, the Non Tax. Base will be handled differently, depending on the Tax Calculation Base, as follows:
- Monthly
- The Non Tax. Base will be applicable once per Supplier during a calendar month, regardless of the number of Invoices that are paid during that month.
- Per Payment
- The Non Tax. Base will be applicable once per Payment.
- Per Invoice
- The Non Tax. Base will be applicable to each Invoice. For example, if you pay three Invoices in the same Payment, the Non Tax. Base will be applied three times.
- Per Purchase Invoice
- The Non Tax. Base field is not used with the Per Purchase Invoice option.
- For example, in the illustration, the Non Tax. Base is 1000.00. In essence, Withholding Tax will not be payable on the first 1000.00 of any Payment. In detail, the Non Tax. Base will be handled differently, depending on the Tax Calculation Base, as follows:
- Min. Withh. Amount
- If the result of the Withholding Tax calculation must be larger than a specified minimum value in order for Withholding Tax to be posted, specify that minimum value here.
- For example, in the illustration, the Min. Amount is 50.00. If the Withholding Tax in a Payment is calculated to be less than 50.00, no Withholding Tax will be posted.
- This figure will be overridden if you have specified a Min. Withh. figure in the relevant row in the matrix.
- This field is not used when the selected Tax Calculation Base option is Per Purchase Invoice.
- For example, in the illustration, the Min. Amount is 50.00. If the Withholding Tax in a Payment is calculated to be less than 50.00, no Withholding Tax will be posted.
- Tax Calculation Base
- Withholding Tax can be calculated using the following methods. The first three will calculate Withholding Tax in Payments, the last will calculate it in Purchase Invoices:
- Monthly
- During a particular calendar month, Withholding Tax will be calculated taking into account the Base figures (i.e. taxable amounts) and Withholding Tax in previous Payments made to the same Supplier during the month.
- For example, if the Non Tax. Base is 1000.00 and you pay an Invoice with a Base of 3000.00, Withholding Tax will be payable on 3000.00 - 1000.00 = 2000.00. If you need to pay a second Invoice with a Base of 3000.00 in the same month, Withholding Tax will be payable on the full 3000.00, because the Non Tax. Base has already been used up by the first Payment.
- However, if you pay three Invoices to the same Supplier with Base figures 100.00, 100.00 and 2800.00 in the same month, no Tax will be payable on the first two Payments, which will take up 200.00 of the Non Tax. Base. When you pay the third Invoice, Tax will be payable on 2800.00 - 800.00 (the remaining Non Tax. Base) = 2000.00.
- If you are using this option, only one Withholding Certificate will be created from each Payment record, so you should not pay different Suppliers in the same Payment.
- For example, if the Non Tax. Base is 1000.00 and you pay an Invoice with a Base of 3000.00, Withholding Tax will be payable on 3000.00 - 1000.00 = 2000.00. If you need to pay a second Invoice with a Base of 3000.00 in the same month, Withholding Tax will be payable on the full 3000.00, because the Non Tax. Base has already been used up by the first Payment.
- Per Payment
- Withholding Taxes will be calculated based on the Base figures (i.e. taxable amounts) in each Payment. Withholding Taxes in previous Payments to the same Supplier will not be taken into account.
- For example, if the Non Tax. Base is 1000.00 and you pay two Invoices with Base figures of 1000.00 and 3000.00 in the same Payment, Withholding Tax will be payable on 1000.00 - 250.00 = 750.00 and 3000.00 - 750.00 = 2250.00 (i.e. the Non Tax. Base will be distributed to the Invoices proportionally). If you need to pay the same Supplier again later in the month, the Non Tax. Base of 1000.00 will once again be applied in that Payment.
- As with the Monthly option, only one Withholding Certificate will be created from each Payment record, so again you should not pay different Suppliers in the same Payment.
- For example, if the Non Tax. Base is 1000.00 and you pay two Invoices with Base figures of 1000.00 and 3000.00 in the same Payment, Withholding Tax will be payable on 1000.00 - 250.00 = 750.00 and 3000.00 - 750.00 = 2250.00 (i.e. the Non Tax. Base will be distributed to the Invoices proportionally). If you need to pay the same Supplier again later in the month, the Non Tax. Base of 1000.00 will once again be applied in that Payment.
- Per Invoice
- Withholding Taxes will be calculated per Invoice within each Payment.
- For example, if the Non Tax. Base is 1000.00 and you pay two Invoices with Base figures (i.e. taxable amounts) of 1000.00 and 3000.00 in the same Payment, Withholding Tax will be payable on 1000.00 - 1000.00 = 0.00 and 3000.00 - 1000.00 = 2000.00 (i.e. the Non Tax. Base will be applied to each Invoice separately). If you need to pay the same Supplier again later in the month, the Non Tax. Base of 1000.00 will once again be applied.
- This option will cause separate Withholding Certificates to be created for each Invoice in a Payment record.
- For example, if the Non Tax. Base is 1000.00 and you pay two Invoices with Base figures (i.e. taxable amounts) of 1000.00 and 3000.00 in the same Payment, Withholding Tax will be payable on 1000.00 - 1000.00 = 0.00 and 3000.00 - 1000.00 = 2000.00 (i.e. the Non Tax. Base will be applied to each Invoice separately). If you need to pay the same Supplier again later in the month, the Non Tax. Base of 1000.00 will once again be applied.
- Per Purchase Invoice
- While the three options above will cause Withholding Tax to be calculated in Payments, this option will cause it to be calculated automatically in Purchase Invoices. To use this option, you must also use the Calculate Withholding Tax option in the Purchase Invoice Settings setting.
- The Non Tax. Base and Min. Withh. Amount fields above are not used with this option, but the Original Amount options below and the Add and Min. Withh. fields in the matrix are used.
- This option will not create Withholding Certificates.
- The Non Tax. Base and Min. Withh. Amount fields above are not used with this option, but the Original Amount options below and the Add and Min. Withh. fields in the matrix are used.
- Monthly
- Original Amount consists of
- Use these options to specify how the Base figure (i.e. the taxable amount, the figure to which the Tax percentage will be applied) for the calculation will be chosen. Note that the options are check boxes, so you can choose more than one:
- Net Amount
- The Purchase Invoice value excluding VAT and other taxes will be included in the Base figure.
- VAT Amount
- The VAT value of the Purchase Invoice will be included in the Base figure.
- Extra Tax Amount
- The Extra Tax value of the Purchase Invoice will be included in the Base figure.
- Net Amount
- From, To
- Enter the range of Base figures that will be subject to the percentage specified in the next field.
- %
- Enter the Withholding Tax percentage.
- Add
- If a fixed amount is to be added to each Withholding Tax amount (i.e. after it has been calculated by applying the percentage to the Base figure), enter that fixed amount here. For example, if Withholding Tax should be 5% of Invoice value plus 40.00, enter 40.00 here.
- Min. Withh.
- If the result of the Withholding Tax calculation must be larger than a specified minimum value in order for Withholding Tax to be posted, specify that minimum value here.
If you specify a figure here, it will used instead of the Min. Withh. Amount in the header.
In this chapter:
- Introduction
- Entering a Payment
- Entering a Payment - Example
- Payments in Currency
- Reconciling Payments, Marking as OK and Posting to the Nominal Ledger
- Nominal Ledger Transactions from Payments
- Printing Payment Forms and Cheques
- Invalidating Payments
- On Account Payments and Prepayments
- Correcting Mistakes in Payments
- Withholding Taxes in the Purchase Ledger, including:
- Withholding Calculation Formulae
- Withholding Taxes
- Supplier Withholdings
- Withholding Certificates
- Workflow and Examples
- Withholding Calculation Formulae
- Operations menu
Go back to:
- Home page for Purchase Ledger manual
- Home page for HansaWorld Enterprise manual
Withholding Taxes in the Purchase Ledger - Withholding Taxes
Once you have defined your Withholding Calculation Formulae as described here, you should configure your Withholding Tax regime or regimes. To do this, use the Withholding Taxes setting.To work with Withholding Taxes, ensure you are in the Purchase Ledger and open the settings list by clicking the [Settings] button in the Master Control panel or using the Ctrl-S/⌘-S keyboard shortcut. Double-click 'Withholding Taxes' in the list. The 'Withholding Taxes: Inspect window will be opened, showing all Withholding Tax records previously entered. Each row in the matrix contains a separate Withholding Tax record or regime.
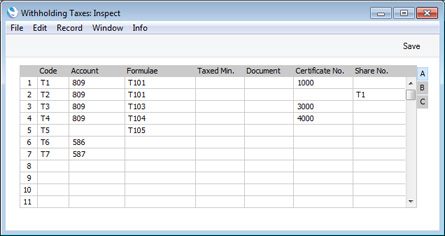
To edit a Withholding Tax record, simply click in the field to be changed and overtype the existing entry. To add a new Withholding Tax record, scroll down to the first blank line. Click [Save] in the Button Bar to save changes. To close the window without saving changes, use the close box.
The information required for each Withholding Tax record is as follows:
Flip A
- Code
- Enter the unique Code by which the record is to be identified from elsewhere in Enterprise by HansaWorld. The Code should contain two characters.
- Account
- Paste Special
Account register, Nominal Ledger/System module
- Specify the Account that will be credited with Withholding Tax amounts in Nominal Ledger Transactions created from Payments.
- If you are having Withholding Tax calculated automatically in Purchase Invoices (i.e. the Tax Calculation Base in a Calculation Formula is Per Purchase Invoice and the Calculate Withholding Tax option in the Purchase Invoice Settings setting is selected), this Account will not be used. Instead, the Withholding Tax Account specified in the Account Usage P/L setting will be credited with Withholding Tax amounts.
- If you are having Withholding Tax calculated automatically in Purchase Invoices (i.e. the Tax Calculation Base in a Calculation Formula is Per Purchase Invoice and the Calculate Withholding Tax option in the Purchase Invoice Settings setting is selected), this Account will not be used. Instead, the Withholding Tax Account specified in the Account Usage P/L setting will be credited with Withholding Tax amounts.
- Formula
- Paste Special
Withholding Calculation Formulae setting, Purchase Ledger
- Specify the Withholding Calculation Formula that will be used to calculate Withholding Tax.
- Taxed Min.
- If there is a minimum Base figure before Withholding Tax can be calculated, specify that value here.
- This field is used when calculating Withholding Tax in Payments. The effect of specifying a Taxed Min. will depend on the Tax Calculation Base in a Calculation Formula, as follows:
- Monthly
- The total Base value for the Supplier for the month so far (i.e. value of all payments to the Supplier) will be compared to the Taxed Min.
- For example, if the first Purchase Invoice you pay has a Base value that is less than the Taxed Min., no Withholding Tax will be payable. If you then pay a second Purchase Invoice from the same Supplier in the same calendar month, the total Base value of both Invoices will be compared to the Taxed Min. If the total is less than the Taxed Min., again no Tax will be payable. If the total is more than the Taxed Min., Tax will be payable on that total i.e. on both Invoices.
- For example, if the first Purchase Invoice you pay has a Base value that is less than the Taxed Min., no Withholding Tax will be payable. If you then pay a second Purchase Invoice from the same Supplier in the same calendar month, the total Base value of both Invoices will be compared to the Taxed Min. If the total is less than the Taxed Min., again no Tax will be payable. If the total is more than the Taxed Min., Tax will be payable on that total i.e. on both Invoices.
- Per Payment
- If you pay several Purchase Invoices from the same Supplier in the same Payment, the total Base value of those Purchase Invoices will be compared to the Taxed Min. If the total is less than the Taxed Min., no Tax will be payable. If the total is more than the Taxed Min., Tax will be payable on that total i.e. on all Invoices in the Payment.
- Per Invoice
- If you pay several Purchase Invoices from the same Supplier in the same Payment, the Base value of each Invoice will be compared to the Taxed Min. individually. Tax will be only be payable on the Invoices whose Base values are greater than the Taxed Min.
- This field is used when calculating Withholding Tax in Payments. The effect of specifying a Taxed Min. will depend on the Tax Calculation Base in a Calculation Formula, as follows:
- Document
- Paste Special
Form register, System module
- Specify the Form that is to be used when printing Withholding Certificates created using the Withholding Tax record. This Form will be used instead of the standard one specified using the 'Define Document' function for the Withholding Certificate document.
- Certificate No.
- Specify the start of the numbering sequence that you want to be used for Withholding Certificates created using the Withholding Tax record.
- Share No.
- Paste Special
Withholding Taxes setting
- Use this field if you need different Withholding Tax records to share the same numbering sequence when creating Withholding Certificates.
- In the illustration above, Tax record T1 has a numbering sequence beginning at 1000. This Code T1 is entered in the Share No. field for T2, so T2 will use the same numbering sequence.
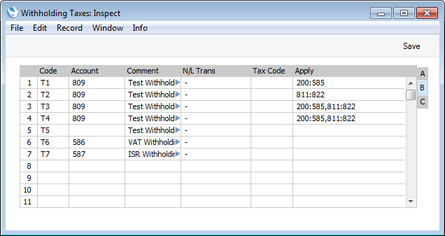
- Comment
- Enter a descriptive name for each Withholding Tax regime. This will be shown in the 'Paste Special' list, so should be detailed enough to ensure the correct record is always chosen.
- This comment will be copied to the Tax Comment field in each Withholding Certificate.
- This comment will be copied to the Tax Comment field in each Withholding Certificate.
- N/L Trans
- Paste Special
Choice of possible entries
- Use this field to choose between two options, as follows:
- -
- Use this option in the majority of situations. All methods and examples described in this manual use this option.
- Post Payment Withholding Tax
- This option can only be used in particular circumstances in Mexico. Please refer to your Enterprise by HansaWorld representative for details.
- -
- Tax Code
- This field is used in Argentina, where a Tax Code will usually consist of a Tax Code (usually three characters), a dash or stroke separator and an Article or Additional Code (again, usually three characters). This Tax Code will be included in files created by the 'Withholding Certificates (Argentina)' Export function in the Purchase Ledger (and in files created by the 'P/L Withholding and Perceptions (Argentina)' Export function if there is no Tax Code in relevant record in the Supplier Withholdings setting). It will also be printed in Withholding Certificates if you have included the fields "TAX Code" (initial characters) and "TAX Article" (final characters) in the Form design.
- Apply
- Paste Special
Account register, Nominal Ledger/System module
- Specify here the Accounts that are liable for Withholding Tax. If you are calculating Withholding Tax in Payments, Withholding Tax will be calculated when you pay a Purchase Invoice in which one of these Accounts has been used.
- As shown in the illustration, you can enter a range of Accounts separated by a colon (:) and/or several Accounts separated by commas.
- If you specify different Formulae on flip A, you will be able to calculate Withholding Tax at different rates, depending on the Apply Account(s).
- As shown in the illustration, you can enter a range of Accounts separated by a colon (:) and/or several Accounts separated by commas.
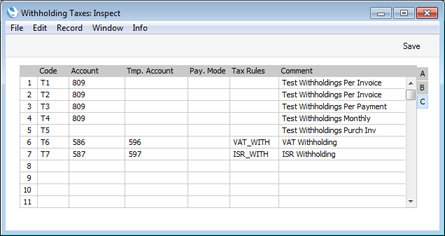
- Tmp. Account
- Paste Special
Account register, Nominal Ledger/System module
- This field is used when adding Withholding Tax to Purchase Invoices manually. In this situation, you will use the 'Add Withholding Tax' Operations menu function to add a Withholding Tax row to the Purchase Invoice. In this row you should specify a Withholding Tax regime and an Account to be credited with Withholding Tax. The Account specified here will be the default.
- This field is also used when calculating Withholding Tax on the sales side. If you sell an Item that is subject to Withholding Tax, a Withholding Tax row will be added to the Invoice automatically. The Sales Account in this row (i.e. the Account to which the Withholding Tax will be posted) will be taken from the record in the Item Group Withholdings setting in the Sales Ledger for the Item Group to which the Item belongs (Tmp A/C field). If the Item Group Withholdings record does not have an A/C but has been connected to a row in this Withholding Taxes setting, this Tmp Account will be used. If the Invoice is a Cash Note, the Account on flip A will be used in place of this Tmp Account.
- This field is also used when calculating Withholding Tax on the sales side. If you sell an Item that is subject to Withholding Tax, a Withholding Tax row will be added to the Invoice automatically. The Sales Account in this row (i.e. the Account to which the Withholding Tax will be posted) will be taken from the record in the Item Group Withholdings setting in the Sales Ledger for the Item Group to which the Item belongs (Tmp A/C field). If the Item Group Withholdings record does not have an A/C but has been connected to a row in this Withholding Taxes setting, this Tmp Account will be used. If the Invoice is a Cash Note, the Account on flip A will be used in place of this Tmp Account.
- Pay. Mode
- Paste Special
Payment Modes setting, Sales/Purchase Ledger
- If you will pay Withholding Tax using a particular Payment Mode, specify that Payment Mode here.
- When you use the 'Calculate Withholding Taxes' Operations menu function to add a row to a Payment containing the Withholding Tax amount, this Payment Mode will be copied to flip C of that row.
- In countries such as Argentina, Withholding Taxes calculated in Payments are posted separately and are not included in amounts paid to Suppliers. Entering a Payment Mode here reduces the possibility of mistakes when entering Payments with Withholding Taxes.
- When you use the 'Calculate Withholding Taxes' Operations menu function to add a row to a Payment containing the Withholding Tax amount, this Payment Mode will be copied to flip C of that row.
- Tax Rules
- Paste Special
Tax Rules setting, Nominal Ledger
- This field is used in Portugal and Mexico.
- In Mexico, use this field to refer to a record in the Tax Rules setting in which the VAT Type is "Withholding" (if the Withholding Tax is a VAT Withholding) or "ISR Withholding" (if the Withholding Tax is an ISR Withholding). This controls reporting to the tax authorities.
- Please refer to your local Enterprise by HansaWorld representative for more information.
- In Mexico, use this field to refer to a record in the Tax Rules setting in which the VAT Type is "Withholding" (if the Withholding Tax is a VAT Withholding) or "ISR Withholding" (if the Withholding Tax is an ISR Withholding). This controls reporting to the tax authorities.
In this chapter:
- Introduction
- Entering a Payment
- Entering a Payment - Example
- Payments in Currency
- Reconciling Payments, Marking as OK and Posting to the Nominal Ledger
- Nominal Ledger Transactions from Payments
- Printing Payment Forms and Cheques
- Invalidating Payments
- On Account Payments and Prepayments
- Correcting Mistakes in Payments
- Withholding Taxes in the Purchase Ledger, including:
- Withholding Calculation Formulae
- Withholding Taxes
- Supplier Withholdings
- Withholding Certificates
- Workflow and Examples
- Withholding Calculation Formulae
- Operations menu
Go back to:
- Home page for Purchase Ledger manual
- Home page for HansaWorld Enterprise manual
Withholding Taxes in the Purchase Ledger - Supplier Withholdings
Having configured your Withholding Tax regime or regimes as described here, you can now assign a Tax regime or regimes to each Supplier. To do this, use the Supplier Withholdings setting, in which you should enter separate records for each Supplier. If you do not enter a record for a particular Supplier, Withholding Tax will not be calculated in Payments when you pay Purchase Invoices from that Supplier.To work with the Supplier Withholdings setting, first move into the Purchase Ledger using the [Module] button in the Master Control panel. Then click the [Settings] button, also in the Master Control panel, or use the Ctrl-S/⌘-S keyboard shortcut. Double-click 'Supplier Withholdings' in the list. The 'Supplier Withholdings: Browse' window will be opened, showing all Supplier Withholding records previously entered. Double-click a record in the list to edit it, or add a new record by clicking the [New] button in the Button Bar. When the record is complete, save it by clicking the [Save] button in the Button Bar or by clicking the close box and choosing to save changes. To close it without saving changes, click the close box.
In Argentina, Supplier Withholding specifications will be updated periodically (usually annually) by the tax authorities. You can import these specifications to the Supplier Withholdings setting using the 'Regional Perceptions & Withholdings (Argentina)' Import function in the Sales and Purchase Ledgers.
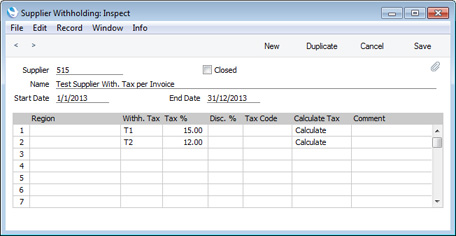
- Supplier
- Paste Special
Suppliers in Contact register
- Specify the Supplier for whom you need to calculate Withholding Taxes. After entering the Supplier Number or using the 'Paste Special' function and pressing Return, the Supplier's name will be entered into the Name field below.
- Name
- The Supplier's Name will be brought in when you enter the Supplier Number.
- Closed
- You can mark a Supplier Withholding record as Closed when it is no longer to be used.
- Start Date, End Date
- Paste Special
Choose date
- Use these fields to specify the period of validity of the Supplier Withholding record.
- You must enter a Start Date before you can save the record, but you don't need to enter an End Date.
If you will have Withholding Taxes calculated automatically in Purchase Invoices, you only need use the first row of the matrix. The calculation will refer to the Withholding Tax regime specified in that first row and calculate Tax using the Calculation Formula specified in that regime.
If you will calculate Withholding Taxes in Payments, you can use more than one row. This allows different Withholding Tax regimes to be used, depending on the Account in the Purchase Invoice being paid.
When you enter a Payment and calculate Withholding Taxes, the calculation will first check the Withholding Tax regimes listed for the Supplier. In the example illustrated above, these are T1 and T2. The calculation will then check the Purchase Invoice being paid to see if any of the Apply Accounts specified for T1 and T2 are used in the Purchase Invoice. If so, it will calculate Withholding Tax on the relevant Purchase Invoice rows.
In the example illustrated above, Tax T1 will apply when Accounts 200:585 are used in a Purchase Invoice (Accounts 200:585) are the Apply Accounts in Withholding Tax T1), and Tax T2 will apply when Accounts 811:822 are used in a Purchase Invoice. In this example, Taxes T1 and T2 have the same Calculation Formula and will post to the same Account, but in both cases in the Supplier Withholding record, a special Tax percentage has been entered for Supplier 515.
- Region
- Paste Special
Regions setting, Sales Ledger
- This field is only used when calculating Withholding Tax in Payments. If you specify a Region here and the No Region Perceptions box is ticked in the Contact record for the Supplier, then Withholding Tax will not be calculated.
- Withh. Tax
- Paste Special
Withholding Taxes setting, Purchase Ledger
- Specify the Withholding Tax regime that is to be applied to the Supplier's Purchase Invoices.
- Tax %
- Use this field if you need to calculate Withholding Tax using a different percentage to the one specified in the Calculation Formula attached to the Withholding Tax regime. All other rules (e.g. Non Tax. Base, Min. Withh. Amount) will still apply.
- This field is only used when calculating Withholding Tax in Payments.
- This field is only used when calculating Withholding Tax in Payments.
- Disc %
- If the Supplier has a discount percentage approved by the tax authorities, you should enter that percentage in this field.
- Tax Code
- This field is used in Argentina, where a Tax Code will usually consist of a Tax Code (usually three characters), a dash or stroke separator and an Article or Additional Code (again, usually three characters). This Tax Code will be included in files created by the 'P/L Withholding and Perceptions (Argentina)' Export function in the Purchase Ledger.
- Calculate Tax
- Paste Special
Choice of possible entries
- Use this field to specify whether Withholding Tax should be calculated for the Supplier. The default option is "Calculate". Choose "Don't Calculate" if Tax is not to be calculated (for example, a Supplier may have been granted an exemption by the tax authorities).
- Comment
- If you enter a tax description here, it will be copied to the Comment field in each Withholding Certificate. Usually you would enter a Comment here if you have entered a percentage in the Tax % field above.
In this chapter:
- Introduction
- Entering a Payment
- Entering a Payment - Example
- Payments in Currency
- Reconciling Payments, Marking as OK and Posting to the Nominal Ledger
- Nominal Ledger Transactions from Payments
- Printing Payment Forms and Cheques
- Invalidating Payments
- On Account Payments and Prepayments
- Correcting Mistakes in Payments
- Withholding Taxes in the Purchase Ledger, including:
- Withholding Calculation Formulae
- Withholding Taxes
- Supplier Withholdings
- Withholding Certificates
- Workflow and Examples
- Withholding Calculation Formulae
- Operations menu
Go back to:
- Home page for Purchase Ledger manual
- Home page for HansaWorld Enterprise manual
Withholding Taxes in the Purchase Ledger - Withholding Certificates
Whenever you approve a Payment in which a Withholding Tax row has been added by the 'Calculate Withholding Tax' Operations menu function, at least one record will be created in the Withholding Certificates setting. You can print Withholding Certificates for sending to Suppliers together with payment, and Certificates also provide the Withholding Tax information that will be sent to the tax authorities. Various localised export functions are available in the Sales and Purchase Ledgers for this purpose.You cannot enter or modify records to the Withholding Certificates setting yourself: you can only view them. To do this, ensure you are in the Purchase Ledger and open the settings list by clicking the [Settings] button in the Master Control panel or using the Ctrl-S/⌘-S keyboard shortcut. Double-click 'Withholding Certificates' in the list. The 'Withholding Certificates: Browse' window will be opened, listing all existing Withholding Certificates. Double-click a record in the list to edit it.
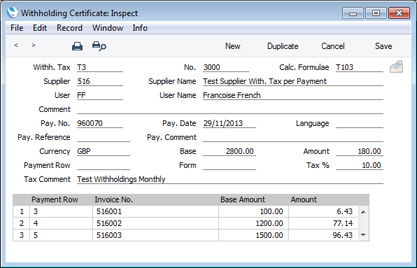
In this chapter:
- Introduction
- Entering a Payment
- Entering a Payment - Example
- Payments in Currency
- Reconciling Payments, Marking as OK and Posting to the Nominal Ledger
- Nominal Ledger Transactions from Payments
- Printing Payment Forms and Cheques
- Invalidating Payments
- On Account Payments and Prepayments
- Correcting Mistakes in Payments
- Withholding Taxes in the Purchase Ledger, including:
- Withholding Calculation Formulae
- Withholding Taxes
- Supplier Withholdings
- Withholding Certificates
- Workflow and Examples
- Withholding Calculation Formulae
- Operations menu
Go back to:
- Home page for Purchase Ledger manual
- Home page for HansaWorld Enterprise manual
Withholding Taxes in the Purchase Ledger - Workflow and Examples
Withholding Tax from Purchase Invoices - Automatic CalculationThis example describes Withholding Tax posted from Purchase Invoices, where the Tax is calculated automatically. Steps 1-5 describe the configuration and subsequent steps the workflow.
- Ensure you have selected the Calculate Withholding Tax option in the Purchase Invoice Settings setting:
Note: this option should not be selected if you will be using the other methods to post Withholding Tax.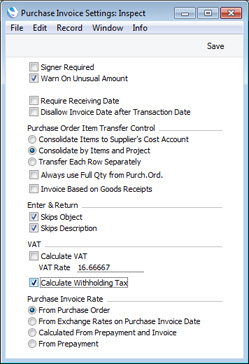
- Specify a Withholding Tax Account in the Account Usage P/L setting:
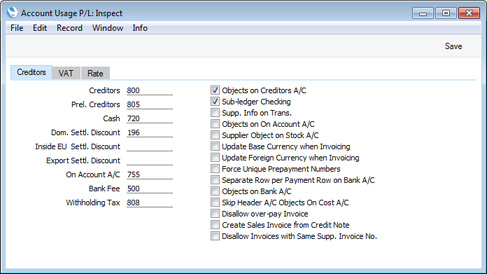
- Create a record in the Withholding Calculation Formulae setting containing the Calculation Formula. The Non Tax. Base and Min. Withh. Amount fields in the header are not used in this context, but the Original Amount options and the Add and Min. Withh. fields in the matrix are used.
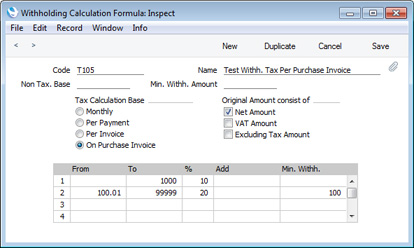
- Create a Withholding Tax regime in the Withholding Taxes setting. In this context, the purpose of this regime is to connect the Supplier to the Calculation Formula. So you only need specify a Code and a Calculation Formula. For this example, Tax T5 will be used:
As there is no need to specify Apply Accounts on flip B, Withholding Tax will always be calculated in Purchase Invoices, irrespective of the Accounts in those Purchase Invoices.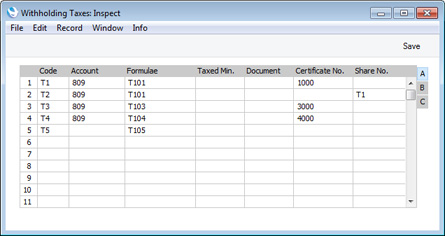
- Create a record in the Supplier Withholdings setting for the Supplier. Only the first row in the matrix will be used: any entries in other rows will be ignored. If you enter a Region or a Tax %, this will also be ignored, but any Disc. % will be included in the calculation:
When you enter a Purchase Invoice, the first row in the relevant Supplier Withholding record will provide the Withholding Tax regime (T5 in this example). T5 will provide the Calculation Formula (T105).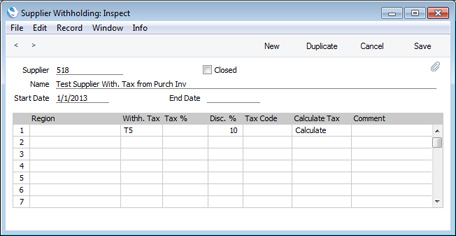
- Enter Purchase Invoices in the usual way. As you add Amounts in each row, Withholding Tax will be calculated automatically and shown in the Withh. Tax field in the footer:
The Calculation Formula states that the Base amount for the calculation is to be the Net Amount i.e. the Purchase Invoice value excluding VAT and other taxes. The calculation is as follows: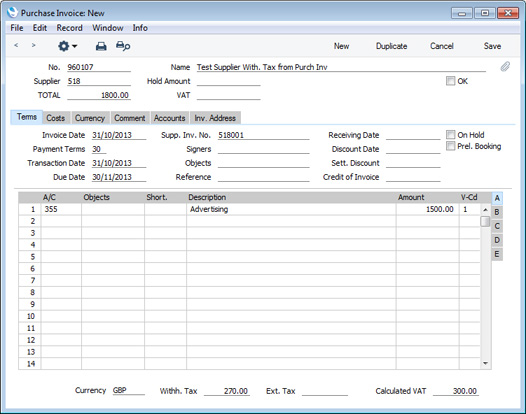
- The Base value is 1500.00.
- 1500.00 is in the range specified in the second row in the Calculation Formula, so Tax is to be calculated at 20%. 1500 * 20% = 300.00.
- The Supplier Withholding record specifies that a Discount of 10% is to be applied. 300.00 - 10% = 270.00.
- 270.00 is more than the Min. Withh. specified in the second row in the Calculation Formula (100.00), so the Withholding Tax is payable.
If the result of the Withholding Tax calculation is not correct (i.e. does not match what is shown on the Supplier?s Invoice), you can overwrite the figure in the Withh. Tax field in the footer. In fact you can use this field on a purely manual basis: if you turn off the Calculate Withholding Tax option in the Purchase Invoice Settings setting, any figure that you enter in the Withh. Tax field yourself will be treated as Withholding Tax as described in this example.
Do not include the Withholding Tax amount in the TOTAL field in the header. This field should contain the sum of the Amounts from the rows and the VAT, as this is what is payable to the Supplier.
- The Base value is 1500.00.
- Approve the Purchase Invoice by marking it as OK and saving it. In the Nominal Ledger Transaction, the Withholding Tax will be credited to the Withholding Tax Account specified in the Account Usage P/L setting, and subtracted from the posting to the Creditor Account:
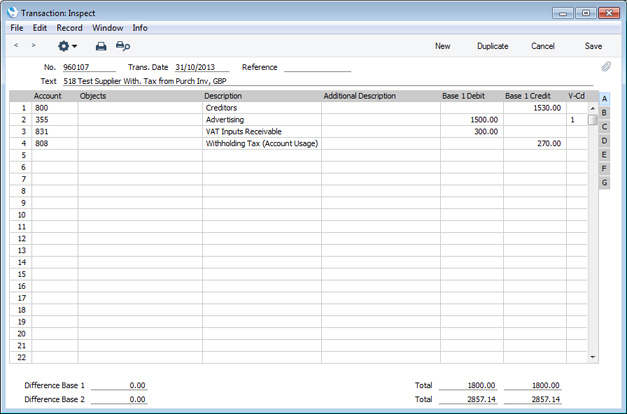
- The open amount of the Purchase Invoice in the Invoice Status report and in statements will be the TOTAL less Withholding Tax. This will also be the amount offered as a default when you specify the Invoice in a Payment:
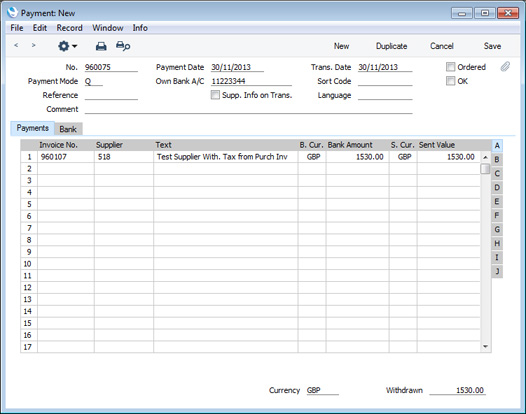
Withholding Tax from Purchase Invoices - Manual Calculation
This example describes Withholding Tax posted from Purchase Invoices, where the Tax is added manually.
Note: in Mexico, this method is used to post Withholding Tax from Purchase Invoices to a temporary Account. When a Purchase Invoice is paid, the Tax is moved from the temporary Account to a final one automatically. Outside Mexico (i.e. if the VAT Law in the Company Info setting is not "Mexican"), it is possible to post the Tax from Purchase Invoices in the same way, but Payments will not move the Tax to the final Account. Therefore, outside Mexico, configuration should be such that Purchase Invoices post to the final Account.
Step 1 describes the configuration and subsequent steps the workflow.
- The only configuration step necessary is to create a Withholding Tax regime or regimes in the setting. In this example, Taxes T6 and T7 will be used:
In Mexico, enter the final Withholding Tax Account in the Account field on flip A. Outside Mexico, the Account field can be left blank.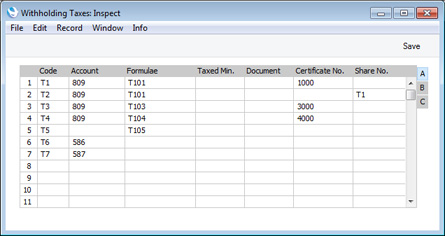
On flip C, in Mexico enter the temporary Withholding Tax Account in the Tmp. Account field. Outside Mexico, enter the final Withholding Tax Account in this field. The Tax Rules field is used in Mexico for reporting to the tax authorities and can be left blank elsewhere:
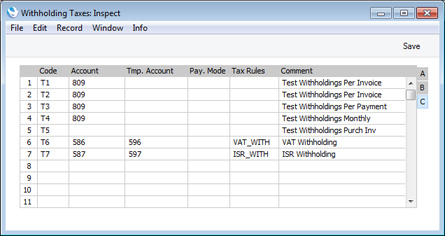
- Enter Purchase Invoices in the usual way. When the time comes to add Withholding Tax, choose 'Add Withholding Tax' from the Operations menu. The 'Add Withholding Row' window opens:
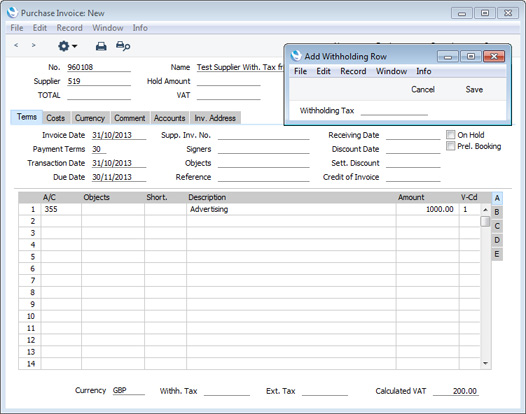
- Choose the Withholding Tax regime that you need using 'Paste Special' and click [Save]. A new row will be added to the Purchase Invoice, containing the Withholding Tax Code and the Tmp. Account:
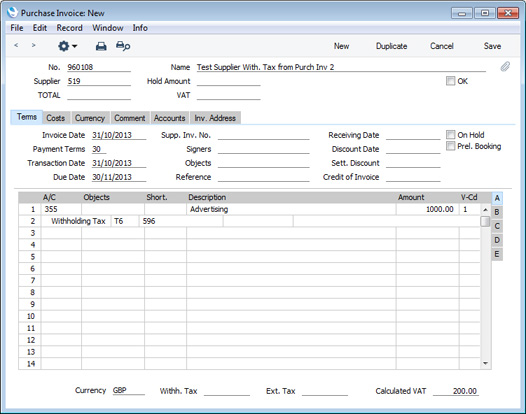
- Copying from the Supplier's Invoice, enter the Withholding Tax amount in the field to the right of the Tmp. Account.
- Repeat steps 2-4 if more than one Withholding Tax is involved. As you add Withholding Tax rows, Withholding Tax will be calculated automatically and shown in the Withh. Tax field in the footer :
Do not include the Withholding Tax amount in the TOTAL field in the header. This field should contain the sum of the Amounts from the rows and the VAT, as this is what is payable to the Supplier.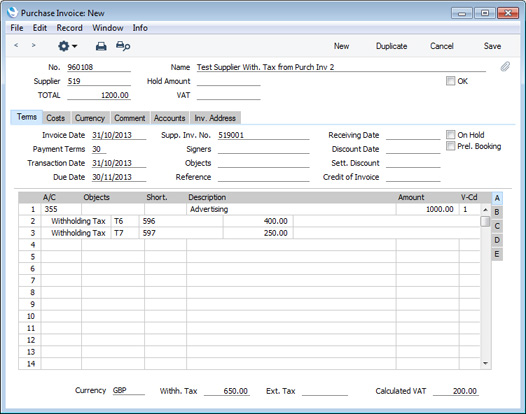
- Approve the Purchase Invoice by marking it as OK and saving it. In the Nominal Ledger Transaction, the Withholding Tax will be credited to the Tmp. Accounts specified in the Withholding Tax rows:
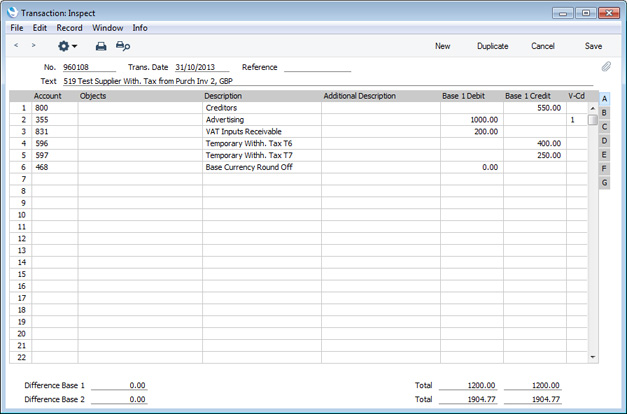
- The open amount of the Purchase Invoice in the Invoice Status report and in statements will be the TOTAL less Withholding Tax. This will also be the amount offered as a default when you specify the Invoice in a Payment:
Outside Mexico (i.e. if the VAT Law in the Company Info setting is not "Mexican"), the Nominal Ledger Transaction from this Payment will simply debit the Creditor Account and credit the Payment Mode Account as normal. In Mexico, additional postings will be added, moving the Withholding Tax from the Tmp. Account to the final one: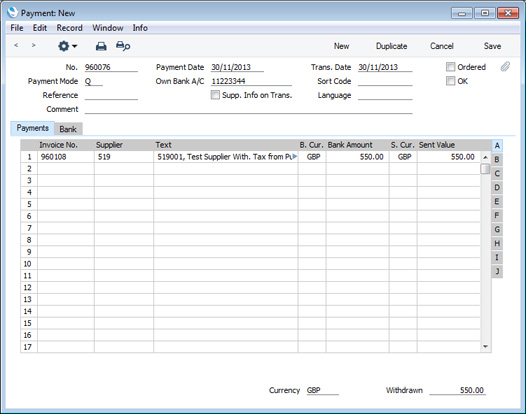
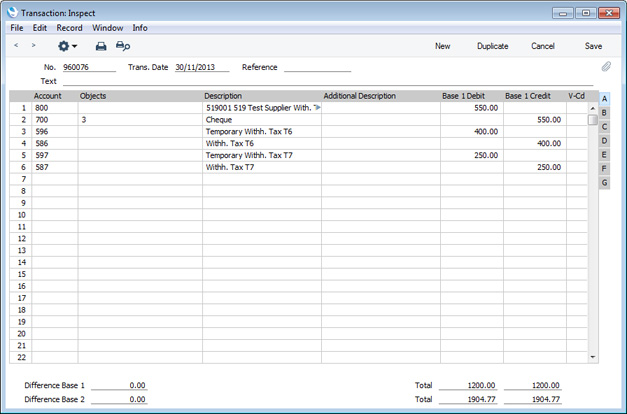
Withholding Tax from Payments - Per Invoice Basis
This example describes Withholding Tax posted from Payments and calculated on a Per Month basis. Illustrated below are the Withholding Calculation Formula, the Withholding Tax and the Supplier Withholding record:
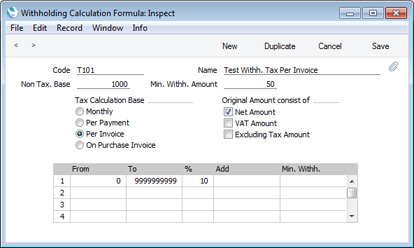
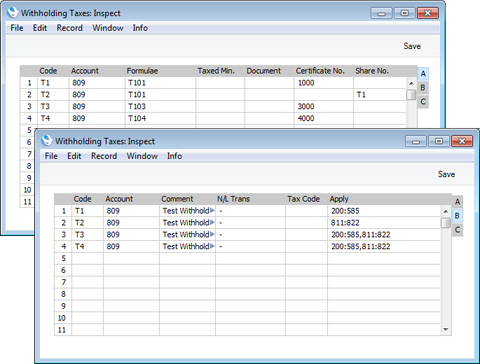
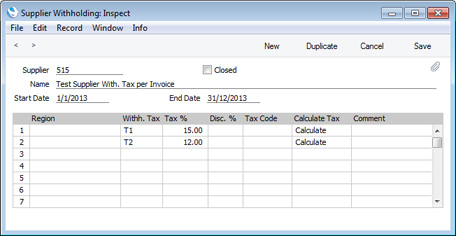
- In this example, we will pay the following Purchase Invoices. Withholding Tax will be payable on the Invoice values excluding VAT i.e. the values in the Excl. VAT column:
This is one of the Purchase Invoices: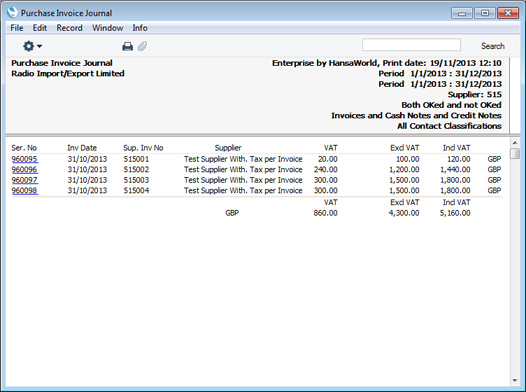
The Purchase Invoice was entered as normal, with no reference to Withholding Tax.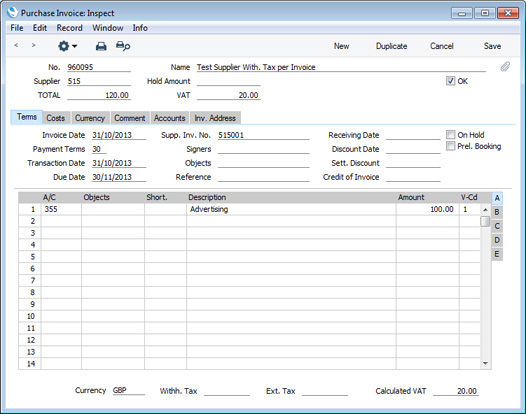
The Account is included in the range in the Apply field for Withholding Tax T1 (flip B), and Tax T1 is listed in the Supplier Withholding record for Supplier 515. So, Withholding Tax will be calculated on that basis (using the Formula T101 specified in Tax T1).
- When you enter the Purchase Invoice in a Payment, a message will inform you that a Withholding Tax calculation is needed:
This message will appear because there is a record in the Supplier Withholdings setting for the Supplier in which it has been specified that Tax is to be calculated. The message is there to remind you to carry out a Withholding Tax calculation (step 3 below), but it does not necessarily mean that Tax will be payable (for example, the result of the calculation might be less than the Min. Amount).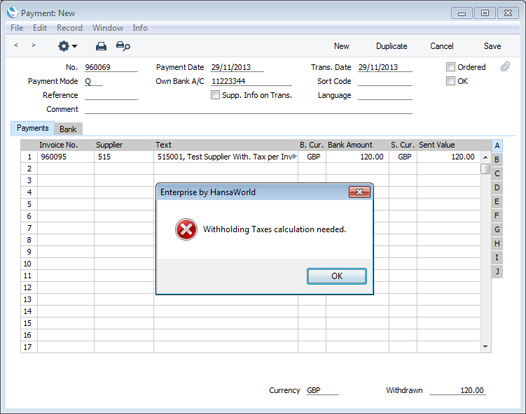
- Add the remaining Purchase Invoices to the Payment:
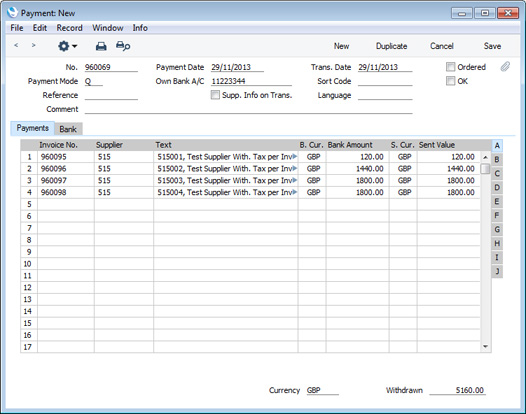
- Choose 'Calculate Withholding Taxes' from the Operations menu. New rows will be added to the Payment containing the result of the Withholding Tax calculation. In this case, Withholding Tax is payable on Invoices 960097 and 960098, and the Withholding Tax amounts were subtracted from the Bank Amounts and Sent Values for those Invoices (third and fourth rows):
On flip G of the Payment, the Withholding Tax regime ("T1" in this case) and the Base amount (i.e. the amount on which Withholding Tax was calculated) will be placed in the relevant fields in the rows containing the Withholding Tax: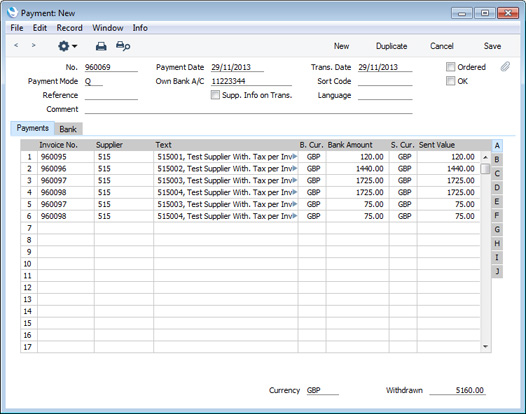
If you specified a Payment Mode on flip C of the Withholding Tax regime, this will be copied to flip C of the Payment rows containing the Withholding Tax as well.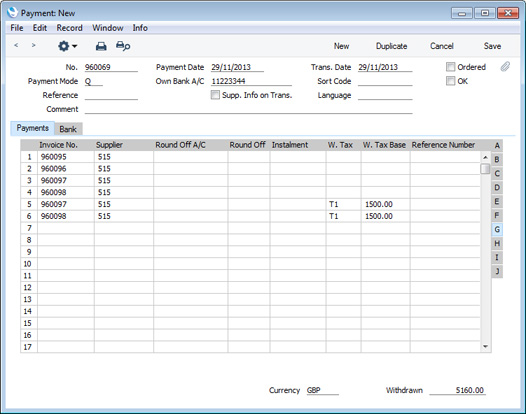
As the Tax Calculation Base in the Calculation Formula is Per Invoice, the Non Tax. Base is applied separately to each Invoice being paid. The Calculation Formula also states that the Base amount for the calculation is to be the Net Amount i.e. the Purchase Invoice value excluding VAT and other taxes. The calculations are as follows:
- The Base value for Invoice 960095 is 100.00.
- The Non Tax. Base in the Calculation Formula is 1000.00, so Withholding Tax will be calculated on 100.00 - 1000.00 = -900.00. As this is less than zero, Invoice 960095 is not liable for Withholding Tax.
- The Base Value for Invoice 960096 is 1200.00. The Non Tax. Base is again applied to this amount. Withholding Tax will be calculated on 1200.00 - 1000.00 = 200.00.
- The Supplier Withholding record specifies that Withholding Tax is 15%. This overrules the 10% specified in the Calculation Formula.
- 200 * 15% = 30.00. 30.00 is less than the Min. Withh. Amount (50.00), so Invoice 960096 is not liable for Withholding Tax.
- For Invoice 960097, the Base value is 1500.00. After subtracting the Non Tax. Base, the calculation is 500 * 15% = 75.00. 75.00 is more than the minimum, so this is the Withholding Tax Amount that is payable.
- Step (f) is repeated for Invoice 960098.
- The Base value for Invoice 960095 is 100.00.
- Approve the Payment in the usual way by checking the OK box and saving. The following Transaction will be created in the Nominal Ledger:
The full payment amount including Withholding Tax is debited to the Creditor Account, as the Invoice is fully paid, and the Withholding Tax Amounts are credited to the Account specified on flip A of the relevant rows in the Withholding Taxes setting (Account 809 in both cases in this example).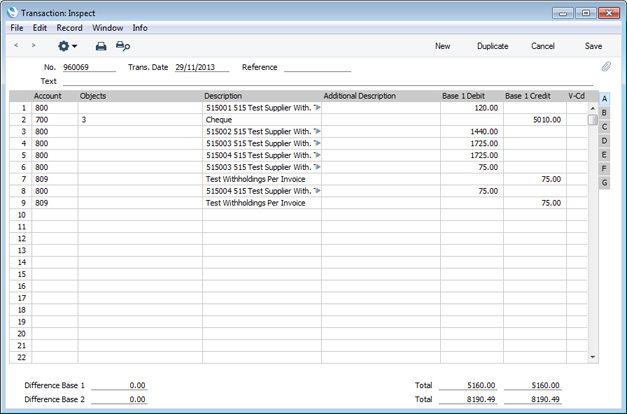
Approving the Payment also causes Withholding Certificates to be created in the Withholding Certificates setting. As the Tax Calculation Base in the Calculation Formula is Per Invoice, separate records will be created for each Invoice liable for Withholding Tax:
The Nos. (1000 and 1001 in the illustration) follows the numbering sequence specified in the Certificate No. field on flip A of the row for the T1 Tax in the Withholding Taxes setting, and the Tax Comment comes from the Comment field in the same setting.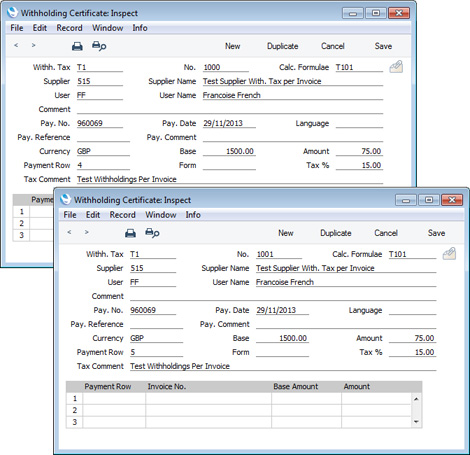
The Payment and the Withholding Certificates will be connected to each other through the Attachments facility. This allows you to open the Certificates quickly and easily when reviewing the Payment, or to open the Payment from one of the Certificates. When viewing the Payment or Certificate, click the button with the paper clip image to open a list of attachments. Then double-click an item in this list to open it.
- In Argentina, it is normal practice to print Withholding Certificates and send them to Suppliers with payments. You can print a Withholding Certificate in the usual ways: by opening it in a record window and clicking the Printer icon; or by opening the list of documents in the Purchase Ledger and selecting 'Withholding Certificates'.
Withholding Tax from Payments - Per Payment Basis
This example describes Withholding Tax posted from Payments and calculated on a Per Payment basis. Illustrated below are the Withholding Calculation Formula, the Withholding Tax and the Supplier Withholding record:
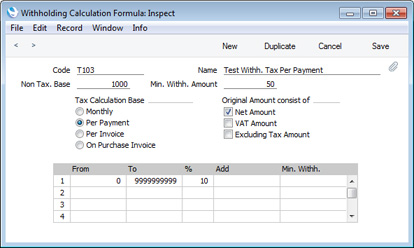
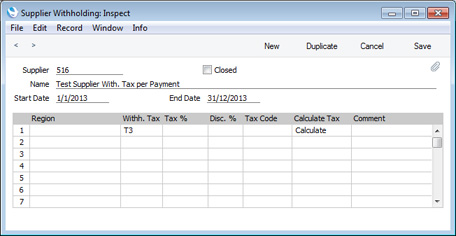
- In this example, we will pay three Purchase Invoices from the same Supplier in the same Payment. As in the previous examples, the Base values are 100.00, 1200.00 and 1500.00:
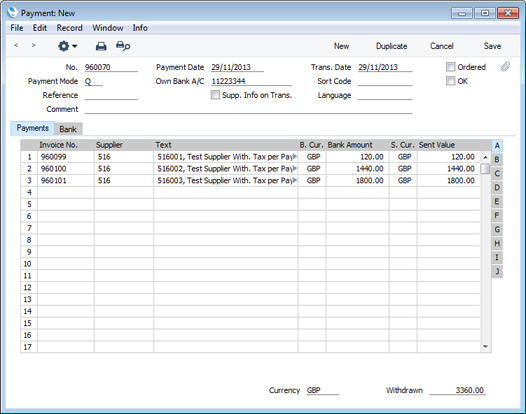
- When selecting the 'Calculate Withholding Taxes' Operations menu function, three new rows containing Withholding Tax will be added to the Payment, one for each Invoice. The Bank Amounts and Sent Values for each Invoice will be reduced accordingly:
As the Tax Calculation Base in the Calculation Formula is Per Payment, the Non Tax. Base is applied to the Payment as a whole (per Supplier if there is more than one). The Calculation Formula also states that the Base amount for the calculation is to be the Net Amount i.e. the Purchase Invoice value excluding VAT and other taxes. The calculations are as follows: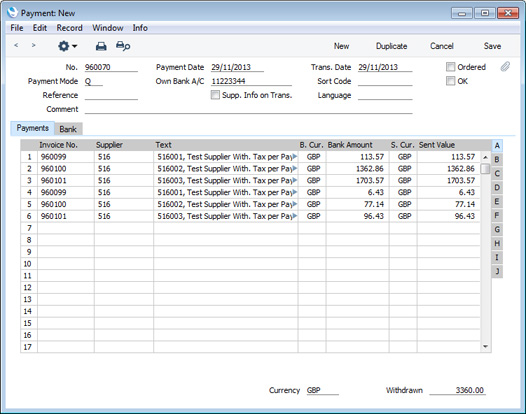
- The Base amount is taken to be the total for the Payment i.e. 100.00 + 1200.00 + 1500.00 = 2800.00.
- The Non Tax. Base in the Calculation Formula is 1000.00, so Withholding Tax will be calculated on 2800.00 - 1000.00 = 1800.00.
- The Min. Withh. Amount in the Calculation Formula is 50.00.
- The Calculation Formula specifies that Withholding Tax is 10%.
- 1800 * 10% = 180.00. 180.00 is more than the minimum, so this is the Withholding Tax Amount that is payable.
- The Withholding Tax Amount is distributed to the Purchase Invoices proportionally:
180.00 * 100.00 / 2800.00 = 6.43
180.00 * 1200.00 / 2800.00 = 77.14
180.00 * 1500.00 / 42800.00 = 96.43
- The Base amount is taken to be the total for the Payment i.e. 100.00 + 1200.00 + 1500.00 = 2800.00.
- Approve the Payment in the usual way by checking the OK box and saving. Approving the Payment also causes a Withholding Certificate to be created in the Withholding Certificates setting:
As the Tax Calculation Base in the Calculation Formula is Per Payment, a single Withholding Certificate is created from the Payment, with the individual Withholding Tax amounts listed in the matrix.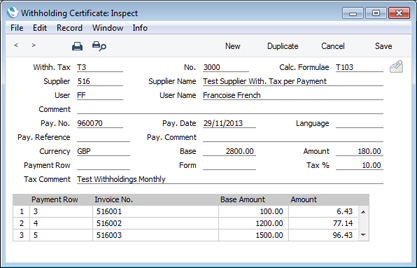
- When you pay the next Invoice from the same Supplier, the Non Tax. Base will once again become applicable (in this example to a Base value of 1500.00):
(1500 - 1000) * 10% = 50.00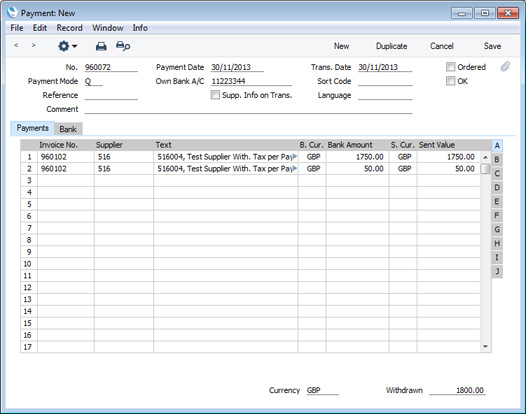
Withholding Tax from Payments - Per Month Basis
This example describes Withholding Tax posted from Payments and calculated on a Per Month basis. Illustrated below are the Withholding Calculation Formula, the Withholding Tax and the Supplier Withholding record:
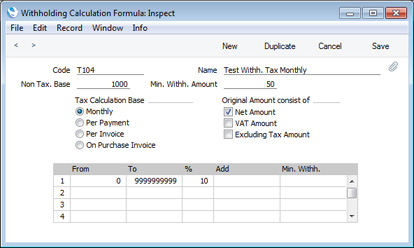
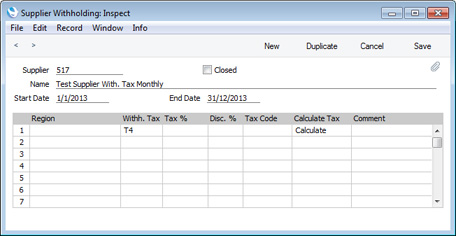
- In this example, we will first pay two Purchase Invoices from the same Supplier in the same Payment. The Base values are 100.00 and 1200.00. The 'Calculate Withholding Taxes' function does not add any Withholding Tax rows to the Payment:
As the Tax Calculation Base in the Calculation Formula is Per Month, the Non Tax. Base is applied to the Payment as a whole (per Supplier if there is more than one). The Calculation Formula also states that the Base amount for the calculation is to be the Net Amount i.e. the Purchase Invoice value excluding VAT and other taxes. The calculations are as follows: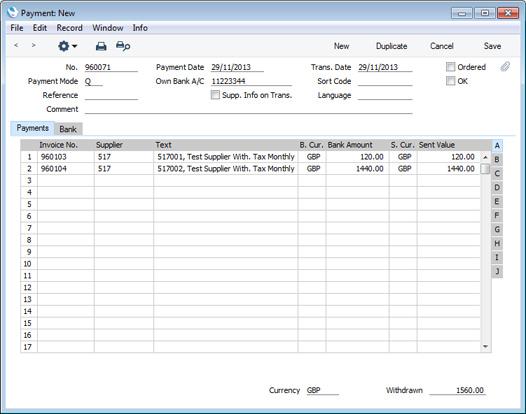
- The Base amount is taken to be the total for the Payment i.e. 100.00 + 1200.00 = 1300.00.
- The Non Tax. Base in the Calculation Formula is 1000.00, so Withholding Tax will be calculated on 1300.00 - 1000.00 = 300.00.
- The Min. Withh. Amount in the Calculation Formula is 50.00.
- The Calculation Formula specifies that Withholding Tax is 10%.
- 300 * 10% = 30.00. 30.00 is less than the minimum, so no Withholding Tax is payable.
- The Base amount is taken to be the total for the Payment i.e. 100.00 + 1200.00 = 1300.00.
- Later in the same month, we will pay a third Invoice from the same Supplier. The Base value of this Invoice is 1500.00.
As the Tax Calculation Base is Per Month, previous Invoices and Withholding Tax payments are taken into account when calculating the Withholding Tax.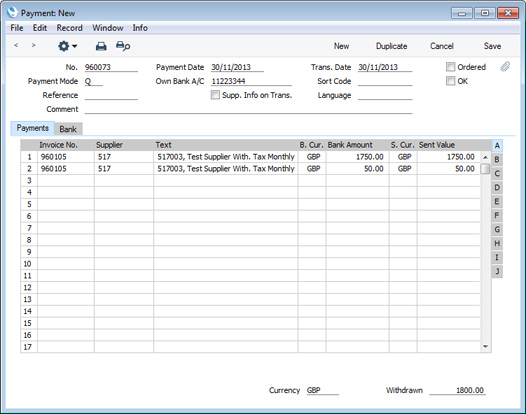
- The Base amount is taken to be the total for the month so far i.e. 100.00 + 1200.00 + 1500.00 = 2800.00.
- The Non Tax. Base in the Calculation Formula is 1000.00, so Withholding Tax will be calculated on 2800.00 - 1000.00 = 1800.00.
- 1800.00 * 10% = 180.00. 180.00 is more than the minimum, so is the Withholding Tax payable.
- The Base amount is taken to be the total for the month so far i.e. 100.00 + 1200.00 + 1500.00 = 2800.00.
- On approving the Payment, a single Withholding Certificate will be created from the Payment, with the individual Withholding Tax amounts listed in the matrix:
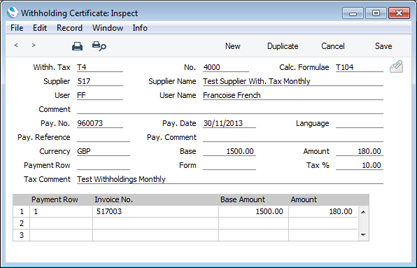
- When you pay the next Invoice from the same Supplier in the same month, Withholding Tax is calculated as follows:
Again, previous Invoices and Withholding Tax payments are taken into account when calculating the Withholding Tax in this instance.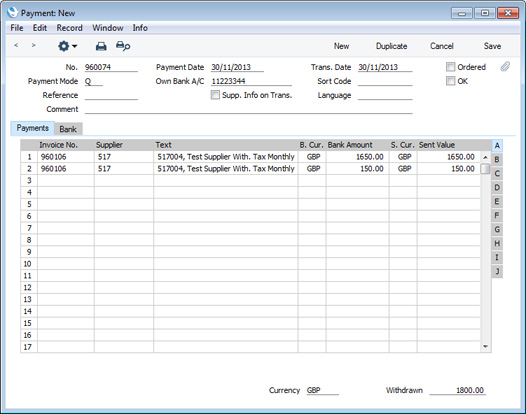
- The Base amount is taken to be the total for the month so far i.e. 100.00 + 1200.00 + 1500.00 + 1500.00 = 4300.00.
- The Non Tax. Base in the Calculation Formula is 1000.00, so Withholding Tax will be calculated on 4300.00 - 1000.00 = 3300.00.
- 3300.00 * 10% = 330.00.
- 180.00 has already been paid, leaving 330.00 - 180.00 = 150.00 to be paid in this instance.
- The Base amount is taken to be the total for the month so far i.e. 100.00 + 1200.00 + 1500.00 + 1500.00 = 4300.00.
- If you specify a Taxed Min. on flip A of the Withholding Taxes setting, the Base amount (total for the month so far in this example, total for the Payment if the Tax Calculation Base is Per Payment) will be compared to the Taxed Min. If the Base amount is greater than the Taxed Min, the Non Tax. Base will be subtracted and the calculation will take place.
In this chapter:
- Introduction
- Entering a Payment
- Entering a Payment - Example
- Payments in Currency
- Reconciling Payments, Marking as OK and Posting to the Nominal Ledger
- Nominal Ledger Transactions from Payments
- Printing Payment Forms and Cheques
- Invalidating Payments
- On Account Payments and Prepayments
- Correcting Mistakes in Payments
- Withholding Taxes in the Purchase Ledger, including:
- Withholding Calculation Formulae
- Withholding Taxes
- Supplier Withholdings
- Withholding Certificates
- Workflow and Examples
- Withholding Calculation Formulae
- Operations menu
Go back to:
- Home page for Purchase Ledger manual
- Home page for HansaWorld Enterprise manual
Operations Menu - Payments
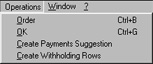
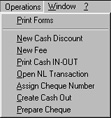
Operations Menu - Payments - Order
This command is available on the Operations menu only from the 'Payments: Browse' window. It permits the ordering of a Payment and is therefore the equivalent of checking the Ordered box in a Payment record. You can also select several Payments in the 'Payments: Browse' window (hold down the Shift key to select a range of Payments in the list) and order them all at once.Operations Menu - Payments - OK
This command is available on the Operations menu only from the 'Payments: Browse' window. It permits the approving of a Payment and is therefore the equivalent of checking the OK box in a Payment record. You can also select several Payments (hold down the Shift key to select a range of Payments in the list) and approve them all at once. Remember that, if so defined in the Sub System setting in the Nominal Ledger, this action causes Nominal Ledger Transactions to be created for each Payment in the selection and that therefore once it has been carried out you will no longer be able to modify those Payments.Operations Menu - Payments - Create Payments Suggestion
This command is available on the Operations menu only from the 'Payments: Browse' window. It finds Purchase Invoices that are due for payment and creates appropriate records in the Payment register. These Payments are not ordered or approved: once they have been checked, these tasks can be carried out using the 'Order' and 'OK' functions on the Operations menu of the 'Payments: Browse' window.Selecting the function opens the following window, which can be used to specify which Purchase Invoices are to be paid. In some ways (described below), this window does not behave in a manner typical of dialogue boxes in Hansa. Once it has been completed, click the [Run] button to create the Payment records.
The function then creates separate Payment records for each Payment Date in the selected period. By default, all Purchase Invoices due for payment on a particular date will appear in the Payment record for that date, irrespective of Supplier (this default can be overridden using the One Supplier Per Payment check box). If payment forms (such as remittance advices or cheques) are then printed, a separate page will be printed for each Supplier.
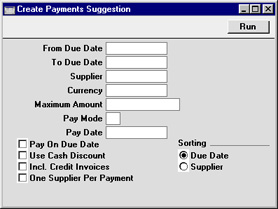
- From Due Date, To Due Date
- Paste Special
Current Date
- Use these fields to specify a range of dates to restrict the Purchase Invoices to be paid to those due for payment in a certain period. If the fields are left blank, only those (if any) Purchase Invoices with no Due Date will be found.
- Supplier
- Paste Special
Supplier register
- Specify here a Supplier whose Invoices are to be paid. Leave blank to consider all Suppliers.
- Currency
- Paste Special
Currency register, System module
- Specify here a Currency to be used in the Payments. Only those open Purchase Invoices in the Currency specified will be considered. If the field is left blank, only those with no Currency (i.e. in the home Currency) and those in Base Currency 1 (as defined in the Base Currency setting in the System Module) will be found.
- Maximum Amount
- Specify here the maximum amount to be paid. The figure should be in the Currency specified above. The total sum of the Purchase Invoices being paid will not exceed the figure specified, but Hansa will not attempt to match the figure exactly by making partial payments. Priority will be given in Due Date order.
- Pay Mode
- Paste Special
Payment Modes setting, Sales/Purchase Ledger
- Specify a Payment Mode to be used by the Payment record. If none is specified, the first Payment Mode in the list will be used.
- Pay Date
- Paste Special
Current Date
- A Payment Date must be specified using this field or by switching on the check box below for the function to have any effect.
- Pay On Due Date
- Switch this check box on if you want to create potentially several Payment records, with Payment Dates that are the same as the Due Dates of the Purchase Invoices being paid. If switched on, this will take precedence over any date entered in the field above.
- Use Cash Discount
- Switch this check box on if you want to take account of any cash discount offered for early settlement. In such a circumstance, the earliest Discount Date of the Purchase Invoices being paid will be used as the Payment Date.
- Incl. Credit Invoices
- Credit Invoices with a value in the Cred. field (i.e. those crediting specific Purchase Invoices) will always be taken into consideration by this function. However, those Credit Invoices without a value in the Cred. field (i.e. those not set against a specific Purchase Invoice) will only be taken into account if this check box is switched on.
- One Supplier Per Payment
- Use this option if you would like separate Payment records to be created for each Supplier. Otherwise, a single Payment record will be created, containing all Purchase Invoices that are due for payment, irrespective of Supplier.
- Sorting
- If you are not using the One Supplier per Payment option above, a single Payment record will be created, containing all Purchase Invoices that are due for payment. Use these options to choose the order in which the Purchase Invoices are to be listed in the Payment record.
Operations Menu - Payments - Cheque Run
This command is only available on the Operations menu for the 'Payments: Browse' window, and to use it you must have activated the Cheques module in your Enterprise by HansaWorld system.The function allows you to connect Payments to unused Own Cheques (in the Own Cheque register in the Cheques module). It will also mark Payments as Ordered and print cheques.
Before using the function, carry out the following configuration work:
- In the Payment Modes setting, make sure you have at least one Payment Mode for cheque payments. On flip B, the Type must be "Own Cheques".
- In the Banks setting, make sure you have separate records representing each bank where you hold an account.
- Ensure you have designed a Form to be used when printing cheques, and that you have connected the Form to the Own Cheques document in the Cheques module (using the 'Define Document' function).
- Remaining the Cheques module, use the 'Create Own Cheques' Maintenance function to create the Own Cheque records to represent the cheques you will issue in payment.
As a minimum, fill in the following fields: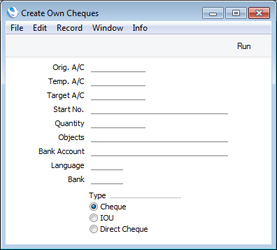
- Target A/C
- Paste Special
Account register, Nominal Ledger/System module
- The Account from where the payments will be issued.
- Start No.
- The Cheque Number to be used in the first Own Cheque.
- Quantity
- The quantity of Own Cheques that you want to create.
- Bank Account
- The account number of your bank account that will issue the cheques.
- Bank
- Paste Special
Banks setting, Purchase Ledger
- The Bank where the account is held.
- Target A/C
- Create Payment records for the payments that you wish to pay by cheque. Use the Payment Mode from step 1 (i.e. with a Type of "Own Cheques") either in the header of each Payment or on flip C of each Payment row as appropriate. Do not mark the Payments as Ordered or OK.
- Highlight the Payments in the 'Payments: Browse' window and choose 'Cheque Run' from the Operations menu. The 'Cheque Run' window will open:
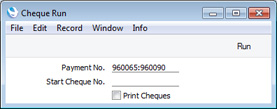
- Payment No.
- Default taken from
Payments highlighted in browse window
- Range Reporting Numeric
- Specify the Payments to which the cheques will be assigned.
- Any Payments in the range that have been marked as Ordered or OK will be ignored by the function.
- Specify the Payments to which the cheques will be assigned.
- Start Cheque No.
- Paste Special
Unused Cheques in the Own Cheque register, Cheques module
- Choose the Cheque Number of the first Own Cheque record to be assigned to a Payment. Note that you should enter a Cheque Number not a Ser. No.
- Print Cheques
- Use this option if you want cheques to be printed immediately.
- The Ser. No. of an Own Cheque record will be placed in the Cheque No. field on flip C of each Payment row (providing a Payment Mode of Type "Own Cheques" applies). If a Payment contains more than one row paying the same Supplier, the same cheque will be used. However, if you have used that Supplier again in another Payment, a second cheque will be used.
- Each Payment will be marked as Ordered.
- The Supplier Number, Name and VAT Reg. No., Bank Currency and total Bank Amount will be copied to each Own Cheque record. The Payment Date from the Payment will be copied to the Effect Date field in the Own Cheque.
- If you did not create enough Own Cheques in step 4, some Payments (i.e. those at the end of the range) will not be assigned cheques and will not be marked as Ordered.
- If you selected the Print Cheques option, cheques will be printed using the Form assigned to the Own Cheques document.
- Payment No.
- If there is a problem printing one of the cheques (for example, there is a paper jam in the printer), open the relevant Payment record and invalidate the affected Payment row(s) (highlight the row number on the left of the matrix and press the Backspace key). When you mark the Payment as OK, the Status of the Own Cheque will be marked as Cancelled, and you can then create a new Payment record to pay the Purchase Invoice again. If you do not want to mark the Payment as OK immediately (because it contains payments to other Suppliers), you can change the Status of the Own Cheque yourself, to remove the risk of using it again (you will need to enter a Reg. Date, change the Status to Issued and save, and then change the Status to Cancelled). If you invalidate the entire Payment (by choosing 'Invalidate' from the Record menu), then the Status of the connected Own Cheque(s) will not be changed to Cancelled because you cannot mark an invalidated Payment as OK. In this case you will need to change the Status of the Own Cheque(s) yourself.
- When you mark each Payment as OK and save it, the Status of the relevant Own Cheques will be changed to Issued (or Cancelled as described in the previous step).
In this chapter:
- Introduction
- Entering a Payment
- Entering a Payment - Example
- Payments in Currency
- Reconciling Payments, Marking as OK and Posting to the Nominal Ledger
- Nominal Ledger Transactions from Payments
- Printing Payment Forms and Cheques
- Invalidating Payments
- Prepayments and On Account Payments
- Correcting Mistakes in Payments
- Withholding Taxes in the Purchase Ledger
- Operations menu, including:
- Order
- OK
- Create Payments Suggestion
- Cheque Run
- Add Settlement Discount
- Add Bank Fee
- Send for Approval
- Cancel Approval Request
- Open NL Transaction
- Assign Cheque Number
- Prepare Cheque
- Print Cheques
- Create Cash Out
- Create E-Mail
- Calculate Withholding Taxes
- Payment Status
- Bank Statement
- Print Cash IN_OUT
- Banking File Export
- Order
- Home page for Purchase Ledger manual
- Home page for HansaWorld Enterprise manual
Operations Menu - Payment - Open NL Transaction
Once a Payment has been approved and saved, if so defined in the Sub System setting in the Nominal Ledger, a Nominal Ledger Transaction is created. This function allows you to view that Transaction.On selecting the function, the Transaction will be opened in a new window.
Operations Menu - Payment - Assign Cheque Number
This function can be used to generate a Cheque Number automatically. Ensure the cursor is in the appropriate row and choose this function from the Operations menu. The next number after that in the last Payment entered will be placed in the Cheque Number field on flip D. Note that the last Payment entered does not have to be approved or ordered. The function will have no effect if there is no previous Payment with a Cheque Number.Operations Menu - Payment - Prepare Cheque
If you have the Cheques module, you can use this function to create a record in the Own Cheque register for an individual Payment row. First, place the cursor in the Cheque Number field on flip D in the row for which an Own Cheque record is to be created. The Cheque Number field must be empty. Then, choose this function from the Operations menu.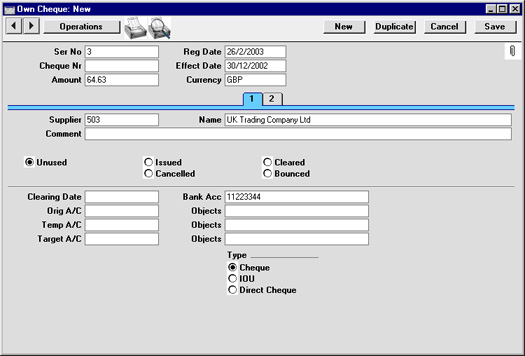
Operations Menu - Payment - Print Cheques
If you specify the Serial Number of an Own Cheque record in the Cheque No. field on flip C of a Payment row, you can then use this function to print that Own Cheque immediately, without the need to change to the Cheques module. You will usually use this function from a Payment that has a Payment Mode in which the Type is "Own Cheques", in which case you must connect Payments to Own Cheques. There is no need to save a Payment before using this function, or to mark it as Ordered or OK.You can also print Own Cheques in batches. To do so, first change to the Cheques module using the [Module] button in the Master Control panel. Then, click the [Documents] button, also in the Master Control panel, and double-click 'Own Cheques' in the 'Documents' list window. Enter the Serial Number (or range of Numbers) (i.e. not Cheque Numbers) of the Own Cheques that you want to be printed and press [Run].
Whether you print singly or in batches, the Form used will be determined as follows:
- Design the cheque document using the Form register in the System module. Use the 'Properties' function on the Operations menu to name the Form (in this description, we have used the name "OWN_CHEQUE") and to assign it a Document Type of "Own Cheques".
- Select the Cheques module using the [Module] button in the Master Control panel.
- Click the [Documents] button in the Master Control panel. The 'Documents' list window will be opened: highlight 'Own Cheques'.
- Select 'Define Document' from the Operations menu.
- In the subsequent 'Form Definition' window, enter "OWN_CHEQUE" in the Form field in the first row (you can use 'Paste Special' to ensure the spelling is correct).
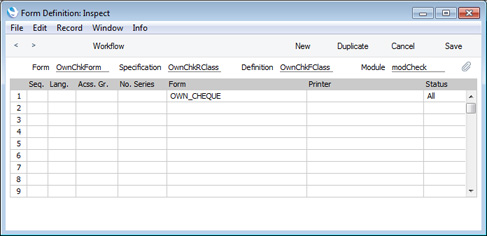
- Click [Save] to save the Form definition. From now on, the Form that you have designed will be used, from the 'Documents' function in the Cheques module and when selecting 'Print Cheques' from the Operations menu when viewing a Payment.
In this chapter:
- Introduction
- Entering a Payment
- Entering a Payment - Example
- Payments in Currency
- Reconciling Payments, Marking as OK and Posting to the Nominal Ledger
- Nominal Ledger Transactions from Payments
- Printing Payment Forms and Cheques
- Invalidating Payments
- Prepayments and On Account Payments
- Correcting Mistakes in Payments
- Withholding Taxes in the Purchase Ledger
- Operations menu, including:
- Order
- OK
- Create Payments Suggestion
- Cheque Run
- Add Settlement Discount
- Add Bank Fee
- Send for Approval
- Cancel Approval Request
- Open NL Transaction
- Assign Cheque Number
- Prepare Cheque
- Print Cheques
- Create Cash Out
- Create E-Mail
- Calculate Withholding Taxes
- Payment Status
- Bank Statement
- Print Cash IN_OUT
- Banking File Export
- Order
- Home page for Purchase Ledger manual
- Home page for HansaWorld Enterprise manual
Operations Menu - Payment - Create Withholding Rows
This function is intended for use in Argentina, where the responsibility for the collection of some of the input VAT lies with the recipient of Purchase Invoices. This is done by paying a proportion of the Invoice amount directly to the authorities. This function is used to create a separate Payment record for that proportion. For full details of this feature, please refer to your local Hansa representative.Operations Menu - Payment - Payment Status
This command will be useful when a Payment needs to go through an approval process before you can mark it as Ordered or OK. If you need to monitor the approval process for a particular Payment, open the Payment in a record window and then select 'Payment Status' from the Operations menu. A report will be printed to screen, listing any Approval Request Activities that have been created from the Payment and the status of each one. Please refer to the description of the Approval Status options on the 'Bank' card of the Payment window for brief details about the approval process and here for full details.---
In this chapter:
- Introduction
- Entering a Payment
- Entering a Payment - Example
- Payments in Currency
- Reconciling Payments, Marking as OK and Posting to the Nominal Ledger
- Nominal Ledger Transactions from Payments
- Printing Payment Forms and Cheques
- Invalidating Payments
- Prepayments and On Account Payments
- Correcting Mistakes in Payments
- Withholding Taxes in the Purchase Ledger
- Operations menu, including:
- Order
- OK
- Create Payments Suggestion
- Cheque Run
- Add Settlement Discount
- Add Bank Fee
- Send for Approval
- Cancel Approval Request
- Open NL Transaction
- Assign Cheque Number
- Prepare Cheque
- Print Cheques
- Create Cash Out
- Create E-Mail
- Calculate Withholding Taxes
- Payment Status
- Bank Statement
- Print Cash IN_OUT
- Banking File Export
- Order
- Home page for Purchase Ledger manual
- Home page for HansaWorld Enterprise manual
Operations Menu - Payment - Bank Statement
It can be useful to see a list of the transactions posting to the Bank or Cash Account and the balance of that Account on the day of the Payment. This function produces a report showing this information.When you select the function, the following window opens:
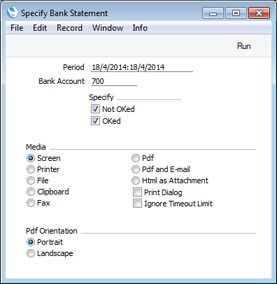
- Period
- Paste Special
Reporting Periods setting
- The report will list the transactions posting to the Bank or Cash Account during the period specified here. The default is the Transaction Date of the Payment.
- Bank Account
- Paste Special
Account register, Nominal Ledger/System module
- Specify the Account whose transactions and balance you wish to see. The default is the Account in the Payment Mode specified in the Payment header.
- Specify
- Use these options to specify whether Receipts, Payments and Personnel Payments that have and/or have not been marked as OK will be shown in the report. Nominal Ledger Transactions will always be shown, irrespective of the options chosen here.
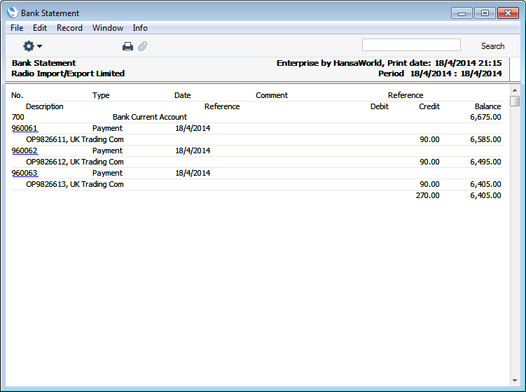
You can also produce the Bank Statement report from the Nominal Ledger.
---
In this chapter:
- Introduction
- Entering a Payment
- Entering a Payment - Example
- Payments in Currency
- Reconciling Payments, Marking as OK and Posting to the Nominal Ledger
- Nominal Ledger Transactions from Payments
- Printing Payment Forms and Cheques
- Invalidating Payments
- Prepayments and On Account Payments
- Correcting Mistakes in Payments
- Withholding Taxes in the Purchase Ledger
- Operations menu, including:
- Order
- OK
- Create Payments Suggestion
- Cheque Run
- Add Settlement Discount
- Add Bank Fee
- Send for Approval
- Cancel Approval Request
- Open NL Transaction
- Assign Cheque Number
- Prepare Cheque
- Print Cheques
- Create Cash Out
- Create E-Mail
- Calculate Withholding Taxes
- Payment Status
- Bank Statement
- Print Cash IN_OUT
- Banking File Export
- Order
- Home page for Purchase Ledger manual
- Home page for HansaWorld Enterprise manual
Operations Menu - Payment - Print Cash IN-OUT
The 'Print Cash IN-OUT' command will usually be used for Payments which use a cash Payment Mode. It prints a cash receipt for your records: there is a legal requirement in the Baltic States to keep printed records of all cash transactions. The function requires the Cash Book module to be present.To print cash receipts in batches, first change to the Cash Book module using the Modules menu. Then, click the [Documents] button in the Master Control panel or select 'Documents' from the File menu. Double-click 'Cash Out Payments' in the 'Documents' list window. Indicate the Payment Number (or range of Numbers) to be printed and press [Run].
Whether printing singly or in batches, the Form used is determined as follows:
- Using the Form register in the System module, design the cash document and name it "CASH_OUT PAYM". Use the 'Properties' function on the Operations menu to assign a Document Type of "Cash Out Payments".
- Select the Cash Book module using the Modules menu.
- Click the [Documents] button in the Master Control panel or select 'Documents' from the File menu. The 'Documents' list window is opened: highlight 'Cash Out Payments'.
- Select 'Define Document' from the Operations menu.
- In the subsequent window, enter "CASH_OUT_PAYM" in the Form field of the first line (you can use 'Paste Special' to ensure the spelling is correct).
- Click [Save] to save the Form definition. From now on, the Form that you have designed will be used, from the 'Documents' function in the Cash Book module and from the Operations menu item on the Payment screen.
Operations Menu - Payment - Banking File Export
This function allows you to create a Banking File export file from an individual Payment. Simply open the Payment in a record window and choose this function from the Operations menu. Please refer to the description of the 'Banking File' Export function here for full details. This function will usually behave as if the default options in the 'Specify Banking File' window are selected (i.e. as shown in the illustration in that description). However, depending on the Payment File Format you are using, you can override some of these defaults using the options on the 'Bank' card of the Payment window.---
In this chapter:
- Introduction
- Entering a Payment
- Entering a Payment - Example
- Payments in Currency
- Reconciling Payments, Marking as OK and Posting to the Nominal Ledger
- Nominal Ledger Transactions from Payments
- Printing Payment Forms and Cheques
- Invalidating Payments
- Prepayments and On Account Payments
- Correcting Mistakes in Payments
- Withholding Taxes in the Purchase Ledger
- Operations menu, including:
- Order
- OK
- Create Payments Suggestion
- Cheque Run
- Add Settlement Discount
- Add Bank Fee
- Send for Approval
- Cancel Approval Request
- Open NL Transaction
- Assign Cheque Number
- Prepare Cheque
- Print Cheques
- Create Cash Out
- Create E-Mail
- Calculate Withholding Taxes
- Payment Status
- Bank Statement
- Print Cash IN_OUT
- Banking File Export
- Order
- Home page for Purchase Ledger manual
- Home page for HansaWorld Enterprise manual
Operations Menu - Payment - Send for Approval
If a Payment has to pass through an approval process before you can mark it as Ordered or OK, use this function to begin that approval process. Please refer to the description of the Approval Status options on the 'Bank' card of the Payment window for brief details about the approval process and here for full details.---
In this chapter:
- Introduction
- Entering a Payment
- Entering a Payment - Example
- Payments in Currency
- Reconciling Payments, Marking as OK and Posting to the Nominal Ledger
- Nominal Ledger Transactions from Payments
- Printing Payment Forms and Cheques
- Invalidating Payments
- Prepayments and On Account Payments
- Correcting Mistakes in Payments
- Withholding Taxes in the Purchase Ledger
- Operations menu, including:
- Order
- OK
- Create Payments Suggestion
- Cheque Run
- Add Settlement Discount
- Add Bank Fee
- Send for Approval
- Cancel Approval Request
- Open NL Transaction
- Assign Cheque Number
- Prepare Cheque
- Print Cheques
- Create Cash Out
- Create E-Mail
- Calculate Withholding Taxes
- Payment Status
- Bank Statement
- Print Cash IN_OUT
- Banking File Export
- Order
- Home page for Purchase Ledger manual
- Home page for HansaWorld Enterprise manual
Operations Menu - Payment- Cancel Approval Request
If a Payment needs to go through an approval process before you can mark it as Ordered or OK and you have started that approval process by selecting 'Send for Approval' from the Operations menu, you will no longer be able to modify the Payment. So, if you realise the Payment contains an error, you must cancel the approval process before you can correct the error. To do this, open the Payment and choose 'Cancel Approval Request' from the Operations menu. You will now be able to amend the Payment and then restart the approval process by once again choosing 'Send for Approval'.If you cannot cancel the approval process, the probable reasons are:
- The Approval Status of the Payment (visible on the 'Bank' card) is not Pending.
- You may have configured the approval process (using the Approval Rules register in the Business Alerts module) so that it does not allow cancellation.
- You cannot cancel the approval process if at least one Approval Person has approved the Payment.
---
In this chapter:
- Introduction
- Entering a Payment
- Entering a Payment - Example
- Payments in Currency
- Reconciling Payments, Marking as OK and Posting to the Nominal Ledger
- Nominal Ledger Transactions from Payments
- Printing Payment Forms and Cheques
- Invalidating Payments
- Prepayments and On Account Payments
- Correcting Mistakes in Payments
- Withholding Taxes in the Purchase Ledger
- Operations menu, including:
- Order
- OK
- Create Payments Suggestion
- Cheque Run
- Add Settlement Discount
- Add Bank Fee
- Send for Approval
- Cancel Approval Request
- Open NL Transaction
- Assign Cheque Number
- Prepare Cheque
- Print Cheques
- Create Cash Out
- Create E-Mail
- Calculate Withholding Taxes
- Payment Status
- Bank Statement
- Print Cash IN_OUT
- Banking File Export
- Order
- Home page for Purchase Ledger manual
- Home page for HansaWorld Enterprise manual
Create Menu - Payments

'New' and 'Duplicate' are standard functions that are provided on every Create and + menu. Use these functions to create new records, in this case in the Payment register. Please follow the links below for details about the other functions:
The Payment register in Standard ERP:
- Introduction
- Entering a Payment
- Entering a Payment - Example
- Payments in Currency
- Reconciling Payments, Marking as OK and Posting to the Nominal Ledger
- Nominal Ledger Transactions from Payments
- Printing Payment Forms and Cheques
- Invalidating Payments
- Prepayments and On Account Payments
- Correcting Mistakes in Payments
- Withholding Taxes in the Purchase Ledger
- Operations menu
- Create menu
- Row menu
- Home page for Purchase Ledger manual
- Home page for Standard ERP manual
Operations Menu - Payment - Create Cash Out
In some countries, cash transactions need to be recorded using a sequential number series. This function is used to record such transactions in the Cash Out register in the Cash Book module. When it is selected, the following window appears, by which a new Cash Out record can be created: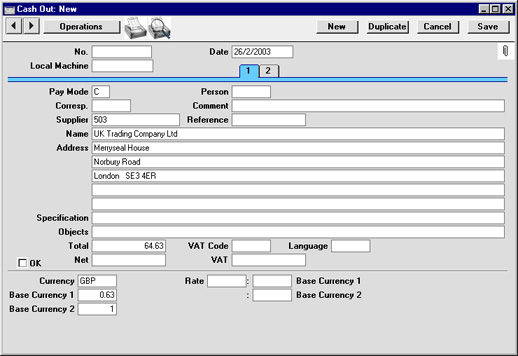
If you check the OK box before saving, this approves the Cash Out record. If you have determined that Nominal Ledger Transactions are to be created from Cash Out records, one will now be raised (this is specified in the Sub System setting in the Nominal Ledger). You will no longer be able to modify the Cash Out record.
The Payment must be saved and approved before a Cash Out record can be created.
Cash Out records can be created from Payments of all kinds, but if you want them to be created from those with Payment Modes of the "Cash" type only, switch on the Cash Collection option in the Cash Book Settings setting. This refers to the Payment Mode in the header of the Payment record. The Type of a Payment Mode is set on flip B of the Payment Mode window. The Cash Collection option also prevents the creation of more than one Cash Out record from a Payment, and prevents the value of the Cash Out record from being changed (i.e. the values of the Payment and the Cash Out record must be the same).
Please click here for full details of the 'Cash Out: New' window.
The function requires the Cash Book module to be present.
Operations Menu - Payment - Create E-Mail
You can use this function to create a Mail containing details of the Payment, which you can send to the Supplier by email.When you select the function, the following window appears, in which you can create a new Mail:
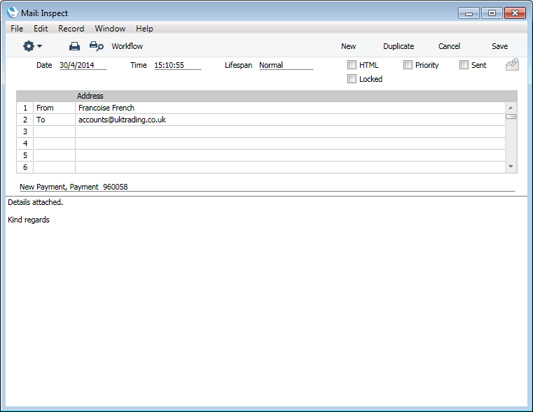
- The sender of the Mail will be the current user.
- The Recipient of the Mail will be the Email Address specified in the Contact record for the Supplier.
- The Subject and Text of the Mail will be taken from the record in the Mail Texts setting in the E-mail and Conferences module in which the Document is "Payments", as follows:
- If the Payment does not have a Language, the Subject and Text of the Mail will be taken from the Subject, First Text and Last Text fields in the header of the Mail Text record.
- If the Payment has a Language, the Subject and Text of the Mail will be taken from the Subject, First Text and Last Text fields in the relevant row for the Language in the Mail Text record.
- If the Payment has a Language but there is no row for the Language in the Mail Text record, the Subject and Text of the Mail will be taken from the Subject, First Text and Last Text fields in the header the Mail Text record.
- If there is no record in the Mail Texts setting in the E-mail and Conferences module in which the Document is "Payments", the Subject and Text of the Mail will be blank.
In all cases, the word "Payment" and the Payment Number will be added automatically to the Subject as a suffix.
In the example illustrated above, the text "New Payment, " (with trailing space) was taken from the Subject field in the Mail Texts record. The text "Payment Details attached." in the illustration was determined by the First Text specified in the Mail Texts record, while the following text "Kind regards" was determined by the Last Text specified in the Mail Texts record. Apart from the Payment Number, no details from the Payment will be added to the Mail.
- If the Payment does not have a Language, the Subject and Text of the Mail will be taken from the Subject, First Text and Last Text fields in the header of the Mail Text record.
- The Payment Form document will be attached to the Mail as a PDF file. This requires you to have designed a Form to be used by the Payment Forms document, and to have assigned that Form to the document using the 'Define Document' function. When you design the Form, you may need to use Styles that will embed fonts in PDF files (this will depend on the fonts you use). You may also need to choose a code page and page setup, which you can do in the Form Properties. Please refer here for details about designing Forms, and here for a list of the fields you can include in the Form used by the Payment Forms document.
If the function does not create a Mail, the probable causes are:
- The current user does not have a Mailbox.
- The Supplier in the Payment does not have an email address.
- The Payment contains rows paying more than one Supplier. The function will only create a Mail if every row in the Payment will pay the same Supplier.
- The Payment has not been saved.
---
In this chapter:
- Introduction
- Entering a Payment
- Entering a Payment - Example
- Payments in Currency
- Reconciling Payments, Marking as OK and Posting to the Nominal Ledger
- Nominal Ledger Transactions from Payments
- Printing Payment Forms and Cheques
- Invalidating Payments
- Prepayments and On Account Payments
- Correcting Mistakes in Payments
- Withholding Taxes in the Purchase Ledger
- Operations menu, including:
- Order
- OK
- Create Payments Suggestion
- Cheque Run
- Add Settlement Discount
- Add Bank Fee
- Send for Approval
- Cancel Approval Request
- Open NL Transaction
- Assign Cheque Number
- Prepare Cheque
- Print Cheques
- Create Cash Out
- Create E-Mail
- Calculate Withholding Taxes
- Payment Status
- Bank Statement
- Print Cash IN_OUT
- Banking File Export
- Order
- Home page for Purchase Ledger manual
- Home page for HansaWorld Enterprise manual
Row Menu - Payment
The matrix in the Payment window has its own menu, which contains functions that refer to or affect an individual row in the matrix. This is sometimes known as the "Row Menu".If you are using Windows or Mac OS X, you can open the Row menu by first clicking in any field in the row in question (i.e. the row to which the function is to be applied), and then right-clicking (Windows) or Ctrl-clicking (Mac OS X) the row number (on the left of the row). A menu will appear, where you can select the function that you need:
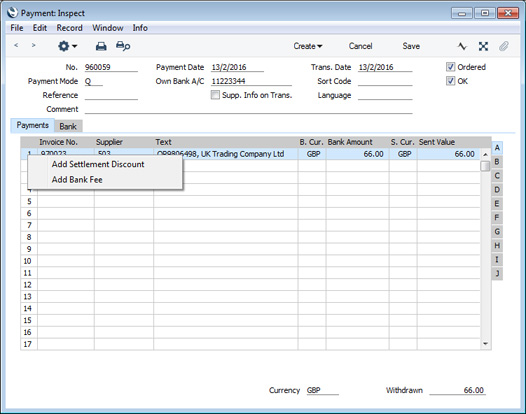
Please follow the links below for details about each function on the Row menu:
The Payment register in Standard ERP:
- Introduction
- Entering a Payment
- Entering a Payment - Example
- Payments in Currency
- Reconciling Payments, Marking as OK and Posting to the Nominal Ledger
- Nominal Ledger Transactions from Payments
- Printing Payment Forms and Cheques
- Invalidating Payments
- Prepayments and On Account Payments
- Correcting Mistakes in Payments
- Withholding Taxes in the Purchase Ledger
- Operations menu
- Create menu
- Row menu
- Home page for Purchase Ledger manual
- Home page for Standard ERP manual
Operations Menu - Payment - New Cash Discount
In normal circumstances, when a Purchase Invoice is paid, a settlement discount is calculated when the Payment is entered. This discount is determined by Hansa according to the Payment Terms of the Invoice and the Payment Date. This function is provided for more individual circumstances.If you have a Purchase Invoice for which you want to deduct a cash discount, start by entering the Purchase Invoice number in the left-hand column. Change the Sent Value to the amount less discount. Then select 'New Cash Discount' from the Operations menu. A new row will be created, containing the phrase "Cash Disc" and the deducted amount, calculated by Hansa. This figure can be changed as appropriate. When the Nominal Ledger Transaction is created, the Cash Discount Account specified on card 1 of the Account Usage P/L setting will be credited.
Operations Menu - Payment - New Fee
This function should be used when you need to pay a single bank charge for the whole Payment. If you need to pay separate bank charges for each Payment row, use the Bank Fee field on flip I.Start by entering the Purchase Invoice number in the left-hand column. Then select 'New Fee' from the Operations menu. A new row will be created, containing the phrase "Fee". Enter the Bank Fee in the right-hand Amount field. When the Nominal Ledger Transaction is created, the Bank Fee Account specified on card 1 of the Account Usage P/L setting will be debited. The Sent Value plus the Bank Fee will be credited to the Bank Account from the Payment Mode, while the Sent Value will be debited to the Creditor Account.