Introduction to the Group Reservation Register
A Group Reservation is a special type of Reservation that you can use to gather several individual Reservations together for administrative purposes such as checking in, invoicing and checking out. Examples might be a family requiring two Reservations to hire separate Rooms for the parents and for the children and a company hiring several Rooms for employees to attend a conference.Both Group Reservations and the individual Reservations will be records in the Reservation register. In this context, the individual Reservations are given the name "Sub Reservations". Each record in the Reservation register contains a hidden flag that controls whether the record will be treated as a Group Reservation or a Sub Reservation, as follows:
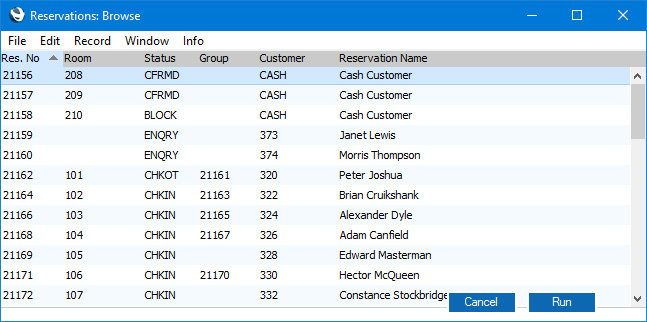
- On opening the Reservation register you will see a list of Reservations in which the hidden flag is not ticked. These are Sub Reservations and individual Reservations that are not connected to a Group. The hidden flag will not be ticked in new Reservations that you create from the 'Reservations: Browse' window.
- On opening the Group Reservation register you will see a list of Reservations in which the hidden flag is ticked. These are Group Reservations. The hidden flag will be ticked in new Reservations that you create from the 'Group Reservations: Browse' window.

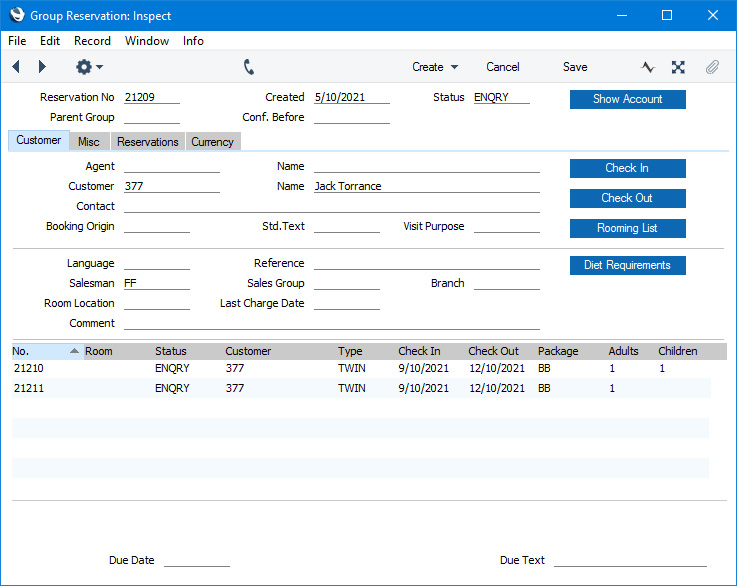
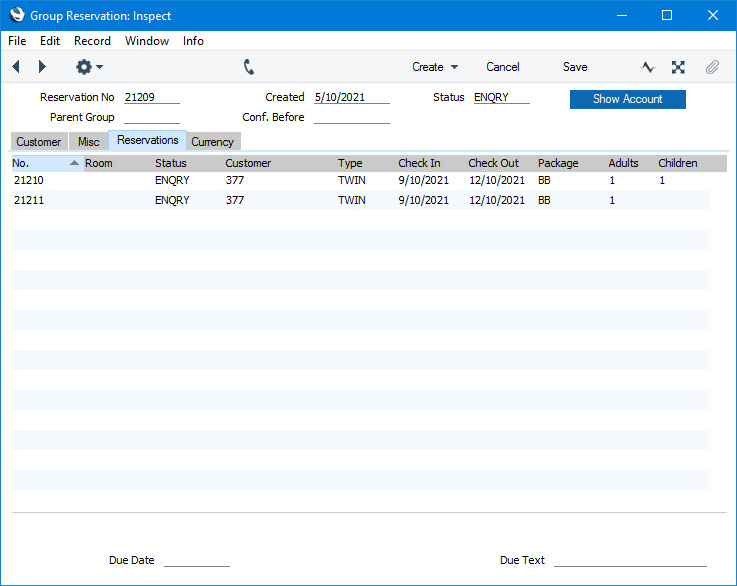
The Group Reservation record window includes a 'Reservations' card that lists the connected Sub Reservations:

- Select 'New Sub Reservation' from the Create menu (Windows/macOS) or + menu (iOS/Android) to create a new Sub Reservation that will be connected to the Group.
- Select 'Sub Reservations' from the Create or + menu to create several new Sub Reservations that will be connected to the Group at the same time.
- Select 'Add Sub Reservation' from the Create or + menu to add an existing Reservation to the Group as a Sub Reservation.
- To create a new Sub Reservation that is a duplicate of an existing one, highlight the existing Sub Reservation in the list and then select 'Duplicate Sub Reservation' from the Create or + menu.
If you need to check every Sub Reservation in at the same time, you can do this from the Group Reservation, by pressing the [Check In] button. However, you can only do this if you have assigned Rooms to each Sub Reservation, and only if no Sub Reservation has checked in yet.
You can also update Guest Accounts from the Group Reservation, using the 'Charge Stay' and 'Charge Until Check Out Date' functions on the Operations or Tools menu. These functions will update every Guest Account in the Sub Reservations as necessary.
When the time comes to create an Invoice, you can also do this from the Group Reservation. The options are:
- If the Group Reservation and the Sub Reservations have the same Customer, an Invoice that you create from the Group Reservation will include every Item on that Customer's Guest Accounts in each Sub Reservation. Typically this will mean that the Invoice will include the Room charges for each Room.
- If you have selected the Pay Separately option on the 'Other' card in an individual Sub Reservation, the contents of the Customer's Guest Account will not be included in the Invoice.
- If any extra Items have been assigned to any of the individual Guests (i.e. to the other Guest Accounts) or you have selected the Pay Separately option in a Sub Reservation, you will need to create Invoices for those Guest Accounts from the individual Sub Reservations.
- Introduction
- Entering a Group Reservation
- Operations Menu
- Create Menu
Go back to:
- Home page for Hotel module manual
- Home page for Standard ERP manual
Entering a Group Reservation
This page describes adding a new record to the Group Reservation register in the Hotel module.---
To open the Group Reservation register, first ensure you are in the Hotel module. Then, if you are using Windows or macOS, click the [Registers] button in the Navigation Centre and double-click 'Group Reservations' in the resulting list. If you are using iOS or Android, tap the [Registers] button in the Navigation Centre and then tap 'Group Reservations' in the 'Registers' list. The 'Group Reservations: Browse' window will be opened, listing Group Reservations that you have already entered.
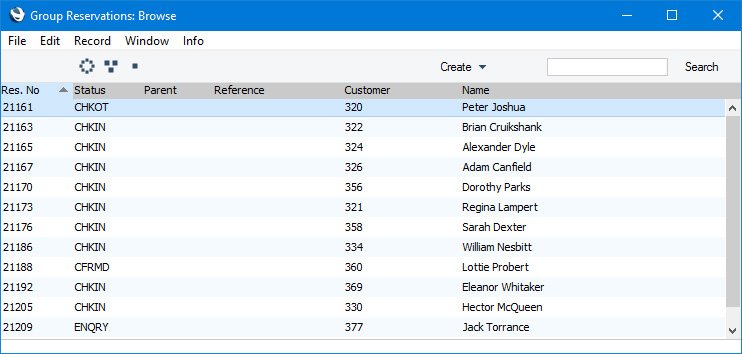
To search for a particular record, first sort the list by the column that you want to use for the search. Then, enter the text that you want to find in the Search field in the top of the window (in the top right-hand corner if you are using Windows/macOS) and press the Return key (macOS) or Search (iOS/Android). The first record containing a match for your search string will be highlighted (if you are using Windows, a match will be highlighted as you type each character). For example, to search for Reservations with a particular Customer Number, sort by Customer before entering the Customer Number (or the first few characters) in the Search field.
If you are using Windows or macOS, there will be three buttons in the top left-hand corner of the browse window. These are part of the Limited Access feature. You can use them as follows (Windows versions of the buttons illustrated on the left, macOS on the right):

- Lists all Group Reservations.
- Lists Group Reservations belonging to members of the same Sales Group as the current user.
- Lists Group Reservations belonging to the current user (i.e. Group Reservations in which the Salesman field contains the Signature of the current user).


When you enter a new Group Reservation record, your Signature will be placed in the Salesman field on the 'Misc' card, and the Group Reservation will be assigned to your Sales Group. The Salesman and Sales Group fields are not modifiable.
Please refer to the page describing the 'Access' card of the Person register for full details about the Limited Access feature.
You can create a Group Reservation using the following methods:
- Open either window in the Resource Planner and press the [New Group Res.] button.
- Open the 'Group Reservations: Browse' window as described immediately above and select 'New' from the Create menu (Windows/macOS) or the + menu (iOS/Android). You can also use the Ctrl-N (Windows) or ⌘-N (macOS) keyboard shortcut. Alternatively, highlight a Group Reservation similar to the one you want to enter and select 'Duplicate' from the same menu. If you don't want to open the 'Group Reservations: Browse' window before creating a new record, you can also use the + menu in the Navigation Centre (all platforms).
- When you mark a Reservation Quotation as Accepted and/or OK and save, a Group Reservation and an appropriate number of Sub Reservations will be created.

Complete the Group Reservation record as appropriate and as described on the following pages, then save it using the [Save] button (Windows/macOS) or by tapping √ (iOS/Android) and close the window by clicking the close box (Windows/macOS) or by tapping < (iOS/Android). Then, close the browse window using the close box or < again.
Please refer to the following pages for details about the fields on each card in the Group Reservation window:
- Header
- Customer card
- Misc card
- Reservations card
- Currency card
The Group Reservation register in Standard ERP:
- Introduction
- Entering a Group Reservation
- Operations Menu
- Create Menu
- Home page for Hotel module manual
- Home page for Standard ERP manual
Entering a Group Reservation - Header
This page describes the fields in the Header of the Group Reservation record window. Please follow the links below for descriptions of the other parts of the Group Reservation record window:- Header
- Customer card
- Misc card
- Reservations card
- Currency card
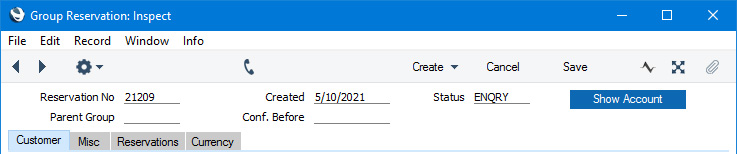
- Reservation No
- Paste Special
Select from another Number Series
- The unique identifying number of the Group Reservation. The default will be chosen as follows:
- It will be taken from the first valid row in the Number Series - Reservations setting.
- It will be the next number following on from the last Reservation or Group Reservation entered.
- You may change the default, but not to a number that has already been used. If you have defined at least one number sequence in the Number Series - Reservations setting, the number you change to must be inside a valid number sequence.
- You will not be able to save a Group Reservation if the Reservation No. does not belong to a valid number sequence. A valid number sequence is one for the period in which the Created Date falls and with unused numbers, so this problem will most usually occur at the beginning of a new calendar or financial year.
- If you are working in a multi-user environment, the Group Reservation Number will be assigned when you save the Group Reservation for the first time.
- It will be taken from the first valid row in the Number Series - Reservations setting.
- Created
- This field automatically records the date when a Group Reservation was added to your Standard ERP database and cannot be changed.
- Status
- Paste Special
Reservation Status setting, Hotel module
- Default taken from Hotel Settings setting (Default Status)
- The life of a Reservation will usually see it pass through several stages. As it does so, its Status will be changed automatically, to signify the stage it has reached. For example, a Reservation may begin as an enquiry, then be confirmed, then the Guests will check in and finally the Guests will check out. Alternatively, from being an enquiry or being confirmed, a Reservation might be cancelled.
- The Status in a Group Reservation is less important than it is in a Sub Reservation, as Group Reservations are not shown in the Resource Planner or included in overbooking or Room availability calculations. However you may wish to update the Status in a Group Reservation so that it remains in line with its Sub Reservations as part of the process of Reservation management.
- When changing the Status in a Sub Reservation, you can only choose a new Status that is allowed by the Reservation Status Sequences setting. This restriction does not apply to Group Reservations: you are free to choose any new Status. However, as in a Sub Reservation, if you are using the Do not Allow Check In/Out Status Manually option in the Hotel Settings setting, you will not be able to change this Status to the Check In Status or the Check Out Status specified on the 'Check In/Out' card in the same setting.
- The life of a Reservation will usually see it pass through several stages. As it does so, its Status will be changed automatically, to signify the stage it has reached. For example, a Reservation may begin as an enquiry, then be confirmed, then the Guests will check in and finally the Guests will check out. Alternatively, from being an enquiry or being confirmed, a Reservation might be cancelled.
- Parent Group
- Paste Special
Group Reservation register, Hotel module
- If a Group Reservation is itself part of a larger Group, the Reservation Number of the larger Group Reservation will appear here.
- You can change this field if you need to assign an existing Reservation to a Group or if you need to remove a Reservation from a Group.
- You can change this field if you need to assign an existing Reservation to a Group or if you need to remove a Reservation from a Group.
- Conf. Before
- Paste Special
Choose date
- If you expect a Group Reservation to be confirmed on a particular date, enter that date here.
- In a Reservation that you create from a Reservation Quotation, a default will be placed in this field, calculated by adding the Confirmation Days specified in the Hotel Settings setting to the current date.
- You can use the 'Unconfirmed Reservations' Maintenance function to delete Group Reservations (and Sub Reservations) that remain unconfirmed after a specified period, or to change the Status of those Group Reservations e.g. to a Cancelled Status.
- In a Reservation that you create from a Reservation Quotation, a default will be placed in this field, calculated by adding the Confirmation Days specified in the Hotel Settings setting to the current date.
- [Show Account] button
- The [Show Account] button will print a report to screen listing the Items (e.g. Room charges, Package Items, Repetitive Items and any other Items) on Guest Accounts of the Agent and Customer in the Group Reservation. Items from all Sub Reservations will be included. The Guest Accounts of any Guests in the Sub Reservations will not be included. Please refer here for details about Guest Accounts and the Show Account report.
- If you need to prevent particular users from using the [Show Account] button, assign them to an Access Group in which you have denied access to the 'Reservation: Display Account' Action.
- Introduction
- Entering a Group Reservation, including:
- Header
- Customer card
- Misc card
- Reservations card
- Currency card
- Header
- Operations Menu
- Create Menu
- Home page for Hotel module manual
- Home page for Standard ERP manual
Entering a Group Reservation - Customer Card
This page describes the fields on the 'Customer' card in the Group Reservation record window. Please follow the links below for descriptions of the other parts of the Group Reservation record window:- Header
- Customer card
- Misc card
- Reservations card
- Currency card

- Agent
- Paste Special
Customers in Contact register
- If the Group Reservation is the responsibility of an Agent, specify the Contact Number of that Agent here. The Agent must have a record in the Contact register in which the Customer box is ticked.
- Name
- The Agent's Name will be placed in this field when you specify the Agent in the field to the left.
- Customer
- Paste Special
Customers in Contact register
- Default taken from Hotel Settings setting (Default Customer field)
- Specify the Customer for the Group Reservation here.
- You must specify a Customer before you can save the Group Reservation.
- If you will need to create a group Invoice that includes some or all the Sub Reservations, you will create it from the Group Reservation and it will be issued to the Customer specified here.
- If you create Sub Reservations from a Group Reservation (using the 'New Sub Reservation' function), the Customer and Name will be copied to each Sub Reservation.
- Specify the Customer for the Group Reservation here.
- Name
- The Customer's Name will be placed in this field when you specify the Customer in the field to the left.
- Contact
- Paste Special
Contact Persons in the Contact register
- If the Agent or Customer is a company, you can use this field to record the name of the Contact Person who is dealing with the Group Reservation.
- If you have specified an Agent in the field above, the 'Paste Special' will list the Contact Persons belonging to the Agent. Otherwise, it will list the Contact Persons belonging to the Customer.
- If you have specified an Agent in the field above, the 'Paste Special' will list the Contact Persons belonging to the Agent. Otherwise, it will list the Contact Persons belonging to the Customer.
- Booking Origin
- Paste Special
Booking Origins setting, Hotel module
- Use this field to make a note of how the Customer heard about the hotel.
- If you create Sub Reservations from a Group Reservation (using the 'New Sub Reservation' function), the Booking Origin will be copied to each Sub Reservation.
- If you need it to be mandatory that a Booking Origin is specified in every Reservation and Group Reservation, select the Force Entry of Booking Origin option on the 'Defaults' card in the Hotel Settings setting.
- If you create Sub Reservations from a Group Reservation (using the 'New Sub Reservation' function), the Booking Origin will be copied to each Sub Reservation.
- Std Text
- Paste Special
Standard Text register, CRM module
- Text from any Standard Text record that you specify here will be printed on Reservation forms, if you have included the 'Text' field in the Form Template.
- Visit Purpose
- Paste Special
Visit Purposes setting, Hotel module
- Default taken from Hotel Settings (Default Visit Purpose field)
- Use this field to record the reason why the Customer or Guest is visiting and staying at the hotel.
- If you need it to be mandatory that a Visit Purpose is specified in every Reservation and Group Reservation, select the Force Visit Purpose on Reservations option on the 'Guests' card in the Hotel Settings setting.
- Use this field to record the reason why the Customer or Guest is visiting and staying at the hotel.
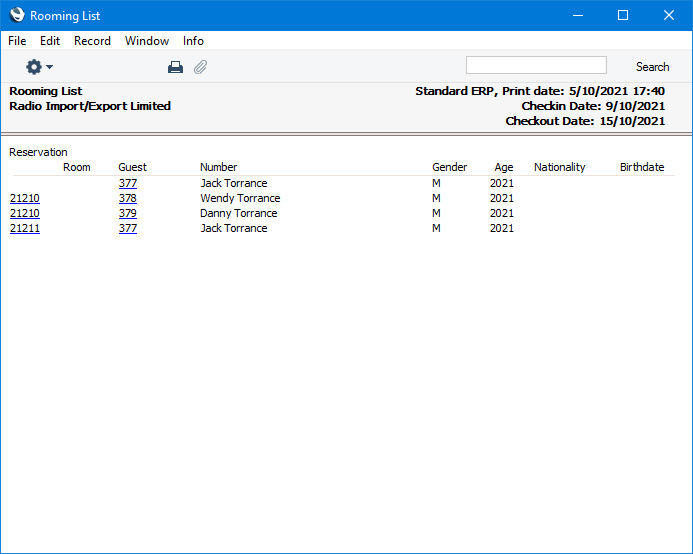
- [Rooming List] button
- The [Rooming List] button will print a report to screen listing the Guests in each Reservation in the Group.
The Group Reservation register in Standard ERP:
- Introduction
- Entering a Group Reservation, including:
- Header
- Customer card
- Misc card
- Reservations card
- Currency card
- Header
- Operations Menu
- Create Menu
- Home page for Hotel module manual
- Home page for Standard ERP manual
Entering a Group Reservation - Misc Card
This page describes the fields on the 'Misc' card in the Group Reservation record window. Please follow the links below for descriptions of the other parts of the Group Reservation record window:- Header
- Customer card
- Misc card
- Reservations card
- Currency card

- Language
- Paste Special
Languages setting, System module
- Default taken from Contact record for the Customer or Agent
- The Language will determine the Form Template that will be used when you print the Reservation, and the printer that will be used to print it. This can include sending the form to a fax machine, if your hardware can support this feature. Do this in the 'Form Definition' window for each form, as described here.
- Note that by default the same Form Template will be used when you print a Reservation and when you print a Group Reservation. It may be that you need a different Form Template to be used when printing a Group Reservation, because you need the printed document to include a list of Sub Reservations and you have designed a Form Template that includes the necessary fields. If so, specify in the 'Form Definition' windows for the various Reservation forms that the Form Template with the list of Sub Reservations is to be used when printing a record with a particular Language and specify that Language in this field. In this sense, the Language does not need to be a real language: it can instead be an arbitrary code.
- The Language will also determine the contents of any Email that you create from the Group Reservation for sending to the Customer. Please refer here for details.
- If the Language field is blank when you specify the Customer or the Agent, the Language will be brought in from the relevant Contact record. However, if the Language field is not blank, it will not be changed.
- This Language field will not be used when creating Invoices from the Group Reservation. Instead, the Language in the Contact record for the Customer will be used.
- The Language will determine the Form Template that will be used when you print the Reservation, and the printer that will be used to print it. This can include sending the form to a fax machine, if your hardware can support this feature. Do this in the 'Form Definition' window for each form, as described here.
- Reference
- Use this field if you need to identify the Group Reservation by means other than the Reservation Number.
- If you create Sub Reservations from a Group Reservation (using the 'New Sub Reservation' function), the Reference will be copied to each Sub Reservation.
- If you create Sub Reservations from a Group Reservation (using the 'New Sub Reservation' function), the Reference will be copied to each Sub Reservation.
- Salesman
- This field will contain the Signature of the user who created the Group Reservation. This cannot be changed.
- If you create Sub Reservations from a Group Reservation (using the 'New Sub Reservation' function), the Salesman will be copied to each Sub Reservation.
- The Salesman field will be used by the Limited Access feature: please refer to the description of the Sales Group field below for details.
- If you create Sub Reservations from a Group Reservation (using the 'New Sub Reservation' function), the Salesman will be copied to each Sub Reservation.
- Sales Group
- The Sales Group will be brought in from the Person record for the current user when they created the Group Reservation. If you are using the Limited Access feature, you can use this field to prevent a user from seeing every Group Reservation in the 'Group Reservations: Browse' window by restricting their view to their own Group Reservations or to those of their Sales Group.
- If you create Sub Reservations from a Group Reservation (using the 'New Sub Reservation' function), the Sales Group will be copied to each Sub Reservation.
Please refer to the page describing the Person register here for full details about the Limited Access feature.
- If you create Sub Reservations from a Group Reservation (using the 'New Sub Reservation' function), the Sales Group will be copied to each Sub Reservation.
- Branch
- Default taken from
Local Machine setting, User Settings module
- If your company has several Branches (e.g. several hotel buildings), you should add separate records for each Branch to the Contact register. These records should contain details about the Branches such as addresses and contact details. You should then go to the Local Machine setting in the User Settings module separately on each client machine and specify the Branch where each machine is located. Having done so, whenever you create a Group Reservation, the Branch where the client machine is located will be recorded in this field and usually cannot be changed.
- Branch details such as the address in the relevant Contact record will be printed on the Reservation document if you have included the various Branch fields in your Form Template.
- If you would like it to be possible for some users to change the Branch in Reservations, assign them to an Access Group in which you have granted Full access to the 'Change Branch Code on Reservation' Action. Separate similar Actions are available for Quotations, Orders and Invoices.
- Branch details such as the address in the relevant Contact record will be printed on the Reservation document if you have included the various Branch fields in your Form Template.
- Room Location
- Paste Special
Room Locations setting, Hotel module
- If you have more than one hotel location e.g. more than one building, specify here the Location where the Guests are planning to stay. If Guests are planning to stay in more than one Location, you will need to enter separate Group Reservations for each one.
- When assigning Rooms to Sub Reservations belonging to the Group, you will only be able to assign Rooms in the specified Location.
- When assigning Rooms to Sub Reservations belonging to the Group, you will only be able to assign Rooms in the specified Location.
- Comment
- Use this field to record notes about Reservations as necessary.
- [Diet Requirements] button
- The [Diet Requirements] button will print a report to screen listing the dietary requirements of the Guests in each Reservation in the Group. You can record the dietary requirements of a Guest using the Diet Remarks field on the 'Guest' card in the relevant Guest record.

The Group Reservation register in Standard ERP:
- Introduction
- Entering a Group Reservation, including:
- Header
- Customer card
- Misc card
- Reservations card
- Currency card
- Header
- Operations Menu
- Create Menu
- Home page for Hotel module manual
- Home page for Standard ERP manual
Entering a Group Reservation - Reservations Card
This page describes the 'Reservations' card in the Group Reservation record window. Please follow the links below for descriptions of the other parts of the Group Reservation record window:---
You can add new Sub Reservations to a Group Reservation using the following methods:
- Select 'New Sub Reservation' from the Create menu (Windows/macOS) or + menu (iOS/Android) to create a new Sub Reservation that will be connected to the Group.
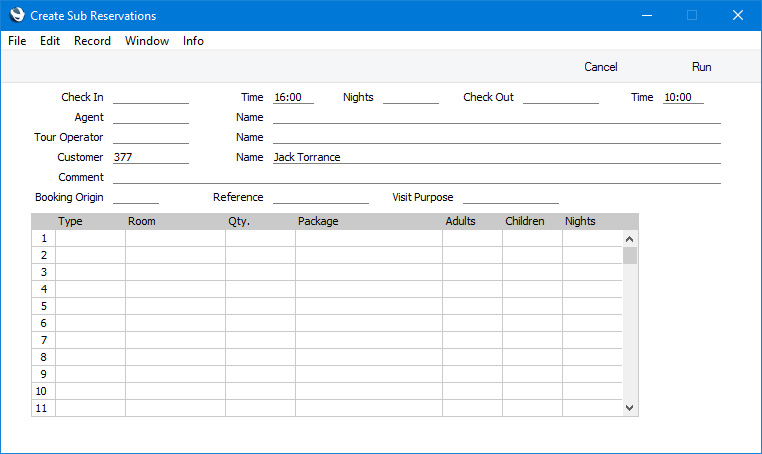
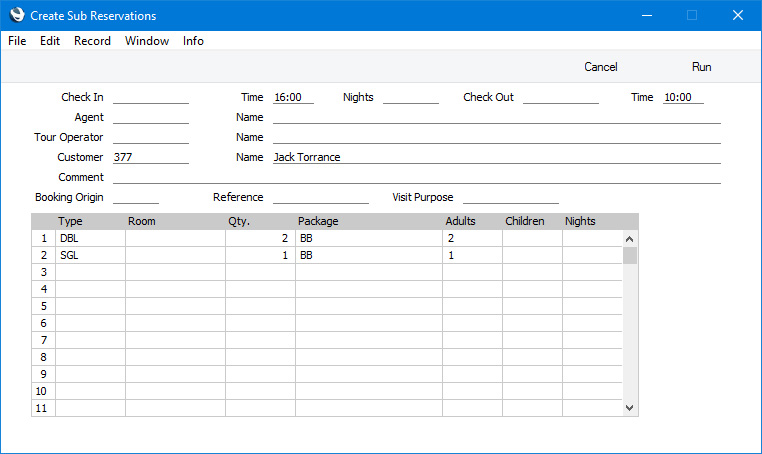
- Select 'Sub Reservations' from the Create or + menu to create several new Sub Reservations that will be connected to the Group at the same time.
- Select 'Add Sub Reservation' from the Create or + menu to add an existing Reservation to the Group as a Sub Reservation.
- To create a new Sub Reservation that is a duplicate of an existing one, highlight the existing Sub Reservation in the list and then select 'Duplicate Sub Reservation' from the Create or + menu.
---
The Group Reservation register in Standard ERP:
- Home page for Hotel module manual
- Home page for Standard ERP manual
Entering a Group Reservation - Currency Card
This page describes the fields on the 'Currency' card in the Group Reservation record window. Please follow the links below for descriptions of the other parts of the Group Reservation record window:- Header
- Customer card
- Misc card
- Reservations card
- Currency card

- Currency
- Paste Special
Currency register, System module
- Default taken from Contact record for the Customer (Sales Currency) or Default Base Currency
- The Currency of the Group Reservation is shown together with the exchange rate, which you can change in an individual Group Reservation if necessary. Leave the field blank to use your home Currency (unless you have set a Default Base Currency, in which case this will be offered as a default and should be treated as your home Currency).
- If you create Sub Reservations from a Group Reservation (using the 'New Sub Reservation' function), the Currency will be copied to each Sub Reservation.
- The Currency of the Group Reservation is shown together with the exchange rate, which you can change in an individual Group Reservation if necessary. Leave the field blank to use your home Currency (unless you have set a Default Base Currency, in which case this will be offered as a default and should be treated as your home Currency).
- Exchange Rates
- Default taken from
Base Currency Rates setting and/or Exchange Rate register, System module
- By default, these fields will display the exchange rates for the specified Currency on the Creation Date
- If you create Sub Reservations from a Group Reservation (using the 'New Sub Reservation' function), the Exchange Rates will be copied to each Sub Reservation.
The Group Reservation register in Standard ERP:
- Introduction
- Entering a Group Reservation, including:
- Header
- Customer card
- Misc card
- Reservations card
- Currency card
- Header
- Operations Menu
- Create Menu
- Home page for Hotel module manual
- Home page for Standard ERP manual
Operations Menu - Group Reservations
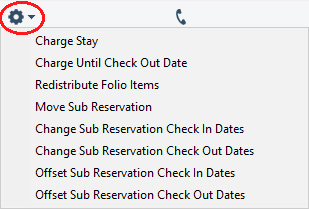
If you are using Windows or macOS, you can open the Operations menu by clicking the button with the 'cog' icon (shown highlighted in the illustration above). If you are using iOS or Android, you can access the Operations menu functions through the Tools menu (with 'wrench' icon).
Please follow the links below for details about each function on the Operations menu:
- Charge Stay, Charge Until Check Out Date
- Redistribute Folio Items
- Move Sub Reservation
- Change Sub Reservation Check In Dates
- Change Sub Reservation Check Out Dates
- Offset Sub Reservation Check In Dates
- Offset Sub Reservation Check Out Dates
The Group Reservation register in Standard ERP:
- Introduction
- Entering a Group Reservation
- Operations Menu
- Create Menu
- Home page for Hotel module manual
- Home page for Standard ERP manual
Operations Menu - Group Reservation - Charge Stay, Charge Until Check Out Date
The 'Charge Stay' and 'Charge Until Check Out Date' functions allow you to add the Room charge, the Package Items and the Repetitive Items to the Guest Accounts in each Reservation in the Group. Reservations will be charged to the Date specified above (and to the Time specified above in the case of Reservations for Rooms that are charged by the hour). You can also run these functions for each Reservation individually. Please refer here for full details.You can use Access Groups to prevent certain users from using the 'Charge Stay' and 'Charge Until Check Out Date' functions. To do this, deny them access to the 'Reservation: Charge Stay' Action.
---
The Group Reservation register in Standard ERP:
- Introduction
- Entering a Group Reservation
- Operations Menu, including:
- Charge Stay, Charge Until Check Out Date
- Redistribute Folio Items
- Move Sub Reservation
- Change Sub Reservation Check In Dates
- Change Sub Reservation Check Out Dates
- Offset Sub Reservation Check In Dates
- Offset Sub Reservation Check Out Dates
- Charge Stay, Charge Until Check Out Date
- Create Menu
- Home page for Hotel module manual
- Home page for Standard ERP manual
Operations Menu - Group Reservation - Redistribute Folio Items
The 'Redistribute Folio Items' function allows you to move Items such as Room charges, Package Items or other Items from one Guest Account to another. You can run this function for an individual Reservation (by opening the Reservation in question and selecting 'Redistribute Folio Items' from the Operations menu (Windows/macOS) or Tools menu (iOS/Android) or you can run it for a Group. If you run it for an individual Reservation, a report will be printed to screen listing the Guests and the Guest Accounts in the Reservation. If you run it for a Group, the report will list the Guests and the Guest Accounts in each Reservation in the Group. Please refer here for full details.Be careful when using this function from a Group Reservation. As the report will list the Guests and the Guest Accounts in each Reservation in the Group, it will be easy to assign Items to the Guest Account of a Guest who is a Guest in a different Reservation. In other words, the intention will be that a Guest in one Room will pay for something purchased for another Room. However, as the Item has been assigned to the Guest Account of someone who is not a Guest in the Reservation, no Invoice will be created for that Item. In this situation, you should not only move the Item to the intended Guest Account, but you should also move it to the Reservation to which the intended Guest Account belongs. To do this, use the [Move Folio Items to another Reservation] text link at the end of the report (which will only be visible for users belonging to Access Groups in which you have granted Full access to the 'Move Folio Items to another Hotel Reservation' Action). This is described in step 5 here.
---
The Group Reservation register in Standard ERP:
- Introduction
- Entering a Group Reservation
- Operations Menu, including:
- Charge Stay, Charge Until Check Out Date
- Redistribute Folio Items
- Move Sub Reservation
- Change Sub Reservation Check In Dates
- Change Sub Reservation Check Out Dates
- Offset Sub Reservation Check In Dates
- Offset Sub Reservation Check Out Dates
- Charge Stay, Charge Until Check Out Date
- Create Menu
- Home page for Hotel module manual
- Home page for Standard ERP manual
Operations Menu - Group Reservation - Move Sub Reservation
This page describes the 'Move Sub Reservation' function on the Operations menu in the Group Reservation browse window. If you are using iOS or Android, the 'Move Sub Reservation' function is on the Tools menu.---
If you need to move Sub Reservations from one Group to another, the following options are available:
- If you need to move a single Sub Reservation, open that Sub Reservation in a record window and enter the Reservation Number of the Group Reservation to which it is to be moved in the Group field:

- Again, if you need to move a single Sub Reservation, open the Group Reservation to which it is to be moved in a record window and choose 'Add Sub Reservation' from the Create menu (Windows/macOS) or + menu (iOS/Android).
- If you need to move more than one Sub Reservation, highlight those Sub Reservations in the 'Reservations: Browse' window and select 'Assign to Group Reservation' from the Operations menu (Windows/macOS) or Tools menu (iOS/Android). If you are using iOS or Android, you can only highlight a single Sub Reservation at a time.
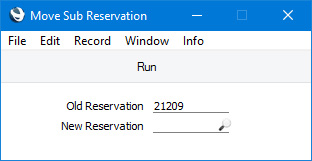
- If you need to move one or more Sub Reservations that currently belong to the same Group, open that Group Reservation in a record window, highlight the Reservation(s) on the 'Reservations' card and select 'Move Sub Reservation' from the Operations or Tools menu.
If you are using the last method, highlighting one or more Sub Reservation(s) and selecting the 'Move Sub Reservation' function will cause the following window to open:
---
The Group Reservation register in Standard ERP:
- Introduction
- Entering a Group Reservation
- Operations Menu, including:
- Charge Stay, Charge Until Check Out Date
- Redistribute Folio Items
- Move Sub Reservation
- Change Sub Reservation Check In Dates
- Change Sub Reservation Check Out Dates
- Offset Sub Reservation Check In Dates
- Offset Sub Reservation Check Out Dates
- Charge Stay, Charge Until Check Out Date
- Create Menu
- Home page for Hotel module manual
- Home page for Standard ERP manual
Operations Menu - Group Reservation - Change Sub Reservation Check In Dates
This page describes the 'Change Sub Reservation Check In Dates' function on the Operations menu in the Group Reservation browse window. If you are using iOS or Android, the 'Change Sub Reservation Check In Dates' function is on the Tools menu.---
The 'Change Sub Reservation Check In Dates' function allows you to change the Check In Dates of all the Sub Reservations that are connected to the Group by specifying a new Check In Date. To do this, open the Group Reservation in a record window and select 'Change Sub Reservation Check In Dates' from the Operations menu (Windows/macOS) or Tools menu (iOS/Android). The following window opens:
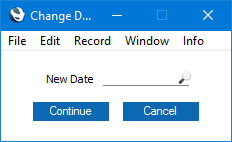
If you need to change the Check In Dates of the Sub Reservations by adding or subtracting a number of days from the existing Check In Dates, use 'Offset Sub Reservation Check In Dates' on the same menu.
---
The Group Reservation register in Standard ERP:
- Introduction
- Entering a Group Reservation
- Operations Menu, including:
- Charge Stay, Charge Until Check Out Date
- Redistribute Folio Items
- Move Sub Reservation
- Change Sub Reservation Check In Dates
- Change Sub Reservation Check Out Dates
- Offset Sub Reservation Check In Dates
- Offset Sub Reservation Check Out Dates
- Charge Stay, Charge Until Check Out Date
- Create Menu
- Home page for Hotel module manual
- Home page for Standard ERP manual
Operations Menu - Group Reservation - Change Sub Reservation Check Out Dates
This page describes the 'Change Sub Reservation Check Out Dates' function on the Operations menu in the Group Reservation browse window. If you are using iOS or Android, the 'Change Sub Reservation Check Out Dates' function is on the Tools menu.---
The 'Change Sub Reservation Check Out Dates' function allows you to change the Check Out Dates of all the Sub Reservations that are connected to the Group by specifying a new Check Out Date. To do this, open the Group Reservation in a record window and select 'Change Sub Reservation Check Out Dates' from the Operations menu (Windows/macOS) or Tools menu (iOS/Android). The following window opens:

If you need to change the Check Out Dates of the Sub Reservations by adding or subtracting a number of days from the existing Check Out Dates, use 'Offset Sub Reservation Check Out Dates' on the same menu.
---
The Group Reservation register in Standard ERP:
- Introduction
- Entering a Group Reservation
- Operations Menu, including:
- Charge Stay, Charge Until Check Out Date
- Redistribute Folio Items
- Move Sub Reservation
- Change Sub Reservation Check In Dates
- Change Sub Reservation Check Out Dates
- Offset Sub Reservation Check In Dates
- Offset Sub Reservation Check Out Dates
- Charge Stay, Charge Until Check Out Date
- Create Menu
- Home page for Hotel module manual
- Home page for Standard ERP manual
Operations Menu - Group Reservation - Offset Sub Reservation Check In Dates
This page describes the 'Offset Sub Reservation Check In Dates' function on the Operations menu in the Group Reservation browse window. If you are using iOS or Android, the 'Offset Sub Reservation Check In Dates' function is on the Tools menu.---
The 'Offset Sub Reservation Check In Dates' function allows you to change the Check In Dates of all the Sub Reservations that are connected to the Group by adding or subtracting a number of days from the existing Check In Dates. To do this, open the Group Reservation in a record window and select 'Offset Sub Reservation Check In Dates' from the Operations menu (Windows/macOS) or Tools menu (iOS/Android). The following window opens:

If you need to change the Check In Dates of the Sub Reservations by specifying a new Check In Date, use 'Change Sub Reservation Check In Dates' on the same menu.
---
The Group Reservation register in Standard ERP:
- Introduction
- Entering a Group Reservation
- Operations Menu, including:
- Charge Stay, Charge Until Check Out Date
- Redistribute Folio Items
- Move Sub Reservation
- Change Sub Reservation Check In Dates
- Change Sub Reservation Check Out Dates
- Offset Sub Reservation Check In Dates
- Offset Sub Reservation Check Out Dates
- Charge Stay, Charge Until Check Out Date
- Create Menu
- Home page for Hotel module manual
- Home page for Standard ERP manual
Operations Menu - Group Reservation - Offset Sub Reservation Check Out Dates
This page describes the 'Offset Sub Reservation Check Out Dates' function on the Operations menu in the Group Reservation browse window. If you are using iOS or Android, the 'Offset Sub Reservation Check Out Dates' function is on the Tools menu.---
The 'Offset Sub Reservation Check Out Dates' function allows you to change the Check Out Dates of all the Sub Reservations that are connected to the Group by adding or subtracting a number of days from the existing Check Out Dates. To do this, open the Group Reservation in a record window and select 'Offset Sub Reservation Check Out Dates' from the Operations menu (Windows/macOS) or Tools menu (iOS/Android). The following window opens:
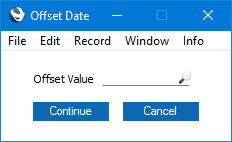
If you need to change the Check Out Dates of the Sub Reservations by specifying a new Check Out Date, use 'Change Sub Reservation Check Out Dates' on the same menu.
---
The Group Reservation register in Standard ERP:
- Introduction
- Entering a Group Reservation
- Operations Menu, including:
- Charge Stay, Charge Until Check Out Date
- Redistribute Folio Items
- Move Sub Reservation
- Change Sub Reservation Check In Dates
- Change Sub Reservation Check Out Dates
- Offset Sub Reservation Check In Dates
- Offset Sub Reservation Check Out Dates
- Charge Stay, Charge Until Check Out Date
- Create Menu
- Home page for Hotel module manual
- Home page for Standard ERP manual
Create Menu - Group Reservations
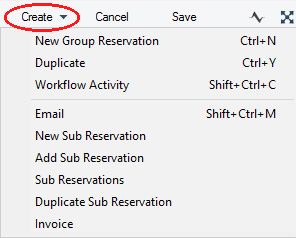
'New' and 'Duplicate' are standard functions that are provided on every Create and + menu. Use these functions to create new records, in this case in the Group Reservation register. Please follow the links below for details about the other functions:
The Group Reservation register in Standard ERP:
- Introduction
- Entering a Group Reservation
- Operations Menu
- Create Menu
- Home page for Hotel module manual
- Home page for Standard ERP manual
Create Menu - Group Reservation - Email
This page describes the 'Email' function on the Create menu in the Group Reservation record window. If you are using iOS or Android, the 'Email' function is on the + menu.---
The 'Email' function allows you to create a Mail containing details of a Group Reservation, which you can use to send the Reservation to the Customer by email. To be able to use this function, the Email and Conferences option in the Configuration setting in the System module must be ticked.
To create a Mail from a Group Reservation, first open the Group Reservation in a record window and then select 'Email' from the Create menu (Windows/macOS) or + menu (iOS/Android). The following screen will appear, in which you can create a new Mail:
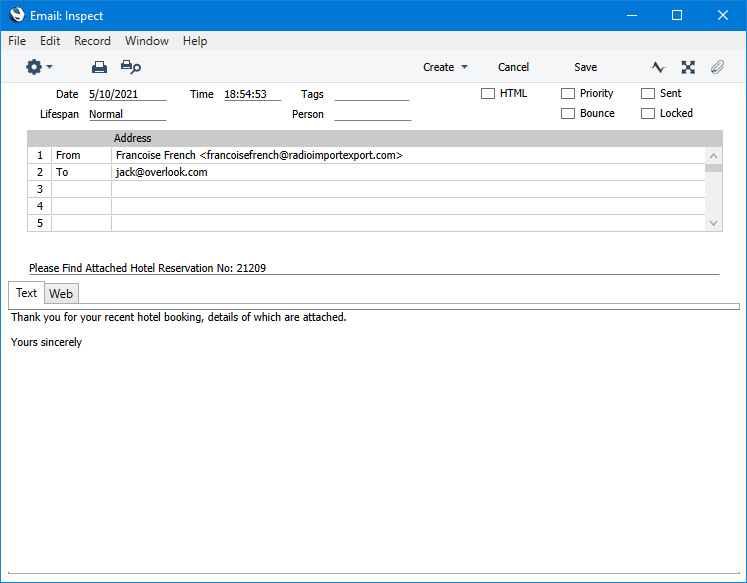
- The sender of the Mail will be the current user. If the current user doesn't have a Mailbox, no Mail will be created.
- The Recipient of the Mail will be the Email Address in the Contact record for the Customer.
It can be the case that a Group Reservation does not have a Customer, but does have at least one Guest. In this case, the Recipient of the Mail will be the Email Address in the Contact record for the first Guest. This situation can arise if the Group Reservation started life as a standalone Reservation with Guests, and you then converted it to a Group Reservation using the 'Create Group Reservations from Mother Reservations' Maintenance function.
If you have not specified an Email Address in the relevant Contact record, no Mail will be created.
- The Subject and Text of the Mail will be taken from the record in the Mail Texts setting in the Email and Conferences module in which the Form is "Reservations". If the Group Reservation has a Language and the Mail Text record contains a row for that Language, the Subject and Text will be determined by the fields in that row. Otherwise, they will be determined by the fields in the Mail Text header, as follows:
- The Subject in the mail will be composed from the Subject in the Mail Text record (which does not need a trailing space), the text "Reservation No: " and the Reservation Number. For example, if the Subject in the Mail Text record is "Please find attached" (without trailing space), the Subject of the Mail will be "Please find attached Reservation No: XXXX" (where XXXX is the Reservation Number).
- The Text of the Mail will be built up as follows:
- The initial text will be taken from the Standard Text record quoted in the First Text field in the Mail Text record.
- The final text will be taken from the Standard Text record quoted in the Last Text field in the Mail Text record. It is recommended that the first line in this Standard Text record should be a carriage return, to ensure that the text in the mail is neatly spaced.
If either Standard Text record is in HTML format, the Mail will be in HTML format as well.
If there is no suitable record in the Mail Texts setting, the Subject of the Mail will be "Reservation No: XXXX" (where XXXX is the Reservation Number). The Text of the Mail will be empty.
- The initial text will be taken from the Standard Text record quoted in the First Text field in the Mail Text record.
- The Subject in the mail will be composed from the Subject in the Mail Text record (which does not need a trailing space), the text "Reservation No: " and the Reservation Number. For example, if the Subject in the Mail Text record is "Please find attached" (without trailing space), the Subject of the Mail will be "Please find attached Reservation No: XXXX" (where XXXX is the Reservation Number).
- A PDF version of the Reservation will be attached to the Mail, accessible through the Document Manager. This requires you to have designed a Form Template to be used when printing Reservations, and to have assigned that Form Template to the Reservation form using the 'Define Form' function. When you design the Form Template, you may need to use Styles that will embed fonts in PDF files (this will depend on the fonts you use). You may also need to choose a code page and page setup, which you can do in the Form Template Properties. Please refer here for details about designing Form Templates, and here for a list of the fields you can include in the Form Template used by the Reservation form.
- The Group Reservation record itself will also be connected to the Mail through its Link Manager and similarly the Mail will be connected to the Group Reservation. This allows you to open the Mail quickly and easily when reviewing the Group Reservation, or to open the Group Reservation from the Mail.
If the function does not create a Mail, the probable causes are:
- The current user does not have a Mailbox.
- No suitable recipient email address was found.
- The Group Reservation has not been saved.
---
The Group Reservation register in Standard ERP:
- Home page for Hotel module manual
- Home page for Standard ERP manual
Create Menu - Group Reservation - New Sub Reservation
This page describes the 'New Sub Reservation' function on the Create menu in the Group Reservation record window. If you are using iOS or Android, the 'New Sub Reservation' function is on the + menu.---
You can add new Sub Reservations to a Group Reservation using the following methods:
- Select 'New Sub Reservation' from the Create menu (Windows/macOS) or + menu (iOS/Android) to create a new Sub Reservation that will be connected to the Group. This method is described on this page.
- Select 'Sub Reservations' from the Create or + menu to create several new Sub Reservations that will be connected to the Group at the same time.
- Select 'Add Sub Reservation' from the Create or + menu to add an existing Reservation to the Group as a Sub Reservation.
- To create a new Sub Reservation that is a duplicate of an existing one, highlight the existing Sub Reservation in the list and then select 'Duplicate Sub Reservation' from the Create or + menu.
The following information will be copied from the Group Reservation to the new Sub Reservation:
- Customer Number and Name
- Salesman
- Sales Group
- Booking Origin
- Reference
- Currency and Exchange Rates
Fill in the other details as appropriate, then save the new Sub Reservation in the Reservation register by clicking the [Save] button (Windows/macOS) or tapping √ (iOS/Android) in the Button Bar. You can then close it using the close box (Windows/macOS) or by tapping < (iOS/Android). Alternatively, if you no longer require the Reservation record, click [Cancel] or tap <. In either case, you will be returned to the Group Reservation window. If you saved the new Sub Reservation, it will immediately be added to the list of Reservations on the 'Reservations' card in the Group Reservation.
---
The Group Reservation register in Standard ERP:
- Introduction
- Entering a Group Reservation
- Operations Menu
- Create Menu, including:
- Email
- New Sub Reservation
- Add Sub Reservation
- Sub Reservations
- Duplicate Sub Reservation
- Invoice
- Email
- Home page for Hotel module manual
- Home page for Standard ERP manual
Create Menu - Group Reservation - Add Sub Reservation
This page describes the 'Add Sub Reservation' function on the Create menu in the Group Reservation record window. If you are using iOS or Android, the 'Add Sub Reservation' function is on the + menu.---
You can add new Sub Reservations to a Group Reservation using the following methods:
- Select 'New Sub Reservation' from the Create menu (Windows/macOS) or + menu (iOS/Android) to create a new Sub Reservation that will be connected to the Group.
- Select 'Sub Reservations' from the Create or + menu to create several new Sub Reservations that will be connected to the Group at the same time.
- Select 'Add Sub Reservation' from the Create or + menu to add an existing Reservation to the Group as a Sub Reservation. This method is described on this page.
- To create a new Sub Reservation that is a duplicate of an existing one, highlight the existing Sub Reservation in the list and then select 'Duplicate Sub Reservation' from the Create or + menu.
The Reservation Number of the Group Reservation will be copied to the Group field in the highlighted Reservations, which will immediately be added to the list of Reservations on the 'Reservations' card in the Group Reservation.
---
The Group Reservation register in Standard ERP:
- Introduction
- Entering a Group Reservation
- Operations Menu
- Create Menu, including:
- Email
- New Sub Reservation
- Add Sub Reservation
- Sub Reservations
- Duplicate Sub Reservation
- Invoice
- Email
- Home page for Hotel module manual
- Home page for Standard ERP manual
Create Menu - Group Reservation - Sub Reservations
This page describes the 'Sub Reservations' function on the Create menu in the Group Reservation record window. If you are using iOS or Android, the 'Sub Reservations' function is on the + menu.---
You can add new Sub Reservations to a Group Reservation using the following methods:
- Select 'New Sub Reservation' from the Create menu (Windows/macOS) or + menu (iOS/Android) to create a new Sub Reservation that will be connected to the Group.
- Select 'Sub Reservations' from the Create or + menu to create several new Sub Reservations that will be connected to the Group at the same time. This method is described on this page.
- Select 'Add Sub Reservation' from the Create or + menu to add an existing Reservation to the Group as a Sub Reservation.
- To create a new Sub Reservation that is a duplicate of an existing one, highlight the existing Sub Reservation in the list and then select 'Duplicate Sub Reservation' from the Create or + menu.
---
The Group Reservation register in Standard ERP:
- Introduction
- Entering a Group Reservation
- Operations Menu
- Create Menu, including:
- Email
- New Sub Reservation
- Add Sub Reservation
- Sub Reservations
- Duplicate Sub Reservation
- Invoice
- Email
- Home page for Hotel module manual
- Home page for Standard ERP manual
Create Menu - Group Reservation - Duplicate Sub Reservation
This page describes the 'Duplicate Sub Reservation' function on the Create menu in the Group Reservation record window. If you are using iOS or Android, the 'Duplicate Sub Reservation' function is on the + menu.---
You can add new Sub Reservations to a Group Reservation using the following methods:
- Select 'New Sub Reservation' from the Create menu (Windows/macOS) or + menu (iOS/Android) to create a new Sub Reservation that will be connected to the Group.
- Select 'Sub Reservations' from the Create or + menu to create several new Sub Reservations that will be connected to the Group at the same time.
- Select 'Add Sub Reservation' from the Create or + menu to add an existing Reservation to the Group as a Sub Reservation.
- To create a new Sub Reservation that is a duplicate of an existing one, highlight the existing Sub Reservation in the list and then select 'Duplicate Sub Reservation' from the Create or + menu. This method is described on this page.
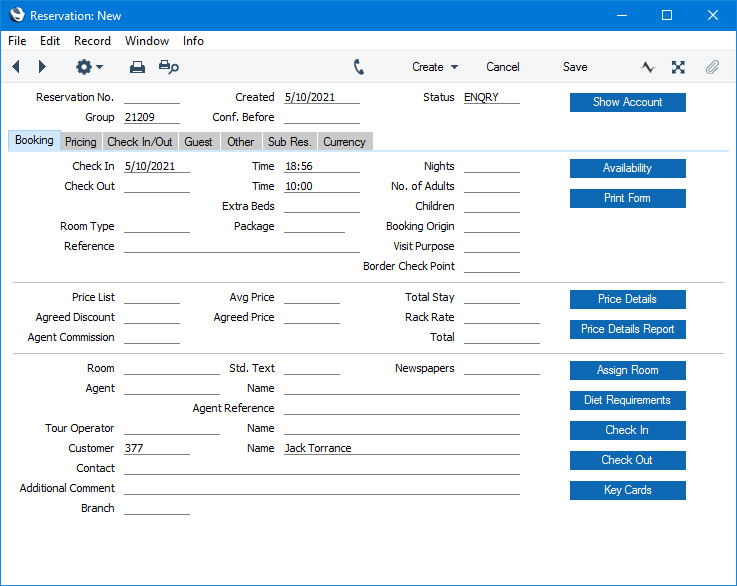
A new record will be opened in a window entitled 'Reservation: New'. This means that it has not yet been saved.
Fill in the other details as appropriate, then save the new Sub Reservation in the Reservation register by clicking the [Save] button (Windows/macOS) or tapping √ (iOS/Android) in the Button Bar. You can then close it using the close box (Windows/macOS) or by tapping < (iOS/Android). Alternatively, if you no longer require the Reservation record, click [Cancel] or tap <. In either case, you will be returned to the Group Reservation window. If you saved the new Sub Reservation, it will immediately be added to the list of Reservations on the 'Reservations' card in the Group Reservation.
---
The Group Reservation register in Standard ERP:
- Introduction
- Entering a Group Reservation
- Operations Menu
- Create Menu, including:
- Email
- New Sub Reservation
- Add Sub Reservation
- Sub Reservations
- Duplicate Sub Reservation
- Invoice
- Email
- Home page for Hotel module manual
- Home page for Standard ERP manual
Create Menu - Group Reservation - Invoice
This page describes the 'Invoice' function on the Create menu in the Group Reservation record window. If you are using iOS or Android, the 'Invoice' function is on the + menu.---
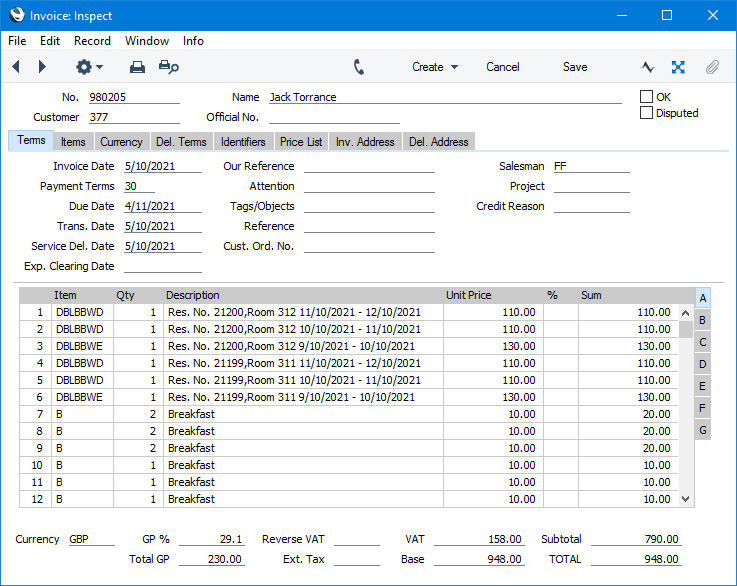
The 'Invoice' function will create an Invoice for the Customer in the Group Reservation. The Items (e.g. Room charges, Package Items, Repetitive Items and/or any other Items) that have been assigned to the Customer's Guest Account in each Sub Reservation will all be included in the Invoice.
For example, a Group Reservation might be in the name of a parent, and it might contain Sub Reservations for two Rooms, for parents and children. The parent will be the Customer in the Group Reservation and in both Sub Reservations. As the Customer, the parent will have Guest Accounts in both Sub Reservations, and the Room charges will be assigned to those Guest Accounts. The Room charges for both Rooms will then be included in the Invoice if you create it using this function in the Group Reservation. If any extra Items have been assigned to any of the individual Guests (i.e. to the other Guest Accounts), you will need to create Invoices for those Guest Accounts from the individual Sub Reservations, as described here. You will be reminded to do this when checking out.
If you do not want a Sub Reservation to be included in the Invoice created from the Group Reservation and instead you need it to be invoiced separately, select the Pay Separately option on the 'Other' card in the Sub Reservation. Again, you will need to create all Invoices for the Sub Reservation from the Sub Reservation.
You can create an Invoice from a Group Reservation in two ways:
- Open the Group Reservation in a record window and select 'Invoice' from the Create or + menu.
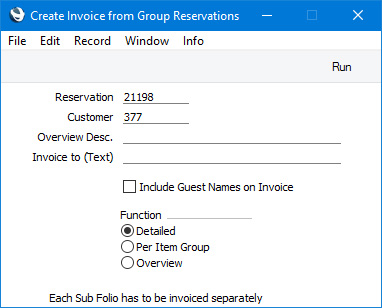
- Run the 'Create Invoice from Group Reservation' Maintenance function.
- Reservation
- If you used method i above to run the function, this field will provide a reminder of the Group Reservation Number.
- If you used method ii to run the function, enter here the Number of the Group Reservation that you need to invoice. You must enter a Group Reservation Number, otherwise the function will have no effect.
- If you used method ii to run the function, enter here the Number of the Group Reservation that you need to invoice. You must enter a Group Reservation Number, otherwise the function will have no effect.
- Customer
- This field provides a reminder of the Customer in the Group Reservation.
- Include Guest Names on Invoice
- Select this option if you need the Guests to be listed on the Invoice.
- Function
- Choose an option to specify how many rows the Invoice should have, as follows:
- Detailed
- This option will assign each daily Room charge and each Item to its own row in the Invoice. For example, if a Guest stays for three nights and takes a newspaper and breakfast each day, the Invoice will contain three rows for the Room charge for each night, three rows for the individual newspapers and three rows for the individual breakfasts.
- Overview
- This option will add a single row to the Invoice for each Item. Continuing the previous example, the Invoice will contain a single row for the Room charges, a single row for the newspapers and a single row for the breakfasts. The Qty in each row will be 3.
- Detailed
- The Invoice will be attached to the Reservation and will be visible in the Link Manager. Open the Link Manager and open the Invoice from there.
- The Show Account report will be updated to show that the Guest Account has been invoiced. Open the Show Account report by pressing the [Show Account] button in the Group Reservation and open the Invoice by clicking or tapping the Invoice Number.
- Invoice Currency ('Terms' card)
- If you specify an Invoice Currency, all Hotel Invoices will be in that Currency. Otherwise, they will be in the Currency used in the Reservation.
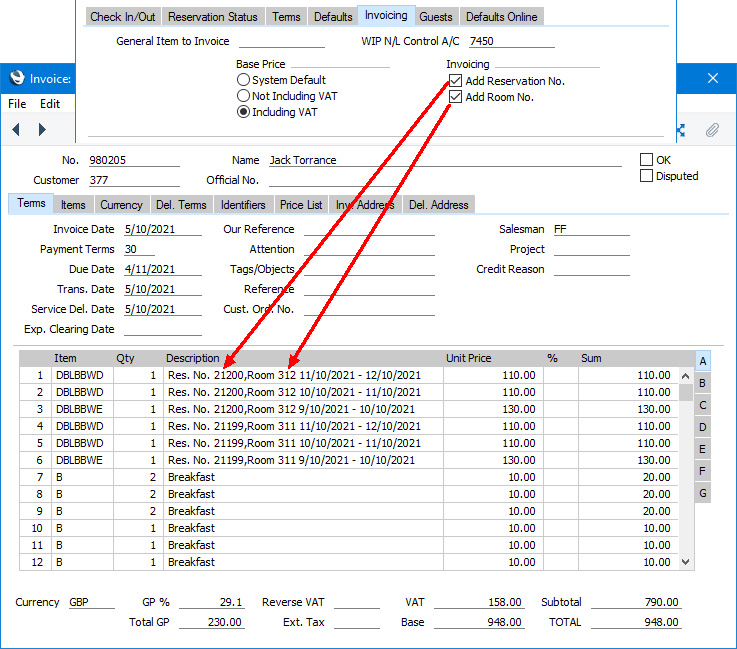
- Add Reservation No., Add Room No. ('Invoicing' card)
- When a Room charge is included in an Invoice, the description in the Invoice row will include the period covered by the Room charge. If you have selected these options, it will include the Reservation Number and/or the Room Number as well.
When the Invoice is complete, tick the OK check box and save. This signifies that the Invoice has been approved. Associated transactions in the Nominal Ledger (including cost of sales postings if you are using this option) will be created if you have so determined using the Sub Systems setting in the Nominal Ledger and in the Number Series - Invoices setting. You will no longer be able to modify the Invoice.
Please refer here for a full description of the Invoice window, including detailed information about marking Invoices as OK, printing them and generating Nominal Ledger Transactions.
As already mentioned, the Group Reservation and the Invoice will be connected to each other through the Link Manager facility. This allows you to open the Group Reservation quickly and easily when reviewing the Invoice, or to open the Invoice from the Group Reservation.
---
The Group Reservation register in Standard ERP:
- Home page for Hotel module manual
- Home page for Standard ERP manual