Introduction to the Quotation Register in Standard ERP
Using Standard ERP you can record every stage of the sales process in sequence from the Quotation through the Order and the Delivery to the Invoice and payment. You can begin the sequence at any stage (with the exception that a Delivery must be created from an Order).After entering a Quotation to the Quotation register, you can print it, send it by email and create Activities to schedule follow-up calls. You can use Quotations to quote for simple sales or for Projects and Project Budgets, and you can create Orders, Invoices, Projects and Project Budgets from Quotations.
You can use the Workflow Overview to monitor the progress of Quotations, and detailed reports allow you to analyse conversion rates.
To open the Quotation register, use the [Switch Module] button in the Navigation Centre or the Ctrl-0 (zero) or ⌘-0 keyboard shortcut to ensure you are in the Quotations module. Then, if you are using Windows or Mac OS X, click the [Registers] button, also in the Navigation Centre, and double-click 'Quotations' in the resulting list. If you are using iOS or Android, tap the [Registers] button in the Navigation Centre and then tap 'Quotations' in the 'Registers' list. The 'Quotations: Browse' window will be opened, listing the Quotations that you have already entered.
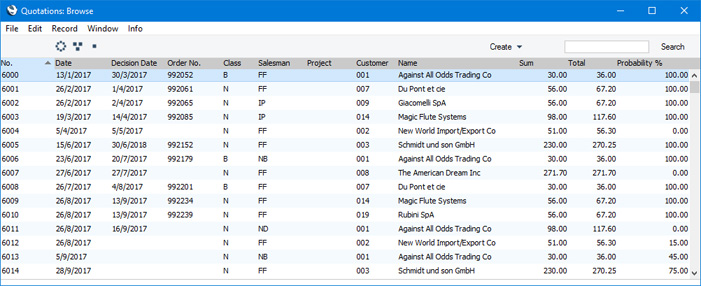
Searching for a particular Quotation depends on whether you are using the Browse Filtering option in the Optional Features setting in the System module, as follows:
- If you are not using the Browse Filtering option, first sort the list by the column that you want to use for the search. Then, enter the text that you want to find in the Search field in the top of the window (in the top right-hand corner if you are using Windows/Mac OS X) and press the Return key (Mac OS X) or Search (iOS/Android). The first record containing a match for your search string will be highlighted (if you are using Windows, a match will be highlighted as you type each character). For example, to search for a particular Customer Name, sort by Name before entering a Customer Name (or the first few characters) in the Search field.
- If you are using the Browse Filtering option, all you need to do is to start typing a letter, word, number, or date in the Search field (there is no need to click in the field before typing). As you type each character, non-matching records will be removed from the list. There is no need to sort the list first.
If you are using Mac OS X, the right-hand column illustrates the Probability of each Quotation using coloured graphical representations:
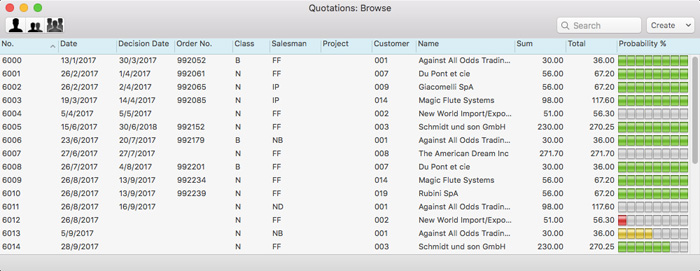

- Lists all Quotations.

- Lists Quotations belonging to members of the same Sales Group as the current user (i.e. Quotations with the same Sales Group on their 'Del. Terms' card as that of the current user).

- Lists Quotations belonging to the current user (i.e. Quotations where the Salesman field contains the Signature of the current user).
Please refer to the page describing the 'Access' card of the Person register for full details about the Limited Access feature.
---
The Quotation register in Standard ERP:
- Introduction
- Entering a Quotation
- Controlling Prices in Quotations
- Inspecting and Changing Quotations
- Printing Quotations
- Operations Menu
- Create Menu
- Row Menu
- Home page for Quotations module manual
- Home page for Standard ERP manual
Entering a Quotation
To enter a new Quotation, open the 'Quotations: Browse' window as described here and select 'New' from the Create menu (Windows/Mac OS X) or from the + menu (iOS/Android). You can also use the Ctrl-N (Windows) or ⌘-N (Mac OS X) keyboard shortcuts. Alternatively, highlight a Quotation similar to the one you want to enter, and select 'Duplicate' from the same menu. If you don't want to open the 'Quotations: Browse' window before creating a new record, you can also use the + menu in the Navigation Centre (all platforms).The 'Quotation: New' window will be opened, empty if you selected 'New' or containing a duplicate of the highlighted Quotation.
If you are using Windows or Mac OS X, you can also create a Quotation by dragging a Customer from the 'Contacts: Browse' window to the 'Quotations: Browse' window. In this case, a new Quotation will be opened complete with full Customer information.
! | You are not bound by the values suggested by Standard ERP. In most fields you can change the pre-set values to something that suits you better. |
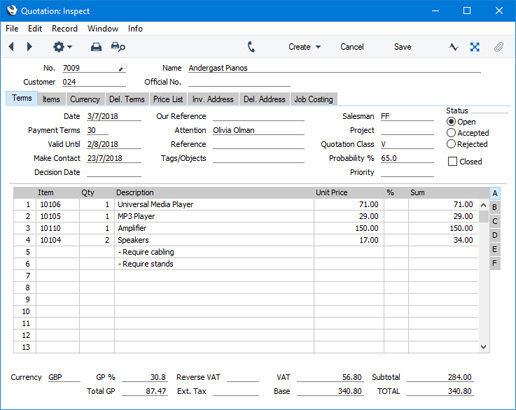
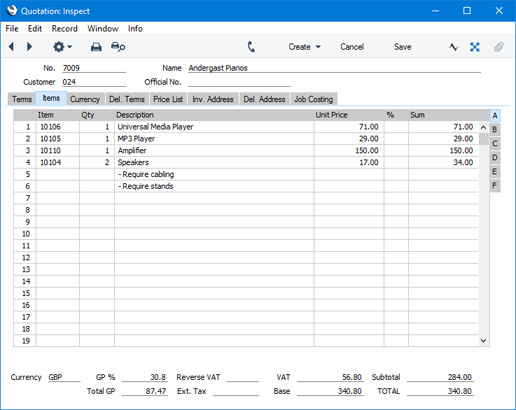
Since the amount of information stored about each Quotation will not fit on a single screen, the 'Quotation: New' window has been divided into eight cards. At the top of each is the header. This contains the Quotation Number, the Customer Number and Name, and the Project Number. You should only use the Project field if you have the Job Costing module. There are eight named buttons ('tabs') in the header.

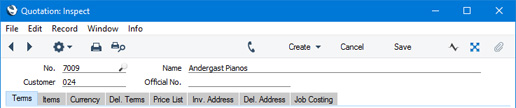
If you are using iOS or Android, there will only be two tabs, marked 'Items' and 'Details'. If you tap 'Details', you will see every card except 'Items' arranged vertically on screen. You can scroll down to see each one, or you can jump to any card by tapping on any tab and selecting the tab you want to go to.
Complete the Quotation as appropriate, then save it using the [Save] button (Windows/Mac OS X) or by tapping √ (iOS/Android). The window title will change from 'Quotation: New' to 'Quotation: Inspect'. You must save all changes you have made before you can print a Quotation or send it by email.
You can control whether it is possible to save Quotations in which the gross profit of at least one Item is less than a specified percentage. Please refer to the GP Below Minimum Alerts page for details.
After entering a Quotation, you can proceed as follows:
- Print the Quotation
- Email the Quotation
- Add an Activity to the Salesman's Task Manager to call the Customer
- Create an Order from the Quotation
- Create an Invoice from the Quotation
- Create a Project from the Quotation
The Quotation register in Standard ERP:
- Introduction
- Entering a Quotation, including:
- Header
- 'Terms' card
- 'Items' card
- 'Currency' card
- 'Del. Terms' card
- 'Price List' card
- 'Inv. Address' card
- 'Del. Address' card
- 'Job Costing' card
- Header
- Controlling Prices in Quotations
- Inspecting and Changing Quotations
- Printing Quotations
- Operations Menu
- Create Menu
- Row Menu
- Home page for Quotations module manual
- Home page for Standard ERP manual
Entering a Quotation - Header
This page describes the fields in the Header of the Quotation record. Please follow the links below for descriptions of the other cards:- Header
- 'Terms' card
- 'Items' card Part 1 (Flips A-F)
- 'Items' card Part 2 (Footer)
- 'Currency' card
- 'Del. Terms' card
- 'Price List' card
- 'Inv. Address' card
- 'Del. Address' card
- 'Job Costing' card
- No.
- Paste Special
Select from another Number Series
- The Quotation Number. The default will be chosen as follows:
- It will be taken from the number sequence specified in the Number Series Defaults setting in the System module.
- It will be taken from the first valid row in the Number Series - Quotations setting.
- It will be the next number following on from the last Quotation entered.
You may change the default, but not to a number that has already been used. If you have defined at least one number sequence in the Number Series - Quotations setting, the number you change to must be inside a valid number sequence.
- You will not be able to save a Quotation if the No. does not belong to a valid number sequence. A valid number sequence is one for the period in which the Quotation Date falls and with unused numbers, so this problem will most usually occur at the beginning of a new calendar or financial year. If you change number sequences each year, remember to update the Number Series Defaults setting if you are using it (step 1 above) so that it refers to the new number sequence.
- If you are working in a multi-user environment, the Quotation Number will be assigned when you save the Quotation for the first time.
- You can prevent certain users from changing the No. in a Quotation using Access Groups, by denying them access to the 'Change Quotation Numbers' Action.
- It will be taken from the number sequence specified in the Number Series Defaults setting in the System module.
- Customer
- Paste Special
Customers in Contact register
- Enter the Customer Number or use the 'Paste Special' function. The Customer's name, address and other information will be entered into the appropriate fields.
- You can use Access Groups to prevent users from selling to Customers in a particular VAT Zone. Assign them an Access Group in which you have granted Full access to the 'Disallow Sales to Domestic Customers' and/or 'Disallow Sales to Export Customers' Actions as necessary. 'Disallow Sales to Export Customers' will prevent sales to Customers in all VAT Zones except Domestic.
- You can use Access Groups to prevent users from selling to Customers in a particular VAT Zone. Assign them an Access Group in which you have granted Full access to the 'Disallow Sales to Domestic Customers' and/or 'Disallow Sales to Export Customers' Actions as necessary. 'Disallow Sales to Export Customers' will prevent sales to Customers in all VAT Zones except Domestic.
- Name
- The Customer Name will be placed here after you have entered the Customer Number.
- Official No.
- Default taken from
Legal Record Numbers setting, Sales Ledger
- This field is only used in Angola and Portugal, where it is a legal requirement to allocate an official serial number to a Quotation when it is printed.
- When you print a Quotation using the 'Print Proforma Invoice' function on the Operations menu (Windows/Mac OS X) or Tools menu (iOS/Android), the first unused number from the first valid sequence in the Legal Record Numbers setting will appear here. After printing the Quotation, many fields will be locked (you will only be able to change the Status, Class, Priority, Probability and Decision Date). The 'Print Proforma Invoice' function will only be available in Angola and Portugal (i.e. when the VAT Law in the Company Info setting is "Angolan" or "Portuguese").
- You should configure the Legal Record Numbers setting so that it contains at least one valid row in which the Register is "Proforma Invoices, Quotations" and the Selection is "At OK".
- The Official No, field is read-only and so cannot be used outside Angola and Portugal.
- When you print a Quotation using the 'Print Proforma Invoice' function on the Operations menu (Windows/Mac OS X) or Tools menu (iOS/Android), the first unused number from the first valid sequence in the Legal Record Numbers setting will appear here. After printing the Quotation, many fields will be locked (you will only be able to change the Status, Class, Priority, Probability and Decision Date). The 'Print Proforma Invoice' function will only be available in Angola and Portugal (i.e. when the VAT Law in the Company Info setting is "Angolan" or "Portuguese").
The Quotation register in Standard ERP:
- Introduction
- Entering a Quotation, including:
- Header
- 'Terms' card
- 'Items' card Part 1 (Flips A-F)
- 'Items' card Part 2 (Footer)
- 'Currency' card
- 'Del. Terms' card
- 'Price List' card
- 'Inv. Address' card
- 'Del. Address' card
- 'Job Costing' card
- Header
- Controlling Prices in Quotations
- Inspecting and Changing Quotations
- Printing Quotations
- Operations Menu
- Create Menu
- Row Menu
- Home page for Quotations module manual
- Home page for Standard ERP manual
Entering a Quotation - Terms Card
This page describes the fields on the 'Terms' card of the Quotation record. Please follow the links below for descriptions of the other cards:- Header
- 'Terms' card
- 'Items' card Part 1 (Flips A-F)
- 'Items' card Part 2 (Footer)
- 'Currency' card
- 'Del. Terms' card
- 'Price List' card
- 'Inv. Address' card
- 'Del. Address' card
- 'Job Costing' card

- Date
- Paste Special
Choose date
- The date of the Quotation: the current date according to the computer's clock will be entered as a default.
- Payment Terms
- Paste Special
Payment Terms setting, Sales/Purchase Ledger
- Default taken from Contact record for the Customer (Sales Pay. Terms)
- The Payment Term that you enter here will be transferred to any Orders and Invoices raised from the Quotation. It will ensure that the correct Payment Terms will be printed on Order and Invoice documentation (in the Language of the Customer if necessary) and, in the case of an Invoice, it will be used to calculate the Due Date. You can also use Payment Terms to configure a system of early settlement discounts.
- The Payment Term that you enter here will be transferred to any Orders and Invoices raised from the Quotation. It will ensure that the correct Payment Terms will be printed on Order and Invoice documentation (in the Language of the Customer if necessary) and, in the case of an Invoice, it will be used to calculate the Due Date. You can also use Payment Terms to configure a system of early settlement discounts.
- Valid Until
- Paste Special
Choose date
- The last date of validity of the Quotation. If you need this to be printed on any documentation relating to the Quotation, add the "Valid Until Date" field to your Form Template design.
- Usually, no default Valid Until Date is offered. If you would like a default to be offered, specify a number of days in the Default Valid Days field in the Quotation Settings setting. The default Valid Until Date in every new Quotation will then be Current Date + Valid Until Days.
- Usually, no default Valid Until Date is offered. If you would like a default to be offered, specify a number of days in the Default Valid Days field in the Quotation Settings setting. The default Valid Until Date in every new Quotation will then be Current Date + Valid Until Days.
- Make Contact
- Paste Special
Choose date
- As a reminder, enter the date when you next want to contact the Customer regarding the Quotation.
- You can use the Make Contact Date as a search criterion in the Quotation Journal report: you can therefore use this report to produce daily call sheets.
- Alternatively, you can use Activities both to produce daily 'to do' lists and to maintain contact histories. When you generate an Activity from a Quotation using the 'Workflow Activity' function on the Create menu (Windows/macOS) or + menu (iOS/Android): the Make Contact Date of the Quotation will be copied to the Start Date field in the new Activity. This will ensure that follow-up calls are correctly scheduled. The Activity will appear in the Salesman's Task Manager.
- You can use the Make Contact Date as a search criterion in the Quotation Journal report: you can therefore use this report to produce daily call sheets.
- Decision Date
- Paste Special
Choose date
- The date when the Customer will make or did make their final decision about the Quotation.
- This field will automatically be set to the current date when you mark the Quotation as Accepted or Rejected and saved.
- In Open Quotations, this date will be used by the Pipeline report to predict future monthly sales. The Quotation Forecasting report is a list of Open Quotations sorted by Decision Date, although the Decision Date is not itself shown in the report.
- In Accepted and Rejected Quotations, this date will be used by the Quotation Decision Statistics and the Quotation Salesman Statistics reports, which analyse the time taken for Quotations to be accepted or rejected.
- You must enter a Decision Date if you are using the Require Decision Date option in the Quotation Settings setting.
- This field will automatically be set to the current date when you mark the Quotation as Accepted or Rejected and saved.
- Our Reference
- Use this field if you need to identify the Quotation by means other than the Quotation Number. A default will be taken from the Our Ref field on the 'Sales' card of the Person record of the current user. A Reference entered here will be copied to any Orders and Invoices created from the Quotation.
- Attention
- Paste Special
Contact Persons in Contact register
- Default taken from Contact record for the Customer (Primary Contact)
- Record here the person for whose attention the Quotation is to be marked. The 'Paste Special' function will only list Contact Persons belonging to the specified Customer.
- Record here the person for whose attention the Quotation is to be marked. The 'Paste Special' function will only list Contact Persons belonging to the specified Customer.
- Reference
- Record here any additional code by which the Quotation can be identified. This Reference will be copied to any Orders and Invoices that you create from the Quotation, and from the Invoices to the Reference field in the resulting Nominal Ledger Transactions. When you receive payment against the Invoices, the Reference will be copied to the Reference Number field on flip G of the relevant Receipt row.
- Tags/Objects
- Paste Special
Tag/Object register, Nominal Ledger/System module
- You can assign up to 20 Tags/Objects, separated by commas, to a Quotation. You might define separate Tags/Objects to represent different departments, cost centres or product types. This provides a flexible method of analysis that you can use in Nominal Ledger reports. Usually the Tags/Objects specified here will represent the Customer and the Salesman.
- In the Nominal Ledger Transactions generated from Invoices eventually resulting from a Quotation, any Tags/Objects specified here will be assigned as follows:
- By default, they will be assigned to the credit posting to the Sales Account(s), and, if the Invoices will update the stock valuation in the Nominal Ledger, to the Cost of Sales postings.
These assignments will not occur if you are using the Skip Header A/C Objects on Sales and COS A/C option in the Account Usage S/L setting.
- If you are using the Tags/Objects on Debtor Account option in the same setting, these Tags/Objects will be assigned to the debit posting to the Debtor Account.
- If you are using the Tags/Objects on VAT Account option in the same setting ('VAT / Tax' card), they will be assigned to the credit posting(s) to the Output VAT Account(s).
- Any Sales Tags/Objects specified in the Contact record for the Customer will be copied to here as a default, as will any Tag/Object specified in the Person record for the Salesman. Tags/Objects representing the Branch in which the client machine is located will also be copied here, taken from the Sales Tags/Objects field in the Contact record for the Branch. The Branch itself will be copied from the Local Machine setting in the User Settings module and will be visible on the 'Del. Terms' card of the Quotation.
- In the Nominal Ledger Transactions generated from Invoices eventually resulting from a Quotation, any Tags/Objects specified here will be assigned as follows:
- Salesman
- Paste Special
Person register, System module and Global User register, Technics module
- Default taken from Contact record for the Customer or current user
- Enter the Signature of the Salesman responsible for the Quotation here. You can enter more than one Signature, separated by commas.
- You can produce separate Quotation Journal reports for each Salesman and, once you have converted a Quotation into an Order or Invoice, there are many reports in the Sales Orders and Sales Ledger modules that can be broken down by Salesman. One is the Bonus, Salesman report, which you can use to calculate commission on Items sold, using the Bonus setting in the Sales Ledger, the Bonus % field on the 'Pricing' card of each Item record or the Bonus field on the 'Sales' card of the Person record. If you specified more than one Salesman, the commission will be divided between them.
- Generating an Activity from the Quotation using the 'Workflow Activity' function on the Create menu (Windows/macOS) or + menu (iOS/Android) will place a reminder in the Salesman's Task Manager to call the Customer on the Make Contact Date.
- You can also specify a Salesman or Salesmen in an individual Quotation row (on flip D). If an Invoice results from the Quotation, the Bonus, Salesman report will assign any commission for the row in question to the Salesman specified in the row only (i.e. not to the Salesman specified in the header). However, the 'Workflow Activity' function will not create Activities for the row Salesman, and the Quotation will not be recognised as belonging to the row Salesman by the Limited Access feature.
- This field is also used by the Limited Access feature: please refer to the description of the Sales Group field on the 'Price List' card for details.
- Enter the Signature of the Salesman responsible for the Quotation here. You can enter more than one Signature, separated by commas.
- Project
- Paste Special
Project register, Job Costing module (if installed)
- If you are using the Job Costing module, you can enter a Project Number here to signal that the Quotation is connected to a specific Project. The Customer, Currency and Tags/Objects will be brought in to the Quotation, and the Salesman in the Project or, if that field is blank, the Project Manager 1 will be brought in to the Salesman field in the Quotation.
- If you create an Order from a Quotation that is connected to a Project, you will be able to issue Deliveries from the Order in the usual way, but you will need to raise associated Invoices from the Job Costing module, using the 'Create Project Invoices' Maintenance function.
- You can also create a new Project from a Quotation, using the 'Project' function on the Create menu. This function will copy the Project Number of the new Project to this field automatically. If this field is not empty, the function will not create a new Project.
- Please refer here for more details about connecting Quotations to Projects.
- If you create an Order from a Quotation that is connected to a Project, you will be able to issue Deliveries from the Order in the usual way, but you will need to raise associated Invoices from the Job Costing module, using the 'Create Project Invoices' Maintenance function.
- Quotation Class
- Paste Special
Quotation Classes setting, Quotations module
- Use this field to assign an optional Quotation Class to the Quotation. Quotation Classes allow you to categorise Quotations for reporting or prioritising. One use might be to distinguish those that are open, won or lost.
- When you convert a Quotation into an Order, you can choose to have the Quotation Class copied to the Order Class field in the new Order. Do this by selecting the Transfer Quotation Class to Order option in the Order Settings setting (Sales Orders module).
- You must enter a Quotation Class if you are using the Require Quotation Class option in the Quotation Settings setting.
- If you are using the Workflow Overview to monitor the progress of Quotations, you will be able to display the Open Quotations belonging to each Class in separate columns. You will be able to change the Class in Quotations by dragging them between columns, and you will also be able to create Orders from Quotations by dragging and dropping.
- When you convert a Quotation into an Order, you can choose to have the Quotation Class copied to the Order Class field in the new Order. Do this by selecting the Transfer Quotation Class to Order option in the Order Settings setting (Sales Orders module).
- Probability
- Use this field to record the percentage probability that an Order will result from the Quotation. This figure will be used by the Quotation Forecasting report, and also by the Forecast report in the Sales Orders module. If you leave this field blank, the probability will be assumed to be 100% in these reports.
- If you change the Status of the Quotation to Accepted or create an Order or Invoice from a Quotation, the Probability will be set to 100%. If you change the Status to Rejected, the Probability will be set to 0%.
- If you change the Status of the Quotation to Accepted or create an Order or Invoice from a Quotation, the Probability will be set to 100%. If you change the Status to Rejected, the Probability will be set to 0%.
- Priority
- You can use this field to grade the importance of each Quotation. This is for information only.
- Status
- At any time a Quotation can be in one of three states, to help with the work flow and for reporting purposes. These states are as follows:
- Open
- When you first enter a Quotation, it will be marked as Open. You can use the Outstanding Quotations report (previously known as the Quotation Stock report) to list Open Quotations.
- Only Open Quotations will be shown in the Workflow Overview.
- Only Open Quotations will be shown in the Workflow Overview.
- Accepted
- When the Customer agrees to go ahead with a Quotation, you should mark it as Accepted. The Probability will be changed to 100%, and the current date will be placed in the Decision Date field.
- If you create an Order or an Invoice from a Quotation, the Quotation will be marked as Accepted automatically.
- You can have a text (SMS) message sent automatically to the Customer whenever you mark a Quotation as Accepted and save it, to confirm that you have received their acceptance of the Quotation. You can also have a text (SMS) message sent automatically to a responsible member of staff. Please refer to the Contact Quotation Alerts page (for the message to the Customer) and the Internal Quotation Alerts page (for the message to the member of staff) for details about these features.
- If you create an Order or an Invoice from a Quotation, the Quotation will be marked as Accepted automatically.
- Rejected
- When the Customer decides not to go ahead with a Quotation, you should mark it as Rejected. The Probability (below) will be changed to 0%, and the current date will be placed in the Decision Date field. You cannot create Orders or Invoices from Rejected Quotations.
- If you need Quotations to pass through an approval process before they can be marked as Accepted or Rejected, you can configure such a process using the Approval Rules register in the Business Alerts module. Please refer to the description of the Approval Status field on the 'Inv. Address' card for brief details about the approval process and here for full details.
- Open
- Closed
- Tick this box when the Quotation is no longer required. You cannot create Orders and Invoices from Closed Quotations, which will be excluded from all reports.
- In most circumstances, when a Customer decides not to go ahead with a Quotation, you should mark it as Rejected and not Closed. This will mean the Quotation Decision Statistics report will use it in calculating an average acceptance rate (the percentage of Quotations that are converted to Orders). Closed Quotations are not included in this calculation, so marking Rejected Quotations as Closed will mean the result of the calculation will be inaccurate.
The Quotation register in Standard ERP:
- Introduction
- Entering a Quotation, including:
- Header
- 'Terms' card
- 'Items' card Part 1 (Flips A-F)
- 'Items' card Part 2 (Footer)
- 'Currency' card
- 'Del. Terms' card
- 'Price List' card
- 'Inv. Address' card
- 'Del. Address' card
- 'Job Costing' card
- Header
- Controlling Prices in Quotations
- Inspecting and Changing Quotations
- Printing Quotations
- Operations Menu
- Create Menu
- Row Menu
- Home page for Quotations module manual
- Home page for Standard ERP manual
Entering a Quotation - Items Card (Flips A-F)
This page describes the fields on flips A-F of the 'Items' card of the Quotation record. Please follow the links below for descriptions of the other cards:- Header
- 'Terms' card
- 'Items' card Part 1 (Flips A-F)
- 'Items' card Part 2 (Footer)
- 'Currency' card
- 'Del. Terms' card
- 'Price List' card
- 'Inv. Address' card
- 'Del. Address' card
- 'Job Costing' card

If you are using Windows or Mac OS X, you can add rows to a Quotation, click in any field in the first blank row and enter appropriate text. To remove a row, click on the row number on the left of the row and press the Backspace key. To insert a row, click on the row number where the insertion is to be made and press Return.
You can also bring Items into a Quotation by opening the 'Items: Browse' window, selecting a range of Items by clicking while holding down the Shift key, and dragging them to the Item field in the first empty Quotation row. You can copy a list of Item Numbers from a spreadsheet or word processor and paste them in the Item field in the first empty row. Finally, you can use the 'Item Search' function on the Operations menu to add Items to the Quotation.
If you are using iOS or Android, you can add rows by tapping the + button below the matrix. To remove a row, long tap on the row number on the left of the row and select 'Delete Row' from the resulting menu. To insert a row, long tap on the row number where the insertion is to be made and select 'Insert Row' from the resulting menu.
Flip A
- Item
- Paste Special
Item register
- With the insertion point in this field, enter the Item Number, Alternative Code or Bar Code for each Item included in the Quotation. Pricing, descriptive and other information will be brought in from the Item record. If you leave this field blank, you can enter a short piece of text in the Description field, perhaps using the row for additional comments to be printed on Quotation documentation.
- If the Item is a Structured Item in which you have ticked the Paste Components during Entry box, its components will be listed on the following rows when you enter a Quantity. If you then change the Quantity of the Structured Item, the Quantities of the components will be updated automatically.
- You can use Access Groups to prevent users from selling Items of a particular Type. Assign them an Access Group in which you have granted Full access to the 'Disallow Sales of Plain Items', 'Disallow Sales of Stocked Items', 'Disallow Sales of Structured Items' and/or 'Disallow Sales of Service Items' Actions as necessary.
- If the Item is a Structured Item in which you have ticked the Paste Components during Entry box, its components will be listed on the following rows when you enter a Quantity. If you then change the Quantity of the Structured Item, the Quantities of the components will be updated automatically.
- Qty
- Enter the number of units offered. The Sum will then be calculated automatically.
- After entering a Quantity, pressing the Enter or Return key will cause the insertion point to move to the Item field in the next row. This will allow you to choose the next Item immediately.
- After entering a Quantity, pressing the Enter or Return key will cause the insertion point to move to the Item field in the next row. This will allow you to choose the next Item immediately.
- Description
- Default taken from
Item
- This field contains the name of the Item, brought in from the Item register. Usually, it will be the Item's Description that is brought in but, if you have entered various translations of the Description on the 'Texts' card of the Item record, the correct translation for the Language of the Quotation (specified on the 'Price List' card) will be brought in instead.
- In addition to the Description or its translation, any rows of text that you have entered on the 'Texts' card of the Item record without a Language will be brought in to the following rows of the Quotation, as shown in rows 5 and 6 in the illustration below.
If you want to add an extra description, you can do so: there is room for up to 100 characters of text. If you need more space, you can continue on the following lines.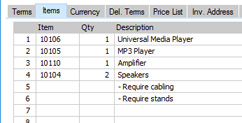
- You can prevent certain users from changing any Description in a Quotation using Access Groups, by denying them access to the 'Change Item Description on Quotation' Action. Separate similar Actions are available for Orders, Deliveries and Invoices.
- In addition to the Description or its translation, any rows of text that you have entered on the 'Texts' card of the Item record without a Language will be brought in to the following rows of the Quotation, as shown in rows 5 and 6 in the illustration below.
- Unit Price
- The Unit Price of the Item according to the Customer's Price List will be brought in when you specify the Item Number. If the Customer does not have a Price List, or the Item is not on the Price List in question, the Base Price from the Item record will be brought in instead. If there is a Price List applying to a Quotation, it will be shown on the 'Price List' card.
- The maximum number of decimal places that you can use in a Unit Price is three. If you need more decimal places, use the Unit Price in combination with the Price Factor on flip D.
- This figure will include VAT (and Extra Tax) if the Price List is one that is Inclusive of VAT or if you have specified on the 'VAT / Tax' card of the Account Usage S/L setting in the Sales Ledger that Base Prices include VAT (or VAT and Extra Tax).
- If the Quotation has a Currency and Exchange Rate, the figure shown will be in the Currency concerned (i.e. having undergone currency conversion).
- Please refer to the Controlling Prices in Quotations page for details about how you can control access to this field and otherwise control pricing in Quotations.
- The maximum number of decimal places that you can use in a Unit Price is three. If you need more decimal places, use the Unit Price in combination with the Price Factor on flip D.
- %
- If you need to offer the Customer a discount on an Item, enter the discount percentage in this field.
- A discount percentage will be brought in to this field automatically if you are using Discount Matrices and if there is a Discount Matrix that includes the Item applying to the Quotation. Discount Matrices allow you to offer quantity discounts based on the value, quantity, weight or volume of each Item sold, so the discount percentage will be recalculated whenever you change the Quantity. If there is a Discount Matrix applying to a Quotation, it will be shown on the 'Price List' card.
- If the Discount Matrix is one that calculates quantity discounts based on Item Group quantities rather than Item quantities, the calculated discount may become incorrect if you specify another Item belonging to the same Item Group in a later row in the Quotation. To cater for this, be sure to select 'Recalculate Discount' from the Operations menu (Windows/Mac OS X) or Tools menu (iOS/Android) when the Quotation is complete. This will recalculate the discount percentage for each Item in the Quotation.
- Please refer here for more details about Discount Matrices.
- The Discount Calculation options in the Round Off setting in the System module allow you to determine whether the discount is to be applied to the Unit Price before it has been multiplied by the Quantity, or to the Sum. In certain circumstances (where there is a very small Unit Price and a large Quantity) this choice can cause the calculated discount to vary due to rounding. Please refer here for details and an example.
- The percentage entered here can act as a discount, margin factor or markup. This is controlled using the Discount Options setting in the System module.
- You can prevent certain users from changing a Discount in any Quotation, Invoice or Order row using Access Groups, by denying them access to the same 'Change Unit Prices' Action that also controls access to the Unit Price field immediately above.
- Please refer to the Controlling Prices in Quotations page for details about how you can control access to this field and otherwise control pricing in Quotations.
- A discount percentage will be brought in to this field automatically if you are using Discount Matrices and if there is a Discount Matrix that includes the Item applying to the Quotation. Discount Matrices allow you to offer quantity discounts based on the value, quantity, weight or volume of each Item sold, so the discount percentage will be recalculated whenever you change the Quantity. If there is a Discount Matrix applying to a Quotation, it will be shown on the 'Price List' card.
- Sum
- The total for the row: Quantity multiplied by Unit Price less Discount. Changing this figure will cause the Discount Percentage to be recalculated. This figure will include VAT (and TAX) if the Price List specified is one that is Inclusive of VAT or if you have specified on the 'VAT / Tax' card of the Account Usage S/L setting that Base Prices include VAT (or VAT and TAX).
- This figure will be rounded up or down according to the Row Sum rounding rules set for the Currency/Payment Term combination in the Currency Round Off setting in the System module. If that setting does not contain an entry for that combination, the Row Sum rounding rules in the Round Off setting also in the System module will be applied.
- Please refer to the Controlling Prices in Quotations page for details about how you can control access to this field and otherwise control pricing in Quotations.
- If you are using the Disallow Negative Row Sums on Sales option in the Account Usage S/L setting in the Sales Ledger, you will not be able to save a Quotation if the Sum in any row is negative.
- This figure will be rounded up or down according to the Row Sum rounding rules set for the Currency/Payment Term combination in the Currency Round Off setting in the System module. If that setting does not contain an entry for that combination, the Row Sum rounding rules in the Round Off setting also in the System module will be applied.
Flip B
- Cust. Item No.
- If you know the Customer's code for the Item (i.e. the Customer's equivalent of the Item Number), you can enter it in this field. For a more permanent record, you can enter this code in the Customer Items setting in the Sales Orders module. After having done so, it will be brought in to this field in future Quotations automatically.
- If you need this code to be printed on Quotation documentation, add the "Customer Item Code" field to the Form Template.
- If you need this code to be printed on Quotation documentation, add the "Customer Item Code" field to the Form Template.
- A/C
- Paste Special
Account register, Nominal Ledger/System module
- The Sales Account specified here will be credited with the Sum in the Nominal Ledger Transactions generated from any Invoices that will eventually result from the Quotation. Sales Accounts are used to record the levels of sales of different types of Items in the Nominal Ledger.
- Please refer here for details about how the Sales Account in each row will be chosen.
- Please refer here for details about how the Sales Account in each row will be chosen.
- Tags/Objects
- Paste Special
Tag/Object register, Nominal Ledger/System module
- Default taken from Item or Item Group
- You can assign up to 20 Tags/Objects, separated by commas, to a Quotation row. You might define separate Tags/Objects to represent different departments, cost centres or product types. This provides a flexible method of analysis that you can use in Nominal Ledger reports. Usually the Tags/Objects specified here will represent the Item.
- The Tags/Objects that you specify here will be transferred to the Nominal Ledger Transactions that will be generated from any Invoices eventually raised from the Quotation. In those Transactions, these Tags/Objects will be assigned to the credit postings to the Sales Account and, if the Invoices will update the stock valuation in the Nominal Ledger, to the cost of sales postings. This assignment will merge these Tags/Objects with those of the parent Quotation (shown on the 'Terms' card).
- The Tags/Objects specified here will also be transferred to the corresponding row of any Delivery eventually resulting from the Quotation row. They will then be assigned to the debit posting to the Cost Account (Cost of Sales Account) in any Nominal Ledger Transaction generated from that Delivery. They will also be assigned to the credit posting to the Stock Account if you are using the Tag/Object on Stock Account option in the Cost Accounting setting.
- You can assign up to 20 Tags/Objects, separated by commas, to a Quotation row. You might define separate Tags/Objects to represent different departments, cost centres or product types. This provides a flexible method of analysis that you can use in Nominal Ledger reports. Usually the Tags/Objects specified here will represent the Item.
- V-Cd
- Paste Special
VAT Codes setting, Nominal Ledger
- In any Invoice that results from a Quotation, the VAT Code entered here will determine the rate at which VAT will be charged on the Item and the VAT Account that will be credited with the VAT value.
- Please refer here for details about how the VAT Code in each row will be chosen.
- Please refer here for details about how the VAT Code in each row will be chosen.
- Rvrs
- Default taken from
Item (Reverse VAT Code)
- If an Item is one that you will sell on a reverse charge VAT basis to a Customer in the Domestic VAT Zone, the Reverse Charge VAT Code will be placed in this field, copied from the Item record. Please refer to the Reverse Charge VAT in Sales Invoices page for more information. This field will only be visible in Lithuania, Poland and the UK (i.e. when the VAT Law in the Company Info setting is "Lithuanian", "Polish" or "Default").
- T-Cd
- Paste Special
Tax Templates setting, Nominal Ledger
- In some countries, Tax Templates are used instead of VAT Codes to determine the rate at which VAT or sales tax will be charged on the Item and the Output VAT Account that will be credited with the VAT or sales tax value. VAT Codes should be used where each sales and purchase transaction (e.g. each row in a Quotation) is taxed at a single rate, while Tax Templates should be used where different taxes and/or several tax rates are applied to one transaction (e.g. to one row).
- If you need to use Tax Templates, you should choose the Use Tax Templates for Tax Calculation option in the Transaction Settings setting in the Nominal Ledger. This option will cause a Tax Template field ("T-Cd") to appear here instead of the VAT Code field ("V-Cd"). Having done so and having entered your Tax Templates in the Tax Templates setting also in the Nominal Ledger, you should specify the Tax Templates that are to be used in each Quotation row here.
- Please refer here for details about how the Tax Template in each row will be chosen.
- If you need to use Tax Templates, you should choose the Use Tax Templates for Tax Calculation option in the Transaction Settings setting in the Nominal Ledger. This option will cause a Tax Template field ("T-Cd") to appear here instead of the VAT Code field ("V-Cd"). Having done so and having entered your Tax Templates in the Tax Templates setting also in the Nominal Ledger, you should specify the Tax Templates that are to be used in each Quotation row here.
Flip C
- Cost
- The unit Cost Price of the Item will be used in Gross Profit and Margin calculations.
- The default offered in each row will be chosen as follows:
- If the Price List of the Quotation is one whose Type is "BuyBack", the Cost Price will be taken from the record in the Price register for the Item/Price List/Customer combination.
- The Cost Price from the Item record will be used.
If you need the figure that is brought in to be the Cost Price of the Item plus its Extra Cost, select the Include Item Extra Cost in Cost option in the Cost Accounting setting in the Stock module.
If you duplicate a Quotation, the new Quotation will contain the latest Cost Price from the Item register, and the Gross Profit will be recalculated accordingly. The Cost Price in the original Quotation will not be transferred to the new Quotation.
- You can prevent certain users from viewing Cost Prices in Quotations, Orders and Invoices using Access Groups, by denying them access to the 'View Item's Cost Price' Action. In a Quotation, this will hide the Cost field, the GP field immediately below and the GP % and Total GP fields in the footer.
- The default offered in each row will be chosen as follows:
- GP
- The Gross Profit for the Quotation row is calculated by subtracting the Cost Price (multiplied by the Quantity) from the Sum. The figure is therefore absolute, not a percentage. You cannot change this figure yourself, but it will be recalculated if you change the Unit or Cost Price or the % discount.
Flip D
- Salesmen
- Paste Special
Person register, System module and Global User register, Technics module
- If necessary, you can specify a different Salesman or Salesmen (separated by commas) for each row of the Quotation.
- From any Invoices created from the Quotation, the Bonus, Salesman report will assign any commission for the corresponding row in the Invoice to the Salesman specified in the row only (i.e. not to the Salesman specified in the header).
- The 'Workflow Activity' function will not create Activities for the row Salesmen, and the Quotation will not be recognised as belonging to the row Salesmen by the Limited Access feature.
- From any Invoices created from the Quotation, the Bonus, Salesman report will assign any commission for the corresponding row in the Invoice to the Salesman specified in the row only (i.e. not to the Salesman specified in the header).
- Invoiced
- This field displays the quantity invoiced from the Quotation row. It will be updated automatically when you create Invoices directly from the Quotation (i.e. not when you create Invoices from Orders that result from the Quotation). The figure will be calculated from all Invoices, including those that have not yet been marked as OK.
- If you delete or invalidate an Invoice related to the Quotation, the Invoiced Quantity in the relevant Quotation rows will be updated automatically.
- If you credit an Invoice related to the Quotation, the Invoiced Quantity will be updated automatically providing you create the Credit Note using the following methods:
- You create the Credit Note by duplicating the original Invoice, and you enter the appropriate Payment Term and the number of the Invoice to be credited before you save the Credit Note for the first time.
- You create the Credit Note by selecting 'Credit Note' from the Create menu (Windows/Mac OS X) or + menu (iOS/Android) from the original Invoice or from the relevant Returned Goods record.
If you create the Credit Note by entering a new record to the Invoice register, the Invoiced Quantity figure in the originating Quotation will not be updated. This is because the Credit Note will not be connected to the Quotation.
- If you are using the Disallow Invoicing more than Quoted option on the card of the Quotation, it will use the Invoiced Quantity figure in each row to prevent the creation of too many Invoices.
- If you delete or invalidate an Invoice related to the Quotation, the Invoiced Quantity in the relevant Quotation rows will be updated automatically.
- Price Factor
- Default taken from
Item
- The Price Factor is the quantity of the Item that can be bought by the Unit Price. For example, if the Unit Price of an Item refers to a box of 24 units, its Price Factor will be 24. Specifying a Price Factor for such an Item is only necessary if it will be sold in individual units (e.g. if you will break into the box of 24 to sell a single unit). The Price Factor will be used to calculate the price of a single unit (in this example, the Price Factor will be 24).
- When you use an Item with a Price Factor in a Quotation row, the Quantity that you specify on flip A should be the quantity of individual units, not the quantity of boxes. When you enter a Quantity, the Sum will be calculated using the formula (Quantity/Price Factor) * Unit Price.
- The Unit Price field on flip A (and the Base Price field in the Item record) can only support three decimal places. Using a Price Factor can be useful if you need to use more. For example, if the price per unit is 0.0001, you can enter 0.01 as the Unit Price and 100 as the Price Factor. This will result in a Sum of 0.0001 when the quantity is one.
- When you use an Item with a Price Factor in a Quotation row, the Quantity that you specify on flip A should be the quantity of individual units, not the quantity of boxes. When you enter a Quantity, the Sum will be calculated using the formula (Quantity/Price Factor) * Unit Price.
- Recipe
- Default taken from
Item
- If the Item is a Structured Item whose Paste Components During Entry box has not been ticked, its Recipe will be recorded here, brought in from the Item record. A Structured Item is essentially an Item that is assembled by your company on the point of delivery from components held in stock: its Recipe lists those components with quantities. You should not change the contents of this field. Please refer here for more details about Recipes.
Flip E
- Unit, Unit Qty, Unit Pr. of Unit
- These fields allow you to quote for an Item using a different Unit to the one specified on the 'Pricing' card of the Item record.
- If you enter a Unit that has a Qty Factor here, the Quantity and pricing for the Quotation row will change accordingly. For example, an Item is usually sold in single units. If you sell two dozen of them, you can enter the Unit representing one dozen (i.e. one whose Qty Factor is "12") in this Unit field and "2" in the Unit Qty field. The Quantity on flip A will change to "24" (i.e. 2 x 12) and the pricing will be adjusted accordingly. The Unit Price of Unit field will show the price for one dozen (i.e. the price of one of the new Unit).
- Use 'Paste Special' from the Unit field to choose from a list of Units.
- If you enter a Unit that has a Qty Factor here, the Quantity and pricing for the Quotation row will change accordingly. For example, an Item is usually sold in single units. If you sell two dozen of them, you can enter the Unit representing one dozen (i.e. one whose Qty Factor is "12") in this Unit field and "2" in the Unit Qty field. The Quantity on flip A will change to "24" (i.e. 2 x 12) and the pricing will be adjusted accordingly. The Unit Price of Unit field will show the price for one dozen (i.e. the price of one of the new Unit).
- Width, Height, Depth
- Default taken from
Item
- These fields contain the dimensions of the Item. You can use them together with the Unit Qty field if the Item is sold by area or volume. Please refer to the description of the Units setting for details and an example.
Flip F
- Inv. After
- Paste Special
Choose date
- As an option, you can enter here the earliest date when the row can be included in an Invoice that you create directly from the Quotation (using the 'Invoice' function on the Create menu).
- Inv. Date, Inv. No.
- These fields will display the Invoice Date and Number of the most recent Invoice raised from the Quotation using the 'Invoice' function on the Create menu. If you delete or invalidate the Invoice, the Invoice Date and Number will be removed from these fields. If you credit the Invoice, the Invoice Date and Number of the Credit Note will be copied to these fields.
---
The Quotation register in Standard ERP:
- Introduction
- Entering a Quotation, including:
- Header
- 'Terms' card
- 'Items' card Part 1 (Flips A-F)
- 'Items' card Part 2 (Footer)
- 'Currency' card
- 'Del. Terms' card
- 'Price List' card
- 'Inv. Address' card
- 'Del. Address' card
- 'Job Costing' card
- Header
- Controlling Prices in Quotations
- Inspecting and Changing Quotations
- Printing Quotations
- Operations Menu
- Create Menu
- Row Menu
- Home page for Quotations module manual
- Home page for Standard ERP manual
Entering a Quotation - Items Card (Footer)
This page describes the fields in the footer of the 'Items' card of the Quotation record. Please follow the links below for descriptions of the other cards:- Header
- 'Terms' card
- 'Items' card Part 1 (Flips A-F)
- 'Items' card Part 2 (Footer)
- 'Currency' card
- 'Del. Terms' card
- 'Price List' card
- 'Inv. Address' card
- 'Del. Address' card
- 'Job Costing' card

- Currency
- Paste Special
Currency register, System module
- Default taken from Contact record for the Customer (Sales Currency) or Default Base Currency
- The Currency of the Quotation: the exchange rate is shown on the 'Currency' card where you can change it for an individual Quotation if necessary. Leave the field blank to use your home Currency (unless you have set a Default Base Currency, in which case this will be offered as a default and should be treated as your home Currency).
- If the Contact record for the Customer has a Sales Currency specified on the 'Pricing' card, you can only use that Currency. Otherwise, you can use any Currency.
- If you change the Currency after adding Items to the Quotation, the prices of those Items will be converted automatically and immediately using the appropriate Exchange Rate for the date of the Quotation. However, if you change the Exchange Rate, prices already in the Quotation will not be recalculated automatically. To have prices recalculated in this situation, use the 'Update Currency Price List Items' function on the Operations menu (Windows/Mac OS X) or Tools menu (iOS/Android). If you change the Quotation Date and the Exchange Rate changes as a consequence, prices will be recalculated automatically if you are using the Update Prices on records with Currency when changing Dates option in the Item Settings setting in the Sales Ledger.
- The Currency of the Quotation: the exchange rate is shown on the 'Currency' card where you can change it for an individual Quotation if necessary. Leave the field blank to use your home Currency (unless you have set a Default Base Currency, in which case this will be offered as a default and should be treated as your home Currency).
- GP%
- The overall gross profit for the Quotation, shown as a percentage.
- You can prevent certain users from viewing the GP % in Quotations, Orders and Invoices using Access Groups, by denying them access to the 'View Item's Cost Price' Action. In a Quotation, this will hide the GP % field, the Total GP field immediately below and the Cost Price and GP fields on flip C of the matrix.
- You can prevent certain users from viewing the GP % in Quotations, Orders and Invoices using Access Groups, by denying them access to the 'View Item's Cost Price' Action. In a Quotation, this will hide the GP % field, the Total GP field immediately below and the Cost Price and GP fields on flip C of the matrix.
- Total GP
- The total gross profit for the Quotation.
- Reverse VAT
- If the Quotation contains any Items that you will sell on a reverse charge VAT basis to a Customer in the Domestic VAT Zone, the value of the VAT that the Customer should pay to the tax authority on the reverse charge basis will be placed in this field. Please refer to the Reverse Charge VAT in Sales Invoices' page for more information. This field will only be visible in Lithuania, Poland and the UK (i.e. when the VAT Law in the Company Info setting is "Lithuanian", "Polish" or "Default").
- TAX2
- This field is used in Argentina.
- If the Quotation has a Region on its 'Inv. Address' card, and the Region is one where a Regional Perception Tax is charged on at least one of the Items on the Quotation, the amount of that tax will be shown in this field, in the Currency of the Quotation. That amount will be recalculated as you add Items to the Quotation.
- When you eventually create, mark as OK and save an Invoice from the Quotation, the TAX2 will be credited to the Account specified in the appropriate Regional Perception Tax record. If you have specified a Min. (minimum Regional Perception Tax amount), and the TAX2 in a Quotation is less than this minimum amount, this field will be blank. This field will also be blank if the Customer is one whose No Region Perceptions box has been ticked ('Terms' card).
- This field will not be visible in Lithuania, Poland and the UK (i.e. when the VAT Law in the Company Info setting is "Lithuanian", "Polish" or "Default").
- If the Quotation has a Region on its 'Inv. Address' card, and the Region is one where a Regional Perception Tax is charged on at least one of the Items on the Quotation, the amount of that tax will be shown in this field, in the Currency of the Quotation. That amount will be recalculated as you add Items to the Quotation.
- Ext. Tax
- When you define VAT Code records using the setting in the Nominal Ledger, you can use the fields on flip B to specify that an additional tax, such as an environmental tax, is to be levied. This additional tax is usually termed "Extra Tax".
- If the VAT Code of any of the rows of the Quotation is one that you have configured to include Extra Tax, the amount of that tax will be shown in this field, in the Currency of the Quotation. That amount will be recalculated as you add Items to the Quotation.
- When you eventually create, mark as OK and save an Invoice from the Quotation, this Extra Tax will be credited to the Tax Account specified for the appropriate VAT Code. The debit posting will depend on whether you are using the Total not including Ext. Tax option on the 'VAT / Tax' card of the Account Usage S/L setting. If you are not using this option, the Extra Tax will be included in the TOTAL of the Invoice and will therefore be included in the debit posting to the Debtor Account. If you are using this option, the Extra Tax will not be included in the TOTAL, and it will be debited to the Tax on Sales Account, also as specified on the 'VAT / Tax' card of the Account Usage S/L setting. You will therefore need to use this option if the Extra Tax is one that will not be paid by Customers.
- If you have specified a Tax Min. (minimum Extra Tax amount) for a VAT Code, and the Extra Tax in a Quotation is less than this minimum amount, this field will be blank. This field will also be blank if the Customer is one whose No Extra Tax box has been ticked ('Terms' card).
- Please refer to the description of flip B of the VAT Codes setting for more details about how the Extra Tax figure is calculated together with examples.
- If the VAT Code of any of the rows of the Quotation is one that you have configured to include Extra Tax, the amount of that tax will be shown in this field, in the Currency of the Quotation. That amount will be recalculated as you add Items to the Quotation.
- VAT, Tax
- The VAT total for the Quotation (or tax total if you are using the Use Tax Templates for Tax Calculation option in the Transaction Settings setting in Nominal Ledger).
- This figure will be rounded up or down according to the Default for Calculated Values rounding rules set in the Round Off setting in the System module.
- This figure will be rounded up or down according to the Default for Calculated Values rounding rules set in the Round Off setting in the System module.
- Base
- The Base is the Quotation total including VAT in your home Currency (or in Base Currency 1 as defined in the Base Currency setting in the System Module). The field will not be used if the Currency of the Quotation is blank.
- Subtotal
- The total value of the Quotation rows (i.e. the total of the values in the Sum field).
- This figure will include VAT (and TAX) if the Price List specified is one that is Inclusive of VAT or if you have specified on the 'VAT / Tax' card of the Account Usage S/L setting that Base Prices include VAT (or VAT and TAX).
- This figure will be rounded up or down according to the Default for Calculated Values rounding rules in the Round Off setting in the System module.
- This figure will include VAT (and TAX) if the Price List specified is one that is Inclusive of VAT or if you have specified on the 'VAT / Tax' card of the Account Usage S/L setting that Base Prices include VAT (or VAT and TAX).
- TOTAL
- The total for the Quotation, including VAT.
- This figure will be rounded up or down according to the Total rounding rules set for the Currency/Payment Term combination in the Currency Round Off setting in the System module. If that setting does not contain an entry for that combination, the Total rounding rules in the Round Off setting also in the System module will be applied.
- If you are using the Disallow Negative Totals on Sales option in the Account Usage S/L setting, you will not be able to save a Quotation if the TOTAL is negative.
- This figure will be rounded up or down according to the Total rounding rules set for the Currency/Payment Term combination in the Currency Round Off setting in the System module. If that setting does not contain an entry for that combination, the Total rounding rules in the Round Off setting also in the System module will be applied.
The Quotation register in Standard ERP:
- Introduction
- Entering a Quotation, including:
- Header
- 'Terms' card
- 'Items' card Part 1 (Flips A-F)
- 'Items' card Part 2 (Footer)
- 'Currency' card
- 'Del. Terms' card
- 'Price List' card
- 'Inv. Address' card
- 'Del. Address' card
- 'Job Costing' card
- Header
- Controlling Prices in Quotations
- Inspecting and Changing Quotations
- Printing Quotations
- Operations Menu
- Create Menu
- Row Menu
- Home page for Quotations module manual
- Home page for Standard ERP manual
Entering a Quotation - Currency Card
This page describes the fields on the 'Currency' card of the Quotation record. Please follow the links below for descriptions of the other cards:- Header
- 'Terms' card
- 'Items' card Part 1 (Flips A-F)
- 'Items' card Part 2 (Footer)
- 'Currency' card
- 'Del. Terms' card
- 'Price List' card
- 'Inv. Address' card
- 'Del. Address' card
- 'Job Costing' card

- Currency
- Paste Special
Currency register, System module
- Default taken from Contact record for the Customer (Sales Currency) or Default Base Currency
- The Currency of the Quotation (also shown in the footer of the 'Items' card) is shown together with the exchange rate which can be modified only for this particular Quotation if necessary. Leave the field blank to use the home Currency (unless you have set a Default Base Currency, in which case this will be offered as a default and should be treated as your home Currency).
- If you change the Currency after adding Items to the Quotation, the prices of those Items will be converted automatically and immediately using the appropriate exchange rate for the date of the Quotation. However, if you change the exchange rate, prices already in the Quotation will not be recalculated automatically. To have prices recalculated in this situation, use the 'Update Currency Price List Items' function on the Operations menu (Windows/Mac OS X) or Tools menu (iOS/Android). If you change the Quotation Date and the Exchange Rate changes as a consequence, prices will be recalculated automatically if you are using the Update Prices on records with Currency when changing Dates option in the Item Settings setting in the Sales Ledger.
- The Currency of the Quotation (also shown in the footer of the 'Items' card) is shown together with the exchange rate which can be modified only for this particular Quotation if necessary. Leave the field blank to use the home Currency (unless you have set a Default Base Currency, in which case this will be offered as a default and should be treated as your home Currency).
- Exchange Rates
- Default taken from
Base Currency Rates setting and/or Exchange Rate register, System module
- By default, these fields will display the exchange rates for the specified Currency on the Quotation Date. Ensure that these rates are correct before adding Items to the Quotation to ensure the correct currency conversion takes place.
- If you change the Quotation Date, the exchange rates will change automatically. The prices of any Items already in the Quotation will be updated automatically and immediately, providing you are using the Update Prices on records with Currency when changing Dates option in the Item Settings setting in the Sales Ledger.
- You can also change the exchange rates in an individual Quotation yourself. In this case, the prices of any Items already in the Quotation will not be updated, so you will need to use the 'Update Currency Price List Items' function on the Operations menu (Windows/Mac OS X) or Tools menu (iOS/Android) to update all prices in the Quotation.
- If you wish to prevent the changing of exchange rates, select the Prevent Base Rate Changes and/or Prevent Foreign Rate Changes options in each Currency record. If you are using these options, the exchange rates in a Quotation will still be changed if you change the Quotation Date.
- One of two conversion methods will be used to calculate prices in Currency. The Dual-Base system will be useful for companies that have offices in two countries that need to report in both Currencies, for companies operating in countries where there is a second Currency (usually the US Dollar or Euro) in common use in addition to the national one, and for companies in the Euro zone who retain their old national Currency for comparison purposes. The second method is a simple conversion from the foreign Currency to the home Currency, applicable to the majority of worldwide Currency transactions. These are described below.
- Exchange Rates (Dual-Base System)
- In the example illustrated above, the Currency of the Quotation is the Euro. Base Currency 1 is the home Currency (GBP, Pounds Sterling) and Base Currency 2 is the Euro. The fields on the left show in the form of a ratio the exchange rate between the two base Currencies (taken from the record in the Base Currency Rates setting that applies on the Quotation Date). The illustration shows that GBP0.63 buys one Euro.
- Note that European Monetary Union (EMU) regulations specify that the ratios must always show how many units of the home or foreign Currency can be bought with one Euro.
- Note that European Monetary Union (EMU) regulations specify that the ratios must always show how many units of the home or foreign Currency can be bought with one Euro.
- Exchange Rates (Simple Currency Conversion System)
- In the case of a simple currency conversion system, the Rate and right-hand Base Currency 1 fields are used to show a simple exchange rate between the foreign and home Currencies. In the example illustrated below, the home Currency is US Dollars (USD) and the foreign Currency Japanese Yen (JPY). JPY122.15 buys USD1.00.
- If you change the Quotation Date, the exchange rates will change automatically. The prices of any Items already in the Quotation will be updated automatically and immediately, providing you are using the Update Prices on records with Currency when changing Dates option in the Item Settings setting in the Sales Ledger.

- Please refer here for further examples.
The Quotation register in Standard ERP:
- Introduction
- Entering a Quotation, including:
- Header
- 'Terms' card
- 'Items' card Part 1 (Flips A-F)
- 'Items' card Part 2 (Footer)
- 'Currency' card
- 'Del. Terms' card
- 'Price List' card
- 'Inv. Address' card
- 'Del. Address' card
- 'Job Costing' card
- Header
- Controlling Prices in Quotations
- Inspecting and Changing Quotations
- Printing Quotations
- Operations Menu
- Create Menu
- Row Menu
- Home page for Quotations module manual
- Home page for Standard ERP manual
Entering a Quotation - Del. Terms Card
This page describes the fields on the 'Del. Terms' card of the Quotation record. Please follow the links below for descriptions of the other cards:- Header
- 'Terms' card
- 'Items' card Part 1 (Flips A-F)
- 'Items' card Part 2 (Footer)
- 'Currency' card
- 'Del. Terms' card
- 'Price List' card
- 'Inv. Address' card
- 'Del. Address' card
- 'Job Costing' card
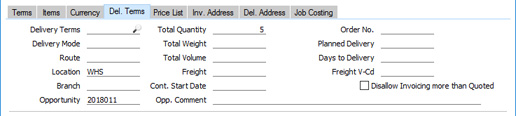
- Delivery Terms
- Paste Special
Delivery Terms setting, Sales/Purchase Orders module
- Default taken from Contact record for the Customer (Sales Del. Terms)
- Specify the Delivery Terms for the Quotation here. You will tend to use this field for international Customers: examples might be Cost, Insurance, Freight or Free On Board.
- In each Delivery Term record. you can enter a description in your home Language and in various translations. When you print the Quotation, the correct translation for the Language for the Quotation (shown on the 'Price List' card) will be printed in the "Delivery Term Text (shiptermtext)" field, assuming you have included that field in your Form Template design.
- Specify the Delivery Terms for the Quotation here. You will tend to use this field for international Customers: examples might be Cost, Insurance, Freight or Free On Board.
- Delivery Mode
- Paste Special
Delivery Modes setting, Sales Orders module
- Default taken from Contact record for the Customer (Sales Del. Mode)
- Enter the mode of shipping used for the Quotation. Examples might be Post or Courier, or might specify the name of the courier that you will eventually use to supply the goods on the Quotation.
- In each Delivery Mode record, you can enter a description in your home Language and in various translations. When you print the Quotation, the correct translation for the Quotation (shown on the 'Price List' card) will be printed in the "Delivery Mode Text (levsattext)" field, assuming you have included that field in your Form Template design.
- Enter the mode of shipping used for the Quotation. Examples might be Post or Courier, or might specify the name of the courier that you will eventually use to supply the goods on the Quotation.
- Route
- Paste Special
Routes setting, Stock module
- You will tend to use the Route field if you have a fleet of delivery vehicles, each of which repeats the same journey or "Route" every day.
- The Route in a Quotation will be updated if you change the Customer, the Location (immediately below) or the Address Code (i.e. Delivery Address, on the 'Del. Address' card), as follows:
- The Route will be taken from the record in the Routes/Locations setting in the Stock module for the Location/Customer/Delivery Address combination.
- If there is no Address Code in the Quotation, the Route will be taken from the record in the Routes/Locations setting for the Location/Customer combination in which the Delivery Address is blank. If there is no such record, the Route will be taken from the first Routes/Locations record for the Location/Customer combination, sorted by Delivery Address.
- In all other circumstances (e.g. there is an Address Code in the Quotation but there is no record in the Routes/Locations setting for the Location/Customer/Delivery Address combination), the Route will be taken from the Contact record for the Customer (Route field on the 'Delivery' card).
- From here, the Route will be copied to any Orders that you create from the Quotation. The Routes of Orders will be used by the Sorted Order List report in the Sales Orders module. This is a list in Route order of Orders with a particular Planned Delivery Date. You can use this report as an aid for delivery drivers.
- From an Order, the Route will be copied to the resulting Deliveries. The Routes of Deliveries will be used by the Trip Sheet report in the Stock module. This is a list of the Deliveries on a particular Route that can be made on a specified date or during a specified period.
- The Route in a Quotation will be updated if you change the Customer, the Location (immediately below) or the Address Code (i.e. Delivery Address, on the 'Del. Address' card), as follows:
- Location
- Paste Special
Locations setting, Stock module
- Used as default in Orders, Deliveries
- If you know that the stock that will eventually be used to satisfy the Quotation will be taken from a particular Location, specify that Location here.
- If you have specified a Main Location in the Stock Settings setting, leaving this field blank means that stock from the Main Location will be used. Note, however, that the Require Location option in the same setting has no power over this field. If you are using this option, you will not have to enter a Location here, but you will have to specify one in any Deliveries eventually resulting from the Quotation.
- A default Location can be brought in from the 'Sales' card of the current user's Person record or from the Local Machine setting in the User Settings module. The Local Machine setting is specific to the client machine you are working on. You can also prevent the current user from using a particular Location, using the Order Reserv. Access field in their Person record. If the current user specifies a Location that they should not use, the message "You are not allowed to withdraw any items from this location." will appear when they try to save the Quotation. Please refer here for more details about this feature.
- If the 'Item Status' window is open, the quantities it shows will refer to the Location specified here. If you have not specified a Location, the quantities will refer to all Locations. This will be the case even if you have specified a Main Location in the Stock Settings setting.
- If you know that the stock that will eventually be used to satisfy the Quotation will be taken from a particular Location, specify that Location here.
- Branch
- Default taken from Local Machine setting, User Settings module
- If your company has several Branches (e.g. several shops), you can specify the Branch where each client machine is located in the Local Machine setting in the User Settings module. You should do this individually on each client machine. When you create a Quotation, the Branch where the client machine is located will be recorded here and usually cannot be changed.
- If you have entered a record in the Contact register for the Branch, Sales Tags/Objects in that Contact record will be copied to the Tags/Objects field on the 'Terms' card of the Quotation. Branch details such as the address in that Contact record will be printed on Quotation documentation if you have included the various Branch fields in your Form Template designs.
- If you are using Tax Templates instead of VAT Codes to determine the rate at which VAT or sales tax will be charged, a Tax Template Code representing the Branch may be copied to the T-Cd field in each row in the matrix. Please refer here for more details.
- If you would like it to be possible for some users to change the Branch in Quotations, assign them an Access Group in which you have granted Full access to the 'Change Branch Code on Quotation' Action. Separate similar Actions are available for Orders and Invoices.
- If your company has several Branches (e.g. several shops), you can specify the Branch where each client machine is located in the Local Machine setting in the User Settings module. You should do this individually on each client machine. When you create a Quotation, the Branch where the client machine is located will be recorded here and usually cannot be changed.
- Opportunity
- In a Quotation that you created from an Opportunity, the Opportunity Number will be shown in this field. The Quotation and the Opportunity will also be connected through the Link Manager.
- Total Quantity
- This field shows the total number of Items on the Quotation and will be updated automatically each time you save the Quotation. If this figure becomes inaccurate for any reason, use the 'Recalculate Weight and Volume' function on the Operations menu (Windows/Mac OS X) or Tools menu (iOS/Android) to update it.
- Total Weight
- Default taken from
Items
- This field displays the total weight of the Items on the Quotation, calculated from the Quantity quoted and the Weight of each Item. It will be updated automatically each time you save the Quotation. If you change the Weight in any of the related Item records or if this figure becomes inaccurate for any other reason, use the 'Recalculate Weight and Volume' function on the Operations menu (Windows/Mac OS X) or Tools menu (iOS/Android) to update this field.
- Total Volume
- Default taken from
Items
- This field displays the total volume of the Items on the Quotation, calculated from the Quantity quoted and the Volume of each Item. It will be updated automatically each time you save the Quotation. If you change the Volume in any of the related Item records or if this figure becomes inaccurate for any other reason, use the 'Recalculate Weight and Volume' function on the Operations menu (Windows/Mac OS X) or Tools menu (iOS/Android) to update this field.
- Freight
- If you have used the Freight setting in the Sales Ledger to specify that an amount for Freight will be added automatically to each Quotation, that amount will be placed in this field.
- The freight charge can be calculated using one of two methods:
- The freight charge can be a fixed amount. This fixed amount will be the Base Price of the Item that you specify in the Freight setting, and it will be placed in this field when you enter a Customer Number.
- The freight charge can be a variable amount based on the total weight of the Items sold. This variable amount will be calculated using the formula that you specify in the Freight/Weight Calculation setting. This field will be updated each time you specify or change the Quantity in one of the Quotation rows.
In both cases, you can change the figure if necessary. The VAT Code and the Sales Account for the freight charge will be taken from the Item entered in the Freight setting (the VAT Code will be shown in the Freight V-Cd field to the right).
- If you are not using the Freight setting, you can enter an ad hoc freight amount in this field if applicable together with a Freight V-Cd.
- The Freight value and any VAT will not be included in the Quotation totals.
- The freight charge can be calculated using one of two methods:
- Order No.
- If you have created an Order from the Quotation using the 'Order' function on the Create menu, the Order Number of that Order will be shown here. The Status of the Quotation will also be changed to Accepted automatically and the Probability will be set to 100%. The current date will be placed in the Decision Date field if that field was empty. If you have created more than one Order, the last Order Number will be shown. Quotations with an Order Number will not be shown in the Outstanding Quotations report.
- Planned Delivery
- Paste Special
Choose date
- The date when the Customer requires the Items on the Quotation to be delivered. Enter this date using the format specified in the Planned Delivery setting in the Sales Orders module. Available options are Free Text, Date, Week Number or Year and Week (four characters).
- You should use this field when you need to deliver on a particular fixed date. If you need to deliver a certain number of days after the Order Date (an unknown date when issuing the Quotation), use the Days to Delivery field (below).
- You should use this field when you need to deliver on a particular fixed date. If you need to deliver a certain number of days after the Order Date (an unknown date when issuing the Quotation), use the Days to Delivery field (below).
- Days to Delivery
- You can use this field to schedule a Delivery from any Order that you create from the Quotation. If you leave the Planned Delivery field in a Quotation (above) blank and specify a number of days in this field, the Planned Delivery date in the Order will be calculated by adding that number of days to the Order Date.
- To use this feature, you must have specified in the Planned Delivery setting (in the Sales Orders module) that the Planned Delivery date field uses the Date format.
- To use this feature, you must have specified in the Planned Delivery setting (in the Sales Orders module) that the Planned Delivery date field uses the Date format.
- Freight V-Cd
- Paste Special
VAT Codes setting, Nominal Ledger
- The VAT Code entered here will determine the rate at which VAT will be charged on any freight charge that you have added to the Quotation (using the Freight field to the left). It will also determine the Output VAT Account that will be credited with the VAT value from the eventual Invoice.
- The default will be taken from the Contact record for the Customer, from the Item specified in the Freight setting, from the Item Group to which that Item belongs, or from the Account Usage S/L setting. The correct VAT Code for the Zone of the Customer will be used.
- The default will be taken from the Contact record for the Customer, from the Item specified in the Freight setting, from the Item Group to which that Item belongs, or from the Account Usage S/L setting. The correct VAT Code for the Zone of the Customer will be used.
- Disallow Invoicing more than Quoted
- Default taken from
Quotation Settings setting
- Selecting this option in a Quotation will have the following effects:
- In an Invoice that you have created from the Quotation, you will not be able to increase the quantity in any row to a figure that is greater than was quoted. You will be able to add rows to the Invoice.
- If you have already created an Invoice from the Quotation for the full quantity, you will be prevented from creating further Invoices.
- If you have already created an Invoice from the Quotation for a partial quantity, the remaining quantity will be used as the default figure in the next Invoice that you create.
If you do not select this option in a Quotation, there will be no restriction on the number of Invoices that you can create from the Quotation, and the full quoted quantity will be used as the default figure in each Invoice.
- In an Invoice that you have created from the Quotation, you will not be able to increase the quantity in any row to a figure that is greater than was quoted. You will be able to add rows to the Invoice.
The Quotation register in Standard ERP:
- Introduction
- Entering a Quotation, including:
- Header
- 'Terms' card
- 'Items' card Part 1 (Flips A-F)
- 'Items' card Part 2 (Footer)
- 'Currency' card
- 'Del. Terms' card
- 'Price List' card
- 'Inv. Address' card
- 'Del. Address' card
- 'Job Costing' card
- Header
- Controlling Prices in Quotations
- Inspecting and Changing Quotations
- Printing Quotations
- Operations Menu
- Create Menu
- Row Menu
- Home page for Quotations module manual
- Home page for Standard ERP manual
Entering a Quotation - Price List Card
This page describes the fields on the 'Price List' card of the Quotation record. Please follow the links below for descriptions of the other cards:- Header
- 'Terms' card
- 'Items' card Part 1 (Flips A-F)
- 'Items' card Part 2 (Footer)
- 'Currency' card
- 'Del. Terms' card
- 'Price List' card
- 'Inv. Address' card
- 'Del. Address' card
- 'Job Costing' card
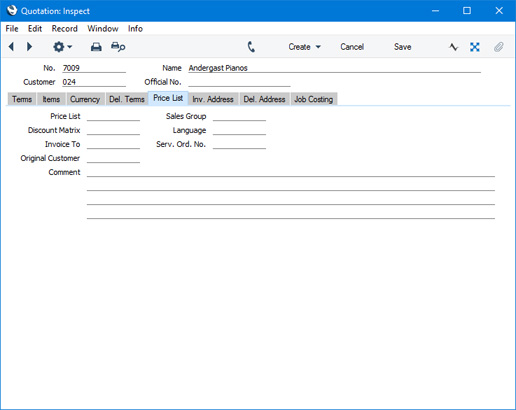
- Price List
- Paste Special
Price List register, Pricing module
- Specify here the Price List that will determine the prices in the Quotation.
- If you change the Price List after adding Items to the Quotation, the prices of those Items will be updated automatically and immediately. At any time, you can also use the 'Update Currency Price List Items' function on the Operations menu (Windows/Mac OS X) or Tools menu (iOS/Android) to update all prices in the Quotation.
- When you create a new Quotation and specify a Customer, the Price List will be chosen as follows:
- It will be brought in from the 'Pricing' card of the Customer's Contact record.
- If the Customer doesn't have a Price List, the Price List for the Customer Category to which the Customer belongs will be used.
- If this is blank, or the Customer does not belong to a Category, the Price List will be taken from the Sales Pay Term record allocated to the Customer. Note that if you change the Payment Term in a Quotation, the Price List in that Quotation will be changed if a Price List has been specified in the new Payment Term.
If you are using dated Price Lists, a Price List chosen as specified above may be replaced by one that is valid on the Quotation Date. Dated Price Lists are described here, with an example here.
- If the Price List specified is one that is Inclusive of VAT, the Unit Prices and Sums in each Quotation row will include VAT.
- When you add a row to the Quotation and specify an Item, the Unit Price will be chosen as follows, assuming the Type of the Price List is "Discount":
- It will be taken from the Price record with the relevant Item/Price List/Customer combination.
- It will be taken from the Price record with the relevant Item/Price List combination where the Customer field is empty.
- The Base Price from the Item record will be used.
If the Type of the Price List is "Qty Dep Values", the Unit Price will be chosen as follows:
- The Unit Price will be taken from the Quantity Dependent Price record with the relevant Item/Price List combination.
- The Base Price from the Item record will be used.
- You can prevent certain users from changing the Price List in Quotations, Orders and Invoices using Access Groups, by denying them access to the 'Change Prices' Action.
- If you change the Price List after adding Items to the Quotation, the prices of those Items will be updated automatically and immediately. At any time, you can also use the 'Update Currency Price List Items' function on the Operations menu (Windows/Mac OS X) or Tools menu (iOS/Android) to update all prices in the Quotation.
- Discount Matrix
- Default taken from
Contact record for the Customer or Customer Category
- If there is a Discount Matrix applying to a Quotation, it will be shown here. You cannot change this field. You can use Discount Matrices to administer quantity discounts: please refer here for more details.
- If you change the Discount Matrix after adding Items to the Quotation, the discounts and sums for those Items will be updated automatically and immediately.
- If the Discount Matrix is one that calculates quantity discounts based on Item Group quantities rather than Item quantities, the calculated discount for an Item may become incorrect if you specify another Item belonging to the same Item Group in a later row in the Quotation. To cater for this, be sure to select 'Recalculate Discount' from the Operations menu (Windows/Mac OS X) or Tools menu (iOS/Android) when the Quotation is complete. This will recalculate the discount percentage for each Item in the Invoice.
- If you change the Discount Matrix after adding Items to the Quotation, the discounts and sums for those Items will be updated automatically and immediately.
- Invoice To
- Paste Special
Customers in Contact register
- Default taken from Contact record for the Customer (Invoice To)
- If the invoice that will eventually result from a Quotation is to be sent to another company, such as a leasing company or a parent company, enter the Customer Number for that company here. That company must have their own Customer record in the Contact register. The default is taken from the Invoice To field on the 'Terms' card of the Contact record for the Customer specified in the Quotation header.
- When you create an Invoice from the Quotation (either directly or with an Order as an intermediate step), the Customer in that Invoice will be the leasing or parent company specified in this field. The Quotation Customer will be copied to the Original Customer field in the Invoice.
- If the invoice that will eventually result from a Quotation is to be sent to another company, such as a leasing company or a parent company, enter the Customer Number for that company here. That company must have their own Customer record in the Contact register. The default is taken from the Invoice To field on the 'Terms' card of the Contact record for the Customer specified in the Quotation header.
- Original Customer
- Paste Special
Customers in Contact register
- This field provides an alternative to the Invoice To field immediately above, to be used in the situation when the Customer who will eventually place the Order is one for whom Invoices are to be sent to a third party such as a leasing company or a parent company.
- You can use the Invoice To field when the Quotation and Order are to be in the name of the Customer, and you will send the Invoice to the third party. You can use this field when the Quotation is also to be in the name of the third party.
- To use this field, specify the ordering Customer here and the leasing or parent company in the Customer field in the header. When you create an Order from the Quotation and an Invoice from that Order, this Original Customer will be copied to the Customer field in the header of the Order and from there to the Original Customer field on the Price List' card of the Invoice. The Customer from the Quotation header will be copied to the Invoice To field on the 'Price List' card of the Order and from there to the Customer field in the header of the Invoice.
- The Customer and the Original Customer must both have the same Sales Currency.
- You can use the Invoice To field when the Quotation and Order are to be in the name of the Customer, and you will send the Invoice to the third party. You can use this field when the Quotation is also to be in the name of the third party.
- Comment
- Default taken from
Contact record for the Customer (Order Comment)
- Record here any comment about the Quotation.
- If you create a Project from a Quotation, the first line of this Comment will be used as the Description in the new Project. It will also be used as the Text in any Activities that you create from the Quotation.
- If you create a Project from a Quotation, the first line of this Comment will be used as the Description in the new Project. It will also be used as the Text in any Activities that you create from the Quotation.
- Sales Group
- Paste Special
Sales Groups setting, System module
- Default taken from Salesman
- The Sales Group will be brought in from the Person record after you have entered a Salesman (on the 'Terms' card). If you are using the Limited Access feature, you can use this field to prevent a user from seeing every Quotation in the 'Quotations: Browse' window by restricting their view to their own Quotations or to those of their Sales Group.
- Please click here for full details about the Limited Access feature.
- The Sales Group will be brought in from the Person record after you have entered a Salesman (on the 'Terms' card). If you are using the Limited Access feature, you can use this field to prevent a user from seeing every Quotation in the 'Quotations: Browse' window by restricting their view to their own Quotations or to those of their Sales Group.
- Language
- Paste Special
Languages setting, System module
- Default taken from Contact record for the Customer
- The Language determines the Item Descriptions that will be shown on the 'Items' card, and the text for the Payment Term, Delivery Term and Delivery Mode that will be printed on forms. Leave the field blank to use your home Language.
- You can also use the Language to determine the Form Template that will be used when you print the Quotation, and the printer that will be used to print it. This can include sending the form to a fax machine, if your hardware can support this feature. Do this in the 'Form Definition' window for the Quotation form, as described here. You can change the Language before printing the Quotation, to ensure it is printed on the correct printer or fax machine.
- The Language determines the Item Descriptions that will be shown on the 'Items' card, and the text for the Payment Term, Delivery Term and Delivery Mode that will be printed on forms. Leave the field blank to use your home Language.
- Serv. Ord. No.
- In a Quotation that you created from a Service Order, the Service Order Number will be shown in this field. The Quotation and the Service Order will also be connected through the Link Manager.
- Creating a Quotation from a Service Order can be useful if you need to quote the Customer for the cost of a repair. If the Customer accepts the Quotation, you can create a Work Sheet from the Quotation by selecting 'Work Sheet' from the Create menu (Windows/Mac OS X) or + menu (iOS/Android). You will not be able to create a Work Sheet from a Quotation if its Serv. Ord. No. field is empty.
The Quotation register in Standard ERP:
- Introduction
- Entering a Quotation, including:
- Header
- 'Terms' card
- 'Items' card Part 1 (Flips A-F)
- 'Items' card Part 2 (Footer)
- 'Currency' card
- 'Del. Terms' card
- 'Price List' card
- 'Inv. Address' card
- 'Del. Address' card
- 'Job Costing' card
- Header
- Controlling Prices in Quotations
- Inspecting and Changing Quotations
- Printing Quotations
- Operations Menu
- Create Menu
- Row Menu
- Home page for Quotations module manual
- Home page for Standard ERP manual
Entering a Quotation - Inv. Address Card
This page describes the fields on the 'Inv. Address' card of the Quotation record. Please follow the links below for descriptions of the other cards:- Header
- 'Terms' card
- 'Items' card Part 1 (Flips A-F)
- 'Items' card Part 2 (Footer)
- 'Currency' card
- 'Del. Terms' card
- 'Price List' card
- 'Inv. Address' card
- 'Del. Address' card
- 'Job Costing' card
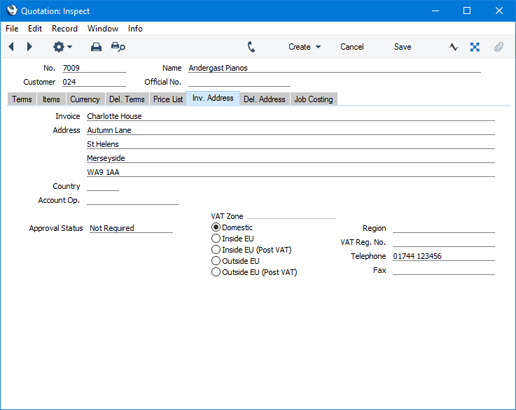
- Invoice to Address
- Default taken from
Contact record for the Customer (Invoice Address)
- The Customer's address, will be brought in from the 'Contact' card of their record in the Contact register. You can change the Address in a particular Quotation, but if you need to make more permanent changes, you should do so in the Contact register.
- This field always shows the address of the Customer shown in the header, even if you have specified an Invoice To company on the 'Terms' card of the Contact record for the Customer.
- If you want to give a name to each of the individual address lines, use the 'Address' card of the User Defined Fields - Contacts setting in the CRM module. This can be useful if, for example, you want to indicate that the town or city is always to be typed into the third line of the address:
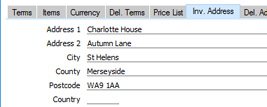
- This field always shows the address of the Customer shown in the header, even if you have specified an Invoice To company on the 'Terms' card of the Contact record for the Customer.
- Country
- Paste Special
Countries setting, System module
- Default taken from Contact record for the Customer (Country on 'Contact' card)
- The Country where the Invoice Address is located will be brought in from the 'Contact' card of the Customer's record in the Contact register.
- The Country where the Invoice Address is located will be brought in from the 'Contact' card of the Customer's record in the Contact register.
- Account Op.
- Paste Special
Banks setting, Purchase Ledger
- Default taken from Contact record for the Customer (Account Operator)
- The Customer's Account Operator will be brought in from the 'Accounts' card of their record in the Contact register.
- Specifying an Account Operator in a Quotation allows information from the corresponding record in the Banks setting to be printed on Quotation documentation, providing you have included the relevant fields in your Form Template designs.
- The Customer's Account Operator will be brought in from the 'Accounts' card of their record in the Contact register.
- Approval Status
- You can use the Approval Rules register in the Business Alerts module to configure an approval process that Quotations must pass through. For example, particular managers may need to check and approve every Quotation in which the TOTAL is greater than a certain value. If you are using such an approval process, this field will display the stage in the process that a particular Quotation has reached.
If a Quotation needs to pass through an approval process, the following functions will be disabled until the approval process has been completed:
- Printing the Quotation.
- Marking the Quotation as Accepted or Rejected.
- Creating an Order from the Quotation.
- Creating an Invoice from the Quotation.
- Creating a Mail from the Quotation.
- Creating a Project from the Quotation.
- Creating a Project Budget from the Quotation.
In brief, the Approval Status of a Quotation can be any of the following:
- Not Required
- The Quotation does not need to pass through an approval process, so the functions listed above will be available immediately.
- Not Requested
- The Quotation does need to pass through an approval process, and you have not yet started that process. To start the process, save any changes and then choose 'Request Approval' from the Operations menu (Windows/Mac OS X) or Tools menu (iOS/Android).
- Pending
- The Quotation has been entered into the approval process, and is waiting to be approved or rejected. If you need to check the progress of the approval process, select Quotation Status' from the Operations or Tools menu.
- If the Status of the Quotation is Pending, you will usually not be able to modify it. If you need certain users to be able to modify Pending records, use Access Groups to grant them Full access to the 'Change Record Header when Approval Status is Pending' and/or 'Change Record Matrix when Approval Status is Pending' Actions.
- If the Status of the Quotation is Pending, you will usually not be able to modify it. If you need certain users to be able to modify Pending records, use Access Groups to grant them Full access to the 'Change Record Header when Approval Status is Pending' and/or 'Change Record Matrix when Approval Status is Pending' Actions.
- Approved
- The approval process has been completed and the Quotation has been approved. The functions listed above will be available.
- Rejected
- The approval process has been completed and the Quotation has been rejected.
Please refer here for full details.
- Printing the Quotation.
- VAT Zone
- Default taken from
Contact record for the Customer
- These radio buttons show the Customer's Zone, brought in from the Contact register. The Zone can control the choice of Sales Account and VAT Code or Tax Template for each Item in the Quotation: you will have defined separate default Sales Accounts and VAT Codes or Tax Templates for each Zone on the 'Sales' card of the Account Usage S/L setting. You cannot change the Zone in a Quotation: you should make any necessary changes in the Contact register before entering Quotations.
- You can change the names of two of these options if they are not suitable. Using the VAT Zone Label setting in the Sales Ledger, you can replace the string "EU" with your own string (for example "SACU" in South Africa).
- You can use Access Groups to prevent users from selling to Customers in a particular Zone. Assign them an Access Group in which you have granted Full access to the 'Disallow Sales to Domestic Customers' Action (if you need to prevent selling to Customers in the Domestic Zone) or the 'Disallow Sales to Export Customers' Action (if you need to prevent selling to Customers in all other Zones) as necessary.
- You can change the names of two of these options if they are not suitable. Using the VAT Zone Label setting in the Sales Ledger, you can replace the string "EU" with your own string (for example "SACU" in South Africa).
- Region
- Paste Special
Regions setting, Sales Ledger
- Default taken from Delivery Address or Contact record for the Customer
- The Region (e.g. the state, province or county) where the Delivery Address is to be found. In Argentina, if the Region is one where a Regional Perception Tax is charged on at least one of the Items on the Order, the amount of that tax will be shown in the TAX2 field in the footer of the 'Items' card.
- The Region (e.g. the state, province or county) where the Delivery Address is to be found. In Argentina, if the Region is one where a Regional Perception Tax is charged on at least one of the Items on the Order, the amount of that tax will be shown in the TAX2 field in the footer of the 'Items' card.
- VAT Reg. No.
- Default taken from
Contact record for the Customer
- The Customer's VAT registration number. This will be copied to Orders and Invoices created from the Quotation.
- You can have a validation check carried out to ensure that the VAT Number entered here is in the correct format for the Customer's Country. If you want there to be such a validation check, define the correct formats in the VAT Number Masks setting in the System module. The validation check will take place when you save the Purchase Invoice, and a message will be shown if the VAT Number is in the wrong format. The check will be based on the Country specified in the Contact record for the Customer or, if that is blank, using the Country in the Company Info setting (i.e. your own Country). If that is also blank, no validation check will be made.
- You can have a validation check carried out to ensure that the VAT Number entered here is in the correct format for the Customer's Country. If you want there to be such a validation check, define the correct formats in the VAT Number Masks setting in the System module. The validation check will take place when you save the Purchase Invoice, and a message will be shown if the VAT Number is in the wrong format. The check will be based on the Country specified in the Contact record for the Customer or, if that is blank, using the Country in the Company Info setting (i.e. your own Country). If that is also blank, no validation check will be made.
- Telephone, Fax
- Default taken from
Contact record for the Customer
- The Customer's telephone and fax numbers, as entered on the 'Contact' card of the Customer's record in the Contact register.
The Quotation register in Standard ERP:
- Introduction
- Entering a Quotation, including:
- Header
- 'Terms' card
- 'Items' card Part 1 (Flips A-F)
- 'Items' card Part 2 (Footer)
- 'Currency' card
- 'Del. Terms' card
- 'Price List' card
- 'Inv. Address' card
- 'Del. Address' card
- 'Job Costing' card
- Header
- Controlling Prices in Quotations
- Inspecting and Changing Quotations
- Printing Quotations
- Operations Menu
- Create Menu
- Row Menu
- Home page for Quotations module manual
- Home page for Standard ERP manual
Entering a Quotation - Del. Address Card
This page describes the fields on the 'Del. Address' card of the Quotation record. Please follow the links below for descriptions of the other cards:- Header
- 'Terms' card
- 'Items' card Part 1 (Flips A-F)
- 'Items' card Part 2 (Footer)
- 'Currency' card
- 'Del. Terms' card
- 'Price List' card
- 'Inv. Address' card
- 'Del. Address' card
- 'Job Costing' card

- Address Code
- Paste Special
Delivery Addresses setting, Sales Orders module
- If a Customer has several Delivery Addresses (e.g. it has several branches), you can list them in the Delivery Addresses setting in the Sales Orders module. Select the correct one for a particular Quotation using the 'Paste Special' function. The full Delivery Address will be brought in to the fields below. Usually, only Delivery Addresses for the specified Customer and those with no Customer specified will be included in the 'Paste Special' list. If you would like the 'Paste Special' list to contain all Delivery Addresses, select the Paste All Delivery Addresses option in the Order Settings setting in the Sales Orders module.
- If you choose a Delivery Address in which you have specified a Region and./or a VAT Code or Tax Template, they will be brought into the Quotation. Any taxes already in the Quotation will be recalculated. This can be useful for international sales.
- If you choose a Delivery Address in which you have specified a Region and./or a VAT Code or Tax Template, they will be brought into the Quotation. Any taxes already in the Quotation will be recalculated. This can be useful for international sales.
- Delivery Address
- Default taken from
Delivery Address or Contact record for the Customer
- Enter the Delivery Address here, if different from the Invoice Address or the usual Delivery Address shown on the 'Delivery' card of the Customer's record in the Contact register.
- Country
- Paste Special
Countries setting, System module
- Default taken from Delivery Address or Contact record for the Customer (Country on 'Delivery' card)
- The Country where the Delivery Address is located will be brought in from the Delivery Address specified in the Address Code field above or from the 'Delivery' card of the Customer's record in the Contact register.
The Quotation register in Standard ERP:
- Introduction
- Entering a Quotation, including:
- Header
- 'Terms' card
- 'Items' card Part 1 (Flips A-F)
- 'Items' card Part 2 (Footer)
- 'Currency' card
- 'Del. Terms' card
- 'Price List' card
- 'Inv. Address' card
- 'Del. Address' card
- 'Job Costing' card
- Header
- Controlling Prices in Quotations
- Inspecting and Changing Quotations
- Printing Quotations
- Operations Menu
- Create Menu
- Row Menu
- Home page for Quotations module manual
- Home page for Standard ERP manual
Entering a Quotation - Job Costing Card
You only need use the fields on the 'Job Costing' card if you have linked the Quotation to a Project. Please refer here for details.---
The Quotation register in Standard ERP:
- Introduction
- Entering a Quotation, including:
- Header
- 'Terms' card
- 'Items' card Part 1 (Flips A-F)
- 'Items' card Part 2 (Footer)
- 'Currency' card
- 'Del. Terms' card
- 'Price List' card
- 'Inv. Address' card
- 'Del. Address' card
- 'Job Costing' card
- Header
- Controlling Prices in Quotations
- Inspecting and Changing Quotations
- Printing Quotations
- Operations Menu
- Create Menu
- Row Menu
- Home page for Quotations module manual
- Home page for Standard ERP manual
Controlling Prices in Quotations
There are several methods that you can use to control prices in Quotations:- To prevent all changes to the Unit Price, % and Sum fields in every Quotation, Order and Invoice row, assign users an Access Group in which you have denied access to the 'Change Unit Prices' Action (i.e. in which you have set the access level to "None").
- If you need to prevent users from changing the Price List in a Quotation, Order or Invoice, assign them to an Access Group in which you have denied access the 'Change Prices' Action.
- You can prevent users from entering a price (i.e. a unit price less discount) that is below a specified minimum in any Quotation, Order or Invoice. To do this, specify a Minimum Price List in each user's Person record. If it is necessary to sell an Item at a price that is below the minimum, a manager can confirm the price using the 'Manager's Discount Override' function on the Operations menu (Windows/Mac OS X) or Tools menu (iOS/Android).
- If you would like to hide the Cost Price, Cost B2, GP, FIFO and Row FIFO fields in each Quotation, Order and Invoice row and the GP % and Total GP fields in the footer of each record, use Access Groups to deny access to the 'View Item's Cost Price' Action.
- If you are using the Disallow Negative Row Sums on Sales option in the Account Usage S/L setting in the Sales Ledger, you will not be able to mark an Order or Invoice as OK and save it or save a Quotation if the Sum in any row is negative.
- Similarly, if you are using the Disallow Negative Totals on Sales option, also in the Account Usage S/L setting, you will not be able to mark an Order or Invoice as OK and save it or save a Quotation if the TOTAL is negative.
- You can have a responsible Person or Persons notified every time a sales person attempts to mark as OK and save a Sales Invoice or save a Quotation or Sales Order in which there is at least one Item with a gross profit that is lower than a specified percentage. The notification will be by Mail and Activity. Specify the percentage in the GP below minimum Alerts setting in the Business Alerts module, and specify the responsible Person or Persons in each Location record. To prevent the saving of any Invoice, Order or Quotation that would trigger such a notification, assign each sales person an Access Group in which you have granted Full access to the 'Disallow Selling Below Minimum GP' Action. Please refer to the description of the GP below minimum Alerts setting for more details.
The Quotation register in Standard ERP:
- Introduction
- Entering a Quotation
- Controlling Prices in Quotations
- Inspecting and Changing Quotations
- Printing Quotations
- Operations Menu
- Create Menu
- Row Menu
- Home page for Quotations module manual
- Home page for Standard ERP manual
Inspecting and Changing Quotations
You can change a Quotation at any time, e.g. add or decrease the offered Quantity of a certain Item, remove or add rows etc. To do so, follow these steps:- Ensure you are in the Quotations module and click (Windows/Mac OS X) or tap (iOS/Android) the [Registers] button in the Navigation Centre. Then, double-click or tap 'Quotations' in the resulting list. The 'Quotations: Browse' window will be opened, listing all Quotations.
- Double-click or tap on the record you want to inspect or change. The 'Quotations: Inspect' window will appear. This is identical to the 'Quotation: New' window described here.
- If you want to increase the quantity of a certain item, place the cursor in the Qty field and enter the new value. The Sum (and the figures in the footer area) will change accordingly.
- If you are using Windows or Mac OS X and you want to insert a new row, select a row by clicking on the row number and press Enter. An empty new row will be inserted, and the existing ones will be moved down. Enter relevant data in the fields according to the description here. If you want to remove a row, select it by clicking on the row number and press the Backspace key or choose 'Clear' from the Edit menu. The row will be deleted, and the others will be moved up.
- If you are using iOS or Android and you want to insert a row, long tap on the row number where the insertion is to be made and select 'Insert Row' from the resulting menu. To remove a row, long tap on the row number on the left of the row and select 'Delete Row' from the resulting menu.
- To print the Quotation, save it and then click the Printer icon (Windows/Mac OS X) or select 'Print' from the File menu (all platforms). Please refer to the Printing Quotations page for more details. To send the Quotation to the Customer by email, choose 'Email' from the Create menu (Windows/Mac OS X) or + menu (iOS/Android).
- If you want to schedule a follow-up call to the Customer, choose 'Workflow Activity' from the Create or + menu. This will place a reminder in the Salesman's Task Manager to call the Customer on the Quotation's Make Contact Date.
- If the Customer accepts the Quotation, you can convert it into an Order by choosing 'Order' from the Create or + menu. The Status of the Quotation will be changed to Accepted automatically, and the Probability will be set to 100. Alternatively, you can create an Invoice from the Quotation using the 'Invoice' function, also on the Create or + menu.
- To close the Quotation, click the close box (Windows/Mac OS X) or tap < (iOS/Android). You will be asked if you would like to save the changes you have just made. You will be returned to the 'Quotations: Browse' window.
The Quotation register in Standard ERP:
- Introduction
- Entering a Quotation
- Controlling Prices in Quotations
- Inspecting and Changing Quotations
- Printing Quotations
- Operations Menu
- Create Menu
- Row Menu
- Home page for Quotations module manual
- Home page for Standard ERP manual
Printing Quotations
There are two ways to print a Quotation.- While entering or inspecting a Quotation, click the Printer icon in the Button Bar (Windows/Mac OS X) or select 'Print' from the File menu (all platforms). If you want to print to screen, click the Preview icon (Windows/Mac OS X only).
- If you need to print several Quotations at once, first ensure you are in the Quotations module. Then, if you are using Windows or Mac OS X, click the [Forms] button in the Navigation Centre and double-click 'Quotations' in the 'Forms' list window. If you are using iOS or Android, tap the [Routines] button in the Navigation Centre and then tap [Forms]. Tap 'Quotations' in the 'Forms' list window. Enter the Quotation Number (or a range of numbers) to be printed and press the [Run] button.
- Design the Quotation Form Template using the Form Template register in the System module. Use the 'Properties' function on the Operations menu to name the Form Template (in this description, we have used the name "QUOTATION") and to assign it a Form Type of "Quotation". You might want to design different Form Templates for use with different Languages. A full list of the fields you can include in the Form Template design can be found here.
A file containing samples of each Form Template including a sample "QUOTATION" is supplied with Standard ERP: if you want to use these samples as templates for your own designs, import the "UKForms.txt" file as described on the Importing Set-up Data page.
- Having designed the Quotation Form Template, you should now specify that it should be used when printing Quotations. Select the Quotations module using the [Switch Module] button in the Navigation Centre or the Ctrl-0 (zero) (Windows) or ⌘-0 (Mac OS X) keyboard shortcuts.
- Click the [Forms] button in the Navigation Centre or use the Ctrl-D/⌘-D key combination. The ' Forms' list window will be opened: highlight 'Quotations'.

- Select 'Define Form' from the Operations menu.
- In the subsequent 'Form Definition' window, enter "QUOTATION" in the Form Template field in the first row (you can use 'Paste Special' to ensure the spelling is correct).

- Click [Save] to save the Quotation Form Template definition. From now on, the Quotation Form Template that you have designed will be used whenever you print a Quotation.
---
The Quotation register in Standard ERP:
- Introduction
- Entering a Quotation
- Controlling Prices in Quotations
- Inspecting and Changing Quotations
- Printing Quotations
- Operations Menu
- Create Menu
- Home page for Quotations module manual
- Home page for Standard ERP manual
Operations Menu - Quotations
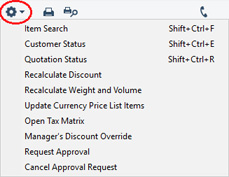
If you are using Windows or Mac OS X, you can open the Operations menu by clicking the button with the 'cog' icon (shown highlighted in the illustration above). If you are using iOS or Android, you can access the Operations menu functions through the Tools menu (with 'wrench' icon).
Note that in Standard ERP version 8.0, some functions that were previously on the Operations menu were moved to the Create and Row menus. On iOS and Android there is no Row menu, so on those platforms the Row menu functions remain on the Operations/Tools menu.
Please follow the links below for details about each function on the Operations menu:
- Item Search
- Customer Status
- Quotation Status
- Recalculate Discount
- Recalculate Weight and Volume
- Update Currency Price List Items
- Open Tax Matrix
- Manager's Discount Override
- Request Approval
- Cancel Approval Request
The Quotation register in Standard ERP:
- Introduction
- Entering a Quotation
- Controlling Prices in Quotations
- Inspecting and Changing Quotations
- Printing Quotations
- Operations Menu
- Create Menu
- Row Menu
- Home page for Quotations module manual
- Home page for Standard ERP manual
Operations Menu - Quotation - Item Search
This page describes the 'Item Search' function on the Operations menu in the Quotation record window. If you are using iOS or Android, the 'Item Search' function is on the Tools menu (with 'wrench' icon).---
You can use the 'Item Search' function to search for Items that you can then add to the Quotation. This function is therefore an alternative to the 'Paste Special' feature. Place the insertion point in the Item field in any row and then select 'Item Search' from the Operations menu (Windows/Mac OS X) or Tools menu (iOS/Android). The following window opens:
- Search for
- Enter here the string (e.g. part of an Item Number or Name) that you are looking for. You must make an entry in this field, otherwise no search will be carried out.
- Classification
- Paste Special
Item Classifications setting, Sales Ledger
- If you enter an Item Classification here, the search for the string that you specified in the field above will be restricted to Items belonging to that Classification.
- Search In
- Specify the field in which you want to search.
---
The Quotation register in Standard ERP:
- Introduction
- Entering a Quotation
- Controlling Prices in Quotations
- Inspecting and Changing Quotations
- Printing Quotations
- Operations Menu, including:
- Item Search
- Customer Status
- Quotation Status
- Recalculate Discount
- Recalculate Weight and Volume
- Update Currency Price List Items
- Open Tax Matrix
- Manager's Discount Override
- Request Approval
- Cancel Approval Request
- Item Search
- Create Menu
- Row Menu
- Home page for Quotations module manual
- Home page for Standard ERP manual
Operations Menu - Quotation - Customer Status
This page describes the 'Customer Status' function on the Operations menu in the Quotation record window. If you are using iOS or Android, the 'Customer Status' function is on the Tools menu (with 'wrench' icon).---
When you are entering or reviewing a Quotation, you can check the current account status of the Customer by selecting 'Customer Status' from the Operations (Windows/Mac OS X) or Tools menu (iOS/Android). A Customer Status report will be printed to screen.
In its basic form, this report will first show the Customer Number, Name and telephone number. This information will be followed by a list of the Customer's Contact Classifications. The five most recently paid Invoices will then be listed, as will all open (unpaid) Invoices.
You can have much more information shown in the report, such as lists of recent Activities, Contract Quotations, Contracts, Quotations and Orders, and monthly sales figures for the past year. To have this extra information shown in the report, create a record for yourself in the Info in Customer Status Report setting in the CRM module. As you can create separate records in this setting for each user, you can control how much of this additional information will be shown to different users. You can effectively give each user a different report definition.
Simply creating a record for yourself in the Info in Customer Status Report setting will add the Customer's address, Warning on Sales if there is one, Credit Limit and turnover for the first period in the Reporting Periods setting to the top of the report. The remainder of the report will then follow the specification in your Info in Customer Status Report record. If you are using the Open Invoices until Due Date only (Suspend on Overdue) option in the Credit Limit setting and a Customer has at least one overdue Invoice, their Credit Limit will be shown to be 0.00 in the report.
If the appearance of the Customer Status report is not as you expect (i.e. the Customer's address, Warning on Sales if there is one, Credit Limit and turnover are not shown, and the report only lists Invoices), the probable cause is you do not have a record in the Info in Customer Status Report setting.
As well as using the 'Customer Status' function described here, you can also produce a Customer Status report using the following methods:
- Activate 'Paste Special' from the Customer Number field in a record such as an Order or Invoice, highlight a Customer in the list and choose 'Customer Status' from the Operations menu (Windows/Mac OS X only);
- Open an Activity where the Customer field contains a Customer (not a Supplier) and choose 'Customer Status' from the Operations or Tools menu;
- Open the Contact record for a Customer and choose 'Customer Status' from the Operations or Tools menu;
- Open the 'Communication Centre' window, highlight one or more Customers in the Contact List and click the [Customer Status] button (Windows/Mac OS X only); and
- In the Sales Ledger, click (Windows/Mac OS X) or tap (iOS/Android) the [Reports] button in the Navigation Centre and choose to produce the Customer Status report.
The Customer Status report has the Standard ERP Drill-down feature. You can open many records such as Contact Persons, Activities, Quotations and Invoices from the report by clicking (Windows/Mac OS X) or tapping (iOS/Android) in the appropriate places (i.e. on Contact Person names, on Activity Dates and on Quotation and Invoice Numbers). You can also click or tap on a Person's Signature to open an Activities, Persons report for that Person. Text with the drill-down feature is shown underlined in the report. If you have a record in the Info in Customer Status Report setting, the report will also contain a [New Activity] text link that you can click or tap to create an empty new Activity and a [Credit History] text link that will open a separate report showing the Customer's credit history. This is a chargeable Cloud Service: to use it you must have registered your database in Estonia using the Automatic Internet Enabler method, as described on the Enabler Key page. You must also have entered a Reg No 1 on the 'Company' card of the Contact record for the Customer whose credit history you are interested in.
---
The Quotation register in Standard ERP:
- Introduction
- Entering a Quotation
- Controlling Prices in Quotations
- Inspecting and Changing Quotations
- Printing Quotations
- Operations Menu, including:
- Item Search
- Customer Status
- Quotation Status
- Recalculate Discount
- Recalculate Weight and Volume
- Update Currency Price List Items
- Open Tax Matrix
- Manager's Discount Override
- Request Approval
- Cancel Approval Request
- Item Search
- Create Menu
- Row Menu
- Home page for Quotations module manual
- Home page for Standard ERP manual
Operations Menu - Quotation - Quotation Status
This page describes the 'Quotation Status' function on the Operations menu in the Quotation record window. If you are using iOS or Android, the 'Quotation Status' function is on the Tools menu (with 'wrench' icon).---
The 'Quotation Status' function prints a report to screen summarising all aspects of the Quotation currently open in a record window.
The report contains full details of the selected Quotation, and lists all connected Orders and Activities. The report contains the Standard ERP Drill-down feature: click (Windows/Mac OS X) or tap (iOS/Android) on an Order Number in the report to open the corresponding Order record, on an Activity Number or Date to open the corresponding Activity, or on the Person of an Activity to produce an Activities, Persons report for that Person.
---
The Quotation register in Standard ERP:
- Introduction
- Entering a Quotation
- Controlling Prices in Quotations
- Inspecting and Changing Quotations
- Printing Quotations
- Operations Menu, including:
- Item Search
- Customer Status
- Quotation Status
- Recalculate Discount
- Recalculate Weight and Volume
- Update Currency Price List Items
- Open Tax Matrix
- Manager's Discount Override
- Request Approval
- Cancel Approval Request
- Item Search
- Create Menu
- Row Menu
- Home page for Quotations module manual
- Home page for Standard ERP manual
Operations Menu - Quotation - Recalculate Discount
This page describes the 'Recalculate Discount' function on the Operations menu in the Quotation record window. If you are using iOS or Android, the 'Recalculate Discount' function is on the Tools menu (with 'wrench' icon).---
Discount Matrices allow you to offer quantity discounts based on the value, quantity, weight or volume of each Item sold. If the Customer in a Quotation is one to whom you have assigned a Discount Matrix, a discount percentage representing a quantity discount will be placed automatically in the % field in each Quotation row whenever you specify an Item and Quantity. If there is a Discount Matrix applying to a Quotation, it will be shown on the 'Price List' card.
The 'Recalculate Discount' function will be useful in cases where the Discount Matrix is one that calculates quantity discounts based on Item Group quantities rather than Item quantities and you have used more than one Item belonging to the same Item Group in the Quotation. When you add a second Item from an Item Group to the Quotation, the discount for the first Item may be rendered incorrect because its calculation did not take the quantity of the second Item into account. Therefore, when the Quotation is complete, you should recalculate the discount of every Item. To do this, select 'Recalculate Discount' from the Operations menu (Windows/Mac OS X) or Tools menu (iOS/Android). You can also use this function if you change the Discount Matrix record itself, to apply the changes you have made in the Discount Matrix to the Quotation.
---
The Quotation register in Standard ERP:
- Introduction
- Entering a Quotation
- Controlling Prices in Quotations
- Inspecting and Changing Quotations
- Printing Quotations
- Operations Menu, including:
- Item Search
- Customer Status
- Quotation Status
- Recalculate Discount
- Recalculate Weight and Volume
- Update Currency Price List Items
- Open Tax Matrix
- Manager's Discount Override
- Request Approval
- Cancel Approval Request
- Item Search
- Create Menu
- Row Menu
- Home page for Quotations module manual
- Home page for Standard ERP manual
Operations Menu - Quotation - Recalculate Weight and Volume
This page describes the 'Recalculate Weight and Volume' function on the Operations menu in the Quotation record window. If you are using iOS or Android, the 'Recalculate Weight and Volume' function is on the Tools menu (with 'wrench' icon).---
Each time you save a Quotation, the Total Quantity, Weight and Volume figures on the 'Del. Terms' card will be updated, calculated using the Quotation Quantities and the dimension information in the Item records. If you change the Weight or Volume of an Item or if these total figures become inaccurate for any other reason, you can recalculate them by selecting 'Recalculate Weight and Volume' from the Operations menu (Windows/Mac OS X) or Tools menu (iOS/Android). You should save the Quotation before using this function.
---
The Quotation register in Standard ERP:
- Introduction
- Entering a Quotation
- Controlling Prices in Quotations
- Inspecting and Changing Quotations
- Printing Quotations
- Operations Menu, including:
- Item Search
- Customer Status
- Quotation Status
- Recalculate Discount
- Recalculate Weight and Volume
- Update Currency Price List Items
- Open Tax Matrix
- Manager's Discount Override
- Request Approval
- Cancel Approval Request
- Item Search
- Create Menu
- Row Menu
- Home page for Quotations module manual
- Home page for Standard ERP manual
Operations Menu - Quotation - Update Currency Price List Items
This page describes the 'Update Currency Price List Items' function on the Operations menu in the Quotation record window. If you are using iOS or Android, the 'Update Currency Price List Items' function is on the Tools menu (with 'wrench' icon).---
Occasionally, you might enter a complex Quotation with the wrong Exchange Rate, or the Exchange Rate might change significantly between the entry of the Quotation and its final approval. In such a situation, you do not need to re-enter the Quotation. Amend the Exchange Rate as appropriate and then select 'Update Currency Price List Items' from the Operations menu (Windows/Mac OS X) or Tools menu (iOS/Android). The prices in the Quotation will be re-converted using the new Exchange Rate. You do not need to save the Quotation before using this function.
If you change the Currency or the Price List in a Quotation, prices in the Quotation will always be recalculated automatically. If you change the Quotation Date and the Exchange Rate changes as a consequence, prices will be recalculated automatically if you are using the Update Prices on records with Currency when changing Dates option in the Item Settings setting in the Sales Ledger. If you are not using this option, you can use this function to recalculate the prices after changing the Quotation Date. If you change the Prices in a Price List, you can then use this function to update a Quotation with those new Prices.
---
The Quotation register in Standard ERP:
- Introduction
- Entering a Quotation
- Controlling Prices in Quotations
- Inspecting and Changing Quotations
- Printing Quotations
- Operations Menu, including:
- Item Search
- Customer Status
- Quotation Status
- Recalculate Discount
- Recalculate Weight and Volume
- Update Currency Price List Items
- Open Tax Matrix
- Manager's Discount Override
- Request Approval
- Cancel Approval Request
- Item Search
- Create Menu
- Row Menu
- Home page for Quotations module manual
- Home page for Standard ERP manual
Operations Menu - Quotation - Open Tax Matrix
This page describes the 'Open Tax Matrix' function on the Operations menu in the Quotation record window. If you are using iOS or Android, the 'Open Tax Matrix' function is on the Tools menu (with 'wrench' icon).---
In some countries, Tax Templates are used instead of VAT Codes. VAT Codes should be used where each sales and purchase transaction (e.g. each row in an Invoice) is taxed at a single rate, while Tax Templates should be used where different taxes and/or several tax rates are applied to one transaction (e.g. to one row).
If you need to use Tax Templates, you should first choose the Use Tax Templates for Tax Calculation option in the Transaction Settings setting in the Nominal Ledger. This option will cause a Tax Template field ("T-Cd") to appear on flip B of the matrix on the 'Items' card of the Quotation record instead of the VAT Code field ("V-Cd").
Because a particular Tax Template can include several tax rates, it can be difficult to see at a glance how the tax figure in a Quotation is calculated. When viewing a Quotation, selecting 'Open Tax Matrix' from the Operations menu (Windows/Mac OS X) or Tools menu (iOS/Android) will cause a new window to be opened, displaying the tax calculation, as follows:
- If you place the insertion point in a Quotation row, the function will display the tax calculation for that row.
- If you place the insertion point in a header field, the function will display the tax calculation for the Invoice as a whole. This is shown in the illustration below.
---
The Quotation register in Standard ERP:
- Introduction
- Entering a Quotation
- Controlling Prices in Quotations
- Inspecting and Changing Quotations
- Printing Quotations
- Operations Menu, including:
- Item Search
- Customer Status
- Quotation Status
- Recalculate Discount
- Recalculate Weight and Volume
- Update Currency Price List Items
- Open Tax Matrix
- Manager's Discount Override
- Request Approval
- Cancel Approval Request
- Item Search
- Create Menu
- Row Menu
- Home page for Quotations module manual
- Home page for Standard ERP manual
Operations Menu - Quotation - Manager's Discount Override
This page describes the 'Manager's Discount Override' function on the Operations menu in the Quotation record window. If you are using iOS or Android, the 'Manager's Discount Override' function is on the Tools menu (with 'wrench' icon).---
You can prevent users from saving a Quotation if they have entered a price (i.e. a unit price less discount) in any row that is below a specified minimum for the Item. To do this, follow these steps:
- Create a Price List (using the Price List register in the Pricing module).
- Create records in the Price register for each Item that is to have a minimum price, and specify the minimum price in the Price field in each one. Assign each Price record to the Price List from step 1.
- Open the Person records for each sales person and specify the Price List in the Minimum Price List field on the 'Sales' card.
In some circumstances, you may wish to allow the saving of a Quotation with at least one row in which the Unit Price less Discount is below the minimum. In order to allow the Quotation to be saved, a manager must approve the price. A manager in this context is a Person with a Discount Password, set using the ' Change Discount Password' function on the Operations menu of the 'Persons: Browse' window (on the Tools menu if you are using iOS or Android).
To approve the price, the manager should follow these steps:
- Click (Windows/Mac OS X) or tap (iOS/Android) in any field in the row in which the Unit Price less Discount is less than the minimum.
- Select this 'Manager's Discount Override' function from the Operations menu (Windows/Mac OS X) or Tools menu (iOS/Android). The 'Manager's Override for Discount' window will open:
- Enter their Signature and Discount Password (not log-in password) and click (Windows/Mac OS X) or tap (iOS/Android) the [Save] button.
- Repeat the previous steps for each row in which the Unit Price less Discount is less than the minimum.
You can also specify a Minimum Price List in the manager's Person record. This will have two consequences:
- The manager will not be able to use the 'Manager's Discount Override' function to approve a price that is lower than the minimum specified in their Minimum Price List; and
- After the manager has approved a price in a Quotation row, the price specified in their Minimum Price List will become the new minimum for that row.
---
The Quotation register in Standard ERP:
- Introduction
- Entering a Quotation
- Controlling Prices in Quotations
- Inspecting and Changing Quotations
- Printing Quotations
- Operations Menu, including:
- Item Search
- Customer Status
- Quotation Status
- Recalculate Discount
- Recalculate Weight and Volume
- Update Currency Price List Items
- Open Tax Matrix
- Manager's Discount Override
- Request Approval
- Cancel Approval Request
- Item Search
- Create Menu
- Row Menu
- Home page for Quotations module manual
- Home page for Standard ERP manual
Operations Menu - Quotation - Request Approval
This page describes the 'Request Approval' function on the Operations menu in the Quotation record window. If you are using iOS or Android, the 'Request Approval' function is on the Tools menu (with 'wrench' icon).---
If a Quotation has to pass through an approval process before you can print it or create Orders and other records from it, use this function to begin that approval process. Please refer to the description of the Approval Status field on the 'Inv. Address' card of the Quotation window for brief details about the approval process and here for full details.
---
The Quotation register in Standard ERP:
- Introduction
- Entering a Quotation
- Controlling Prices in Quotations
- Inspecting and Changing Quotations
- Printing Quotations
- Operations Menu, including:
- Item Search
- Customer Status
- Quotation Status
- Recalculate Discount
- Recalculate Weight and Volume
- Update Currency Price List Items
- Open Tax Matrix
- Manager's Discount Override
- Request Approval
- Cancel Approval Request
- Item Search
- Create Menu
- Row Menu
- Home page for Quotations module manual
- Home page for Standard ERP manual
Operations Menu - Quotation - Cancel Approval Request
This page describes the 'Cancel Approval Request' function on the Operations menu in the Quotation record window. If you are using iOS or Android, the 'Cancel Approval Request' function is on the Tools menu (with 'wrench' icon).---
If a Quotation needs to go through an approval process before you can print it or create Orders and other records from it and you have started that approval process by selecting 'Request Approval' from the Operations menu (Windows/Mac OS X) or Tools menu (iOS/Android), you will no longer be able to modify the Quotation. So, if you realise the Quotation contains an error, you must cancel the approval process before you can correct the error. To do this, open the Quotation and choose 'Cancel Approval Request' from the Operations or Tools menu. You will now be able to amend the Quotation and then restart the approval process by once again choosing 'Request Approval'.
If you cannot cancel the approval process, the probable reasons are:
- The Approval Status of the Quotation (visible on the 'Inv. Address' card) is not Pending.
- You may have configured the approval process (using the Approval Rules register in the Business Alerts module) so that it does not allow cancellation.
- You cannot cancel the approval process if at least one Approval Person has approved the Quotation.
---
The Quotation register in Standard ERP:
- Introduction
- Entering a Quotation
- Controlling Prices in Quotations
- Inspecting and Changing Quotations
- Printing Quotations
- Operations Menu, including:
- Item Search
- Customer Status
- Quotation Status
- Recalculate Discount
- Recalculate Weight and Volume
- Update Currency Price List Items
- Open Tax Matrix
- Manager's Discount Override
- Request Approval
- Cancel Approval Request
- Item Search
- Create Menu
- Row Menu
- Home page for Quotations module manual
- Home page for Standard ERP manual
Create Menu - Quotations
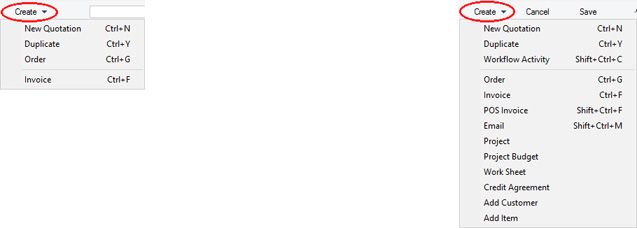
'New' and 'Duplicate' are standard functions that are provided on every Create and + menu on every window. Use these functions to create new records, in this case in the Quotation register. Please follow the links below for details about the other functions:
- Order
- Invoice
- Workflow Activity
- Email
- Project
- Project Budget
- Work Sheet
- Credit Agreement
- Add Customer
- Add Item
The Quotation register in Standard ERP:
- Introduction
- Entering a Quotation
- Controlling Prices in Quotations
- Inspecting and Changing Quotations
- Printing Quotations
- Operations Menu
- Create Menu
- Row Menu
- Home page for Quotations module manual
- Home page for Standard ERP manual
Create Menu - Quotations - Order
This page describes the 'Order' function on the Create menu in the Quotation record window. If you are using iOS or Android, the 'Order' function is on the + menu.---
You can create an Order from a Quotation using the following methods:
- Highlight the Quotation in the 'Quotations: Browse' window and select 'Order' from the Create menu (Windows/Mac OS X) or + menu (iOS/Android). If you are using iOS or Android, you can highlight a Quotation by searching for it. The new Order will be opened automatically for checking and approval.
- Open the Quotation in a record window and again select 'Order' from the Create or + menu. Save any changes you have made to the Quotation before selecting the function. Again, the new Order will be opened automatically for checking and approval.
- If you are using the Workflow Overview, you can create Orders from Quotations by dragging the Quotations into a column containing Orders. In this case, the new Orders will not be opened automatically for checking and approval, but you can open them immediately from the Workflow Overview.
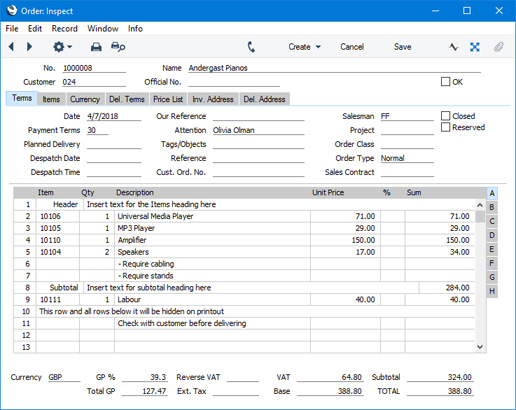
There is no restriction on the number of Orders that you can create from a single Quotation record, but no Order will be created if the Quotation has been Closed or Rejected. Also, no Order will be created if there is no valid record in the Number Series - Sales Orders setting (in the Sales Orders module). This might be a fault in the setting itself, or it might be because the default Order Number on the 'Number Series' card of the current user's Person record or in the Number Series Defaults setting (in the System module) is not in a valid Number Series. This problem will usually occur at the beginning of a new year. In a single-user system only, if you change any field on the 'Number Series' card of the Person record, you will need to quit and restart for the change to take effect. If you change a field in the Number Series Defaults setting, you will need to quit and restart in a single-user system and on your client machine in a multi-user system.
Please click here for a full description of the Order window, including detailed information about issuing Deliveries and raising Invoices.
To close the Order window, click the close box (Windows/Mac OS X) or tap < (iOS/Android). You will be asked if you would like to save any changes that you may have made.
The Order Number will be copied to the 'Del. Terms' card of the Quotation: it will become visible when you re-open the Quotation, and will also be shown in the 'Quotations: Browse' window. The Status of the Quotation will be changed to Accepted automatically, and the Probability will be set to 100%. The current date will be placed in the Decision Date field if that field was empty.
The Quotation and the Order will be connected to each other through the Link Manager facility. This allows you to open the Quotation quickly and easily when reviewing the Order, or to open the Order from the Quotation.
If you need Quotations to pass through an approval process before you can create Orders from them, you can configure such a process using the Approval Rules register in the Business Alerts module. Please refer to the description of the Approval Status field on the 'Inv. Address' card of the Quotation window for brief details about the approval process and here for full details.
You can use Access Groups to prevent certain users from creating Orders from Quotations. To do this, deny them access to the 'Order from Quotation' Action.
---
The Quotation register in Standard ERP:
- Introduction
- Entering a Quotation
- Controlling Prices in Quotations
- Inspecting and Changing Quotations
- Printing Quotations
- Operations Menu
- Create Menu, including:
- Order
- Invoice
- Workflow Activity
- Email
- Project
- Project Budget
- Work Sheet
- Credit Agreement
- Add Customer
- Add Item
- Order
- Row Menu
- Home page for Quotations module manual
- Home page for Standard ERP manual
Create Menu - Quotations - Invoice
This page describes the 'Invoice' function on the Create menu in the Quotation record window. If you are using iOS or Android, the 'Invoice' function is on the + menu.---
You can create an Invoice directly from a Quotation using the following methods:
- Highlight the Quotation in the 'Quotations: Browse' window and select 'Invoice' from the Create menu (Windows/Mac OS X) or + menu (iOS/Android). If you are using iOS or Android, you can highlight an Order by searching for it. The new Invoice will be opened automatically for checking and approval.
- Open the Quotation in a record window and again select 'Invoice' from the Create or + menu. Save any changes you have made to the Quotation before selecting the function. Again, the new Invoice will be opened automatically for checking and approval.
Virtually all the information in the Quotation will be transferred to the corresponding fields in the Invoice, reducing the typing load and minimising the risk of error.
If you need there to be a restriction on the number of Invoices that you can create from a Quotation, tick the Disallow Invoicing more than Quoted box on the 'Del. Terms' card in the Quotation. This option will be ticked by default if you have selected the option with the same name in the Quotation Settings setting. No Invoices will be created from Quotations that have been Closed or Rejected.
You do not need to create an Order from a Quotation before creating an Invoice. However if you have created an Order, it is recommended that you create the Invoice from the Order rather than from the Quotation, to ensure stock levels remain accurate. If you do not follow this sequence, stock levels will be changed twice: on Delivery (created from the Order) and on Invoice (from the Quotation). Stock levels would not be changed for the second time if you create the Invoice from the Order.
Please click here for a full description of the Invoice window, including detailed information about marking Invoices as OK, printing Invoices and Nominal Ledger Transactions.
To close the Invoice window and return to the Quotation, click the close box (Windows/Mac OS X) or tap < (iOS/Android). You will be asked if you would like to save any changes that you may have made.
In the Quotation, the Invoiced field on flip D of each row and the Inv. Date and Inv. No. fields on flip F will have been updated automatically. The Status of the Quotation will be changed to Accepted automatically, and the Probability will be set to 100%. The current date will be placed in the Decision Date field if that field was empty.
If the function does not create an Invoice, the probable causes are:
- The Quotation has been marked as Closed or Rejected.
- There are no rows in the Quotation that need invoicing. This might be because the Disallow Invoicing more than Quoted option on the 'Del. Terms' card has been ticked and you have already invoiced the Quotation in full, or because every row has an Inv. After date (flip F) that is in the future.
- There is no valid record in the Number Series - Invoices setting (in the Sales Ledger). This might be a fault in the setting itself, or it might be because the default Invoice Number on the 'Number Series' card of the current user's Person record or in the Number Series Defaults setting (in the System module) is not in a valid Number Series. This problem will usually occur at the beginning of a new year. In a single-user system only, if you change any field on the 'Number Series' card of the Person record, you will need to quit and restart for the change to take effect. If you change a field in the Number Series Defaults setting, you will need to quit and restart in a single-user system and on your client machine in a multi-user system.
If you need Quotations to pass through an approval process before you can create Invoices from them, you can configure such a process using the Approval Rules register in the Business Alerts module. Please refer to the description of the Approval Status field on the 'Inv. Address' card of the Quotation window for brief details about the approval process and here for full details.
You can use Access Groups to prevent certain users from creating Invoices from Quotations. To do this, deny them access to the 'Invoice from Quotation' Action.
---
The Quotation register in Standard ERP:
- Introduction
- Entering a Quotation
- Controlling Prices in Quotations
- Inspecting and Changing Quotations
- Printing Quotations
- Operations Menu
- Create Menu, including:
- Order
- Invoice
- Workflow Activity
- Email
- Project
- Project Budget
- Work Sheet
- Credit Agreement
- Add Customer
- Add Item
- Order
- Row Menu
- Home page for Quotations module manual
- Home page for Standard ERP manual
Create Menu - Quotation - Workflow Activity
This page describes the 'Workflow Activity' function on the Create menu in the Quotation record window. If you are using iOS or Android, the 'Workflow Activity' function is on the + menu.---
Creating an Activity from a Quotation can be useful when you need to schedule a follow-up task related to the Quotation, such as calling the Customer to check that the Quotation has been received or to attempt to convert it into a sale.
You can create an Activity from a Quotation using the following methods:
- Open the Quotation in a record window and select 'Workflow Activity' from the Create menu (Windows/Mac OS X) or + menu (iOS/Android). Save any changes you have made to the Quotation before selecting the function. The new Activity will be opened automatically for checking and approval.
- Open the Quotation in a record window and then open the 'Workflow Manager' window. Click or tap the [+] button in this window to create a new Activity. Again, the new Activity will be opened automatically for checking and approval.
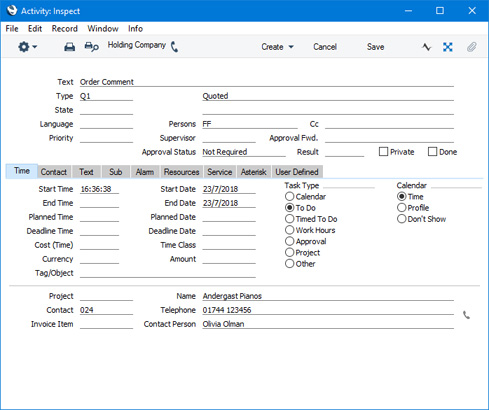
- The Activity Type will be taken from the Activity Types, Subsystems setting in the CRM module.
- The setting of the Done check box will also be taken from the Activity Types, Subsystems setting.
- The Task Type will be To Do.
- The Symbol will be Other.
- The Start Date of the Activity will be the Make Contact Date of the Quotation if there is one, otherwise it will be the Quotation Date.
- Customer details will be taken from the Quotation.
- The Person of the Activity will be the Salesman from the Quotation, and the Signature of the current user (if the current user is not the Salesman) will appear in the Cc field. As the Task Type will be To Do, the Activity will be placed in the Salesman's and the current user's Task Managers.
- The first line of the Comment on the 'Price List' card of the Quotation will be copied to the Text field in the Activity.
The Quotation and the Activity will be connected to each other through the Link Manager and Workflow Manager. When reviewing the Activity, you can return to the Invoice quickly and easily using the Link Manager in the Activity, while you can open the Activity from the Quotation using the Workflow Manager.
You must save a Quotation before you can create an Activity. This is to ensure the links mentioned in the previous paragraph can be established.
The 'Activity: Inspect' window is fully described here.
---
The Quotation register in Standard ERP:
- Introduction
- Entering a Quotation
- Controlling Prices in Quotations
- Inspecting and Changing Quotations
- Printing Quotations
- Operations Menu
- Create Menu, including:
- Order
- Invoice
- Workflow Activity
- Email
- Project
- Project Budget
- Work Sheet
- Credit Agreement
- Add Customer
- Add Item
- Order
- Row Menu
- Home page for Quotations module manual
- Home page for Standard ERP manual
Create Menu - Quotation - Email
This page describes the 'Email' function on the Create menu in the Quotation record window. If you are using iOS or Android, the 'Email' function is on the + menu.---
The 'Email' function allows you to create a Mail containing details of a Quotation, which you can use to send the Quotation to the Customer by email. To be able to use this function, the Email and Conferences option in the Configuration setting in the System module must be ticked.
To create a Mail from a Quotation, first open the Quotation in a record window and then select 'Email' from the Create menu (Windows/Mac OS X) or + menu (iOS/Android). The following screen appears, in which you can create a new Mail:
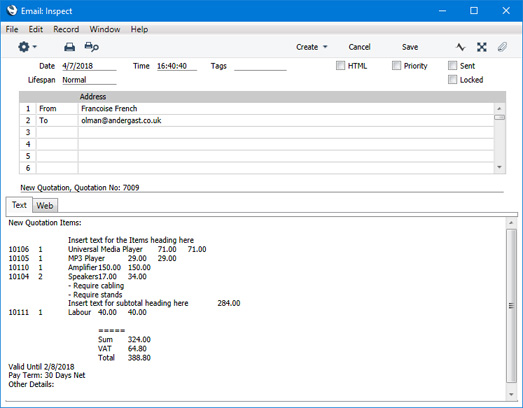
- The sender of the Mail will be the current user. If the current user doesn't have a Mailbox, no Mail will be created.
- The Recipient of the Mail will be chosen as follows:
- If the Customer in the Quotation has a record in the Additional Email Recipients setting in the CRM module, the Mail will be sent to the Contact Persons listed with the Form Type "Quotation" in that record.
- If the Customer does not have a record in the Additional Email Recipients setting or its record in that setting has no Contact Persons with the Form Type "Quotation", the Mail will be sent to the Email Address of the Contact Person quoted in the Attention field in the Quotation.
- If the Contact Person quoted in the Attention field in the Quotation does not have an Email Address or there is no Contact Person in the Attention field, the Mail will be sent to the Email Address specified in the Contact record for the Customer.
- If the above points are not satisfied, no Mail will be created.
- If the Customer in the Quotation has a record in the Additional Email Recipients setting in the CRM module, the Mail will be sent to the Contact Persons listed with the Form Type "Quotation" in that record.
- The Subject and Text of the Mail will be taken from the record in the Mail Texts setting in the Email and Conferences module in which the Form is "Quotations". If the Quotation has a Language and the Mail Text record contains a row for that Language, the Subject and Text will be determined by the fields in that row. Otherwise, they will be determined by the fields in the Mail Text header, as follows:
- The Subject in the mail will be composed from the Subject in the Mail Text record (which should have a trailing space), the text "Quotation No: " and the Quotation Number. For example, if the Subject in the Mail Text record is "Please find attached " (with trailing space), the Subject of the Mail will be "Please find attached Quotation No: XXXX" (where XXXX is the Quotation Number).
- The Text of the Mail will be built up as follows:
- The initial text will be taken from the Standard Text record quoted in the First Text field in the Mail Text record.
- Depending on the Do not put Record Details in Mail Body option in the Mail Text record, the Items in the Quotation will then be listed, followed by the Quotation totals, the Valid Until date and the Payment Term.
- The final text will be taken from the Standard Text record quoted in the Last Text field in the Mail Text record. It is recommended that the first line in this Standard Text record should be a carriage return, to ensure that the text in the mail is neatly spaced.
- The initial text will be taken from the Standard Text record quoted in the First Text field in the Mail Text record.
If either Standard Text record is in HTML format, the Mail will be in HTML format as well.
- The Subject in the mail will be composed from the Subject in the Mail Text record (which should have a trailing space), the text "Quotation No: " and the Quotation Number. For example, if the Subject in the Mail Text record is "Please find attached " (with trailing space), the Subject of the Mail will be "Please find attached Quotation No: XXXX" (where XXXX is the Quotation Number).
- A PDF version of the Quotation will be attached to the Mail, accessible through the Document Manager. This requires you to have designed a Form Template to be used when printing Quotations, and to have assigned that Form Template to the Quotation Form using the 'Define Form' function. When you design the Form Template, you may need to use Styles that will embed fonts in PDF files (this will depend on the fonts you use). You may also need to choose a code page and page setup, which you can do in the Form Template Properties. Please refer here for details designing Form Templates.
- The Quotation record itself will also be connected to the Mail through its Link Manager, and similarly the Mail will be connected to the Quotation. This allows you to open the Mail quickly and easily when reviewing the Quotation, or to open the Quotation from the Mail.
If the function does not create a Mail, the probable causes are:
- The current user does not have a Mailbox.
- No suitable recipient email address was found.
- The Quotation has not been saved.
- The Approval Status of the Quotation does not allow a Mail to be created from it. If you need Quotations to pass through an approval process before you can create Mails from them, you can configure such a process using the Approval Rules register in the Business Alerts module. Please refer to the description of the Approval Status field on the 'Inv. Address' card of the Quotation window or brief details about the approval process and here for full details.
---
The Quotation register in Standard ERP:
- Introduction
- Entering a Quotation
- Controlling Prices in Quotations
- Inspecting and Changing Quotations
- Printing Quotations
- Operations Menu
- Create Menu, including:
- Order
- Invoice
- Workflow Activity
- Email
- Project
- Project Budget
- Work Sheet
- Credit Agreement
- Add Customer
- Add Item
- Order
- Row Menu
- Home page for Quotations module manual
- Home page for Standard ERP manual
Create Menu - Quotation - Project
Please refer here for details about creating Projects from Quotations.---
The Quotation register in Standard ERP:
- Introduction
- Entering a Quotation
- Controlling Prices in Quotations
- Inspecting and Changing Quotations
- Printing Quotations
- Operations Menu
- Create Menu, including:
- Order
- Invoice
- Workflow Activity
- Email
- Project
- Project Budget
- Work Sheet
- Credit Agreement
- Add Customer
- Add Item
- Order
- Row Menu
- Home page for Quotations module manual
- Home page for Standard ERP manual
Create Menu - Quotation - Project Budget
Please refer here for details about creating Project Budgets from Quotations.---
The Quotation register in Standard ERP:
- Introduction
- Entering a Quotation
- Controlling Prices in Quotations
- Inspecting and Changing Quotations
- Printing Quotations
- Operations Menu
- Create Menu, including:
- Order
- Invoice
- Workflow Activity
- Email
- Project
- Project Budget
- Work Sheet
- Credit Agreement
- Add Customer
- Add Item
- Order
- Row Menu
- Home page for Quotations module manual
- Home page for Standard ERP manual
Create Menu - Quotation - Work Sheet
This page describes the 'Work Sheet' function on the Create menu in the Quotation record window. If you are using iOS or Android, the 'Work Sheet' function is on the + menu.---
The Work Sheet is the mechanism by which the time spent and the spare parts used in a repair are registered against a Service Order. You can enter Work Sheets directly to the Work Sheet register or you can generate them from a Work Order or a Service Order. If you need to quote a Customer for a repair, you can create a Quotation from a Service Order and then create the Work Sheet from the Quotation.
To create a Work Sheet from a Quotation, first open the Quotation in a record window and then select 'Work Sheet' from the Create menu (Windows/Mac OS X) or + menu (iOS/Android). A new record will be created in the Work Sheet register in the Service Orders module and opened immediately in a window entitled 'Work Sheet: Inspect'. This means that it has been created and saved and is being opened for amendment and approval.
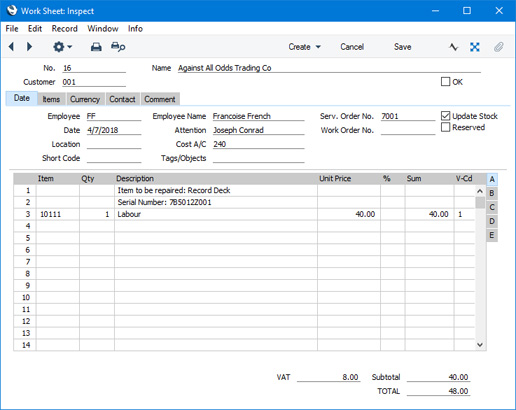
On flip B of each Work Sheet row, the Items will have been related to the item of equipment being repaired (known as the "Main" item), i.e. to an item on the Service Order. If there is more than one Main item on the Service Order, you may need to link the Items in the Work Sheet to a different Main item. To do this, enter the Serial Number of the correct Main Item in the Main Serial No field in each row as appropriate. You can use 'Paste Special' from the Main Serial No field to open a selection list showing the Serial Numbers of Main Items on the Service Order. The Item Type (warranty status or otherwise) will be brought in automatically, but you can change it for in an individual Work Sheet.
If the spare parts specified on the Work Sheet are not in stock, you can create a Purchase Order from the Work Sheet by selecting 'Purchase Order' from the Create menu.
When you have carried out the work, mark the Work Sheet as OK and save. Work Sheet Transaction records will be created (one for each Work Sheet row). These Work Sheet Transactions will be used to construct the eventual Invoice for the time spent and spare parts used. If the Update Stock box on the 'Date' card of the Work Sheet is ticked, stock levels of any Stocked Items (i.e. spare parts) will be amended. If you have determined using the Sub Systems setting in the Nominal Ledger that cost accounting transactions are to be created from Work Sheets (i.e. you are maintaining a stock value in the Nominal Ledger), a stock Transaction in the Nominal Ledger will also be raised if you have used any Stocked Items in the Work Sheet.
There is no limit to the number of Work Sheets that can be created from a particular Quotation. If the function does not create a Work Sheet, the probable causes are:
- The Quotation was not created from a Service Order (i.e. the Serv. Ord. No. field on the 'Price List' card of the Quotation is empty).
- There is no valid record in the Number Series - Work Sheets setting (in the Service Orders module). This problem will usually occur at the beginning of a new year.
---
The Quotation register in Standard ERP:
- Introduction
- Entering a Quotation
- Controlling Prices in Quotations
- Inspecting and Changing Quotations
- Printing Quotations
- Operations Menu
- Create Menu, including:
- Order
- Invoice
- Workflow Activity
- Email
- Project
- Project Budget
- Work Sheet
- Credit Agreement
- Add Customer
- Add Item
- Order
- Row Menu
- Home page for Quotations module manual
- Home page for Standard ERP manual
Create Menu - Quotation - Credit Agreement
You can use this function to create a Credit Agreement from a Quotation. Please refer to your local HansaWorld representative for more details.---
The Quotation register in Standard ERP:
- Introduction
- Entering a Quotation
- Controlling Prices in Quotations
- Inspecting and Changing Quotations
- Printing Quotations
- Operations Menu
- Create Menu, including:
- Order
- Invoice
- Workflow Activity
- Email
- Project
- Project Budget
- Work Sheet
- Credit Agreement
- Add Customer
- Add Item
- Order
- Row Menu
- Home page for Quotations module manual
- Home page for Standard ERP manual
Create Menu - Quotation - Add Customer
This page describes the 'Add Customer' function on the Create menu in the Invoice record window. If you are using iOS or Android, the 'Add Customer' function is on the + menu.---
The 'Add Customer' function provides an easy way of creating a new Customer record in the Contact register while looking at a Quotation. When you select the function from the Create menu (Windows/Mac OSX) or + menu (iOS/Android), the 'Contact: New' window will be opened immediately. The Customer check box will be ticked by default. If you entered a Customer Name, Invoice Address and/or Payment Terms in the Quotation, those details will be copied to the new Contact as well. Enter the new Customer's details and click [Save] (Windows/Mac OS X) or tap √ (iOS/Android). The new Customer will be saved, the window will be closed and the new Customer Number and other details will be entered in the Quotation. Please refer here for full details about the Contact register.
---
The Quotation register in Standard ERP:
- Introduction
- Entering a Quotation
- Controlling Prices in Quotations
- Inspecting and Changing Quotations
- Printing Quotations
- Operations Menu
- Create Menu, including:
- Order
- Invoice
- Workflow Activity
- Email
- Project
- Project Budget
- Work Sheet
- Credit Agreement
- Add Customer
- Add Item
- Order
- Row Menu
- Home page for Quotations module manual
- Home page for Standard ERP manual
Create Menu - Quotation - Add Item
This page describes the 'Add Item' function on the Create menu in the Quotation record window. If you are using iOS or Android, the 'Add Item' function is on the + menu.---
The 'Add Item' function provides an easy way of creating a new Item record while looking at a Quotation. When you select the function from the Create menu (Windows/Mac OSX) or + menu (iOS/Android), the 'Item: New' window will be opened immediately. If you entered an Item Number, Description, Unit Price, Sales Account, VAT Code/Tax Template Code and/or Cost Price in a Quotation row and left the insertion point in that row before selecting the function, those details will be copied to the new Item record. Enter the new Item's details and click [Save] (Windows/Mac OS X) or tap √ (iOS/Android). The new Item will be saved, the window will be closed and the new Item Number and other details will be entered in the first empty row in the Quotation. Please refer here for full details about the Item register.
---
The Quotation register in Standard ERP:
- Introduction
- Entering a Quotation
- Controlling Prices in Quotations
- Inspecting and Changing Quotations
- Printing Quotations
- Operations Menu
- Create Menu, including:
- Order
- Invoice
- Workflow Activity
- Email
- Project
- Project Budget
- Work Sheet
- Credit Agreement
- Add Customer
- Add Item
- Order
- Row Menu
- Home page for Quotations module manual
- Home page for Standard ERP manual
Row Menu - Quotation
The matrix in the Quotation window has its own menu, which contains functions that refer to or affect an individual row in the matrix. This is sometimes known as the "Row Menu".If you are using Windows or Mac OS X, you can open the Row menu by first clicking in any field in the row in question (i.e. the row to which the function is to be applied), and then right-clicking (Windows) or Ctrl-clicking (Mac OS X) the row number (on the left of the row). A menu will appear, where you can select the function that you need:

Please follow the links below for details about each function on the Row menu:
The Quotation register in Standard ERP:
- Introduction
- Entering a Quotation
- Controlling Prices in Quotations
- Inspecting and Changing Quotations
- Printing Quotations
- Operations Menu
- Create Menu
- Row Menu
- Home page for Quotations module manual
- Home page for Standard ERP manual
Row Menu - Quotation - Item Status
This page describes the 'Item Status' function on the Row menu in the Quotation record window. This function can't be used on iOS or Android.---
The 'Item Status' function displays the current status (for example, the quantity in stock, the quantity on unfulfilled Sales Orders, etc) of any of the Items in a Quotation in a separate 'Item Status' window.
To open the 'Item Status' window, first click in any field in the Quotation row containing the Item you are interested in. Then open the Row menu by right-clicking (Windows) or ctrl-clicking (Mac OS X) the row number and select the 'Item Status' function. The 'Item Status' window will be opened. For the example illustrated below, we clicked in the second row of a Quotation (containing Item 10105) before selecting the 'Item Status' function:
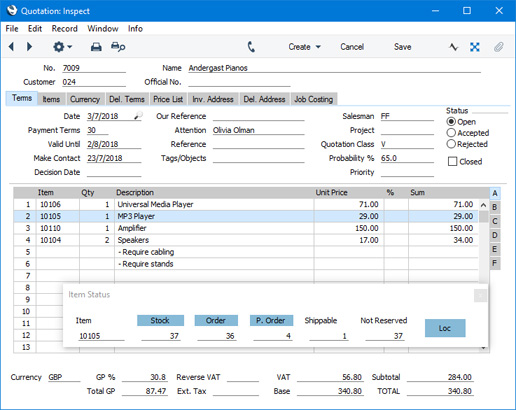
If you have specified a Location in a Quotation, the figures in the 'Item Status' window will refer to that Location. If you have not specified a Location, the figures will refer to all Locations. This will be the case even if you have specified a Main Location in the Stock Settings setting.
If you would like the 'Item Status' window to open automatically whenever you open a Quotation (if it isn't open already), select the Show Item Status option in the Item Settings setting in the Sales Ledger.
Please refer here for full details about the 'Item Status' window, including details about how the figures are calculated, about using the Item Status Settings setting in the Sales Ledger to choose which figures will be shown in the 'Item Status' window and about displaying different figures in the 'Item Status' window to different users.
---
The Quotation register in Standard ERP:
- Introduction
- Entering a Quotation
- Controlling Prices in Quotations
- Inspecting and Changing Quotations
- Printing Quotations
- Operations Menu
- Create Menu
- Row Menu, including:
- Home page for Quotations module manual
- Home page for Standard ERP manual
Row Menu - Quotation - Previous Sales Prices
This page describes the 'Previous Sales Prices' function on the Row menu in the Quotation record window. If you are using iOS or Android, the 'Previous Sales Prices' function is on the Tools menu (with 'wrench' icon).---
The 'Previous Sales Prices' function prints a report to screen listing the prices previously paid by the Customer for one of the Items in a Quotation.
To use this function, first place the insertion point in the Quotation row containing the Item in which you are interested. Then open the Row menu by right-clicking (Windows) or ctrl-clicking (Mac OS X) the row number. When the Row menu opens, select 'Previous Sales Prices'. If you are using iOS or Android, select 'Previous Sales Prices' from the Tools menu (with 'wrench' icon). A report will be printed to screen, listing each price paid by the Customer for the Item, together with the Invoice Number of the most recent Invoice in which they were charged each different price.
---
The Quotation register in Standard ERP:
- Introduction
- Entering a Quotation
- Controlling Prices in Quotations
- Inspecting and Changing Quotations
- Printing Quotations
- Operations Menu
- Create Menu
- Row Menu, including:
- Item Status
- Previous Sales Prices
- Add Header Line
- Add Hidden Line
- Add Subtotal
- Item Status
- Home page for Quotations module manual
- Home page for Standard ERP manual
Row Menu - Quotation - Add Header Line
This page describes the 'Add Header Line' function on the Row menu in the Quotation record window. If you are using iOS or Android, the 'Add Header Line' function is on the Tools menu (with 'wrench' icon).---
You can use the 'Add Header Line' function in a Quotation when you need to insert a row above the Quotation Items where you can enter some descriptive text. You can use this function at any time while entering the Quotation, as follows:
- Place the insertion point anywhere in the Quotation row that is to be the first row after the header row. Open the Row menu by right-clicking (Windows) or ctrl-clicking (Mac OS X) the row number, and select the 'Add Header Line' function. If you are using iOS or Android, select 'Add Header Line' from the Tools menu (with 'wrench' icon). A special "Header" row will be inserted in the grid above the row containing the insertion point.
- Place the insertion point in any field outside the grid on the 'Items' card and select this function (if you are using Windows or Mac OS X, right-click or ctrl-click any row number). A special "Header" row will be inserted in the grid as the first row.
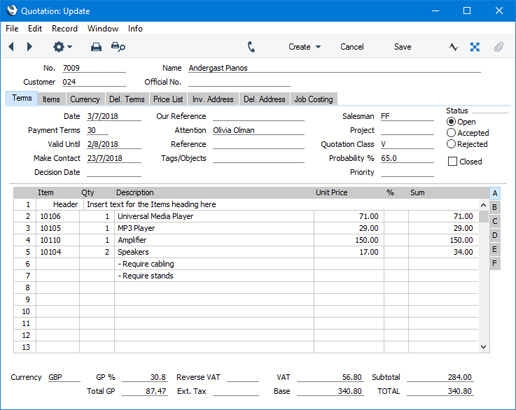
The special "Header" row will be transferred to all Orders and Invoices created from the Quotation.
---
The Quotation register in Standard ERP:
- Introduction
- Entering a Quotation
- Controlling Prices in Quotations
- Inspecting and Changing Quotations
- Printing Quotations
- Operations Menu
- Create Menu
- Row Menu, including:
- Item Status
- Previous Sales Prices
- Add Header Line
- Add Hidden Line
- Add Subtotal
- Item Status
- Home page for Quotations module manual
- Home page for Standard ERP manual
Row Menu - Quotation - Add Hidden Line
This page describes the Add Hidden Line' function on the Row menu in the Quotation record window. If you are using iOS or Android, the 'Add Hidden Line' function is on the Tools menu (with 'wrench' icon).---
The 'Add Hidden Line' function allows you to ensure certain rows in a Quotation will not appear when you print the Quotation or send it by email.
Enter the Quotation so that the rows to be printed are listed first, above those that are not to be printed. Then, place the insertion point in the first row that is not to be printed. Open the Row menu by right-clicking (Windows) or ctrl-clicking (Mac OS X) the row number and select the 'Add Hidden Line' function. If you are using iOS or Android, select 'Add Hidden Line' from the Tools menu (with 'wrench' icon). A new row will be inserted above the row containing the insertion point (row 8 in the illustration below). This new row and all those below it will not be printed.

You can prevent certain users from using the 'Add Hidden Line' function in Quotations, Orders and Invoices using Access Groups, by denying them access to the 'Hidden Line' Action.
---
The Quotation register in Standard ERP:
- Introduction
- Entering a Quotation
- Controlling Prices in Quotations
- Inspecting and Changing Quotations
- Printing Quotations
- Operations Menu
- Create Menu
- Row Menu, including:
- Item Status
- Previous Sales Prices
- Add Header Line
- Add Hidden Line
- Add Subtotal
- Item Status
- Home page for Quotations module manual
- Home page for Standard ERP manual
Row Menu - Quotation - Add Subtotal Line
This page describes the 'Add Subtotal Line' function on the Row menu in the Quotation record window. If you are using iOS or Android, the 'Add Subtotal Line' function is on the Tools menu (with 'wrench' icon).---
The 'Add Subtotal Line' function allows you to add rows displaying subtotals to a Quotation.
First, place the insertion point anywhere in the Quotation row that is to be the first row after the subtotal row. Then, open the Row menu by right-clicking (Windows) or ctrl-clicking (Mac OS X) the row number and select the 'Add Subtotal' function. If you are using iOS or Android, select 'Add Subtotal Line' from the Tools menu (with 'wrench' icon). A special "Subtotal" row will be inserted in the grid above the row containing the insertion point (row 8 in the illustration below). A subtotal will be placed in the Sum field in this new row, the sum of the previous rows. In the field to the left of the Sum you can type some explanatory text, which will be shown on the Quotation when it is printed. If the Quotation already has a "Subtotal" row, only the Items below that row will be included in the new subtotal.
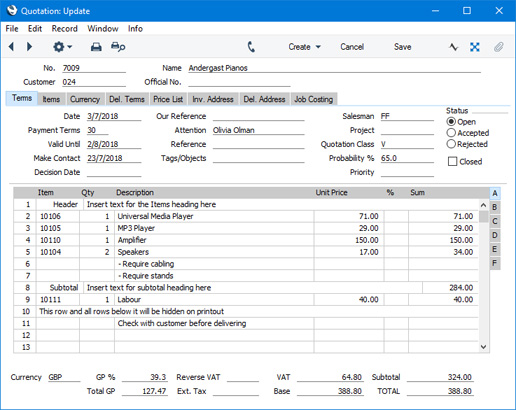
The special "Subtotal" row will be transferred to all Orders and Invoices created from the Quotation.
---
The Quotation register in Standard ERP:
- Introduction
- Entering a Quotation
- Controlling Prices in Quotations
- Inspecting and Changing Quotations
- Printing Quotations
- Operations Menu
- Create Menu
- Row Menu, including:
- Item Status
- Previous Sales Prices
- Add Header Line
- Add Hidden Line
- Add Subtotal
- Item Status
- Home page for Quotations module manual
- Home page for Standard ERP manual