Workflow Manager
The Workflow Manager allows you to create Activities and connect them to any record in Standard ERP. You will then be able to open them from each other quickly and easily, without needing to search for them in browse windows or in reports.In the top right-hand corner of every record window, there is a [Workflow Manager] button:

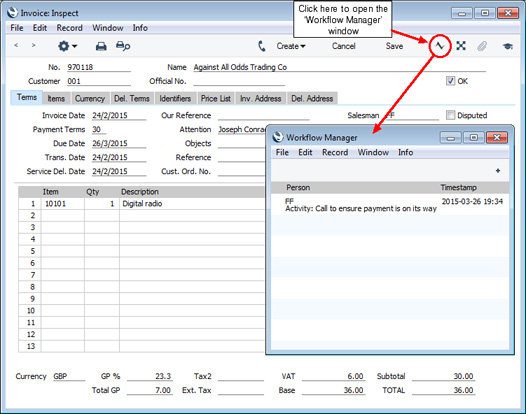
Placing Activities in the Workflow Manager
When you connect an Activity to a record, the Activity will be added to that record's Workflow Manager. You can connect an Activity to a record using the following methods:- With the record open in a record window, choose 'Workflow Activity' from the Create menu. A new Activity will be created and opened in a window entitled 'Activity: Inspect'. This means that it has already been saved and is being opened for checking. The details in the Activity (date, Person, Activity Type, etc) will depend on the record from which it was created. For example, the date in an Activity created from an Invoice will be the Due Date of the Invoice, while the date in Activity created from a Quotation will be the Make Contact date of the Quotation. The Activity Type will be determined by the setting in the CRM module.
- With the record open in a record window, open the 'Workflow Activity' window and then click the [+] button in the top right-hand corner (Windows and Linux) or the top left-hand corner (Mac OS X). As in point 1, a new Activity will be created and opened in a window entitled 'Activity: Inspect'.
- If the Activity already exists, open it in a record window and drag its [Document Manager] button to the 'Workflow Manager' window of the record in question. If you are using Mac OS X, you can also drag the [Document Manager] button of the Activity to the [Workflow Manager] button of the record.
Colour Coding
Activities listed in the 'Workflow Activity' window are colour-coded: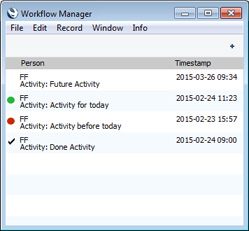
- (no colour)
- Activities due to be done in the future
- red
- Activities due to be done in the past
- green
- Activities due to be done today
- √
- Activities marked as Done

Activity Text
If you are using Mac OS X, an Activity will be marked with a small arrow in the 'Workflow Manager' window if it has notes and comments entered on its 'Text' card: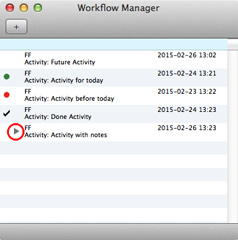
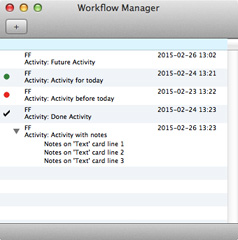
Opening Activities from the 'Workflow Manager' window
When looking at a record, you can open a connected Activity as follows:- Click the [Workflow Manager] button to open the record's 'Workflow Manager' window.
- Double-click the Activity. It will be opened in its own window where you can read or edit it in the usual manner.
Go back to:
- Home page for Working Environment manual
- Home page for Standard ERP manual
Attachments
You can connect files, notes or other records to any record in Enterprise by HansaWorld. These connected objects are known as "Attachments".Every record window contains an [Attachments] button in the top right-hand corner. If a record has an Attachment, the button has the icon on the left, otherwise it has the icon on the right.

Attaching Files to Records
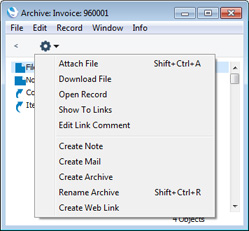
To attach a file to a record, open the record in question and click the [Attachments] button. Select 'Attach File' from the Operations menu. An 'Open File' dialogue box will open, allowing you to locate the file to be attached. Find the file and click [Open]. The file will be attached to the record. Its filename will appear in the list of Attachments with the prefix "File:". You can attach as many files as you like to a single record.The 'Attach File' function attaches a file to a record by copying the file into a folder called "Attach" that is in the same folder as your Enterprise by HansaWorld application. In multi-user systems, the "Attach" folder should be on the server. This means that you will still be able to download and read the attached file, even after the original has been deleted. If you want to attach a large file to a record, make sure (using the disk space indicator in the 'About Enterprise by HansaWorld' window) that the hard disk containing your Enterprise by HansaWorld application has sufficient space. As the file is uploaded to the server, a progress indicator appears so that you can monitor its progress.
! | The "Attach" folder must be present in the folder containing your Enterprise by HansaWorld application if you want to attach files to records. Do not rename any of the files in the "Attach" folder. |
Reading Files
You can read a file that has been attached to a record in one of three ways. In the first two cases, a 'Save File' dialogue box will be opened, asking you where the file is to be saved.- By double-clicking on the file in the list of Attachments. When the file has been saved to your hard disk, your default browser will be opened so that the file can be opened using the appropriate helper application (not Mac OS X).
- By clicking on the file in the list of Attachments and selecting 'Download File' from the Operations menu. The file is saved to your hard disk, but no attempt is made to open it using a helper application.
- By clicking on the file in the list of Attachments and selecting 'Open Record' from the Operations menu. The file is saved to the "Tmp" folder in the folder containing your Enterprise by HansaWorld application, and it will then be opened using the appropriate helper application.
Attaching Notes or Comments to Records
You can attach notes or comments to records. To do this, open the record in question and click the [Attachments] button. Select 'Create Note' from the Operations menu. A window will open, where you can type in your note.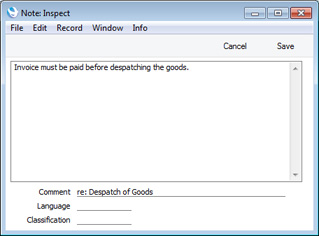
Reading and Changing Notes
You can read a note or comment that has been attached to a record in one of three ways:- By clicking on the note in the list of Attachments and selecting 'Open Record' from the Operations menu;
- By double-clicking on the note in the list of Attachments; and
- By clicking on the note in the list of Attachments and selecting 'Save' from the Record menu; and
Printing Notes
A note or comment that has been attached to a record can be printed when you print the record. For example, a note that has been attached to an Invoice can be printed on the Invoice document. This feature is included in the Invoice, Activity, Receipt Form, Payment Form, Reservation, Purchase Order, Order, Internal Sales Order, Quotation, Rental Quotation, Stock Movement and VAT Correction documents. If more than one note has been attached to a record, only the first note will be printed.If you want notes and comments to be printed in this way, you should include the "Note" field in each of your Form designs:
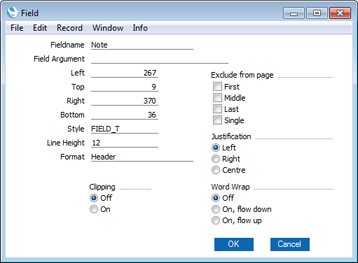
If you generally attach many notes to records, you can specify that the note with a specific Comment will be printed, not the first note. You will then need to ensure that every time you attach a note intended for printing to a record in a particular register, you always use the same Comment. For example, you may want to print a note about special offers on Invoices. Each time you attach a note to an Invoice, use the same Comment (e.g. "Special Offer"). Then, when adding the "Note" field to the Invoice Form, specify this Comment ("Special Offer" in the example) as the Field Argument:
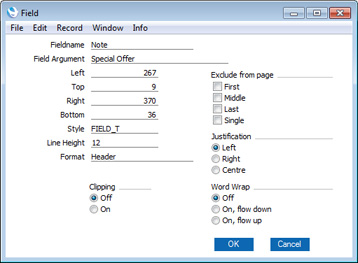
Form design in fully described here.
Changing the Names of Attachments
If you want to change the name of a file or note as it appears in the list of Attachments, highlight it and select 'Edit Link Comment' from the Operations menu. A window opens where you can type in a new name.
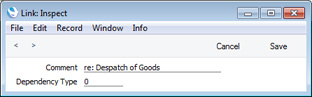
If the Attachment is a note, you can also change its name by double-clicking and editing the Comment in the 'Note: Inspect' window.
Attaching Records to Other Records
You can attach records to other records by dragging and dropping from the browse window of one register onto the [Attachments] button of another. For example, to attach a Contact record to an Invoice, open the Invoice in a record window and then open the 'Contacts: Browse' or the 'Paste Customer' window. Find the correct Contact in the list, click on the Contact Number and drag it to the [Attachments] button of the Invoice. The Contact record will then appear in the Invoice's list of attachments. Alternatively, if the Contact record is already open, you can drag its [Attachments] button onto that of the Invoice. You can also select a range of Contact records in the browse window by clicking while holding down the Shift key, and then drag them all to the [Attachments] button.
Later, when viewing the Contact record in the example above, you might wish to see a list of the other records to which it has been attached. Open the list of Attachments and select 'Show To Links' from the Operations menu. The records the Contact has been attached to will be listed below a dotted line.
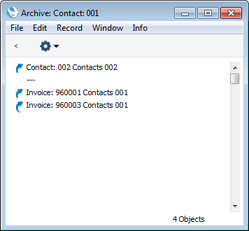
Viewing Attached Records
You can read a record that has been attached to another record in one of three ways:- By clicking on the record in the list of Attachments and selecting 'Open Record' from the Operations menu;
- By double-clicking on the record in the list of Attachments; and
- By clicking on the record in the list of Attachments and selecting 'Save' from the Record menu (or pressing the Enter key).
Attaching Reports to Records
To attach a report to a record, first print the report to screen, and open the record in question. The Button Bar of the report window contains an [Attachments] button:
When you attach a report to a record, the report is first printed to file and that file is then attached to the record. The report file is stored in the "Attach" folder that is in the same folder as your Enterprise by HansaWorld application. In multi-user systems, the "Attach" folder should be on the server. If you need to read the report later, you will effectively be reading the file, not producing the report again. The information it contains will be correct for the moment when it was originally produced, not for the moment when you are reading it. This may be useful if you have attached the report to a Mail for discussion with another member of staff. When you read the report later, it will be opened in a standard report window, so you can select 'Recalculate' from the Operations menu if you need to update the report to include the latest information in the database.
! | The "Attach" folder must be present in the folder containing your Enterprise by HansaWorld application if you want to attach reports to records. Do not rename any of the files in the "Attach" folder. |
Reading Reports
You can read a report that has been attached to a record in one of three ways. Whichever method you use, the report will be opened in a standard report window.- By double-clicking on the report in the list of Attachments.
- By clicking on the file in the list of Attachments and selecting 'Download File' from the Operations menu.
- By clicking on the file in the list of Attachments and selecting 'Open Record' from the Operations menu.
Removing Attachments
To remove an attachment of any kind from a record, highlight it in the list of Attachments and either press the Backspace key on your keyboard or select 'Clear' from the Edit menu.Attaching Records to Mails
You can attach records to Mails in one of two ways:- Where the Mail already exists, you can drag the record from its browse window to the [Attachments] button of the Mail, as described in the 'Attaching Records to Other Records' section above.
- Where the Mail does not exist, open the record and click its [Attachments] button. Select 'Create Mail' from the Operations menu. A new Mail will be opened. Complete the Mail in the usual way and save. The new Mail will be attached to the record automatically, and the recipient of the Mail will be able to open the record using the 'Show To Links' Operations menu function.
Mails are fully described here.
Copying Attachments from one Record to Another
You can copy an Attachment of any kind from one record to another as follows:
- Open the record with the Attachment (the 'source' record) and click its [Attachments] button.
- Open the record that is to receive the Attachment (the 'destination' record).
- Drag the Attachment from the list of Attachments to the [Attachments] button of the 'destination' record (or to its list of Attachments).
- Hold down the Shift key while dragging if you do not want to remove the Attachment from the 'source' record.
Organising Attachments: Archives
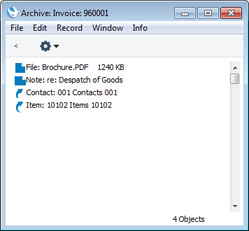
When a record has many Attachments, you can organise them into Archives. An Archive is a folder that can contain Attachments of all kinds, including other Archives.- Open the list of Attachments.
- Select 'Create Archive' from the Operations menu. The 'Create Archive' window opens, where you can give the new Archive a name:
When you click the [Save] button, the new Archive will appear at the top of the list of Attachments: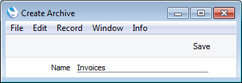
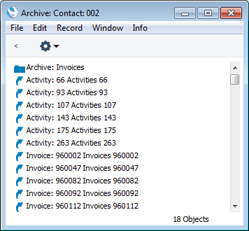
- Move the Attachments into the Archive by dragging and dropping onto it.
- If you want to work with an Attachment that is in an Archive, double-click the Archive. The contents of the Archive are then shown in the window, whose title changes to show the name of the Archive.
To go back to the top level (or previous level) list of Attachments, click the button with the arrow icon (located towards the top left-hand corner of the window):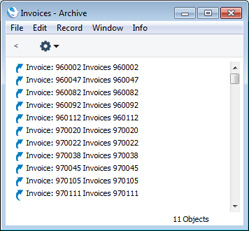

- If you want to rename the Archive, first open it as described in step 4 above and then select 'Rename Archive' from its Operations menu.
Enter the new Name of the Archive and click [Save].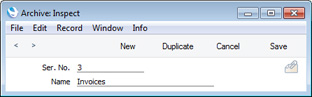
- You can remove an Attachment from an Archive in one of two ways. If you want the Attachment to remain attached to the record, drag it to the main list of Attachments or to another Archive. To remove the Attachment altogether, click on it and either press the Backspace key on your keyboard or select 'Clear' from the Edit menu.
- To remove an Archive, click on it in the main list of Attachments and either press the Backspace key or select 'Clear' from the Edit menu. You can only remove empty Archives. To empty an Archive, you must remove its contents item by item as described in step 6 above.
Go back to:
- Home page for Working Environment manual
- Home page for HansaWorld Enterprise manual
Document Manager
The Document Manager allows you to connect files, notes or other objects to any record in Standard ERP. These connected objects are sometimes known as "Attachments".In the top right-hand corner of every record window, there is a [Document Manager] button. If a record has an Attachment, the button has the icon on the left, otherwise it has the icon on the right.


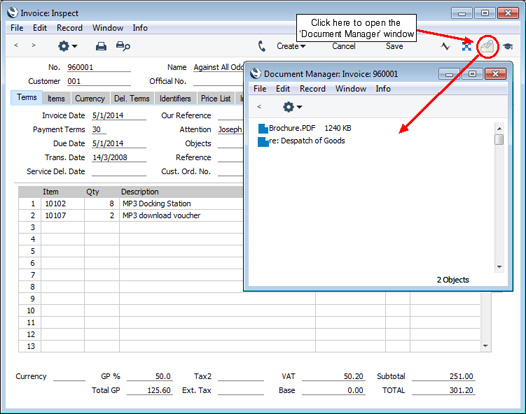
Attaching Files to Records
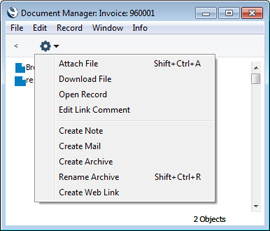
To attach a file to a record, open the record in question and click the [Document Manager] button. Select 'Attach File' from the Operations menu. An 'Open File' dialogue box will open, allowing you to locate the file to be attached. Find the file and click [Open]. The file will be attached to the record, and its filename will appear in the 'Document Manager' window. You can attach as many files as you like to a single record.The 'Attach File' function attaches a file to a record by copying the file into a folder called "Attach" that is in the same folder as your Standard ERP application. In multi-user systems, the "Attach" folder should be on the server. This means that you will still be able to download and read the attached file, even after the original has been deleted. If you want to attach a large file to a record, make sure (using the disk space indicator in the 'About Standard ERP' window) that the hard disk containing your Standard ERP application has sufficient space. As the file is uploaded to the server, a progress indicator appears so that you can monitor its progress.
! | The "Attach" folder must be present in the folder containing your Standard ERP application if you want to attach files to records. Do not rename any of the files in the "Attach" folder. |
Reading Files
You can read a file that has been attached to a record in one of three ways:- By double-clicking on the file in the 'Document Manager' window. The file will be saved in the "Tmp" folder in the folder containing your Standard ERP application, and it will then be opened using the appropriate helper application (not Mac OS X).
- By clicking on the file in the list of Attachments and selecting 'Download File' from the Operations menu. A 'Save File' dialogue box will be opened, asking you where the file is to be saved, and the file will then be saved to your hard disk. No attempt will be made to open it using a helper application. If you are using Mac OS X, you can double-click the file in the 'Document Manager' window as an alternative to selecting the 'Download File' function.
- By clicking on the file in the 'Document Manager' window and selecting 'Open Record' from the Operations menu. The file will be saved to the "Tmp" folder in the folder containing your Standard ERP application, and it will then be opened using the appropriate helper application.
Attaching Notes or Comments to Records
You can attach notes or comments to records. To do this, open the record in question and click the [Document Manager] button. Select 'Create Note' from the Operations menu. A window will open, where you can type in your note.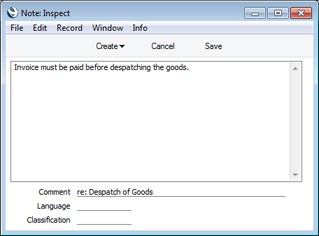
Reading and Changing Notes
You can read a note or comment that has been attached to a record in one of three ways:- By clicking on the note in the 'Document Manager' window and selecting 'Open Record' from the Operations menu;
- By double-clicking on the note in the 'Document Manager' window; and
- By clicking on the note in the 'Document Manager' window and selecting 'Save' from the Record menu.
Printing Notes
A note or comment that has been attached to a record can be printed when you print the record. For example, a note that has been attached to an Invoice can be printed on the Invoice. This feature is included in the Invoice, Activity, Receipt Form, Payment Form, Reservation, Purchase Order, Order, Internal Sales Order, Quotation, Rental Quotation, Stock Movement and VAT Correction forms. If more than one note has been attached to a record, only the first note will be printed.If you want notes and comments to be printed in this way, you should include the "Note" field in each of your Form Template designs:
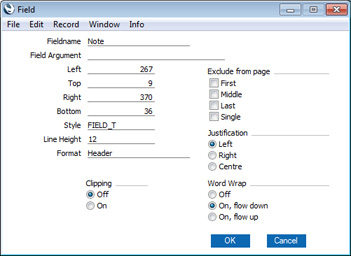
If you generally attach many notes to records, you can specify that the note with a specific Comment will be printed, not the first note. You will then need to ensure that every time you attach a note intended for printing to a record in a particular register, you always use the same Comment. For example, you may want to print a note about special offers on Invoices. Each time you attach a note to an Invoice, use the same Comment (e.g. "Special Offer"). Then, when adding the "Note" field to the Invoice Form Template, specify this Comment ("Special Offer" in the example) as the Field Argument:
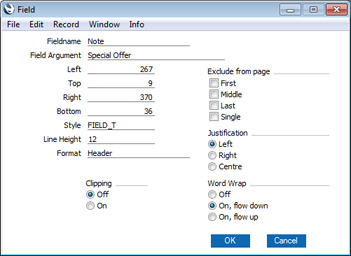
Form Template design in fully described here.
Changing the Names of Attachments
If you want to change the name of a file or note as it appears in the 'Document Manager' window, highlight it and select 'Edit Link Comment' from the Operations menu. A window opens where you can type in a new name.
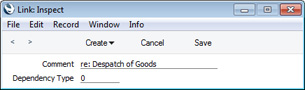
If the Attachment is a note, you can also change its name by double-clicking and editing the Comment in the 'Note: Inspect' window.
Attaching Reports to Records
To attach a report to a record, first print the report to screen, and open the record in question. The Button Bar of the report window contains a [Document Manager] button:

When you attach a report to a record, the report will first be printed to file and that file will be attached to the record. The report file is stored in the "Attach" folder that is in the same folder as your Standard ERP application. In multi-user systems, the "Attach" folder should be on the server. If you need to read the report later, you will effectively be reading the file, not producing the report again. The information it contains will be correct for the moment when it was originally produced, not for the moment when you are reading it. This may be useful if you have attached the report to a Mail for discussion with another member of staff. When you read the report later, it will be opened in a standard report window, so you can select 'Recalculate' from the Operations menu if you need to update the report to include the latest information in the database.
! | The "Attach" folder must be present in the folder containing your Standard ERP application if you want to attach reports to records. Do not rename any of the files in the "Attach" folder. |
Reading Reports
You can read a report that has been attached to a record in one of three ways. Whichever method you use, the report will be opened in a standard report window.- By double-clicking on the report in the 'Document Manager' window.
- By clicking on the file in the 'Document Manager' window and selecting 'Download File' from the Operations menu.
- By clicking on the file in the 'Document Manager' window and selecting 'Open Record' from the Operations menu.
Removing Attachments
To remove an attachment of any kind from a record, highlight it in the 'Document Manager' window and either press the Backspace key on your keyboard or select 'Clear' from the Edit menu.Copying Attachments from one Record to Another
You can copy an Attachment of any kind from one record to another as follows:- Open the record with the Attachment (the "source" record) and click its [Document Manager] button to open its 'Document Manager' window.
- Open the record that is to receive the Attachment (the "destination" record) and (not necessary if you are using Mac OS X) click its [Document Manager] button.
- Drag the Attachment from the source 'Document Manager' window to the destination 'Document Manager' window (or to the [Document Manager] button of the destination record (Mac OS X only)).
- Hold down the Shift key while dragging if you do not want to remove the Attachment from the source record.
Organising Attachments: Archives
When a record has many Attachments, you can organise them into Archives. An Archive is a folder that can contain Attachments of all kinds, including other Archives.- Open the 'Document Manager' window.
- Select 'Create Archive' from the Operations menu. The 'Create Archive' window opens, where you can give the new Archive a name:
When you click the [Save] button, the new Archive will appear at the top of the 'Document Manager' window: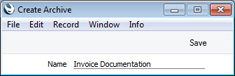
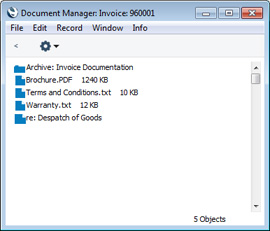
- Move the Attachments into the Archive by dragging and dropping onto it.
- If you want to work with an Attachment that is in an Archive, double-click the Archive. The contents of the Archive are then shown in the window, whose title changes to show the name of the Archive.
To go back to the top level (or previous level) list of Attachments, click the button with the arrow icon (located towards the top left-hand corner of the window):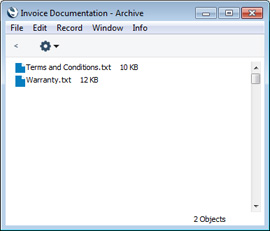

- If you want to rename the Archive, first open it as described in step 4 above and then select 'Rename Archive' from its Operations menu.
Enter the new Name of the Archive and click [Save].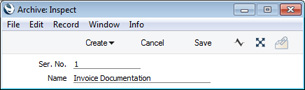
- You can remove an Attachment from an Archive in one of two ways. If you want the Attachment to remain attached to the record, drag it to the main list of Attachments or to another Archive. To remove the Attachment altogether, click on it and either press the Backspace key on your keyboard or select 'Clear' from the Edit menu.
- To remove an Archive, click on it in the main list of Attachments and either press the Backspace key or select 'Clear' from the Edit menu. You can only remove empty Archives. To empty an Archive, you must remove its contents item by item as described in step 6 above.
Go back to:
- Home page for Working Environment manual
- Home page for Standard ERP manual
Personal Desktop
As well as being able to connect files, notes or records to any record in Enterprise by HansaWorld (as described here), you can also attach them to your Master Control panel. They will be listed in the area on the right of the Master Control panel, known as the "Personal Desktop". You can also list important reports, documents, Maintenance functions, settings and registers in the Personal Desktop. You can therefore configure your Personal Desktop so that it gives you immediate access to the areas of Enterprise by HansaWorld that are most important to you (i.e. removing the need to change modules, find records in browse windows and find reports in list windows). The Personal Desktop is therefore similar to a list of Bookmarks in a browser.If you want to use the Personal Desktop, you must first set up a Mailbox for yourself. To do this, open the Persons register in the System module, highlight your record in the 'Persons: Browse' window and choose 'Create Mailbox' from the Operations menu. This process is described in full here. In a multi-user system, each user that will be using the Personal Desktop should have their own Mailbox.
! | You must have a Mailbox if you want to use the Personal Desktop. |
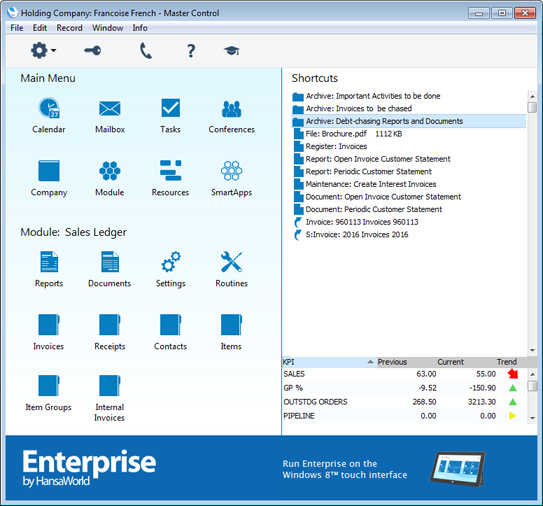
Once you have a Mailbox, your name will be shown in the title bar of the Master Control panel, and the contents of your Personal Desktop will be listed in the area on the right:
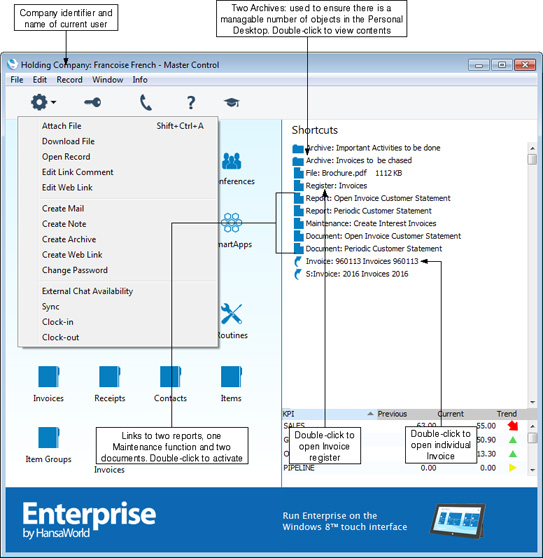
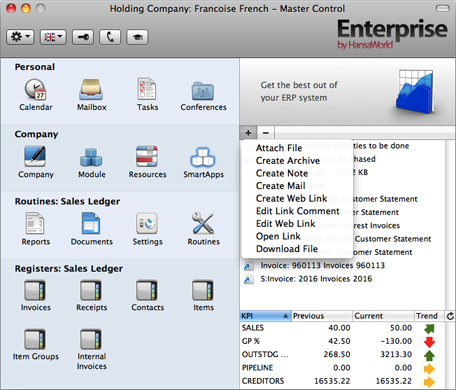
If you are using Windows or Linux, the Master Control panel's Operations menu contains various functions that you can use when working with the Personal Desktop, as shown in the illustration above. If you are using the Mac OS X version of the Enterprise by HansaWorld application, you will find these functions on the drop-down menu that appears when you click the [+] button immediately above the Personal Desktop, as illustrated below:
Records in your Personal Desktop
You can place records in your Personal Desktop using the following methods:- By dragging the record from its browse window and dropping it on the Personal Desktop. For example, to place a Contact record in the Personal Desktop, open the 'Contacts: Browse' window and find the correct Contact in the list. Click on the Contact Number and drag it to the Personal Desktop. You can also select a range of Contact records in the browse window by clicking while holding down the Shift key, and then drag them all to the Personal Desktop.
- By opening the record and dragging its [Attachments] button onto the Personal Desktop.
- By opening the record and selecting 'Send to Desktop' from the Record menu. The record should have been saved at least once before you use this function (i.e. the title of the window should be 'Inspect' or 'Update', not 'New').
The illustration also shows that the Personal Desktop can contain records from different Companies. In the illustration, the current Company is Company H (shown in the title bar of the Master Control panel, next to the name of the current user). "H" is short for Holding Company in the example database. The final item in the Personal Desktop in the illustration ("S: Invoice: 2016") is an Invoice that belongs to Company S (a Subsidiary Company). Any record that does not belong to the current Company will be shown in the Personal Desktop with its Company Short Code before the name of the register. So, in this example, if the current user were to quit Enterprise by HansaWorld and restart, selecting Company S, then Invoice 960113 would appear in the Personal Desktop as "H: Invoice: 960113" and Invoice 2016 would appear simply as "Invoice: 2106".
You can open a record in the Personal Desktop using one of these methods:
- By clicking on the record in the Personal Desktop and selecting 'Open Record' from the Operations menu (Windows and Linux) or 'Open Link' from the + menu (Mac OS X);
- By double-clicking on the record in the Personal Desktop;
- By clicking on the record in the Personal Desktop and selecting 'Save' from the Record menu; and
- By clicking on the record in the Personal Desktop and pressing the Enter or Return key.
Settings, Reports, Documents and Maintenance functions in your Personal Desktop
To place a setting, report, document, import or export function or Maintenance function in your Personal Desktop, simply open the appropriate list window and then drag an item from the list to the Personal Desktop.For example, to place the Open Invoice Customer Statement in your Personal Desktop (as shown in the example illustration above), first use the [Module] button in the Master Control panel to enter the Sales Ledger and then click the [Reports] button, also in the Master Control panel. Click on 'Open Invoice Customer Statement' in the list and drag this text to your Personal Desktop.
To work with a setting, report, document or Maintenance function, use one of these methods:
- Click on the item in the Personal Desktop and select 'Open Record' from the Operations menu (Windows and Linux) or 'Open Link' from the + menu (Mac OS X);
- Double-click on the item in the Personal Desktop;
- Click on the item in the Personal Desktop and select 'Save' from the Record menu; and
- Click on the item in the Personal Desktop and press the Enter or Return key.
Registers in your Personal Desktop
o place a register in your Personal Desktop, simply drag it from the Master Control panel to the Personal Desktop. For example, to place the Invoice register in your Personal Desktop (as shown in the example illustration above), first use the [Module] button in the Master Control panel to enter the Sales Ledger. Click on the [Invoices] button in the Master Control panel and drag it to your Personal Desktop.To work with a register, use one of these methods:
- Click on the item in the Personal Desktop and select 'Open Record' from the Operations menu (Windows and Linux) or 'Open Link' from the + menu (Mac OS X);
- Double-click on the item in the Personal Desktop;
- Click on the item in the Personal Desktop and select 'Save' from the Record menu; and
- Click on the item in the Personal Desktop and press the Enter or Return key.
Notes and Comments in your Personal Desktop
You can place notes or comments in your Personal Desktop. To do this, bring the Master Control panel to the front and select 'Create Note' from the Operations menu (Windows and Linux) or from the + menu (Mac OS X). A window will open, where you can type in your note.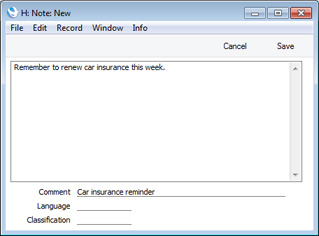
You can read a note or comment in your Personal Desktop in one of four ways:
- By clicking on the note in the Personal Desktop and selecting 'Open Record' from the Operations menu (Windows and Linux) or 'Open Link' from the + menu (Mac OS X);
- By double-clicking on the note in the Personal Desktop;
- By clicking on the note in the Personal Desktop and selecting 'Save' from the Record menu; and
- By clicking on the note in the Personal Desktop and pressing the Enter or Return key.
Changing the Names of Items in your Personal Desktop
If you want to change the name of a file or note as it appears in your Personal Desktop, highlight it and select 'Edit Link Comment' from the Operations menu (Windows) or from the + menu (Mac OS X). A window opens where you can type in a new name.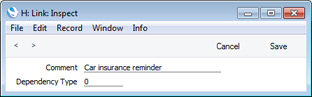
You can also change the name of a note by opening it and editing the Comment in the 'Note: Inspect' window.
Reports in your Personal Desktop
To place a report in your Personal Desktop, first print the report to screen. The Button Bar of the report window contains an [Attachments] button: simply drag this button to the Personal Desktop. The name of the report will appear in the list of Attachments with the prefix "File:".To work with a report, use one of these methods:
- Click on the item in the Personal Desktop and select 'Open Record' from the Operations menu (Windows and Linux) or 'Open Link' from the + menu (Mac OS X);
- Double-click on the item in the Personal Desktop;
- Click on the item in the Personal Desktop and select 'Save' from the Record menu; and
- Click on the item in the Personal Desktop and press the Enter or Return key.
When you attach a report to the Personal Desktop, the report is first printed to file and that file is then attached to the Personal Desktop. The report file is stored in the "Attach" folder that is in the same folder as your Enterprise by HansaWorld application. In multi-user systems, the "Attach" folder should be on the server. If you need to read the report later, you will effectively be reading the file, not producing the report again. The information it contains will be correct for the moment when it was originally produced, not for the moment when you are reading it. The report will be opened in a standard report window, so you can select 'Recalculate' from the Operations menu if you need to update the report to include the latest information in the database.
! | The "Attach" folder must be present in the folder containing your Enterprise by HansaWorld application if you want to attach reports to records. Do not rename any of the files in the "Attach" folder. |
Web Links
You can place links to web pages in your Personal Desktop. Follow these steps:- Choose 'Create Web Link' from the Operations menu (Windows and Linux) or from the + menu (Mac OS X). A window will open, where you can enter a Name for the link (this Name will identify the link in your Personal Desktop):
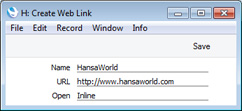
- Enter the URL (including http:// or https://), and choose "Inline" or "External" in the Open field, using 'Paste Special'. If you choose "Inline", the web page will be opened in a new window inside Enterprise by HansaWorld. If you enter "External", the web page will be opened in your default browser.
- When you save, the link will appear in your Personal Desktop with the prefix "Web Link:". The Web Link will now be operational.
Removing Items from your Personal Desktop
To remove an item of any kind from your Personal Desktop, highlight it and either press the Backspace key on your keyboard or select 'Clear' from the Edit menu. If you are using the Mac OS X version of the Enterprise by HansaWorld application, you can also highlight the item to be removed and click the [-] button immediately above the Personal Desktop.Organising Items in your Personal Desktop: Archives
When you have many items in your Personal Desktop, you can organise them into Archives. An Archive is a folder that can contain Attachments of all kinds, including other Archives.- Bring the Master Control Panel to the front by clicking on it, by using the Ctrl-M/⌘-M keyboard shortcut or by selecting 'Master Control' from the File menu.
- Select 'Create Archive' from the Operations menu (Windows and Linux) or from the + menu (Mac OS X). The 'Create Archive' window opens, where you can give the new Archive a name:
When you click the [Save] button, the new Archive will appear towards the top of the Personal Desktop.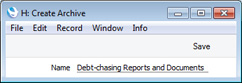
- Move the relevant items into the Archive by dragging and dropping onto it.
- If you want to work with an item that is in an Archive, double-click the Archive. A new window will be opened, listing the items that are in the Archive. This window has the same properties, features and functions as a list of Attachments, so you can work with it in the manner described in the 'Organising Attachments' section towards the bottom of the Attachments page.
If the Archive contains another Archive, double-click the second Archive to open it. The contents and title of the window will change to those of the second Archive. To go back to the top level (or previous level) Archive, click the button with the arrow icon (located towards the top left-hand corner of the window):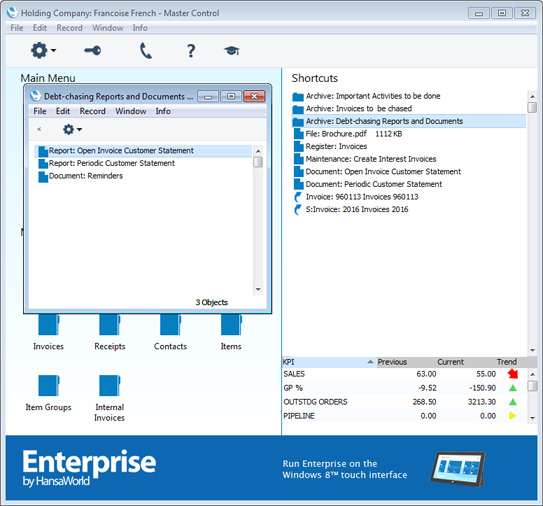

- If you want to rename the Archive, first open it as described in step 4 above and then select 'Rename Archive' from the Operations menu.
Enter the new Name of the Archive and click [Save].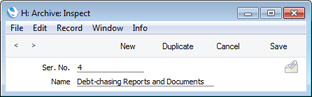
- You can remove an item from an Archive in one of two ways. First, you can drag it to the Personal Desktop or to another Archive. Otherwise, to remove the item altogether, click on it and either press the Backspace key on your keyboard or select 'Clear' from the Edit menu. If you are using the Mac OS X version of the Enterprise by HansaWorld application, you can also highlight the item to be removed and click the [-] button immediately above the Personal Desktop.
- To remove an Archive, click on it in the Personal Desktop and either press the Backspace key or select 'Clear' from the Edit menu (or click the [-] button). You can only remove empty Archives. To empty an Archive, you must remove its contents item by item as described in step 6 above.
Go back to:
- Home page for Working Environment manual
- Home page for HansaWorld Enterprise manual
Key Performance Indicators
In the bottom right-hand corner of the Master Control panel, there is an area set aside to display Key Performance Indicators (KPIs):
You can configure your company's KPIs so that different ones will be seen by different users. So, if someone else logs in to Enterprise by HansaWorld on your machine using the [Login] button in the Master Control panel, your KPIs will disappear, to be replaced with theirs.
The Trend column illustrates the difference between the Prev. and Current figures and can contain the following icons:

- The Trend is positive by at least 35%, or the Prev. figure only is zero.

- The Trend is positive by between 10% and 35%.

- The Trend is between 10% and -10%.

- The Trend is negative by between 10% and 35%.

- The Trend is negative by at least 35%, or the Current figure only is zero.

For details about configuring KPIs, please refer here.
---
Go back to:
- Home page for Working Environment manual
- Home page for HansaWorld Enterprise manual