Introduction to the Cash In and Cash Out Registers in Standard ERP
The Cash In and Cash Out registers allow you to record cash transactions that are not connected to Invoices or Purchase Invoices. Use the Cash In register for cash receipts (money received by your business) and the Cash Out register for cash payments. The Nominal Ledger consequences of these transactions are handled automatically.You can choose to enter individual cash receipts on a Customer-by-Customer basis, or you can enter the day's receipts as a single transaction, providing the same Sales and Cash or Bank Account applies to them all. The same is true for cash payments.
Note that the Cash In and Cash Out registers are very similar in their behaviour. These web pages describe both registers, but the illustrations are taken from the Cash In register. Any differences in the Cash Out register will be noted. The generic term "cash transaction" has been used in the parts of this documentation that apply equally to Cash In and Cash Out records.
You can enter records to the two registers in two ways:
- You can enter records directly to the Cash In and Cash Out registers;
- You can create cash transactions from Invoices, Purchase Invoices, Receipts and Payments using the 'Cash In' and 'Cash Out' functions on the Create menus in those windows. This will be useful in countries where incoming cash transactions need to be recorded together using a sequential number series, and outgoing cash transactions need to be recorded together as well. If you want these functions to create cash transactions from Invoices that are Cash Notes (Invoices with Payment Terms of the "Cash" type) only and from Receipts and Payments with "Cash" type Payment Modes only, select the Cash Collection option in the Cash Book Settings setting.
To open the Cash Out register, follow the procedure described in the previous paragraph and double-click or tap 'Cash Out' in the 'Registers' list.
Depending on which register you have opened, the 'Cash In: Browse' or 'Cash Out: Browse' window will appear, listing the Cash In or Cash Out transactions you have already entered.
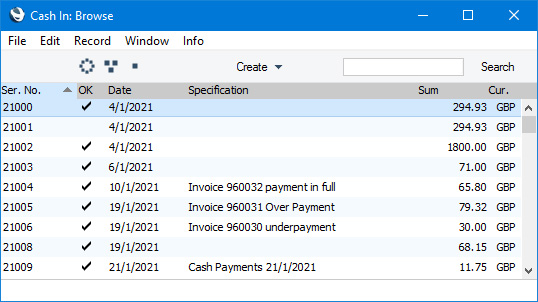
If you are using Windows or macOS, you can change the sort order by clicking on the headings. To reverse any sort, simply click once again on the column heading. The current sort order is marked by the column heading being coloured blue. If you are using iOS or Android, tap on the column heading and choose the sort order you need. Repeat the procedure to reverse the sort.
To search for a particular record, first sort the list by the column that you want to use for the search. Then, enter the text that you want to find in the Search field in the top of the window (in the top right-hand corner if you are using Windows/macOS) and press the Return key (macOS) or Search (iOS/Android). The first record containing a match for your search string will be highlighted (if you are using Windows, a match will be highlighted as you type each character). For example, to search for cash transactions with a particular date, sort by Date before entering the Date (or the first few characters) in the Search field.
If you are using Windows or macOS, there will be three buttons in the top left-hand corner of the browse window. These are part of the Limited Access feature. You can use them as follows (Windows versions of the buttons illustrated on the left, macOS on the right):

- Lists all cash transactions.
- Lists cash transactions belonging to members of the same Sales Group as the current user.
- Lists cash transactions belonging to the current user (i.e. cash transactions in which the Person field contains the Signature of the current user).


Please refer to the page describing the 'Access' card of the Person register for full details about the Limited Access feature.
---
The Cash In and Cash Out registers (Cash Transactions) in Standard ERP:
- Introduction
- Entering a Cash Transaction
- Printing Cash Transactions
- Nominal Ledger Transactions from Cash Transactions
- Invalidating Cash Transactions
- Operations menu
- Home page for Cash Book module manual
- Home page for Standard ERP manual
Entering a Cash Transaction
To enter a new cash transaction, first open the 'Cash In: Browse' or 'Cash Out: Browse' window as described here. Then select 'New' from the Create menu (Windows/macOS) or the + menu (iOS/Android) or use the Ctrl-N (Windows) or ⌘-N (macOS) keyboard shortcut. Alternatively, highlight (click or tap on) a cash transaction similar to the one you want to enter and select 'Duplicate' from the same menu. If you don't want to open the 'Cash In: Browse' or 'Cash Out: Browse' window before creating a new record, you can also use the + menu in the Navigation Centre (all platforms).The 'Cash In: New' or 'Cash Out: New' window will be opened, empty if you selected 'New' or containing a duplicate of the highlighted cash transaction. Complete the cash transaction record as appropriate and as described on the following pages, then save it using the [Save] button (Windows/macOS) or by tapping √ (iOS/Android) and close the window by clicking the close box (Windows/macOS) or by tapping < (iOS/Android). Then, close the browse window using the close box or < again.
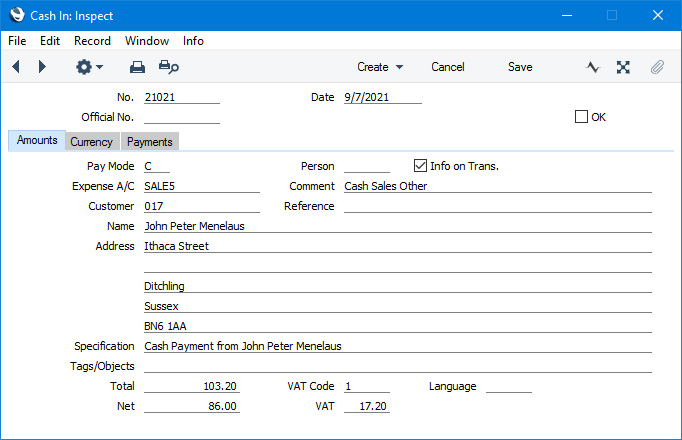

If you are using iOS or Android, there will only be two tabs, marked 'Items' and 'Details'. If you tap 'Details', you will see every card except 'Payments' arranged vertically on screen. You can scroll down to see each one, or you can jump to any card by tapping on any tab and selecting the tab you want to go to.
Please refer to the following pages for details about the fields on each card:
The Cash In and Cash Out registers (Cash Transactions) in Standard ERP:
- Introduction
- Entering a Cash Transaction
- Printing Cash Transactions
- Nominal Ledger Transactions from Cash Transactions
- Invalidating Cash Transactions
- Operations menu
- Home page for Cash Book module manual
- Home page for Standard ERP manual
Entering a Cash Transaction - Header
This page describes the fields in the Header of the Cash In and Cash Out windows. Please follow the links below for descriptions of the other parts of the Cash In and Cash Out record windows:---
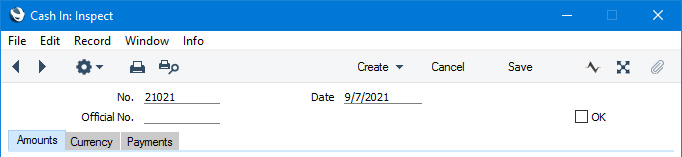
- No.
- Paste Special
Select from another Number Series
- The unique identifying number of the cash transaction. The default will be chosen as follows:
- If you have used the Payment Modes setting to define separate number sequences for each Payment Mode and you are using the Common Number Series option in the Cash Book Settings setting, the number will be determined by the Payment Mode and will change if you change the Payment Mode. Number sequences defined in the Payment Modes setting are not shown in the 'Paste Special' list.
- If you are not using the Common Number Series option, the number will be taken from the number sequence allocated to the current user on the 'Number Series' card of their Person record.
- The number will be taken from the first valid row in the Number Series - Cash In or Number Series - Cash Out setting as appropriate.
- It will be the next number following on from the last Cash In record entered or the last Cash Out record entered (as appropriate).
You can change the default number, but not to one that has already been used. If you have defined at least one number sequence in the Number Series - Cash In or Number Series - Cash Out setting as appropriate, the number you change to must be inside a valid number sequence.
- You will not be able to save a cash transaction if the No. does not belong to a valid number sequence. A valid number sequence is one for the period in which the Date of the cash transaction falls and with unused numbers, so this problem will most usually occur at the beginning of a new calendar or financial year. If you change number sequences each year, remember to update your Person records if you are using the Number Series fields there (step 2 above) so that they refer to the new number sequences.
- If you are working in a multi-user environment, the Cash In or Cash Out Number will be assigned when you save the record for the first time, chosen as described above and providing you have not already specified a number yourself.
- If you have used the Payment Modes setting to define separate number sequences for each Payment Mode and you are using the Common Number Series option in the Cash Book Settings setting, the number will be determined by the Payment Mode and will change if you change the Payment Mode. Number sequences defined in the Payment Modes setting are not shown in the 'Paste Special' list.
- Date
- Paste Special
Choose date
- The date of the cash transaction: the current date according to the computer's clock is entered as a default. This date will also be the Transaction Date of the Nominal Ledger Transaction created when you mark the cash transaction as OK and save.
- If you are using the Force Chronology for Cash In/Out option in the Cash Book Settings setting, you will not be able to change this date. All cash transactions will therefore use the current date, thus ensuring they are always recorded in date order.
- If you are using the Force Chronology for Cash In/Out option in the Cash Book Settings setting, you will not be able to change this date. All cash transactions will therefore use the current date, thus ensuring they are always recorded in date order.
- Official Ser. No.
- Paste Special
Legal Cash In No. setting, Cash Book module or Legal Record Numbers setting, Sales Ledger
- In Lithuania it is a legal requirement to allocate an official serial number to each Cash In record. You should enter the number sequence allocated to your company in the Legal Cash In No. setting: the next unused number from that sequence will appear here by default. You can change the default but only to another unused number that is in the sequence. In this context, this field is used in the Cash In register only.
- Outside Lithuania you should leave the Legal Cash In No. setting empty. If you need to allocate an official serial number to each Cash In and/or Cash Out record, you should configure official number sequences using the Legal Record Numbers setting in the Sales Ledger. Enter rows in which the Register is "Cash In" or "Cash Out" as appropriate. Depending on how you have configured this setting, an Official No. will be assigned to a Cash In or Cash Out record when you save it for the first time or when you save it after marking it as OK. You may be able to change to another number, depending on the configuration (and also depending on the VAT Law in the Company Info setting). The new number must fall in a valid sequence (e.g. one that is valid for the Classification of the Customer or Supplier and the Date).
- If you are using the Legal Record Numbers setting, you can use 'Paste Special' to choose from a different sequence. Sequences whose From Date is later than the current date and sequences that cannot be used with the Classification of the Customer or Supplier will not be shown in the 'Paste Special' list.
- Outside Lithuania you should leave the Legal Cash In No. setting empty. If you need to allocate an official serial number to each Cash In and/or Cash Out record, you should configure official number sequences using the Legal Record Numbers setting in the Sales Ledger. Enter rows in which the Register is "Cash In" or "Cash Out" as appropriate. Depending on how you have configured this setting, an Official No. will be assigned to a Cash In or Cash Out record when you save it for the first time or when you save it after marking it as OK. You may be able to change to another number, depending on the configuration (and also depending on the VAT Law in the Company Info setting). The new number must fall in a valid sequence (e.g. one that is valid for the Classification of the Customer or Supplier and the Date).
- OK
- Tick this box when you are ready to commit the cash transaction to the Nominal Ledger. When you next save the record, a Nominal Ledger Transaction will be created in the Transaction register, if you have so determined in the Sub Systems setting in the Nominal Ledger and in the Number Series - Cash In or Number Series - Cash Out settings as appropriate(or in the Payment Modes setting if you are using the Common Number Series option in the Cash Book Settings setting). Because of this consequence, once you have ticked this box and have saved the cash transaction, you will no longer be able to change it.
- The Nominal Ledger Transaction is described on the Nominal Ledger Transactions from Cash Transactions page.
- You can use Access Groups to prevent certain users from marking Cash In and Cash Out records as OK. To do this, deny them access to the 'OK Cash In' and 'OK Cash Out' Actions respectively.
- The Nominal Ledger Transaction is described on the Nominal Ledger Transactions from Cash Transactions page.
The Cash In and Cash Out registers (Cash Transactions) in Standard ERP:
- Introduction
- Entering a Cash Transaction, including:
- Printing Cash Transactions
- Nominal Ledger Transactions from Cash Transactions
- Invalidating Cash Transactions
- Operations menu
- Home page for Cash Book module manual
- Home page for Standard ERP manual
Entering a Cash Transaction - Amounts Card
This page describes the fields on the 'Amounts' card in the Cash In and Cash Out windows. Please follow the links below for descriptions of the other parts of the Cash In and Cash Out record windows:---
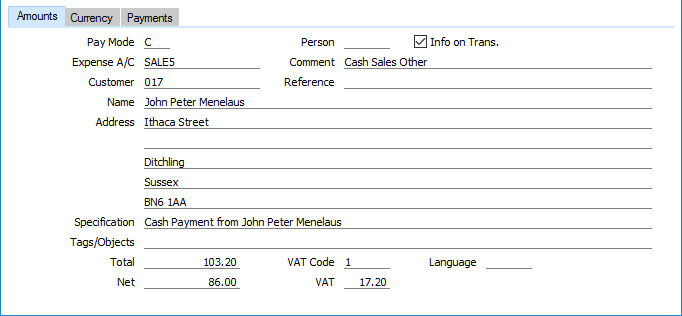
- Pay Mode
- Paste Special
Payment Modes setting, Sales/Purchase Ledger, Cash Book module
- Default taken from Cash Book Settings (Def. Pay. Mode)
- The Payment Mode determines the Nominal Ledger Account that will be debited (Cash In) or credited (Cash Out) with the value of the cash transaction. Usually this will be a Cash or Bank Account.
- You can use a single cash transaction to record the day's cash receipts or payments by listing them on the 'Payments' card. If these cash receipts or payments all use the same Payment Mode (i.e. they will all be received into or issued from the same Cash or Bank Account), specify that Payment Mode here. If a particular cash receipt or payment uses a different Payment Mode, specify that Payment Mode in the relevant row on the 'Payments' card (flip B).
- You must specify a Payment Mode either here or in every row on the 'Payments' card before the cash transaction can be saved. In most cases, the Payment Mode must be one in which the Type (on flip B of the Payment Modes setting) is "Free" or "Cash". However, a row on the "Payments" card in a Cash In or Cash Out record in which the Type is "Cheque" requires a "Received Cheques" Payment Mode, while an "Own Cheque" row in a Cash Out record requires an "Own Cheques" Payment Mode.
- If you have used the Payment Modes setting to define separate number sequences for each Payment Mode and you are using the Common Number Series option in the Cash Book Settings setting, the transaction number will be determined by the default Payment Mode and will change if you change the Payment Mode.
- The Payment Mode determines the Nominal Ledger Account that will be debited (Cash In) or credited (Cash Out) with the value of the cash transaction. Usually this will be a Cash or Bank Account.
- Person
- Paste Special
Person register, System module and Global User register, Technics module
- To record a cash payment received from or issued to a particular Person, enter their Signature in this field or use the 'Paste Special' function. You should also register the value of the payment by entering a row on the 'Payments' card in which the Type is "Personnel Payment".
- After entering a Signature in this field and pressing Enter or Return, the Person's name, address and other information including Tag/Object will be entered into the appropriate fields. This information will be taken from their Global User or Person record and from their connected record in the Contact register.
- After entering a Signature in this field and pressing Enter or Return, the Person's name, address and other information including Tag/Object will be entered into the appropriate fields. This information will be taken from their Global User or Person record and from their connected record in the Contact register.
- Info on Trans.
- If you select this option in a Cash In record that records the receiving of cash against an Invoice or Purchase Credit Note or in a Cash Out record that records the issuing of cash against a Purchase Invoice or Sales Credit Note, the Invoice Number, Payment Date and Customer/Supplier will be copied to flip E of the row posting to the Debtor or Creditor Account in the resulting Nominal Ledger Transaction.
- A Cash In record that records the receiving of cash against an Invoice or Purchase Credit Note is one in which you have added a row to the 'Payments' card in which the Type is "Invoice" or "Credit Purchase Invoice". A Cash Out record that records the issuing of cash against a Purchase Invoice or Sales Credit Note is one in which you have added a row to the 'Payments' card in which the Type is "Purchase Invoice" or "Credit Invoice".
- Similarly, selecting this option in a Cash In or Cash Out record receiving or issuing a Prepayment will cause the Payment Date and Customer/Supplier (but not an Invoice Number or Prepayment Number) to be copied to flip E of the row posting to the On Account A/C in the resulting Nominal Ledger Transaction.
- This option will be selected by default in a Cash In record if you are using the Invoice Info on N/L Transaction option on the 'Debtors' card of the Account Usage S/L setting, and in a Cash Out record if you are using the Supp. Info. on Trans. option on the 'Creditors' card in the Account Usage P/L setting.
- For details about using Cash In records to receive cash against Invoices or Purchase Credit Notes, please refer to the page describing the 'Payments' card.
- A Cash In record that records the receiving of cash against an Invoice or Purchase Credit Note is one in which you have added a row to the 'Payments' card in which the Type is "Invoice" or "Credit Purchase Invoice". A Cash Out record that records the issuing of cash against a Purchase Invoice or Sales Credit Note is one in which you have added a row to the 'Payments' card in which the Type is "Purchase Invoice" or "Credit Invoice".
- Expense A/C
- Paste Special
Expense Accounts setting, Cash Book module (Def. Expense Account)
- Default taken from Cash Book Settings
- The Expense Account determines the Nominal Ledger Account that will be credited (Cash In) or debited (Cash Out) with the value of the cash transaction (or the value of the cash transaction less VAT if a separate VAT posting is being made). In the case of transactions that you enter directly to the Cash In and Cash Out registers, this might be a Sales (Cash In) or Purchase (Cash Out) Account, or, in the case of cash payments made to or received from members of staff, an Expense Account. For payments of between your bank and petty cash, it will be your Bank Account (the Petty Cash Account will come from the Payment Mode). In the case of cash transactions that you create from Invoices, especially if you are using the Double Transaction method to create cash transactions from Invoices and Purchase Invoices, it may be a temporary holding Account for cash. A separate VAT posting will be made if the VAT field contains a value and if you are using the Post VAT option in the Cash Book Settings setting.
- You can use a single cash transaction to record the day's cash receipts or payments by listing them on the 'Payments' card. If these cash receipts or payments all use the same Expense Account (i.e. they all affect the same Sales or Purchase Account), specify that Expense Account here. If a particular cash receipt or payment uses a different Expense Account, specify that Expense Account in the relevant row on the 'Payments' card (flip B).
- In the case of a 'simple' cash transaction (i.e. one where the grid on the 'Payments' card is empty or contains at least one row of Type "Cash In" or "Cash Out"), you must specify an Expense Account either here or in every row on the 'Payments' card before the cash transaction can be saved.
- The Expense Account determines the Nominal Ledger Account that will be credited (Cash In) or debited (Cash Out) with the value of the cash transaction (or the value of the cash transaction less VAT if a separate VAT posting is being made). In the case of transactions that you enter directly to the Cash In and Cash Out registers, this might be a Sales (Cash In) or Purchase (Cash Out) Account, or, in the case of cash payments made to or received from members of staff, an Expense Account. For payments of between your bank and petty cash, it will be your Bank Account (the Petty Cash Account will come from the Payment Mode). In the case of cash transactions that you create from Invoices, especially if you are using the Double Transaction method to create cash transactions from Invoices and Purchase Invoices, it may be a temporary holding Account for cash. A separate VAT posting will be made if the VAT field contains a value and if you are using the Post VAT option in the Cash Book Settings setting.
- Comment
- Default taken from
Expense Account
- The text for the Expense Account. You can change this text for a particular cash transaction.
- Customer
- Paste Special
Customers in Contact register
- To record a cash payment received from a particular Customer, enter their Customer Number or use the 'Paste Special' function. When you press Return, the Customer's name, address and other information will be entered into the appropriate fields. There is no need to enter a Customer Number: leave the field blank if you want to use a single Cash In record to record the day's cash receipts or to record the receipt of cash from a member of staff.
- If the cash payment was made by the Customer to settle an Invoice, enter a row on the 'Payments' card in which the Type is "Invoice" and specify the Invoice Number in the Number field. Alternatively, if the payment is a Prepayment against an Order, enter a row on the 'Payments' card in which the Type is "Prepayment from Customer" and specify the Order Number in the Order field. In both cases, the Customer Number will then be brought in to this field automatically, and the address and other information will also be brought in as previously described.
- This field is used in the Cash In register only.
- If the cash payment was made by the Customer to settle an Invoice, enter a row on the 'Payments' card in which the Type is "Invoice" and specify the Invoice Number in the Number field. Alternatively, if the payment is a Prepayment against an Order, enter a row on the 'Payments' card in which the Type is "Prepayment from Customer" and specify the Order Number in the Order field. In both cases, the Customer Number will then be brought in to this field automatically, and the address and other information will also be brought in as previously described.
- Supplier
- Paste Special
Suppliers in Contact register
- To record a cash payment issued to a particular Supplier, enter their Supplier Number or use the 'Paste Special' function. When you press Return, the Supplier's name, address and other information will be entered into the appropriate fields. There is no need to enter a Supplier Number: leave the field blank if you want to use a single Cash Out record to record the day's cash payments or to record a cash payment to a member of staff.
- If you issued the cash payment to the Supplier to settle an Invoice, enter a row on the 'Payments' card in which the Type is "Purchase Invoice" and specify the Invoice Number in the Number field. Alternatively, if the payment is a Prepayment against a Purchase Order, enter a row on the 'Payments' card in which the Type is "Prepayment to Supplier" and specify the Purchase Order Number in the Order field. In both cases, the Supplier Number will then be brought in to this field automatically, and the address and other information will also be brought in as previously described.
- This field is used in the Cash Out register only.
- If you issued the cash payment to the Supplier to settle an Invoice, enter a row on the 'Payments' card in which the Type is "Purchase Invoice" and specify the Invoice Number in the Number field. Alternatively, if the payment is a Prepayment against a Purchase Order, enter a row on the 'Payments' card in which the Type is "Prepayment to Supplier" and specify the Purchase Order Number in the Order field. In both cases, the Supplier Number will then be brought in to this field automatically, and the address and other information will also be brought in as previously described.
- Reference
- Use this field if you need to identify the cash transaction by means other than the Serial Number. One purpose for the field might be to record the number used by the Customer or Supplier to identify the payment.
- In a Cash In record that was created from a Sales Invoice, this field will contain a string that includes "S/INV." as a prefix and the Invoice Number.
- The Reference will be copied to the Reference field in any Nominal Ledger Transaction that will be created from the cash transaction.
- In a Cash In record that was created from a Sales Invoice, this field will contain a string that includes "S/INV." as a prefix and the Invoice Number.
- Name
- The Person, Customer or Supplier Name will be entered after you have entered a Person's initials or the Customer or Supplier Number.
- Address
- The Address of the Person, Customer or Supplier will be entered after you have entered a Person's Signature or the Customer or Supplier Number. In the case of a Person, the address will be taken from the Contact record specified in the Person or Global User record.
- Specification
- Any comment that you enter here (perhaps the circumstances of the cash transaction) will be copied to the Text field in the resulting Nominal Ledger Transaction, and will be shown in the 'Cash In: Browse' or 'Cash Out: Browse' window.
- In the case of the Cash Out register only, when you enter a Person above, their bank account number (from the 'Accounts' card of their Person record) will be copied here automatically.
- The Specification will be copied to the Text field in any Nominal Ledger Transaction that will be created from the cash transaction.
- In the case of the Cash Out register only, when you enter a Person above, their bank account number (from the 'Accounts' card of their Person record) will be copied here automatically.
- Tags/Objects
- Paste Special
Tag/Object register, System module
- Default taken from Person, and Customer (Sales Tags/Objects) or Supplier (Purch. Tags/Objects)
- You can assign up to 20 Tags/Objects, separated by commas, to a cash transaction, to be transferred to the consequent Nominal Ledger Transaction. You might define separate Tags/Objects to represent different departments, cost centres or product types. This provides a flexible method of analysis that can be used in Nominal Ledger reports.
- In the Nominal Ledger Transaction generated from a cash transaction, the Tags/Objects specified here will be assigned to the Account that is credited (Cash In) or debited (Cash Out) by the value of the cash transaction (or by the value of the cash transaction less VAT if a separate VAT posting is being made).
- You can assign up to 20 Tags/Objects, separated by commas, to a cash transaction, to be transferred to the consequent Nominal Ledger Transaction. You might define separate Tags/Objects to represent different departments, cost centres or product types. This provides a flexible method of analysis that can be used in Nominal Ledger reports.
- Total
- The total for the cash transaction, including VAT. This figure should be in Currency (specify the Currency on the 'Currency' card).
- If you have used at least one row on the 'Payments' card, the Total figure will be updated automatically and will not be changeable.
- If you have used at least one row on the 'Payments' card, the Total figure will be updated automatically and will not be changeable.
- VAT Code
- Paste Special
VAT Codes setting, Nominal Ledger
- Default taken from Cash Book Settings
- The VAT Code entered here determines the rate at which VAT will be charged on the cash transaction and the VAT Account to be used.
- If you would like a VAT element to be included the Nominal Ledger Transactions generated from cash transactions, select the Post VAT option in the Cash Book Settings setting. The VAT will be credited to the Output Account specified for the VAT Code record (Cash In) or debited to the Input Account (Cash Out). The Nominal Ledger Transaction will not include a VAT element if you have not selected the Post VAT option.
- If you are using the Post VAT option, the VAT Code specified here will be assigned to the posting to the Account from the Expense Account in the resulting Nominal Ledger Transaction. If you need it to be assigned to the posting to the VAT Account as well, select the Add VAT Code to VAT A/C rows option in the Transaction Settings setting in the Nominal Ledger.
- If you are using a Cash In record to receive cash against an Invoice and you are also using the Post Receipt VAT option in the Account Usage S/L setting, the VAT Code from the first row of the Invoice will appear here when you enter the Invoice Number on the 'Payments' card. Similarly, if you are using a Cash Out record to issue cash against a Purchase Invoice and you are also using the Post Payment VAT option in the Account Usage P/L setting, the VAT Code from the first row of the Purchase Invoice will appear here when you enter the Purchase Invoice Number on the 'Payments' card.
- The VAT Code entered here determines the rate at which VAT will be charged on the cash transaction and the VAT Account to be used.
- VAT
- The VAT total for the cash transaction: this figure will be updated when you enter the Total or the Net figure and whenever you change the VAT Code. This figure should be in Currency.
- This figure will be rounded up or down according to the Default for Calculated Values and VAT rounding rules set in the Round Off setting in the System module acting in combination (the Default for Calculated Values rounding rules govern the calculation while the VAT rounding rules govern the figure after calculation).
- This figure will be rounded up or down according to the Default for Calculated Values and VAT rounding rules set in the Round Off setting in the System module acting in combination (the Default for Calculated Values rounding rules govern the calculation while the VAT rounding rules govern the figure after calculation).
- Language
- Paste Special
Languages setting, System module
- You can use the Language to determine the Form Template that will be used when you print the cash transaction, and the printer that will be used to print it. This can include sending the document to a fax machine, if your hardware can support this feature. To configure these printing specifications, use the 'Form Definition' window for the Cash In and Cash Out forms, as described here. You can change the Language before printing a cash transaction, to ensure it is printed on the correct printer or fax machine.
- Net
- The total for the cash transaction, excluding VAT. This figure will be calculated automatically when you enter the Total and whenever you change the VAT Code. This figure should be in Currency.
- This figure will be rounded up or down according to the Total rounding rules set in the Round Off setting in the System module. In the Nominal Ledger Transaction resulting from the cash transaction, any amounts lost or gained in this rounding process will be posted to the Round Off Account specified in the Account Usage S/L setting, providing you are using the Post VAT option in the Cash Book Settings setting. If you are not using this option, the Total will be posted to both sides of the Transaction so there will be no rounding error.
- If you have used at least one row on the 'Payments' card, the Net figure will be updated automatically and will not be changeable.
- This figure will be rounded up or down according to the Total rounding rules set in the Round Off setting in the System module. In the Nominal Ledger Transaction resulting from the cash transaction, any amounts lost or gained in this rounding process will be posted to the Round Off Account specified in the Account Usage S/L setting, providing you are using the Post VAT option in the Cash Book Settings setting. If you are not using this option, the Total will be posted to both sides of the Transaction so there will be no rounding error.
- Tax
- This field will only be visible if the VAT Law in the Company Info setting is "Argentinean", "Brazilian", "Italian", "Kenyan", "Mexican", "Philippinian", "Portuguese", "Singaporean" or "South African".
- When you define VAT Codes using the setting in the Nominal Ledger, you can use the fields on flip B to specify that an additional tax, such as an environmental tax, is to be levied. This additional tax is usually termed "Extra Tax".
- If the VAT Code specified above is one that you have configured to include Extra Tax, the amount of that tax will be shown in this field, in the Currency of the cash transaction.
- When you mark the cash transaction as OK and save it, this Extra Tax will be credited (in the case of a Cash In record) or debited (in the case of a Cash Out) to the Tax Account specified for the appropriate VAT Code.
- If you have specified a Tax Min. (minimum Extra Tax amount) for a VAT Code, and the Extra Tax in an Invoice is less than this minimum amount, this field will be blank.
- Please refer to the description of flip B of the VAT Codes setting here for more details about how the Extra Tax figure is calculated together with examples.
- When you define VAT Codes using the setting in the Nominal Ledger, you can use the fields on flip B to specify that an additional tax, such as an environmental tax, is to be levied. This additional tax is usually termed "Extra Tax".
The Cash In and Cash Out registers (Cash Transactions) in Standard ERP:
- Introduction
- Entering a Cash Transaction, including:
- Printing Cash Transactions
- Nominal Ledger Transactions from Cash Transactions
- Invalidating Cash Transactions
- Operations menu
- Home page for Cash Book module manual
- Home page for Standard ERP manual
Entering a Cash Transaction - Currency Card
This page describes the fields on the 'Currency' card in the Cash In and Cash Out windows. Please follow the links below for descriptions of the other parts of the Cash In and Cash Out record windows:---

- Currency
- Paste Special
Currency register, System module
- Default taken from Contact record for the Customer (Cash In, Sales Currency), Contact record for the Supplier (Cash Out, Purch. Currency), or Default Base Currency
- The Currency of the cash transaction is shown together with the exchange rate, which you can change in an individual cash transaction if necessary. The Total, Net, VAT and Tax figures on the 'Amounts' card should all be in the Currency specified here. Leave the field blank to use your home Currency (unless you have set a Default Base Currency, in which case this will be offered as a default and should be treated as your home Currency).
- If the Customer has a Sales Currency (Cash In) or a Supplier has a Purchase Currency (Cash Out) specified, that Currency will be offered as a default, but you can use any other Currency if necessary.
- The Currency of the cash transaction is shown together with the exchange rate, which you can change in an individual cash transaction if necessary. The Total, Net, VAT and Tax figures on the 'Amounts' card should all be in the Currency specified here. Leave the field blank to use your home Currency (unless you have set a Default Base Currency, in which case this will be offered as a default and should be treated as your home Currency).
- Exchange Rates
- Default taken from
Base Currency Rates setting and/or Exchange Rate register, System module
- By default, these fields will display the exchange rates for the specified Currency on the date of the cash transaction.
- One of two conversion methods will be used. The Dual-Base system will be useful for companies that have offices in two countries that need to report in both Currencies, for companies operating in countries where there is a second Currency (usually the US Dollar or Euro) in common use in addition to the national one, and for companies in the Euro zone who retain their old national Currency for comparison purposes. The second method is a simple conversion from the foreign Currency to the home Currency, applicable to the majority of worldwide Currency transactions. These are described below.
- Exchange Rates (Dual-Base System)
- In the example shown above, the Currency of the transaction is the Euro. Base Currency 1 is the home Currency (GBP, Pounds Sterling) and Base Currency 2 is the Euro. The fields on the left show in the form of a ratio the exchange rate between the two base Currencies (taken from the latest record in the Base Currency Rates setting). The illustration shows that GBP0.89715 buys one Euro.
- Note that European Monetary Union (EMU) regulations specify that the ratios must always show how many units of the home or foreign Currency can be bought with one Euro.
- Note that European Monetary Union (EMU) regulations specify that the ratios must always show how many units of the home or foreign Currency can be bought with one Euro.
- Exchange Rates (Simple Currency Conversion System)
- In the case of a simple currency conversion system, the Rate and right-hand Base Currency 1 fields are used to show a simple exchange rate between the foreign and home Currencies. In the example shown below, the home Currency is US Dollars (USD) and the foreign Currency Japanese Yen (JPY). JPY136.727 buys USD1.00.

- One of two conversion methods will be used. The Dual-Base system will be useful for companies that have offices in two countries that need to report in both Currencies, for companies operating in countries where there is a second Currency (usually the US Dollar or Euro) in common use in addition to the national one, and for companies in the Euro zone who retain their old national Currency for comparison purposes. The second method is a simple conversion from the foreign Currency to the home Currency, applicable to the majority of worldwide Currency transactions. These are described below.
The Cash In and Cash Out registers (Cash Transactions) in Standard ERP:
- Introduction
- Entering a Cash Transaction, including:
- Printing Cash Transactions
- Nominal Ledger Transactions from Cash Transactions
- Invalidating Cash Transactions
- Operations menu
- Home page for Cash Book module manual
- Home page for Standard ERP manual
Entering a Cash Transaction - Payments Card - Part 1
This page describes the Type field on the 'Payments' card in the Cash In and Cash Out windows. Please follow the links below for descriptions of the other parts of the Cash In and Cash Out record windows:---
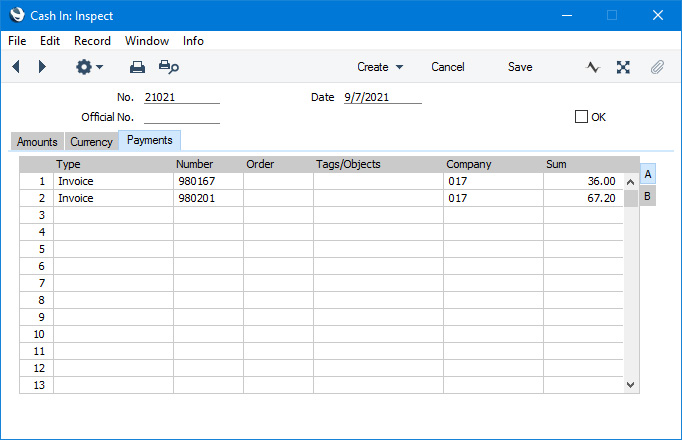
You can use the 'Payments' card in a Cash In or Cash Out record to pay off Sales and Purchase Invoices, providing the payments are made in cash. You can also pay Personnel Payments, Credit and Debit Notes and Prepayments, and reverse Cash In or Cash Out records.
Invoices and Purchase Invoices paid off in this manner will no longer be treated as open, but records in the Receipt or Payment registers will not be created.
As you add rows to the 'Payments' card, the Total and Net fields on the 'Amounts' card will be updated automatically.
- Type
- Paste Special
Choices of possible entries
- Use this field to specify the type of cash transaction. You can mix Types in a single record, providing all cash payments use the same Customer/Supplier, Person and Tags/Objects.
- These are the choices available in a Cash In record:
- Cash In
- Use this option to record a standard cash receipt. Enter the value of the cash receipt in the Sum field.
- The resulting Nominal Ledger Transaction will debit the Account from the Payment Mode and credit the Account from the Expense Account. If the Cash In record contains several rows with this Type, the Transaction will contain separate debit and credit postings for each row.
- If you are using the Post VAT option in the Cash Book Settings setting, you cannot use the "Cash In" option here. Instead, you should enter the entire value of the cash receipt to the Total field on the 'Amounts' card and leave the grid on the 'Payments' card empty.
- The resulting Nominal Ledger Transaction will debit the Account from the Payment Mode and credit the Account from the Expense Account. If the Cash In record contains several rows with this Type, the Transaction will contain separate debit and credit postings for each row.
- Invoice
- Use this option to record a cash receipt against an existing outstanding Invoice. When you enter the Invoice Number in the Number field to the right (using 'Paste Special'), the Customer will be placed in the Company field, and the outstanding amount will be placed in the Sum field. The Customer and Address will also be placed in the appropriate fields on the 'Amounts' card. You can change the Sum if necessary.
- You can enter several Invoices in a single Cash In record, but they must all use the same Customer. If the Customer Number and outstanding amount are not placed in the Company and Sum fields when you enter an Invoice Number, this will be because the Customer is different to the one on the row above, or to the one already entered on the 'Amounts' card. A "Not the same customer" message will also appear.
- The resulting Nominal Ledger Transaction will debit the Account from the Payment Mode and credit the Debtor Account from the Invoice. If a Cash In record contains several rows with this Type, the Transaction will contain separate debit and credit postings for each row. If you are using the Post Receipt VAT option in the Account Usage S/L setting, the VAT value will be debited from the Output Account and credited to the O/P or VAT (C/A) Account. The VAT value will be calculated using the VAT Code on the first row of the Invoice. This VAT Code will be visible on the 'Amounts' card. If you are receiving cash against several Invoices in one Cash In, the VAT Code will be taken from the last Invoice that you enter in the grid, so take care that this VAT Code is appropriate for each row in each Invoice. If it is not, use a Receipt to receive the cash payment.
- The cash receipt will be included in the appropriate reports (e.g. the Sales Ledger report, the Periodic Customer Statement and the Open Invoice Customer Statement).
- You can enter several Invoices in a single Cash In record, but they must all use the same Customer. If the Customer Number and outstanding amount are not placed in the Company and Sum fields when you enter an Invoice Number, this will be because the Customer is different to the one on the row above, or to the one already entered on the 'Amounts' card. A "Not the same customer" message will also appear.
- Credit Purchase Invoice
- Use this option to record a cash receipt against an existing outstanding Purchase Credit Note (a "debit note"). This might be useful when you have paid a Purchase Invoice and you then receive a debit note and a cash refund. When you enter the Number of the original Purchase Invoice (i.e. not the Number of the debit note) in the Number field to the right (using 'Paste Special'), the Supplier will be placed in the Company field, and the outstanding amount will be placed in the Sum field. The Supplier and Address will also be placed in the appropriate fields on the 'Amounts' card. You can change the Sum if necessary.
- You can enter several Purchase Invoices in a single Cash In record, but they must all use the same Supplier. If the Supplier Number and outstanding amount are not placed in the Company and Sum fields when you enter an Invoice Number, this will be because the Supplier is different to the one on the row above, or to the one already entered on the 'Amounts' card. A "Not the same customer" message will also appear.
- The resulting Nominal Ledger Transaction will debit the Account from the Payment Mode and credit the Creditor Account from the Purchase Invoice. If a Cash In record contains several rows with this Type, the Transaction will contain separate debit and credit postings for each row. If you are using the Post Payment VAT option in the Account Usage P/L setting, the VAT value will be debited from the Input Account and credited to the I/P or Prepayment VAT Account. The VAT value will be calculated using the VAT Code on the first row of the Purchase Invoice. This VAT Code will be visible on the 'Amounts' card. If you are receiving cash refunds against several Purchase Invoices in one Cash In, the VAT Code will be taken from the last Purchase Invoice that you enter in the grid, so take care that this VAT Code is appropriate for each row in each Invoice. If it is not, use a Payment to reverse the cash payments.
- The cash receipt will be included in the appropriate reports (e.g. the Purchase Ledger report, the Periodic Supplier Statement and the Open Invoice Supplier Statement).
- You can enter several Purchase Invoices in a single Cash In record, but they must all use the same Supplier. If the Supplier Number and outstanding amount are not placed in the Company and Sum fields when you enter an Invoice Number, this will be because the Supplier is different to the one on the row above, or to the one already entered on the 'Amounts' card. A "Not the same customer" message will also appear.
- Personnel Payment
- Use this option to record a cash receipt from a member of staff. Enter the value of the cash receipt in the Sum field. You must enter a Person on the 'Amounts' card before you can save the Cash In record.
- The resulting Nominal Ledger Transaction will debit the Account from the Payment Mode and credit the Account from the Person record ('Accounts' card).
- The cash receipt will be included in the Periodic Personnel Statement report in the Expenses module.
- The resulting Nominal Ledger Transaction will debit the Account from the Payment Mode and credit the Account from the Person record ('Accounts' card).
- Prepayment from Customer
- Use this option to record the receiving of a cash deposit.
- If the deposit is connected to a Sales Order, enter its Order Number in the Order field to the right (using 'Paste Special'). The Customer will be placed in the Company field, and the value of the Order less any previous deposit will be placed in the Sum field. The Customer and Address will also be placed in the appropriate fields on the 'Amounts' card. You can change the Sum if necessary. The Order Number will be used as the Prepayment Number and so will be copied to the Number field.
- If the deposit is not connected to a Sales Order, enter a Prepayment Number in the Number field, a Customer in the Company field, and the value of the deposit in the Sum field. The Prepayment Number can be a number of your own generation, the number allocated to the prepayment by the Customer or, preferably, the number of the Sales Order against which the deposit has been received.
- In both cases, the Customer must be one in which the On Account box ('Terms' card) has been ticked.
- It is not necessary to use a unique number as the Prepayment Number. This allows you to receive more than one deposit against an individual Sales Order. However, using a Prepayment Number more than once may make the Prepayment History report difficult to understand, and may make it difficult to link a particular Prepayment to an Invoice using the 'Connect to Prepayment' function. Therefore you may wish to use the Force Unique Prepayment Numbers option, on the 'Debtors' card of the Account Usage S/L setting. This will mean that once you have used a Prepayment Number in a Prepayment that you have marked as OK, you will not be able to use it again.
- The resulting Nominal Ledger Transaction will debit the Account from the Payment Mode and credit the Debtors On Account A/C for the Customer Category to which the Customer belongs, or the On Account A/C on the 'Debtors' card of the Account Usage S/L setting. If you are using the Post Prepayment VAT option in the Account Usage S/L setting, the VAT value will be debited from the Prepayment VAT Account in the same setting and credited to the O/P or VAT (A/C) Account. The VAT value will be calculated using the VAT Code on the first row of the Order. This VAT Code will be visible on the 'Amounts' card. If you are receiving cash deposits against several Orders in one Cash In, the VAT Code will be taken from the last Order that you enter in the grid, so take care that this VAT Code is appropriate for them all.
- When you raise an Invoice to be set against the Prepayment, you can connect the two using the 'Connect to Prepayment' function on the Operations menu of the Invoice screen. This is fully described on the On Account Receipts and Prepayments page. The Prepayment will be shown in the Prepayment History report in the Sales Ledger.
- You can use Access Groups to ensure that you can only receive Prepayments against Orders that have been marked as OK. To do this, give all users Full access to the 'Disallow Prepayment for not OKed Order' Action. It will then not be possible to save a Cash In record that receives a Prepayment against an Order that has not been marked as OK.
- If the deposit is connected to a Sales Order, enter its Order Number in the Order field to the right (using 'Paste Special'). The Customer will be placed in the Company field, and the value of the Order less any previous deposit will be placed in the Sum field. The Customer and Address will also be placed in the appropriate fields on the 'Amounts' card. You can change the Sum if necessary. The Order Number will be used as the Prepayment Number and so will be copied to the Number field.
- Rev. Prep. to Supplier
- Use this option to reverse a Prepayment that you have issued to a Supplier (i.e. to receive cash back from the Supplier). Enter the Prepayment Number in the Number field to the right (using 'Paste Special'). The Supplier will be placed in the Company field, and the open value of the Prepayment will be placed in the Sum field. The Supplier and Address will also be placed in the appropriate fields on the 'Amounts' card. You can change the Sum if necessary.
- The resulting Nominal Ledger Transaction will debit the Account from the Payment Mode and credit the Creditors On Account A/C in the Contact record for the Supplier ('Accounts' card), the Creditors On Account A/C in the Customer Category to which the Supplier belongs, or the On Account A/C on the 'Creditors' card of the Account Usage P/L setting.
- The resulting Nominal Ledger Transaction will debit the Account from the Payment Mode and credit the Creditors On Account A/C in the Contact record for the Supplier ('Accounts' card), the Creditors On Account A/C in the Customer Category to which the Supplier belongs, or the On Account A/C on the 'Creditors' card of the Account Usage P/L setting.
- Cheque
- Use this option to receive cash against a Cheque. Enter the Serial Number of the Cheque in the Number field to the right (using 'Paste Special'). The Cheque must be marked as "Registered", and 'Paste Special' will only list "Registered" Cheques. The Customer will be placed in the Company field, and the open value of the Cheque will be placed in the Sum field. The Customer and Address will also be placed in the appropriate fields on the 'Amounts' card. You can change the Sum if necessary.
- If you are using this option, the Payment Mode on flip B or on the 'Amounts' card must be one in which the Type is "Received Cheques".
- The resulting Nominal Ledger Transaction will debit the Account from the Payment Mode and credit the Account from the Expense Account. The Cheque will be changed from "Registered" to "Accepted", the Account from the Payment Mode will be copied to the Temp A/C field in the Cheque and the Account from the Expense Account will be copied to the Orig A/C field.
- If you are using this option, the Payment Mode on flip B or on the 'Amounts' card must be one in which the Type is "Received Cheques".
These are the choices available in a Cash Out record:
- Cash Out
- Use this option to record a standard cash payment. Enter the value of the cash payment in the Sum field.
- The resulting Nominal Ledger Transaction will credit the Account from the Payment Mode and debit the Account from the Expense Account. If the Cash Out record contains several rows with this Type, the Transaction will contain separate debit postings for each row but usually a single credit posting to the Payment Mode Account. If you need the Transaction to contain separate credit postings for each row, select the Separate Row per Cash Out Row on Bank A/C option in the Cash Book Settings setting.
- If you are using the Post VAT option also in the Cash Book Settings setting, you cannot use the "Cash Out" option here. Instead, you should enter the entire value of the cash payment to the Total field on the 'Amounts' card and leave the grid on the 'Payments' card empty.
- The resulting Nominal Ledger Transaction will credit the Account from the Payment Mode and debit the Account from the Expense Account. If the Cash Out record contains several rows with this Type, the Transaction will contain separate debit postings for each row but usually a single credit posting to the Payment Mode Account. If you need the Transaction to contain separate credit postings for each row, select the Separate Row per Cash Out Row on Bank A/C option in the Cash Book Settings setting.
- Credit Invoice
- Use this option to issue a cash payment against an existing outstanding Credit Note. This might be useful when a Customer has paid an Invoice and you then issue a Credit Note and a cash refund. When you enter the Number of the original Invoice (i.e. not the Number of the Credit Note) in the Number field to the right (using 'Paste Special'), the Customer will be placed in the Company field, and the outstanding amount will be placed in the Sum field. The Customer and Address will also be placed in the appropriate fields on the 'Amounts' card. You can change the Sum if necessary.
- You can enter several Invoices in a single Cash Out record, but they must all use the same Customer. If the Customer Number and outstanding amount are not placed in the Company and Sum fields when you enter an Invoice Number, this will be because the Customer is different to the one on the row above, or to the one already entered on the 'Amounts' card. A "Not the same Supplier" message will also appear.
- The resulting Nominal Ledger Transaction will credit the Account from the Payment Mode and debit the Debtor Account from the Invoice. If a Cash Out record contains several rows with this Type, the Transaction will contain separate debit postings for each row but usually a single credit posting to the Payment Mode Account. If you need the Transaction to contain separate credit postings for each row, select the Separate Row per Cash Out Row on Bank A/C option in the Cash Book Settings setting.
- The cash payment will be included in all appropriate reports (e.g. the Sales Ledger report, the Periodic Customer Statement and the Open Invoice Customer Statement).
- If you need to post VAT from a cash refund, you cannot use the "Credit Invoice" option here. Instead, you should make sure you are using the Post Receipt VAT option in the Account Usage S/L setting and then enter the cash refund in the Receipt register in the Sales Ledger, using an appropriate Payment Mode.
- You can enter several Invoices in a single Cash Out record, but they must all use the same Customer. If the Customer Number and outstanding amount are not placed in the Company and Sum fields when you enter an Invoice Number, this will be because the Customer is different to the one on the row above, or to the one already entered on the 'Amounts' card. A "Not the same Supplier" message will also appear.
- Purchase Invoice
- Use this option to record a cash payment against an existing outstanding Purchase Invoice. When you enter the Invoice Number in the Number field to the right (using 'Paste Special'), the Supplier will be placed in the Company field, and the outstanding amount will be placed in the Sum field. The Supplier and Address will also be placed in the appropriate fields on the 'Amounts' card. You can change the Sum if necessary.
- You can enter several Purchase Invoices in a single Cash Out record, but they must all use the same Supplier. If the Supplier Number and outstanding amount are not placed in the Company and Sum fields when you enter an Invoice Number, this will be because the Supplier is different to the one on the row above, or to the one already entered on the 'Amounts' card. A "Not the same Supplier" message will also appear.
- The resulting Nominal Ledger Transaction will credit the Account from the Payment Mode and debit the Creditor Account from the Invoice. If a Cash Out record contains several rows with this Type, the Transaction will contain separate debit postings for each row but usually a single credit posting to the Payment Mode Account. If you need the Transaction to contain separate credit postings for each row, select the Separate Row per Cash Out Row on Bank A/C option in the Cash Book Settings setting.
- The cash payment will be included in all appropriate reports (e.g. the Purchase Ledger report, the Periodic Supplier Statement and the Open Supplier Customer Statement).
- If you need to post VAT from a cash payment, you cannot use the "Purchase Invoice" option here. Instead, you should first make sure you are using the Post Payment VAT option in the Account Usage P/L setting and then enter the cash payment in the Payment register in the Purchase Ledger, using an appropriate Payment Mode.
- You can enter several Purchase Invoices in a single Cash Out record, but they must all use the same Supplier. If the Supplier Number and outstanding amount are not placed in the Company and Sum fields when you enter an Invoice Number, this will be because the Supplier is different to the one on the row above, or to the one already entered on the 'Amounts' card. A "Not the same Supplier" message will also appear.
- Personnel Payment
- Use this option to record a cash payment made to a member of staff. Enter the value of the cash payment in the Sum field. You must enter a Person on the 'Amounts' card before you can save the Cash Out record.
- The resulting Nominal Ledger Transaction will credit the Account from the Payment Mode and debit the Account from the Person record ('Accounts' card).
- The cash payment will be included in the Periodic Personnel Statement report in the Expenses module.
- The resulting Nominal Ledger Transaction will credit the Account from the Payment Mode and debit the Account from the Person record ('Accounts' card).
- Prepayment to Supplier
- Use this option to record the issuing of a cash deposit.
- If the deposit is connected to a Purchase Order, enter its Purchase Order Number in the Order field to the right (using 'Paste Special'). The Supplier will be placed in the Company field, and the value of the Purchase Order less any previous deposit will be placed in the Sum field. The Supplier and Address will also be placed in the appropriate fields on the 'Amounts' card. You can change the Sum if necessary. The Purchase Order Number will be used as the Prepayment Number and so will be copied to the Number field.
- If the deposit is not connected to a Purchase Order, enter a Prepayment Number in the Number field, a Supplier in the Company field, and the value of the deposit in the Sum field. The Prepayment Number can be a number of your own generation or the number allocated to the prepayment by the Supplier.
- In both cases, the Supplier must be one in which the On Account box ('Terms' card) has been ticked.
- It is not necessary to use a unique number as the Prepayment Number. This allows you to issue more than one deposit against an individual Purchase Order. However, using a Prepayment Number more than once may make the Prepayment History report difficult to understand, and may make it difficult to link a particular Prepayment to a Purchase Invoice using the 'Connect to Prepayment' function. Therefore you may wish to use the Force Unique Prepayment Numbers option, on the 'Creditors' card of the Account Usage P/L setting. This will mean that once you have used a Prepayment Number in a Prepayment that you have marked as OK, you will not be able to use it again.
- The resulting Nominal Ledger Transaction will credit the Account from the Payment Mode and debit the Creditors On Account A/C in the Contact record for the Supplier ('Accounts' card), the Creditors On Account A/C in the Customer Category to which the Supplier belongs, or the On Account A/C on the 'Creditors' card of the Account Usage P/L setting.
- When you create a Purchase Invoice to be set against the Prepayment, you can connect the two using the 'Connect to Prepayment' function on the Operations menu of the Invoice screen. This is fully described on the On Account Payments and Prepayments page. The Prepayment will be shown in the Prepayment History report in the Purchase Ledger.
- If you need to post VAT from a cash deposit, you cannot use the "Prepayment" option here. Instead, you should first make sure you are using the Book Prepayment VAT option in the Account Usage P/L setting and then enter the cash receipt in the Payment register in the Purchase Ledger using an appropriate Payment Mode.
- You can use Access Groups to ensure that you can only issue Prepayments against Purchase Orders that have been marked as OK. To do this, give all users Full access to the 'Disallow Prepayment for not OKed Purchase Order' Action. It will then not be possible to save a Cash Out record that issues a Prepayment against a Purchase Order that has not been marked as OK.
- If the deposit is connected to a Purchase Order, enter its Purchase Order Number in the Order field to the right (using 'Paste Special'). The Supplier will be placed in the Company field, and the value of the Purchase Order less any previous deposit will be placed in the Sum field. The Supplier and Address will also be placed in the appropriate fields on the 'Amounts' card. You can change the Sum if necessary. The Purchase Order Number will be used as the Prepayment Number and so will be copied to the Number field.
- Rev. Prep. from Customer
- Use this option to reverse a Prepayment that you have received from a Customer (i.e. to return cash to the Customer). Enter the Prepayment Number in the Number field to the right (using 'Paste Special'). The Customer will be placed in the Company field, and the open value of the Prepayment will be placed in the Sum field. The Customer and Address will also be placed in the appropriate fields on the 'Amounts' card. You can change the Sum if necessary.
- The resulting Nominal Ledger Transaction will credit the Account from the Payment Mode and debit the Debtors On Account A/C for the Customer Category to which the Customer belongs, or the On Account A/C on the 'Debtors' card of the Account Usage S/L setting.
- The resulting Nominal Ledger Transaction will credit the Account from the Payment Mode and debit the Debtors On Account A/C for the Customer Category to which the Customer belongs, or the On Account A/C on the 'Debtors' card of the Account Usage S/L setting.
- Cheque
- Use this option to issue cash against a Cheque. Enter the Serial Number of the Cheque in the Number field to the right (using 'Paste Special'). The Cheque must be marked as "Accepted", and 'Paste Special' will only list "Accepted" Cheques. The Customer will be placed in the Company field, and the open value of the Cheque will be placed in the Sum field. The Customer and Address will also be placed in the appropriate fields on the 'Amounts' card. You can change the Sum if necessary.
- If you are using this option, the Payment Mode on flip B or on the 'Amounts' card must be one in which the Type is "Received Cheques".
- The resulting Nominal Ledger Transaction will credit the Account from the Payment Mode and debit the Account from the Expense Account. The Cheque will be changed from "Accepted" to "Endorsed", the Account from the Payment Mode will be copied to the Temp A/C field in the Cheque and the Account from the Expense Account will be copied to the Target A/C field.
- If you are using this option, the Payment Mode on flip B or on the 'Amounts' card must be one in which the Type is "Received Cheques".
- Own Cheque
- Use this option to issue cash against an Own Cheque. Enter the Serial Number of the Own Cheque in the Number field to the right (using 'Paste Special'). The Own Cheque must be marked as "Unused", and 'Paste Special' will only list "Unused" Own Cheques. The Supplier will be placed in the Company field, and the open value of the Cheque will be placed in the Sum field. The Supplier and Address will also be placed in the appropriate fields on the 'Amounts' card. You can change the Sum if necessary.
- If you are using this option, the Payment Mode on flip B or on the 'Amounts' card must be one in which the Type is "Own Cheques".
- The resulting Nominal Ledger Transaction will credit the Account from the Payment Mode and debit the Account from the Expense Account. The Own Cheque will be changed from "Unused" to "Issued", the Account from the Payment Mode will be copied to the Temp A/C field in the Own Cheque and the Account from the Expense Account will be copied to the Orig A/C field.
- If you are using this option, the Payment Mode on flip B or on the 'Amounts' card must be one in which the Type is "Own Cheques".
- The 'Paste Special' list attached to the Number field will vary, depending on the option that you choose here.
- These are the choices available in a Cash In record:
------
The Cash In and Cash Out registers (Cash Transactions) in Standard ERP:
- Introduction
- Entering a Cash Transaction, including:
- Printing Cash Transactions
- Nominal Ledger Transactions from Cash Transactions
- Invalidating Cash Transactions
- Operations menu
- Home page for Cash Book module manual
- Home page for Standard ERP manual
Entering a Cash Transaction - Payments Card - Part 2
This page describes the fields on the 'Payments' card in the Cash In and Cash Out windows (apart from the Type field). Please follow the links below for descriptions of the other parts of the Cash In and Cash Out record windows:---
You can use the 'Payments' card in a Cash In or Cash Out record to pay off Sales and Purchase Invoices, providing the payments are made in cash. You can also pay Personnel Payments, Credit and Debit Notes and Prepayments, and reverse Cash In or Cash Out records.
Invoices and Purchase Invoices paid off in this manner will no longer be treated as open, but records in the Receipt or Payment registers will not be created.
As you add rows to the 'Payments' card, the Total and Net fields on the 'Amounts' card will be updated automatically.
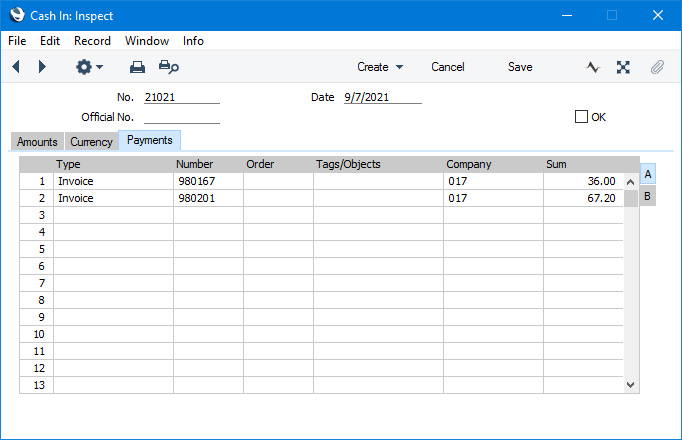
Flip A
- Type
- Please refer here for details about the Type field.
- Number
- Paste Special
Depends on the Type
- If the Type (above) is "Invoice" or "Credit Purchase Invoice" (in a Cash In record), or "Purchase Invoice" or "Credit Invoice" (in a Cash Out record), enter the Sales or Purchase Invoice Number of the Invoice to be paid off or choose an Invoice Number using 'Paste Special'. When you press the Tab or Enter key, its Customer or Supplier Number will appear in the Company field, and the outstanding amount will be placed in the Sum field.
- If the Type is "Prepayment from Customer" (in a Cash In record) or "Prepayment to Supplier" (in a Cash Out record), you must enter a Prepayment Number here. This can be a number of your own generation, the number allocated to the prepayment by the Customer or Supplier or, preferably, the number of the Sales or Purchase Order against which the deposit has been received/issued. In the last case, if you enter the Sales or Purchase Order Number in the Order field to the right, it will be copied here automatically.
- If the Type is "Rev. Prep to Supplier" (in a Cash In record) or "Rev. Prep from Customer" (in a Cash Out record), enter the Prepayment Number of the Prepayment that you need to reverse, choosing one using 'Paste Special' if necessary.
- If the Type is "Cheque" (in a Cash In record) or "Cheque" or "Own Cheque" (in a Cash Out record), enter the Serial Number of the Cheque or Own Cheque, choosing one using 'Paste Special' if necessary.
- In all cases, when you press the Tab or Enter key, its Customer or Supplier Number will appear in the Company field, and the outstanding or open value will be placed in the Sum field. The Customer or Supplier and Address will also be placed in the appropriate fields on the 'Amounts' card.
- If the Type is "Prepayment from Customer" (in a Cash In record) or "Prepayment to Supplier" (in a Cash Out record), you must enter a Prepayment Number here. This can be a number of your own generation, the number allocated to the prepayment by the Customer or Supplier or, preferably, the number of the Sales or Purchase Order against which the deposit has been received/issued. In the last case, if you enter the Sales or Purchase Order Number in the Order field to the right, it will be copied here automatically.
- Order
- Paste Special
Sales or Purchase Orders
- If the Type is "Prepayment from Customer" (in a Cash In record) or "Prepayment to Supplier" (in a Cash Out record) and the cash transaction will register the receiving or issuing of a cash deposit connected to a Sales or Purchase Order, enter the Sales or Purchase Order Number here. When you press the Tab or Enter key, the Sales or Purchase Order Number will be copied to the Number field as a default Prepayment Number, the Customer or Supplier Number will appear in the Company field, and the value of the Order less any previous Prepayments will be placed in the Sum field. The Customer or Supplier and Address will also be placed in the appropriate fields on the 'Amounts' card.
- Company
- Once you have entered a Sales or Purchase Invoice Number, Prepayment Number or Serial Number of a Cheque or Own Cheque in the Number field or a Sales or Purchase Order Number in the Order field, the relevant Customer or Supplier will be shown here. This can't be changed.
- If the Type is "Prepayment from Customer" or "Prepayment to Supplier" and you have not entered a Sales or Purchase Order Number in the Order field, you must specify the Customer from whom you received the cash deposit or the Supplier to whom you issued it.
- If the Type is "Prepayment from Customer" or "Prepayment to Supplier" and you have not entered a Sales or Purchase Order Number in the Order field, you must specify the Customer from whom you received the cash deposit or the Supplier to whom you issued it.
- Sum
- Enter the value of the cash payment, including VAT if appropriate. As you add rows to the 'Payments' card, the Total and Net fields on the 'Amounts' card will be updated automatically.
Flip B
- Expense A/C
- Paste Special
Expense Accounts setting, Cash Book module
- Enter an Expense Account, if different from the Expense Account entered on the 'Amounts' card. This allows different cash payments in the same cash transaction to be credited (Cash In) or debited (Cash Out) to different Accounts.
- Please refer to the description of the Expense A/C field on the 'Amounts' card for more details.
- Please refer to the description of the Expense A/C field on the 'Amounts' card for more details.
- Pay, Mode
- Paste Special
Payment Modes setting, Sales/Purchase Ledger, Cash Book module
- Enter a Payment Mode, if different from the Payment Mode entered on the 'Amounts' card. This allows different cash payments in the same cash transaction to be debited (Cash In) or credited (Cash Out) to different Bank Accounts.
- Please refer to the description of the Pay. Mode field on the 'Amounts' card for more details.
- Please refer to the description of the Pay. Mode field on the 'Amounts' card for more details.
- Comment
- Use this field to record notes about the cash payment. If you specify an Expense Account in the field to the left, the Comment from the Expense Account record will be brought in automatically.
- Any Comment that you enter here will be included in the Description in the posting to the Account from the Expense Account record in the resulting Nominal Ledger Transaction.
Flip C (Cash Out only)
- Identifier
- Enter the Supplier's VAT Reg. No. from the supporting receipt or invoice or other identifying information. This is for information only.
- Supplier Name
- If the Type on flip A is "Cash Out", the Supplier's Name will be brought in to this field when you specify a Supplier in the field to the left or the Company field on flip A.
- Document No.
- If a cash payment is supported by a receipt or invoice, enter the receipt or invoice number here. This is for information only.
- V-Cd
- Paste Special
VAT Codes setting, Nominal Ledger
- Enter a VAT Code here if you need VAT to calculated on a cash payment. The VAT Code will be copied to the 'Amounts' card where the VAT value will be displayed. Each row should contain the same VAT Code.
- If you need VAT postings to be included in Nominal Ledger Transactions generated from Cash Out records, select the Post VAT option in the Cash Book Settings setting. The VAT will be debited to the input Account specified for the VAT Code record. The Nominal Ledger Transaction will not include a VAT element if you have not selected the Post VAT option.
The Cash In and Cash Out registers (Cash Transactions) in Standard ERP:
- Introduction
- Entering a Cash Transaction, including:
- Printing Cash Transactions
- Nominal Ledger Transactions from Cash Transactions
- Invalidating Cash Transactions
- Operations menu
- Home page for Cash Book module manual
- Home page for Standard ERP manual
Printing Cash Transactions
There are several occasions when you may want to print a cash transaction: to view a test print-out to check the transaction before you finally approve it; to produce a copy for your own files, or to send a receipt to the Customer or payment notification to the Supplier.To print a single cash transaction, open the transaction in a record window and click on the Printer icon in the Button Bar (Windows/macOS only) or select 'Print' from the File menu (all platforms). If you want to print to screen, click the Preview icon (Windows/macOS only).
If you want to print a range of cash transactions, follow the instructions below:
- Ensure you are in the Cash Book module and then:
- If you are using Windows or macOS, click the [Forms] button in the Navigation Centre or use the Ctrl-D/⌘-D keyboard shortcut. Then, double-click 'Cash In' or 'Cash Out' as appropriate in the resulting list.
- If you are using iOS or Android, tap the [Routines] button in the Navigation Centre and then tap [Forms]. Tap 'Cash In' or 'Cash Out' as appropriate in the 'Forms' list window.
- If you are using Windows or macOS, click the [Forms] button in the Navigation Centre or use the Ctrl-D/⌘-D keyboard shortcut. Then, double-click 'Cash In' or 'Cash Out' as appropriate in the resulting list.
- The 'Specify Cash In' or 'Specify Cash Out' (depending on which option you selected in step 1 above) window will be shown.
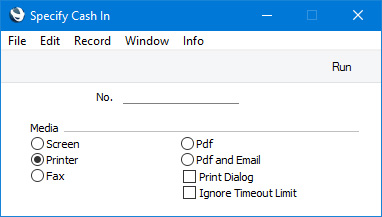
- Enter the Cash In or Cash Out Number of the single cash transaction that you need to be printed, or the highest and lowest Cash In or Cash Out Numbers of a range of transactions separated by a colon (:).
- Press [Run] in the Button Bar to start the printing, or cancel by closing the window.
- Design the Cash In and Cash Out Form Templates using the Form Template register in the System module Use the 'Properties' function on the Operations menu to name the Form Templates (in this description, we have used the names "CSHIN" and "CSHOUT") and to assign then Form Types of "Cash In" and "Cash Out" respectively. A full list of the fields you can include in the Template design can be found here.
A file containing samples of each Form Template including a sample "CSHIN" and "CSHOUT" is supplied with Standard ERP: if you want to use these samples as templates for your own designs, import the "UKForms.txt" file as described on the Importing Set-up Data page.
- Having designed the Cash In and Cash Out Form Templates, you should now specify that they should be used when printing Cash In and Cash Out records respectively. Select the Cash Book module using the [Switch Module] button in the Navigation Centre or the Ctrl-0 (Windows) or ⌘-0 (macOS) keyboard shortcuts.
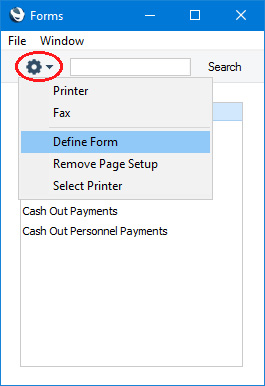
- Click the [Forms] button in the Navigation Centre or use the Ctrl-D/⌘-D keyboard shortcut. The 'Forms' list window will be opened: highlight 'Cash In' or 'Cash Out' as appropriate.
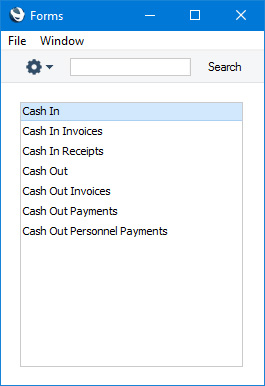
- Select 'Define Form' from the Operations menu (with 'cog' icon):
- In the subsequent 'Form Definition' window, enter "CSHIN" or "CSHOUT" as appropriate in the Form Template field in the first line (you can use 'Paste Special' to ensure the spelling is correct).
If you only want to be able to print cash transactions that have been marked as OK, enter "OKed" in the Status column in every row in the 'Form Definition' window. This will prevent the printing of cash transactions that have not yet been marked as OK. If you have also used Access Groups to specify which users are able to mark Cash In and/or Cash Out records as OK, this feature helps prevent the fraudulent creation and printing of unauthorised cash transactions.
You can also use this feature to use a different Form Template when printing cash transactions that have not been marked as OK, as shown below: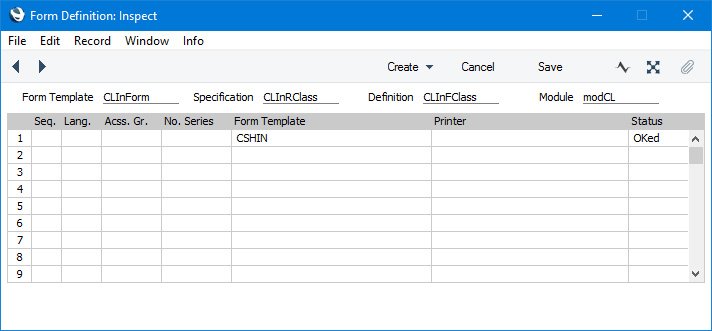
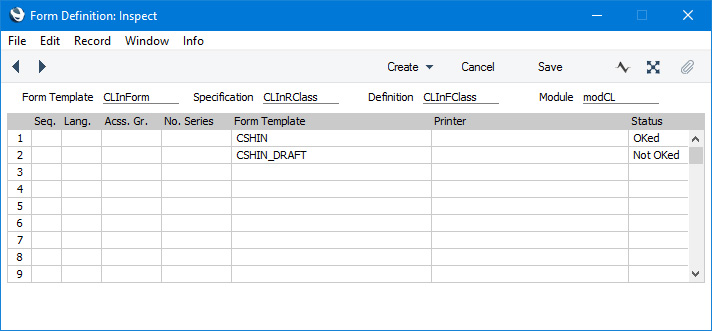
- Click [Save] to save the Form definition. From now on, the Cash In or Cash Out Form Template that you have designed will be used when you print Cash In or Cash Out records using the 'Forms' function and the Printer icon.
The Cash In and Cash Out registers (Cash Transactions) in Standard ERP:
- Introduction
- Entering a Cash Transaction
- Printing Cash Transactions
- Nominal Ledger Transactions from Cash Transactions
- Invalidating Cash Transactions
- Operations menu
- Home page for Cash Book module manual
- Home page for Standard ERP manual
Nominal Ledger Transactions from Cash Transactions
When you save a cash transaction after marking it as OK, a Nominal Ledger Transaction will be generated automatically if so determined in the Sub Systems setting in the Nominal Ledger, in the Number Series - Cash In or Number Series - Cash Out setting as appropriate and in the Payment Modes setting.If the cash transaction is in the Cash In register and you have left the 'Payments' card empty, the Nominal Ledger Transaction will debit the Account from the Payment Mode and credit the Account from the Expense Account. If you are using the Post VAT option in the Cash Book Settings setting, there will also be a credit posting to the Output Account specified for the VAT Code record. Tags/Objects on the credit side will be taken from the Cash In record, while those on the debit side will be taken from the Payment Mode.
If the cash transaction is in the Cash Out register and you have left the 'Payments' card empty, the Nominal Ledger Transaction will credit the Account from the Payment Mode and debit the Account from the Expense Account. If you are using the Post VAT option in the Cash Book Settings setting, there will also be a debit posting to the Input Account specified for the VAT Code record. Tags/Objects on the debit side will be taken from the Cash Out record, while those on the credit posting will be taken from the Payment Mode.
In both cases, the Reference and Specification from the cash transaction will be copied to the Reference and Text fields respectively in the Transaction.
If you are using the 'Payments' card, please refer to the description of that card here for details about the resulting Transactions.
If you created the cash transaction from an Invoice or Purchase Invoice using the 'Create Cash In' or 'Create Cash Out' Operations menu functions respectively, the Transaction will not include a VAT element even if you are using the Post VAT option, because VAT will already have been posted from the originating Invoice.
Shown below is an example of a Nominal Ledger Transaction created from a Cash In record where the Post VAT option is in use:
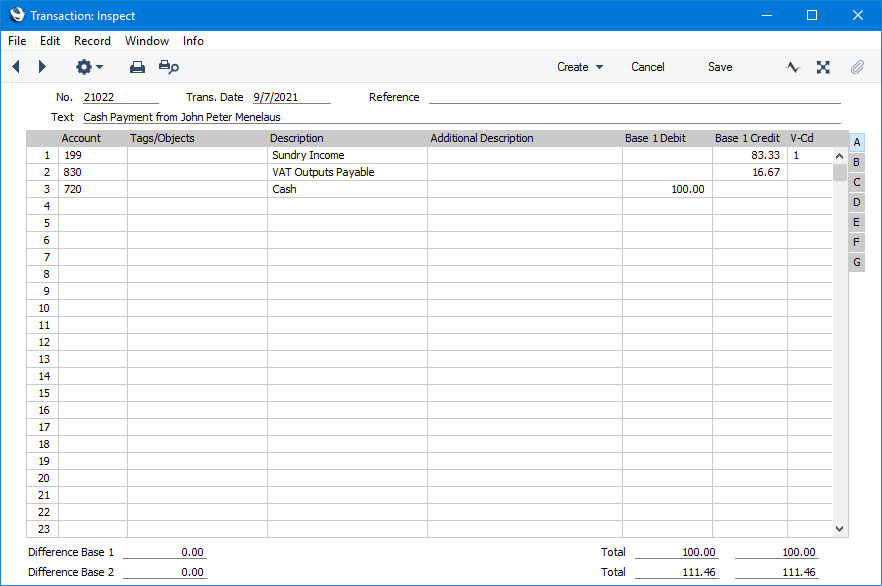
As shown in the illustration above, the VAT Code will be copied to the Transaction rows posting to the Account from the Expense Account. If you would like it to be copied to the Transaction row posting to the VAT Account as well, use the Add VAT Code to VAT A/C rows option in the Transaction Settings setting in the Nominal Ledger.
---
The Cash In and Cash Out registers (Cash Transactions) in Standard ERP:
- Introduction
- Entering a Cash Transaction
- Printing Cash Transactions
- Nominal Ledger Transactions from Cash Transactions
- Invalidating Cash Transactions
- Operations menu
- Home page for Cash Book module manual
- Home page for Standard ERP manual
Invalidating Cash Transactions
In some circumstances it can be appropriate to invalidate a cash transaction. To do this, open the cash transaction in a record window and choose 'Invalidate' from the Record menu (which has a 'cog' icon if you are using iOS or Android). This function will remove the cash transaction from all reports, and any associated Nominal Ledger Transaction will be removed from the Nominal Ledger as well. An invalidated cash transaction is easily distinguished because all fields have red lines drawn through them. These red lines are also shown in the 'Cash In: Browse' and 'Cash Out: Browse' windows.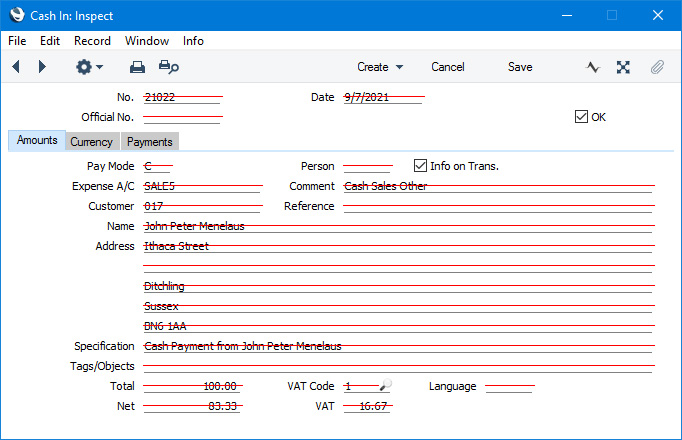
You cannot invalidate a cash transaction if it has not yet been marked as OK or if its Transaction Date is earlier than the Lock Others date specified in the Locking setting in the System module.
You can use Access Groups to prevent certain users from invalidating cash transactions. To do this, deny them access to the 'Invalidate Cash In' and/or the 'Invalidate Cash Out' Actions as appropriate.
---
The Cash In and Cash Out registers (Cash Transactions) in Standard ERP:
- Introduction
- Entering a Cash Transaction
- Printing Cash Transactions
- Nominal Ledger Transactions from Cash Transactions
- Invalidating Cash Transactions
- Operations menu
- Home page for Cash Book module manual
- Home page for Standard ERP manual
Operations Menu - Cash In and Cash Out
If you are using Windows or macOS, you can open the Operations menu by clicking the button with the 'cog' icon (shown highlighted in the illustration above). If you are using iOS or Android, you can access the Operations menu functions through the Tools menu (with 'wrench' icon).
Please follow the links below for details about each function on the Operations menu:
The Cash In and Cash Out registers (Cash Transactions) in Standard ERP:
- Introduction
- Entering a Cash Transaction
- Printing Cash Transactions
- Nominal Ledger Transactions from Cash Transactions
- Invalidating Cash Transactions
- Operations menu
- Home page for Cash Book module manual
- Home page for Standard ERP manual
Operations Menu - Cash In and Cash Out - Open NL Transaction
This page describes the 'Open NL Transaction' function on the Operations menu in the Cash In and Cash Out record windows. If you are using iOS or Android, the 'Open NL Transaction' function is on the Tools menu (with 'wrench' icon).---
When you mark a cash transaction as OK and save it, a Nominal Ledger Transaction will be created (if so defined in the Sub Systems setting in the System module, in the Number Series - Cash In or Number Series - Cash Out setting as appropriate and in the Payment Modes setting). The 'Open NL Transaction' function allows you to view that Transaction from the cash transaction.
When you select the function from the Operations menu (Windows/macOS) or Tools menu (iOS/Android), the Transaction will be opened in a new window.
You can use Access Groups to prevent certain users from opening Transactions from Invoices. To do this, deny them access to the 'Open Transactions from Operations Menu' Action or to the Nominal Ledger altogether.
---
The Cash In and Cash Out registers (Cash Transactions) in Standard ERP:
- Introduction
- Entering a Cash Transaction
- Printing Cash Transactions
- Nominal Ledger Transactions from Cash Transactions
- Invalidating Cash Transactions
- Operations menu, including:
- Open NL Transaction
- Show Invoices
- Open NL Transaction
- Home page for Cash Book module manual
- Home page for Standard ERP manual
Operations Menu - Cash In and Cash Out - Show Invoices
This page describes the 'Show Invoices' function on the Operations menu in the Cash In and Cash Out record windows. If you are using iOS or Android, the 'Show Invoices' function is on the Tools menu (with 'wrench' icon).---
If you are viewing a cash transaction that you created from an Invoice or Purchase Invoice using the 'Cash In' or 'Cash Out' Create menu functions, you can select 'Show Invoices' from the Operations menu (Windows/macOS) or Tools menu (iOS/Android) if you need to print a report to screen that displays some basic details about that Invoice or Purchase Invoice. If you created the cash transaction from a Receipt or Payment using the 'Cash In' or 'Cash Out' Create menu functions, the report will show the original Invoice or Purchase Invoice. In all cases, you can then open the Invoice or Purchase Invoice by clicking (Windows/macOS) or tapping (iOS/Android the Invoice Numbers in the report.
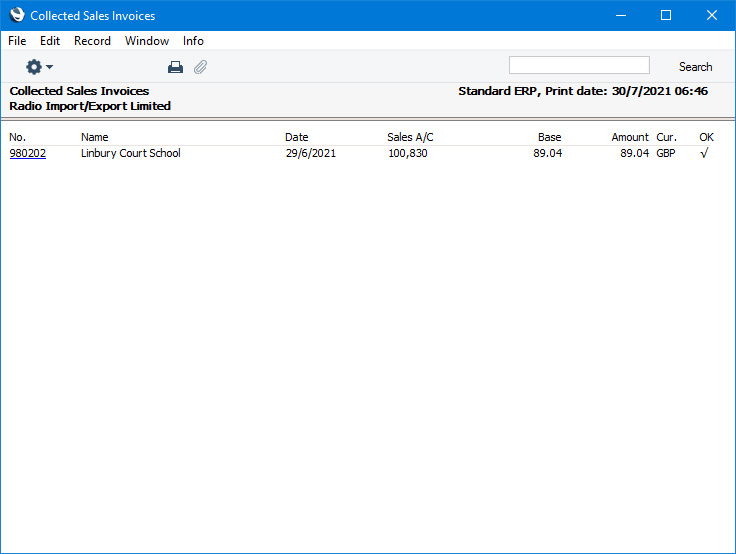
---
The Cash In and Cash Out registers (Cash Transactions) in Standard ERP:
- Introduction
- Entering a Cash Transaction
- Printing Cash Transactions
- Nominal Ledger Transactions from Cash Transactions
- Invalidating Cash Transactions
- Operations menu, including:
- Open NL Transaction
- Show Invoices
- Open NL Transaction
- Home page for Cash Book module manual
- Home page for Standard ERP manual