Introduction to the Contact Person Register
When you enter a record in the Customer register, you can record the name of the main contact person in the Primary Contact field on the 'Contact' card. This name will be brought in as a default whenever the Customer is used in a Quotation, Order or Invoice.If you need to enter further Contact Persons for a particular Customer, you can do so using this register, which is also available as a setting in the Sales Ledger. Then, selecting 'Paste Special' when in the Attn. field of a Quotation, Order or Invoice will list all Contacts for the specified Customer, including the main contact.
Entering Contact Persons
To enter a new Contact Person, ensure you are in the CRM module and click the [Contact Persons] button in the Master Control panel or select 'Contact Persons' from the Registers menu. The 'Contact Persons: Browse' window appears, listing Contacts already entered.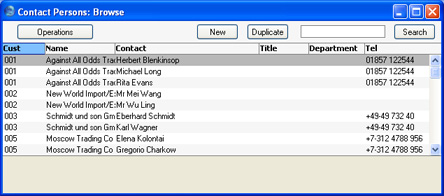
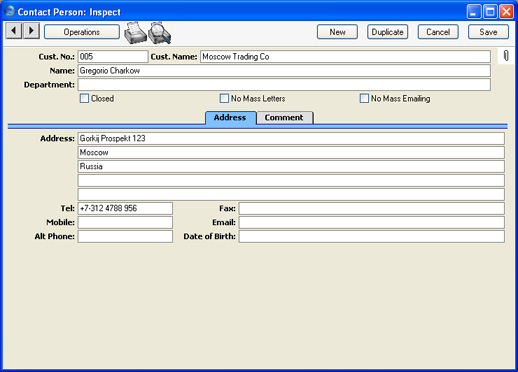

Entering Contact Persons - Header
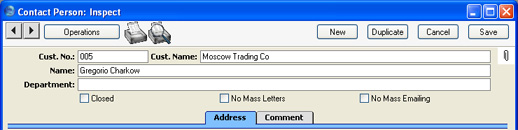
- Cust No.
- Paste Special
Customers and Suppliers in Customer register
- Enter the Customer Number or use the 'Paste Special' function. When you press Return, the Customer's name, address and other information will be entered into the appropriate fields.
- By default, the 'Paste Special' list shows Customers. Click the [Suppliers] button if you need to see Suppliers.
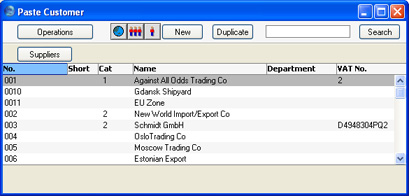
- By default, the 'Paste Special' list shows Customers. Click the [Suppliers] button if you need to see Suppliers.
- Cust. Name
- The Customer Name is entered after you have entered the Customer Number.
- If you would like this field to be updated automatically whenever the Customer Name is changed in the Customer register, check the Update Customer's Name on Contact Persons box in the Activity Types, Subsystems setting.
- If you would like this field to be updated automatically whenever the Customer Name is changed in the Customer register, check the Update Customer's Name on Contact Persons box in the Activity Types, Subsystems setting.
- Department
- The Department in which the Contact Person works.
- Name
- The name of the Contact Person.
- Closed
- Check this box if the Contact is no longer to be used. Closed Contacts will appear in the 'Contact Persons: Browse' window but not in the Contact Persons 'Paste Special' list. A closed Contact can be re-opened at any time. Letters will not be printed for Closed Contacts from the Customer Letter register.
- No Mass Letters
- If this box is checked, printed letters will be sent to the Contact Person when specifically addressed to them, but the Contact Person will not be included in mass mailing campaigns. A mass mailing campaign is one generated from a Customer Letter whose One Per Contact box is checked. No Contact Persons belonging to a Customer marked No Mass Letters will be included in mass mailing campaigns.
- You can switch this option on or off for several Customers at once using the 'Mass Mailing' Maintenance function.
- You can switch this option on or off for several Customers at once using the 'Mass Mailing' Maintenance function.
- No Mass Emailing
- If this box is checked, single emails will be sent to the Contact Person when specifically addressed to them, but the Contact Person will not be included in mass emailing campaigns. A mass emailing campaign is one generated from a Customer Letter whose One Per Contact box is checked. No Contact Persons belonging to a Customer marked No Mass Mailing will be included in mass emailing campaigns.
- You can switch this option on or off for several Customers at once using the 'Mass Mailing' Maintenance function.
Entering Contact Persons - Address Card
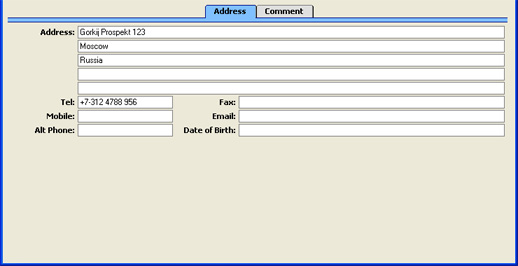
- Address
- Hansa will enter the address from the Customer record. Change to a personal or department address if necessary.
- Tel, Fax
- Entered by Hansa from the Customer record. Change as necessary.
- You can use the 'Update Fax Numbers' Maintenance function in the System module to remove spaces and dashes from all Contact Persons' Fax Numbers. This will be necessary if you will be sending faxes through the fax server, in which case fax numbers should not contain non-numeric characters.
- You can use the 'Update Fax Numbers' Maintenance function in the System module to remove spaces and dashes from all Contact Persons' Fax Numbers. This will be necessary if you will be sending faxes through the fax server, in which case fax numbers should not contain non-numeric characters.
- Mobile
- The Contact's mobile number.
- Email
- The email address of the Contact Person. This will be brought to any Customer Letters addressed to this Contact, allowing communication by email in future versions of Hansa.
- Alt Phone
- Any other contact number such as home telephone or personal fax number can be recorded here.
- Date of Birth
- The Contact's date of birth. Use the Birthday List report to list Contacts with a particular birthday.
Entering Contact Persons - Comment Card
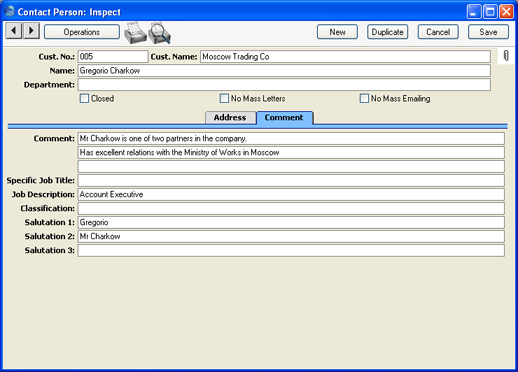
- Comment
- Any comment.
- Specific Job Title
- The Job Title of the Contact, as it appears on their business card. This can be included when addressing letters to Contacts.
- Job Description
- Paste Special
Job Descriptions setting, CRM module
- Use this field to describe the role of the Contact within their company. It allows you to side step any slight differences in Job Title terminology that may exist in different companies. For example, the generic role of Finance Director might have "Director (Finance)" as its Job Title in one company but "Director of Finance" in another. Enter the generic title ("Finance Director") in the Job Description field of such Contacts, to enable you to mail all Finance Directors together, irrespective of differences in inter-company terminology.
- Classification
- Paste Special
Customer Classifications setting, CRM module
- Use this field to mark each Contact with comments relevant to their role in the sales process, such as "Decision Maker" or "User".
- As with the Classification field on the 'Contact' card of the Customer screen, you can enter more than one Classification in this field, separated by commas.
- As with the Classification field on the 'Contact' card of the Customer screen, you can enter more than one Classification in this field, separated by commas.
- Salutation 1, 2 and 3
- These fields can be used to record greetings with various degrees of formality. It is recommended that you enter Salutations in all three fields, even if they are the same.
- When you design the Forms that will be used to print Customer Letters, you can include the Salutation 1, 2 or 3 field depending on the formality of the letter. You can also use these fields when designing Invoices.
Printing Contact Person Details
When a Contact Person record is open, click the Printer icon to print a Contact Person List report for that Person. This shows contact details (telephone, fax and mobile numbers and email address).Operations Menu
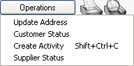
The Operations menus for Contact Persons are shown below. Shown first is the Operations menu for the 'Contact Persons: Browse' window: highlight a Contact Person in the list before selecting the function. You can also apply the function to a group of Contact Persons: highlight the first Contact Person in the group and then click on the last while holding down the Shift key. Then select the function. Underneath is the Operations menu for the 'Contact Person: New' and 'Contact Person: Inspect' windows.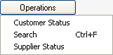
Operations Menu - Search
You can search for Contact Persons containing a certain word or phrase. To do this, open the 'Contact Persons: Browse' window and select 'Search' from the Operations menu. The following window opens: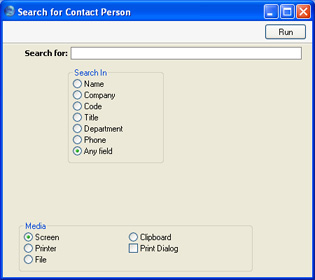
- Search for
- Enter here the word or phrase that you are looking for.
- Search in
- Choose the field where you want to search for the word or phrase.
Operations Menu - Customer Status
The 'Customer Status' function provides a short cut to the Customer Status report, otherwise only available in a less detailed form in the Sales Ledger.In its basic form, this report shows address and turnover information and lists all Contact Persons for the Customer to whom the Contact Person currently on screen belongs. However, if required, more information can be shown in the report, such as lists of recent Activities, Invoices, Contract Quotations, Contracts, Quotations and Orders, and monthly sales figures for the past year. Use the Customer Status Report setting in the CRM module to control how much of this additional information will be shown to different users, each of whom can be given a different report definition. Much of this additional information will not be shown if the report is produced from the 'Reports' function in the Sales Ledger.
The Customer Status report has Hansa's Drill-down feature. Many records such as Contact Persons, Quotations and Invoices can be opened by clicking in the appropriate places in the report. The report also contains a [New Activity] text button that you can click to create an empty new Activity.
The function will have no effect if you try to use it with a Contact belonging to a company that is not marked as a Customer.
Operations Menu - Update Address
Select this function to update the Contact Person with the latest Address and Telephone and Fax Number from the Customer record.Operations Menu - Create Activity
This function can be used to create records in the Activity register in the System module. This can be useful if it is necessary, for example, to schedule a call to a new Contact Person.When you select the function, the following screen appears, where you can create a new Activity:
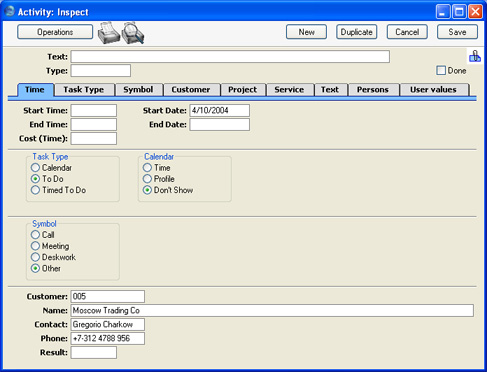
After amendment if necessary, save the record in the Activity register by clicking the [Save] button in the Button Bar and close it using the close box. Alternatively, if you no longer require the Activity, remove it using the 'Delete' function on the Record menu. In either case, you will be returned to the Contact Person window.
The Contact Person and the Activity will be connected to each other through the Attachments facility. This allows you to open the Contact Person quickly and easily when reviewing the Activity, or to open the Activity from the Contact Person. When viewing the Activity or Contact Person, click the button with the paper clip image to open a list of attachments. Then double-click an item in this list to open it.
The Contact Person does not have to be saved before creating an Activity, although if the Contact Person is not saved, some details may not be fed through to the Activity.
The 'Activity: Inspect' window is fully described here.
Operations Menu - Supplier Status
In its basic form, the 'Supplier Status' function provides an immediate report listing previous Invoices and Payments for the Supplier to whom the Contact Person currently on screen belongs (or for those Suppliers to whom the Contact Persons highlighted in the browse window belong). It also shows total turnover and amount due figures. The function will have no effect if you try to use it with a Contact belonging to a company that is not marked as a Supplier.However, if required, additional information can also be shown in the report, such as lists of recent Activities, Goods Receipts and Purchase Orders and monthly purchasing figures for the past year. Use the Supplier Status Report setting in the CRM module to control how much of this additional information will be shown to different users, each of whom can be given a different report definition.