Introduction to Reports in the Nominal Ledger
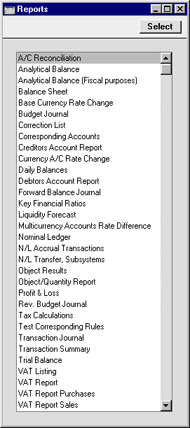
As with all modules, to print a report in the Nominal Ledger, select 'Reports' from the File menu or click [Reports] in the Master Control panel. The keyboard shortcut Ctrl-R or ⌘-R can also be used. Then, double-click the appropriate item in the list.The following reports are available in the Nominal Ledger:
It is often possible to report on a selection range, such as a range of Accounts, or a range of Items. To do this, enter the lowest and highest values of the range, separated by a colon. For example, to report on Accounts 001 to 010, enter "001:010" in the Account field. Depending on the field, the sort used might be alpha or numeric. In the case of an alpha sort, a range of 1:2 would also include 100, 10109, etc.
Using the options at the bottom of the specification window, determine the print destination of the report (the default is to print to screen). You can initially print to screen and subsequently send the report to a printer using the Printer icon. You can also print the report to disk as a text file. This will be useful if you want to format the report in your house style before printing.
Once you have entered the reporting criteria and have chosen a print destination, click [Run].
Definition of Nominal Ledger Reports
The appearance and format of some Nominal Ledger reports can be changed to suit your specific requirements. This is known as changing the report's definition. The reports for which this facility is available are the Balance Sheet, Key Financial Ratios, Profit & Loss Report and VAT Report.To change a report definition, first select 'Settings' from the File menu and double-click 'Report Settings' in the subsequent list. Then, highlight a report name in the list on the left-hand side of the 'Report Settings' window and click the [Definition] button. The subsequent definitions windows are described on the pages describing the individual reports.
! | If you have modified the standard Chart of Accounts or imported your own, you must change the Nominal Ledger report definitions accordingly. |
Drill-down
Hansa has a unique drill-down feature in some of the reports when they are printed to screen. For example, when you have a Profit & Loss statement on the screen, you may click on any of the Account numbers in the report. Subject to you having the necessary access rights, the Nominal Ledger report for the same Account and period is then opened in a separate window, listing the Transactions that contribute to the account balance on the P&L statement. If you then click on one of the Transaction Numbers in the Nominal Ledger report, the Transaction record will open, showing all the details recorded for the event. This example is illustrated below: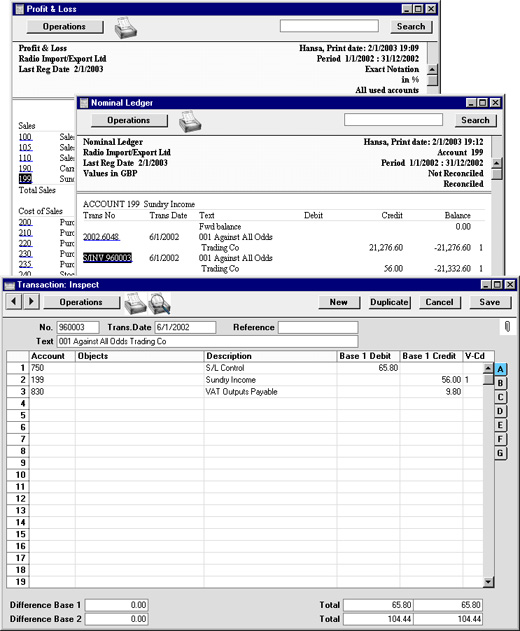
The Operations Menu
A/C Reconciliation
This report will most commonly be used to aid the task of bank reconciliation, which is done using the Account Reconciliation register. The report is a list of Transaction rows (i.e. individual account postings) for the report period, showing for each the Account, Transaction Number and Date, Amount in either Base Currency (as selected), Amount in foreign Currency (where appropriate) and whether it has been reconciled.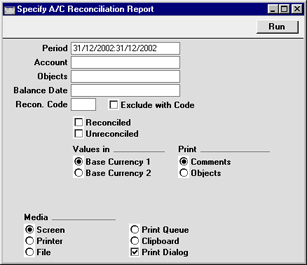
- Period
- Paste Special
Reporting Periods setting, System module
- All Transaction rows whose date falls in the period entered here will be included in the report. The default value is the first period in the Reporting Periods setting.
- Accounts
- Paste Special
Account register, Nominal Ledger/System module
- Range Reporting Alpha
- Use this field to limit the report to Transaction rows posting to a certain Account, or range of Accounts. Usually you will need to specify your Bank Account(s) or other reconcilable Account here, otherwise the report will be much longer than necessary.
- Use this field to limit the report to Transaction rows posting to a certain Account, or range of Accounts. Usually you will need to specify your Bank Account(s) or other reconcilable Account here, otherwise the report will be much longer than necessary.
- Objects
- Paste Special
Object register, Nominal Ledger/System module
- Specify an Object to list only those Transaction rows featuring that Object in the report. If you enter a number of Objects separated by commas, only those Transaction rows featuring all the Objects listed will be shown.
- Balance Date
- Paste Special
Current Date
- Two totals are shown for each Account: the total reconciled during the report period and the total reconciled before a certain date. Specify that date here.
- Recon. Code, Exclude with Code
- If you want to list reconciled Transaction rows with a particular Recon. Code (entered on flip D of the A/C Reconciliation screen), enter that Recon. Code here. To list all reconciled Transaction rows except those with a particular Recon. Code, check the Exclude With Code box as well.
- This field and check box have no effect if you are only listing unreconciled Transaction rows.
- This field and check box have no effect if you are only listing unreconciled Transaction rows.
- Reconciled
- Check this box to include reconciled Transaction rows in the report.
- Unreconciled
- Check this box to include unreconciled Transaction rows in the report. At least one of the Reconciled and Unreconciled boxes must be checked or the report will be blank.
- Values in
- If you are using the Dual-Base system, values in this report can be shown in either Base Currency. Use these options to choose which Currency is to be used on this occasion.
- If you are not using the Dual-Base system, use the Base Currency 1 option to produce a report in your home Currency.
- If you are not using the Dual-Base system, use the Base Currency 1 option to produce a report in your home Currency.
- Print
- You can choose to show Object Codes or Comments in the report. If the Comment option is chosen, the Description from the Transaction row is shown together with the Text from the Transaction header.
Accrual Report
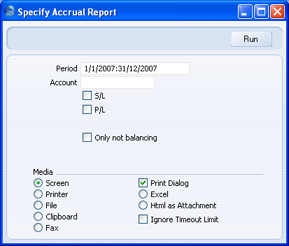
This report is a list of Invoices with an N/L Accrual specified on flip C (in the case of Purchase Invoices) or flip B (in the case of Sales Invoices). For each Invoice, it lists the accrued postings that have not yet been debited to Purchase Accounts or credited to Sales Accounts. It therefore provides an indication of the value of these accrued postings, and also provides a timetable for when these accrued postings will be transferred from Accrual Accounts to Sales or Purchase Accounts. For more details about N/L Accruals, please click here.When printed to screen, the Accrual Report has the HansaWorld Enterprise Drill-down feature. Click on an Invoice Number in the report to open the Nominal Ledger Transaction for that Invoice. You can then open the Invoice itself by selecting 'Open Subsystem Record' from the Operations menu. You can also click on a Simulation Number in the report to open an individual Accrual Simulation record.
- Period
- Paste Special
Reporting Periods setting, System module
- The report will list Purchase and Sales Invoices whose Transaction Dates fall in the period specified here and with an N/L Accrual specified on flip C (in the case of Purchase Invoices) or flip B (in the case of Sales Invoices).
- Account
- Paste Special
Account register, Nominal Ledger/System module
- Range Reporting Alpha
- If you specify an Account (or range of Accounts) here, the report will list Invoices that use that Account as an Accrual Account. This is the Account that is quoted in the N/L Accrual record specified on flip C of an accrued Purchase Invoice or on flip B of an accrued Sales Invoice.
- If you specify an Account (or range of Accounts) here, the report will list Invoices that use that Account as an Accrual Account. This is the Account that is quoted in the N/L Accrual record specified on flip C of an accrued Purchase Invoice or on flip B of an accrued Sales Invoice.
- S/L
- Use this option if you like accrued Sales Invoices to be listed in the report.
- P/L
- Use this option if you like accrued Purchase Invoices to be listed in the report.
- Only not balancing
- By default, every accrued Invoice in the selected Ledger and from the specified period will be listed in the report. If you use this option, only those Invoices where the accrued value is less than the Invoice value will be listed. These are Invoices where at least one Transaction has been created from a balancing pair of postings in the Accrual Simulation, moving part of the Invoice value from the Accrual Account to the Sales or Purchase Account.
Analytical Balance
This report is similar to the Trial Balance, but with the addition of debit and credit balances for each Account. The paper printout in addition shows the accumulated balances for the financial year.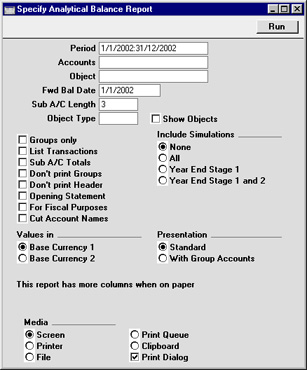
- Period
- Paste Special
Reporting Periods setting, System module
- Enter the period to be covered by the report. The default value is the first period in the Reporting Periods setting.
- Accounts
- Paste Special
Account register, Nominal Ledger/System module
- Range Reporting Alpha
- Limit the report to a single Account, or range of Accounts.
- Limit the report to a single Account, or range of Accounts.
- Object
- Paste Special
Object register, Nominal Ledger/System module
- Enter an Object here if you want the balances in the report to be calculated from Transactions with that Object only. If you enter a number of Objects separated by commas, balances will only be calculated from those Transactions featuring all the Objects listed.
- Fwd Bal Date
- Specify here the date for which the Forward Balances are to be calculated. The default is the first date of the period specified for the report.
- Sub A/C Length
- This field is used together with the Sub A/C Totals check box. Please refer to the description of that check box below for details.
- Object Type
- Paste Special
Object Types setting, Nominal Ledger
- Enter an Object Type here if you want the balances in the report to be calculated from Transactions with Objects belonging to a certain Object Type only.
- Show Objects
- Usually the report shows total debit and credit balances for each Account. Check this box if you would like subtotal balances for each Object to be shown as well.
- Groups Only
- With this option on, the report will only show subtotals for groups of Accounts, grouped using the first digit of the Account Code. If the option is off, balances for each Account are shown together with the group subtotals.
- List Transactions
- With this box checked, the Transaction Numbers of all Transactions that fall within the reporting period, together with debit and credit totals, will be listed at the bottom of the report.
- Sub A/C Totals
- This option takes the group totalling described for the Groups Only check box above a stage further. It displays subtotals for groups of Accounts with the same initial digits. The number of initial digits that are the same is entered to the Sub A/C Length field above. For example, if the Sub A/C Length is 3, the balances for Accounts 4011, 4012 and 4014 will be shown as a subtotal. The single-digit group total (for Accounts starting with 4 in the example) will be shown as well.
- Don't print Groups
- By default, the report lists balances for each Account together with the group subtotals (subtotals of balances of Accounts with the same initial digit). If you don't want to print the group subtotals, check this box.
- Don't print Header
- Check this box if you want the report to be printed without a header.
- Opening Statement
- This box can only be used together with the With Group Accounts option described below. This combination produces a report showing Balance Sheet Accounts only.
- For Fiscal Purposes
- This option prints the figures without the thousands separator (i.e. 1,000.00 is printed as 1000.00). This format is required by the fiscal authorities in Portugal.
- Cut Account Names
- This option prints abbreviated versions of each Account Name.
- Values in
- If you are using the Dual-Base system, values in this report can be shown in either Base Currency. Use these options to choose which Currency is to be used on this occasion.
- If you are not using the Dual-Base system, use the Base Currency 1 option to produce a report in your home Currency.
- If you are not using the Dual-Base system, use the Base Currency 1 option to produce a report in your home Currency.
- Include Simulations
- Choose one of these options if you want to include simulated transactions in the report. If you choose the All option, Simulation rows of "Invalid" or "Transferred" Status will not be included.
- Presentation
- Two versions of this report can be produced:
- Standard
- This version of the report shows standard Accounts only.
- With Group Accounts
- This version of the report is designed for use in Portugal. It includes the hierarchical report headings (together with subtotals) defined using the Group Account check box on the Account screen. Please click here for full details.
- If the Opening Statement box above is checked, the report will show Balance Sheet Accounts only.
Analytical Balance (Fiscal Purposes)
This report as the same as the Analytical Balance with the For Fiscal Purposes option selected. Please refer to the description of the Analytical Balance report for full details.Balance Sheet
The Balance Sheet shows the assets, liabilities and capital of the company at a given point in time. You can use the Balance Sheet model supplied with Hansa, or you can define your own, possibly editing the standard definition to suit your needs.
Please click for details about:
- The definition of the Balance Sheet;
- Printing the Balance Sheet;
- Special features of the Balance Sheet.
Balance Sheet - Defining
You can define the structure of the Balance Sheet to suit your requirements. The following example illustrates the set-up process.
To change the report definition of the Balance Sheet, first select 'Settings' from the File menu and double-click 'Report Settings' in the subsequent list. Then, highlight 'Balance Sheet' in the list on the left-hand side of the 'Report Settings' window and click the [Definition] button. The 'Definition of Balance Sheet: Browse' window is opened.
The window shows the Balance Sheet row by row, as it has been presented up to now. The rows are numbered 10, 50, etc., so there is room to insert new rows in between.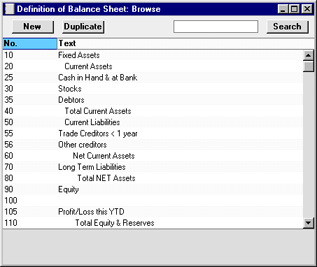
Double-click the first row, "10: Fixed Assets".
The 'Definition of Balance Sheet: Inspect' window is opened, showing the current definition of the row.
The number identifies the row in the Balance Sheet, and the Text "Fixed Assets" is printed as a heading for a group of Accounts when the report is sent to the screen or to the printer.
In the Accounts field a sequence of Account numbers has been entered. An alpha sort is used so, in the example illustration above, "600:69999" effectively means that all Accounts whose first digit is "6" are to be used.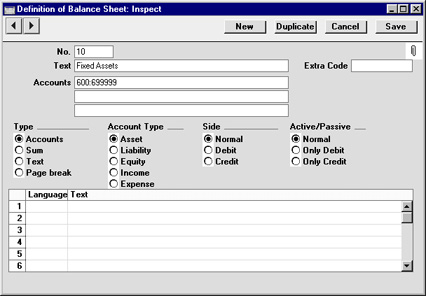
Of the four Type options, "Accounts" has been selected to indicate that each of the Accounts in the number interval will be presented individually. After the last Account in the group, a total for the group will be printed.
The Account Type is "Asset". The Account Type concept is explained here.
The Side and Active/Passive options are described on the Special Features of the Balance Sheet page.
The table can be used to enter various translations of the Text (i.e. the report heading or sub-heading). Specify a Language in the first column using 'Paste Special' if necessary, and the appropriate translation in the second column. There is no need to enter a row for your home Language. When printing the report, you can specify which Language is to be used.
The Extra Code is used in Russia where the Balance Sheet is printed using a standard report design that includes line numbers: use this field to specify the correct line number for this row of the report. The Extra Code only appears on the report when it is produced using the No Comparison option.
The Accounts field consists of three rows, with room for a definition 300 characters long. As alternatives to specifying a range of Accounts, you can also specify a number of individual Accounts, or ranges of Accounts, separated by commas. If a range of Accounts is entered with the highest number first, the Accounts in that range will be presented in reverse order. For example, the sequence "605:601,626,651:655" will appear as follows in the printed report:
If you click the [Next Record] button (on the left-hand side of the Button Bar) or select 'Next' from the Record menu, the next definition row, number 25, "Cash in Hand & at Bank", is shown. This definition contains a range of Accounts : 700 to 739999. This row is of the type "Accounts", and of the "Asset" Account Type.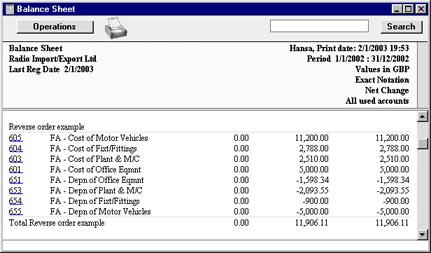
!
If you move from record to record by clicking the [Next Record] or [Previous Record] buttons, remember that any changes you make will be saved. If you don't want to save the changes, you must use the close box, or click [Cancel].
Click forward to number 40, "Total Current Assets". Here the values of rows 25, 30 and 35 are added together, and the result is shown on line 40 with the heading "Total Current Assets". The Type is "Sum" and the Account Type is still "Asset".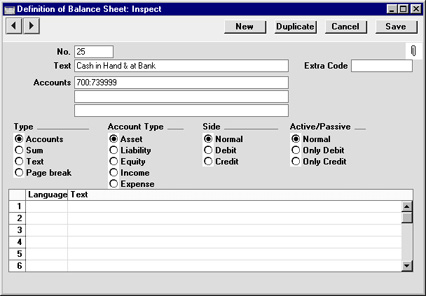
In this way the Balance Sheet is designed, row by row.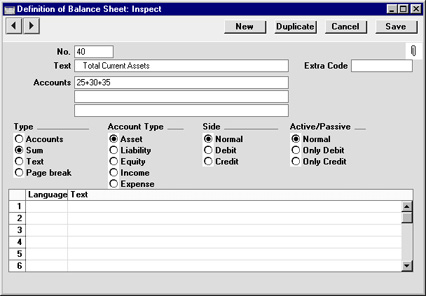
When you have finished with the last row, if you want to save your changes, click [Save], or else close the window with the close box. Then, close the list of definitions using the close box once again.
The new Balance Sheet report is now ready to print.
!
Hansa comes with a standard Chart of Accounts and a set of Report Definitions. This is a well structured Chart, with systematic groupings of Accounts. It is suitable without any changes for most small or medium companies, but it is also easily modified by yourself or your financial adviser.
If you stay within the structure of the Chart (e.g. avoid putting Liability Accounts among the Assets!), there is no need to alter the definitions. But remember, it is a good idea to print a test Balance Sheet to see if your definitions produce exactly what you expect.
Inserting a Row in the Balance Sheet
- Ensure you are in the Nominal Ledger, then open the 'Settings' list window and double-click 'Report Settings' in the subsequent list. Then, highlight 'Balance Sheet' in the list on the left-hand side of the 'Report Settings' window and click the [Definition] button.
The 'Definition of Balance Sheet: Browse' window is opened.
- Click [New] or highlight a row similar to the one you are creating and click [Duplicate]. An empty form or a copy of the highlighted row is opened.
- Enter the information for the new row. Remember to give the new row a number that will insert it in the right place in the Balance Sheet. (e.g. if you want to insert a row between rows 30 and 40, you can use 35.)
- Click [Save] and close the window, or click the close box to cancel. You will be returned to the 'Definition of Balance Sheet: Browse' window, where the new row is shown in its proper place in the list.
- Ensure you are in the Nominal Ledger, then open the 'Settings' list window and double-click 'Report Settings' in the subsequent list. Then, highlight 'Balance Sheet' in the list on the left-hand side of the 'Report Settings' window and click the [Definition] button.
The 'Definition of Balance Sheet: Browse' window is opened.
- Double-click the row you want to remove, to show its definition window.
- Select 'Delete' from the Record menu. The row is deleted from the Balance Sheet and the definition for the following row is shown in its place.
- Close the window. You will be returned to the 'Definition of Balance Sheet: Browse' window.
!
You cannot undo the deletion of a row in the Balance Sheet.
Balance Sheet - Multiple Balance Sheet Definitions
In some companies there is a requirement for multiple Balance Sheet definitions. To cater for this requirement, HansaWorld Enterprise allows you to add up to 15 Balance Sheet reports to the Nominal Ledger. Each of these reports can have its own definition. To add a new Balance Sheet, follow these steps:
- Click the [Settings] button in the Master Control panel and double-click 'Report Settings' in the subsequent list.
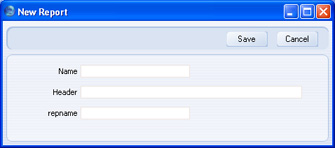
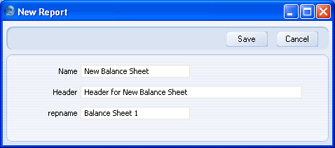
- When the 'Report Settings' window opens, click the [New] button. The 'New Report' window opens:
- Name
- Enter a name for the report. This name will appear in the 'Reports' list.
- Header
- Enter a second name for the report. This name will be printed in the report header, and will also appear in the title bar of the report window if you print the report to screen.
- repname
- Paste Special
Choices of possible entries
- You can create up to 15 Balance Sheet reports, 15 Profit & Loss reports and 15 Key Financial Ratios reports. Use this field to specify the report type (i.e. Balance Sheet, Profit & Loss or Key Financial Ratios), and also the report number (i.e. which one of the fifteen you are creating on this occasion).
- Name
- Click the [Save] button to save the new report. The 'New Report' window closes, and the new report is added to the bottom of the list in the Report Settings window, using the Name specified in the 'New Report' window:
If you need to modify the report (perhaps you made a spelling mistake or you chose a temporary name), highlight it in the list in the 'Report Settings' window and click the [Open] button. The report is opened in the 'New Report' window illustrated in step 2.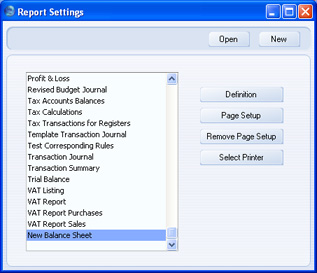
- Having created the new report, you should now enter a definition for the new report. Highlight it in the list in the 'Report Settings' window and click the [Definition] button. This process is the same as for the 'standard' Balance Sheet, and is as described on the Defining a Balance Sheet page.
If the definition of the new report is to be similar to that of the 'standard' Balance Sheet or of another Balance Sheet that you have previously created, you can drag rows from the existing definition to the new one. Highlight each report in turn in the list in the 'Report Settings' window and click the [Definition] button. You will then have two report definition windows open:
In the illustration above, the 'Definition of Balance Sheet: Browse' window contains the definition of the 'standard' Balance Sheet, while the 'Definition of Balance Sheet 1: Browse' window, empty at the moment, will contain the definition of the new Balance Sheet being created. The "1" in the window title corresponds to "Balance Sheet 1" in the repname field in the 'New Report' window illustrated in step 2.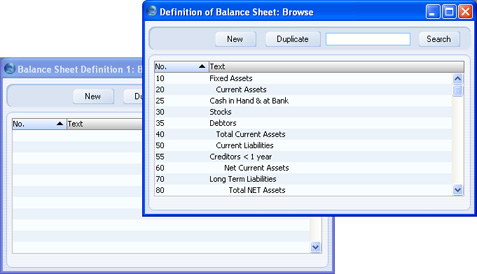
You can drag rows individually from one window to the other, or you can highlight several rows at a time by shift-clicking and drag them all at once.
- To print the new report, open the 'Reports' list as normal. The new report will appear at the bottom of the list, using the Name specified in the 'New Report' window:
Double-click the report name and print the report in the usual way. The specification window for the report is the same as that for the 'standard' Balance Sheet, and is described in the 'Printing a Balance Sheet' section immediately below. The text in the title bar of the report window, and the report title on the first line of the report header ("Header for New Balance Sheet") will be taken from the Header field in the 'New Report' window illustrated in step 2 above.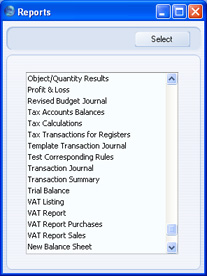
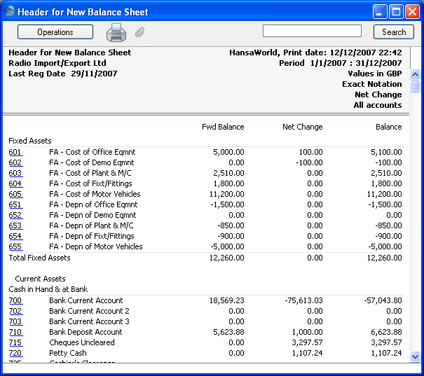
- If you need to remove the new report, open the 'Reports' list as shown in step 5 and click on the report name. Then, select 'Clear' from the Edit menu.
Balance Sheet - Printing
Open the 'Reports' list window and double-click 'Balance Sheet'. The 'Specify Balance Sheet' window is opened.
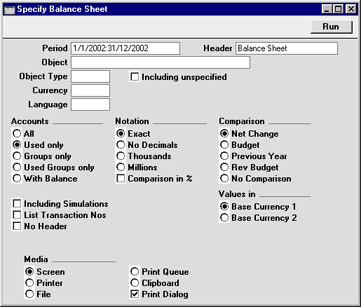
- Period
- Paste Special
Reporting Periods setting, System module
- Enter the period for the Balance Sheet you want to print. Hansa will suggest the first period in the Reporting Periods setting as a default.
- Header
- Specify a title for the report here.
- Object
- Paste Special
Object register, Nominal Ledger/System module
- Enter an Object Code in this field if you want to limit the report to Transactions with a certain Object. If the field is empty, all Transactions, with and without Objects, are included. If you enter a number of Objects separated by commas, only those Transactions featuring all the Objects listed will be shown.
- Object Type
- Paste Special
Object Types setting, Nominal Ledger
- Enter an Object Type Code in this field if you want to limit the report to transactions for Objects of a certain Object Type.
- Including Unspecified
- Check this box if, for each Account, you want to show a balance figure for Transactions for Objects of a certain Object Type and a second balance for all other Transactions.
- Currency
- Paste Special
Currency register, System module
- If a Currency is entered here, all amounts in the report will be converted to the specified Currency using the Exchange Rate for the Transaction Date.
- A foreign Currency should be entered here. To produce a report with figures in Base Currency 1 or 2, leave this field blank and choose which Base Currency is to be used using the Values In options described below.
- A foreign Currency should be entered here. To produce a report with figures in Base Currency 1 or 2, leave this field blank and choose which Base Currency is to be used using the Values In options described below.
- Language
- Paste Special
Languages setting, System module
- The Balance Sheet can be produced in different Languages: enter the required Language Code here. The appropriate translation for each Account Name will be taken from the 'Texts' card of the Account record and for each report heading and sub-heading from the report definition.
- Accounts
- Select how you want the Accounts printed in the report.
- All
- This option will show all Accounts that have been included in the Balance Sheet definitions.
- Used only
- This option will only show Accounts that have been used. This includes Accounts that have balances brought forward from a previous period but that have not been used in the report period.
- Groups only
- This option does not show balances for individual Accounts. Instead, it simply shows an overall balance for each row as entered in the Balance Sheet definitions.
- Used Groups only
- This option only shows balances for rows as entered in the Balance Sheet definitions that have been used.
- All
- Notation
- Select the printing format for the values in the Balance Sheet.
- Exact
- Shows the balances as stored in the Transactions.
- No Decimals
- Rounds the balances up or down to the nearest whole number.
- Thousands, Millions
- Divide the balances by 1,000 or 1,000,000.
- Comparison in %
- Only valid if Budget or Rev Budget is chosen as the Comparison option.
- Exact
- Comparison
- Choose to compare with Net Change, Budget, Revised Budget or the previous year.
- If you are using the Budget or Revised Budget option, Budget or Revised Budget records will only be included in the report if they have at least one entry in the grid area of the screen complete with date.
- The No Comparison option simply shows the balances brought forward and those for the report period. It is appropriate for users in Russia where the Balance Sheet is printed using a standard report design including line numbers. The line numbers are specified using the Extra Code field in the Balance Sheet definitions.
- If you are using the Budget or Revised Budget option, Budget or Revised Budget records will only be included in the report if they have at least one entry in the grid area of the screen complete with date.
- Including Simulations
- Check this box to include simulated transactions in the report. Simulation rows of "Invalid" and "Transferred" Status will not be included.
- List Transaction Nos
- With this box checked, the Transaction Numbers of all Transactions that fall within the reporting period, together with debit and credit totals, will be listed at the bottom of the report.
- No Header
- Check this box if you want the report to be printed without a header.
- Values in
- If you are using the Dual-Base system, values in this report can be shown in either Base Currency. Use these options to choose which Currency is to be used on this occasion.
- If you are not using the Dual-Base system, use the Base Currency 1 option to produce a report in your home Currency.
- If a foreign Currency is entered in the Currency field above, these options will be ignored and the amounts in the report will be converted to the specified Currency using the Exchange Rate for the Transaction Date.
- If you are not using the Dual-Base system, use the Base Currency 1 option to produce a report in your home Currency.
When printed to screen, the Balance Sheet has Hansa's Drill-down feature. Click on the Account Number of any Account in the report to open the Nominal Ledger Report for the same Account and period. From the Nominal Ledger report, you can click on any Transaction Number to open an individual Transaction record.
Balance Sheet - Special Features
This section has no relevance for those companies that practise standard western accounting conventions.
In the Balance Sheet definition, there are two groups of options which need a special mention. This design has been made in order to facilitate certain accounting and reporting requirements in various countries. The easiest way to explain the usefulness of these facilities is with the help of an example. In most companies, there are a number of reconciliation or suspense accounts, either assets or liabilities, which alternately can hold debit or credit balances. The accounting conventions of some countries only allow "pure" debit or credit accounts, and when a balance sheet is produced, it becomes necessary to move individual accounts back and forth between the active or the passive groups, depending on the current positive or negative balance.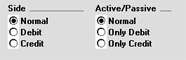
To complicate things even further, in some countries it is customary to distinguish between four different "states" of a book entry: Debit+, Debit-, Credit+ and Credit-. In modern western accounting systems, a book entry is either debit or credit, regardless of the class of the account, i.e. we have a simple arithmetic definition of balances.
In those environments where all these special rules are used, the preparation of balance reports tends to become complicated and labour consuming. These special functions of Hansa allow the far-reaching automation of many of these routine tasks. This is how it works.
Let us start with the following Nominal Ledger report, showing the actual debit and credit balances for two Accounts.
Account 702 - Bank Current Account 2:
Account 703 - Bank Current Account 3: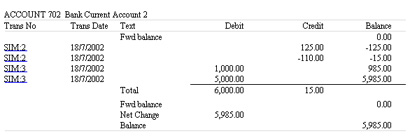
Account no. 703 is defined as an asset, and currently has a balance in credit. Total Debits during the period is 15, and total Credits 1000. Account no. 702 has a normal debit balance, but on this account two negative values have been entered, one in debit and one in credit. If the Accounts are used in a report definition in the normal way, with the buttons Side:Normal and Active/Passive:Normal selected, the balance of Account no 703 will be shown as a negative asset value.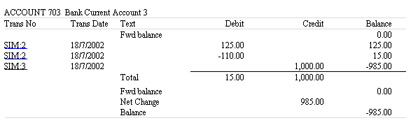
With the buttons Side:Debit and Active/Passive:Only Debit options selected, the debit column total for Account 702 will be shown, because the Account balance is in debit: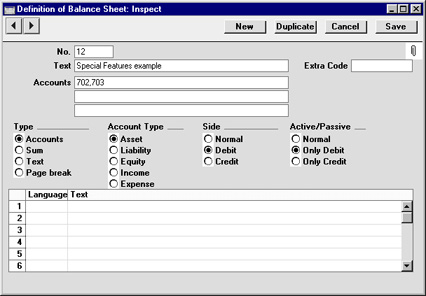
With Side:Credit and Active/Passive:Only Credit selected, the balances from both the Accounts' credit columns will be shown, because both are negative.
With Side:Credit and Active/Passive:Only Debit selected, nothing will be shown, because the credit column of Account 702 has a positive value, and 703 has a overall debit balance.
With Side:Debit and Active/Passive:Only Credit selected, once again nothing will be shown.
The combination Side:Credit and Active/Passive:Normal shows the credit column balances for both Accounts:

Bank Reconciliation
This report lists all unreconciled postings to the Bank Account and divides them into three groups: Outstanding Payments; Outstanding Receipts; and Bank Charges. The third group includes all postings that do not fall into the other two groups (e.g. bank interest, transfers between bank accounts, salary payments).
The report will then take the closing balance from your last bank statement and calculates a new balance that takes the unreconciled postings into account. This new balance is then compared to the current balance for the Bank Account in your database. If the two balances are different, the probable reason is that there is still at least one unreconciled posting that you can reconcile with the bank statement.
When printed to screen, the Bank Reconciliation report has the HansaWorld Enterprise Drill-down feature. Click on a Sub System Number (e.g. Invoice Number) in the report to open the Nominal Ledger Transaction for that Sub System record. You can then open the Sub System record itself (e.g. the Invoice) by selecting 'Open Subsystem Record' from the Operations menu.
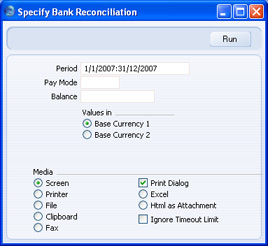
- Period
- Paste Special
Reporting Periods setting, System module
- Specify the report period. This should be sufficient to include all unreconciled postings to the Bank Account.
- Pay Mode
- Paste Special
Payment Modes setting, Sales/Purchase Ledger
- Enter a Payment Mode: the report will show all unreconciled postings to the Account shown on flip A of this Payment Mode.
- The report will be empty if you do not specify a Payment Mode.
- The report will be empty if you do not specify a Payment Mode.
- Balance
- Enter the closing balance from your last bank statement. The report will calculate a new balance that takes the unreconciled postings into account. This new balance is then compared with the current balance for the Account in the Payment Mode specified above.
- Values in
- If you are using the Dual-Base system, values in this report can be shown in either Base Currency. Use these options to choose which Currency is to be used on this occasion.
- If you are not using the Dual-Base system, use the Base Currency 1 option to produce a report in your home Currency.
Bank Statement
This report lists the Payments, Receipts, Nominal Ledger Transactions and Personnel Payments posting to the specified Bank or Cash Account during the specified period, together with a final balance.
Compared to other Nominal Ledger reports listing Account postings and balances, the Bank Statement lists each transaction individually and also shows Customer and Supplier information. In addition, using the HansaWorld Drill-down feature to click on a Receipt, Payment or Personnel Payment Number will open the corresponding sub system record, not the related Nominal Ledger Transaction that will be opened from other Nominal Ledger reports.
You can also produce this report using the 'Bank Statement' function on the Operations menu of the Receipt, Payment and Personnel Payment screens.
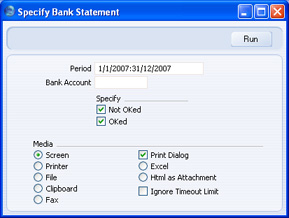
- Period
- Paste Special
Reporting Periods setting, System module
The report will list the transactions posting to the Bank or Cash Account during the period specified here.
- Bank Account
- Paste Special
Account register, Nominal Ledger/System module
- Specify the Account whose transactions and balance you wish to see. You must specify an Account, otherwise the report will be empty.
- Specify
- Use these options to specify whether approved and/or unapproved Receipts, Payments and Personnel Payments will be shown in the report. Nominal Ledger Transactions will always be shown, irrespective of the options chosen here.
Bank Transactions
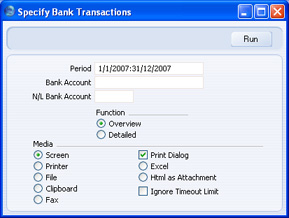
This report is a list of the records in the Bank Transactions setting. If your database is registered in Estonia and you are using the SEB Bank Statements Internet Service, this setting will contain bank statements received electronically from SEB Bank. One record in the setting represents a single transaction on a statement. If you need to check the statement is correct, you can print this report and then compare it with the Account Reconciliation or Nominal Ledger report.
- Period
- Paste Special
Reporting Periods setting, System module
- Enter the start and end date of the period whose Bank Transactions are to be shown in the report. The first record in the Reporting Periods setting is used as a default. A Bank Transaction record will be included in the report if the R. Trans. Date on the 'Recipient' card falls in the period specified here.
- Bank Account
- If you have several bank accounts, you can use the SEB Bank Statements Internet Service to receive electronic statements for more than one of those accounts. If so, you can use this field to restrict the report to the Bank Transactions affecting just one bank account. The report will contain those Bank Transactions where the Type is "C" and this bank account is specified on the 'Payer' card, and those Bank Transactions where the Type is "D" and this bank account is specified on the 'Recipient' card.
- N/L Bank Account
- Paste Special
Account register, Nominal Ledger/System module
- If you enter the Account that represents your bank account in your Chart of Accounts here, the report will include the opening balance for that Account, and a theoretical closing balance that includes the Bank Transactions.
- Function
- Use these options to choose the level of detail that you want to be printed in the report.
- Overview
- The report will contain a single line for each Bank Transaction, showing the R. Trans. Date, the Tr. Number, the Currency, the amount (shown as a debit if the Type is "D" or as a credit if the Type is "C") and the Comment.
- Detailed
- In addition to the information printed in the Overview, the report will print the Payer and Recipient names, the P. and R. References and the P. Reg. No. 1.
- Overview
Base Currency Rate Change
Please click here for full details of this report.Budget Journal
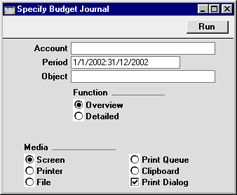
This report lists the records in the Budget register.
- Account
- Paste Special
Account register, Nominal Ledger/System module
- Range Reporting Alpha
- Specify the Account or range of Accounts for which Budgets are to be printed.
- Specify the Account or range of Accounts for which Budgets are to be printed.
- Period
- Paste Special
Reporting Periods setting, System module
- Enter the start and end date of the period whose Budgets are to be shown in the report. The first record in the Reporting Periods setting is used as a default.
- All Budgets that are relevant to the report period will be listed in the report. For example, if the report period is June 1st to June 30th, Budgets starting or ending in June will be included, and Budgets starting before June and ending after June will also be shown.
- All Budgets that are relevant to the report period will be listed in the report. For example, if the report period is June 1st to June 30th, Budgets starting or ending in June will be included, and Budgets starting before June and ending after June will also be shown.
- Object
- Paste Special
Object register, Nominal Ledger/System module
- To list Budgets with a particular Object, enter that Object here.
- Function
- Use these options to determine the level of detail to be included in the report.
- Overview
- This option gives a report with one line per Budget, showing Account Number and Name, Object, Start and End Date and Sum.
- Detailed
- In addition to the information shown in the Overview, this option also lists the monthly or quarterly totals in each Budget.
- Overview
Chart of Accounts
This page describes the Chart of Accounts report in the Nominal Ledger.
---
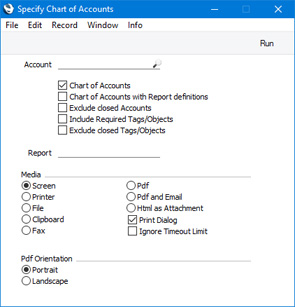
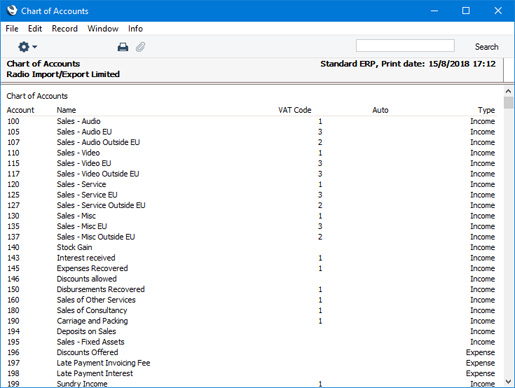
Use the Chart of Accounts report when you need to print a list of the Accounts in the Account register. You can also produce this report by running the System Documentation report in the System module using the Chart of Accounts or Chart of Accounts with Report definitions options.
- Account
- Paste Special
Account register, Nominal Ledger/System module
- Range Reporting Alpha
- Enter an Account Number or a range of Numbers separated by a colon (:) here if you would like specific Accounts to be shown in the report.
- Enter an Account Number or a range of Numbers separated by a colon (:) here if you would like specific Accounts to be shown in the report.
- Chart of Accounts
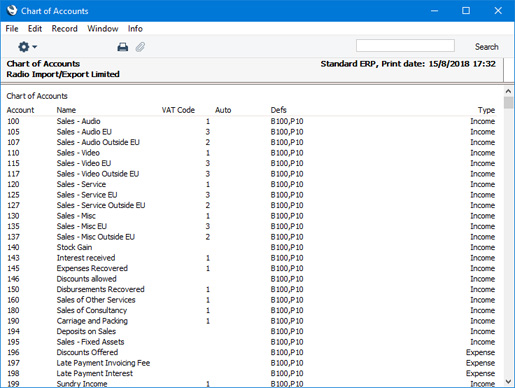
- This option prints a list of the Accounts in the Account register, in Account Number order. It shows the Account Number and Name, VAT Code, Autotransaction and Account Type.
- Chart of Accounts with Report definitions
- This option adds an extra column to the report showing the report definitions in which each Account has been used.
- For example, if Account 11110 appears in row 1020 in the Balance Sheet, the extra column in this report will show "B1020", with "B" signifying the Balance Sheet and "1020" signifying the row number. If you have more than one Balance Sheet definition, the same code "B" will be used for each one, so it will not be possible to distinguish between different definitions. If you would like the report to show the Account usage in a single report definition, specify that report in the Report field below.
- For example, if Account 11110 appears in row 1020 in the Balance Sheet, the extra column in this report will show "B1020", with "B" signifying the Balance Sheet and "1020" signifying the row number. If you have more than one Balance Sheet definition, the same code "B" will be used for each one, so it will not be possible to distinguish between different definitions. If you would like the report to show the Account usage in a single report definition, specify that report in the Report field below.
- Exclude closed Accounts
- Select this option if you would like to omit Accounts that have been marked as Closed from the report.
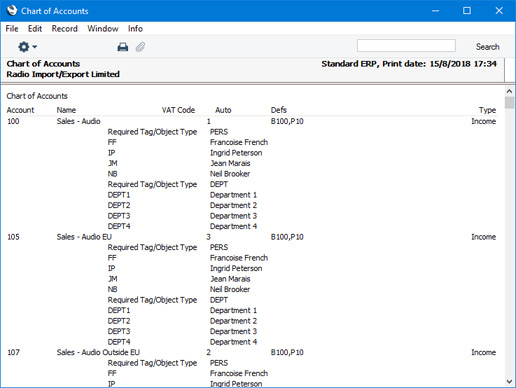
- Include Required Tags/Objects
- Select this option if you would like the report to display the Tags/Objects that must be used with each Account, as specified in the Tag/Object Type Control setting.
- Exclude closed Tags/Objects
- If you have selected the Include Required Tags/Objects option above, select this option as well if you need Objects that have been marked as Closed to be excluded from the report.
- Report
- Paste Special
Report Definitions in the Report Settings setting, Nominal Ledger
- If you have selected the Chart of Accounts with Report definitions option above and you need the report to show the Accounts that are used in a single report definition, specify that report here.
Reports in the Nominal Ledger:
- Introduction
- Definition of Nominal Ledger Reports
- Drill-down
- The Operations Menu
- Account Reconciliation
- Accrual Report
- Analytical Balance
- Analytical Balance (Fiscal purposes)
- Balance Sheet
- Bank Reconciliation
- Bank Statement
- Bank Transactions
- Base Currency Rate Change
- Budget Journal
- Cash Flow
- Chart of Accounts
- Correction List
- Corresponding Accounts
- Creditors Account
- Currency A/C Rate Change
- Daily Balances
- Debtors Account
- Forward Balance Journal
- Income & Expense Book
- Key Financial Ratios
- Liquidity Forecast
- Multicurrency Accounts Rate Difference
- N/L Accrual Transactions
- N/L Transfer, Subsystems
- Nominal Ledger
- Profit & Loss
- Revised Budget Journal
- Simulation Journal
- Tag/Object Results
- Tag/Object/Quantity Results
- Tax Account Balances
- Tax Calculations
- Tax Transactions for Registers
- Template Transaction Journal
- Test Corresponding Rules
- Transaction Journal
- Transaction Summary
- Trial Balance
- VAT Listing
- VAT Report
- VAT Report Purchases
- VAT Report Sales
- VAT Transaction Journal
- XBRL Report
Go back to:
- Home page for Nominal Ledger manual
- Home page for Standard ERP manual
Correction List
The Correction List lists the Transactions that fall in the specified period that have been corrected (using the 'Correction Mark' function) or updated (using the 'Update Mark' function). You cannot change the definition of this report.
When printed to screen, the Correction List has Hansa's Drill-down feature. Click on any Transaction Number in the report to open an individual Transaction record.
Double-clicking 'Correction List' in the 'Reports' list opens the following window:
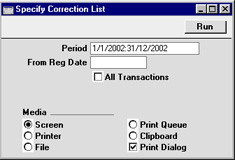
- Period
- Paste Special
Reporting Periods setting, System module
- Enter the report period in the format 01-02-02:28-02-02. If you are using four-digit years as in the illustration, the leading digits will be inserted automatically. If your report period is a single day, just enter the date once and this will be converted to a period format automatically. The first row of the Reporting Periods setting is used as a default value.
- From Reg. Date
- This is the registration date (the entry date), not the Transaction Date.
- All Transactions
- By default, this report only shows corrected or updated Transactions that fall within the report period. If you would like to list all Transactions, perhaps to gain an impression of the proportion that have been changed, check this box.
Correction List
This page describes the Correction List report in the Nominal Ledger.
---
The Correction List is a list of corrections and updates that you have made to Transactions from a specified period. You can make a correction to a Transaction by opening it in a record window and selecting 'Correction Mark' from the Operations menu (Windows/macOS) or Tools menu (iOS/Android), while you can make an update using the 'Update Mark' function on the same menu. The report will also include Transactions created from Sub System records that you have invalidated. You cannot change the definition of this report.
You can also produce this report from the Consolidation module. In this case, the report will list corrections and updates made to Transactions in every Company in the database.
When printed to screen, the Correction List has the Standard ERP Drill-down feature. Click (Windows/macOS) or tap (iOS/Android) on any Transaction Number in the report to open an individual Transaction record.
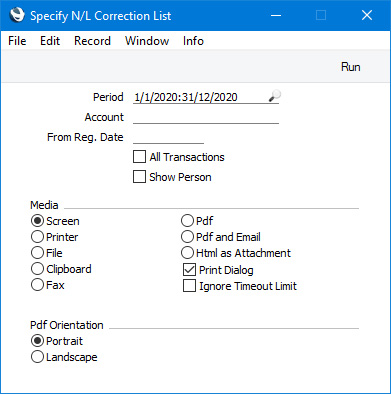
Selecting 'Correction List' from the 'Reports' list in the Nominal Ledger or the Consolidation module will open the following window:
- Period
- Paste Special
Reporting Periods setting, System module
- Enter the report period. The report will list corrected and updated Transactions that were originally entered during the period that you specify here. The corrections and updates themselves may have been made after this period.
- If you need the period to be a single day, just enter the date once and this will be converted to the period format automatically.
- The first row of the Reporting Periods setting will be used as the default value.
- If you need the period to be a single day, just enter the date once and this will be converted to the period format automatically.
- Account
- Paste Special
Account register, Nominal Ledger/System module
- Range Reporting Alpha
- Enter an Account here if you need the report to list corrected and updated Transactions featuring a particular Account in at least one row.
- Enter an Account here if you need the report to list corrected and updated Transactions featuring a particular Account in at least one row.
- From Reg. Date
- Enter a date here if you need the report to list corrections and updates made on or after a particular date.
- All Transactions
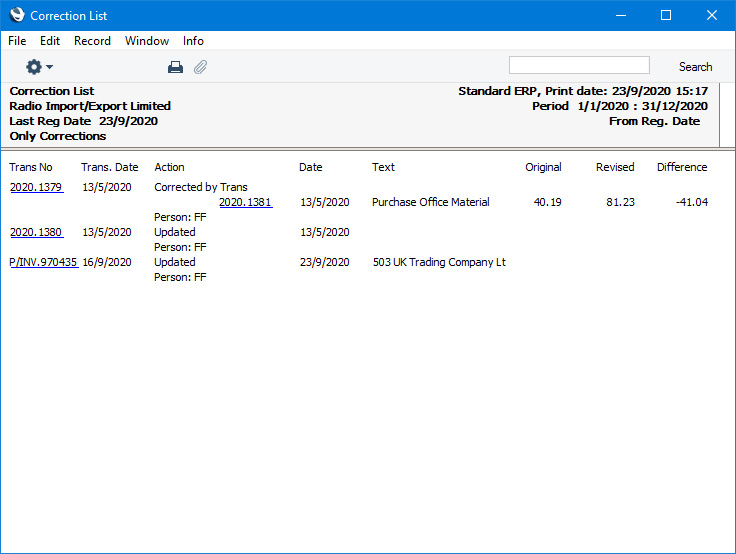
- By default, the report will only list Transactions that have been corrected or updated. For each Transaction, it will show the Transaction Number, the Transaction Date, the action (i.e. correction or update) and date of the action. In the case of a corrected Transaction, the Number of the correcting Transaction will also be shown. If you select this option, every Transaction, including those that have not been corrected or updated, will be listed in the report, together with their registration dates. You might use this option to gain an impression of the proportion of Transactions that have been changed, or to get an idea of how long it takes for updates and corrections to be made.
- If you use this option and also enter an Account in the field above, the report will list all Transactions that post to that Account, with and without corrections and updates. Other updates and corrections will not be shown.
- If you use this option and also enter an Account in the field above, the report will list all Transactions that post to that Account, with and without corrections and updates. Other updates and corrections will not be shown.
- Show Person
- If a Transaction was corrected, the Signature of the correcting Person will be included in the report if you have selected this option. If a Transaction was updated or invalidated, the Signature will always be shown.
- 2020.1379
- Transaction corrected by Transaction 2020.1381.
- 2020.1380
- Transaction updated.
- P/INV.970435
- Transaction created from a Sub System record (Purchase Invoice 970435) that was invalidated.
---
Reports in the Nominal Ledger:
- Introduction
- Definition of Nominal Ledger Reports
- Drill-down
- The Operations Menu
- Account Reconciliation
- Accrual Report
- Analytical Balance
- Analytical Balance (Fiscal purposes)
- Balance Sheet
- Bank Reconciliation
- Bank Statement
- Bank Transactions
- Base Currency Rate Change
- Budget Journal
- Cash Flow
- Chart of Accounts
- Correction List
- Corresponding Accounts
- Creditors Account
- Currency A/C Rate Change
- Daily Balances
- Debtors Account
- Forward Balance Journal
- Income & Expense Book
- Key Financial Ratios
- Liquidity Forecast
- Multicurrency Accounts Rate Difference
- N/L Accrual Transactions
- N/L Transfer, Subsystems
- Nominal Ledger
- Profit & Loss
- Revised Budget Journal
- Simulation Journal
- Tag/Object Results
- Tag/Object/Quantity Results
- Tax Account Balances
- Tax Calculations
- Tax Transactions for Registers
- Template Transaction Journal
- Test Corresponding Rules
- Transaction Journal
- Transaction Summary
- Trial Balance
- VAT Listing
- VAT Report
- VAT Report Purchases
- VAT Report Sales
- VAT Transaction Journal
- XBRL Report
Go back to:
- Home page for Nominal Ledger manual
- Home page for Standard ERP manual
Corresponding Accounts
This report shows how each Account posting in the selected period has been balanced. For example, where an Account has been used on the credit side of a Transaction, this report will show the Account(s) used on the debit side, with amounts posted. The balancing Accounts are termed 'Corresponding Accounts'.
In complex transactions, where, for example, the first two lines are debit Accounts and there are then several credit lines, correspondence is established manually using the Corr field of each Transaction row.
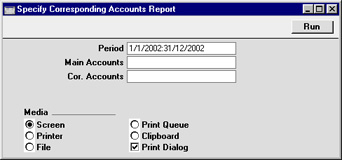
- Period
- Paste Special
Reporting Periods setting, System module
- Specify the period to be covered by the report.
- Main Accounts
- Paste Special
Account register, Nominal Ledger/System module
- Range Reporting Alpha
- Specify here the Accounts whose correspondence you wish to analyse.
- Specify here the Accounts whose correspondence you wish to analyse.
- Corr. Accounts
- Paste Special
Account register, Nominal Ledger/System module
- Range Reporting Alpha
- Use this field if you are only interested in viewing specific corresponding Accounts.
- Use this field if you are only interested in viewing specific corresponding Accounts.
- Balances Only
- With this box checked, for each main Account, each corresponding Account is listed on a single row, with, as appropriate, debit and credit balances for the report period. With the box not checked, for each main Account, all Transactions for each corresponding Account are shown individually.
- List Transaction Nos
- With this box checked, the Transaction Numbers of all Transactions that fall within the reporting period, together with debit and credit totals, will be listed at the bottom of the report.
Creditors Account Report
This report satisfies a specific requirement of users in Russia. Please refer to your Hansa representative for more details.Currency A/C Rate Change
Please click here for full details of this report.Daily Balances
This report provides daily debit, credit and overall balances for all used Accounts.
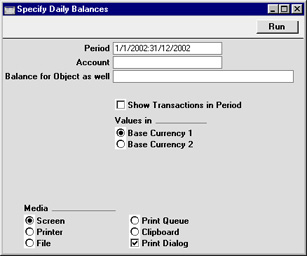
- Period
- Paste Special
Reporting Periods setting, System module
- Specify the period to be covered by the report. To obtain balances for a particular day, simply enter the date.
- If a report period of greater than one day is entered, for each Account individual daily balances are shown only for those days on which the Account was used.
- If a report period of greater than one day is entered, for each Account individual daily balances are shown only for those days on which the Account was used.
- Account
- Paste Special
Account register, Nominal Ledger/System module
- Range Reporting Alpha
- Specify the Account or range of Accounts whose balances are to be shown in the report.
- Specify the Account or range of Accounts whose balances are to be shown in the report.
- Balance for Object as well
- Paste Special
Object register, Nominal Ledger/System module
- If you need to show for each Account a balance for a particular Object as well, specify that Object here. If you enter a number of Objects separated by commas, a single balance for Transactions featuring all the Objects listed will be shown.
- Show Transactions in Period
- With this box checked, the Transaction Numbers of each Transaction that falls within the reporting period, together with debit and credit totals, will be listed at the bottom of the report.
- Values in
- If you are using the Dual-Base system, values in this report can be shown in either Base Currency. Use these options to choose which Currency is to be used on this occasion.
- If you are not using the Dual-Base system, use the Base Currency 1 option to produce a report in your home Currency.
Debtors Account Report
This report satisfies a specific requirement of users in Russia. Please refer to your Hansa representative for more details.Forward Balance Journal
This report lists the records in the Brought Forward Balance register.
For each record, the report shows the Serial Number, Date, Object and Description. The individual debit and credit postings to each Account are listed, together with the Currencies of the balances.
When printed to screen, the Forward Balance Journal has Hansa's Drill-down feature. Click on any serial number in the report to open an individual Brought Forward Balance record.
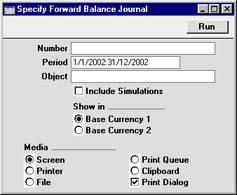
- Number
- Range Reporting
Numeric
- Enter a Serial Number or a range of Numbers to show particular Brought Forward Balance records, or leave blank to include all such records.
- Period
- Paste Special
Reporting Periods setting, System module
- Enter the start and end date of the period whose Brought Forward Balance records are to be shown in the report. The first record in the Reporting Periods setting is used as a default.
- Object
- Paste Special
Object register, Nominal Ledger/System module
- To list Budgets with a particular Object, enter that Object here.
- Include Simulations
- Check this box if you would like to include in the report Brought Forward Balance records whose Simulation boxes have been checked. These records will be marked as Simulations in the report.
- Show in
- If you are using the Dual-Base system, values in this report can be shown in either Base Currency. Use these options to choose which Currency is to be used on this occasion.
- If you are not using the Dual-Base system, use the Base Currency 1 option to produce a report in your home Currency.
Income & Expense Book
This page describes the Income & Expense Book report in the Nominal Ledger.
---
The Income and Expense Book report is a list of postings made during a specified period, sorted by date and classified by the type of Account. The report uses six Account classifications: Income Sales; Income Other; Purchases; Expense; Expense Cash and Expense Other.
Before running the report, you should use the Income & Expense Book setting in the Nominal Ledger to classify each Account. Usually you will need to enter a separate record to this setting for each classification, but you can enter more than one record for a particular classification if necessary.
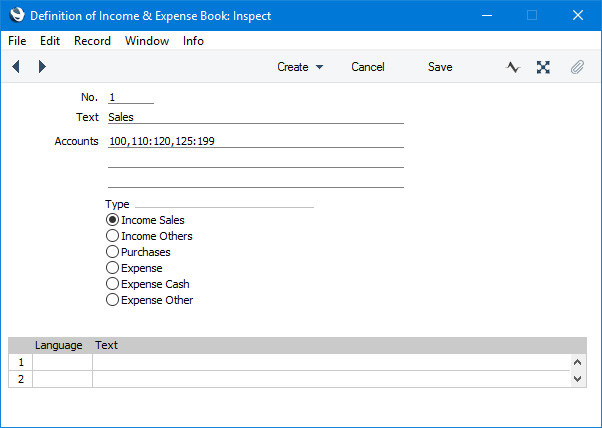
- No.
- Enter a unique code to identify each record in the Income & Expense Book setting. The code must be numeric.
- Text
- Use this field to assign a descriptive name to each record in the Income & Expense Book setting. This will be shown in the browse window.
- Accounts
- Paste Special
Account register, Nominal Ledger/System module
- Enter an Account or a range of Account numbers separated by a colon (:). You can also enter a number of individual Accounts, or ranges of Accounts, separated by commas, as shown in the illustration above.
- These Accounts should all have the same classification for the purposes of the Income & Expense Book report (e.g. they should all be income Accounts, or they should all be expense Accounts)
- The Accounts field consists of three rows, each allowing 100 characters, thus allowing for a definition 300 characters long.
- These Accounts should all have the same classification for the purposes of the Income & Expense Book report (e.g. they should all be income Accounts, or they should all be expense Accounts)
- Type
- Choose an option to specify the type or classification of the Accounts listed above for the purposes of the Income & Expense Book report.
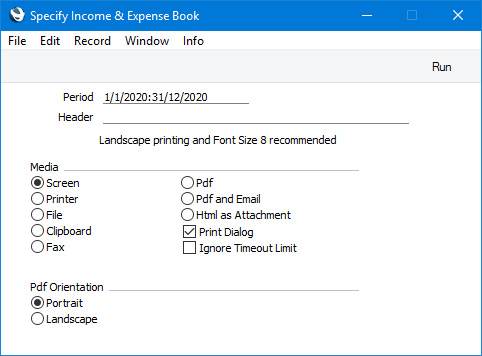
- Period
- Paste Special
Reporting Periods setting, System module
- The report will list postings from the period that you specify here. The first period in the Reporting Periods setting will be offered as a default.
When printed to screen, the Income & Expense Book report has the Standard ERP Drill-down feature. Click (Windows/macOS) or tap (iOS/Android) on any Transaction Number to open an individual Transaction record.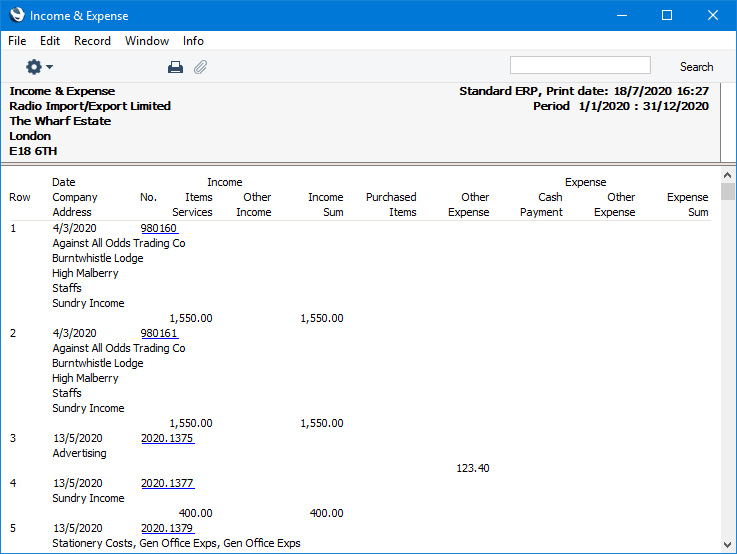
For each posting, the report will display the following information depending on the origin of the posting:
- Invoice
- The Customer Name, the Invoice Address (from the Invoice) and the Description from the Transaction row (or, if blank, the Text from the Transaction header). If the Invoice has been invalidated, the date and value will be shown struck through with red lines, the date of the invalidation and the Signature of the invalidator will be displayed, and the value will not be included in the report totals.
- Purchase Invoice
- The Supplier Name, the Invoice Address (from the Contact record for the Supplier) and the Description from the Transaction row (or, if blank, the Text from the Transaction header). Both the Supp. Inv. No. and the Purchase Invoice Number will be displayed, with the Purchase Invoice Number in brackets. If the Purchase Invoice has been invalidated, the date and value will be shown struck through with red lines, the date of the invalidation and the Signature of the invalidator will be displayed, and the value will not be included in the report totals.
- If the Purchase Invoice and Transaction Dates in a Purchase Invoice are different, the Purchase Invoice Date will be displayed in the report, but the inclusion of the Purchase Invoice in the report period will depend on the Transaction Date.
- If the Purchase Invoice and Transaction Dates in a Purchase Invoice are different, the Purchase Invoice Date will be displayed in the report, but the inclusion of the Purchase Invoice in the report period will depend on the Transaction Date.
- Other
- The Description from the Transaction row (or, if blank, the Text from the Transaction header).
Reports in the Nominal Ledger:
- Introduction
- Definition of Nominal Ledger Reports
- Drill-down
- The Operations Menu
- Account Reconciliation
- Accrual Report
- Analytical Balance
- Analytical Balance (Fiscal purposes)
- Balance Sheet
- Bank Reconciliation
- Bank Statement
- Bank Transactions
- Base Currency Rate Change
- Budget Journal
- Cash Flow
- Chart of Accounts
- Correction List
- Corresponding Accounts
- Creditors Account
- Currency A/C Rate Change
- Daily Balances
- Debtors Account
- Forward Balance Journal
- Income & Expense Book
- Key Financial Ratios
- Liquidity Forecast
- Multicurrency Accounts Rate Difference
- N/L Accrual Transactions
- N/L Transfer, Subsystems
- Nominal Ledger
- Profit & Loss
- Revised Budget Journal
- Simulation Journal
- Tag/Object Results
- Tag/Object/Quantity Results
- Tax Account Balances
- Tax Calculations
- Tax Transactions for Registers
- Template Transaction Journal
- Test Corresponding Rules
- Transaction Journal
- Transaction Summary
- Trial Balance
- VAT Listing
- VAT Report
- VAT Report Purchases
- VAT Report Sales
- VAT Transaction Journal
- XBRL Report
Go back to:
- Home page for Nominal Ledger manual
- Home page for Standard ERP manual
Key Financial Ratios
When a company, its situation and prospects are evaluated, the Key Financial Ratios report is a useful tool.
Hansa allows you to create your own Key Ratios, to improve the analysis. Examples might be sales per sq. ft. for retail outlets, or the relation between salaries and debited time for consultants. Some Key Ratios are used in other reports: the Turnover % option in the Profit & Loss report requires that there be a Key Ratio defining 'turnover', for example.
Please click for details about:
- The definition of the Key Financial Ratios report;
- Printing the Key Financial Ratios.
Key Financial Ratios - Defining
- To change the report definition of the Key Financial Ratios report, first select 'Settings' from the File menu and double-click 'Report Settings' in the subsequent list. Then highlight 'Key Financial Ratios' in the list on the left-hand side of the 'Report Settings' window and click the [Definition] button. The 'Definition of Key Financial Ratios: Inspect' window is opened.
- Enter the definitions for your Key Ratios.
The following illustration shows a sample list of defined Ratios. In this list, all the functions available for use in defining Key Ratios are illustrated.
The fields on the screen are as follows: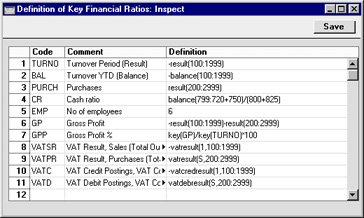
- Row
- Each Ratio is defined on its own numbered row in this window.
- Code
- A unique code identifying each Key Ratio: this can be used to refer to the Key Ratio when calculating others (see the illustration).
- Comment
- The name of the Ratio, to be shown on the report.
- Definition
- The formula used to calculate the value of this Key Ratio.
Several commands are available for use by formulae in the Definition field. They are not case sensitive.
- RESULT(Account Code)
- This command returns the net change during the period for the Account specified in the brackets. Some examples of the use of this command are as follows:
- RESULT(100)
- Returns the net change in Account 100 for the specified period.
- RESULT(100:1999)
- Returns the sum of the net changes in Accounts 100 to 1999 for the specified period. The Accounts used are determined using an alpha sort, rather than a numeric one. Thus Account 1000001 will be included in the example range, while Account 200 will not.
- -RESULT(100:1999)
- As the previous example, but the sign of the final figure is changed. This is useful when displaying figures for sales, which are stored as negative figures in Hansa. Prefixing the RESULT command with a minus sign will cause sales to be displayed as positive figures in the report.
- RESULT(100+120:1999)
- Takes the net change in Account 100 and adds it to the sum of the net changes in Accounts 120 to 1999.
- RESULT(100)
- BALANCE(Account Code)
- This command returns the closing balance for the Account specified. It therefore differs from the RESULT command in that balances brought forward from previous periods are taken into account.
- The command can return the sum of the balances of specified Accounts in the same manner as the RESULT command: please refer to the description of the RESULT command above for examples.
- The command can return the sum of the balances of specified Accounts in the same manner as the RESULT command: please refer to the description of the RESULT command above for examples.
- KEY(Code)
- The value of another Key Ratio can be included in the calculation. The Key Ratio referred to must already have been defined. If not, a zero value is used. Therefore, in the example illustration, the GPP line must appear below the GP and TURNO lines.
- Note that although the KEY command itself is not case sensitive, the reference to another Key Ratio is. Thus, in the example illustration, key(TURNO) and KEY(TURNO) are relevant, but key(turno) is not.
- Note that although the KEY command itself is not case sensitive, the reference to another Key Ratio is. Thus, in the example illustration, key(TURNO) and KEY(TURNO) are relevant, but key(turno) is not.
- VATRESULT(VAT Code, Account Code)
- This command is similar to RESULT, but in calculating the net change during the period for the Account specified, only postings with the specified VAT Code are taken into account.
- The reference to the VAT Code is not case sensitive.
- The command can return the sum of the balances of specified Accounts in the same manner as the RESULT command: please refer to the description of the RESULT command above for examples.
- The reference to the VAT Code is not case sensitive.
- VATBALANCE(VAT Code, Account Code)
- This command returns the closing balance for the Account specified, with only Transactions with the specified VAT Code taken into account. It therefore differs from the VATRESULT command in that balances brought forward from previous periods are taken into account.
- VATCREDRESULT(VAT Code, Account Code)
- This command returns the total credit posting to the Account specified during the period, taking only transactions with the specified VAT Code into account.
- VATDEBRESULT(VAT Code, Account Code)
- This command returns the total debit posting to the Account specified during the period, taking only transactions with the specified VAT Code into account.
- APDUE(Number of days)
- This command returns the total in the Purchase Ledger that is overdue for payment by the specified number of days. The last day of the report period is used as the due date. For example, APDUE(20) will return the total that became due 20 days or more before the end of the report period (i.e. that was overdue by at least 20 days on the last day of the period). A number must be specified: use APDUE(0) if the total is to include all overdue Purchase Invoices.
- ARDUE(Number of days)
- This command is the Sales Ledger equivalent of APDUE above.
- Row
- When you have finished defining Key Ratios, click [Save]. You are returned to the 'Reports' list window.
As the calculation uses Hansa's internal values, balances on e.g. sales Accounts will be shown as negatives, since they normally are in credit. You solve this simply by reversing the sign for all such calculations: an example of this is in Key Ratio No. 1 in the illustration. The examples also show how to group different Accounts.
The value of a well-structured Chart of Accounts is easily noticed here. If all income related Accounts are found in a consecutive series, summing them all up becomes simple.
Key Financial Ratios - Example - Key Ratios for Different Periods
This page uses an example Key Financial Ratios report to describe using the fields on flip B of the 'Key Financial Ratios Report Definition' window. These fields allow you to have the same Key Ratios printed for different periods. Please refer here for descriptions of the commands you can include in a Key Ratios report definition.
---
To begin the example, we have created the simple report illustrated below in which we have used the RESULT command to print the net sales for the report period. The RESULT command will print the net change in the Account balance(s) over the report period, and Accounts 100:199 are the Sales Accounts. The report was printed with the month of August as the period:
One way to extend the report is to have the same Key Ratio printed for different periods. Follow these steps: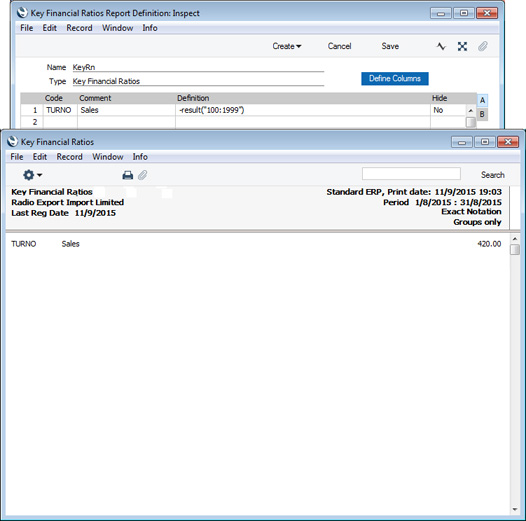
- Place the same formula on each line in the definition:
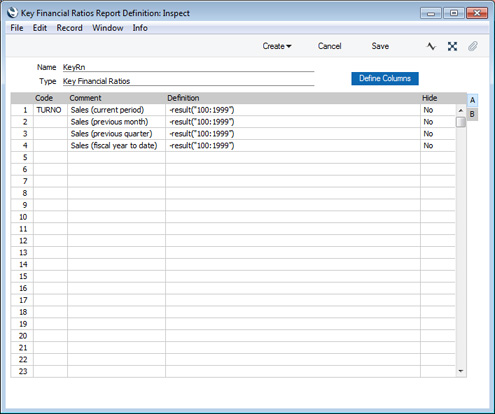
- To set the period for each Key Ratio, go to flip B and use the Period, Offset and Length fields:
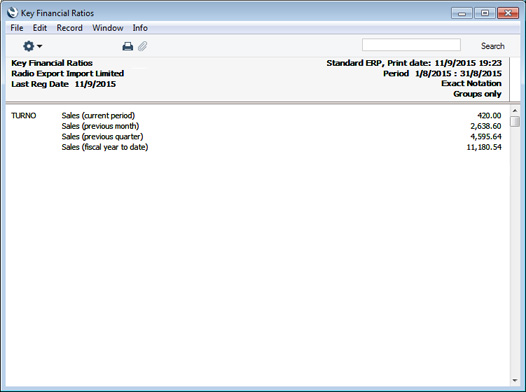
This the resulting report: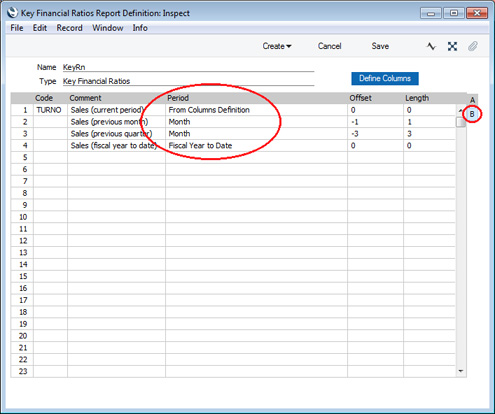
- From Columns Definition
- Select this option if you would like the period for the Key Ratio to be the same as the report period.
- In the example illustrated above, the period specified in the report specification window is August, so the Key Ratio in row 1 will print the sales figures for August.
- The Offset and Length fields are not used with this option.
- In the example illustrated above, the period specified in the report specification window is August, so the Key Ratio in row 1 will print the sales figures for August.
- Month
- Use this option if you would like the period for the Key Ratio to be a particular calendar month or months.
- Use the Offset field to specify when the Key Ratio period is to start. For example, if the Offset is 0, the Key Ratio period will begin on the same date as the report period. If the Offset is -1, the Key Ratio period will begin one month before the start of the report period. If the Offset is 1, the Key Ratio period will begin one month after the start of the report period.
- If the Offset is not 0, you must also specify a Length. The Length is the number of months in the Key Ratio period. For example, if the Offset is -3 and the Length is 3, the Key Ratio period will begin three months before the report period and will be three months in duration. In the example illustrated above, if the report period is August, the period for the Key Ratio in row 3 will run from May 1 to July 31. If the Offset is 0 and you do not specify a Length, the Length will be assumed to be 1 (i.e. the Key Ratio period will be the first month in the report period).
- Use the Offset field to specify when the Key Ratio period is to start. For example, if the Offset is 0, the Key Ratio period will begin on the same date as the report period. If the Offset is -1, the Key Ratio period will begin one month before the start of the report period. If the Offset is 1, the Key Ratio period will begin one month after the start of the report period.
- Year
- Use this option if you would like the period for the Key Ratio to be a particular calendar year or years.
- Use the Offset field to specify when the Key Ratio period is to start. For example, if the Offset is 0, the Key Ratio period will begin on the same date as the report period. If the Offset is -1, the Key Ratio period will begin one year before the start of the report period. If the Offset is 1, the Key Ratio period will begin one year after the start of the report period.
- You must also specify a Length (i.e. the Length should not be 0). The Length is the number of years in the Key Ratio period. For example, if the Offset is -3 and the Length is 3, the Key Ratio period will begin three years before the report period and will be three years in duration. If the report period is the month of August, the Key Ratio period will begin in August three years previously and end the day before the report period begins.
- Use the Offset field to specify when the Key Ratio period is to start. For example, if the Offset is 0, the Key Ratio period will begin on the same date as the report period. If the Offset is -1, the Key Ratio period will begin one year before the start of the report period. If the Offset is 1, the Key Ratio period will begin one year after the start of the report period.
- Fiscal Year to Date
- If you select this option, the period for the Key Ratio will run from the beginning of the fiscal year in which the start date in the report period falls to the end of the report period.
- In the example illustrated above, if the report period is August, and fiscal years begin on January 1, the period for the Key Ratio in row 4 will run from January 1 to August 31.
- You can use the Offset field to move the beginning of the period to a different year. For example, if the Offset is -1, the start of the period will be the beginning of the previous fiscal year (January 1 in the previous year in the example). The end of the Key Ratio period will always be the same as the end of the report period, so positive Offsets are not useful.
- The Length field is not used with this option.
- In the example illustrated above, if the report period is August, and fiscal years begin on January 1, the period for the Key Ratio in row 4 will run from January 1 to August 31.
- Fiscal Year
- Select this option if the period for the Key Ratio is to be the fiscal year in which the start date in the report period falls.
- For example, if the report period is August and fiscal years begin on January 1, the period for the Key Ratio will run from January 1 to December 31 in the same year as the report period.
- You can use the Offset field to choose a different year, and the Length field to choose the number of years in the period. For example, if the Offset is -1 and the Length is 1, the period will be the fiscal year before the report period. If the Offset is 0 and the Length is 3, the period will be the three fiscal years starting with the fiscal year in which the start date in the report period falls.
- If you specify an Offset, you must also specify a Length.
- For example, if the report period is August and fiscal years begin on January 1, the period for the Key Ratio will run from January 1 to December 31 in the same year as the report period.
---
Pages describing the Key Financial Ratios report:
- Introduction
- The Definition of the Key Financial Ratios report
- Example - Key Ratios for Different Periods
- Example - Adding Columns to the report
- Example - Objects
- Additional Column Options
- Assisted Formula Entry
- Multiple Key Ratio Report Definitions
- Printing the Key Financial Ratios Report
Reports in the Nominal Ledger:
- Introduction
- Definition of Nominal Ledger Reports
- Drill-down
- The Operations Menu
- Account Reconciliation
- Accrual Report
- Analytical Balance
- Analytical Balance (Fiscal purposes)
- Balance Sheet
- Bank Reconciliation
- Bank Statement
- Bank Transactions
- Base Currency Rate Change
- Budget Journal
- Correction List
- Corresponding Accounts
- Creditors Account
- Currency A/C Rate Change
- Daily Balances
- Debtors Account
- Forward Balance Journal
- Income & Expense Book
- Key Financial Ratios
- Liquidity Forecast
- Multicurrency Accounts Rate Difference
- Nominal Ledger
- N/L Accrual Transactions
- N/L Transfer, Subsystems
- Object Results
- Object/Quantity Results
- Profit & Loss
- Revised Budget Journal
- Simulation Journal
- Tax Account Balances
- Tax Calculations
- Tax Transactions for Registers
- Template Transaction Journal
- Test Corresponding Rules
- Transaction Journal
- Transaction Summary
- Trial Balance
- VAT Listing
- VAT Report
- VAT Report Purchases
- VAT Report Sales
- VAT Transaction Journal
- XBRL Report
Go back to:
- Home page for Nominal Ledger manual
- Home page for Standard ERP manual
Key Financial Ratios - Example - Adding Columns to the Report
This page describes adding columns to a Key Financial Ratios report. Please refer here for descriptions of the commands you can include in a Key Ratios report definition.
---
If you have many Key Ratios, listing them with various periods as described in the previous example might result in a long report in which comparison between the various periods is not easy. An alternative is to add column definitions to the report. This will allow you to display information from different periods in columns.
To add column definitions, click the [Define Columns] button in the 'Key Financial Ratios Report Definitions' window (in this illustration we have removed rows 2-4 from the previous example as they are no longer needed):
The 'Column Definition: New' window opens: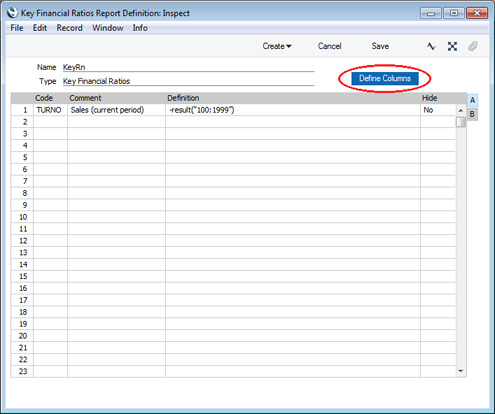
Most of the 'Column Definition: New' window is taken up by a matrix. Each row in the matrix will cause a separate column to be printed in the Key Financial Ratios report.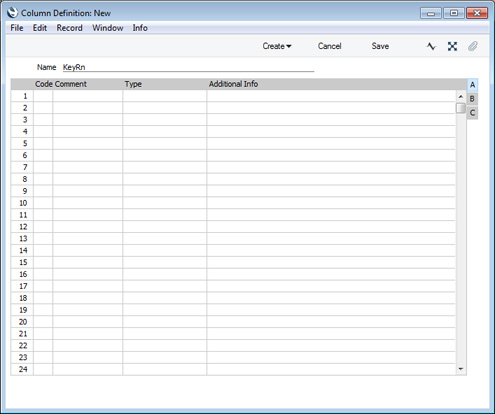
In its standard form and as shown in the illustrations so far, the Key Ratios report will contain three columns: the Code, Comment and Value columns. When you use the 'Column Definition' window to add columns to the report, you should first add three columns to represent the three that are already there:
For each column, enter the following information: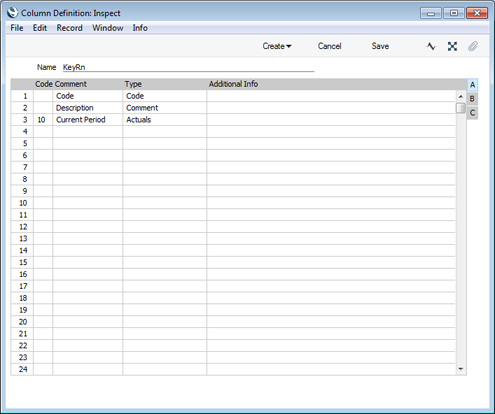
- Code
- Enter a Code for each column. There's no need to specify a Code if the Type (below) is "Code" or "Comment", but you must do so otherwise. If the columns in a report all contain the same figures or do not contain any figures at all, the probable reason is that the columns do not have Codes.
- Comment
- Enter the column heading of each column here.
- Type
- Paste Special
Choice of possible entries
The column type will determine what will be printed in the column, as follows:
- Code
- The Key Ratio Code (i.e. the Code in the row in the 'Key Financial Ratios Report Definitions' window) will be printed.
- Comment
- The Key Ratio Comment will be printed.
- Actuals
- Figures calculated using the Key Ratio formula will be printed.
- Columns Sumup
- Allows you to apply mathematical operations to values in previous columns (e.g. to add the values in various columns together, to subtract the value in one column from the value in another, or to express the value in one column as a percentage of the value in another). Enter the mathematical operation in the Additional Info field to the right using the format column("Code") (e.g. column("10")+column("20")+column("30"), column("10")-column("20"), column("10")/column("20")*100).
- Budget
- Budget figures for the Account(s) used in the Key Ratio formula will be printed.
- Revised Budget
- Revised Budget figures for the Account(s) used in the Key Ratio formula will be printed.
- Purchase Order Commitments
- Will print the total value of open Purchase Order rows in which the Purch. A/C is one of the Accounts used in the Key Ratio formula. An open Purchase Order row is one where the Recvd. OK figure is less than the Qty (i.e. you have ordered but not yet received the Items). Only rows in Purchase Orders that have been marked as OK and that are not Closed will be included.
- For example, if the Key Ratio formula is RESULT("820") and there is an open Purchase Order row in which the Purch A/C is 820, the value of this row will be included in the column figure.
- For example, if the Key Ratio formula is RESULT("820") and there is an open Purchase Order row in which the Purch A/C is 820, the value of this row will be included in the column figure.
- Goods Receipt Accruals
- Will print the total value of uninvoiced Purchase Order rows in which the Purch. A/C is one of the Accounts used in the Key Ratio formula. An uninvoiced Purchase Order row is one where the Invoiced figure is less than the Recvd. OK figure (i.e. you have received the Items but not yet been invoiced for them). Only rows in Purchase Orders that have been marked as OK and that are not Closed will be included.
By default, the page will be right-justified, with the last column (row 3 in the example definition) being placed on the right-hand side of the page. To move the columns to the left-hand side of the page and adjust the column widths, go to flip C in the 'Column Definition' window and use the Position field. You can enter the following special values in this field: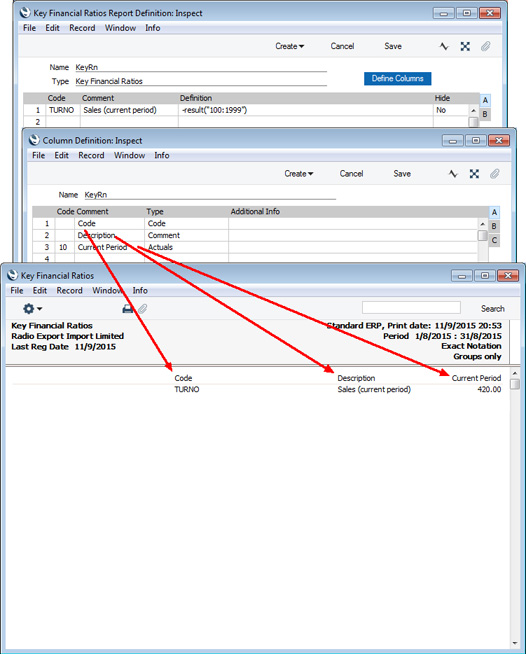
- 0
- The column will be placed on the left-hand side of the report.
- 1
- The column will be placed on the right-hand side of the report.
To add more columns, enter a Code and Comment for each new one and choose a Type using 'Paste Special'. In this example we need the report to display sales figures for various periods, so we've set the Type to "Actuals" in each case (meaning that the figures will be calculated using the Key Ratio formula i.e. the formula in the row in the 'Key Financial Ratios Report Definitions' window):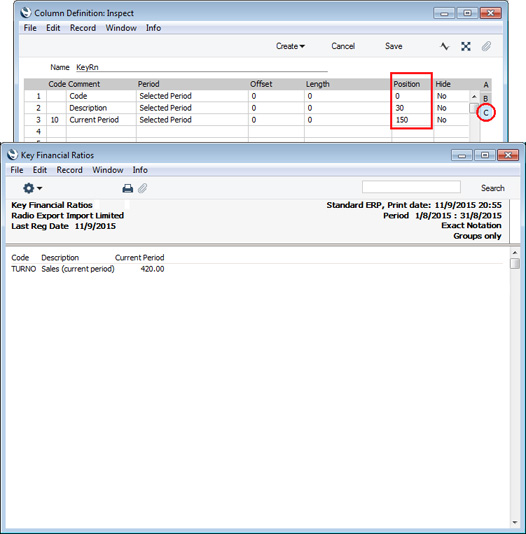
On flip C, use the Period, Offset and Length fields to specify the periods for each column. Use these fields in the same way as the similar fields on flip B of the 'Key Financial Ratios Report Definitions: Inspect' window (described on the Example page). Again, you can choose the Period using 'Paste Special': the options are the same as previously described, with the exception that the first option is named 'Selected Period'. This means that the period will be taken from the report specification window. Also as in the 'Key Financial Ratios Report Definitions' window, you can hide a particular column if necessary.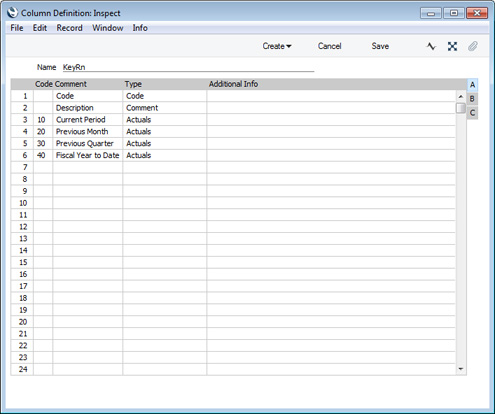
This is the resulting report (in the example we did not use the Position field for the new columns so they are right-justified):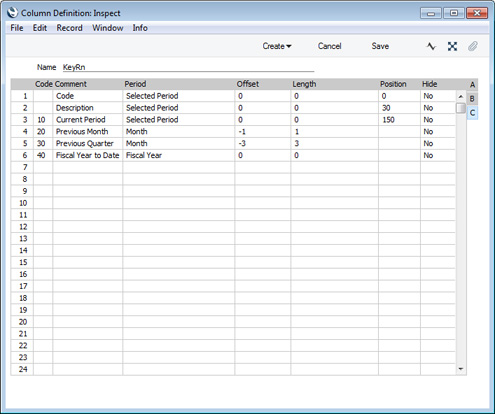
If we now add a second Key Ratio in the 'Key Financial Ratios Report Definitions' window, the columns will be applied to the new Key Ratio automatically: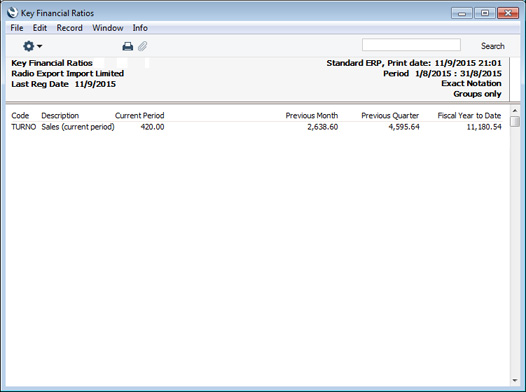
The report now displays actual figures for four different periods. As well as columns displaying actual figures, you can add columns displaying Budget and Revised Budget figures. In the next example, we've added a column in that will display Budget figures (the Type is "Budget"). A column displaying Revised Budget figures would be similar, except the Type would be "Revised Budget".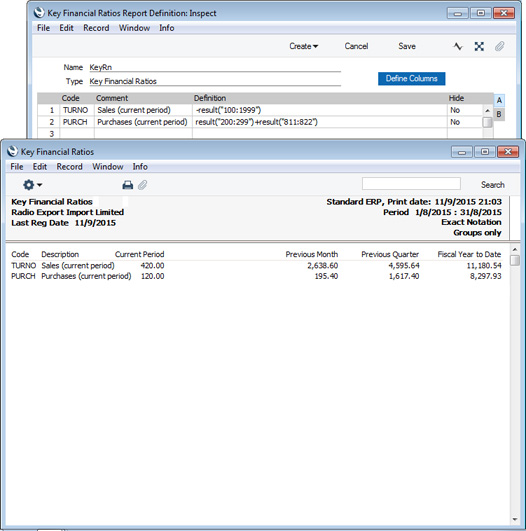
As the first Key Ratio is -RESULT(100:1999), the Budget column will display the total Budgeted amount for all the Accounts in the range 100:1999. For the second Key Ratio, the Budget column will similarly display the total Budgeted amount for Accounts 200:299 and 811:822.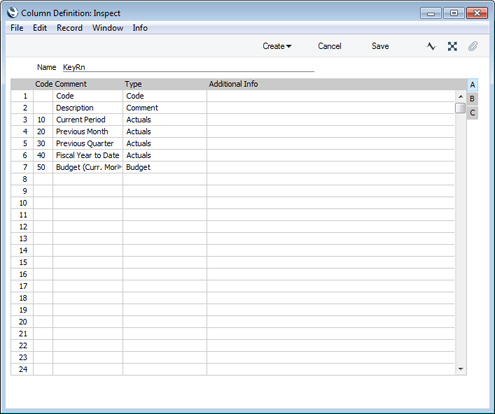
The Period on flip C of the Budget column definition is "Selected Period", so the total Budgeted amounts will be calculated from Budget rows with dates falling in the period in the report specification window. For example:
- If you have monthly Budget figures and the report period is one month, the Budget figure for that month will be included in the report.
- If you have quarterly Budget figures and the report period is one month, a pro rata amount calculated from the Budget figure for the relevant quarter will be included in the report.
This is the resulting report:
So far, the columns in the example have all printed information extracted from the database. You can also add columns that will display figures calculated from those in previous columns. To do this, add a column in which the Type is "Columns Sumup" and enter the calculation formula in the Additional Info field. In the formula, the syntax for referring to previous columns is COLUMN("CODE"), where "CODE" is the Code of the column you are referring to.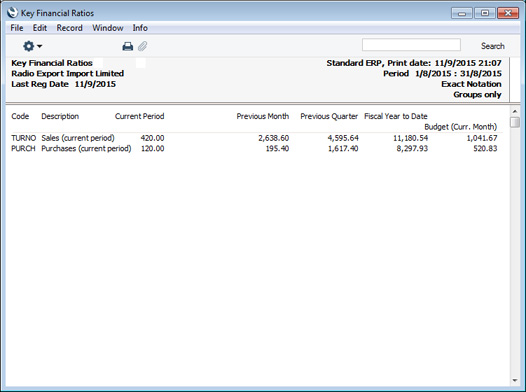
In the example illustrated below, we've added two columns comparing actual and Budget figures. In the first one (row 8), the formula is:
- COLUMN("10")-COLUMN("50")
When you need to enter a calculation formula in the Additional Info field, you can type it directly into the field, or you can use the Assisted Formula Entry feature to have the formula constructed for you. This feature will be helpful when you don't remember the correct syntax.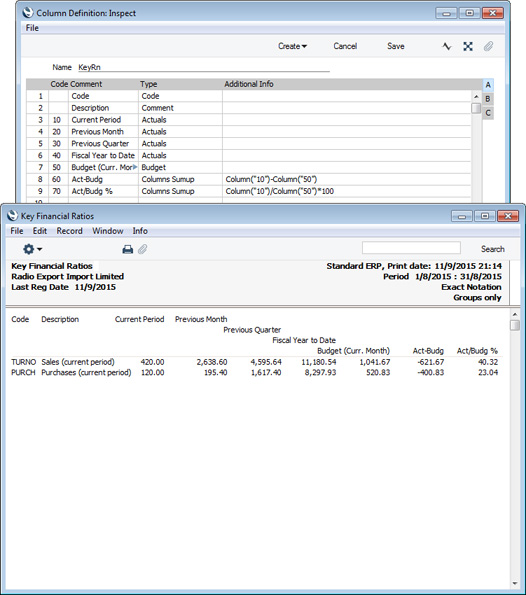
To use the Assisted Formula Entry feature, follow these steps:
- Simply activate 'Paste Special' from the Additional Info field in the relevant row:
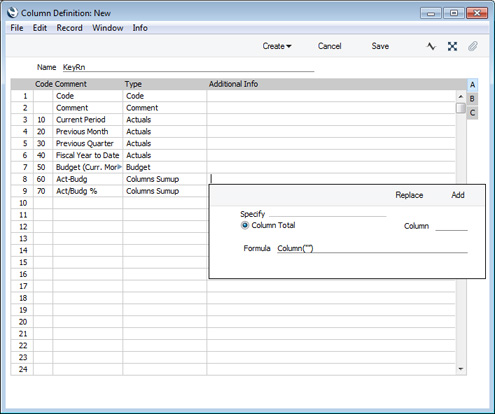
- Enter the Code of the previous column in the Column field:
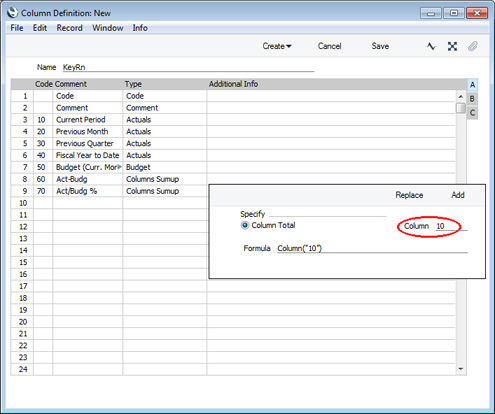
- Then click the [Replace] or [Add] buttons as follows:
- Replace
- The new formula will be placed in the Additional Info field, replacing what was previously there.
- Add
- The new formula will be placed in the Additional Info field, in addition to what is already there.
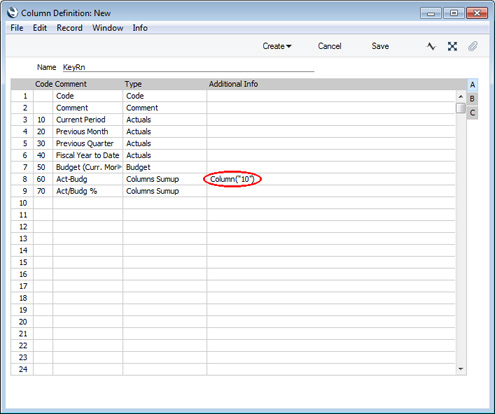
- Replace
- Type a mathematical operator in the Additional Info field.
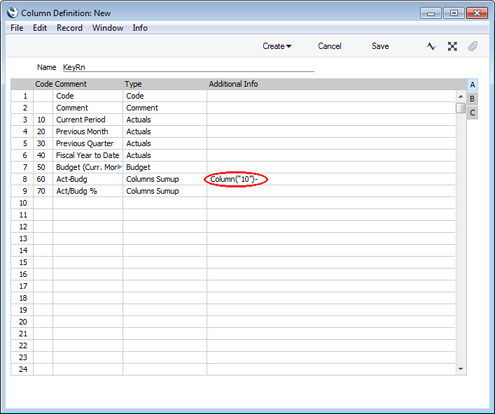
- Type in a second column reference or open 'Paste Special' once again, enter a Column Code and click the [Add] button to have the column reference added to the formula.
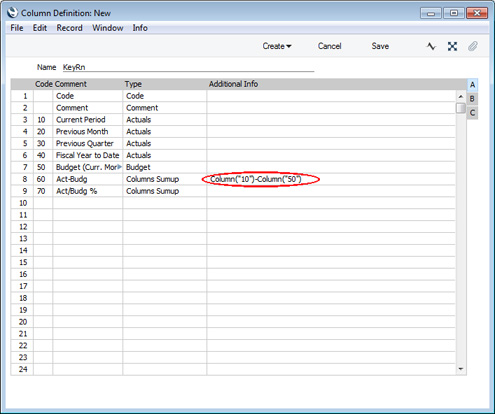
---
Pages describing the Key Financial Ratios report:
- Introduction
- The Definition of the Key Financial Ratios report
- Example - Key Ratios for Different Periods
- Example - Adding Columns to the report
- Example - Objects
- Additional Column Options
- Assisted Formula Entry
- Multiple Key Ratio Report Definitions
- Printing the Key Financial Ratios Report
Reports in the Nominal Ledger:
- Introduction
- Definition of Nominal Ledger Reports
- Drill-down
- The Operations Menu
- Account Reconciliation
- Accrual Report
- Analytical Balance
- Analytical Balance (Fiscal purposes)
- Balance Sheet
- Bank Reconciliation
- Bank Statement
- Bank Transactions
- Base Currency Rate Change
- Budget Journal
- Correction List
- Corresponding Accounts
- Creditors Account
- Currency A/C Rate Change
- Daily Balances
- Debtors Account
- Forward Balance Journal
- Income & Expense Book
- Key Financial Ratios
- Liquidity Forecast
- Multicurrency Accounts Rate Difference
- Nominal Ledger
- N/L Accrual Transactions
- N/L Transfer, Subsystems
- Object Results
- Object/Quantity Results
- Profit & Loss
- Revised Budget Journal
- Simulation Journal
- Tax Account Balances
- Tax Calculations
- Tax Transactions for Registers
- Template Transaction Journal
- Test Corresponding Rules
- Transaction Journal
- Transaction Summary
- Trial Balance
- VAT Listing
- VAT Report
- VAT Report Purchases
- VAT Report Sales
- VAT Transaction Journal
- XBRL Report
Go back to:
- Home page for Nominal Ledger manual
- Home page for Standard ERP manual
Key Financial Ratios - Example - Objects
This page describes adding two- and three-dimensional Object analysis to a Key Financial Ratios report definition. Please refer here for descriptions of the commands you can include in a Key Ratios report definition.
---
The first step is to use the OBJRESULT command in Key Ratio definitions. This command will print the net change over the report period for a specified Account or Accounts, only including postings with a particular Object. In this example in which Accounts 100:199 are Sales Accounts, we have created Key Ratios to compare the sales figures of various product types. Each product type has its own Object:
The second step is to create columns to provide a second level of analysis. For example, you might want to analyse sales of the various product types by salesman, or by the business types of the customers. To do this, add the columns as described here and then go to flip B of the 'Column Definition' window to specify the Objects for each column. In this example, we have created columns for each salesperson. Each salesperson also has their own Object: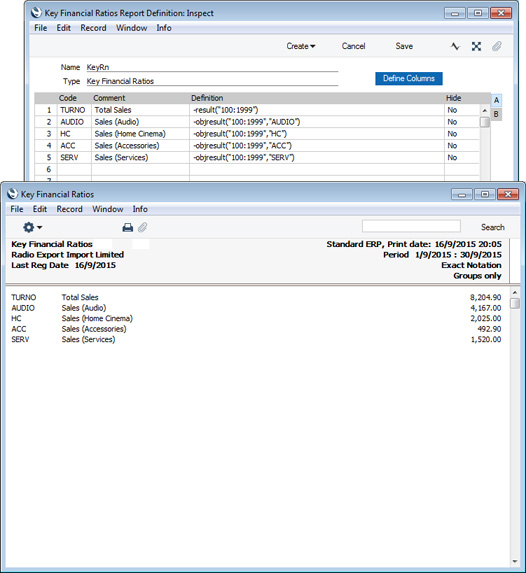
If necessary, you can add a third level of Object analysis. For example, in addition to the breakdown by product type and salesperson, you might want to see the type of customers being sold to (e.g. business type or area). In the specification window for the Key Financial Ratios report, you can specify an Object Type. In this example, we have specified BUS (i.e. business types):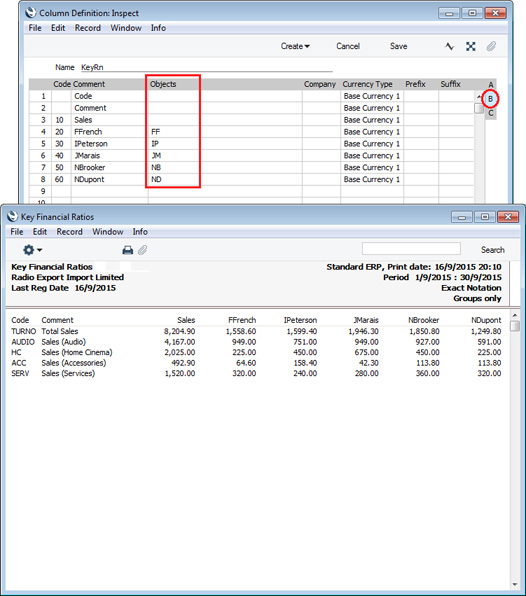
The report will contain separate sections for each Object belonging to the BUS Object Type: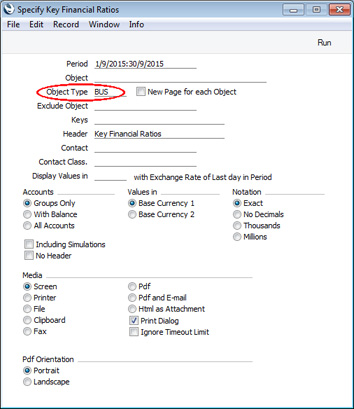
---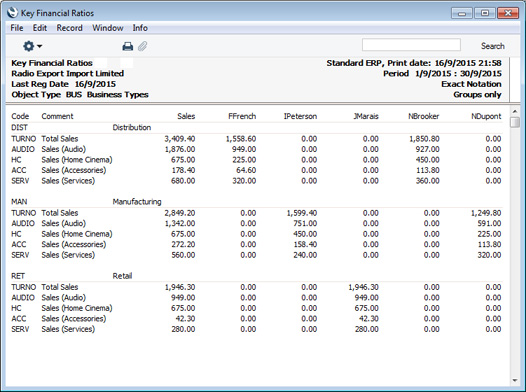
Pages describing the Key Financial Ratios report:
- Introduction
- The Definition of the Key Financial Ratios report
- Example - Key Ratios for Different Periods
- Example - Adding Columns to the report
- Example - Objects
- Additional Column Options
- Assisted Formula Entry
- Multiple Key Ratio Report Definitions
- Printing the Key Financial Ratios Report
Reports in the Nominal Ledger:
- Introduction
- Definition of Nominal Ledger Reports
- Drill-down
- The Operations Menu
- Account Reconciliation
- Accrual Report
- Analytical Balance
- Analytical Balance (Fiscal purposes)
- Balance Sheet
- Bank Reconciliation
- Bank Statement
- Bank Transactions
- Base Currency Rate Change
- Budget Journal
- Correction List
- Corresponding Accounts
- Creditors Account
- Currency A/C Rate Change
- Daily Balances
- Debtors Account
- Forward Balance Journal
- Income & Expense Book
- Key Financial Ratios
- Liquidity Forecast
- Multicurrency Accounts Rate Difference
- Nominal Ledger
- N/L Accrual Transactions
- N/L Transfer, Subsystems
- Object Results
- Object/Quantity Results
- Profit & Loss
- Revised Budget Journal
- Simulation Journal
- Tax Account Balances
- Tax Calculations
- Tax Transactions for Registers
- Template Transaction Journal
- Test Corresponding Rules
- Transaction Journal
- Transaction Summary
- Trial Balance
- VAT Listing
- VAT Report
- VAT Report Purchases
- VAT Report Sales
- VAT Transaction Journal
- XBRL Report
Go back to:
- Home page for Nominal Ledger manual
- Home page for Standard ERP manual
Key Financial Ratios - Additional Column Options
This page describes various options on Flip B of the Key Ratio Column Definition window. Please refer here for more details about adding columns to a Key Ratio report definition.
---
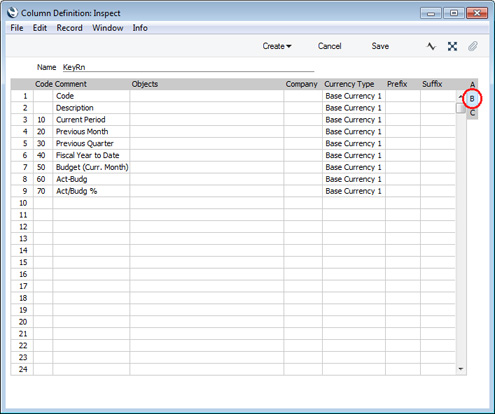
- Company
- Paste Special
Companies in the database
- If you have more than one Company in your database, you can use this field if you need the column to display figures from a particular Company. Leave the field empty to display figures from the Company you are in (i.e. the Company in which the Key Ratio report definition is stored).
- Currency Type
- Paste Special
Choice of possible entries
- Use this field to specify whether the figures in the column will be in Base Currency 1 or 2, as follows:
- Base Currency 1
- Choose this option if the figures are to be in Base Currency 1.
- Base Currency 2
- Choose this option if the figures are to be in Base Currency 2.
- From Specification
- Choose this option if you would like to choose the Base Currency when printing the report, using the Values in options in the report specification window.
- Base Currency 1
- Prefix
- If you would like every figure in the column to be printed with a prefix, specify that prefix here.
- Suffix
- If you would like every figure in the column to be printed with a suffix, specify that suffix here.
Pages describing the Key Financial Ratios report:
- Introduction
- The Definition of the Key Financial Ratios report
- Example - Key Ratios for Different Periods
- Example - Adding Columns to the report
- Example - Objects
- Additional Column Options
- Assisted Formula Entry
- Multiple Key Ratio Report Definitions
- Printing the Key Financial Ratios Report
Reports in the Nominal Ledger:
- Introduction
- Definition of Nominal Ledger Reports
- Drill-down
- The Operations Menu
- Account Reconciliation
- Accrual Report
- Analytical Balance
- Analytical Balance (Fiscal purposes)
- Balance Sheet
- Bank Reconciliation
- Bank Statement
- Bank Transactions
- Base Currency Rate Change
- Budget Journal
- Correction List
- Corresponding Accounts
- Creditors Account
- Currency A/C Rate Change
- Daily Balances
- Debtors Account
- Forward Balance Journal
- Income & Expense Book
- Key Financial Ratios
- Liquidity Forecast
- Multicurrency Accounts Rate Difference
- Nominal Ledger
- N/L Accrual Transactions
- N/L Transfer, Subsystems
- Object Results
- Object/Quantity Results
- Profit & Loss
- Revised Budget Journal
- Simulation Journal
- Tax Account Balances
- Tax Calculations
- Tax Transactions for Registers
- Template Transaction Journal
- Test Corresponding Rules
- Transaction Journal
- Transaction Summary
- Trial Balance
- VAT Listing
- VAT Report
- VAT Report Purchases
- VAT Report Sales
- VAT Transaction Journal
- XBRL Report
Go back to:
- Home page for Nominal Ledger manual
- Home page for Standard ERP manual
Key Financial Ratios - Assisted Formula Entry
As described on the Defining Key Ratios page, there are a number of commands that you can use when defining Key Ratio formulae. You can type these commands directly into the Definition field in the 'Key Financial Ratios Report Definition' window, or you can use the Assisted Formula Entry feature to have the command constructed for you. This feature will be helpful when you don't remember a Key Ratio command or the correct syntax.
To use the Assisted Formula Entry feature, simply activate 'Paste Special' from the Definition field in the Key Ratio row:
Each of the radio button options on the left-hand side of the window represents one of the Key Ratio commands. When you choose one of these options, the equivalent Key Ratio command will be placed in the Formula field at the bottom of the window. Depending on the command, you should then specify additional details on the right-hand side of the window: these will be added to the formula in the Formula field. For example, if you select the Account Result option on the left, you should then specify an Account or Accounts on the right.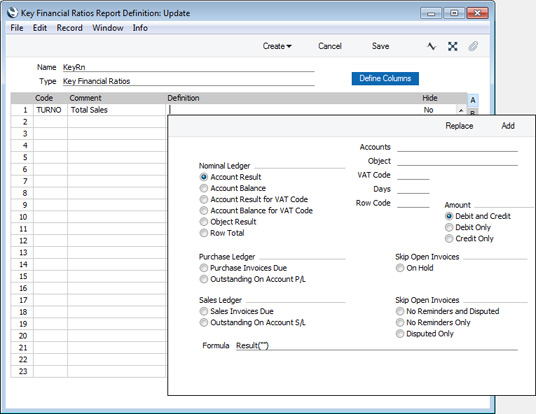
When the formula is complete, click the [Replace] or [Add] buttons as follows:
- Replace
- The new formula will be placed in the Definition field in the Key Ratio row, replacing what was previously there.
- Add
- The new formula will be placed in the Definition field in the Key Ratio row, in addition to what is already there. This will be useful if you are constructing a Definition that will contain more than one Key Ratio command.
- Nominal Ledger
- Choose one of these options if you need the Key Ratio to print information from the Nominal Ledger.
- Account Result
- Prints the net change over the report period in the balance of a particular Account or Accounts.
- Additional details required:
- Specify an Account, range of Accounts separated by a colon or individual Accounts separated by commas in the Accounts field. Use 'Paste Special' to choose the Accounts if necessary.
- Select the Debit Only option if you only need the debit result to be printed.
- Select the Credit Only option if you only need the credit result to be printed.
- Additional details required:
- Account Balance
- Prints the balance of a particular Account or Accounts on the last day of the report period.
- Additional details required:
- Specify an Account, range of Accounts separated by a colon or individual Accounts separated by commas in the Accounts field. Use 'Paste Special' to choose the Accounts if necessary.
- Select the Debit Only option if you only need the debit balance to be printed.
- Select the Credit Only option if you only need the credit balance to be printed.
- Additional details required:
- Account Result for VAT Code
- Prints the net change over the report period in the balance of a particular Account or Accounts, only taking postings with a particular VAT Code into account.
- Additional details required:
- Specify an Account, range of Accounts separated by a colon or individual Accounts separated by commas in the Accounts field. Use 'Paste Special' to choose the Accounts if necessary.
- Specify a VAT Code in the VAT Code field. Use 'Paste Special' to choose the VAT Code if necessary.
- Select the Debit Only option if you only need the debit result to be printed.
- Select the Credit Only option if you only need the credit result to be printed.
- Additional details required:
- Account Balance for VAT Code
- Prints the balance of a particular Account or Accounts on the last day of the report period, only taking postings with a particular VAT Code into account.
- Additional details required:
- Specify an Account, range of Accounts separated by a colon or individual Accounts separated by commas in the Accounts field. Use 'Paste Special' to choose the Accounts if necessary.
- Specify a VAT Code in the VAT Code field. Use 'Paste Special' to choose the VAT Code if necessary.
- Select the Debit Only option if you only need the debit balance to be printed.
- Select the Credit Only option if you only need the credit balance to be printed.
- Additional details required:
- Object Result
- Prints the net change over the report period in the balance of a particular Account or Accounts, only taking postings with a particular Object into account.
- Additional details required:
- Specify an Account, range of Accounts separated by a colon or individual Accounts separated by commas in the Accounts field. Use 'Paste Special' to choose the Accounts if necessary.
- Specify an Object in the Object field. Use 'Paste Special' to choose the Object if necessary.
- Select the Debit Only option if you only need the debit result to be printed.
- Select the Credit Only option if you only need the credit result to be printed.
- Additional details required:
- Row Total
- Select this option to include the result of another Key Ratio calculation in the formula.
- Additional details required:
- Enter the Code of the other Key Ratio in the Row Code field.
- Additional details required:
- Account Result
- Purchase Ledger
- Choose one of these options if you need the Key Ratio to print information from the Purchase Ledger.
- Purchase Invoices Due
- Prints the total amount in the Purchase Ledger that is overdue for payment on the last day of the report period.
- Additional details required:
- If you need to see how much is overdue by more than a particular number of days on the last day of the report period, enter that number of days in the Days field.
- If you want to exclude Purchase Invoices that have been marked as On Hold, select the On Hold option.
- Equivalent Key Ratio commands: APDue, APOHDue
- Additional details required:
- Outstanding On Account P/L
- Prints the On Account balance in the Purchase Ledger on the last day of the report period (including open On Account Payments and Prepayments).
- Equivalent Key Ratio command: APOnAcc
- Purchase Invoices Due
- Sales Ledger
- Choose one of these options if you need the Key Ratio to print information from the Sales Ledger.
- Sales Invoices Due
- Prints the total amount in the Sales Ledger that is overdue for payment on the last day of the report period.
- Additional details required:
- If you need to see how much is overdue by more than a particular number of days on the last day of the report period, enter that number of days in the Days field.
- If you want to exclude Invoices that have been marked as Disputed, select the Disputed Only option.
- If you want to exclude Invoices that have been marked as No Reminders, select the No Reminders Only option.
- If you want to exclude Invoices that have been marked as Disputed, and Invoices that have been marked as No Reminders, select the No Reminders and Disputed option.
- Equivalent Key Ratio commands: ARDue, ARDPDue, ARNRDue, ARDPNRDue
- Additional details required:
- Outstanding On Account S/L
- Prints the On Account balance in the Sales Ledger on the last day of the report period (including open On Account Receipts and Prepayments).
- Equivalent Key Ratio command: AROnAcc
- Sales Invoices Due
---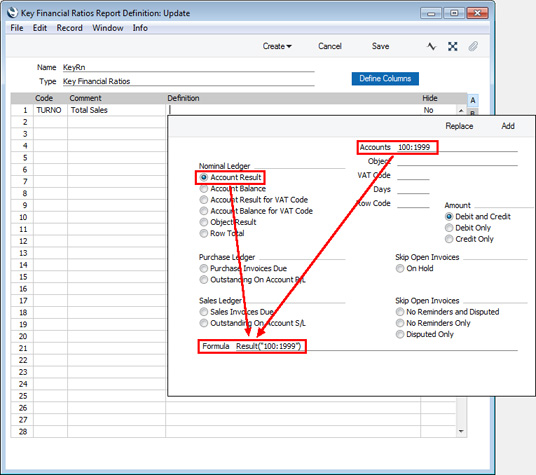
Pages describing the Key Financial Ratios report:
- Introduction
- The Definition of the Key Financial Ratios report
- Example - Key Ratios for Different Periods
- Example - Adding Columns to the report
- Example - Objects
- Additional Column Options
- Assisted Formula Entry
- Multiple Key Ratio Report Definitions
- Printing the Key Financial Ratios Report
Reports in the Nominal Ledger:
- Introduction
- Definition of Nominal Ledger Reports
- Drill-down
- The Operations Menu
- Account Reconciliation
- Accrual Report
- Analytical Balance
- Analytical Balance (Fiscal purposes)
- Balance Sheet
- Bank Reconciliation
- Bank Statement
- Bank Transactions
- Base Currency Rate Change
- Budget Journal
- Correction List
- Corresponding Accounts
- Creditors Account
- Currency A/C Rate Change
- Daily Balances
- Debtors Account
- Forward Balance Journal
- Income & Expense Book
- Key Financial Ratios
- Liquidity Forecast
- Multicurrency Accounts Rate Difference
- Nominal Ledger
- N/L Accrual Transactions
- N/L Transfer, Subsystems
- Object Results
- Object/Quantity Results
- Profit & Loss
- Revised Budget Journal
- Simulation Journal
- Tax Account Balances
- Tax Calculations
- Tax Transactions for Registers
- Template Transaction Journal
- Test Corresponding Rules
- Transaction Journal
- Transaction Summary
- Trial Balance
- VAT Listing
- VAT Report
- VAT Report Purchases
- VAT Report Sales
- VAT Transaction Journal
- XBRL Report
Go back to:
- Home page for Nominal Ledger manual
- Home page for Standard ERP manual
Key Financial Ratios - Multiple Key Ratio Definitions
You can create up to 15 of your own Key Financial Ratio reports as required. Please refer to the Multiple Balance Sheet Definitions page for full details about creating new reports. After creating a new report, you should then enter a definition for it, as described on the Defining Key Ratios page.Key Financial Ratios - Printing
Open the 'Reports' list window and double-click 'Key Financial Ratios'. The 'Specify Key Ratios' window is opened.
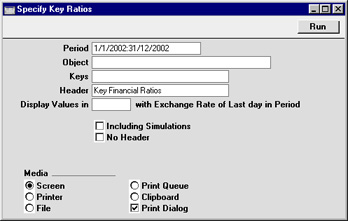
- Period
- Paste Special
Reporting Periods setting, System module
- Enter the report period, in the format "01-02-02:28-02-02". If you are using four-digit years as in the illustration, the leading digits will be inserted automatically. If your report period is a single day, just enter the date once and this will be converted to a period format automatically. The first row of the Reporting Periods setting is the default value.
- Object
- Paste Special
Object register, Nominal Ledger/System module
- Enter the Object (if any) for which you want to calculate Key Ratios.
- Keys
- If you do not want to show all Key Ratios in the report, specify here which ones are to be included. If specifying more than one, they should be separated by commas (e.g. "TURNO,CR,EMP").
- Header
- Specify a title for the report here.
- Display Values in
- Paste Special
Currency register, System module
- Specify the Currency that is to be used in the report. Leave the field empty to use the home Currency (Base Currency 1).
- Including Simulations
- Check this box if you want to include simulated transactions in your report. Simulation rows of "Invalid" and "Transferred" Status will not be included.
- No Header
- Check this box if you want the report to be printed without a header.
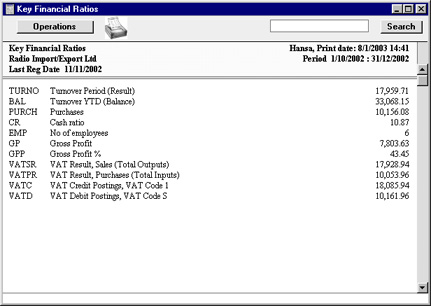
Liquidity Forecast
This report presents a forecast of all actual and future payments to and from the firm during a specified period. The forecast is based on the Due Dates of Purchase and Sales Invoices. Also included are any records in the Simulation register affecting the Cash and Bank Accounts specified in the Payment Modes setting in the Sales and Purchase Ledgers. These simulated transactions would be entered in advance to reflect payments that do not occur in the Sales and Purchase Ledgers, thus rendering this report more accurate. Such Simulations can easily be converted to Transactions at the appropriate time using the 'Transactions' function on the Operations menu of the 'Simulations: Browse' window. If you have the Cheques module, you can also take Cheques and Own Cheques into account.
When printed to screen, this report has Hansa's Drill-down feature. Click on any Transaction Number in the report to open the Transaction. Invoices will be shown in the 'Invoice: Inspect' window, Purchase Invoices in the 'Purchase Invoice: Inspect' window.
Double-clicking 'Liquidity Forecast' in the 'Reports' list opens the following window:
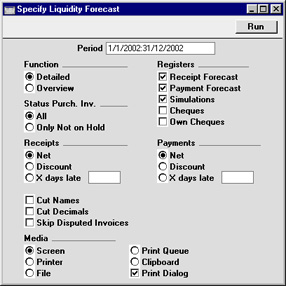
- Period
- Paste Special
Reporting Periods setting, System module
- Enter the report period, in the format "01-02-02:28-02-02". If you are using four-digit years as in the illustration, the leading digits will be inserted automatically. If your report period is a single day, just enter the date once and this will be converted to a period format automatically. The first row of the Reporting Periods setting is the default value.
- Function
- Choose between the Detailed option, showing each Transaction, and the Overview, showing a single line summary for each day.
- Registers
- By default, the report contains the Debtors' and Creditors' forecasts and Simulations containing any of the Accounts used in the Payment Modes setting. You can exclude any of these sections from the report by clicking in these boxes. If you have the Cheques module, you can also include sections for Cheques and Own Cheques.
- Status Purch. Inv.
- You can choose to exclude those Purchase Invoices for which payment has been prevented (those whose Hold check box has been switched on).
- Receipts, Payments
- Select an alternative for the payment pattern to be used in calculating the Receipt and Payment schedule.
- Net
- This option assumes that payment will be received or issued on the Due Date.
- Discount
- This option assumes that invoices with a cash discount term will be paid by the Discount Date in order to qualify for the cash discount.
- X days late
- This option allows you to assume that all Invoices will be paid on average a specified number of days later than the Due Date.
- Net
- Cut Names
- If you are using the Detailed option, the Customer or Supplier Name will be shown for each Invoice, and each Simulation comment will be printed in full. Check this box if you would like to cut these Names and Comments so that the first 25 characters only are printed.
- Cut Decimals
- Check this box if you would like whole numbers only to be shown in the report. For example, an amount of 5.88 will be shown as 5 if this box is checked.
- Skip Disputed Invoices
- Check this box to exclude from the report Sales Invoices marked as Disputed.
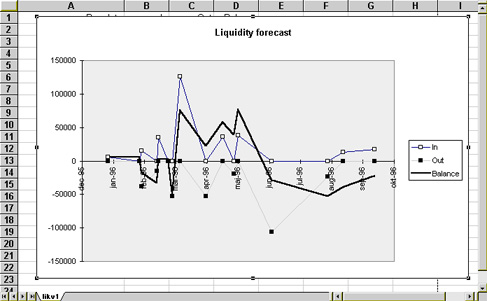
Multicurrency Accounts Rate Difference
This page describes the Multicurrency Accounts Rate Difference report in the Nominal Ledger.
---
The Multicurrency Accounts Rate Difference report summarises the postings made to a particular Account in a specified Currency or in all Currencies (except Base Currencies 1 and 2). Three versions of each balance will be shown: in the original Currency; in Base Currency 1 using the Exchange Rate at the time of each posting; and in Base Currency 1 using the Exchange Rate for a specified date. The report will also show the difference between the two Base Currency figures. The report will therefore show the losses or gains that will result from applying the Exchange Rate to old Transactions.
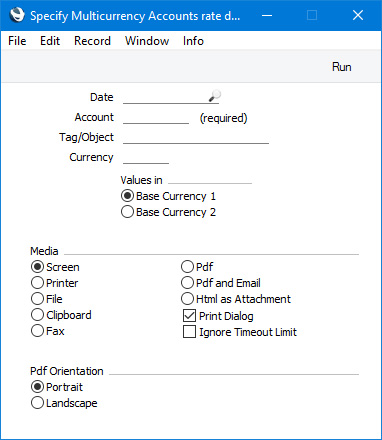
- Date
- Paste Special
Choose date
- The report will use the date that you specify here for the following purposes:
- The first two columns in the report will display the total postings to the specified Account up to this date in two Currencies: the Currency of the posting and Base Currency 1 (your home Currency).
- The third column in the report will display the Currency balance of each Account converted to Base Currency 1 using the Exchange Rate applying on this date.
- You must specify a date, otherwise the report will be empty.
- The first two columns in the report will display the total postings to the specified Account up to this date in two Currencies: the Currency of the posting and Base Currency 1 (your home Currency).
- Account
- Paste Special
Account register, Nominal Ledger/System module
- The report will summarise the postings made to the Account that you specify here. For example, if you have posted to a particular Account in Currencies JPY and USD, the report will contain two lines, one for the JPY postings and one for the USD postings. If you only need one of those lines, specify the relevant Currency in the field below. Postings made after the date specified above will not be included.
- You must specify a single Account, otherwise the report will be empty.
- You must specify a single Account, otherwise the report will be empty.
- Tag/Object
- Paste Special
Tag/Object register, Nominal Ledger/System module
- If you only need postings with a particular Tag/Object to be included in the report, specify that Tag/Object here.
- Currency
- Paste Special
Currency register, System module
- By default, the report will summarise the postings made to the Account specified above, with each Currency that you have used occupying a separate line in the report. If you only need the report to contain a single line for a particular Currency, specify that Currency here.
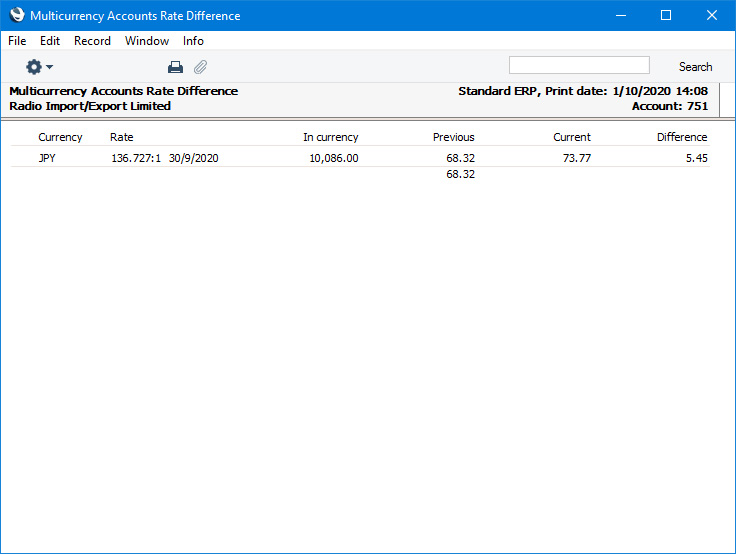
- In currency
- The total value posted to the Account up to the specified date expressed in JPY.
- Previous
- The total value posted to the Account up to the specified date expressed in Base Currency 1, using the values converted and stored at the time of posting.
- Current
- The total value posted to the Account up to the specified date expressed in Base Currency 1, converted using the Exchange Rate from 30 September 2020.
- Difference
- The difference between the Previous and Current figures.
Reports in the Nominal Ledger:
- Introduction
- Definition of Nominal Ledger Reports
- Drill-down
- The Operations Menu
- Account Reconciliation
- Accrual Report
- Analytical Balance
- Analytical Balance (Fiscal purposes)
- Balance Sheet
- Bank Reconciliation
- Bank Statement
- Bank Transactions
- Base Currency Rate Change
- Budget Journal
- Cash Flow
- Chart of Accounts
- Correction List
- Corresponding Accounts
- Creditors Account
- Currency A/C Rate Change
- Daily Balances
- Debtors Account
- Forward Balance Journal
- Income & Expense Book
- Key Financial Ratios
- Liquidity Forecast
- Multicurrency Accounts Rate Difference
- N/L Accrual Transactions
- N/L Transfer, Subsystems
- Nominal Ledger
- Profit & Loss
- Revised Budget Journal
- Tag/Object Results
- Tag/Object/Quantity Results
- Tax Account Balances
- Tax Calculations
- Tax Transactions for Registers
- Template Transaction Journal
- Test Corresponding Rules
- Transaction Journal
- Transaction Summary
- Trial Balance
- VAT Listing
- VAT Report
- VAT Report Purchases
- VAT Report Sales
- VAT Transaction Journal
- XBRL Report
Go back to:
- Home page for Nominal Ledger manual
- Home page for Standard ERP manual
N/L Accrual Transactions
This report is used to preview the Transactions that will be created by the subsequent running of the 'Generate N/L Accrual Transactions' Maintenance function. The specification windows used for the report and Maintenance function are the same: please refer to the description of the 'Generate N/L Accrual Transactions' Maintenance function for details.N/L Transfer, Subsystems
The integration between Hansa's different modules means that Nominal Ledger Transactions can be generated automatically from other ledgers and modules ('Sub Systems'). For example, approving an Invoice in the Sales Ledger can cause the automatic generation of a Nominal Ledger Transaction debiting a Debtor Account and crediting a Sales Account and, if appropriate, a VAT Account. This feature is controlled using the Sub Systems setting.
If you are not using this feature, this report, which lists transactions in the selected register or Sub System (e.g. Invoices entered in the Sales Ledger), can be used as a basis for entering equivalent Nominal Ledger Transactions manually.
The report shows all transactions of the specified type in the specified period, irrespective of whether equivalent Nominal Ledger Transactions have already been created. Only approved transactions are shown.
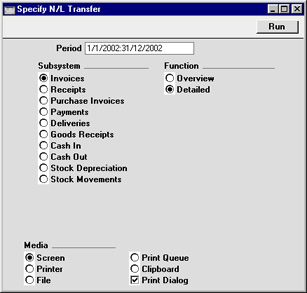
- Period
- Paste Special
Reporting Periods setting, System module
- Enter the start and end date of the report period, separated by a colon (:).
- Subsystem
- Select one subsystem for the report.
- Function
- Use these options to control the level of detail shown in the report.
- Overview
- This option will produce a list with a single row for each transaction (Invoice, Payment etc.) including a total amount for each. At the end, a list of the Account/Object combinations used by the transactions listed above is printed, showing for each the total amounts debited and credited. This allows the summarising of the listed transactions listed into a single Nominal Ledger Transaction.
- Detailed
- This option shows the Account/Object combinations used by each transaction, allowing a separate Nominal Ledger Transaction to be entered for each Sub System transaction. As with the Overview option, a summary of the movements in each Account/Object combination is shown at the end of the report.
- Overview
Nominal Ledger
The Nominal Ledger report is a list of the Transaction rows entered during the report period (i.e. it is a list of the amounts posted to each Account in that period).
This report offers exceptionally powerful multi-level Object analysis. You can search for Transaction rows with several different Objects, and you can control subtotalling. For example, if you have Object Types of DEPT (Departments) and PERS (Persons), you can create a report with the Transaction rows sorted by Account and department and with subtotals per person within each department. These features are illustrated in detail on the Examples page.
When printed to screen, the Nominal Ledger report has Hansa's Drill-down feature. Click on any Transaction Number to open an individual Transaction record.
Double-clicking 'Nominal Ledger' in the 'Reports' list opens the following window:
Header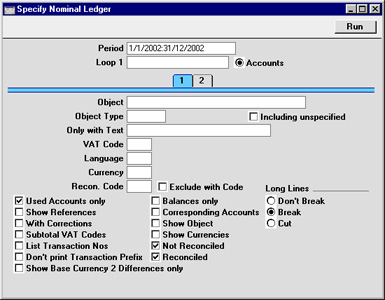
- Period
- Paste Special
Reporting Periods setting, System module
- Specify a report period, in the format "01-02-02:28-02-02". If you are using four-digit years as in the illustration, the leading digits will be inserted automatically. If your report period is a single day, just enter the date once and this will be converted to a period format automatically. The first row of the Reporting Periods setting is the default value.
- Loop 1, Loop 2, Loop 3
- (Loop 2 and Loop 3 are on card 2.)
- You can enter a range of Accounts, a range of Objects or an Object Type to each of these fields. The following examples illustrate how these fields can be used:
Eg Entry Report contains 1 Loop 1: 100:199 (Accounts) Transaction rows posting to Accounts in the range 100:199, sorted by Account 2 Loop 1: SALES (Object) Transaction rows with the SALES Object, sorted by Object 3 Loop 1: DEPT (Object Type) Transaction rows with Objects belonging to the DEPT Object Type, sorted by Object 4 Loop 1: 100:199 (Accounts) Loop 2: DEPT (Object Type) Transaction rows with Objects belonging to the DEPT Object Type and posting to Accounts in the range 100:199, sorted by Account then Object 5 Loop 1: DEPT (Object Type) Loop 2: 100:199 (Accounts) As 4 but sorted by Object then Account 6 Loop 1: 100:199 (Accounts) Loop 2: DEPT (Object Type) Loop 3: PERS (Object Type) Transaction rows with Objects belonging to the DEPT Object Type and to the PERS Object Type and posting to Accounts in the range 100:199, sorted by Account, by DEPT Objects and finally by PERS Objects - You must make an entry in the Loop 1 field before using Loops 2 and 3, or the report will be blank.
- Please refer to the Examples page for more information about how to use these fields.
- You can enter a range of Accounts, a range of Objects or an Object Type to each of these fields. The following examples illustrate how these fields can be used:
- Accounts
- Next to each Loop field there is an Accounts radio button. This should be selected if you wish to enter an Account or range of Accounts in the corresponding Loop field, for two reasons:
- If the Accounts radio button is selected, Hansa will assume that what has been entered in the Loop field is an Account or range of Accounts and search for matching Transaction rows accordingly. If the Accounts radio button is not selected, Hansa will assume that the Loop field contains an Object, a range of Objects or an Object Type.
- If the Accounts radio button is selected, you can use 'Paste Special' from the Loop field to open a list of Accounts from which the appropriate one can be selected. If the Accounts radio button is not selected, 'Paste Special' will open a list of Objects.
- If the Accounts radio button is selected, Hansa will assume that what has been entered in the Loop field is an Account or range of Accounts and search for matching Transaction rows accordingly. If the Accounts radio button is not selected, Hansa will assume that the Loop field contains an Object, a range of Objects or an Object Type.
- Object
- Paste Special
Object register, Nominal Ledger/System module
- Enter an Object Code in this field if you want the report to list Transaction rows with a certain Object. If the field is empty, all Transaction rows, with and without Objects, are included. If you enter a number of Objects separated by commas, only those Transaction rows featuring all the Objects listed will be shown.
- Object Type
- Paste Special
Object Types setting, Nominal Ledger
- Enter an Object Type Code in this field if you want the report to list Transaction rows with Objects belonging to a certain Object Type.
- Including Unspecified
- Check this box if you want to show Transaction rows with Objects belonging to the Object Type specified above, and all other Transaction rows as well. You should also switch on the Show Object check box (below), so that those Transaction rows with Objects belonging to the chosen Object Type can be distinguished from the others.
- Only with Text
- Enter a search string in this field to list Transaction rows with certain Descriptions. Thus, assuming that the default entries to the Description field have been used, you can enter an Account Name here to report on all postings to that Account. Note that you do not have to enter the complete text string: "Sales" finds "Sales Type 1", "Sales Type 2", etc.
- VAT Code
- Paste Special
VAT Codes setting, Nominal Ledger
- Enter a VAT Code here to list Transaction rows with a particular VAT Code.
- Language
- Paste Special
Languages setting, System module
- The Nominal Ledger report can be produced in different Languages: enter the required Language Code here. The appropriate translation for each Account Name will be taken from the 'Texts' card of the Account record.
- Currency
- Paste Special
Currency register, System module
- If a Currency is entered here, the report will only list those Transaction rows with that Currency shown on flip C. The amounts shown in the report will be taken from flip C of those Transaction rows: i.e. they will be in the chosen Currency. If the field is blank, all Transaction rows will be included in the report with their amounts taken from the Base 1 or Base 2 Debit or Credit fields on flip B (choose which Base Currency is to be used using the Values In options described below).
- Recon. Code, Exclude with Code
- If you want to list reconciled Transactions with a particular Recon. Code (entered on flip D of the Account Reconciliation screen), enter that Recon. Code here. To list all reconciled Transactions except those with a particular Recon. Code, check the Exclude With Code box as well.
- The Reconciled box (below) must be checked if you want to use this field and check box.
- The Reconciled box (below) must be checked if you want to use this field and check box.
- Used Accounts only
- Check this box to exclude Accounts that were not used during the report period. Accounts not used but with a balance brought forward will be shown.
- Show References
- By default, the report shows the Text of each Transaction. Use this option if you would like the Reference and the Text to be shown.
- With Corrections
- Check this box if you want all corrections in the Transactions to be shown.
- Subtotal VAT Codes
- Check this box if you want the total debit and credit amounts for each VAT Code to be shown at the bottom of the report.
- List Transaction Nos
- With this box checked, the Transaction Numbers of all Transactions that fall within the reporting period, together with debit and credit totals, will be listed at the bottom of the report.
- Don't Print Transaction Prefix
- Transaction Numbers are usually shown in the report together with their prefixes as shown in the 'Transactions: Browse' window. Transactions entered directly to the Nominal Ledger, for example, are shown as "2002.3" while those created from a Sub System are shown as, for example, "S/INV.020003". If you do not want these prefixes to be shown in the report, check this box.
- Show Base Currency 2 Differences only
- If this option is checked, the report will consist of a list of those Transaction rows where the value in Base Currency 2 is not correct, according to the Exchange and Base Rate for the Transaction Date. This may be because an ad hoc Exchange or Base Rate was used for the Transaction row in question, or because an Exchange or Base Rate record was changed some time after it was entered. This latter action is not recommended.
- This option cannot be used if you want to calculate values in Base Currency 2 by applying current Exchange and Base Rates to old Transactions rows. To do this, use the Base Currency Rate Change report.
- This option cannot be used if you want to calculate values in Base Currency 2 by applying current Exchange and Base Rates to old Transactions rows. To do this, use the Base Currency Rate Change report.
- Balances only
- Use this option if you only need to show a balance for each Account, instead of having every Transaction row listed.
- Corresponding Accounts
- Check this box if you want the Corresponding Accounts of each Transaction row printed in the report. The Object column will be replaced with one showing the Corresponding Accounts.
- Show Object
- Check this box to print the Objects used in each Transaction row.
- Show Currencies
- In the case of Transaction rows in a foreign Currency (i.e. not Base Currency 1 or 2), check this box if you want to show amounts in Currency as well as in the home Currency.
- Not Reconciled
- Check this box to include in the report Transaction rows that have not been reconciled using the Account Reconciliation register.
- Reconciled
- Check this box to include in the report Transaction rows that have been reconciled using the Account Reconciliation register.
- Long Lines
- Three options are available for dealing with long descriptions when printing on paper. The Don't Break option is always used when printing to screen. If you preview the report to screen, choose 'Recalculate and Print' from the Operations menu to invoke the Long Lines option (i.e. do not click the Printer icon).
- If a landscape Page Setup is used and/or the page magnification is reduced, the space available for long descriptions (i.e. the width of the description column) is increased.
- Don't Break
- The full length of the description is printed on one line. If it interferes with figures in the next column, these are moved to the next line.
- Break
- The full length of the description is printed, spread over several lines if necessary.
- Cut
- The final characters of the description are not printed, so that it fits onto one line in the allocated column.
- If a landscape Page Setup is used and/or the page magnification is reduced, the space available for long descriptions (i.e. the width of the description column) is increased.
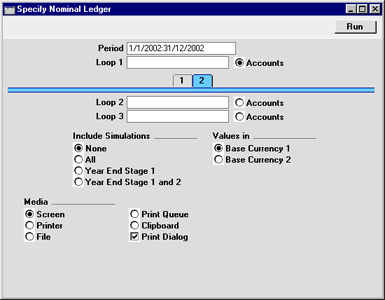
- Include Simulations
- Choose one of these options if you want to include simulated transactions in the report. If you choose the All option, Simulation rows of "Invalid" or "Transferred" Status will not be included.
- Values in
- If you are using the Dual-Base system, values in this report can be shown in either Base Currency. Use these options to choose which Currency is to be used on this occasion.
- If you are not using the Dual-Base system, use the Base Currency 1 option to produce a report in your home Currency.
- If a foreign Currency is entered in the Currency field above, the amounts in the report will be in that Currency.
- If you are not using the Dual-Base system, use the Base Currency 1 option to produce a report in your home Currency.
Nominal Ledger - Examples
In this section, we will illustrate the features offered by the Nominal Ledger report, using the Transactions resulting from a day's invoicing. Each Invoice carries an Object representing the sales person and one representing the office making the sale. The Objects representing the sales people belong to the "PERS" Object Type, while those representing the offices belong to the "OFF" Object Type.
The Transactions involved are as follows:
Trans No Account Objects Debit Credit 5013 750 S/L Control 408.50 110 Sales Type 2 NB,TALL 64.00 100 Sales Type 1 NB,TALL 284.00 830 VAT Outputs Payable 60.50 5014 750 S/L Control 306.68 110 Sales Type 2 IP,TALL 48.00 100 Sales Type 1 IP,TALL 213.00 830 VAT Outputs Payable 45.68 5015 750 S/L Control 715.58 110 Sales Type 2 JM,LOND 112.00 100 Sales Type 1 JM,LOND 497.00 830 VAT Outputs Payable 106.58 5016 750 S/L Control 102.23 110 Sales Type 2 FF,LOND 16.00 100 Sales Type 1 FF,LOND 71.00 830 VAT Outputs Payable 15.23 First, the Nominal Ledger report is used to list the journal postings to each Sales Account (i.e. to list Transaction rows with Sales Accounts):
The range of Sales Accounts (100:199) is entered to the Loop 1 field in the header. 'Paste Special' can be used. As with all the examples on this page, the Show Object box has been checked so that Objects are shown in the illustrations.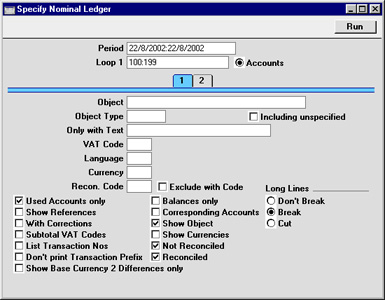
This is the resulting report:
The report is a list of Accounts. For each Account, opening and closing balances are shown together with the net change over the report period. The postings to each Account are listed in date order.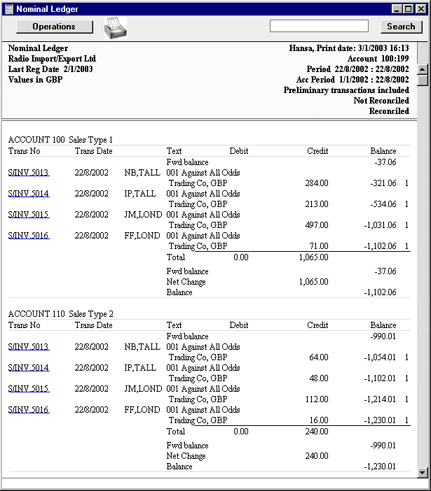
In the next example, Transaction rows with Objects belonging to a particular Object Type are listed. The Sales Account range is again entered in the Loop 1 field, and the "PERS" Object is entered to the Object Type field, with the aim of listing all Transaction rows that have an Object representing a sales person:
Since every Transaction row in this example has an Object belonging to the "PERS" Object Type, the result is the same as the first report: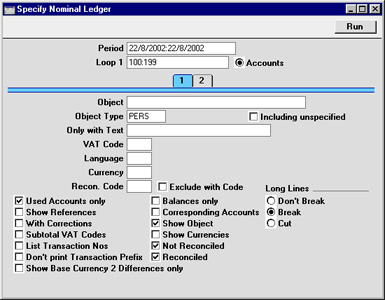
If you want subtotals for each Object belonging to the "PERS" Object Type, do not use the Object Type field. Instead, go to card 2 of the specification window and enter "PERS" in the Loop 2 field: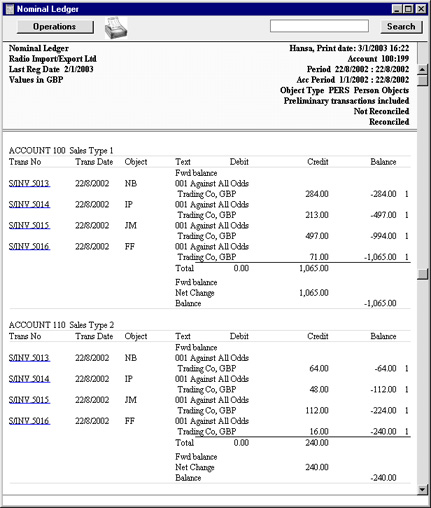
In one sense, entering "PERS" in the Loop 2 field is the same as entering it in the Object Type field in the previous example: it ensures that only Transaction rows with Objects belonging to the "PERS" Object Type will be listed in the report. But, in addition, it instructs Hansa that within each Account the postings are to be sorted by sales person. This means that subtotals will be provided for each sales person within each Account.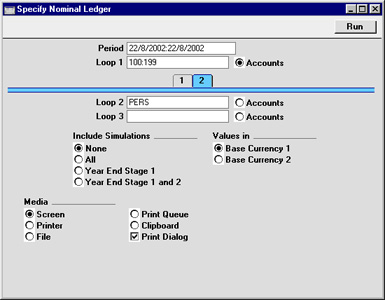
In general terms, Loops 1, 2 and 3 are used to impose a sort order on the report. The Account range has been entered to the Loop 1 field, so this is the top level sort order. The "PERS" Object Type has been entered to the Loop 2 field, so the second level sort order is by the Objects belonging to that Type. Subtotals are provided at the lowest level of sorting. So, in this case, the report is sorted by Account and then by Object, with subtotals for each Object:
The Loop 3 field can be used if you want to sort through three levels. For example, you might want to report on the range of Sales Accounts, by office, with subtotals per sales person within each office. The "OFF" Object Type (for Objects representing the offices) is entered to the Loop 2 field, and the "PERS" Object Type is entered to the Loop 3 field: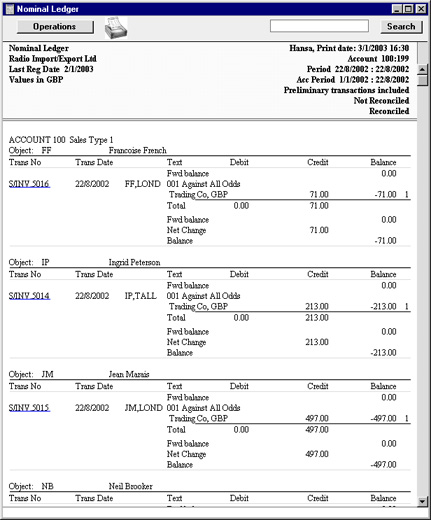
The Loop 2 and Loop 3 fields are both used as search criteria (only Transaction rows with Objects belonging to both Object Types will be listed in the report). Also, because an entry has been made to the Loop 3 field, subtotals will be provided at this level.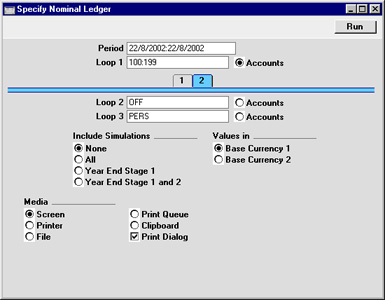
Again, the resulting report is structured on an Account-by-Account basis (i.e. the top level sort is by Account). This time, within each Account the postings are sorted first at the Loop 2 level (i.e. by office) and then at the Loop 3 level (i.e. by sales person). Within each Loop 2 Object (i.e. within each office) subtotals are provided for each Loop 3 Object (i.e. for each sales person):
Finally, you can change the structure of the report from Account-by-Account to Object-by-Object. This time, within each Object subtotals are provided for each Account. In the example, this has the effect of listing the Sales Accounts used by each sales person, so that it can be seen what each one has sold. To do this, enter the "PERS" Object Type in the Loop 1 field and the range of Sales Accounts in the Loop 2 field. Select the Accounts radio button next to the Loop 2 field, because this now contains Account Numbers and not Objects: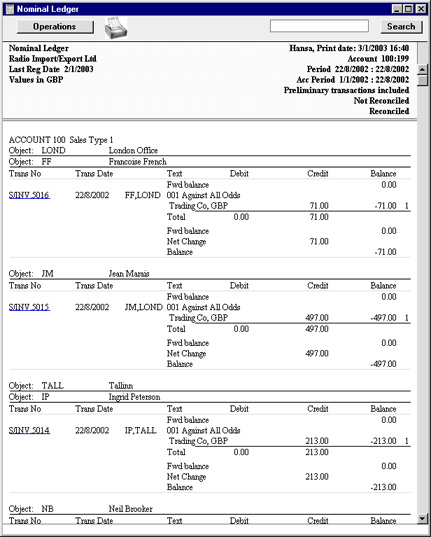
This is the report, sorted by Object (level 1) and then by Account (level 2), with subtotals provided for each Account within each Object: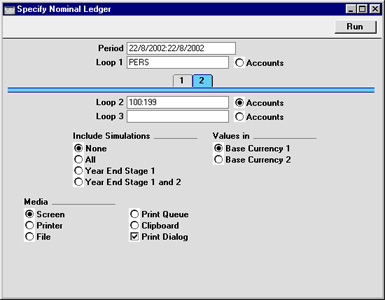
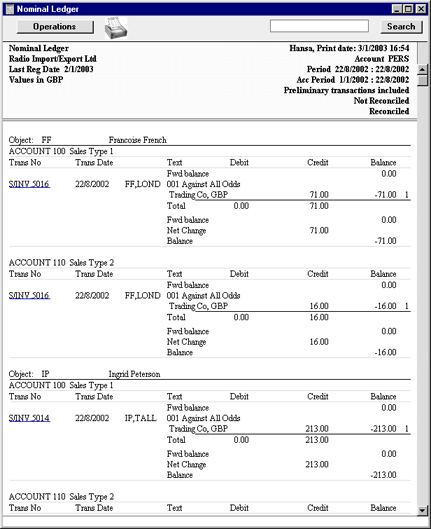
Profit & Loss
The Profit & Loss report shows the sales turnover achieved by your company in the specified period. It also shows the total cost of sales and thus the gross profit, and the total overheads and thus the net profit of your business.
When printed to screen, the Profit & Loss report has Hansa's Drill-down feature. Click on the Account Number of any Account in the report to open the Nominal Ledger Report for the same Account and period. When in the Nominal Ledger report, you can click on any Transaction Number to open an individual Transaction record.
Please click for details about:
- The definition of the Profit & Loss report;
- Printing the Profit & Loss report.
Profit & Loss - Definition
The content of the Profit & Loss report is defined in the same way as the Balance Sheet. Please refer to the Balance Sheet Definition page for full details.Profit & Loss - Printing
Open the 'Reports' list window and double-click 'Profit & Loss'. The 'Specify Profit & Loss Report' window is opened.
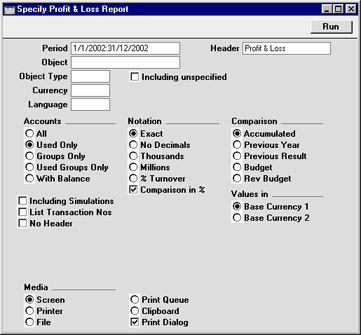
- Period
- Paste Special
Reporting Periods setting, System module
- The report period. Enter first and last date. The first period in the Reporting Periods setting is the default.
- Header
- Enter your own title for the report.
- Objects
- Paste Special
Object register, Nominal Ledger/System module
- Enter an Object Code to reduce the scope of the report. If the field is empty, all Transactions, with and without Objects, are included. If you enter a number of Objects separated by commas, only those Transactions featuring all the Objects listed will be included.
- Object Type
- Paste Special
Object Types setting, Nominal Ledger
- Enter an Object Type Code in this field if you want to limit the report to transactions for Objects of a certain Object Type.
- Including Unspecified
- Check this box if, for each Account, you want to show a balance figure for Transactions for Objects of a certain Object Type and a second balance for all other Transactions.
- Currency
- Paste Special
Currency register, System module
- If a Currency is entered here, the Profit & Loss report will be calculated using only those Transaction rows with the Currency shown on flip C. The amounts shown in the report will be taken from flip C of those Transaction rows: i.e. they will be in the chosen Currency. If the field is blank, all Transaction rows will be included in the report with their amounts taken from the Base 1 or Base 2 Debit or Credit fields on flip A (choose which Base Currency is to be used using the Values In options described below).
- Language
- Paste Special
Languages setting, System module
- The Profit & Loss report can be produced in different Languages: enter the required Language Code here. The appropriate translation for each Account Name will be taken from the 'Texts' card of the Account record and for each report heading or sub-heading from the report definition (please refer to the Balance Sheet Definition page for full details).
- Accounts
- Select how you want the Accounts printed in the report.
- All
- This option will show all Accounts that have been included in the Profit & Loss report definitions.
- Used only
- This option will only show Accounts that have been used. This includes Accounts that have balances brought forward from a previous period but that have not been used in the report period.
- Groups only
- This option does not show balances for individual Accounts. Instead, it simply shows an overall balance for each row as entered in the Profit & Loss report definitions.
- Used Groups only
- This option only shows balances for rows as entered in the Profit & Loss report definitions that have been used.
- All
- Notation
- There are six options to control the presentation of amounts in the report.
- Exact
- Shows the balances as stored in the Transactions.
- No Decimals
- Rounds the balances up or down to the nearest whole number.
- Thousands, Millions
- Divide the balances by 1,000 or 1,000,000.
- % Turnover
- Shows each account balance as a percentage of overall turnover. This option requires that 'turnover' be defined as a Key Ratio using the code "TURNO". Please refer to the page describing the definition of the Key Financial Ratios report for details about how to do this.
- Comparison in %
- Only valid if Budget or Rev Budget is chosen as the Comparison option.
- Exact
- Comparison
- Select one option for the comparison column in the report.
- Accumulated
- This option compares the report period with the Year To Date.
- Previous Year
- This compares the report period with the same period last year.
- Previous Result
- This compares the report period with the previous financial year.
- Budget, Rev Budget
- These options compare the report period with the Budget or Revised Budget figures for the same period. Note that for each Budget or Revised Budget record there must be at least one entry in the grid area of the screen complete with date before they will be included in the report.
- Comparison in %
- This option, in the Notation area causes the comparison values to be expressed as percentages.
- Accumulated
- Including Simulations
- Check this box to include simulation transactions in the report. Simulation rows of "Invalid" and "Transferred" Status will not be included.
- List Transaction Nos
- With this box checked, the Transaction Numbers of all Transactions that fall within the reporting period, together with debit and credit totals, will be listed at the bottom of the report.
- No Header
- Check this box if you want the report to be printed without a header.
- Values in
- If you are using the Dual-Base system, values in this report can be shown in either Base Currency. Use these options to choose which Currency is to be used on this occasion.
- If you are not using the Dual-Base system, use the Base Currency 1 option to produce a report in your home Currency.
- If a foreign Currency is entered in the Currency field above, the amounts in the report will be in that Currency.
- If you are not using the Dual-Base system, use the Base Currency 1 option to produce a report in your home Currency.
Revised Budget Journal
This report lists the records in the Revised Budget register.
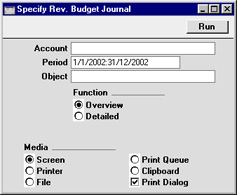
- Account
- Paste Special
Account register, Nominal Ledger/System module
- Range Reporting Alpha
- Specify the Account or range of Accounts for which Revised Budgets are to be printed.
- Specify the Account or range of Accounts for which Revised Budgets are to be printed.
- Period
- Paste Special
Reporting Periods setting, System module
- Enter the start and end date of the period whose Revised Budgets are to be shown in the report. The first record in the Reporting Periods setting is used as a default.
- All Revised Budgets that are relevant to the report period will be listed in the report. For example, if the report period is June 1st to June 30th, Revised Budgets starting or ending in June will be included, and Revised Budgets starting before June and ending after June will also be shown.
- All Revised Budgets that are relevant to the report period will be listed in the report. For example, if the report period is June 1st to June 30th, Revised Budgets starting or ending in June will be included, and Revised Budgets starting before June and ending after June will also be shown.
- Object
- Paste Special
Object register, Nominal Ledger/System module
- To list Revised Budgets with a particular Object, enter that Object here.
- Function
- Use these options to determine the level of detail to be included in the report.
- Overview
- This option gives a report with one line per Revised Budget, showing Account Number and Name, Object, Start and End Date and Sum.
- Detailed
- In addition to the information shown in the Overview, this option also lists the monthly or quarterly totals in each Revised Budget.
- Overview
Simulation Journal
This page describes the Simulation Journal report in the Nominal Ledger.
---
The Simulation Journal is a list of the records in the Simulation register.
When printed to screen, the Simulation Journal has the Standard ERP Drill-down feature. Click (Windows/macOS) or tap (iOS/Android) on any Simulation Number in the report to open an individual Simulation record.
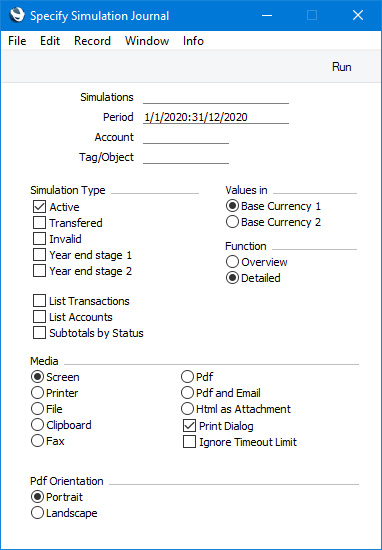
- Simulations
- Range Reporting
Numeric
- Enter a Simulation Number or a range of Numbers separated by a colon (:) here if you would like specific Simulations to be shown in the report.
- Period
- Paste Special
Reporting Periods setting, System module
- Enter the report period. The report will list Simulations whose Transaction Dates fall in the period specified here. The first period listed in the Reporting Periods setting will be used as a default.
- Account
- Paste Special
Account register, Nominal Ledger/System module
- Use this field if you want to list Simulations in which a particular Account has been used in at least one row.
- If you produce the report using the Overview option, the figures in the report for each Simulation will be calculated from the rows with the specified Account. If you use the Detailed option, only the rows with the specified Account will be listed.
- If you produce the report using the Overview option, the figures in the report for each Simulation will be calculated from the rows with the specified Account. If you use the Detailed option, only the rows with the specified Account will be listed.
- Tag/Object
- Paste Special
Tag/Object register, Nominal Ledger/System module
- Use this field if you want to list Simulations in which a particular Tag/Object has been used in at least one row. If you enter a number of Tags/Objects separated by commas, a Simulation will only be included in the report if it has at least one row featuring all the Tags/Objects.
- If you produce the report using the Overview option, the figures in the report for each Simulation will be calculated from the rows with the specified Tag/Object(s). If you use the Detailed option, only the rows with the specified Tag/Object(s) will be listed.
- If you produce the report using the Overview option, the figures in the report for each Simulation will be calculated from the rows with the specified Tag/Object(s). If you use the Detailed option, only the rows with the specified Tag/Object(s) will be listed.
- Simulation Type
- Select one or more of these options if you need to list Simulations in which there is at least one row with a particular Status.
- List Accounts
- If you select this option, each Account used in the Simulations in the report, together with debit and credit totals, will be listed at the end of the report.
- Subtotals by Status
- This option will list each Status used in the Simulations in the report, together with debit and credit totals.
- Values in
- If you are using the Dual-Base system, use these options to specify whether the values in the report are to be shown in Base Currency 1 or 2.
- If you are not using the Dual-Base system, use the Base Currency 1 option to produce a report in your home Currency.
- If you are not using the Dual-Base system, use the Base Currency 1 option to produce a report in your home Currency.
- Function
- Use these options to specify the level of detail required in the report.
- Overview
- This choice produces a report with a single line for each Simulation, showing the Simulation Number, Transaction Date, Reference, Text, Signature of the user who created the Simulation and debit and credit totals.
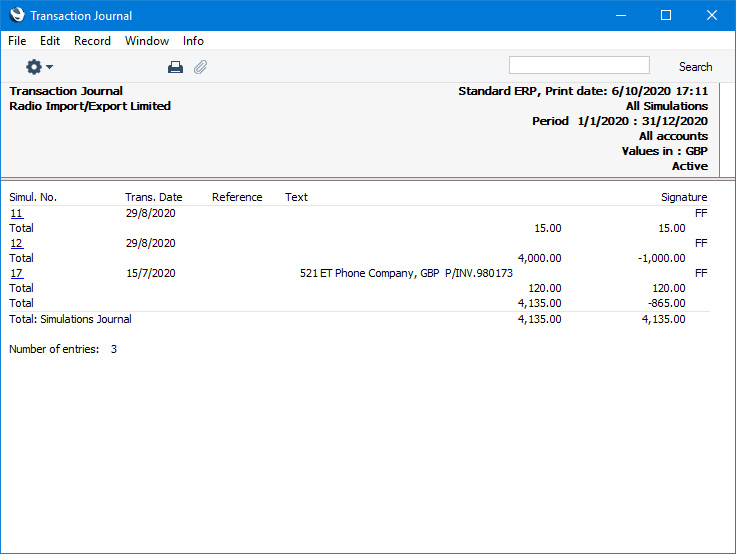
- Detailed
- In addition to the information shown in the Overview, this option lists the Simulation rows individually, showing the Account, Tags/Objects, Transaction Date, Description, Debit or Credit Value and VAT Code.
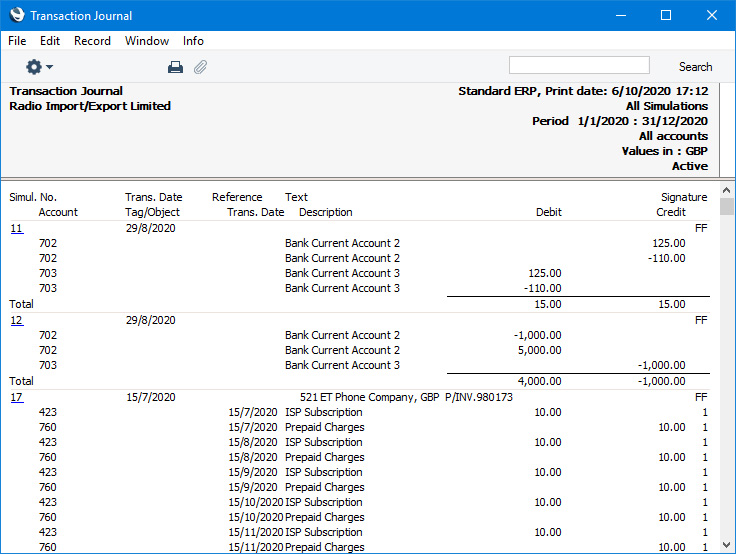
- Overview
Reports in the Nominal Ledger:
- Introduction
- Definition of Nominal Ledger Reports
- Drill-down
- The Operations Menu
- Account Reconciliation
- Accrual Report
- Analytical Balance
- Analytical Balance (Fiscal purposes)
- Balance Sheet
- Bank Reconciliation
- Bank Statement
- Bank Transactions
- Base Currency Rate Change
- Budget Journal
- Cash Flow
- Chart of Accounts
- Correction List
- Corresponding Accounts
- Creditors Account
- Currency A/C Rate Change
- Daily Balances
- Debtors Account
- Forward Balance Journal
- Income & Expense Book
- Key Financial Ratios
- Liquidity Forecast
- Multicurrency Accounts Rate Difference
- N/L Accrual Transactions
- N/L Transfer, Subsystems
- Nominal Ledger
- Profit & Loss
- Revised Budget Journal
- Simulation Journal
- Tag/Object Results
- Tag/Object/Quantity Results
- Tax Account Balances
- Tax Calculations
- Tax Transactions for Registers
- Template Transaction Journal
- Test Corresponding Rules
- Transaction Journal
- Transaction Summary
- Trial Balance
- VAT Listing
- VAT Report
- VAT Report Purchases
- VAT Report Sales
- VAT Transaction Journal
- XBRL Report
Go back to:
- Home page for Nominal Ledger manual
- Home page for Standard ERP manual
Object Results
This report shows the profit/loss for the selected Objects. A comparison with the previous month, quarter or year is possible.
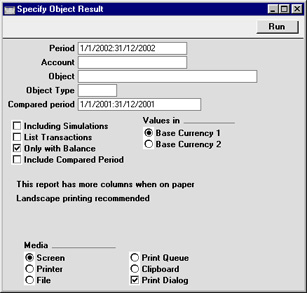
- Period
- Paste Special
Reporting Periods setting, System module
- Enter the first and last date of the report period, separated by a colon (:).
- Account
- Paste Special
Account register, Nominal Ledger/System module
- Range Reporting Alpha
- Select one Account, a range of Accounts, or leave blank to include all Accounts.
- Select one Account, a range of Accounts, or leave blank to include all Accounts.
- Object
- Paste Special
Object register, Nominal Ledger/System module
- Range Reporting Alpha
- Enter an Object Code to limit the report to just one Object.
- Enter an Object Code to limit the report to just one Object.
- Object Type
- Paste Special
Object Types setting, Nominal Ledger
- Enter an Object Type to limit the report to Objects in that group.
- Compared period
- Paste Special
Reporting Periods setting, System module
- If you want the report to include a comparison with a different period, enter that period here. The default is to a period one year earlier than the main reporting period. The Include Compared Period box (below) must be checked).
- Including Simulations
- Check this box to include Simulations in the report. Simulation rows of "Invalid" and "Transferred" Status will not be included.
- List Transactions
- With this box checked, the Transaction Numbers of all Transactions that fall within the reporting period, together with debit and credit totals, will be listed at the bottom of the report. All Transactions will be listed, irrespective of Object usage.
- Only with Balance
- Only Objects used in the period will be listed.
- Include Compared Period
- If you want the report to include a comparison with a different period, check this box and specify that period in the Compared Period field (above).
- Values in
- If you are using the Dual-Base system, values in this report can be shown in either Base Currency. Use these options to choose which Currency is to be used on this occasion.
- If you are not using the Dual-Base system, use the Base Currency 1 option to produce a report in your home Currency.
Object/Quantity Report
This report provides a detailed analysis of Object usage during the report period. Sorted by Object, the report shows balances for each Object/Account combination for the report period. For comparison purposes, Budget and Revised Budget figures for the report period are also shown.
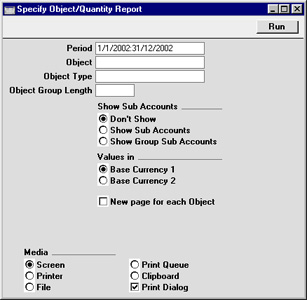
- Period
- Paste Special
Reporting Periods setting, System module
- The reporting period. Enter the first and last date separated by a colon (:).
- Object
- Paste Special
Object register, Nominal Ledger/System module
- Range Reporting Alpha
- Enter an Object Code to limit the report to just one Object.
- Enter an Object Code to limit the report to just one Object.
- Object Type
- Paste Special
Object Types setting, Nominal Ledger
- Enter an Object Type to limit the report to Objects in that group.
- Object Group Length
- This field is used together with the Show Group Sub Accounts option. Please refer to the description of this option below for details.
- Show Sub Accounts
- This report can show subtotals for groups of Accounts or Objects with the same initial characters. Use these option to control this feature.
- Don't Show
- Use this option if you don't want to use the group subtotalling feature.
- Show Sub Accounts
- Use this option if you would like the report to show subtotals for groups of Accounts, grouped using the first character of the Account Code.
- For example, if your Sales Accounts are in the range 100-199, the report will show a separate balance for each Account and a balance for all Sales Accounts (because they share the same initial character, "1"). These balances are all per Object.
- For example, if your Sales Accounts are in the range 100-199, the report will show a separate balance for each Account and a balance for all Sales Accounts (because they share the same initial character, "1"). These balances are all per Object.
- Show Group Sub Accounts
- Use this option if you would like the report to show subtotals for groups of Objects, grouped using the initial characters of the Object Code. Specify the number of initial characters that are to be the same using the Object Group Length field above.
- For example, if the Object Group Length is 2, the report will contain individual sections for Objects 010, 011, 012 etc. and a separate section for these Objects grouped together (i.e. all Objects with the initial characters of "01").
- This option also provides subtotals for groups of Accounts, as described for the Show Sub Accounts option above.
- For example, if the Object Group Length is 2, the report will contain individual sections for Objects 010, 011, 012 etc. and a separate section for these Objects grouped together (i.e. all Objects with the initial characters of "01").
- Don't Show
- Values in
- If you are using the Dual-Base system, values in this report can be shown in either Base Currency. Use these options to choose which Currency is to be used on this occasion.
- If you are not using the Dual-Base system, use the Base Currency 1 option to produce a report in your home Currency.
- If you are not using the Dual-Base system, use the Base Currency 1 option to produce a report in your home Currency.
- New page for each Object
- Check this box if you would like each Object to have a separate page. This applies when the report is printed to a printer only.
Tax Accounts Balances
This report is used in Russia. Please refer to your local HansaWorld representative for details.Tax Calculations
Please click here for a description of this report.Tax Transactions for Registers
This report is used in Russia. Please refer to your local HansaWorld representative for details.Template Transaction Journal
This report lists the records in the Template Transactions setting.
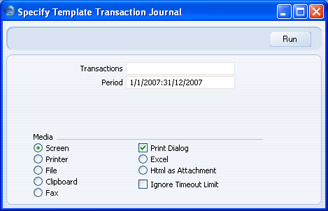
- Transactions
- Range Reporting
Numeric
- Specify the Template Transaction or range of Template Transactions that you want to be printed in the report.
- Period
- Paste Special
Reporting Periods setting, System module
- Enter the start and end date of the period whose Template Transactions are to be shown in the report. The first record in the Reporting Periods setting is used as a default.
Test Corresponding Rules
Hansa contains a feature whereby the Accounts used on each side (debit/credit) of a Transaction can be subject to certain rules (corresponding rules). These are described in detail on the Transaction Settings setting page: they ensure that it is clear which debit postings are balanced by which credit postings in each Transaction. If you are not using this feature, you can use this report to list the Transactions that would not comply with these rules (i.e. those which would not be permissible were the option being used).
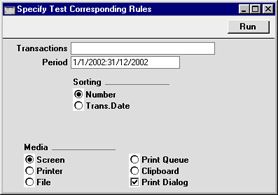
- Transactions
- Range Reporting
Numeric
- If you only want to print a certain range of Transactions, enter the first and the last transaction number, separated by a colon. If you leave the field blank, the whole journal will be printed.
- The Transaction Number must include the prefix as shown in the 'Transactions: Browse' window. To print a Transaction that was entered directly to the Nominal Ledger, enter, for example, "2002.3" or, for a range, "2002.3:2002.10". To print a Transaction that was created from a Sub System, enter, for example, "S/INV.020003" or "S/INV.020003:S/INV.020010" for a range.
- The Transaction Number must include the prefix as shown in the 'Transactions: Browse' window. To print a Transaction that was entered directly to the Nominal Ledger, enter, for example, "2002.3" or, for a range, "2002.3:2002.10". To print a Transaction that was created from a Sub System, enter, for example, "S/INV.020003" or "S/INV.020003:S/INV.020010" for a range.
- Period
- Paste Special
Reporting Periods setting, System module
- Specify the period to be covered by the report.
- Sorting
- The report can be sorted by Transaction Number or Date.
Transaction Journal
The Transaction Journal (also called Daily Transaction Ledger) is a summary of all entries made in the ledger. Its definition cannot be changed.
Reporting in Hansa is non-destructive. That means you can make and print a report as many times as you wish. Some accounting programs are designed in such a way as to allow journal printing only directly in connection with the data entry. Hansa does not have this limitation.
Open the 'Reports' list window and double-click 'Transaction Journal'. The 'Specify Transaction Journal' window is opened.
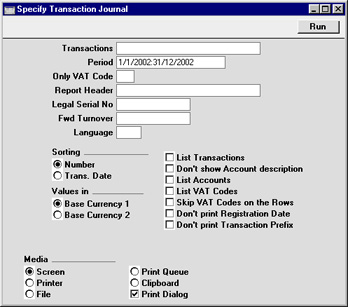
- Transactions
- Range Reporting
Numeric
- If you only want to print a certain range of Transactions, e.g. those entered today, you can select this range using the Transactions field. Enter the first and the last Transaction Number, separated by a colon (:). If you leave the field blank, all records in the Transaction register from the selected period will be printed.
- The Transaction Number must include the prefix as shown in the 'Transactions: Browse' window. To print a Transaction that was entered directly to the Nominal Ledger, enter, for example, "2002.3" or, for a range, "2002.3:2002.10". To print a Transaction that was created from a Sub System, enter, for example, "S/INV.020003" or "S/INV.020003:S/INV.020010" for a range.
- The Transaction Number must include the prefix as shown in the 'Transactions: Browse' window. To print a Transaction that was entered directly to the Nominal Ledger, enter, for example, "2002.3" or, for a range, "2002.3:2002.10". To print a Transaction that was created from a Sub System, enter, for example, "S/INV.020003" or "S/INV.020003:S/INV.020010" for a range.
- Period
- Paste Special
Reporting Periods setting, System module
- Enter the period to be covered by the report.
- Only VAT Code
- Paste Special
VAT Codes setting, Nominal Ledger
- You may limit the report to Transactions that include postings with a particular VAT Code.
- Report Header
- Specify the report title here. If none is specified, 'Transaction Journal' is used.
- Legal Ser No.
- In some countries it is mandatory for all Transactions to follow a single number series, irrespective of their nature. If that is the case, enter the first number in the series here and check the Don't Print Transaction Prefix box below. Each Transaction will be given a number in the specified series, in place of the usual Transaction Number.
- Fwd Turnover
- If you enter an amount in this field, this amount will be added to the total turnover at the bottom of the report.
- Language
- Paste Special
Languages setting, System module
- The Transaction Journal can be produced in different Languages: enter the required Language Code here. The appropriate translation for each Account Name will be taken from the 'Texts' card of the Account record.
- Sorting
- The report can be sorted by Transaction Number or Transaction Date.
- Values in
- If you are using the Dual-Base system, values in this report can be shown in either Base Currency. Use these options to choose which Currency is to be used on this occasion.
- If you are not using the Dual-Base system, use the Base Currency 1 option to produce a report in your home Currency.
- If you are not using the Dual-Base system, use the Base Currency 1 option to produce a report in your home Currency.
- List Transactions
- With this box checked, each Transaction used by the report, together with debit and credit totals, will be listed at the bottom of the report. If the scope of the report has been restricted using any of the fields above, only those Transactions included in the report will be listed.
- Don't show Account description
- Use this option if you don't wish Account Descriptions for each Transaction row to be shown.
- List Accounts
- With this box checked, each Account used by the Transactions in the report, together with debit and credit totals, will be listed at the bottom of the report. If the scope of the report has been restricted using any of the fields above, only those Accounts affected by the Transactions shown will be listed.
- List VAT Codes
- With this box checked, each VAT Code used by the Transactions in the report, together with debit and credit totals, will be listed at the bottom of the report. If the scope of the report has been restricted using any of the fields above, only those VAT Codes affected by the Transactions shown will be listed.
- Skip VAT Codes on the Rows
- If a Transaction row has a VAT Code, this is usually shown in the report. Check this box if this is not needed.
- Don't print Registration Date
- The report usually shows both the Transaction Date (that shown in the Transaction header) and the Registration Date (the date the Transaction was entered to Hansa). If you do not wish to show the Registration Date, check this box.
- Don't print Transaction Prefix
- Transaction Numbers are usually shown in the report together with their prefixes as shown in the 'Transactions: Browse' window. Transactions entered directly to the Nominal Ledger, for example, are shown as "2002.3" while those created from a Sub System are shown as, for example, "S/INV.020003". If you do not want these prefixes to be shown in the report (i.e. in the examples, to omit "2002." and "S/INV."), check this box.
- If this box is checked and an entry is made in the Legal Ser. No. field above, each Transaction will be given a number in the sequence beginning with the Legal Ser. No. in place of the usual Transaction Number.
Transaction Summary
This report is very similar to the Transaction Journal. Like that report, it lists each Transaction in the report period, showing the Accounts debited and credited, together with the amounts.
Unlike the Transaction Journal, this report does not show the usual Transaction Numbers. Instead, each Transaction is given a sequential number in a single number series, irrespective of their nature.
As well as listing the Transactions in the report period, up to four summary sections can be printed at the end of the report. These show the debit and credit totals for each Account used in Transactions resulting from Invoices, Receipts, Purchase Invoices and/or Payments in the report period.
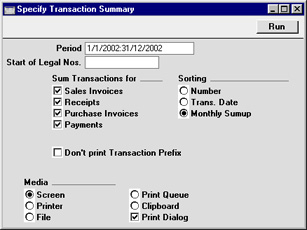
- Period
- Paste Special
Reporting Periods setting, System module
- Enter the period to be covered by the report.
- Start of Legal Nos
- This report does not show Transaction Numbers, as stored in the Transaction register. Instead, the Transactions are renumbered to follow a single number series, irrespective of their nature. Enter the first number in the series here. If no number is entered, the sequence will start at 1.
- Sum Transactions for
- Up to four summary sections can be printed at the end of the report, showing debit and credit totals for each Account used in Transactions resulting from Invoices, Receipts, Purchase Invoices and/or Payments in the report period. Use these options to choose which summary sections are to be printed.
- Sorting
- Three sort options are offered:
- Number
- The Transactions are listed in Transaction Number order, as stored in the Transaction register. If included in the report, the four summary sections are printed at the end.
- Trans. Date
- The Transactions are listed in Transaction Date order. If included in the report, the four summary sections are printed at the end.
- Monthly Sumup
- The Transactions are listed in Transaction Date order. Instead of printing the four summary sections at the end of the report, this option provides those summaries per month and prints them in the appropriate places in the list.
- Number
- Don't print Transaction Prefix
- When listed in the 'Transactions: Browse' window, Transaction Numbers are shown together with prefixes that indicate the type of the transaction. Transactions entered directly to the Nominal Ledger, for example, are shown as "2002.3" while those created from a Sub System are shown as, for example, "S/INV.020003".
- Although this report does not print Transaction Numbers, their prefixes are printed as an indication of the type of Transaction. If you do not want these prefixes to be shown in the report, check this box.
Trial Balance
The Trial Balance is a report showing all individual Account balances. It is mostly used for reconciliation. You cannot alter the definition of the Trial Balance report, but you can determine which Transactions are to be included.
When printed to screen, the Trial Balance has Hansa's Drill-down feature. Click on the Account Number of any Account in the report to open the Nominal Ledger Report for the same Account and period. When in the Nominal Ledger report, you can click on any Transaction Number to open an individual Transaction record.
The totals of the three columns in the report should each be zero, signifying that in your accounts the total debits and the total credits are equal. If this is not the case, there may be an error in one or more of your Transactions that should be corrected immediately.
Open the 'Reports' list window and double-click 'Trial Balance'. The 'Specify Trial Balance' window is opened.
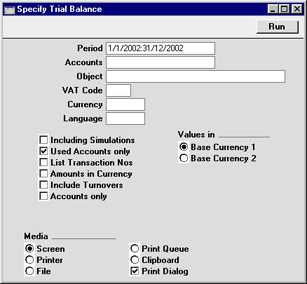
- Period
- Paste Special
Reporting Periods setting, System module
- Enter the period for which you want to produce the Trial Balance. The first period in the Reporting Periods setting is the default value.
- Accounts
- Paste Special
Account register, Nominal Ledger/System module
- Range Reporting Alpha
- Limit the report to a certain Account, or a range of Accounts.
- Limit the report to a certain Account, or a range of Accounts.
- Object
- Paste Special
Object register, Nominal Ledger/System module
- Indicate an Object to limit the scope of the report.
- VAT Code
- Paste Special
VAT Codes setting, Nominal Ledger
- Enter a VAT Code here to restrict the report to Transactions with a certain VAT Code.
- Currency
- Paste Special
Currency register, System module
- If a Currency is entered here, all amounts in the report will be converted to the specified Currency using the Exchange Rate for the Transaction Date.
- A foreign Currency should be entered here. To produce a report with figures in Base Currency 1 or 2, leave this field blank and choose which Base Currency is to be used using the Values In options described below.
- A foreign Currency should be entered here. To produce a report with figures in Base Currency 1 or 2, leave this field blank and choose which Base Currency is to be used using the Values In options described below.
- Language
- Paste Special
Languages setting, System module
- The Trial Balance can be produced in different Languages: enter the required Language Code here. The appropriate translation for each Account Name will be taken from the 'Texts' card of the Account record.
- Including Simulations
- Check this box to include simulated transactions in the report. Simulation rows of "Invalid" and "Transferred" Status will not be included.
- Used Accounts only
- With this box checked, the report will only show Accounts with Transactions registered during the period, and/or with balances brought forward from a previous period.
- List Transaction Nos
- With this box checked, the Transaction Numbers of all Transactions that fall within the reporting period, together with debit and credit totals, will be listed at the bottom of the report. All Transactions will be listed, irrespective of any restrictions in the scope of the report specified in the fields above.
- Amounts in Currency
- With this option checked, summary totals of each Currency used in the selected Transactions are shown at the bottom of the report.
- Include Turnovers
- The standard version of this report has three columns showing for each Account the balance brought forward, the net change over the report period and the final balance. Check this box if you would like two additional columns to be included, showing the total debit and credit postings to each Account.
- Accounts only
- The standard version of this report gives subtotals for groups of Accounts, grouped using the first character of the Account Code. For example, if your Sales Accounts are in the range 100-199, the report will show figures for each Account and for all Sales Accounts (because they share the same initial character, "1").
- Check this box if you do not want the report to include subtotals for groups of Accounts.
- Check this box if you do not want the report to include subtotals for groups of Accounts.
- Values in
- If you are using the Dual-Base system, values in this report can be shown in either Base Currency. Use these options to choose which Currency is to be used on this occasion.
- If you are not using the Dual-Base system, use the Base Currency 1 option to produce a report in your home Currency.
- If a foreign Currency is entered in the Currency field above, these options will be ignored and the amounts in the report will be converted to the specified Currency using the Exchange Rate for the Transaction Date.
- If you are not using the Dual-Base system, use the Base Currency 1 option to produce a report in your home Currency.
VAT Listing
This report lists the transactions used in calculating the VAT Return (produced using the VAT Report). For each transaction, the total including and excluding VAT, the VAT total, the overall VAT percentage and the Currency are shown.
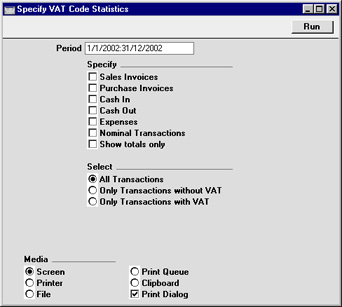
- Period
- Paste Special
Reporting Periods setting, System module
- Enter the period to be covered in the report. The default value is the first period in the Reporting Periods setting.
- Specify
- You can choose to have Sales Invoices, Purchase Invoices, Expenses, inward and outgoing cash transactions and/or Nominal Ledger Transactions listed in the report. At least one section must be chosen or the report will be blank. For each section, the list of transactions will be followed by a list of VAT Codes used by those transactions, together with totals. If you don't need the transactions to be listed and just want a single line summary of each section, use the Show Totals Only option.
- Select
- The report can show all Transactions or just those with or without VAT.
VAT Report
Whenever a VAT Return is due you have to print a VAT Report. The report is used both as a transaction document for the ledger and as the basis for payment.
The report summarises the Input and Output VAT Accounts for the specified period, and also shows the total Inputs (purchases) and Outputs (sales). A positive total indicates that you are liable for VAT, a negative one signifies that you are owed money by the VAT authority.
Once a VAT Return has been printed for a given period, it is recommended that you enter a Transaction in the Transaction register transferring the VAT amount payable/receivable into the VAT Payments Account (835 in the Chart of Accounts supplied with Hansa). This Transaction would debit the VAT Outputs Payable Account (830) and credit the VAT Inputs Receivable Account (831), with a balancing posting to the VAT Payments Account. This Transaction must be entered within the period it concerns, preferably as the last Transaction of the period. The amount payable/receivable can then be transferred to your bank account with a further Transaction when payment is made/received.
In certain circumstances only, you can print different VAT Reports for specific Objects, which is useful if your Objects represent different departments with different VAT Numbers. For you to be able to do this, each VAT entity must have its own database or Company. For each, carry out a Consolidation Export, specifying a unique Object in the Cons. Object field. Import these files to a database or Company representing your consolidated accounts and then print a VAT Report for each Cons. Object.
There are two reasons why this procedure must be followed:
- When Nominal Ledger Transactions are created from Sub Systems, any Objects used are not attached to the VAT posting. The Consolidated Export can impose an Object on each VAT posting for use by the consolidated Company.
- If hierarchical Object structures are used in a single Company, producing separate VAT Returns for each Object would be prone to error.
- The definition of the VAT Report;
- Printing the VAT Report.
VAT Report - Defining
You can define the VAT Report to determine which Accounts should be included.
To change the report definition of the VAT Report, first click the [Settings] button in the Master Control panel and double-click 'Report Settings' in the subsequent list. Then highlight 'VAT Report' in the list on the left-hand side of the 'Report Settings' window and click the [Definition] button. The 'Definition of VAT Report: Browse' window is opened.
The definition above is a standard UK VAT report, using the Chart of Accounts and definitions supplied with HansaWorld Enterprise. You can alter it to suit your specific requirements: you will need to change it if you have modified the standard Chart of Accounts or imported your own. You will also need to change it if you are using the Book Receipt VAT, Book Prepayment VAT and/or Book Payment VAT options to calculate VAT from Receipts and Payments, not from Invoices and Purchase Invoices. If so, you will need to replace the Output and Input Accounts in the formulae with the O/P and I/P Accounts specified in the VAT Codes setting.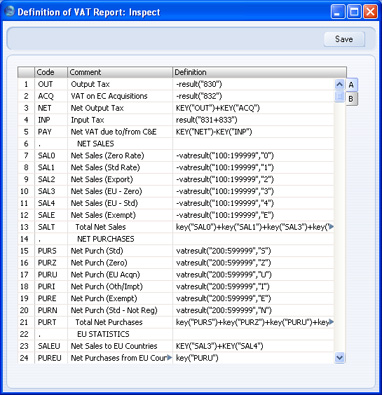
Each row in the definitions list represents a line in the VAT Report. You can add, insert or delete rows as necessary. To insert a row, highlight the row above which the new one is to be inserted (by clicking the row number) and press the Return key. To delete a row, highlight it and press the Backspace key.
The right-hand field of each row contains a formula by which the figure to be shown is calculated. This formula uses the same definition language as the Key Financial Ratios definition. Please refer to the page describing the definition of that report for a full description of the commands available.
If you are an existing user of HansaWorld Enterprise updating to version 4.1 or later, note that the syntax used in the Key Ratio formulae changed in this version. All parameters should now be enclosed in quotation marks. The order of parameters for the VATRESULT, VATBALANCE, VATCREDRESULT and VATDEBRESULT commands has been transposed.
- Row
- Each line of the report is defined on its own numbered row.
- Code
- A code identifying a row that you can use in the definitions of other rows.
- Comment
- A descriptive text that identifies the line in the finished report.
- Definition
- The definition of the row in the report, i.e. which Accounts should be used in calculating the figure to be shown, and the formula of that calculation.
When you have finished defining the VAT Report, click [Save].
VAT Report - Example VAT Report Definitions
This page describes and illustrates some example VAT Report Definitions. Please follow the links below for more details about the VAT Report:
- Introduction
- Definition of the VAT Report
- Example VAT Report Definitions
- Printing the VAT Report
Example - Standard VAT
A VAT Report definition suitable for use in the UK is illustrated below:
In essence, we are using the RESULT command to calculate the VAT to be paid or reclaimed and the VATRESULT command to calculate turnover figures. The RESULT command will print the net change in a specified Account over the report period i.e. the net amount posted to the Account. The VATRESULT command will print the net amount posted with a specified VAT Code to the Account.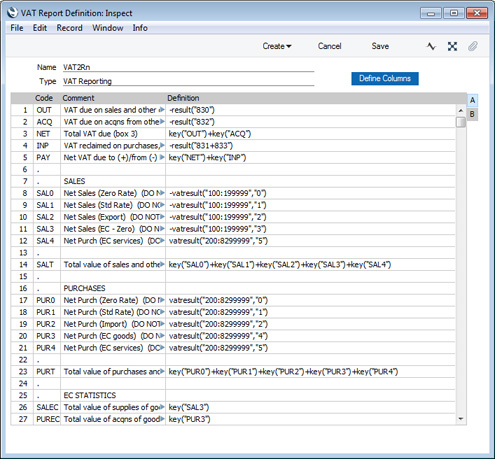
In more detail the calculations in this report definition are as follows:
Row 1 OUT
-RESULT("830") 830 is the Output VAT Account, so this row prints the total output VAT on domestic sales made during the report period. Sales figures are stored as negative figures in Standard ERP, so the negative sign will convert them to positive. This figure should be placed in Box 1 on the UK VAT Return. If you have more than one Output VAT Account, you can include them all in the formula (e.g. -RESULT("830+8300")), or you can print the net change in each Account on separate lines and then add them together using the KEY command.
Row 2 ACQ
-RESULT("832") 832 is the Account for output VAT on EU acquisitions of goods, so this row will print the VAT due on acquisitions of goods from other EU member states. This figure should be placed in Box 2 on the UK VAT Return. Please refer to the Reverse Charge VAT example towards the end of this page for more details about EU acquisitions. Row 3 NET
KEY("OUT")+KEY("ACQ") Prints the total Output VAT due, calculated by adding the previous two figures together. This figure should be placed in Box 3 on the UK VAT Return. Row 4 INP
-RESULT("831+833") 831 is the Input VAT Account and 833 is the Account for input VAT on EU acquisitions of goods. This row will therefore print the VAT reclaimable on purchases and other inputs (including acquisitions from the EU). The result will be printed as a negative figure. This figure should be placed in Box 4 on the UK VAT Return. Row 5 PAY
KEY("NET")+KEY("INP") Prints the net VAT to be paid or reclaimed, calculated by adding the figure in row 3 to the (negative) figure in row 4. A positive figure indicates that you are liable for VAT, a negative one signifies that you are owed money by the VAT authority. This figure should be placed in Box 5 on the UK VAT Return. Rows 8-12 SAL0-SAL4
-VATRESULT("100:1999999","0") -VATRESULT("100:1999999","1")
-VATRESULT("100:1999999","2")
-VATRESULT("100:1999999","3")
-VATRESULT("200:8299999","5")
Accounts 100:199 are the Sales Accounts. These rows print the total values of sales made with each VAT Code. If you sell non-digital services to customers in the EU who are not registered for VAT, you will need to charge VAT at the relevant domestic rate for the type of Item. Place these Customers in the Inside EU (Post VAT) Zone and use the standard VAT Code. This will ensure these sales will be included in the Box 1 figure (row 1) and in the relevant sales turnover figure here.
Row 12 will print the value of purchases of services from Suppliers in the Inside EU Zone. This will ensure this figure is included in Box 6 (row 14 below).
Row 14 SALT
KEY("SAL0") + KEY("SAL1") + KEY("SAL2") + KEY("SAL3") + KEY("SAL4") Prints the sum of rows 8-12 i.e. the total value of sales and all other outputs excluding VAT. This figure should be placed in Box 6 on the UK VAT Return.
Rows 17-21 PUR0-PUR4
-VATRESULT("200:8299999","0") -VATRESULT("200:8299999","1")
-VATRESULT("200:8299999","2")
-VATRESULT("200:8299999","4")
-VATRESULT("200:8299999","5")
Accounts 200:829 all represent items that can be purchased by the business. These rows print the total values of purchases made with each VAT Code. The range does not include the VAT Accounts (830:835). If you are using the Add VAT Code to VAT A/C rows option in the Transaction Settings setting, the appropriate VAT Code will be copied to the V-Cd field in each Transaction row posting to a VAT Account, as well as to the V-Cd field in the rows posting to a Sales or Cost Account. If the range included the VAT Accounts, the resulting figures would include VAT when they should exclude it.
Row 23 PURT
KEY("PUR0") + KEY("PUR1") + KEY("PUR2") + KEY("PUR3") + KEY("PUR4") Prints the sum of rows 17-21 i.e. the total value of purchases and all other inputs excluding VAT. This figure should be placed in Box 7 on the UK VAT Return. Row 26 SALEC
KEY("SAL3") Prints the total value of sales made with VAT Code 3 i.e. the total value of sales to other EU member states. This assumes that sales made to other EU member states will always carry VAT Code 3, and that VAT Code 3 is not used for any other sales. This figure should be placed in Box 8 on the UK VAT Return. (Box 8 should not include sales of services, so a different VAT Code would need to be used for such sales.) Row 27 PUREC
KEY("PUR3") Prints the total value of purchases made with VAT Code 4 i.e. the total value of purchases of goods from other EU member states. This assumes that purchases of goods made from other EU member states will always carry VAT Code 4, and that VAT Code 4 is not used for any other purchases. This figure should be placed in Box 9 on the UK VAT Return. (Box 9 should not include purchases of services. In the example, VAT Code 5 would be used for such purchases.)
As previously mentioned, the VAT Report definition illustrated and described above uses the Chart of Accounts and VAT Codes that are supplied with Standard ERP. You will need to amend the VAT Report definition (or start one from scratch) if you have modified the standard Chart of Accounts and/or VAT Codes, or created your own. For example, in the sample Chart of Accounts, the Output VAT Account is 830 and the standard VAT Code is 1. If your Output VAT Account is not 830 (e.g. it is 83010), you must replace every instance of "830" in the report definition with "83010". If your standard VAT Code is not 1 (e.g. it is S), you must replace every instance of "1" in the report definition with "S". It may be for example that you use different VAT Codes for sales and purchases.
Example - Cash VAT
In some countries, you can account for output VAT on the basis of the payments you receive, rather than on the Invoices you issue. Similarly, you can account for input VAT on the basis of the payments you issue, rather than on the Purchase Invoices that you receive. This is sometimes known as accounting for VAT on a cash basis or, in the UK, Cash Accounting.
If you need to account for VAT on a cash basis, follow these steps:
- On the sales side, the Account Usage S/L contains two options that you should select, depending on your requirements:
- Select the Post Receipt VAT option if you need VAT to be posted from normal Receipts (i.e. Receipts in which you are receiving payment against Invoices) and On Account Receipts.
- Select the Post Prepayment VAT option if you would like VAT to be posted from Prepayment Receipts. You will also need to specify a Prepayment VAT Account in the same setting.
- Select the Post Receipt VAT option if you need VAT to be posted from normal Receipts (i.e. Receipts in which you are receiving payment against Invoices) and On Account Receipts.
- Similarly, on the purchase side, the Account Usage P/L contains two options that you should select, depending on your requirements:
- Select the Post Payment VAT option if you need VAT to be posted from normal Payments (i.e. Payments in which you are issuing payment against Purchase Invoices) and On Account Payments.
- Select one of the Post Prepayment VAT options if you would like VAT to be posted from Prepayment Payments. You will also need to specify On Account VAT and Prepayment VAT Accounts in the same setting and, depending on your requirements, you may also need to select the Prepayment amount excluding VAT option.
- Select the Post Payment VAT option if you need VAT to be posted from normal Payments (i.e. Payments in which you are issuing payment against Purchase Invoices) and On Account Payments.
- If you need to account for VAT on a cash basis, Sales Invoices will still post to an Output VAT Account as normal, and Purchase Invoices will still post to an Input VAT Account. However, these Accounts will now be treated as preliminary VAT Accounts. When a Customer pays an Invoice, the Transaction from the Receipt will include an extra VAT element in which the VAT is moved from the Output VAT Account to a final Account, known as the O/P Account. On the purchase side, when you pay a Purchase Invoice, the Transaction from the Payment will include an extra VAT element in which the VAT is moved from the Input VAT Account to a final Account, known as the I/P Account.
The next step is to specify the O/P and I/P Accounts, which you should do in the VAT Codes setting:
Note in the rows for VAT Codes 4 and 5 that the Output and O/P Accounts are the same, and the Input and I/P Accounts are the same. VAT Codes 4 and 5 are used for acquisitions from the EU, and in the UK such transactions cannot be included in the Cash Accounting scheme. Standard ERP still requires O/P and I/P Accounts to be specified: using the same Accounts in effect means that acquisition VAT will be immediately be posted to the final Account, without passing through a preliminary Account.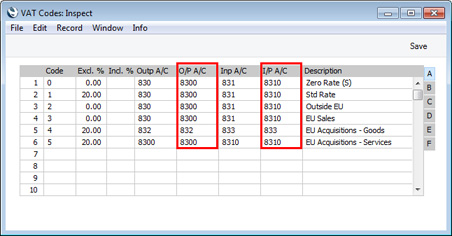
- Finally, you should change the definition of the VAT Report so that the VAT to be paid or reclaimed will be calculated using the O/P and I/P Accounts instead of the Output and Input Accounts. In the illustration below, we have changed rows 1 and 4:
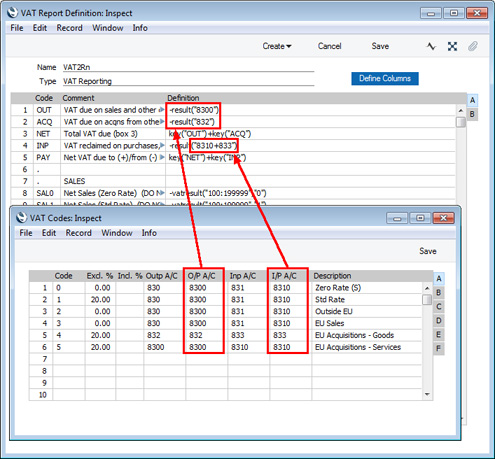
- Illustrated below is an example Invoice together with its Nominal Ledger Transaction. The VAT is posted to the Output Account as normal:
When the Customer pays the Invoice a month later, the Nominal Ledger Transaction shows the VAT being moved from the Output Account to the O/P Account: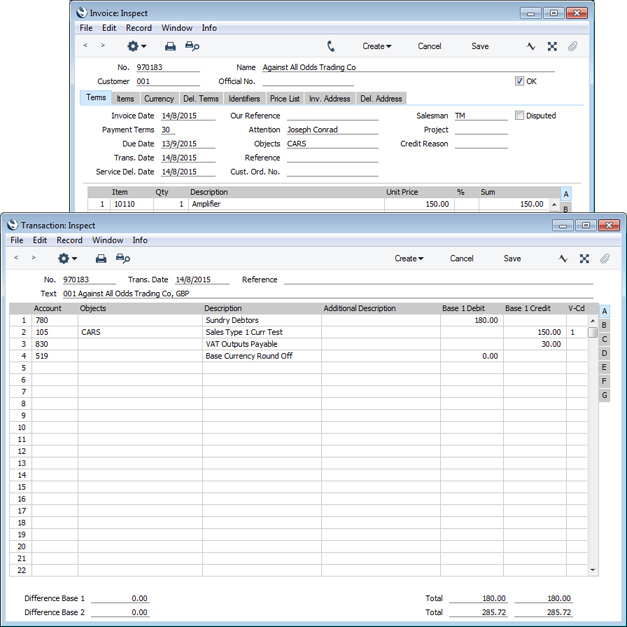
The VAT Report for the month when the Invoice was paid includes the VAT in the payable figure: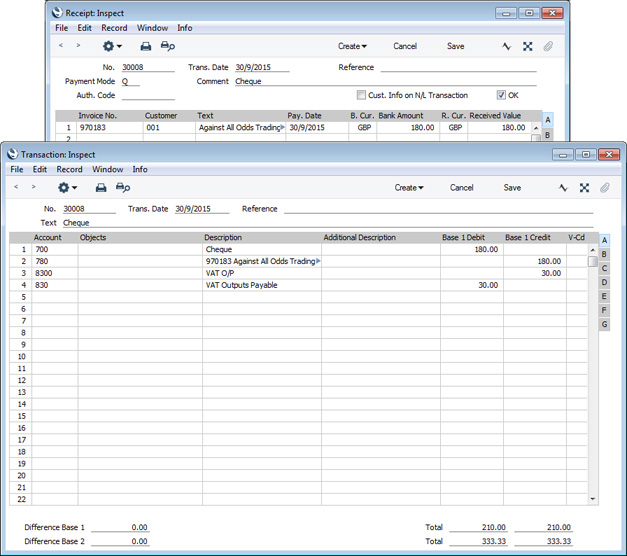
Note that the Invoice is not included in rows 8-11 and 14 (SAL0-SAL3 and SALT). As previously described, these rows use the VATRESULT command to print the total values of sales and purchases made with each VAT Code. For example, VATRESULT("100";"1") will print the value of sales posted from Invoices to Account 100 with VAT Code 1. The date when such a sale is posted is the Invoice date.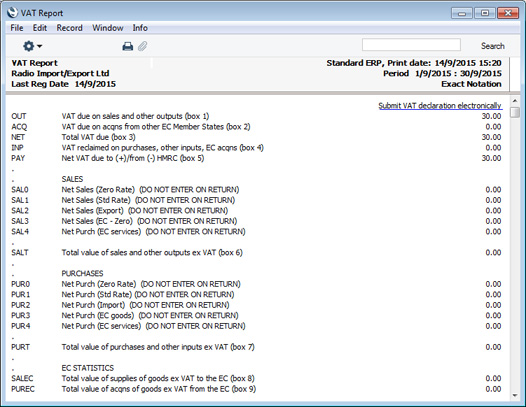
When you are accounting for VAT on a cash basis, you need to be able to establish the total value of sales and purchases by payment date, not by Invoice date. This information is not held in the Nominal Ledger and so cannot be retrieved by the VATRESULT command.
Instead, you can obtain this information from the VAT Code Statistics report in the Sales Ledger and the P/L VAT Code Statistics report in the Purchase Ledger. These reports each include a summary section in which the Base column will list the total values excluding VAT of sales and purchases made with each VAT Code. When you are using the Post Receipt VAT and Post Payment VAT options, the information in this summary section will be compiled by Receipt/Payment Date, not by Invoice Date:
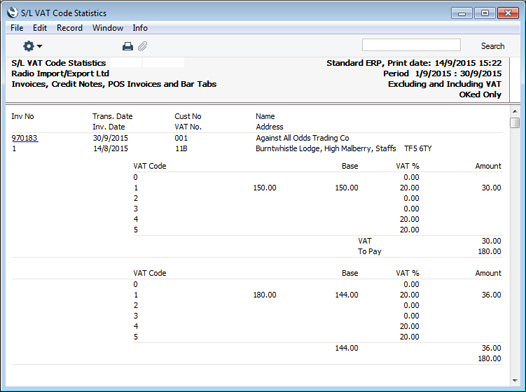
Example - Reverse Charge VAT
In a normal transaction, the Supplier should account to the tax authorities for the VAT that is due on the supply. However, in certain situations, it is the Customer who must account for any VAT that is due. If you are the customer in such a situation, you will not pay VAT to the Supplier but instead will pay VAT to the tax authorities at the domestic rate that would apply had you purchased the Items from a local Supplier. This is sometimes known as the "reverse charge" procedure. You can reclaim this VAT, if the purchase relates to VAT taxable supplies that you will go on to make.
One situation when you need to use the reverse charge procedure is when you purchase Items from VAT-registered Suppliers in other countries in the EU. Items that you purchase from other countries in the EU are usually known as "acquisitions" or "arrivals" (the term "imports" usually refers to Items purchased from other countries outside the EU). One method for handling VAT on acquisitions using the reverse charge procedure is described below. An alternative method is to create Internal Invoices from Purchase Invoices for EU Acquisitions. Please refer here for more details.
To include EU Acquisition VAT in the VAT Report, follow these steps:
- In the VAT Codes setting in the Nominal Ledger, create two VAT Codes for VAT on EU Acquisitions. Two VAT Codes are needed because purchases of goods and purchases of services need to be reported differently on the UK VAT Return.
VAT Code 4 in the example illustration below will be used for purchases of goods. VAT will be debited to the Input Account in this VAT Code and credited to the Output Account. It is recommended that you use an Output Account that is not used in any other VAT Code.
VAT Code 5 in the example will be used for purchases of services. In this case, you can use the standard Output and Input Accounts (although you can use dedicated Accounts if you prefer).
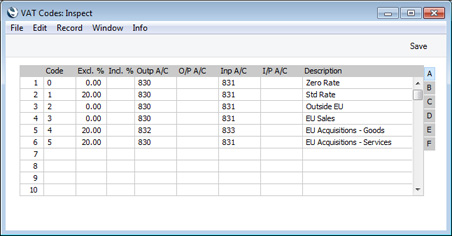
- In a Purchase Invoice for goods received from a Supplier in the Inside EU VAT Zone, enter the total charged by the Supplier (i.e. without VAT) in the TOTAL field and the Amounts in the rows using the VAT Code 4 from step 1. The Calculated VAT field in the footer will be updated automatically. In this example, the Currency in the Invoice is the Euro:
The VAT Code in each row will be chosen as follows: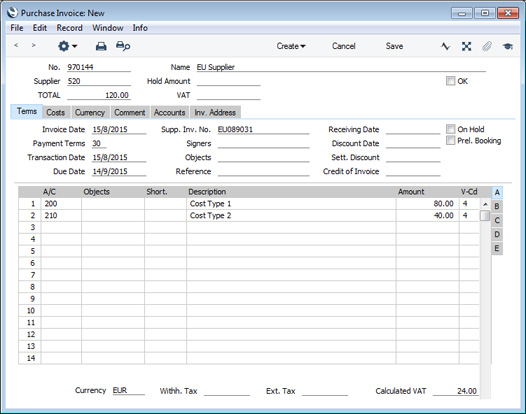
- The Purch. VAT Code for the Supplier will be used.
- It will be taken from the Account record.
- The VAT Code on the 'VAT' card of the Account Usage P/L setting will be used.
In the case of point (ii), you can only specify a single VAT Code in each Account record. It is therefore recommended that you use dedicated Accounts for purchases of goods from the EU, to ensure that the correct VAT Code will be offered as the default. If you use the same Account for non-EU and EU purchases, there is a risk that the wrong VAT Code will be offered by default and that you don't change it.
In the last case, the appropriate VAT Code for the Zone of the Supplier will be used.
- The Purch. VAT Code for the Supplier will be used.
- When you mark the Purchase Invoice as OK and save it, the total charged by the Supplier will be posted to the Creditor Account. Because the Supplier is in the Inside EU VAT Zone, VAT will be debited to the Input Account of the selected VAT Code and credited to the Output Account (EUR figures are shown in the Base 2 Debit and Credit fields, with figures in Base Currency 1 in the Base 1 Debit and Credit fields):
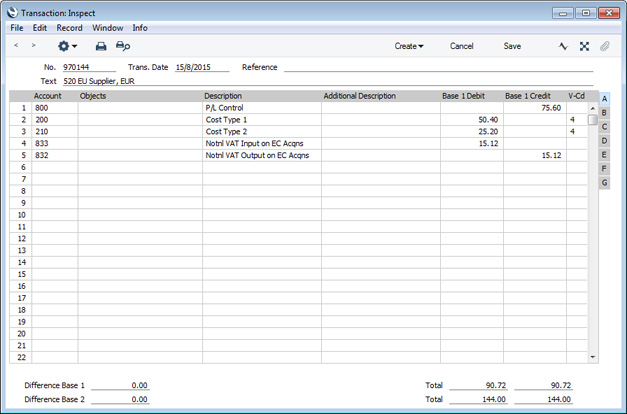
- In the VAT report, you will need to include acquisition VAT when calculating the output VAT that is payable. You will also be able to include it when calculating the input VAT that is reclaimable, if the acquisitions relate to VAT taxable supplies that you make.
In the UK, the output VAT payable on EU goods acquisitions should be included in the VAT report as a separate figure. This has been done in row 2 in the example VAT Report definition illustrated below. In this row, the RESULT command will return the net change in the Output VAT Account used in VAT Code 4, hence the recommendation that this be an Output Account that is not used in any other VAT Code. From there the output VAT will be included in the total output VAT figure in row 3.
It is not necessary to include the input VAT as a separate figure. So, in row 4 the RESULT of the Input VAT Account has been added to that of the domestic Input VAT Account to produce a total figure.
Row 20 uses the VATRESULT command to print the total value of EU acquisitions with VAT Code 4. This figure is then used in rows 23 and 27 (Boxes 7 and 9 on the UK VAT Return).
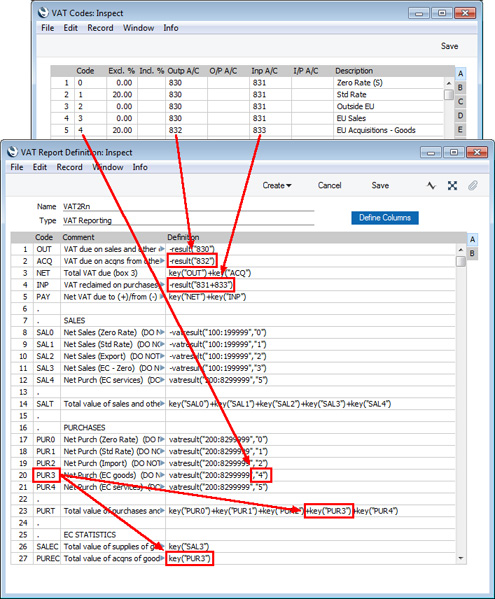
- Using this definition, the Purchase Invoice illustrated above will be included in the VAT Report as shown below:
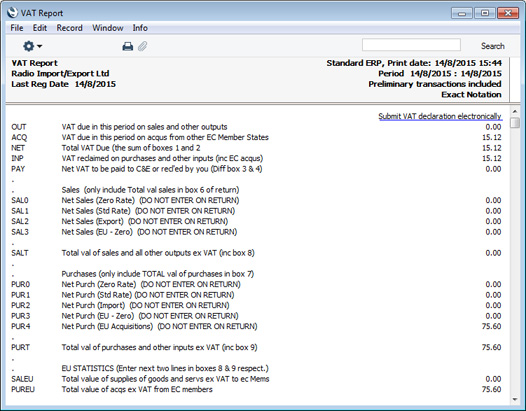
Follow these steps:
- The procedure for entering a Purchase Invoice for services is the same as that for entering a Purchase Invoice for goods. Enter the total charged by the Supplier (i.e. without VAT) in the TOTAL field and the Amounts in the rows using VAT Code 5. Again, it is therefore recommended that you use dedicated Accounts for purchases of services from the EU, to ensure that the correct VAT Code will be offered as the default The Calculated VAT field in the footer will be updated automatically. In this example, the Currency in the Invoice is the Euro:
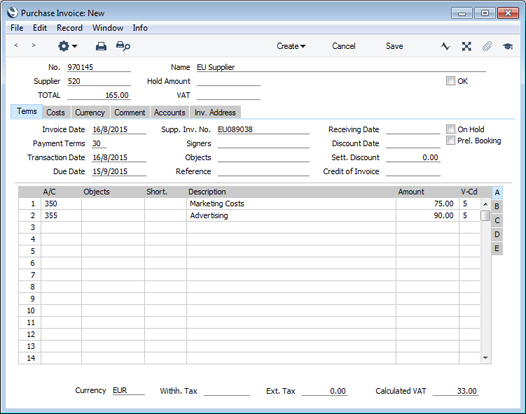
- When you mark the Purchase Invoice as OK and save it, the total charged by the Supplier will be posted to the Creditor Account. Because the Supplier is in the Inside EU VAT Zone, VAT will be debited to the Input Account of the selected VAT Code and credited to the Output Account (EUR figures are shown in the Base 2 Debit and Credit fields, with figures in Base Currency 1 in the Base 1 Debit and Credit fields):
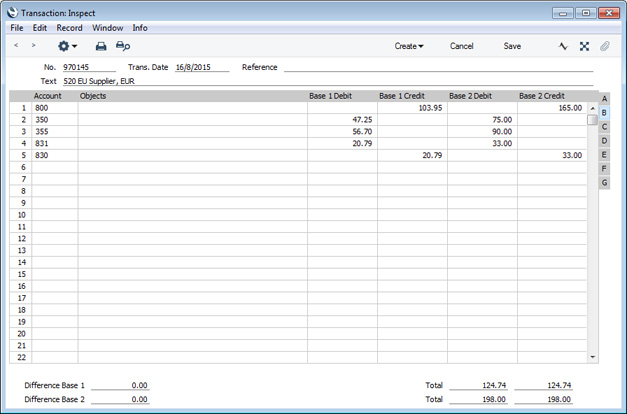
- In the VAT report, you will need to include acquisition VAT when calculating the output VAT that is payable. You will also be able to include it when calculating the input VAT that is reclaimable, if the acquisitions relate to VAT taxable supplies that you make. In this respect, reporting services is similar to reporting goods.
However, in the UK, the output VAT payable on EU services acquisitions should not be included in the VAT report as a separate figure (unlike EU goods acquisitions) i.e. it should be included in box 1 in the UK VAT Return and not box 2. As with goods, the input VAT should be included in box 4. This allows you to use the standard Output and Input Accounts, as in this example. You can use dedicated Accounts if you prefer, but if you do, be sure to include them in the RESULT commands that calculate the Output VAT and Input VAT totals in your VAT Report Definition (rows 1 and 4 in the example).
Purchase of services from Suppliers in the EU VAT Zone need to be included in both the sales totals and the purchase totals on the UK VAT Return (boxes 6 and 7). Using a dedicated VAT Code (VAT Code 5 in the example) will allow you to do this. Rows 12 and 21 in the example VAT Report definition use the VATRESULT command to print the total value of EU acquisitions with VAT Code 5. This figure is then used in rows 14 and 23.
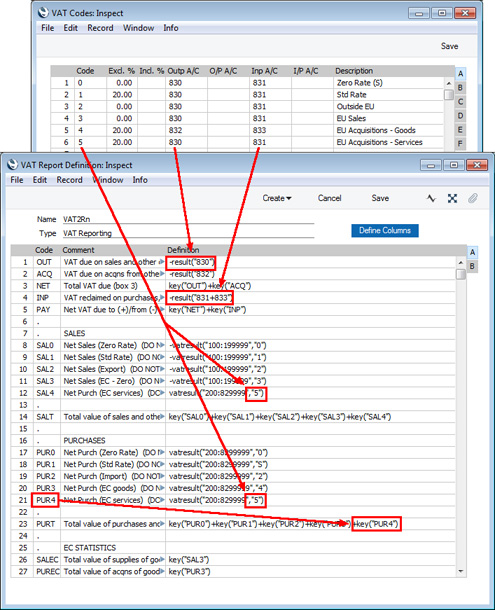
- Using this definition, the Purchase Invoice illustrated above will be included in the VAT Report as shown below:
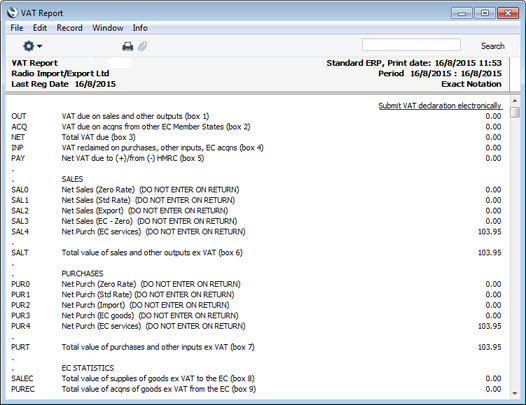
- Create a new record in the Tax Rules setting in the Nominal Ledger. In the VAT Type field, choose "Reversed" using 'Paste Special':
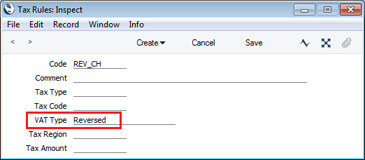
- In the VAT Codes setting, create a VAT Code for reverse charge VAT. Specify Input and Output Accounts and the VAT rate and, in the Tax Rules field on flip B, enter the Tax Rule record that you created in step 10:
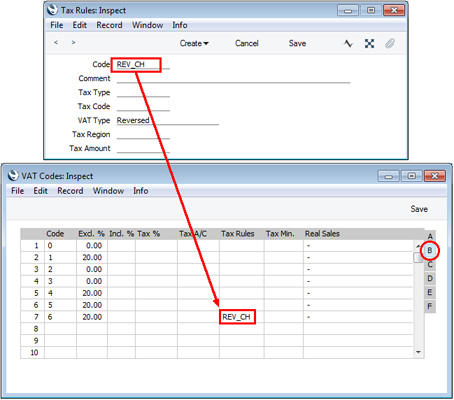
- In a Purchase Invoice that is to be subject to the reverse charge procedure, enter the total charged by the Supplier (i.e. without VAT) in the TOTAL field and the Amounts in the rows using the VAT Code from step 11:
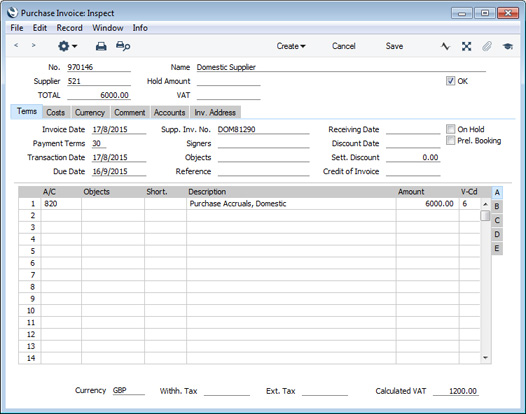
- When you mark the Purchase Invoice as OK and save it, the total charged by the Supplier will be posted to the Creditor Account. Because the Tax Rule in the VAT Code is "Reversed", VAT will be debited to the Input Account of the selected VAT Code and credited to the Output Account:
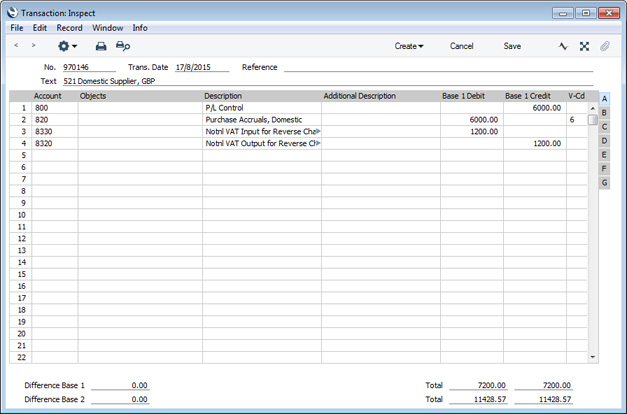
- In the VAT report, you will need to include reverse charge VAT when calculating the output VAT that is payable. Subject to the normal rules, you will also be able to include it when calculating the input VAT that is reclaimable.
In the UK, you must include the output tax payable on purchases under the reverse charge in the output VAT total (box 1 in the UK VAT Return). This has been done in row 1 in the example VAT Report definition illustrated below. In this row, the RESULT command will return the total net change in the standard Output VAT Account (Account 830) and in the Output VAT Account used in VAT Code 6 (Account 8320). From there the output VAT will be included in the total output VAT figure in row 3.
You should not include the VAT exclusive value of the purchases (box 6 on the UK VAT Return). So, rows 8-12 do not include a VATRESULT calculation for VAT Code 6.
If you will reclaim input VAT, you should include it in the input VAT total. In row 4 the RESULT of the Input VAT Account has been added to those of the domestic Input VAT Account and the EU Acquisitions Input Account to produce a total figure.
Row 22 uses the VATRESULT command to the total value of reverse charge purchases with VAT Code 5. This figure is then used in row 24 (Box 7 on the UK VAT Return).
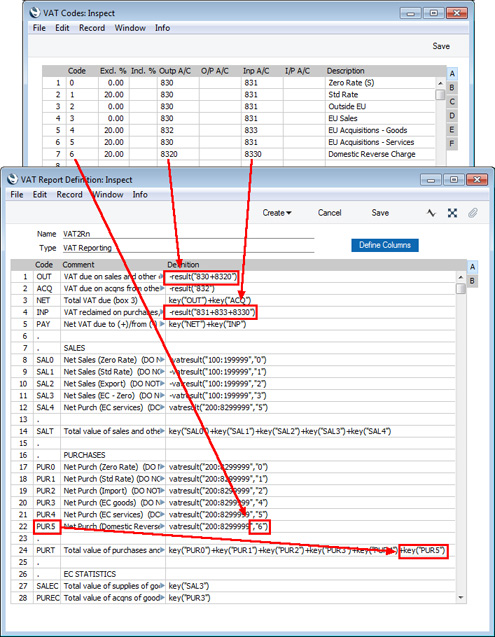
- Using this definition, the Purchase Invoice illustrated above will be included in the VAT Report as shown below:
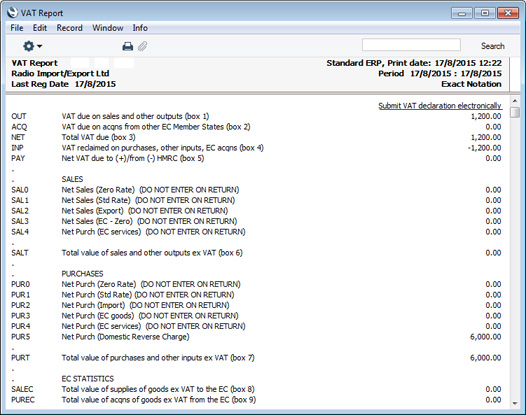
Please click for details about:
- Introduction to the VAT Report
- Definition of the VAT Report
- Example VAT Report Definitions
- Printing the VAT Report
- Submitting the VAT Report electronically (UK only)
Reports in the Nominal Ledger:
- Introduction
- Definition of Nominal Ledger Reports
- Drill-down
- The Operations Menu
- Account Reconciliation
- Accrual Report
- Analytical Balance
- Analytical Balance (Fiscal purposes)
- Balance Sheet
- Bank Reconciliation
- Bank Statement
- Bank Transactions
- Base Currency Rate Change
- Budget Journal
- Correction List
- Corresponding Accounts
- Creditors Account
- Currency A/C Rate Change
- Daily Balances
- Debtors Account
- Forward Balance Journal
- Income & Expense Book
- Key Financial Ratios
- Liquidity Forecast
- Multicurrency Accounts Rate Difference
- Nominal Ledger
- N/L Accrual Transactions
- N/L Transfer, Subsystems
- Object Results
- Object/Quantity Results
- Profit & Loss
- Revised Budget Journal
- Simulation Journal
- Tax Account Balances
- Tax Calculations
- Tax Transactions for Registers
- Template Transaction Journal
- Test Corresponding Rules
- Transaction Journal
- Transaction Summary
- Trial Balance
- VAT Listing
- VAT Report
- VAT Report Purchases
- VAT Report Sales
- VAT Transaction Journal
- XBRL Report
Go back to:
- Home page for Nominal Ledger manual
- Home page for Standard ERP manual
VAT Report - Example VAT Report Definitions - Standard VAT
This page describes an example VAT Report definition that is suitable for use in the UK. Please refer to the following pages for more details about the VAT Report in Standard ERP:
- Introduction
- Definition of the VAT Report
- Example VAT Report Definitions, including:
- Standard VAT
- Cash VAT
- Reverse Charge VAT
- Standard VAT
- Printing the VAT Report
A VAT Report definition suitable for use in the UK is illustrated below:
In essence, we are using the RESULT command to calculate the VAT to be paid or reclaimed and the VATRESULT command to calculate turnover figures. The RESULT command will print the net change in a specified Account over the report period i.e. the net amount posted to the Account. The VATRESULT command will print the net amount posted with a specified VAT Code to the Account.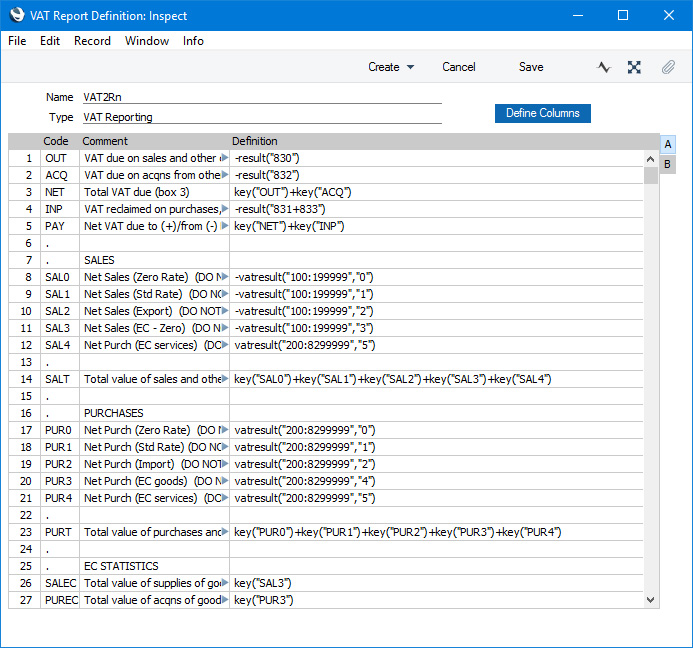
In more detail the calculations in this report definition are as follows:
Row 1 OUT
-RESULT("830") 830 is the Output VAT Account, so this row prints the total output VAT on domestic sales made during the report period. Sales figures are stored as negative figures in Standard ERP, so the negative sign will convert them to positive. This figure should be placed in Box 1 on the UK VAT Return. If you have more than one Output VAT Account, you can include them all in the formula (e.g. -RESULT("830+8300")), or you can print the net change in each Account on separate lines and then add them together using the KEY command.
Row 2 ACQ
-RESULT("832") 832 is the Account for output VAT on EU acquisitions of goods, so this row will print the VAT due on acquisitions of goods from other EU member states. This figure should be placed in Box 2 on the UK VAT Return. Please refer to the Reverse Charge VAT example towards the end of this page for more details about EU acquisitions. Row 3 NET
KEY("OUT")+KEY("ACQ") Prints the total Output VAT due, calculated by adding the previous two figures together. This figure should be placed in Box 3 on the UK VAT Return. Row 4 INP
-RESULT("831+833") 831 is the Input VAT Account and 833 is the Account for input VAT on EU acquisitions of goods. This row will therefore print the VAT reclaimable on purchases and other inputs (including acquisitions from the EU). The result will be printed as a negative figure. This figure should be placed in Box 4 on the UK VAT Return. Row 5 PAY
KEY("NET")+KEY("INP") Prints the net VAT to be paid or reclaimed, calculated by adding the figure in row 3 to the (negative) figure in row 4. A positive figure indicates that you are liable for VAT, a negative one signifies that you are owed money by the VAT authority. This figure should be placed in Box 5 on the UK VAT Return. Rows 8-12 SAL0-SAL4
-VATRESULT("100:1999999","0") -VATRESULT("100:1999999","1")
-VATRESULT("100:1999999","2")
-VATRESULT("100:1999999","3")
-VATRESULT("200:8299999","5")
Accounts 100:199 are the Sales Accounts. These rows print the total values of sales made with each VAT Code. If you sell non-digital services to customers in the EU who are not registered for VAT, you will need to charge VAT at the relevant domestic rate for the type of Item. Place these Customers in the Inside EU (Post VAT) Zone and use the standard VAT Code. This will ensure these sales will be included in the Box 1 figure (row 1) and in the relevant sales turnover figure here.
Row 12 will print the value of purchases of services from Suppliers in the Inside EU Zone. This will ensure this figure is included in Box 6 (row 14 below).
Row 14 SALT
KEY("SAL0") + KEY("SAL1") + KEY("SAL2") + KEY("SAL3") + KEY("SAL4") Prints the sum of rows 8-12 i.e. the total value of sales and all other outputs excluding VAT. This figure should be placed in Box 6 on the UK VAT Return.
Rows 17-21 PUR0-PUR4
-VATRESULT("200:8299999","0") -VATRESULT("200:8299999","1")
-VATRESULT("200:8299999","2")
-VATRESULT("200:8299999","4")
-VATRESULT("200:8299999","5")
Accounts 200:829 all represent items that can be purchased by the business. These rows print the total values of purchases made with each VAT Code. The range does not include the VAT Accounts (830:835). If you are using the Add VAT Code to VAT A/C rows option in the Transaction Settings setting, the appropriate VAT Code will be copied to the V-Cd field in each Transaction row posting to a VAT Account, as well as to the V-Cd field in the rows posting to a Sales or Cost Account. If the range included the VAT Accounts, the resulting figures would include VAT when they should exclude it.
Row 23 PURT
KEY("PUR0") + KEY("PUR1") + KEY("PUR2") + KEY("PUR3") + KEY("PUR4") Prints the sum of rows 17-21 i.e. the total value of purchases and all other inputs excluding VAT. This figure should be placed in Box 7 on the UK VAT Return. Row 26 SALEC
KEY("SAL3") Prints the total value of sales made with VAT Code 3 i.e. the total value of sales to other EU member states. This assumes that sales made to other EU member states will always carry VAT Code 3, and that VAT Code 3 is not used for any other sales. This figure should be placed in Box 8 on the UK VAT Return. (Box 8 should not include sales of services, so a different VAT Code would need to be used for such sales.) Row 27 PUREC
KEY("PUR3") Prints the total value of purchases made with VAT Code 4 i.e. the total value of purchases of goods from other EU member states. This assumes that purchases of goods made from other EU member states will always carry VAT Code 4, and that VAT Code 4 is not used for any other purchases. This figure should be placed in Box 9 on the UK VAT Return. (Box 9 should not include purchases of services. In the example, VAT Code 5 would be used for such purchases.)
As previously mentioned, the VAT Report definition illustrated and described above uses the Chart of Accounts and VAT Codes that are supplied with Standard ERP. You will need to amend the VAT Report definition (or start one from scratch) if you have modified the standard Chart of Accounts and/or VAT Codes, or created your own. For example, in the sample Chart of Accounts, the Output VAT Account is 830 and the standard VAT Code is 1. If your Output VAT Account is not 830 (e.g. it is 83010), you must replace every instance of "830" in the report definition with "83010". If your standard VAT Code is not 1 (e.g. it is S), you must replace every instance of "1" in the report definition with "S". It may be for example that you use different VAT Codes for sales and purchases.
Please follow the links below for more details about the VAT Report:
- Introduction to the VAT Report
- Definition of the VAT Report
- Example VAT Report Definitions, including:
- Standard VAT
- Cash VAT
- Reverse Charge VAT
- Standard VAT
- Printing the VAT Report
- Submitting the VAT Report electronically (UK only)
Reports in the Nominal Ledger:
- Introduction
- Definition of Nominal Ledger Reports
- Drill-down
- The Operations Menu
- Account Reconciliation
- Accrual Report
- Analytical Balance
- Analytical Balance (Fiscal purposes)
- Balance Sheet
- Bank Reconciliation
- Bank Statement
- Bank Transactions
- Base Currency Rate Change
- Budget Journal
- Cash Flow
- Chart of Accounts
- Correction List
- Corresponding Accounts
- Creditors Account
- Currency A/C Rate Change
- Daily Balances
- Debtors Account
- Forward Balance Journal
- Income & Expense Book
- Key Financial Ratios
- Liquidity Forecast
- Multicurrency Accounts Rate Difference
- N/L Accrual Transactions
- N/L Transfer, Subsystems
- Nominal Ledger
- Profit & Loss
- Revised Budget Journal
- Simulation Journal
- Tag/Object Results
- Tag/Object/Quantity Results
- Tax Account Balances
- Tax Calculations
- Tax Transactions for Registers
- Template Transaction Journal
- Test Corresponding Rules
- Transaction Journal
- Transaction Summary
- Trial Balance
- VAT Listing
- VAT Report
- VAT Report Purchases
- VAT Report Sales
- VAT Transaction Journal
- XBRL Report
Go back to:
- Home page for Nominal Ledger manual
- Home page for Standard ERP manual
VAT Report - Example VAT Report Definitions - Cash VAT
This page describes an example VAT Report definition that is suitable for use when using the Post Receipt VAT and Post Payment VAT options, with particular reference to the Cash VAT scheme in the UK. Please refer to the following pages for more details about the VAT Report in Standard ERP:
- Introduction
- Definition of the VAT Report
- Example VAT Report Definitions, including:
- Standard VAT
- Cash VAT
- Reverse Charge VAT
- Standard VAT
- Printing the VAT Report
In some countries, you can account for output VAT on the basis of the payments you receive, rather than on the Invoices you issue. Similarly, you can account for input VAT on the basis of the payments you issue, rather than on the Purchase Invoices that you receive. This is sometimes known as accounting for VAT on a cash basis or, in the UK, Cash Accounting.
If you need to account for VAT on a cash basis, follow these steps:
- On the sales side, the Account Usage S/L contains two options that you should select, depending on your requirements:
- Select the Post Receipt VAT option if you need VAT to be posted from normal Receipts (i.e. Receipts in which you are receiving payment against Invoices) and On Account Receipts.
- Select the Post Prepayment VAT option if you would like VAT to be posted from Prepayment Receipts. You will also need to specify a Prepayment VAT Account in the same setting.
In the UK only (i.e. when the VAT Law in the Company Info setting is "Default"), you should also specify VAT Base and VAT Base Opposite Accounts. When an Invoice is paid, the VAT Base Account will be credited with the Invoice turnover (i.e. value excluding VAT). The V-Cd field in this posting will be filled in. The purpose of this posting is to allow the Invoice turnover to be added to the value of sales and all other outputs excluding VAT (the Box 6 figure on the UK VAT Return) on the payment date rather than on the Invoice Date. The purpose of the VAT Base Opposite Account is solely to balance the VAT Base Account.
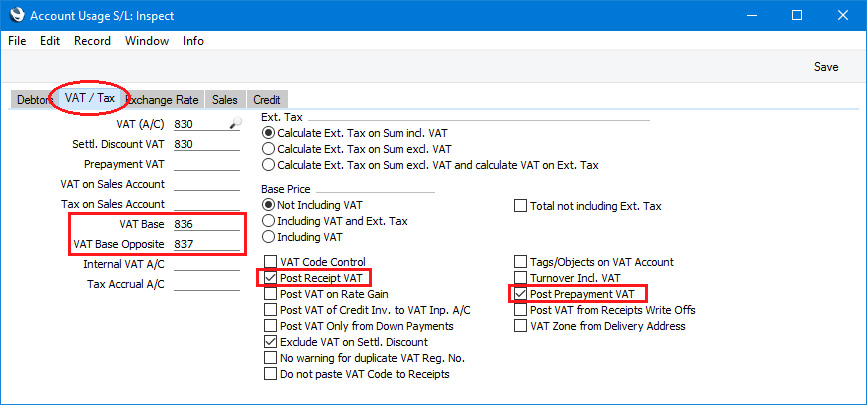
- Select the Post Receipt VAT option if you need VAT to be posted from normal Receipts (i.e. Receipts in which you are receiving payment against Invoices) and On Account Receipts.
- Similarly, on the purchase side, the Account Usage P/L contains two options that you should select, depending on your requirements:
- Select the Post Payment VAT option if you need VAT to be posted from normal Payments (i.e. Payments in which you are issuing payment against Purchase Invoices) and On Account Payments.
- Select one of the Post Prepayment VAT options if you would like VAT to be posted from Prepayment Payments. You will also need to specify On Account VAT and Prepayment VAT Accounts in the same setting and, depending on your requirements, you may also need to select the Prepayment amount excluding VAT option.
In the UK only, you should also specify VAT Base and VAT Base Opposite Accounts. When you pay a Purchase Invoice, the VAT Base Account will be debited with the Invoice turnover (i.e. value excluding VAT). The V-Cd field in this posting will be filled in. The purpose of this posting is to allow the Purchase Invoice turnover to be added to the value of purchases and all other inputs excluding VAT (the Box 7 figure on the UK VAT Return) on the payment date rather than on the Invoice Date. The purpose of the VAT Base Opposite Account is solely to balance the VAT Base Account.
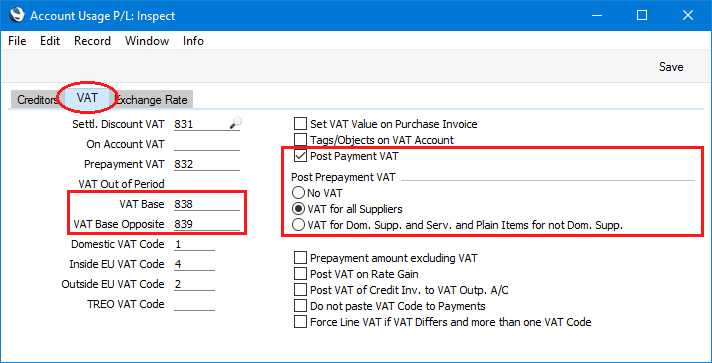
- Select the Post Payment VAT option if you need VAT to be posted from normal Payments (i.e. Payments in which you are issuing payment against Purchase Invoices) and On Account Payments.
- If you need to account for VAT on a cash basis, Sales Invoices will still post to an Output VAT Account as normal, and Purchase Invoices will still post to an Input VAT Account. However, these Accounts will now be treated as preliminary VAT Accounts. When a Customer pays an Invoice, the Transaction from the Receipt will include an extra VAT element in which the VAT is moved from the Output VAT Account to a final Account, known as the O/P Account. On the purchase side, when you pay a Purchase Invoice, the Transaction from the Payment will include an extra VAT element in which the VAT is moved from the Input VAT Account to a final Account, known as the I/P Account.
The next step is to specify the O/P and I/P Accounts, which you should do in the VAT Codes setting:
Note in the rows for VAT Codes 4 and 5 that the Output and O/P Accounts are the same, and the Input and I/P Accounts are the same. VAT Codes 4 and 5 are used for acquisitions from the EU, and in the UK such transactions cannot be included in the Cash Accounting scheme. Standard ERP still requires O/P and I/P Accounts to be specified: using the same Accounts in effect means that acquisition VAT will be immediately be posted to the final Account, without passing through a preliminary Account.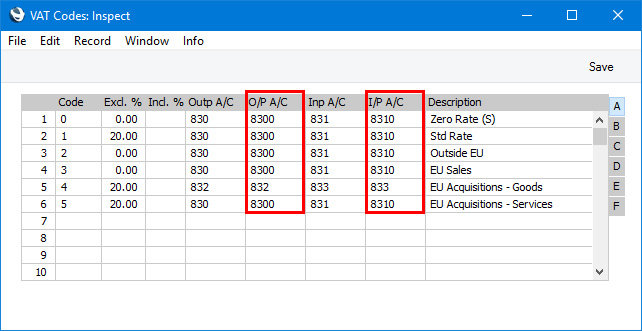
- Finally, you should make two changes to the definition of the VAT Report (in this example, we will add the changes to the example standard VAT Report definition described here). The first change is to ensure that the VAT to be paid or reclaimed will be calculated using the O/P and I/P Accounts instead of the Output and Input Accounts. In the illustration below, we have changed rows 1 and 4:
The second change is to ensure that the values of sales and purchases are calculated from the two VAT Base Accounts. Postings to the sales and cost Accounts should still be included in the calculations, because the value of Invoices that are Cash Notes (i.e. Invoices that are immediately paid and so will not have corresponding Receipts and Payments) will not be posted to the VAT Base Account: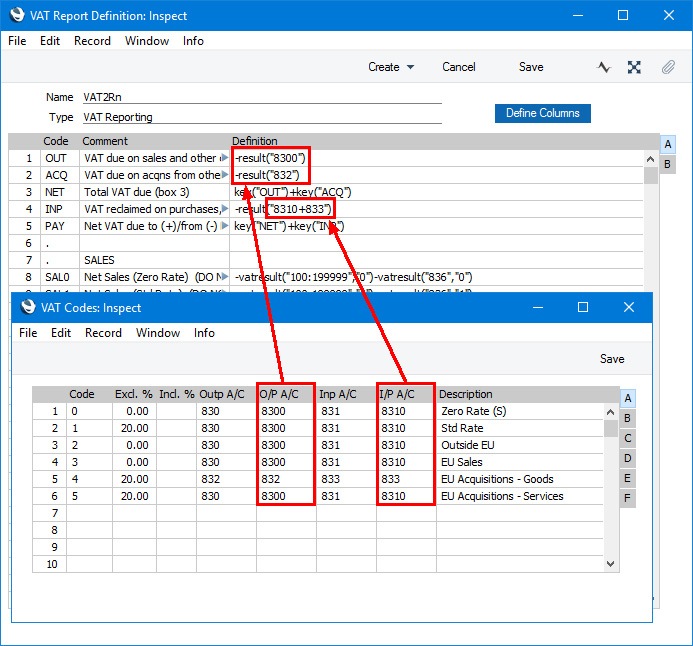
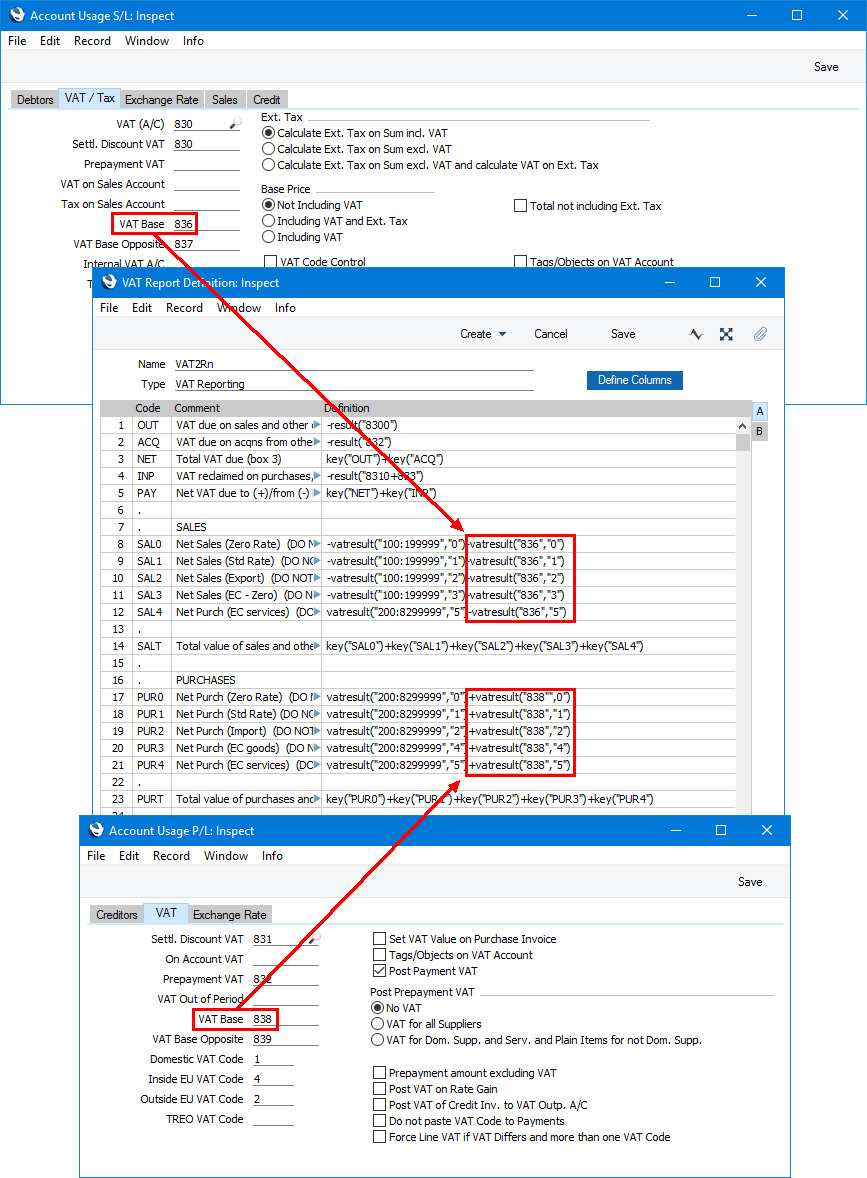
- Illustrated below is an example Invoice together with its Nominal Ledger Transaction. The VAT is posted to the Output Account as normal (row 3), but the posting to the Sales Account (row 2) does not include a VAT Code (V-Cd):
When the Customer pays the Invoice a month later, the Nominal Ledger Transaction shows the VAT being moved from the Output Account to the O/P Account. The sales value excluding VAT is credited to the VAT Base Account and debited to the VAT Base Opposite Account. The posting to the VAT Base Account includes the VAT Code: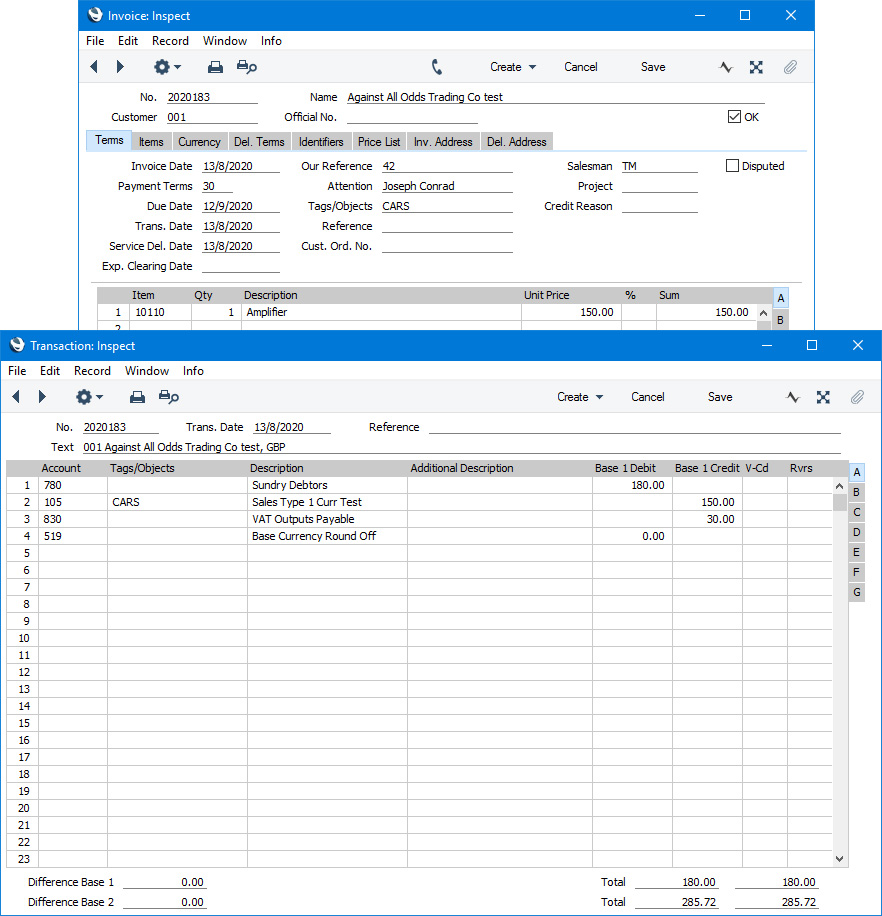
The VAT Report for the month when the Invoice was paid includes the VAT in the payable figure: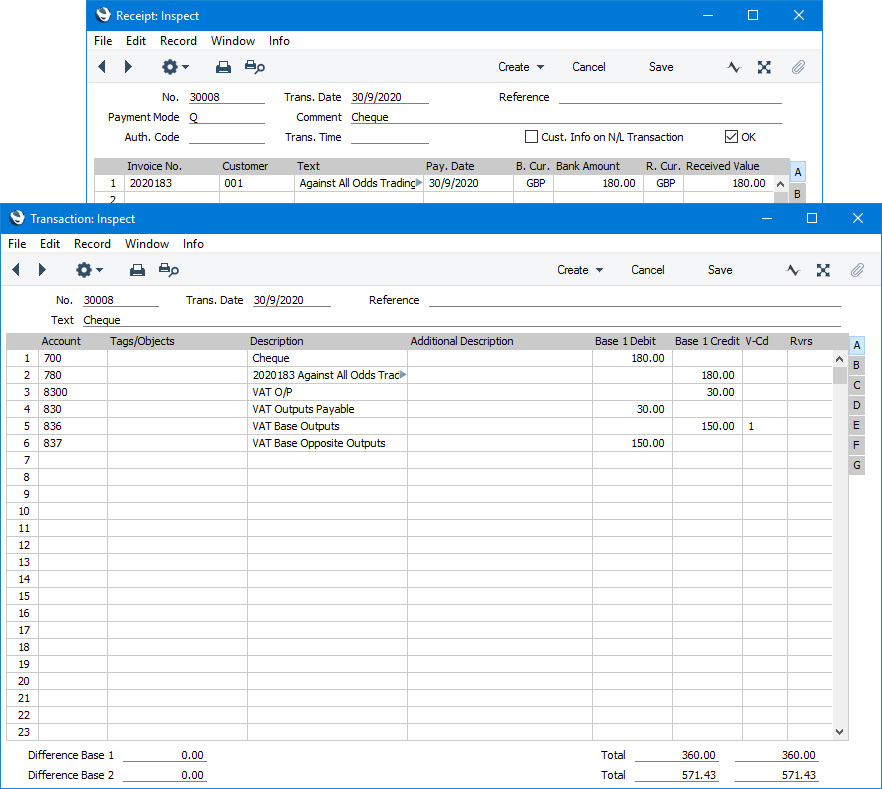
The value of the Invoice is included in rows 8-11 and 14 (SAL0-SAL3 and SALT). As previously described, these rows use the VATRESULT command to print the total values of sales and purchases made with each VAT Code. For example, VATRESULT("100";"1") will print the value of sales posted from Invoices to Account 100 with VAT Code 1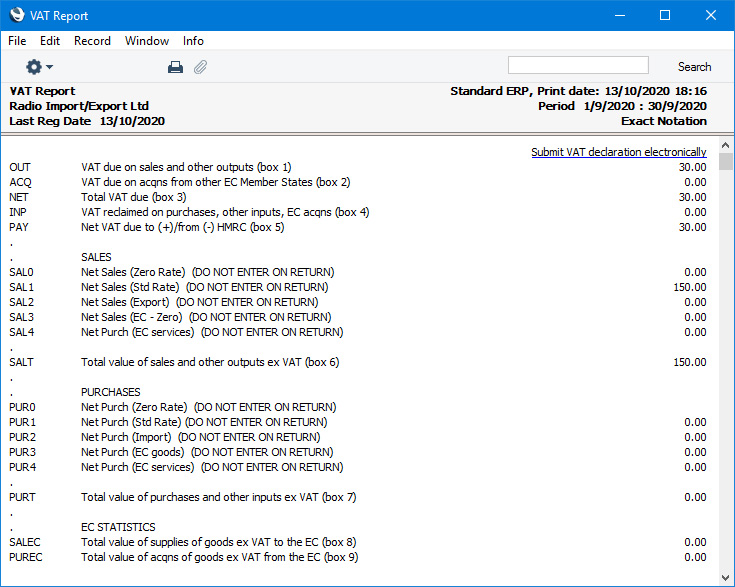
When you are accounting for VAT on a cash basis, you need to be able to establish the total value of sales and purchases by payment date, not by Invoice date. To this end, the VAT Code field in postings to Sales and Cost Accounts in Transactions created from Sales and Purchase Invoices will be empty. Transactions created from Receipts and Payments will include postings to VAT Base Accounts, and VAT Codes will be assigned to these postings. This allows you to use the VATRESULT command to establish the total value of sales and purchases by payment date.
- The next illustration shows an Invoice with a "Cash" Type Payment Term (i.e. a Cash Note) together with its Nominal Ledger Transaction. As the Invoice is a Cash Note there will be no Receipt, so the VAT is posted directly to the O/P Account (row 3) and the posting to the Sales Account (row 2) does include a VAT Code (V-Cd):
On recalculating the VAT Report previously illustrated, it will now include the Cash Note. The value of the Cash Note is included in rows 8-11 and 14 (SAL0-SAL3 and SALT because the figures in these rows are calculated by applying the VATRESULT command to the Sales Accounts as well as to the VAT Base Account: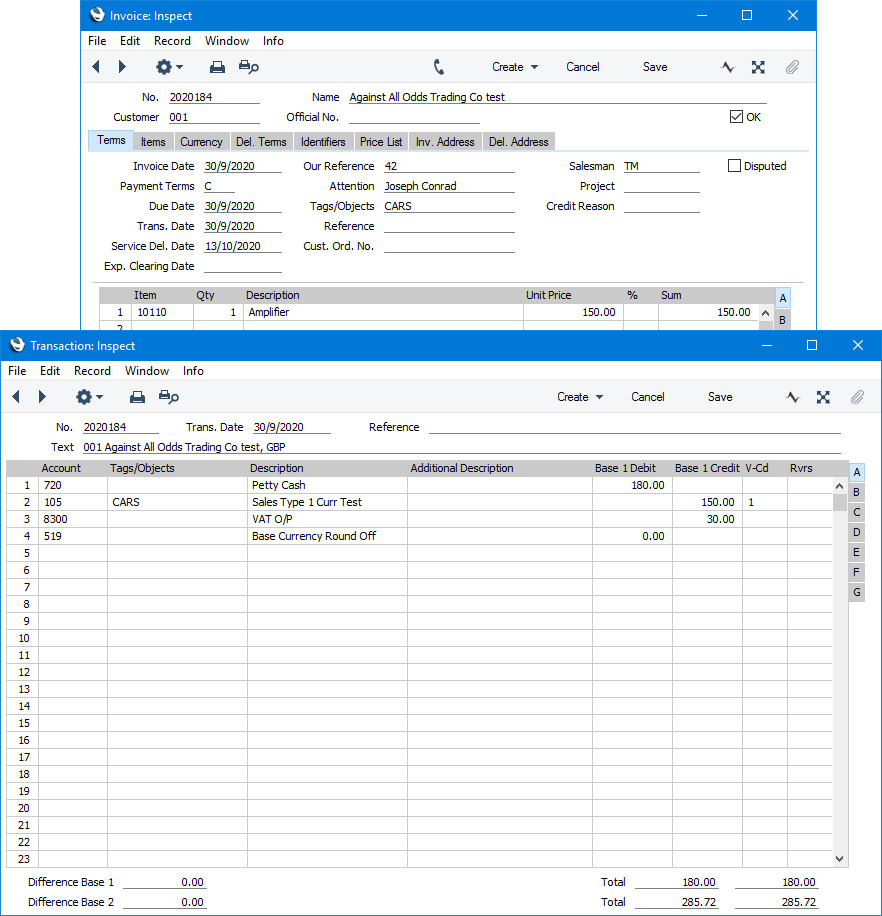
Please follow the links below for more details about the VAT Report: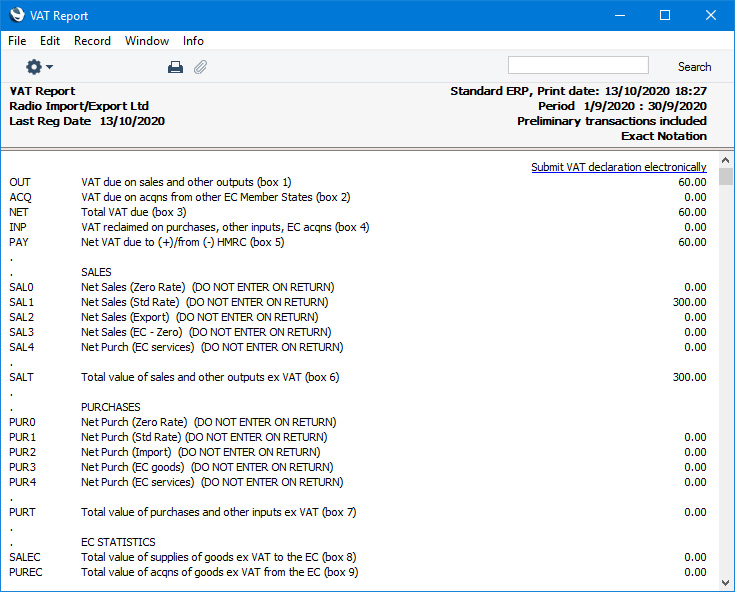
- Introduction to the VAT Report
- Definition of the VAT Report
- Example VAT Report Definitions, including:
- Standard VAT
- Cash VAT
- Reverse Charge VAT
- Standard VAT
- Printing the VAT Report
- Submitting the VAT Report electronically (UK only)
Reports in the Nominal Ledger:
- Introduction
- Definition of Nominal Ledger Reports
- Drill-down
- The Operations Menu
- Account Reconciliation
- Accrual Report
- Analytical Balance
- Analytical Balance (Fiscal purposes)
- Balance Sheet
- Bank Reconciliation
- Bank Statement
- Bank Transactions
- Base Currency Rate Change
- Budget Journal
- Cash Flow
- Chart of Accounts
- Correction List
- Corresponding Accounts
- Creditors Account
- Currency A/C Rate Change
- Daily Balances
- Debtors Account
- Forward Balance Journal
- Income & Expense Book
- Key Financial Ratios
- Liquidity Forecast
- Multicurrency Accounts Rate Difference
- N/L Accrual Transactions
- N/L Transfer, Subsystems
- Nominal Ledger
- Profit & Loss
- Revised Budget Journal
- Simulation Journal
- Tag/Object Results
- Tag/Object/Quantity Results
- Tax Account Balances
- Tax Calculations
- Tax Transactions for Registers
- Template Transaction Journal
- Test Corresponding Rules
- Transaction Journal
- Transaction Summary
- Trial Balance
- VAT Listing
- VAT Report
- VAT Report Purchases
- VAT Report Sales
- VAT Transaction Journal
- XBRL Report
Go back to:
- Home page for Nominal Ledger manual
- Home page for Standard ERP manual
VAT Report - Example VAT Report Definitions - Reverse Charge VAT
This page describes an example VAT Report definition that is suitable for use with Reverse Charge VAT. Please refer to the following pages for more details about the VAT Report in Standard ERP:
- Introduction
- Definition of the VAT Report
- Example VAT Report Definitions, including:
- Standard VAT
- Cash VAT
- Reverse Charge VAT
- Standard VAT
- Printing the VAT Report
- Submitting the VAT Report electronically (UK only)
In a normal transaction, the Supplier should account to the tax authorities for the VAT that is due on the supply. However, in certain situations, it is the Customer who must account for any VAT that is due. If you are the customer in such a situation, you will not pay VAT to the Supplier but instead will pay VAT to the tax authorities at the domestic rate that would apply had you purchased the Items from a local Supplier. This is sometimes known as the "reverse charge" procedure. You can reclaim this VAT, if the purchase relates to VAT taxable supplies that you will go on to make.
One situation when you need to use the reverse charge procedure is when you purchase Items from VAT-registered Suppliers in other countries in the EU. Items that you purchase from other countries in the EU are usually known as "acquisitions" or "arrivals" (the term "imports" usually refers to Items purchased from other countries outside the EU). One method for handling VAT on acquisitions using the reverse charge procedure is described below. An alternative method is to create Internal Invoices from Purchase Invoices for EU Acquisitions. Please refer here for more details.
To include EU Acquisition VAT in the VAT Report, follow these steps:
- In the VAT Codes setting in the Nominal Ledger, create two VAT Codes for VAT on EU Acquisitions. Two VAT Codes are needed because purchases of goods and purchases of services need to be reported differently on the UK VAT Return.
VAT Code 4 in the example illustration below will be used for purchases of goods. VAT will be debited to the Input Account in this VAT Code and credited to the Output Account. It is recommended that you use an Output Account that is not used in any other VAT Code.
VAT Code 5 in the example will be used for purchases of services. In this case, you can use the standard Output and Input Accounts (although you can use dedicated Accounts if you prefer).
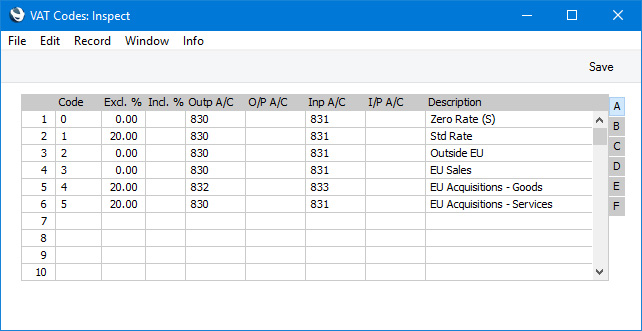
- In a Purchase Invoice for goods received from a Supplier in the Inside EU VAT Zone, enter the total charged by the Supplier (i.e. without VAT) in the TOTAL field and the Amounts in the rows using the VAT Code 4 from step 1. The Calculated VAT field in the footer will be updated automatically. In this example, the Currency in the Invoice is the Euro:
The VAT Code in each row will be chosen as follows: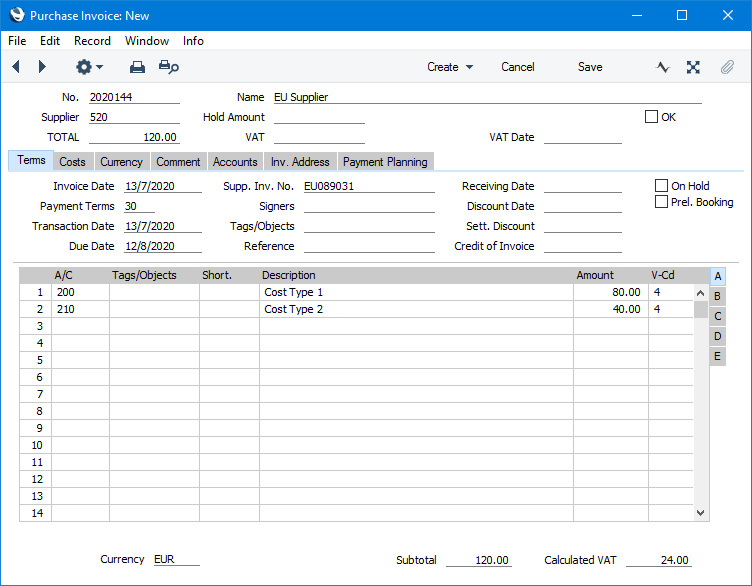
- The Purch. VAT Code for the Supplier will be used.
- It will be taken from the Account record.
- The VAT Code on the 'VAT' card of the Account Usage P/L setting will be used.
In the case of point (ii), you can only specify a single VAT Code in each Account record. It is therefore recommended that you use dedicated Accounts for purchases of goods from the EU, to ensure that the correct VAT Code will be offered as the default. If you use the same Account for non-EU and EU purchases, there is a risk that the wrong VAT Code will be offered by default and that you don't change it.
In the last case, the appropriate VAT Code for the Zone of the Supplier will be used.
- The Purch. VAT Code for the Supplier will be used.
- When you mark the Purchase Invoice as OK and save it, the total charged by the Supplier will be posted to the Creditor Account. Because the Supplier is in the Inside EU VAT Zone, VAT will be debited to the Input Account of the selected VAT Code and credited to the Output Account (EUR figures are shown in the Base 2 Debit and Credit fields, with figures in Base Currency 1 in the Base 1 Debit and Credit fields):
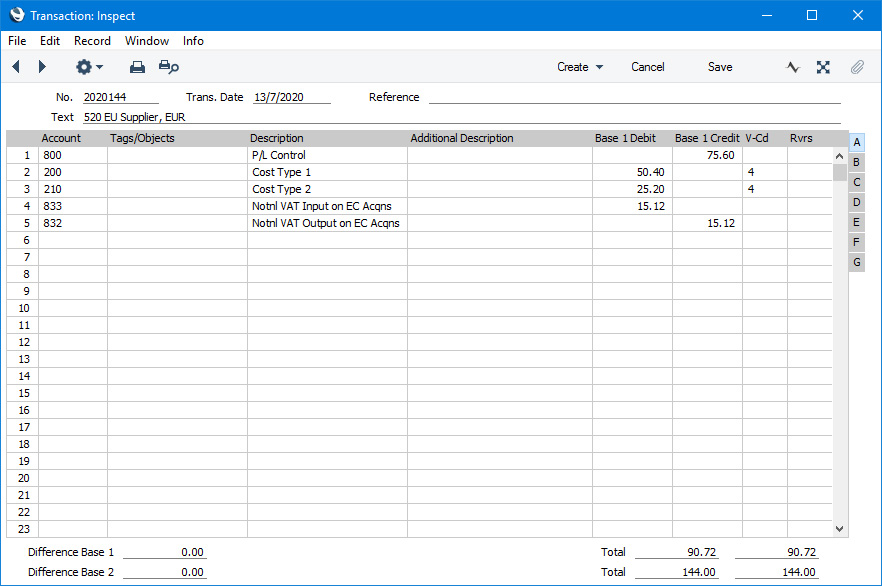
- In the VAT report, you will need to include acquisition VAT when calculating the output VAT that is payable. You will also be able to include it when calculating the input VAT that is reclaimable, if the acquisitions relate to VAT taxable supplies that you make.
In the UK, the output VAT payable on EU goods acquisitions should be included in the VAT report as a separate figure. This has been done in row 2 in the example VAT Report definition illustrated below. In this row, the RESULT command will return the net change in the Output VAT Account used in VAT Code 4, hence the recommendation that this be an Output Account that is not used in any other VAT Code. From there the output VAT will be included in the total output VAT figure in row 3.
It is not necessary to include the input VAT as a separate figure. So, in row 4 the RESULT of the Input VAT Account has been added to that of the domestic Input VAT Account to produce a total figure.
Row 20 uses the VATRESULT command to print the total value of EU acquisitions with VAT Code 4. This figure is then used in rows 23 and 27 (Boxes 7 and 9 on the UK VAT Return).
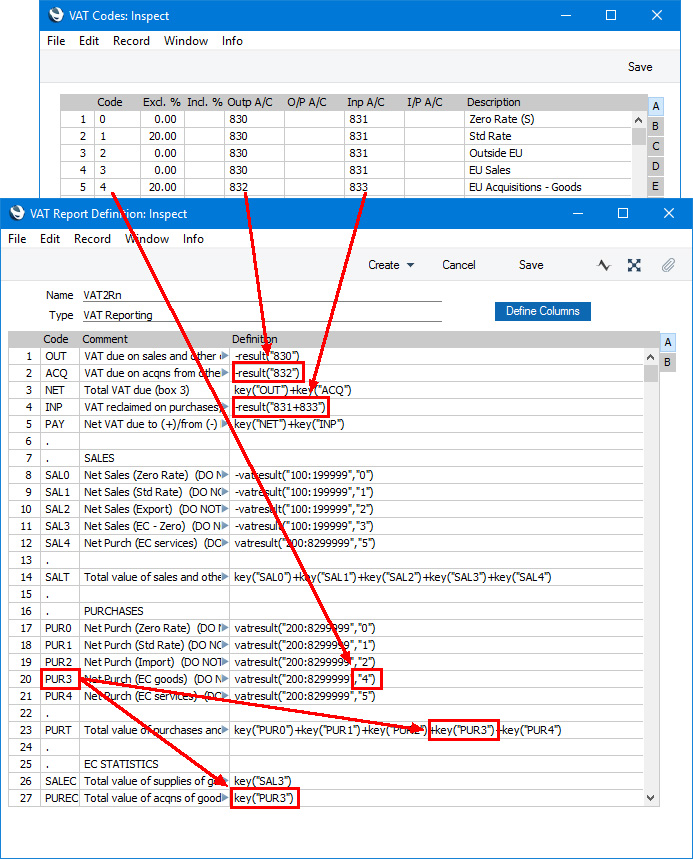
- Using this definition, the Purchase Invoice illustrated above will be included in the VAT Report as shown below:
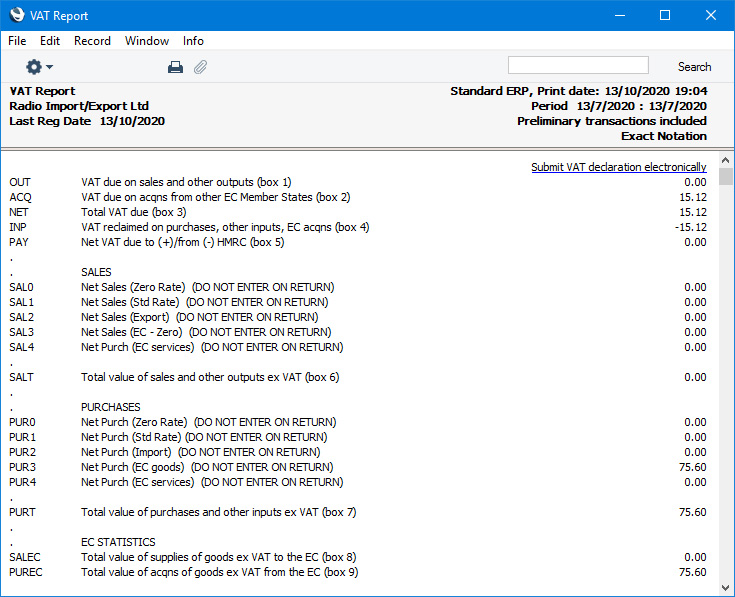
Follow these steps:
- The procedure for entering a Purchase Invoice for services is the same as that for entering a Purchase Invoice for goods. Enter the total charged by the Supplier (i.e. without VAT) in the TOTAL field and the Amounts in the rows using VAT Code 5. Again, it is therefore recommended that you use dedicated Accounts for purchases of services from the EU, to ensure that the correct VAT Code will be offered as the default. The Calculated VAT field in the footer will be updated automatically. In this example, the Currency in the Invoice is the Euro:
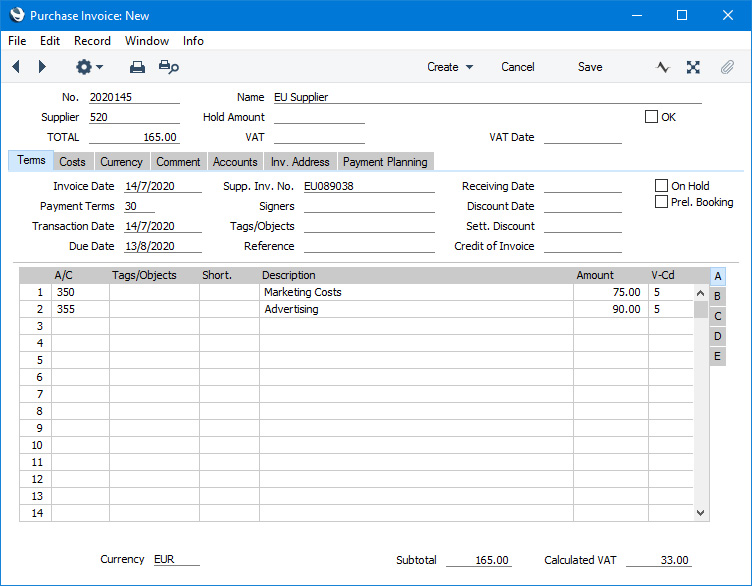
- When you mark the Purchase Invoice as OK and save it, the total charged by the Supplier will be posted to the Creditor Account. Because the Supplier is in the Inside EU VAT Zone, VAT will be debited to the Input Account of the selected VAT Code and credited to the Output Account (EUR figures are shown in the Base 2 Debit and Credit fields, with figures in Base Currency 1 in the Base 1 Debit and Credit fields):
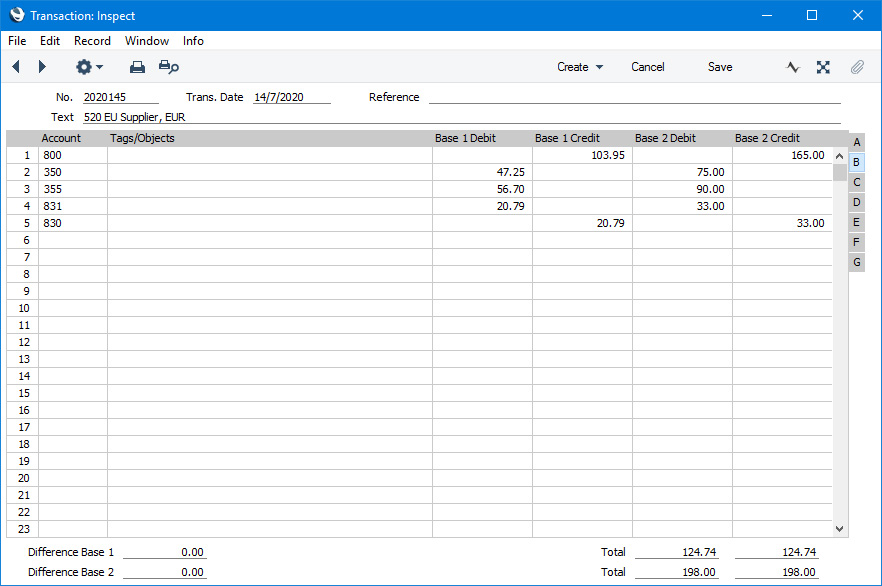
- In the VAT report, you will need to include acquisition VAT when calculating the output VAT that is payable. You will also be able to include it when calculating the input VAT that is reclaimable, if the acquisitions relate to VAT taxable supplies that you make. In this respect, reporting services is similar to reporting goods.
However, in the UK, the output VAT payable on EU services acquisitions should not be included in the VAT report as a separate figure (unlike EU goods acquisitions) i.e. it should be included in box 1 in the UK VAT Return and not box 2. As with goods, the input VAT should be included in box 4. This allows you to use the standard Output and Input Accounts, as in this example. You can use dedicated Accounts if you prefer, but if you do, be sure to include them in the RESULT commands that calculate the Output VAT and Input VAT totals in your VAT Report Definition (rows 1 and 4 in the example).
Purchase of services from Suppliers in the EU VAT Zone need to be included in both the sales totals and the purchase totals on the UK VAT Return (boxes 6 and 7). Using a dedicated VAT Code (VAT Code 5 in the example) will allow you to do this. Rows 12 and 21 in the example VAT Report definition use the VATRESULT command to print the total value of EU acquisitions with VAT Code 5. This figure is then used in rows 14 and 23.
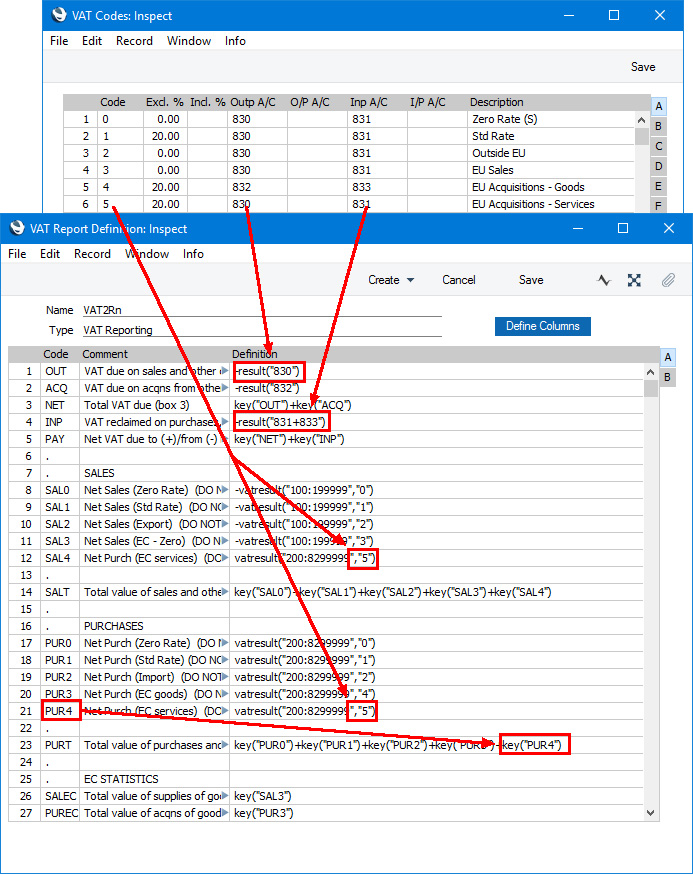
- Using this definition, the Purchase Invoice illustrated above will be included in the VAT Report as shown below:
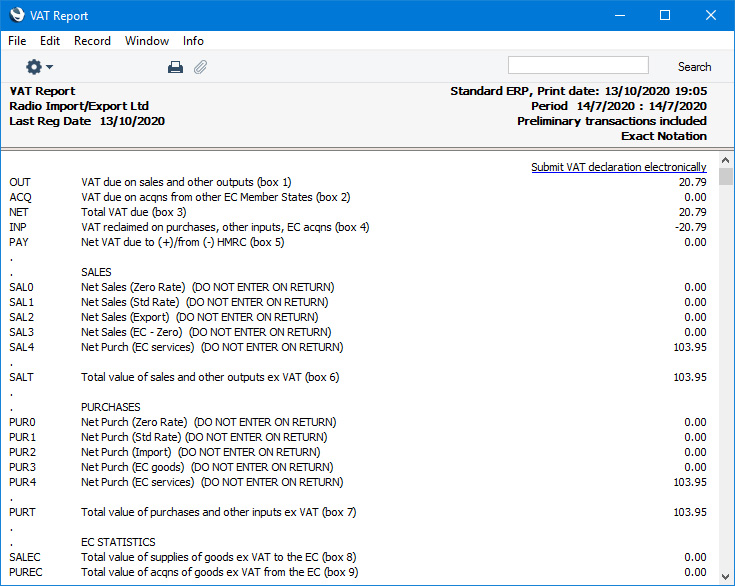
- Create a new record in the Tax Rules setting in the Nominal Ledger. In the VAT Type field, choose "Reversed" using 'Paste Special':
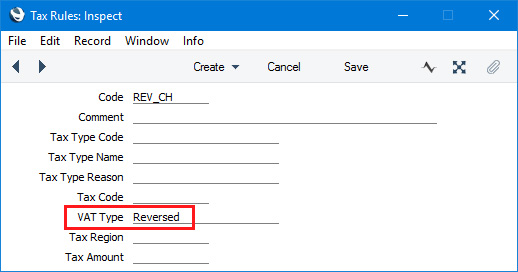
- In the VAT Codes setting, create a VAT Code for reverse charge VAT. Specify Input and Output Accounts and the VAT rate and, in the Tax Rules field on flip B, enter the Tax Rule record that you created in step 10:
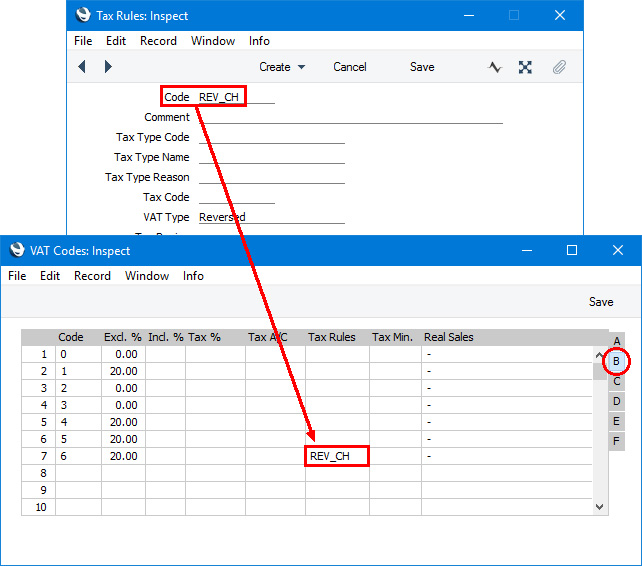
- In a Purchase Invoice that is to be subject to the reverse charge procedure, enter the total charged by the Supplier (i.e. without VAT) in the TOTAL field and the Amounts in the rows using the VAT Code from step 11:
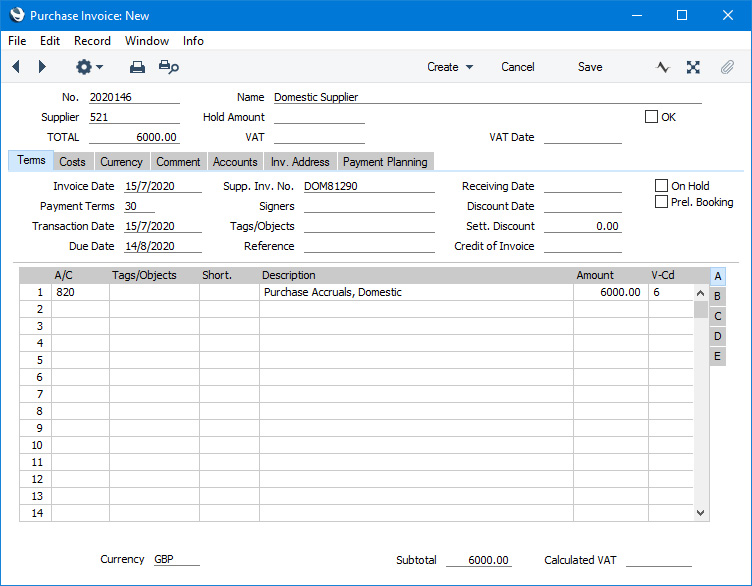
- When you mark the Purchase Invoice as OK and save it, the total charged by the Supplier will be posted to the Creditor Account. Because the Tax Rule in the VAT Code is "Reversed", VAT will be debited to the Input Account of the selected VAT Code and credited to the Output Account, and the VAT Code will be placed in the Rvrs field in the row posting to the Cost Account instead of the V-Cd field:
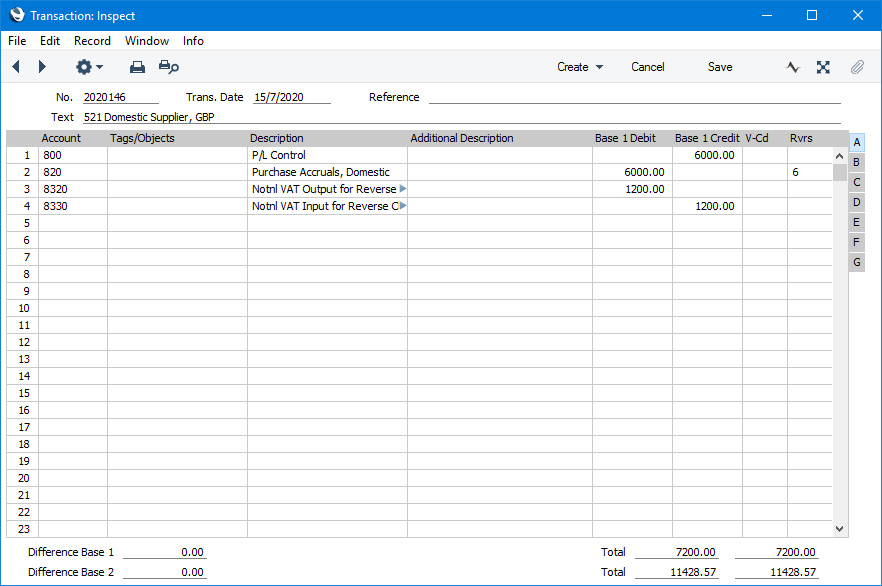
- In the VAT report, you will need to include reverse charge VAT when calculating the output VAT that is payable. Subject to the normal rules, you will also be able to include it when calculating the input VAT that is reclaimable.
In the UK, you must include the output tax payable on purchases under the reverse charge in the output VAT total (box 1 in the UK VAT Return). This has been done in row 1 in the example VAT Report definition illustrated below. In this row, the RESULT command will return the total net change in the standard Output VAT Account (Account 830) and in the Output VAT Account used in VAT Code 6 (Account 8320). From there the output VAT will be included in the total output VAT figure in row 3.
You should not include the VAT exclusive value of the purchases (box 6 on the UK VAT Return). So, rows 8-12 do not include a VATRESULT calculation for VAT Code 6.
If you will reclaim input VAT, you should include it in the input VAT total. In row 4 the RESULT of the Input VAT Account has been added to those of the domestic Input VAT Account and the EU Acquisitions Input Account to produce a total figure.
Row 22 uses the VATRESULT command to calculate the total value of reverse charge purchases with VAT Code 5 (in calculating this figure, VATRESULT will check both the V-Cd and Rvrs fields in Transaction rows). This figure is then used in row 24 (Box 7 on the UK VAT Return).
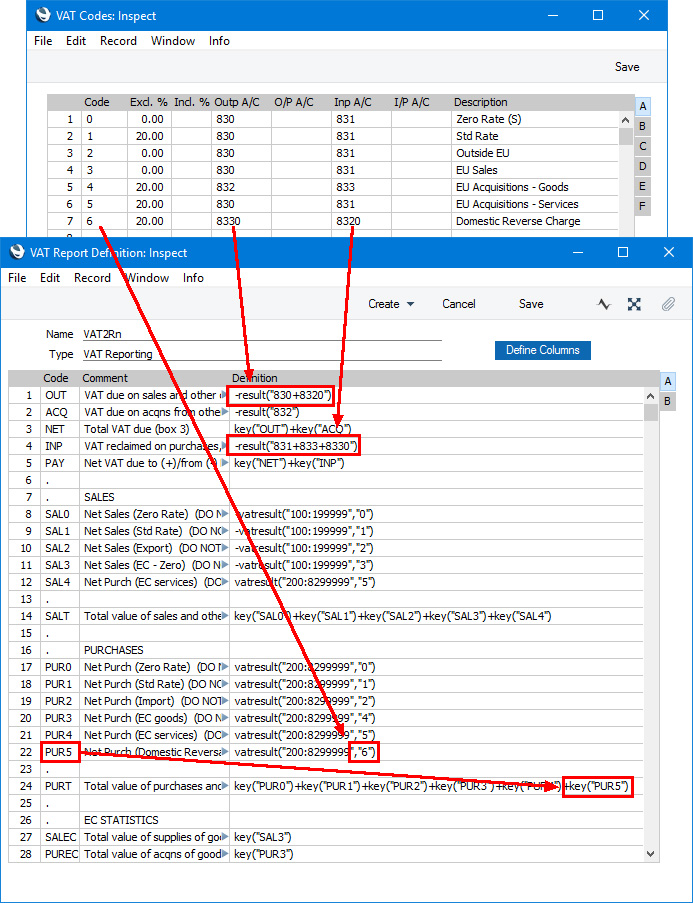
- Using this definition, the Purchase Invoice illustrated above will be included in the VAT Report as shown below:
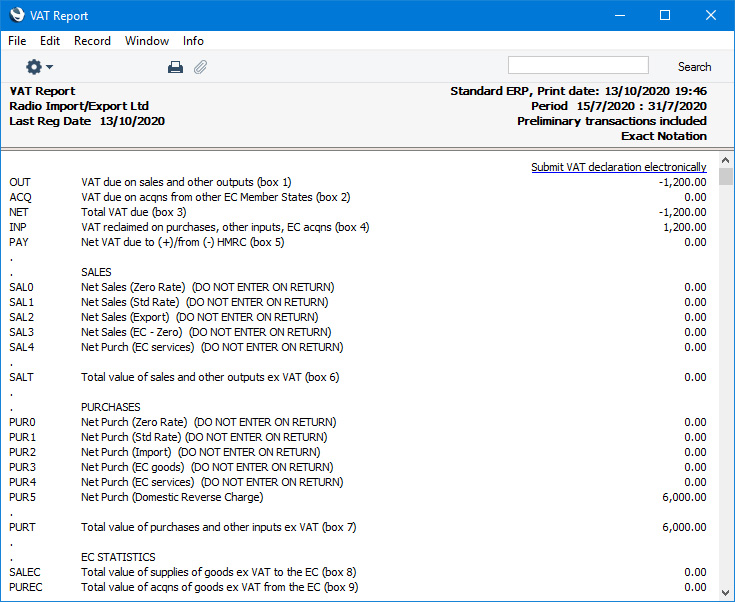
- Introduction to the VAT Report
- Definition of the VAT Report
- Example VAT Report Definitions, including:
- Standard VAT
- Cash VAT
- Reverse Charge VAT
- Standard VAT
- Printing the VAT Report
- Submitting the VAT Report electronically (UK only)
Reports in the Nominal Ledger:
- Introduction
- Definition of Nominal Ledger Reports
- Drill-down
- The Operations Menu
- Account Reconciliation
- Accrual Report
- Analytical Balance
- Analytical Balance (Fiscal purposes)
- Balance Sheet
- Bank Reconciliation
- Bank Statement
- Bank Transactions
- Base Currency Rate Change
- Budget Journal
- Cash Flow
- Chart of Accounts
- Correction List
- Corresponding Accounts
- Creditors Account
- Currency A/C Rate Change
- Daily Balances
- Debtors Account
- Forward Balance Journal
- Income & Expense Book
- Key Financial Ratios
- Liquidity Forecast
- Multicurrency Accounts Rate Difference
- N/L Accrual Transactions
- N/L Transfer, Subsystems
- Nominal Ledger
- Profit & Loss
- Revised Budget Journal
- Simulation Journal
- Tag/Object Results
- Tag/Object/Quantity Results
- Tax Account Balances
- Tax Calculations
- Tax Transactions for Registers
- Template Transaction Journal
- Test Corresponding Rules
- Transaction Journal
- Transaction Summary
- Trial Balance
- VAT Listing
- VAT Report
- VAT Report Purchases
- VAT Report Sales
- VAT Transaction Journal
- XBRL Report
Go back to:
- Home page for Nominal Ledger manual
- Home page for Standard ERP manual
VAT Report - Printing
Open the 'Reports' list window and double-click 'VAT Report'. The 'Specify VAT Report' window is opened.

- Period
- Paste Special
Reporting Periods setting, System module
- Enter the period for which you want to print the report in the format 01/02/02:28/02/02. If you are using four-digit years as in the illustration, the leading digits will be inserted automatically. The first period in the Reporting Periods setting is the default value.
- Object
- Paste Special
Object register, Nominal Ledger/System module
- Enter one or more Objects to limit the scope of the report.
- Values in
- If you are using the Dual-Base system, values in this report can be shown in either Base Currency. Use these options to choose which Currency is to be used on this occasion.
- If you are not using the Dual-Base system, use the Base Currency 1 option to produce a report in your home Currency.
- If you are not using the Dual-Base system, use the Base Currency 1 option to produce a report in your home Currency.
- Including Simulations
- Check this box to include Simulations in the report. Simulation rows of "Invalid" and "Transferred" Status will not be included.
- List Transactions
- With this box checked, the Transaction Numbers of all Transactions that fall within the reporting period, together with debit and credit totals, will be listed at the bottom of the report.
- No Header
- Check this box if you want the report to be printed without a header.
VAT Report Purchases
This report, which can also be found in the Purchase Ledger, satisfies a specific requirement for a monthly VAT report in Poland. Please refer to your Hansa representative for more details.VAT Report Sales
This report, which can also be found in the Sales Ledger, satisfies a specific requirement for a monthly VAT report in Poland. Please refer to your Hansa representative for more details.VAT Transaction Journal
This page describes the VAT Transaction Journal report in the Nominal Ledger.
---
The VAT Transaction Journal is a list of journal postings (i.e. Transaction rows) that have VAT Codes. The list is sorted by Account and then by date. The report shows the Transaction Number (including fiscal year or Sub System prefix), the debit or credit value (with debits being shown as negative, the VAT value and total. This report should not be used if it will include Transaction rows with reverse VAT (e.g. in Transactions created from Purchase Invoices for goods in the Inside EU VAT Zone).
When printed to screen, the VAT Transaction Journal has the Standard ERP Drill-down feature. Click (Windows/macOS) or tap (iOS/Android) an Account Number in the report to open an Account record, or on a Transaction Number to open an individual Transaction record.
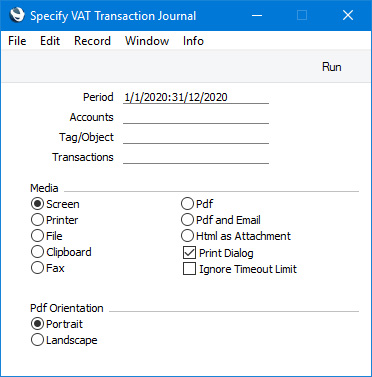
- Period
- Paste Special
Reporting Periods setting, System module
- Specify here a period for the report. The report will list rows with VAT Codes from Transactions dated during this period.
- Accounts
- Paste Special
Account register, Nominal Ledger/System module
- Range Reporting Alpha
- If you need the report to list Transaction rows posting to a particular Account, specify that Account here. You can also enter a range of Accounts separated by a colon (:).
- If you need the report to list Transaction rows posting to a particular Account, specify that Account here. You can also enter a range of Accounts separated by a colon (:).
- Tag/Object
- Paste Special
Tag/Object register, Nominal Ledger/System module
- If you need the report to list Transaction rows with a particular Tag/Object, specify that Tag/Object here. You can also enter a number of Tags/Objects separated by commas, in which case the report will list Transaction rows with all the Tags/Objects listed.
- Transactions
- Range Reporting
Numeric
- If you need the report to list rows with VAT Codes from Transactions in a particular range, enter the first and the last Transaction Numbers in the range, separated by a colon (:). If you leave the field blank, rows from every Transaction from the specified period will be included in the report.
- When entering a Transaction Number here, you must include the fiscal year or Sub System prefix (as shown in the 'Transactions: Browse' window. To include a Transaction that you entered directly to the Transaction register in the report, enter, for example, "2020.3" or, for a range, "2020.3:2020.10". To include a Transaction that was created from a Sub System in the report, enter, for example, "S/INV.200003" or "S/INV.200003:S/INV.200010" for a range.
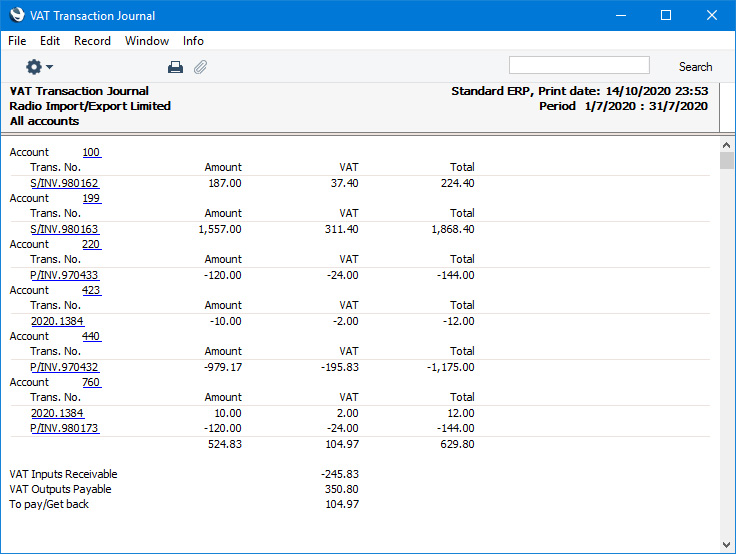
- When entering a Transaction Number here, you must include the fiscal year or Sub System prefix (as shown in the 'Transactions: Browse' window. To include a Transaction that you entered directly to the Transaction register in the report, enter, for example, "2020.3" or, for a range, "2020.3:2020.10". To include a Transaction that was created from a Sub System in the report, enter, for example, "S/INV.200003" or "S/INV.200003:S/INV.200010" for a range.
Reports in the Nominal Ledger:
- Introduction
- Definition of Nominal Ledger Reports
- Drill-down
- The Operations Menu
- Account Reconciliation
- Accrual Report
- Analytical Balance
- Analytical Balance (Fiscal purposes)
- Balance Sheet
- Bank Reconciliation
- Bank Statement
- Bank Transactions
- Base Currency Rate Change
- Budget Journal
- Cash Flow
- Chart of Accounts
- Correction List
- Corresponding Accounts
- Creditors Account
- Currency A/C Rate Change
- Daily Balances
- Debtors Account
- Forward Balance Journal
- Income & Expense Book
- Key Financial Ratios
- Liquidity Forecast
- Multicurrency Accounts Rate Difference
- N/L Accrual Transactions
- N/L Transfer, Subsystems
- Nominal Ledger
- Profit & Loss
- Revised Budget Journal
- Simulation Journal
- Tag/Object Results
- Tag/Object/Quantity Results
- Tax Account Balances
- Tax Calculations
- Tax Transactions for Registers
- Template Transaction Journal
- Test Corresponding Rules
- Transaction Journal
- Transaction Summary
- Trial Balance
- VAT Listing
- VAT Report
- VAT Report Purchases
- VAT Report Sales
- VAT Transaction Journal
- XBRL Report
Go back to:
- Home page for Nominal Ledger manual
- Home page for Standard ERP manual
XBRL Report
Please refer to the description of the two XBRL Reporting settings for details about the XBRL Report.
---
Reports in the Nominal Ledger:
- Introduction
- Definition of Nominal Ledger Reports
- Drill-down
- The Operations Menu
- Account Reconciliation
- Accrual Report
- Analytical Balance
- Analytical Balance (Fiscal purposes)
- Balance Sheet
- Bank Reconciliation
- Bank Statement
- Bank Transactions
- Base Currency Rate Change
- Budget Journal
- Cash Flow
- Chart of Accounts
- Correction List
- Corresponding Accounts
- Creditors Account
- Currency A/C Rate Change
- Daily Balances
- Debtors Account
- Forward Balance Journal
- Income & Expense Book
- Key Financial Ratios
- Liquidity Forecast
- Multicurrency Accounts Rate Difference
- N/L Accrual Transactions
- N/L Transfer, Subsystems
- Nominal Ledger
- Profit & Loss
- Revised Budget Journal
- Simulation Journal
- Tag/Object Results
- Tag/Object/Quantity Results
- Tax Account Balances
- Tax Calculations
- Tax Transactions for Registers
- Template Transaction Journal
- Test Corresponding Rules
- Transaction Journal
- Transaction Summary
- Trial Balance
- VAT Listing
- VAT Report
- VAT Report Purchases
- VAT Report Sales
- VAT Transaction Journal
- XBRL Report
Go back to:
- Home page for Nominal Ledger manual
- Home page for Standard ERP manual
- Introduction to the VAT Report
- In the VAT Codes setting in the Nominal Ledger, create two VAT Codes for VAT on EU Acquisitions. Two VAT Codes are needed because purchases of goods and purchases of services need to be reported differently on the UK VAT Return.
- Transactions
- Standard