Introduction to the Invoice Register
The Invoice register is a record of your company's sales. Each time a sale is made, an Invoice should be entered, printed and sent to the Customer. The Invoice register is thus used for a number of tasks:- The printed Invoice sent to the Customer acts as a demand for payment;
- Unpaid Invoices in the register provide the basis for your debt chasing reports; and
- Each Invoice can cause a Nominal Ledger Transaction to be created, thus generating the turnover and debtor figures in your monthly and yearly management reports. If required, the Nominal Ledger Transaction can also include a cost accounting element, helping to maintain a stock valuation in the Nominal Ledger. This creation process is automatic, requiring no intervention or work from you.
- Standard Invoices, or demands for payment, are issued where the goods have been delivered or work carried out before payment has been received. Payments against such Invoices should be recorded in the Receipt register.
- The Cash Note is issued when you receive payment at the same time as carrying out the work. When a Cash Note is entered to the Invoice register, Hansa will treat it as having being paid, so there is no need to enter a separate payment record in the Receipt register. Hansa can also look after the Nominal Ledger implications for you (debiting the Cash Account rather than the Debtor Account).
- A Deposit is a payment made in advance of the goods being delivered or the work being carried out. Invoices for deposits (sometimes described as "Down Payment Invoices") can be entered in manner described in point (1) above. Where the payment is received before an Invoice has been raised, this should be recorded in the Receipt register as a Prepayment Receipt. These can be allocated to the Invoice when it is generated at a later date. Alternatively, they can be entered as Cash Notes as described in point (2) above.
- Credit Notes are used to correct mistakes in Invoices, or to cancel Invoices that have been raised in error. They are, in effect, negative Invoices that reduce your turnover and debtor figures. Again, Hansa can look after these Nominal Ledger implications automatically.
Records can be entered to the Invoice register using the following methods:
- They can be entered directly to the Invoice register. This method is suitable for all the types of sales transaction mentioned above.
- They can be created remotely from other registers, such as Orders and Service Orders. This method will probably be used for standard Invoices and Down Payment Invoices. Down Payment Invoices can also be created from Receipts.
- They can be generated in batches using a Maintenance function. This method can be used to create standard Invoices from Orders and Projects, and to create Interest Invoices (for interest on late payments).
To open the Invoice register, ensure you are in the Sales Ledger module, then select 'Invoices' from the Registers menu or click the [Invoices] button in the Master Control panel.
The 'Invoices: Browse' window is opened, showing Invoices already entered.
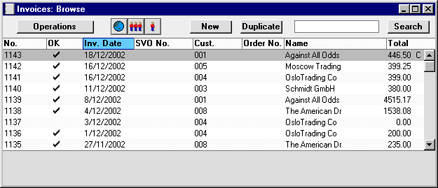
As in all browse windows you may sort the transactions by each column by clicking on the headings. To reverse any sort, simply click once again on the column heading. You can also scroll the list with the scroll bars. Finally, you can search for a record by entering a keyword in the field in the top right-hand corner. Hansa will search for the first record matching the keyword in the same column as the selected sorting order.
There are three things you can do in the Invoice register:
- Enter Invoices
- Inspect and approve Invoices
- Print Invoices
Entering an Invoice
Hansa provides several shortcuts to simplify your work with entering Invoices. You may for example enter the current date into a date field with the 'Paste Special' function. This can also be used to simplify the entering of Item Numbers, Customer Numbers, Payment Codes etc.To enter a new Invoice, click [New] in the Button Bar or use the Ctrl-N (Windows and Linux) or ⌘-N (Macintosh) keyboard shortcut. Alternatively, highlight an Invoice similar to the one you want to enter and click [Duplicate] on the Button Bar.
The 'Invoice: New' window is opened, empty if you clicked [New] or containing a duplicate of the highlighted Invoice. In the case of the duplicate, the Invoice and Transaction Dates of the new Invoice will be the current date, not the date of the original one, and the Due Date will be recalculated accordingly.
! | You are not bound by the values suggested by Hansa. For most fields you can change the pre-set values into something that suits you better. Such changes are valid only for the Invoice in question. |
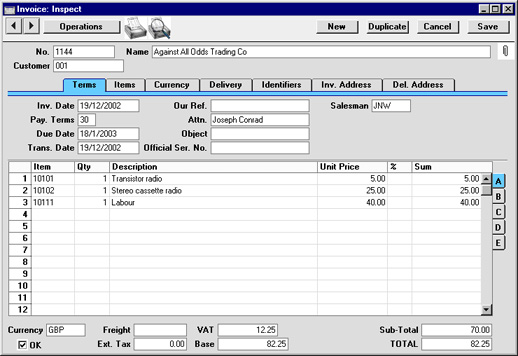
Since the amount of information stored about each Invoice will not fit on a single screen, the Invoice window has been divided into seven cards. At the top of each is the header. This contains the Invoice Number, the Customer Number and Name. There are seven named buttons ('tabs') in the header.

If you have the Sales Orders module, it is likely that most Invoices will be created remotely from the Sales Orders screen, using the 'Invoice' function on the Operations menu. If so, you will find that most of the fields in the Invoice will contain information carried over from the corresponding Sales Order. You can also create an Invoice by dragging an Order from the 'Orders: Browse' window to the 'Invoices: Browse' window.
When you have added the Items to the Invoice, you may want to check it. Click the [Save] button to save the Invoice and then click the Printer icon in the Button Bar to print a sample Invoice document. If you want to print to screen, click the Preview icon.
In multi-user systems, Hansa will assign the next available Invoice Number to the Invoice when it is saved for the first time. You will still be able to make changes until you approve the Invoice by clicking the OK check box. When this is done and the Invoice saved once again, it will be entered to the Sales Ledger, a Nominal Ledger Transaction for the Invoice will be created and it will no longer be modifiable.
Entering an Invoice - Header

- No.
- Paste Special
Select from another Number Series
- When creating a new Invoice, Hansa will enter the next unused number from the number sequence allocated on the 'Ser Nos' card of the user's Person record or from the Number Series - Invoices setting.
- If you have entered Language-dependent number sequences in the Number Series - Invoices setting, the Invoice Number may change when you enter a Customer Number, depending on the Language of that Customer.
- If you are using the Common Number Series option in the Cash Book Settings setting in the Cash Book module, the Invoice Number may change if you enter a Payment Mode to the Payment Terms field, or if you use a Customer with a Payment Mode in their Payment Terms field. Please refer to the description of the Payment Terms field on the 'Terms' card for full details.
- You may change the default Invoice Number, but not to one that has already been used. If you are working in a multi-user environment, the Invoice Number is assigned when the Invoice is saved.
- If you have entered Language-dependent number sequences in the Number Series - Invoices setting, the Invoice Number may change when you enter a Customer Number, depending on the Language of that Customer.
- Customer
- Paste Special
Customer register
- Enter the Customer Number or use the 'Paste Special' function. When you press Return, the Customer's name, address and other information will be entered into the appropriate fields.
- If the Customer has been assigned a Default Item record (on the 'Pricing' card of the Customer record), all Items in that record will be added to the Invoice automatically when the Customer Number is entered. Note that these Items will not have a Quantity, so be sure to enter one before printing and approving the Invoice.
- If there is a Prepayment in the Customer's name that has not yet been allocated to an Invoice, a warning will appear when the Customer Number is entered. Prepayments are described on the here.
- If the Customer has been assigned a Default Item record (on the 'Pricing' card of the Customer record), all Items in that record will be added to the Invoice automatically when the Customer Number is entered. Note that these Items will not have a Quantity, so be sure to enter one before printing and approving the Invoice.
- Name
- The Customer Name is entered after you have entered the Customer Number.
Entering an Invoice - Terms Card

- Invoice Date
- Paste Special
Current Date
- The current date according to the computer's clock is entered as a default.
- Our Ref.
- Use this field if you need to identify the Invoice by means other than the Invoice Number. A default will be taken from the Our Ref field on the 'Ser Nos' card of the Person record of the current user.
- Salesman
- Paste Special
Person register, System module
- Default taken from Customer or current user
- The Salesman responsible for the sale should be registered here: there are many reports in the Sales Ledger which can be broken down by Salesman. It is also possible to assign commission on Items sold, using the Bonus setting, the Bonus % field on the 'Pricing' card of the Item screen or the Bonus field on the 'Bonus' card of the Person screen. The Salesman can be changed after the Invoice has been approved.
- The Salesman responsible for the sale should be registered here: there are many reports in the Sales Ledger which can be broken down by Salesman. It is also possible to assign commission on Items sold, using the Bonus setting, the Bonus % field on the 'Pricing' card of the Item screen or the Bonus field on the 'Bonus' card of the Person screen. The Salesman can be changed after the Invoice has been approved.
- Pay Terms
- Paste Special
Payment Terms setting, Sales/Purchase Ledger
- Default taken from Customer
- Payment Terms entered here will determine the Due Date (below), in addition simply to ensuring that the correct Payment Terms appear on Invoices (in the Language of the Customer if necessary). Payment Terms records entered using the Sales Ledger setting can enable a system of early settlement discounts to be established.
- Specifying Payment Terms for each Invoice provides the basis for the debt-chasing reports provided in Hansa.
- Payment Terms are also the means by which Cash Notes and Credit Notes are distinguished from ordinary Invoices. Using 'Paste Special', select a Payment Term record of the "Cash" or "Credit Note" type respectively. When the record is then approved and saved, the appropriate Nominal Ledger Transaction will be created. In the case of Cash Notes, this will debit the Cash Account (as specified in the Account Usage S/L setting) rather than the Debtor Account, while in the case of Credit Notes, the Transaction will be a reversal of the original Invoice Transaction.
- Cash Notes are immediately treated as paid and so will not appear in your debtor reports. There is no need to enter a payment against them.
- When a Payment Term of the "Credit Note" type is selected, a crediting message is entered in the first row of the grid area. Enter the number of the Invoice to be credited, using 'Paste Special' if necessary to bring up a list of open (unpaid) Invoices. If the Use Credit Sales Accounts option on card 1 of the Account Usage S/L setting is in use, credit Sales Accounts and VAT Codes will be used in place of the standard ones. These will taken from the 'Credit A/C' card of the appropriate Item Group record or from card 4 of the Account Usage S/L setting. If the Credit Note was created by copying an Invoice, changing the Payment Terms to "CN" will cause the Sales Accounts and VAT Codes of the existing Items to be changed automatically.
- If a "Cash" or "Credit Note" Payment Term is used, the Invoice will not use the standard Invoice document when printed. Instead, the Cash Note or Credit Note (respectively) document will be used. Please refer to the Printing Invoices page for more details.
- In the Baltic States, in some circumstances Invoices should follow the same number sequence as that used by Receipts and Cash In records. For this to happen, define the number sequences using the left-hand From and To fields on flip C of the Payment Modes setting and check the Common Number Series box in the Cash Book Settings setting in the Cash Book module. Then, enter a Payment Mode to this field: the Invoice Number will change to one in the correct sequence. When the Invoice is approved, it is treated as paid and no posting to a Debtor Account is made. Instead, a debit posting is made to the Account of the Payment Mode (i.e. a bank or cash Account). In some installations, Payment Modes may be shown in the 'Paste Special' list.
- Payment Terms entered here will determine the Due Date (below), in addition simply to ensuring that the correct Payment Terms appear on Invoices (in the Language of the Customer if necessary). Payment Terms records entered using the Sales Ledger setting can enable a system of early settlement discounts to be established.
- Attn.
- Paste Special
Contact Persons setting, Sales Ledger
- Default taken from Customer
- Record here the person for whose attention the Invoice is to be marked.
- Record here the person for whose attention the Invoice is to be marked.
- Due Date
- Paste Special
Current Date
- This is calculated by Hansa using the Invoice Date and the Payment Term. It is the date on which the Invoice becomes due for payment.
- If the Payment Term is one with instalments, the Due Date of the final instalment is shown here.
- If the Payment Term is one with instalments, the Due Date of the final instalment is shown here.
- Object
- Paste Special
Object register, System module
- Up to 20 Objects, separated by commas, can be assigned to this Invoice and all transactions generated from it. You might define separate Objects to represent different departments, cost centres or product types. This provides a flexible method of analysis that can be used in Nominal Ledger reports.
- In any Nominal Ledger Transactions generated from this Invoice, any Objects specified here will be assigned to the credit posting to the Sales Account(s), the debit posting to the Cost Account (if cost accounting is being used), and the debit posting to the Debtor Account (if the Objects on Debtor Account option in the Account Usage S/L setting is being used).
- Any Objects specified for the Customer will be copied here as a default, as will any Objects specified in the Person record for the current user.
- In any Nominal Ledger Transactions generated from this Invoice, any Objects specified here will be assigned to the credit posting to the Sales Account(s), the debit posting to the Cost Account (if cost accounting is being used), and the debit posting to the Debtor Account (if the Objects on Debtor Account option in the Account Usage S/L setting is being used).
- Trans. Date
- The Transaction Date for the Nominal Ledger Transaction. This is always the same as the Invoice Date and cannot be changed independently.
- Official Ser. No.
- Paste Special
Next number in number sequence
- In some countries it is a legal requirement to allocate an official serial number to each Invoice. This number may be supplied pre-printed on Invoice stationery. The number sequence allocated to your company should be entered in the Official Invoice Serial Number setting: the next unused number from that sequence will appear here by default. This can be changed: Hansa will check when the Invoice is saved that the new number is in the sequence, and future Invoices will continue the sequence from that new number.
- The Official Serial Number is shown in the 'Paste Open Invoices' window. Therefore, you will be able to allocate payments to Invoices using the Invoice Number or the Official Serial Number.
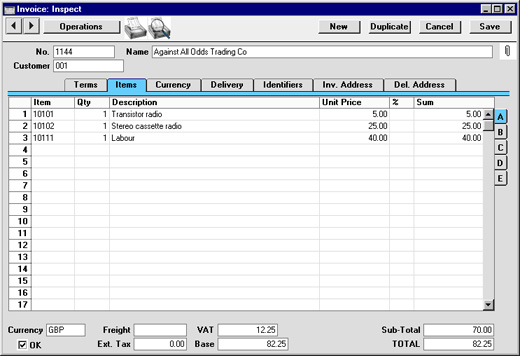
Entering an Invoice - Items Card
Use the grid on the 'Items' card to list the invoiced Items. This grid is divided into five horizontal flips. When you click on a flip tab (marked A-E), the two or three right-hand columns of the grid are replaced.
To add rows to an Invoice, click in any field in the first blank row and enter appropriate text. To remove a row, click on the row number on the left of the row and press the Backspace key. To insert a row, click on the row number where the insertion is to be made and press Return.
You can also bring Items into an Invoice by opening the 'Items: Browse' window, selecting a range of Items by clicking while holding down the Shift key, and then dragging them to the Item field in the first empty Invoice row.
Flip A
- Item
- Paste Special
Item register
- With the cursor in this field, enter the Item Number or Bar Code for each Item ordered. Pricing, descriptive and other information will be brought in from the Item record. If you leave this field blank, you can enter any text in the Description field, perhaps using the row for additional comments to be printed on Invoice documentation.
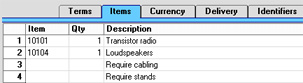
- If the Item is a Structured Item whose Show Components on Documents check box is on, its components will be listed on the following rows when you enter a Quantity. If you decide to change the Quantity, be sure to change the Quantities of the components as well.
- If the Customer has been assigned a Default Item record (on the 'Pricing' card of the Customer record), all Items in that record will be added to the Invoice automatically when the Customer Number is entered. Note that these Items will not have a Quantity, so be sure to enter one before printing and approving the Invoice.
- If the Item is a Structured Item whose Show Components on Documents check box is on, its components will be listed on the following rows when you enter a Quantity. If you decide to change the Quantity, be sure to change the Quantities of the components as well.
- Qty
- Enter the number of units sold. Press Return to calculate the Sum, and the cursor will move to the Item field on the next row.
- You must specify a Quantity before a Sum can be calculated for the Invoice row.
- In the case of Invoices created from Orders, the Quantity will default to that delivered. You can reduce this if necessary. If you need to invoice a greater Quantity than was delivered, this must be done by adding a new row to the Invoice. Ensure that the Update Stock box on the 'Delivery' card is checked so that stock levels are updated accordingly and, if appropriate, to cause cost accounting transactions to be created in the Nominal Ledger for the extra quantity. This box will only apply to Invoice rows that are not related to the Order.
- You must specify a Quantity before a Sum can be calculated for the Invoice row.
- Description
- Default taken from
Item
- This field shows the name of the Item, brought in from the Item register. If you want to add an extra description, you can do so: there is room for up to 100 characters of text. You can also use the next line if necessary.
- If you have specified various translations of the Description on the 'Texts' card of the Item screen, the correct translation will be brought in according to the Language of the Invoice (specified on the 'Identifiers' card). In addition, Hansa will take any rows of text that have been entered on the 'Texts' card of the Item record without a Language and move them into the Description field, using the next line if necessary.
- If you have specified various translations of the Description on the 'Texts' card of the Item screen, the correct translation will be brought in according to the Language of the Invoice (specified on the 'Identifiers' card). In addition, Hansa will take any rows of text that have been entered on the 'Texts' card of the Item record without a Language and move them into the Description field, using the next line if necessary.
- Unit Price
- The Unit Price according to the valid Price List for this Customer is brought in. If the Customer has no Price List specified, or the Item is not on the Price List in question, the Base Price from the Item screen is brought in. This figure will include VAT (and TAX) if the Price List specified is one that is Inclusive of VAT or if you have specified on card 1 of the Account Usage S/L setting that Base Prices include VAT (or VAT and TAX).
- If a Currency and Exchange Rate have been specified, the figure shown will be in the Currency concerned (i.e. having undergone currency conversion).
- If a Currency and Exchange Rate have been specified, the figure shown will be in the Currency concerned (i.e. having undergone currency conversion).
- %
- Discount percentage. If a Discount Matrix that includes this Item has been allocated to the Customer, this figure will be determined by the Item Number and Quantity. It can be changed to an adhoc rate if necessary. If there is a Discount Matrix applying to this Invoice, it will be shown on the 'Delivery' card.
- Discount Matrices allow quantity discounts to be applied automatically, based on value, quantity, weight or volume. If the Discount Matrix is one that uses Item Groups rather than Items and more than one Item from the same Item Group has been used in the Invoice, the discount for those Items should be calculated from the overall quantity for that Item Group. To do this, select 'Recalculate Discount' from the Operations menu once the Invoice is complete. This function can also be used if the Discount Matrix record itself is changed before the Invoice is approved.
- In the Round Off setting in the System module, you can determine whether the discount is to be applied to the Unit Price before it has been multiplied by the Quantity, or to the Sum. In certain circumstances (where there is a very small unit price and a large quantity) this choice can cause the calculated discount to vary, due to the rounding system used in Hansa. Please refer here for details and an example.
- The percentage entered here can act as a discount, margin factor or markup. This is controlled using the General Options setting in the System module.
- Discount Matrices allow quantity discounts to be applied automatically, based on value, quantity, weight or volume. If the Discount Matrix is one that uses Item Groups rather than Items and more than one Item from the same Item Group has been used in the Invoice, the discount for those Items should be calculated from the overall quantity for that Item Group. To do this, select 'Recalculate Discount' from the Operations menu once the Invoice is complete. This function can also be used if the Discount Matrix record itself is changed before the Invoice is approved.
- Sum
- The total for the row: Quantity multiplied by Unit Price less Discount. Changing this figure will cause the Discount Percentage to be recalculated. This figure will include VAT (and TAX) if the Price List specified is one that is Inclusive of VAT or if you have specified on card 1 of the Account Usage S/L setting that Base Prices include VAT (or VAT and TAX).
- This figure will be rounded up or down according to rounding rules set for the Currency in the Currency Round Off setting in the System module.
- A/C
- Paste Special
Account register, Nominal Ledger/System module
- This code determines the Nominal Ledger Sales Account for this Item. The Nominal Ledger Transaction generated by this Invoice will credit the Account specified here. A default is offered, taken from the record in the Price register for the Item/Price List combination. If there is no such record, or it has no Sales Account specified, the default will be taken from the Item record, the Item Group or from card 3 of the Account Usage S/L setting. This default can be changed for a particular Invoice row if necessary.
- If the Payment Term (above) is of the "Credit Note" type and the Use Credit Sales Accounts option on card 1 of the Account Usage S/L setting is in use, a credit Sales Account will be used in place of the standard one. This will taken from the 'Credit A/C' card of the appropriate Item Group record or from card 4 of the Account Usage S/L setting.
- If the Payment Term (above) is of the "Credit Note" type and the Use Credit Sales Accounts option on card 1 of the Account Usage S/L setting is in use, a credit Sales Account will be used in place of the standard one. This will taken from the 'Credit A/C' card of the appropriate Item Group record or from card 4 of the Account Usage S/L setting.
- Accrual
- Paste Special
N/L Accruals setting, Nominal Ledger
- Please refer to the Accruals page for details of this field and an illustrated example.
- Objects
- Paste Special
Object register, Nominal Ledger/System module
- Default taken from Item
- Up to 20 Objects, separated by commas, can be assigned to this Item and all transactions generated from it. You might define separate Objects to represent different departments, cost centres or product types. This provides a flexible method of analysis that can be used in Nominal Ledger reports.
- In the Nominal Ledger Transaction generated from this Invoice, any Objects specified here will be assigned to the credit posting to the Sales Account and, if cost accounting is being used, the debit posting to the Cost Account. This assignment will merge these Objects with those of the parent Invoice (shown on the 'Terms' card).
- Up to 20 Objects, separated by commas, can be assigned to this Item and all transactions generated from it. You might define separate Objects to represent different departments, cost centres or product types. This provides a flexible method of analysis that can be used in Nominal Ledger reports.
- V-Cd
- Paste Special
VAT Codes setting, Nominal Ledger
- The VAT Code entered here determines the rate at which VAT will be charged on this Item and the VAT Account to be credited. A default is offered, taken from the Customer record. If none is specified, the default is taken from the Item, the Item Group or from card 3 of the Account Usage S/L setting. This default can be changed for a particular Invoice row if necessary.
- If the Payment Term (above) is of the "Credit Note" type and the Use Credit Sales Accounts option on card 1 of the Account Usage S/L setting is in use, a credit VAT Code will be used in place of the standard one. This will taken from the 'Credit A/C' card of the appropriate Item Group record or from card 4 of the Account Usage S/L setting.
- If you have checked the VAT Code Control option on card 1 of the Account Usage S/L setting, the VAT Code specified here must be the same as that specified for the Sales Account in the Account register. If the VAT Codes don't match, you will not be able to save the Invoice.
- If the Payment Term (above) is of the "Credit Note" type and the Use Credit Sales Accounts option on card 1 of the Account Usage S/L setting is in use, a credit VAT Code will be used in place of the standard one. This will taken from the 'Credit A/C' card of the appropriate Item Group record or from card 4 of the Account Usage S/L setting.
- Cost
- Default taken from
Item (Cost Price + Extra Cost)
- The unit Cost Price is used in Gross Profit and Margin calculations. It can be altered if necessary.
- GP
- The Gross Profit for the Invoice row is calculated by subtracting the Cost Price (multiplied by the Quantity) from the Sum. The figure is therefore absolute, not a percentage.
- FIFO
- The average FIFO unit cost of the Items on this row. The total FIFO stock value of the Items on this Invoice row is shown on flip D. These figures are brought in automatically when the Invoice is approved, but are only shown for Stocked Items in Invoices that have not been generated from a Sales Order. For Invoices that have been generated from a Sales Order, FIFO values are shown in the appropriate Delivery record.
- Serial No.
- Paste Special
Serial Numbers of Items in stock
- If Serial Numbers are required for the Item, they can be entered here.
- Serial Numbered Items must be recorded on separate Invoice rows each with a Quantity of one. This enables the recording of separate Serial Numbers and their correct removal from stock.
- If no Location is specified, the 'Paste Special' list will show the Serial Numbers of Items in all Locations, with an indication of the Location in which each Item is stored. However, if you have specified a Location on the 'Identifiers' card, only those Serial Numbers stored in that Location will be shown.
- If you would like Best Before dates to be shown in the 'Paste Special' list, switch on the Show Best Before Dates option in the Item Settings setting in the Sales Ledger. Best Before Dates are entered using the Batch Specifications setting in the Stock module.
- The 'Paste Special' list will not be shown if you are using the No Serial No. on Goods Receipts option in the Stock Settings setting. In this case, you must still enter a Serial Number and the Quantity must still be one, but no check will be carried out that the Serial Number you have used is valid (i.e. one that is currently in stock).
- Note that Serial Numbers must be allocated manually: there is no automatic FIFO allocation.
- The Cost Price for Serial No option in the Cost Accounting setting in the Stock module controls how the choice of Serial Number affects the FIFO field on flip C and the value of any cost accounting element in the Nominal Ledger Transaction resulting from the Invoice. If this option is not in use, the oldest Cost Price will be shown in the FIFO field, even where the Serial Number chosen is not the oldest one. If this option is in use, the actual Cost Price of the selected Serial Number will be shown in the FIFO field.
- Serial Numbered Items must be recorded on separate Invoice rows each with a Quantity of one. This enables the recording of separate Serial Numbers and their correct removal from stock.
- P.Factor
- Default taken from
Item
- A Price Factor can be used to recalculate the Unit Price of an Item. For example, if the Item is normally purchased in boxes with 24 units, the Price Factor 24 can be entered in the Item record. The Unit Price for the Item will then refer to a box of 24 units. The Price Factor will be brought in to the Invoice from the Item and affect the Sum in an appropriate manner. It can be altered and Hansa will recalculate the Sum accordingly. The formula used is Sum = (Quantity/Price Factor) * Unit Price.
- Recipe
- Paste Special
Recipes setting, Stock module
- Default taken from Item
- If the Item is a Structured Item, its Recipe is recorded here, brought in from the Item record. A Structured Item is essentially an Item which is assembled by your company from purchased components: its Recipe lists those components with quantities. Recipes are set up using a setting in the Stock module.
- If the Item is a Structured Item, its Recipe is recorded here, brought in from the Item record. A Structured Item is essentially an Item which is assembled by your company from purchased components: its Recipe lists those components with quantities. Recipes are set up using a setting in the Stock module.
- Row FIFO
- The total FIFO stock value of the Items on this Invoice row. This figure is brought in automatically when the Invoice is approved, but is only shown for Stocked Items in Invoices that have not been generated from a Sales Order. For Invoices that have been generated from a Sales Order, FIFO values are shown in the appropriate Delivery record.
- Coeff
- Default taken from
Item
- The Unit Coefficient of the Item is shown here, taken from the 'Stock' card of the Item. If you are maintaining stock quantities using different units of measurement, this coefficient is the ratio between those units of measurement.
- Unit, Unit Qty, Unit Pr. of Unit
- These fields allow you to sell an Item using a different Unit to that specified on the 'Pricing' card of the Item record.
- When a Unit that has a Qty Factor is entered here, the Quantity and pricing for the Invoice row will change accordingly. For example, an Item is usually sold in single units. If you sell two dozen of them, you can enter the Unit representing one dozen (i.e. its Qty Factor is "12") in this Unit field and "2" in the Unit Qty field. The Quantity on flip A will change to "24" (i.e. 2 x 12) and the pricing will be adjusted accordingly. The Unit Price of Unit field will show the price for one dozen (i.e. the price of one of the new Unit).
- Use 'Paste Special' from the Unit field to choose from a list of Units.
- Use the 'Recalculate Weight and Volume' function on the Operations menu to update the Total Quantity, Weight and Volume on the 'Delivery' card of the Invoice.
- When a Unit that has a Qty Factor is entered here, the Quantity and pricing for the Invoice row will change accordingly. For example, an Item is usually sold in single units. If you sell two dozen of them, you can enter the Unit representing one dozen (i.e. its Qty Factor is "12") in this Unit field and "2" in the Unit Qty field. The Quantity on flip A will change to "24" (i.e. 2 x 12) and the pricing will be adjusted accordingly. The Unit Price of Unit field will show the price for one dozen (i.e. the price of one of the new Unit).
- Width, Height, Depth
- Default taken from
Item
- These fields contain the dimensions of the Item. They can be used together with the Unit Qty field if the Item is sold by area or volume. Please refer to the description of the Units setting for details and an example.

- OK
- Checking this box approves the Invoice and causes it to be entered in the Sales Ledger. A corresponding transaction will also be created in the Nominal Ledger. If the Stock module is present and the Invoice was entered directly (rather than created from a Sales Order), stock levels of any Stocked Items on the Invoice will be adjusted. Because of these consequences, once this box has been checked and the Invoice saved, you will no longer be able to make changes to the Invoice. Exceptions to this rule are the Reminder Level and Last Reminder Date fields and the No Interest, No Reminder and Disputed check boxes on the 'Delivery' card and the Salesman field on the 'Terms' card.
- References in these web pages to approved Invoices are to Invoices whose OK check box has been switched on.
- References in these web pages to approved Invoices are to Invoices whose OK check box has been switched on.
- Currency
- Paste Special
Currency register, System module
- Default taken from Customer or Default Base Currency
- The Currency of the Invoice: the exchange rate is shown on the 'Currency' card where it can be modified only for this particular Invoice if necessary. Ensure that the correct Currency is shown before any Items are added to the Invoice so that prices are converted correctly. If you forget, the 'Update Currency Price List Items' function is available on the Operations menu which retrospectively converts the prices of Items added to the Invoice before the Currency was specified (save the Invoice before selecting this function). Leave the field blank to use the home Currency (unless you have set a Default Base Currency, in which case this will be offered as a default and should be treated as your home Currency).
- If the Customer record has a Currency specified on the 'Pricing' card, only that Currency can be used. Otherwise, any Currency can be used.
- The Currency of the Invoice: the exchange rate is shown on the 'Currency' card where it can be modified only for this particular Invoice if necessary. Ensure that the correct Currency is shown before any Items are added to the Invoice so that prices are converted correctly. If you forget, the 'Update Currency Price List Items' function is available on the Operations menu which retrospectively converts the prices of Items added to the Invoice before the Currency was specified (save the Invoice before selecting this function). Leave the field blank to use the home Currency (unless you have set a Default Base Currency, in which case this will be offered as a default and should be treated as your home Currency).
- Freight
- The Freight setting can be used to attach a fixed amount for Freight to each Invoice (or a calculated amount based on the total weight of the Items on the Invoice). If this is being used, the appropriate amount will be placed in this field on the entry of a Customer Number (or when the Quantity is changed in one of the rows). This figure can be altered if necessary. The VAT Code and the Sales Account for the freight charge will be taken from the Item entered in the Freight setting.
- If the Freight setting is not being used, enter a freight amount if applicable. In this case, VAT will not be charged and the amount will be posted to the appropriate Sales Account for the Zone of the Customer, set on card 3 of the Account Usage S/L setting.
- If the Freight setting is not being used, enter a freight amount if applicable. In this case, VAT will not be charged and the amount will be posted to the appropriate Sales Account for the Zone of the Customer, set on card 3 of the Account Usage S/L setting.
- Ext. Tax
- When defining VAT Code records using the setting in the Nominal Ledger, it is possible to specify that an additional tax, such as an environmental tax, be levied. If the VAT Code of any of the rows of the Invoice is one where such an additional tax has been defined, the amount of that tax will be shown in this field. That amount will be recalculated as Items are added to the Invoice. When the Invoice is approved, this Extra Tax will be credited to the Tax 1 Account specified for the appropriate VAT Code.
- VAT
- The VAT total for the Invoice.
- This figure is rounded up or down according to rounding rules set for the Currency (in the Currency Round Off setting in the System module). If no Currency has been specified, or the Currency in question has not been entered in the Currency Round Off setting, the rounding rules are taken from the Round Off setting (also in the System module).
- In the Nominal Ledger Transaction resulting from this Invoice, any amounts lost or gained in this rounding process are posted to the Round Off Account specified in the Account Usage S/L setting.
- VAT is calculated after the Sum of each row has been rounded up or down according to rounding rules set in the Currency Round Off setting.
- This figure is rounded up or down according to rounding rules set for the Currency (in the Currency Round Off setting in the System module). If no Currency has been specified, or the Currency in question has not been entered in the Currency Round Off setting, the rounding rules are taken from the Round Off setting (also in the System module).
- Base
- This shows the Invoice total including VAT in the home Currency (or in Base Currency 1 as defined in the Base Currency setting in the System Module). It is only used if the Currency of the Invoice is not blank and is not Base Currency 1.
- Sub-Total
- The total for the Invoice, excluding VAT.
- TOTAL
- The total for the Invoice, including VAT.
- This figure is rounded up or down according to rounding rules set for the Currency (in the Currency Round Off setting in the System module). If no Currency has been specified, or the Currency in question has not been entered in the Currency Round Off setting, the rounding rules are taken from the Round Off setting (also in the System module). In the Nominal Ledger Transaction resulting from this Invoice, any amounts lost or gained in this rounding process are posted to the Round Off Account specified in the Account Usage S/L setting.
Entering an Invoice - Items Card Part 2 (Flips C-G)
This page describes the fields on flips C-G of the 'Items' card of the Invoice record. Please click the following links for descriptions of the other cards:- Header
- 'Terms' card
- 'Items' card Part 1 (Flips A and B)
- 'Items' card Part 2 (Flips C-G)
- 'Items' card Part 3 (Footer)
- 'Currency' card
- 'Del. Terms' card
- 'Identifiers' card
- 'Price List' card
- 'Inv. Address' card
- 'Del. Address' card
Flip C
- Cost
- The unit Cost Price of the Item used in Gross Profit and Margin calculations.
- In an Invoice that you enter directly to the Invoice register, the default offered in each row will be chosen as follows:
- If an Item is Serial Numbered at the Batch or Unit level, you are using the Cost Price for Serial Number option for that Item and you are using the Use Actual Cost Price for GP Cost option in the Cost Accounting setting in the Stock module, the appropriate Cost Price for the Serial Number will be brought in to this field when you specify a Serial Number on flip D.
- If the Price List of the Invoice is one whose Type is "BuyBack", the Cost Price will be taken from the record in the Price register for the Item/Price List/Customer combination.
- The Cost Price from the Item record will be used.
If you need the figure that is brought in to be the Cost Price of the Item plus its Extra Cost, select the Include Item Extra Cost in Cost option in the Cost Accounting setting in the Stock module.
- It will be copied from the originating row in the Order.
The Cost Price in an Order will have been chosen using the same three numbered points described above. However, if you are using the Update GP on Order when Delivering option in the Order Settings setting in the Sales Orders module, it will have been updated to the unit cost of sales value used in the Delivery. The actual cost of sales value of the delivered Item will therefore be copied to the Invoice
- It can be calculated by adding the Cost Price from the Item record to its Extra Cost. If you wish to use this option, select the Update GP at Invoicing option in the Cost Accounting setting in the Stock module. This can be more accurate if you are routinely updating Items' Cost Prices from Goods Receipts and are using back-to-back Purchase Orders. In this situation, you will probably enter a Sales Order and create a Purchase Order from it, and the subsequent Goods Receipt will update the Cost Price in the Item record, all before creating the Invoice. If you are using this option, this latest Cost Price will be copied from the Item record to the Invoice when you do create it.
- If you duplicate an Invoice, the new Invoice will contain the latest Cost Price from the Item register, and the Gross Profit will be recalculated accordingly. The Cost Price in the original Invoice will not be transferred to the new Invoice.
- You can prevent certain users from changing Cost Prices in an Invoice using Access Groups, by denying them access to the 'Change Cost on Invoice Rows' Action. You can also hide the Cost field altogether, by denying access to the 'View Item's Cost Price' Action. This will hide the GP % field, the Cost B2, GP and FIFO fields immediately below, the Row FIFO field on flip D and the GP % and Total GP fields in the footer, and will hide the same fields in Orders and Quotations as well.
- In an Invoice that you enter directly to the Invoice register, the default offered in each row will be chosen as follows:
- Cost B2
- The unit Cost Price of the Item, converted to Base Currency 2. This figure will be used in the GP Invoices report if you produce it using the Cost Price B2 option.
- GP
- The Gross Profit for the Invoice row is calculated by subtracting the Cost Price (multiplied by the Quantity) from the Sum. The figure is therefore absolute, not a percentage. You cannot change this figure yourself, but it will be recalculated if you change the Quantity, the Unit or Cost Price or the % discount.
- FIFO
- The average unit cost of sales of the Items in the row. The total value will be shown in the Row FIFO field on flip D.
- In an Invoice that you enter directly to the Invoice register, these figures will be calculated automatically when you mark the Invoice as OK and save, but they will only be shown for Stocked Items (they will also be shown for Plain and Service Items if you are using the Cost Accounting for Plain and Service Items option in the Cost Accounting setting in the Stock module).
- The calculation of this figure will usually use the Cost Model specified in the relevant Item or Item Group record. If that Cost Model is Default, the Primary Cost Model specified in the Cost Accounting setting will be used. Despite its name, the field will therefore show the unit FIFO, LIFO, Weighted Average or other value of the Item, depending on the Cost Model. The exception is when the Item requires Serial Numbers and you are using the Cost Price for Serial Number option in the Cost Accounting setting: please refer to the description of the Serial No. field on flip D below for details.
- In the case of Invoices that you have generated from Sales Orders and Deliveries, cost of sales values will be copied from flip C of the appropriate Delivery record.
- When you mark the Invoice as OK and save, the value in the Row FIFO field on flip D may be credited to the Stock Account and debited to the Cost of Sales Account in the resulting Nominal Ledger Transaction. These postings will be made if the Invoice row was not created from a Sales Order and if the Update Stock box on the 'Del. Terms' card is ticked. These postings will also be made if the Invoice row was created from a Sales Order or a Delivery and you have chosen to have cost of sales transactions created from Invoices and not from Deliveries. Please refer to the Cost Accounting Transactions from Deliveries and Invoices' page for more details.
- In an Invoice that you enter directly to the Invoice register, these figures will be calculated automatically when you mark the Invoice as OK and save, but they will only be shown for Stocked Items (they will also be shown for Plain and Service Items if you are using the Cost Accounting for Plain and Service Items option in the Cost Accounting setting in the Stock module).
Flip D
- Salesmen
- Paste Special
Person register, System module and Global User register, Technics module
- If necessary, you can specify a different Salesman or Salesmen (separated by commas) for each row of the Invoice.
- The Bonus, Salesman report will assign any commission for the row in question to the Salesman specified in the row only (i.e. not to the Salesman specified in the header). However, the 'Workflow Activity' function will not create Activities for the row Salesmen, and the Invoice will not be recognised as belonging to the row Salesmen by the Limited Access feature.
- The Bonus, Salesman report will assign any commission for the row in question to the Salesman specified in the row only (i.e. not to the Salesman specified in the header). However, the 'Workflow Activity' function will not create Activities for the row Salesmen, and the Invoice will not be recognised as belonging to the row Salesmen by the Limited Access feature.
- Serial No.
- Paste Special
Serial Numbers of Items in stock
- If the Item uses Serial Numbers at the unit or batch level, you must enter a valid Serial Number here.
- For Items with Serial Numbers at the Unit level, you must enter an appropriate number of separate rows each with a Quantity of one. This enables you to enter Serial Numbers individually, and ensures their correct removal from stock.
- For Items with Serial Numbers at the Batch level, you only need enter a single Invoice row with the appropriate Quantity. You can enter a single Serial/Batch Number, providing you have a sufficient quantity in stock with that Serial Number. If this is not the case, you will be told there is insufficient stock when you try to save the Invoice.
- If you enter a Serial Number in a new row, other details such as the Item Number and Name, pricing information, Location and, if appropriate, Position will be brought in automatically.
- If you have not specified a Location in the Invoice, the 'Paste Special' list will show the Serial Numbers of Items in every Location, with an indication of the Location in which each Serial Number is stored. However, if you have specified a Location on the 'Del. Terms' card or on flip B of the row, the 'Paste Special' list will only show the Serial Numbers stored in that Location.
- If you would like the Best Before date and/or Batch Status of each Serial Number to be shown in the 'Paste Special' list, select the Show Best Before Dates and/or Show Batch Status options respectively in the Item Settings setting in the Sales Ledger. Please refer to the description of the Batch Specifications setting in the Stock modulefor details about Best Before Dates and here for details about Batch Statuses.
- The 'Paste Special' list will not be available if you are using the No Serial No. on Goods Receipts option in the Stock Settings setting. In this case, you must still enter a Serial Number and, if the Item has Serial Numbers at the Unit level, the Quantity must still be one, but no check will be carried out that the Serial Number you have used is valid (i.e. one that is currently in stock).
- No default Serial Numbers will be offered, so you will need to enter them yourself. There is no automatic FIFO allocation.
- The cost of sales value of an Item with Serial Numbers is controlled by the Cost Price for Serial Number option. This option is in the Cost Accounting setting in the Stock module, but you can override it in individual Item and Item Group records ('Cost Model' card in both cases). If you are not using this option, the cost of sales value will be calculated using the usual Cost Model, even though this may not be appropriate for the Serial Number chosen (e.g. if you are using the FIFO Cost Model, the oldest cost of sales value will be used, even if the chosen Serial Number is not the oldest one). If you are using the Cost Price for Serial Number option, the cost of sales value will be the actual Cost Price of the selected Serial Number. The cost of sales value will be placed in the FIFO field on flip C when you mark the Invoice as OK and save.
- An Invoice created from an Order can mirror the Order (i.e. it can contain a single row for the Serial Numbered Item with the Quantity from the Order and with no Serial Numbers) or it can mirror the Delivery (i.e. it can contain a number of rows each with a Quantity of one, showing each Serial Number). The latter case will be useful if you need to have the Serial Numbers printed on Invoices as well as on Delivery Notes. If you need the Invoice to mirror the Delivery, select the Invoice based on Delivery option in the Order Settings setting in the Sales Orders module or, if you don’t want to use this option, create the Invoice from the Delivery..
- For Items with Serial Numbers at the Unit level, you must enter an appropriate number of separate rows each with a Quantity of one. This enables you to enter Serial Numbers individually, and ensures their correct removal from stock.
- P.Factor
- Default taken from
Item
- The Price Factor is the quantity of the Item that can be bought by the Unit Price. For example, if the Unit Price of an Item refers to a box of 24 units, its Price Factor will be 24. Specifying a Price Factor for such an Item is only necessary if it will be sold in individual units (e.g. if you will break into the box of 24 to sell a single unit). The Price Factor will be used to calculate the price of a single unit (in this example, the Price Factor will be 24).
- When you use an Item with a Price Factor in an Invoice row, the Quantity that you specify on flip A should be the quantity of individual units, not the quantity of boxes. When you enter a Quantity, the Sum will be calculated using the formula (Quantity/Price Factor) * Unit Price.
- The Unit Price field on flip A (and the Base Price field in the Item record) can only support three decimal places. Using a Price Factor can be useful if you need to use more. For example, if the price per unit is 0.0001, you can enter 0.01 as the Unit Price and 100 as the Price Factor. This will result in a Sum of 0.0001 when the quantity is one.
- When you use an Item with a Price Factor in an Invoice row, the Quantity that you specify on flip A should be the quantity of individual units, not the quantity of boxes. When you enter a Quantity, the Sum will be calculated using the formula (Quantity/Price Factor) * Unit Price.
- Recipe
- Default taken from
Item
- If the Item is a Structured Item whose Paste Components During Entry box has not been ticked, its Recipe will be recorded here, brought in from the Item record. A Structured Item is essentially an Item that will be assembled by your company on the point of delivery from components held in stock: its Recipe lists those components with quantities. You should not change the contents of this field. Please refer here for more details about Recipes.
- Row FIFO
- The total cost of sales value of the Items on this Invoice row. The cost of sales value per unit is shown in the FIFO field on flip C: please refer to the description of this field above for more details.
- In multi-user systems, you can prevent certain users from viewing Cost Prices in Quotations, Orders and Invoices using Access Groups, by denying them access to the 'View Item's Cost Price' Action. In an Invoice, this will hide the Row FIFO field, the Cost, Cost B2, GP and FIFO fields on flip C and the GP % and Total GP fields in the footer.
Flip E
- Unit, Unit Qty, Unit Pr. of Unit
- These fields allow you to sell an Item using a different Unit to the one specified on the 'Pricing' card of the Item record.
- If you enter a Unit that has a Qty Factor, the Quantity and pricing for the Invoice row will change accordingly. For example, an Item is usually sold in single units. If you sell two dozen of them, you can enter the Unit representing one dozen (i.e. one whose Qty Factor is "12") in this Unit field and "2" in the Unit Qty field. The Quantity on flip A will change to "24" (i.e. 2 x 12) and the pricing will be adjusted accordingly. The Unit Price of Unit field will show the price for one dozen (i.e. the price of one of the new Unit).
- Use 'Paste Special' from the Unit field to choose from a list of Units.
- If you enter a Unit that has a Qty Factor, the Quantity and pricing for the Invoice row will change accordingly. For example, an Item is usually sold in single units. If you sell two dozen of them, you can enter the Unit representing one dozen (i.e. one whose Qty Factor is "12") in this Unit field and "2" in the Unit Qty field. The Quantity on flip A will change to "24" (i.e. 2 x 12) and the pricing will be adjusted accordingly. The Unit Price of Unit field will show the price for one dozen (i.e. the price of one of the new Unit).
- Width, Height, Depth
- Default taken from
Item
- These fields contain the dimensions of the Item. You can use them together with the Unit Qty field if the Item is sold by area or volume. Please refer to the description of the Units setting for details and an example.
Flip F
- Cust. Item No.
- If you know the Customer's code for the Item (i.e. the Customer's equivalent of the Item Number), you can enter it in this field. For a more permanent record, you can enter this code in the Customer Items setting in the Sales Orders module. After having done so, it will be brought in to this field in future Invoices automatically.
- If you need this code to be printed on Invoice documentation, add the "Customer Item Code" field to the Form Template.
- If you need this code to be printed on Invoice documentation, add the "Customer Item Code" field to the Form Template.
- Coeff
- Default taken from
Item
- The Unit Coefficient of the Item is shown here, taken from the 'Stock' card of the Item. If you are maintaining stock quantities using different units of measurement, this coefficient is the ratio between those units of measurement.
- Cred. Row
- If an Invoice is a Credit Note that will update stock levels and the Nominal Ledger stock valuation, you should ensure the Cred. Row (Credited Row) field in each row is filled in. The Cred. Row field should contain the (row number - 1) of the corresponding row in the Invoice that is being credited. For example, this field should contain "0" when referring to row 1 in the Invoice being credited, while it should contain "1" when referring to row 2 in the Invoice being credited, and so on.
- If you create a Credit Note from an Invoice using the 'Credit Note' function on the Create menu, the Cred. Row field in each row in the Credit Note will be filled in automatically.
- If you create a Credit Note by duplicating an Invoice and changing the Payment Term, the Cred. Row field in each row in the Credit Note will remain empty. However, you can enter a row number yourself if you want to connect a row in the Credit Note to the corresponding row in the Invoice, and you must do so in every row if the Credit Note will update stock. Again, enter "0" to refer to row 1 in the Invoice being credited, enter "1" to refer to row 2 in the Invoice being credited, and so on.
- A Credit Note will update stock (i.e. it will update stock levels and the Nominal Ledger stock valuation) if the Update Stock box on the 'Del. Terms' card is ticked. This box will be ticked by default if you are using the Credit Invoices Update Stock option in the Optional Features setting in the System module, and you can also tick it yourself in an individual Credit Note.
- By connecting a row in a Credit Note to a row in the Invoice being credited, the Cred. Row field ensures the Item can be brought back into stock in a way that obeys the Original Cost on Returned Goods and options in the Cost Accounting setting in the Stock module. Without the Cred. Row field, it would not be possible to ascertain the original cost or position.
- The Cred. Row field will also ensure that you cannot enter a Quantity or Sum in a row in a Credit Note that is greater than those figures in the corresponding row in the Invoice being credited. If you try to save a Credit Note in which the Quantity or Sum in a row is too high, the message "Too high quantity" or "Too high Amount" (as appropriate) will appear. The "Too high quantity" message will also appear when the Cred. Row field is empty (i.e. when the Credit Note will update stock and when you have not connected a row to a row in the Invoice being credited).
- If a Credit Note will update stock but is not crediting a particular Invoice (i.e. you have not specified an Invoice to be credited in the "Credit of Invoice" row), then you can leave the Cred. Row field empty. The Items will be brought into stock as new items in the FIFO/LIFO Queue, and the cost will be the Cost Price from each Item record.
- If a Credit Note will not update stock but the Cred. Row field in a row contains a value, the check that the Sum in that row is not greater than the Sum in the corresponding row in the Invoice being credited will still be carried out. However, the Quantity will not be checked.
- Please refer here for more details about Credit Notes.
- If you create a Credit Note from an Invoice using the 'Credit Note' function on the Create menu, the Cred. Row field in each row in the Credit Note will be filled in automatically.
- Environ. Tax
- Please refer to the description of the Environment Tax setting here for a full description of this field.
Flip G
- Customs No., Country of Origin
- In some countries such as Argentina, Mexico and Russia, it is a legal requirement that the Customs Number and Country of Origin are attached to the sales document when an imported Item is sold.
- If you sell an Item that is Serial Numbered (at the Unit or Batch level), the Customs Number and Country of Origin will be brought in from flip F of the Goods Receipt row that brought the Item into stock.
- If you sell an Item that is not Serial Numbered, it will not be possible to bring this information in automatically but you will be able to enter it yourself. Use 'Paste Special' to choose the Country of Origin.
- If you need this information printed on Invoices, add the "Customs Declaration Number" and "Country of Origin" fields to the Form Template design. In the case of a Serial Numbered Item, you can also have the Customs Declaration Date printed, taken from flip F of the Goods Receipt row that brought the Item into stock. This will be printed by the "Customs Declaration Date" field.
- If you sell an Item that is Serial Numbered (at the Unit or Batch level), the Customs Number and Country of Origin will be brought in from flip F of the Goods Receipt row that brought the Item into stock.
---
The Invoice register in Standard ERP:
- Introduction
- Entering an Invoice, including:
- Header
- 'Terms' card
- 'Items' card Part 1 (Flips A and B)
- 'Items' card Part 2 (Flips C-G)
- 'Items' Part 3 card (Footer)
- 'Currency' card
- 'Del. Terms' card
- 'Identifiers' card
- 'Price List' card
- 'Inv. Address' card
- 'Del. Address' card
- Header
- Entering an Invoice - Examples
- Controlling Prices in Invoices
- Inspecting Invoices, Marking as OK and Posting to the Nominal Ledger
- Nominal Ledger Transactions from Invoices
- Error Messages
- Printing Invoices
- Accruals in the Sales Ledger
- Cash Notes in the Sales Ledger
- Credit Notes
- Operations menu
- Create menu
- Row menu
- Home page for Sales Ledger manual
- Home page for Standard ERP manual
Entering an Invoice - Items Card Part 3 (Footer)
This page describes the fields in the Footer of the 'Items' card of the Invoice record. Please click the following links for descriptions of the other cards:- Header
- 'Terms' card
- 'Items' card Part 1 (Flips A and B)
- 'Items' card Part 2 (Flips C-G)
- 'Items' card Part 3 (Footer)
- 'Currency' card
- 'Del. Terms' card
- 'Identifiers' card
- 'Price List' card
- 'Inv. Address' card
- 'Del. Address' card
Footer

- Currency
- Paste Special
Currency register, System module
- Default taken from Contact record for the Customer (Sales Currency) or Default Base Currency
- The Currency of the Invoice: the exchange rate is shown on the 'Currency' card where you can change it for an individual Invoice if necessary. Leave the field blank to use your home Currency (unless you have set a Default Base Currency, in which case this will be offered as a default and should be treated as your home Currency).
- If the Contact record for the Customer has a Sales Currency specified on the 'Pricing' card, you can only use that Currency. Otherwise, you can use any Currency.
- If you change the Currency after adding Items to the Invoice, the prices of those Items will be converted automatically and immediately using the appropriate Exchange Rate for the date of the Invoice, providing you are using the Update Prices on records with Currency when changing Dates option in the Item Settings setting in the Sales Ledger. This option will also cause prices to be updated if the Exchange Rate changes when you change the Invoice Date. Prices will not be updated if you change the Exchange Rate itself. At any time, you can use the 'Update Currency Price List Items' function on the Operations menu to recalculate all prices in the Invoice.
- The Currency of the Invoice: the exchange rate is shown on the 'Currency' card where you can change it for an individual Invoice if necessary. Leave the field blank to use your home Currency (unless you have set a Default Base Currency, in which case this will be offered as a default and should be treated as your home Currency).
- GP %
- The overall gross profit for the Invoice, shown as a percentage.
- In multi-user systems, you can prevent certain users from viewing the GP % in Quotations, Orders and Invoices using Access Groups, by denying them access to the 'View Item's Cost Price' Action. In an Invoice, this will hide the Cost field, the Total GP field immediately below, the Cost Price, Cost B2, GP and FIFO fields on flip C of the matrix and the Row FIFO field on flip D.
- In multi-user systems, you can prevent certain users from viewing the GP % in Quotations, Orders and Invoices using Access Groups, by denying them access to the 'View Item's Cost Price' Action. In an Invoice, this will hide the Cost field, the Total GP field immediately below, the Cost Price, Cost B2, GP and FIFO fields on flip C of the matrix and the Row FIFO field on flip D.
- Total GP
- The total gross profit of the Items on the Invoice: this does not include any profit in the Freight value, as set in the Freight or Freight/Weight Calculation settings.
- Tax2
- This field is used in Argentina.
- If the Invoice has a Region on its 'Inv. Address' card, and the Region is one where a Regional Perception Tax is charged on at least one of the Items on the Invoice, the amount of that tax will be shown in this field, in the Currency of the Invoice. That amount will be recalculated as you add Items to the Invoice.
- When you mark the Invoice as OK and save it, the Tax2 will be credited to the Account specified in the appropriate Regional Perception Tax record. If you have specified a Min. (minimum Regional Perception Tax amount), and the Tax2 in an Invoice is less than this minimum amount, this field will be blank. This field will also be blank if the Customer is one whose No Region Perceptions box has been ticked ('Terms' card).
- If the Invoice has a Region on its 'Inv. Address' card, and the Region is one where a Regional Perception Tax is charged on at least one of the Items on the Invoice, the amount of that tax will be shown in this field, in the Currency of the Invoice. That amount will be recalculated as you add Items to the Invoice.
- Ext. Tax
- When you define VAT Code records using the setting in the Nominal Ledger, you can use the fields on flip B to specify that an additional tax, such as an environmental tax, is to be levied. This additional tax is usually termed "Extra Tax".
- If the VAT Code in any of the rows of the Invoice is one that you have configured to include Extra Tax, the amount of that tax will be shown in this field, in the Currency of the Invoice. That amount will be recalculated as you add Items to the Invoice.
- When you mark the Invoice as OK and save it, this Extra Tax will be credited to the Tax Account specified for the appropriate VAT Code. The debit posting will depend on whether you are using the Total not including Ext. Tax option on the 'VAT / Tax' card of the Account Usage S/L setting. If you are not using this option, the Extra Tax will be included in the TOTAL of the Invoice and will therefore be included in the debit posting to the Debtor Account. If you are using this option, the Extra Tax will not be included in the TOTAL, and it will be debited to the Tax on Sales Account, also as specified on the 'VAT / Tax' card of the Account Usage S/L setting. You will therefore need to use this option if the Extra Tax is one that will not be paid by Customers.
- If you have specified a Tax Min. (minimum Extra Tax amount) for a VAT Code, and the Extra Tax in an Invoice is less than this minimum amount, this field will be blank. This field will also be blank if the Customer is one whose No Extra Tax box has been checked ('Terms' card).
- Please refer to the description of flip B of the VAT Codes setting for more details about how the Extra Tax figure is calculated together with examples.
- If the VAT Code in any of the rows of the Invoice is one that you have configured to include Extra Tax, the amount of that tax will be shown in this field, in the Currency of the Invoice. That amount will be recalculated as you add Items to the Invoice.
- VAT, Tax
- The VAT total for the Invoice (or tax total if you are using the Use Tax Templates for Tax Calculation option in the Transaction Settings setting in Nominal Ledger).
- This figure will be rounded up or down according to the Default for Calculated Values rounding rules set in the Round Off setting in the System module.
- In the Nominal Ledger Transaction resulting from an Invoice, any amounts lost or gained in this rounding process will be posted to the Round Off Loss or Round Off Gain Accounts specified in the Account Usage S/L setting, as appropriate.
- This figure will be rounded up or down according to the Default for Calculated Values rounding rules set in the Round Off setting in the System module.
- Base
- The Base is the Invoice total including VAT in your home Currency (or in Base Currency 1 as defined in the Base Currency setting in the System Module). The field will not be used if the Currency of the Invoice is blank.
- Subtotal
- The total value of the Invoice rows (i.e. the total of the values in the Sum field).
- This figure will include VAT (and TAX) if the Price List specified is one that is Inclusive of VAT or if you have specified on the 'VAT / Tax' card of the Account Usage S/L setting that Base Prices include VAT (or VAT and TAX).
- The Subtotal will be rounded up or down according to the Default for Calculated Values rounding rules in the Round Off setting in the System module.
- This figure will include VAT (and TAX) if the Price List specified is one that is Inclusive of VAT or if you have specified on the 'VAT / Tax' card of the Account Usage S/L setting that Base Prices include VAT (or VAT and TAX).
- TOTAL
- The total for the Invoice, including VAT.
- This figure will be rounded up or down according to the Total rounding rules set for the Currency/Payment Term combination in the Currency Round Off setting in the System module. If that setting does not contain an entry for that combination, the Total rounding rules in the Round Off setting also in the System module will be applied. In the Nominal Ledger Transaction resulting from an Invoice, any amounts lost or gained in this rounding process are posted to the Round Off Loss or Round Off Gain Accounts specified in the Account Usage S/L setting, as appropriate.
- If you are using the Disallow Negative Totals on Sales option in the Account Usage S/L setting, you will not be able to mark an Invoice as OK and save it if the TOTAL is negative.
- This figure will be rounded up or down according to the Total rounding rules set for the Currency/Payment Term combination in the Currency Round Off setting in the System module. If that setting does not contain an entry for that combination, the Total rounding rules in the Round Off setting also in the System module will be applied. In the Nominal Ledger Transaction resulting from an Invoice, any amounts lost or gained in this rounding process are posted to the Round Off Loss or Round Off Gain Accounts specified in the Account Usage S/L setting, as appropriate.
---
The Invoice register in Standard ERP:
- Introduction
- Entering an Invoice, including:
- Header
- 'Terms' card
- 'Items' card Part 1 (Flips A and B)
- 'Items' card Part 2 (Flips C-G)
- 'Items' card Part 3 (Footer)
- 'Currency' card
- 'Del. Terms' card
- 'Identifiers' card
- 'Price List' card
- 'Inv. Address' card
- 'Del. Address' card
- Header
- Entering an Invoice - Examples
- Controlling Prices in Invoices
- Inspecting Invoices, Marking as OK and Posting to the Nominal Ledger
- Nominal Ledger Transactions from Invoices
- Error Messages
- Printing Invoices
- Accruals in the Sales Ledger
- Cash Notes in the Sales Ledger
- Credit Notes
- Operations menu
- Create menu
- Row menu
- Home page for Sales Ledger manual
- Home page for Standard ERP manual
Entering an Invoice - Currency Card

- Currency
- Paste Special
Currency register, System module
- Default taken from Customer or Default Base Currency
- The Currency of the Invoice (also shown in the footer of the 'Items' card) is shown together with the exchange rate which can be modified only for this particular Invoice if necessary. Ensure that the correct Currency is shown before any Items are added to the Invoice so that prices are converted correctly. If you forget, the 'Update Currency Price List Items' function is available on the Operations menu which retrospectively converts the prices of Items added to the Invoice before the Currency was specified (save the Invoice before using this function). Leave the field blank to use the home Currency (unless you have set a Default Base Currency, in which case this will be offered as a default and should be treated as your home Currency).
- The Currency of the Invoice (also shown in the footer of the 'Items' card) is shown together with the exchange rate which can be modified only for this particular Invoice if necessary. Ensure that the correct Currency is shown before any Items are added to the Invoice so that prices are converted correctly. If you forget, the 'Update Currency Price List Items' function is available on the Operations menu which retrospectively converts the prices of Items added to the Invoice before the Currency was specified (save the Invoice before using this function). Leave the field blank to use the home Currency (unless you have set a Default Base Currency, in which case this will be offered as a default and should be treated as your home Currency).
- Exchange Rates
- Default taken from
Base Currency Rates setting and/or Exchange Rate register, System module
- The current exchange rates for the specified Currency will be entered to this card by Hansa. Ensure that they are correct before adding Items to the Invoice to ensure the correct currency conversion takes place.
- In the case of Invoices in Currency created from Orders, the exchange rates shown here will be those specified for the Order if the Update Base Cur when Invoicing and Update Foreign Cur. when Invoicing options in the Account Usage S/L setting are not in use. Otherwise, the latest Base and Exchange Rates will be used, although the prices in Currency of the Items will not be changed. This means the Customer will still be charged the agreed price, but the value of the Invoice in the home Currency (and therefore in the Nominal Ledger) will be different to that of the Order. If you want to update the pricing in the Invoice to reflect new Base and Exchange Rates (and therefore to maintain the original value in the home Currency in the Nominal Ledger), save the Invoice and then select 'Update Currency Price List Items' from the Operations menu.
- One of two conversion methods will be used. The Dual-Base system will be useful for companies that have offices in two countries that need to report in both Currencies, for companies operating in countries where there is a second Currency (usually the US Dollar or Euro) in common use in addition to the national one, and for companies in the Euro zone who retain their old national Currency for comparison purposes. The second method is a simple conversion from the foreign Currency to the home Currency, applicable to the majority of worldwide Currency transactions. These are described below.
- Exchange Rates (Dual-Base System)
- In the example shown above, the Currency of the Invoice is the Euro. Base Currency 1 is the home Currency (GBP, Pounds Sterling) and Base Currency 2 is the Euro. The fields on the left show in the form of a ratio the exchange rate between the two base Currencies (taken from the latest record in the Base Currency Rates setting). The illustration shows that GBP 0.63 buys one Euro.
- Note that European Monetary Union (EMU) regulations specify that the ratios must always show how many units of the home or foreign Currency can be bought with one Euro.
- Note that European Monetary Union (EMU) regulations specify that the ratios must always show how many units of the home or foreign Currency can be bought with one Euro.
- Exchange Rates (Simple Currency Conversion System)
- In the case of a simple currency conversion system, the Rate and right-hand Base Currency 1 fields are used to show a simple exchange rate between the foreign and home Currencies. In the example shown below, the home Currency is US Dollars (USD) and the foreign Currency Japanese Yen (JPY). JPY 122.15 buys USD 1.00.
- In the case of Invoices in Currency created from Orders, the exchange rates shown here will be those specified for the Order if the Update Base Cur when Invoicing and Update Foreign Cur. when Invoicing options in the Account Usage S/L setting are not in use. Otherwise, the latest Base and Exchange Rates will be used, although the prices in Currency of the Items will not be changed. This means the Customer will still be charged the agreed price, but the value of the Invoice in the home Currency (and therefore in the Nominal Ledger) will be different to that of the Order. If you want to update the pricing in the Invoice to reflect new Base and Exchange Rates (and therefore to maintain the original value in the home Currency in the Nominal Ledger), save the Invoice and then select 'Update Currency Price List Items' from the Operations menu.

- Please click here for more examples.
Entering an Invoice - Delivery Card
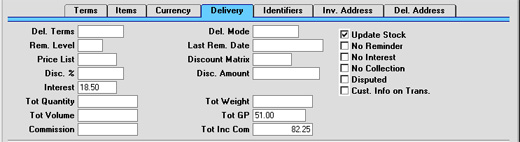
- Del. Terms
- Paste Special
Delivery Terms setting, Sales Orders module
- Default taken from Customer
- Specify the Delivery Terms for this Invoice here. You will tend to use this field for international Customers: examples might be Cost, Insurance, Freight or Free On Board.
- For each Delivery Term record you can specify an appropriate description in different Languages: the Language for the Invoice (on the 'Identifiers' card) will therefore determine the translation to be printed on any documentation produced from the Invoice.
- Specify the Delivery Terms for this Invoice here. You will tend to use this field for international Customers: examples might be Cost, Insurance, Freight or Free On Board.
- Del. Mode
- Paste Special
Delivery Modes setting, Sales Orders module
- Default taken from Customer
- Enter the mode of shipping for this Invoice. Examples might be Post or Courier, or might specify the name of the courier that you will use to supply the goods on the Invoice.
- For each Delivery Mode record you can specify an appropriate description in different Languages: the Language for the Invoice (on the 'Identifiers' card) will therefore determine the translation to be printed on any paperwork produced from the Invoice.
- You can also set up different versions of the Invoice document for each Delivery Mode, perhaps incorporating appropriate payment instructions. To do this, enter the Delivery Mode in the Language field when defining documents. Document definition is described here.
- Enter the mode of shipping for this Invoice. Examples might be Post or Courier, or might specify the name of the courier that you will use to supply the goods on the Invoice.
- Rem. Level
- This Reminder Level indicates how many Reminder documents have been printed for this Invoice. You can update this field yourself, or it can be updated automatically whenever a Reminder or a customer statement is printed.
- Reminders are printed using the Reminder document. A separate Reminder can be printed for each overdue Invoice, and it can contain one of three messages of increasing severity. These messages are defined in the Texts for Reminders setting. When you next print a Reminder for this Invoice, the message it contains will be chosen depending on this Reminder Level. For example, if the Reminder Level of the Invoice is 2, the message will be taken from the Reminder 2 field in the Texts for Reminders setting, and so on. If the Reminder Level of an Invoice is greater than 3, a Reminder document will be printed, but it will not contain a message.
- For Reminders to be printed, the No Reminder check box (above) must be switched off.
- This field may be changed even after the Invoice has been approved.
- Reminders are printed using the Reminder document. A separate Reminder can be printed for each overdue Invoice, and it can contain one of three messages of increasing severity. These messages are defined in the Texts for Reminders setting. When you next print a Reminder for this Invoice, the message it contains will be chosen depending on this Reminder Level. For example, if the Reminder Level of the Invoice is 2, the message will be taken from the Reminder 2 field in the Texts for Reminders setting, and so on. If the Reminder Level of an Invoice is greater than 3, a Reminder document will be printed, but it will not contain a message.
- Last Rem. Date
- The last date a reminder or statement was printed for this Invoice is recorded here. This field may be changed manually even after approving the Invoice.
- Price List
- Paste Special
Price List register, Pricing module
- Default taken from Customer, Customer Category or Payment Term
- Specify here the Price List which will determine the prices used on this Invoice. Ensure you have chosen the correct Price List before adding rows to the Invoice: if you forget, the 'Update Currency Price List Items' function is available on the Operations menu which can be used to change the prices of Items added to the Invoice before the Price List was specified (save the Invoice before using this function).
- When a row is added to the Invoice and an Item specified, Hansa searches either in the Price register or in the Quantity Dependent Prices setting for the single record representing the Item/Price List combination and brings in the Unit Price from there. If no such record is found, the Base Price of the Item is used. If a Discount Price List is specified, the Price register will be used. Otherwise, the Quantity Dependent Prices setting will be used.
- If the Price List specified is one which is Inclusive of VAT, the Unit Prices and Sums of each Invoice row will include VAT.
- When creating a new Invoice, Hansa will first look to the Customer record for an appropriate Price List. If none is specified there, the Price List for the Customer Category to which the Customer belongs will be used. If this is blank, or the Customer does not belong to a Category, Hansa will look to the Payment Term record allocated to the Customer. If the Payment Term is subsequently changed for this Invoice only, the Price List will only be changed if it is blank.
- Specify here the Price List which will determine the prices used on this Invoice. Ensure you have chosen the correct Price List before adding rows to the Invoice: if you forget, the 'Update Currency Price List Items' function is available on the Operations menu which can be used to change the prices of Items added to the Invoice before the Price List was specified (save the Invoice before using this function).
- Discount Matrix
- Default taken from
Customer or Customer Category
- If there is a Discount Matrix applying to this Invoice, it will be shown here. The field cannot be changed. Discount Matrices are used to administer quantity discounts.
- Interest
- Default taken from
Customer or Interest setting, Sales Ledger
- If payment for this Invoice is late, the 'Create Interest Invoices' Maintenance function can be used to charge interest. This is the annual rate that will be used to calculate the interest on this Invoice, if interest is to be calculated using the interest rate applicable at the Invoice Date. The figure will be brought in from the Customer or from the Interest setting but can be altered for this Invoice only. Interest Invoices will not be created if the Interest check box on the 'Terms' card of the Customer screen is switched off or if the No Interest check box (described below) is switched on. Please refer to the description of the Interest setting for details about interest rates and calculation.
- Tot Quantity
- This shows the total number of Items on the Invoice. If this figure becomes inaccurate for any reason, use the 'Recalculate Weight and Volume' function on the Operations menu to update it.
- Tot Weight
- Default taken from
Items
- This field will contain a calculated value based on the Invoice Quantity and the Weight of the Items. If the Weight of one of the Items is changed or if this figure becomes inaccurate for any other reason, use the 'Recalculate Weight and Volume' function on the Operations menu to update this field.
- Tot Volume
- Default taken from
Items
- This field will contain a calculated value based on the Invoice Quantity and the Volume of the Items. If the Volume of one of the Items is changed or if this figure becomes inaccurate for any other reason, use the 'Recalculate Weight and Volume' function on the Operations menu to update this field.
- Tot GP
- The total gross profit of the Items on the Invoice: this does not include any profit in the Freight value, as set in the Freight or Freight/Weight Calculation settings.
- Commission, Tot Inc Com
- These fields are used in Russia. Please refer to your local Hansa representatives for details.
- Update Stock
- Default taken from
Account Usage S/L setting card 1, Sales Ledger
- Use this option if you need stock levels for the Items on the Invoice to be reduced when the Invoice is approved. This only affects Items that are Stocked Items. No check of the availability of stock will be made, unless the Do Not Allow Over Delivery option in the Stock Settings setting in the Stock module is in use. This feature is used only if the Stock module is installed.
- Switching this option on will also cause cost accounting postings (for use when maintaining stock values in the Nominal Ledger) to be included in the Nominal Ledger Transaction generated when the Invoice is approved.
- Both effects of this check box will only be used in those cases where Deliveries are made at the invoicing stage, from Invoices without related Sales Orders.
- In the case of Invoices created from Orders, if you need to invoice a greater Quantity than was delivered, this must be done by adding a new row to the Invoice. Ensure that this Update Stock box is checked so that stock levels are updated accordingly and, if appropriate, to cause cost accounting transactions to be created in the Nominal Ledger for the extra quantity. In this situation, this box will only apply to Invoice rows that are not related to the Order.
- In the case of Invoices created from Projects, this check box will be switched off, and cannot be used. You should therefore not add new rows to such Invoices.
- Note that when raising a Credit Note, this check box will be switched off by default, whatever the status of the Inv Update Stock option in the Account Usage S/L setting. If you are using cost accounting (maintaining stock valuations in the Nominal Ledger), it should be left turned off because otherwise the stock value will be updated with an incorrect FIFO amount. For details about updating stock from Credit Notes, please refer to the Credit Notes and Stock page.
- Switching this option on will also cause cost accounting postings (for use when maintaining stock values in the Nominal Ledger) to be included in the Nominal Ledger Transaction generated when the Invoice is approved.
- No Reminder
- If the Reminders box on the 'Terms' card of the Customer is on, that Customer can be sent reminders for all outstanding Invoices. If a reminder is not to be sent for this Invoice, check this box. Reminders are sent using the Reminder document.
- Invoices marked as No Reminder can be excluded from some reports and documents such as the Open Invoice Customer Statement and the Sales Ledger report.
- Invoices marked as No Reminder can be excluded from some reports and documents such as the Open Invoice Customer Statement and the Sales Ledger report.
- No Interest
- If the Interest box on the 'Terms' card of the Customer is on, that Customer can be charged interest on all outstanding Invoices. If this Invoice is not to be included in the interest calculation, check this box. Interest is calculated using the 'Create Interest Invoices' Maintenance function.
- No Collection
- This check box is used in Finland. Please refer to your local Hansa representatives for details. Invoices marked as No Collection can be excluded from some reports and documents such as the Open Invoice Customer Statement and the Sales Ledger report.
- Disputed
- Check this box if the Invoice is subject to a dispute.
- Disputed Invoices can be in- or excluded from some reports and documents such as the Open Invoice Customer Statement and the Sales Ledger report. However, the Invoice will still be subject to Interest charges and Reminders unless the No Interest and No Reminder boxes above are checked as well. The Disputed, No Interest and No Reminder boxes can all be checked after the Invoice has been approved.
- If the Invoice is greatly overdue, the debt can be transferred from the Debtor Account to the Bad Debtor Account using the 'Transfer to Bad Debtors' Maintenance function. This function will mark the Invoice as Disputed, to prevent the debt being transferred again the next time the function is used. If you mark an Invoice as Disputed yourself, you will therefore prevent the debt being transferred.
- In multi-user systems, you can prevent certain users from marking an Invoice as Disputed using Access Groups (by denying access to the 'Allow to Dispute Invoice' Action).
- Disputed Invoices can be in- or excluded from some reports and documents such as the Open Invoice Customer Statement and the Sales Ledger report. However, the Invoice will still be subject to Interest charges and Reminders unless the No Interest and No Reminder boxes above are checked as well. The Disputed, No Interest and No Reminder boxes can all be checked after the Invoice has been approved.
- Cust. Info. on Trans.
- When a Nominal Ledger Transaction is generated automatically from this Invoice, use this option if you would like to have the Invoice Number, Due Date and Customer shown on flip E of the Transaction. This applies to the posting to the Debtor Account only.
- The check box will be on by default if you are using the Invoice Info on N/L Transaction option on card 1 of the Account Usage S/L setting.
Ingresar una Factura - Solapa Identificadores
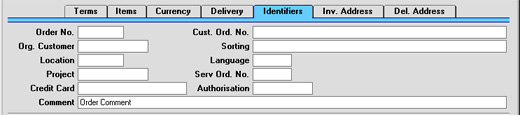
- Nro. Orden
- En el caso de las Facturas generadasdesde las Órdenes de Ventas utilizando la
from Sales Orders using the automatic invoicing function, Hansa will enter the Order Number in this field.
- Cust. Ord. No.
- Record the Customer's Purchase Order Number here. Where an Invoice has been created from an Order, the Customer's Order Number will be brought in automatically.
- Org. Customer
- Where an Invoice has been created from an Order and the Customer placing the Order is one for whom Invoices are sent to a third party such as leasing company, the Customer Number of the ordering Customer is placed here.
- Sorting
- This field contains the Sort Key from the originating Order or from the Customer. This is for information only.
- Location
- Paste Special
Locations setting, Stock module
- If the stock which will be used to satisfy this Invoice is to be taken from a particular Location, specify that Location here. Otherwise, stock from all Locations will be available.
- If a Main Location has been specified in the Stock Settings setting, leaving the field blank means that stock from that Location will be used. However, if, in the same setting, the Require Location option is on, this field must contain a value.
- A default Location can be brought in from the 'Bonus' card of the user's Person record.
- If the 'Item Status' window is on screen, the quantities shown will refer to the Location specified here.
- If a Main Location has been specified in the Stock Settings setting, leaving the field blank means that stock from that Location will be used. However, if, in the same setting, the Require Location option is on, this field must contain a value.
- Language
- Paste Special
Languages setting, System module
- Default taken from Customer
- The Language Code determines the text to be transferred from various registers and settings, for example the Item Name, text for Payment Terms and Payment Mode, the selection of document forms etc. Leave the field blank to use the base Language.
- The Language Code determines the text to be transferred from various registers and settings, for example the Item Name, text for Payment Terms and Payment Mode, the selection of document forms etc. Leave the field blank to use the base Language.
- Project
- In cases of Invoices created from Projects using the 'Create Project Invoices' Maintenance function in the Job Costing module, Hansa will enter the Project Number in this field. This field cannot be changed.
- If this field contains a value, the Invoice will not use the standard Invoice document when printed. Instead, the Project Invoice document will be used. Please refer to the Printing Invoices page for more details.
- The Update Stock box (above) will be switched off in Invoices created from Projects.
- If this field contains a value, the Invoice will not use the standard Invoice document when printed. Instead, the Project Invoice document will be used. Please refer to the Printing Invoices page for more details.
- Serv. Ord. No.
- This field contains a value if the Invoice was raised from a Service Order. It is only used if the Service Orders module is installed, and cannot be changed.
- Note that Invoices associated with a Service Order should be raised from the Service Orders module, using the 'Make Customer Invoice' function on the Operations menu of the Service Order screen.
- Note that Invoices associated with a Service Order should be raised from the Service Orders module, using the 'Make Customer Invoice' function on the Operations menu of the Service Order screen.
- Credit Card
- Paste Special
Credit Card register, Cheques module (if installed)
- If the Invoice is being paid using a credit card, enter its number here. Known credit card numbers for each Customer can be stored in the Credit Card register in the Cheques module.
- Authorisation
- If the Invoice is being paid using a credit card, record the authorisation code here once it has been obtained.
- Comment
- Default taken from
Customer
- Record here any comment about this Invoice: the comment can be printed on the Invoice document. The default is taken from the Order Comment field of the Customer record. This field can be changed after the Invoice has been approved.
Entering an Invoice - Price List Card
This page describes the fields on the 'Price List' card of the Invoice record. Please click the following links for descriptions of the other cards:- Header
- 'Terms' card
- 'Items' card Part 1 (Flips A and B)
- 'Items' card Part 2 (Flips C-G)
- 'Items' card Part 3 (Footer)
- 'Currency' card
- 'Del. Terms' card
- 'Identifiers' card
- 'Price List' card
- 'Inv. Address' card
- 'Del. Address' card
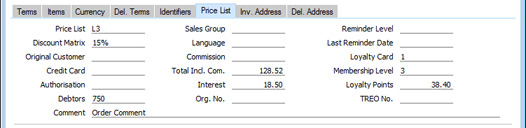
- Price List
- Paste Special
Price List register, Pricing module
- Specify here the Price List that will determine the prices used in the Invoice.
- If you change the Price List after adding Items to the Invoice, the prices of those Items will be updated automatically and immediately. At any time, you can also use the 'Update Currency Price List Items' function on the Operations menu to update all prices in the Invoice.
- When you create a new Invoice and specify a Customer, the Price List will be chosen as follows:
- If the Customer has a Loyalty Card, it will be brought in from the relevant row in the Loyalty Card Membership Level Structure setting in the Point of Sales module.
- It will be brought in from the 'Pricing' card of the Customer's Contact record.
- The Price List for the Customer Category to which the Customer belongs will be used.
- The Price List will be taken from the Sales Pay. Term record allocated to the Customer. If you change the Payment Term in an Invoice, the Price List in that Invoice will be changed if a Price List has been specified in the Payment Term.
- If the Price List specified is one that is Inclusive of VAT, the Unit Prices and Sums in each Invoice row will include VAT.
- When you add a row to the Invoice and specify an Item, the Unit Price will be chosen as follows, assuming the Type of the Price List is "Discount":
- The Unit Price will be taken from the Price record with the relevant Item/Price List/Customer combination.
- It will be taken from the Price record with the relevant Item/Price List combination where the Customer field is empty.
- The Base Price from the Item record will be used.
- The Unit Price will be taken from the Quantity Dependent Price record with the relevant Item/Price List combination.
- The Base Price from the Item record will be used.
- In multi-user systems, you can prevent certain users from changing the Price List in Quotations, Orders and Invoices using Access Groups, by denying them access to the 'Change Prices' Action).
- If you change the Price List after adding Items to the Invoice, the prices of those Items will be updated automatically and immediately. At any time, you can also use the 'Update Currency Price List Items' function on the Operations menu to update all prices in the Invoice.
- Discount Matrix
- Paste Special
Discount Matrix register, Pricing module
- If there is a Discount Matrix applying to an Invoice, it will be shown here. You can use Discount Matrices to administer quantity discounts: please refer to here for more details..
- When you create a new Invoice and specify a Customer, the Discount Matrix will be chosen as follows:
- If the Customer has a Loyalty Card, it will be brought in from the relevant row in the Loyalty Card Membership Level Structure setting in the Point of Sales module.
- It will be brought in from the 'Pricing' card of the Customer's Contact record.
- The Discount Matrix for the Customer Category to which the Customer belongs will be used.
- By default, you cannot change this field. If you wish to allow users to be able to change the Discount Matrix in Invoices, assign them an Access Group in which you have granted Full access to the 'Change Discount Matrix on Invoice' Action.
- If you change the Discount Matrix after adding Items to the Invoice, the discounts and sums for those Items will be updated automatically and immediately.
- If the Discount Matrix is one that calculates quantity discounts based on Item Group quantities rather than Item quantities, the calculated discount for an Item may become incorrect if you specify another Item belonging to the same Item Group in a later row in the Invoice. To cater for this, be sure to select 'Recalculate Discount' from the Operations menu when the Invoice is complete. This will recalculate the discount percentage for each Item in the Invoice.
- When you create a new Invoice and specify a Customer, the Discount Matrix will be chosen as follows:
- Original Customer
- This field will be used in the situation where you have created an Invoice from an Order, Delivery or Quotation and the ordering Customer is one for whom Invoices are to be sent to a third party such as a leasing company. In this situation, the Customer in the Invoice will be the third party, and the Customer Number of the ordering Customer will be placed here. This field cannot be changed.
- Credit Card
- Paste Special
Credit Card register, Cheques module (if installed)
- If the Invoice is being paid using a credit card, enter its number here. Known credit card numbers for each Customer can be stored in the Credit Card register in the Cheques module.
- If you have entered a Payment Mode with the same Code as the Payment Term used in the Invoice, and the Type of that Payment Mode is "Credit Card", you will not be able to save the Invoice if this field is empty or if it contains a Credit Number that does not exist in the Credit Card register.
- If you have entered a Payment Mode with the same Code as the Payment Term used in the Invoice, and the Type of that Payment Mode is "Credit Card", you will not be able to save the Invoice if this field is empty or if it contains a Credit Number that does not exist in the Credit Card register.
- Authorisation
- If the Invoice is being paid using a credit card, record the authorisation code here once it has been obtained.
- Debtors Account
- Paste Special
Account register, Nominal Ledger/System module
- The Debtor Account specified here will be debited when you mark the Invoice as OK and save and it is then posted to the Nominal Ledger. The default will be chosen as follows:
- The Debtors Account specified in the Customer Category to which the Customer belongs will be used.
- The Debtors Account entered in the Account Usage S/L setting will be used.
- The Cash Account will be taken from the Payment Term specified in the Invoice:
- The Cash Account entered in the Account Usage S/L setting will be used.
- The Bad Debtors Account specified in the Customer Category to which the Customer belongs will be used.
- The Bad Debtors Account entered in the Account Usage S/L setting will be used.
- The Debtors Account specified in the Customer Category to which the Customer belongs will be used.
- Comment
- Default taken from
Contact record for the Customer (Order Comment)
- Record here any comment about this Invoice: it will be printed on the Invoice document if you have included the "Invoice Comment" field in your Form Template design. You can change this field after you have marked the Invoice as OK and saved.
- Sales Group
- Paste Special
Sales Groups setting, System module
- Default taken from Salesman
- The Sales Group will be brought in from the Person record when you specify a Salesman (on the 'Terms' card). If you are using the Limited Access feature, you can use this field to prevent a user from seeing every Invoice in the 'Invoices: Browse' window by restricting their view to their own Invoices or to those of their Sales Group.
- Please click here for full details about the Limited Access feature.
- The Sales Group will be brought in from the Person record when you specify a Salesman (on the 'Terms' card). If you are using the Limited Access feature, you can use this field to prevent a user from seeing every Invoice in the 'Invoices: Browse' window by restricting their view to their own Invoices or to those of their Sales Group.
- Language
- Paste Special
Languages setting, System module
- Default taken from Contact record for the Customer
- The Language determines the Item Descriptions that will be shown on the 'Items' card, and the text for the Payment Term, Delivery Term and Delivery Mode that will be printed on forms. Leave the field blank to use your home Language.
- You can also use the Language to determine the Form Template that will be used when you print the Invoice, and the printer that will be used to print it. This can include sending the form to a fax machine, if your hardware can support this feature. Do this in the 'Form Definition' window for the Invoice form, as described here. You can change the Language before printing the Invoice even if it has been marked as OK, to ensure it is printed on the correct printer or fax machine.
- The Language determines the Item Descriptions that will be shown on the 'Items' card, and the text for the Payment Term, Delivery Term and Delivery Mode that will be printed on forms. Leave the field blank to use your home Language.
- Commission, Tot Inc Com
- These fields are used in Russia. Please refer to your local HansaWorld representatives for details.
- Interest
- Default taken from
Contact record for the Customer or Interest setting, Sales Ledger
- If payment for an Invoice is late, you can use the 'Create Interest Invoices' Maintenance function to charge interest. The figure in this field is the annual rate that this function will use to calculate the interest on the Invoice, if you have specified in the Interest setting that interest is to be calculated using the interest rate applicable at the Invoice Date. This figure will be brought in from the Customer or from the Interest setting but you can change it for an individual Invoice if necessary. Interest Invoices will not be created if the Interest check box on the 'Terms' card of the Contact record for the Customer is not ticked or if the No Interest check box in an Invoice (on the 'Identifiers' card) is ticked. Please refer to the description of the Interest setting for details about interest rates and calculation.
- Org. No.
- If an Invoice is a Credit Note, this field will display the Invoice Number of the Invoice being credited.
- This field is for information only. It also helps ensure features such as the ability to print Credit Notes operate correctly. You should not change this field. If you need to change the Invoice Number of the Invoice being credited, you should not do so here and instead should do so in the first row of the matrix on the 'Items' card.
- This field is for information only. It also helps ensure features such as the ability to print Credit Notes operate correctly. You should not change this field. If you need to change the Invoice Number of the Invoice being credited, you should not do so here and instead should do so in the first row of the matrix on the 'Items' card.
- Reminder Level
- This Reminder Level indicates how many Reminders have been printed for an Invoice and how many times it has been included in an Open Invoice Customer Statement.
- The Reminder Level in an Invoice will be updated automatically whenever you print a Reminder for the Invoice or include it in a statement, providing you select the Increase Reminder Level option when printing. The Reminder Level will not be increased even if you use the Increase Reminder Level option if you print statements for a past date, or if the Invoice is not yet due for payment when you include it in a statement. You can also change the Reminder Level in an Invoice yourself, and you can do this after you have marked the Invoice as OK.
- You can print Reminders using the Reminders form. When you print a Reminder for an Invoice, a reminder message will be included, provided you have added the "Reminder Text" field to the Form Template design and providing you have composed three reminder messages in the Reminder Texts setting. The message that will be printed will be of increasing severity depending on the Reminder Level of the Invoice. For example, if the Reminder Level of the Invoice is 2, the message will be taken from the Reminder 2 field in the Reminder Texts setting, and so on.
- Reminders will not be printed for an Invoice in which you have ticked the No Reminder box on the 'Identifiers' card.
- When you print a Debtors Letter or an Open Invoice Customer Statement for a particular Customer, that Customer's open Invoices will be listed together on a single page. The Reminder Levels of all the Invoices in the Letter or Statement will be checked and the reminder message for the highest Level will be printed on the form (in the "Reminder Level (remtext)" field).
- The Reminder Level in an Invoice will be updated automatically whenever you print a Reminder for the Invoice or include it in a statement, providing you select the Increase Reminder Level option when printing. The Reminder Level will not be increased even if you use the Increase Reminder Level option if you print statements for a past date, or if the Invoice is not yet due for payment when you include it in a statement. You can also change the Reminder Level in an Invoice yourself, and you can do this after you have marked the Invoice as OK.
- Last Reminder Date
- As mentioned above, the Reminder Level in an Invoice will be updated automatically whenever you print a Reminder for the Invoice or include it in a statement, providing you select the Increase Reminder Level option when printing. This field displays the date when the Reminder Level was last updated in this way. You can also change this field yourself, even in an Invoice that has been marked as OK.
- Loyalty Card
- Paste Special
Loyalty Card register, POS module/Loyalty Cards setting, Restaurant module
- If the Customer has a Loyalty Card, it will be shown here. You can also choose a Loyalty Card using 'Paste Special', in which case the Customer details will be brought in automatically. If specifying a Loyalty Card changes the Price List and/or Discount Matrix, the prices of any Items already in the Invoice will be recalculated automatically. Please refer here for details about Loyalty Cards.
- Membership Level
- This field displays the Membership Level of the Customer's Loyalty Card. This is for information only and cannot be changed.
- Loyalty Points
- The number of Loyalty Points earned by the Invoice. Whenever you add or change an Invoice row, this figure will be updated automatically.
- TREO No.
- TREO (Tax Remission Export Office) Orders are used in Kenya and other East African countries. If a manufacturing company receives a Sales Order from an export Customer, then any components purchased for manufacturing the Items on the Sales Order will be exempt from tax and customs duties. Such a Sales Order must be marked with a Control Code supplied by the tax authority and with the expiry date of that Control Code, which you should enter in these fields. This Control Code will be copied this field in all Invoices resulting from the Order.
The Invoice register in Standard ERP:
- Introduction
- Entering an Invoice, including:
- Header
- 'Terms' card
- 'Items' card Part 1 (Flips A and B)
- 'Items' card Part 2 (Flips C-G)
- 'Items' card Part 3 (Footer)
- 'Currency' card
- 'Del. Terms' card
- 'Identifiers' card
- 'Price List' card
- 'Inv. Address' card
- 'Del. Address' card
- Header
- Entering an Invoice - Examples
- Controlling Prices in Invoices
- Inspecting Invoices, Marking as OK and Posting to the Nominal Ledger
- Nominal Ledger Transactions from Invoices
- Error Messages
- Printing Invoices
- Accruals in the Sales Ledger
- Cash Notes in the Sales Ledger
- Credit Notes
- Operations menu
- Create menu
- Row menu
- Home page for Sales Ledger manual
- Home page for Standard ERP manual
Entering an Invoice - Inv. Address Card
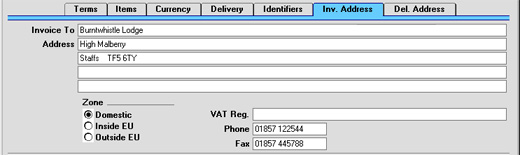
Entering an Invoice - Del. Address Card
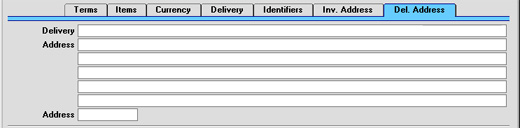
- Delivery Address
- Default taken from
Customer
- Enter the Delivery Address here, if different from the Invoice Address or the usual Delivery Address shown on the 'Delivery' card of the Customer record.
- Address
- Paste Special
Delivery Addresses setting, Sales Orders module
- If the Customer is one with several Delivery Addresses (e.g. it has several branches), these can be recorded in the Delivery Addresses setting in the Sales Orders module. Select the correct one for this Invoice using the 'Paste Special' function. The full Delivery Address will be brought in to the fields above. Usually, only Delivery Addresses for this Customer and those with no Customer specified will be included in the 'Paste Special' list. If you would like all the 'Paste Special' list to contain all Delivery Addresses, check the Paste All Delivery Addresses box in the Order Settings setting in the Sales Orders module.
Entering an Invoice - Examples
We shall now show how to use the various fields on the Invoice screen with the help of a few examples.Open the Invoice register using the Master Control panel or the Registers menu in the Sales Ledger. The 'Invoice: New' window is shown, with Invoice Number and Date entered. The cursor is already in the Customer Number field. Press Ctrl-Return (Windows and Linux) or ⌘-Return (Macintosh) to activate the 'Paste Special' feature. This brings up the 'Paste Customer' window.
Select a Customer from the list by double-clicking on its name (or by using the cursor keys and pressing Return). Press Return again and Customer information such as Name and Address is placed in the appropriate fields on the Invoice screen.
Press Return again to move the insertion point to the Item field, the top left-hand field in the Invoice rows grid. Again, you can use 'Paste Special' to select an Item. Select an Item by double-clicking. Press Return to bring information such as the Item Name, Base Price, Sales Account number and VAT Code.
Then, enter the Quantity sold and press Return. The Amount, Tax, Sum and Totals are calculated automatically, and the insertion point moves to the next line. Repeat this procedure for each Item on the Invoice.
If the Invoice needs altering, edit the fields in the normal way. As the Invoice has not been saved, you can also cancel it entirely by clicking [Cancel] or the close box. In that case you will be asked to confirm the cancellation:

When all Items have been entered, you may want to check the Invoice. Click the [Save] button to save it and then click the Printer icon in the Button Bar to print a sample copy. If you want to print to screen, click the Preview icon.
Until the Invoice has been approved by checking the OK box, it is still possible to change it.
Entering an Invoice - Settlement Discount Examples
You can offer a settlement discount to a Customer to encourage them to pay an Invoice by a specified date. Follow these steps:- Create a record in the Payment Terms setting containing the details of the settlement discount. Enter the discount percentage in the Settl. Discount % field and the number of days for which the settlement discount offer is valid in the Settl. Disc Days field:
The Type should be "Normal", and you should also specify the number of Net Days to allow Due Dates to be calculated.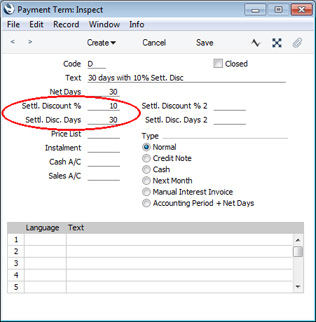
If you need to configure a two-stage Settlement Discount, use the Settl. Discount % 2 and Settl. Disc Days 2 fields as well. For example, you may need to offer a 10% Discount for payment within 10 days and a 5% Discount for payment within the following 20 days. If so, use the Settl. Discount % and Settl. Disc. Days fields for the first stage (10% Discount for payment within 10 days), and the Settl. Discount % 2 and Settl. Disc. Days 2 fields for the second stage (5% Discount for payment within the following 20 days). Settl. Disc. Days 2 counts from the Invoice Date, so in this example it should be 30.
- Specify Settlement Discount Accounts on the 'Sales' card of the Account Usage S/L setting. If necessary, you can enter different Accounts to be used depending on the VAT Zone of the Customer:
The value of the settlement discount will be debited to the Settlement Discount Account when the Customer pays the Invoice.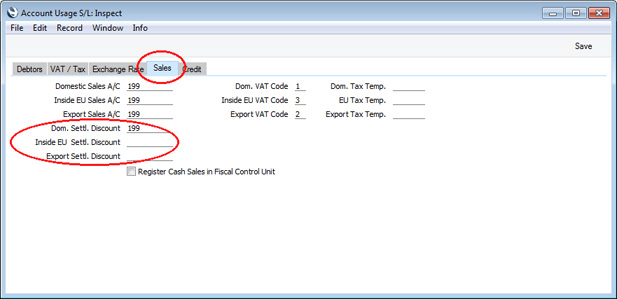
- Enter the Invoice in the usual way.
The settlement discount will be calculated using the formula:
- TOTAL x Settlement Discount %
Field in Form Template Prints Discounted VAT VAT - VAT on Settlement Discount (i.e. the VAT total of the Invoice - the VAT element in the Settlement Discount) (will print the VAT total in Invoices with no Settlement Discount). You should only use this field if you have specified a Settl. Discount VAT Account (steps 7 and 8 below) If Settlement Discount If an Invoice qualifies for a Settlement Discount, this field will print the phrase that you enter as the Field Argument If Settlement Discount 2 If an Invoice qualifies for a second Settlement Discount, this field will print the phrase that you enter as the Field Argument Settlement Discount Settlement Discount amount Settlement Discount Date Prints the date on which the Settlement Discount expires Settlement Discount in Base 1 Settlement Discount amount, converted to Base Currency 1 Settlement Discount in Base 2 Settlement Discount amount, converted to Base Currency 2 Settlement Discount Total TOTAL - Settlement Discount amount Settlement Discount 2 Second Settlement Discount amount Settlement Discount 2 Date Prints the date on which the second Settlement Discount expires Settlement Discount 2 in Base 1 Second Settlement Discount amount, converted to Base Currency 1 Settlement Discount 2 in Base 2 Second Settlement Discount amount, converted to Base Currency 2 Settlement Discount 2 Total TOTAL - second Settlement Discount amount To Pay after Settlement Discount TOTAL - Settlement Discount amount To Pay after Settlement Discount in Base 1 TOTAL - Settlement Discount amount, converted to Base Currency 1 To Pay after Settlement Discount in Base 2 TOTAL - Settlement Discount amount, converted to Base Currency 2 To Pay after Half Settlement Discount TOTAL - (Settlement Discount amount / 2) Total VAT of Settlement Discount VAT on Settlement Discount (i.e. the VAT element in the Settlement Discount) (will be empty in Invoices with no Settlement Discount). You should only use this field if you have specified a Settl. Discount VAT Account (steps 7 and 8 below)
- Mark the Invoice as OK and save. The settlement discount will not affect the postings in the Nominal Ledger.
- When you receive payment from the Customer, create a new record in the Receipt register. When you specify the Invoice Number, an extra row containing the settlement discount will be added to the Receipt automatically, providing the Transaction Date is on or before the Discount Date. The Received and Bank Amount will be changed to the outstanding amount less the settlement discount:
The Receipt register is described in more detail here.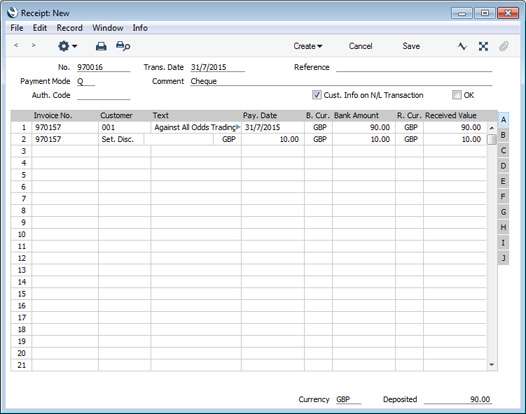
- Mark the Receipt as OK and save. In the resulting Nominal Ledger Transaction, the settlement discount will be debited to the Settlement Discount Account that you specified in step 2:
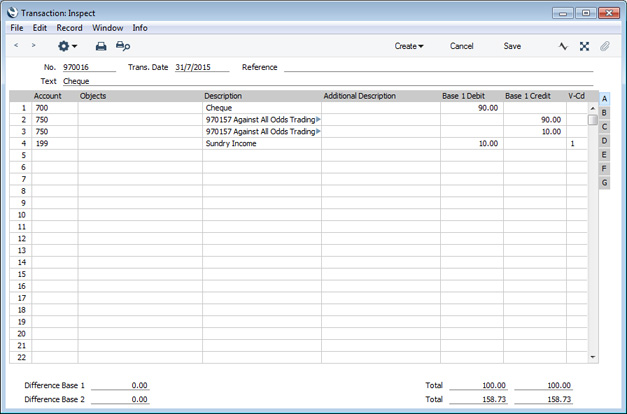
- In some countries, the posting of the settlement discount from the Receipt should include a VAT element. If you need such a posting, specify a Settl. Discount VAT Account on the 'VAT / Tax' card of the Account Usage S/L setting:
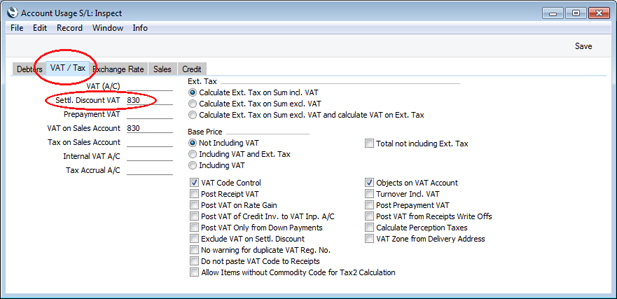
- The existence of a Settl. Discount VAT Account means that the settlement discount less VAT will be debited to the Settlement Discount Account that you specified in step 2, and the VAT element will be debited to the Settlement Discount VAT Account:
The VAT element will be calculated using the following formula (with example figures in brackets):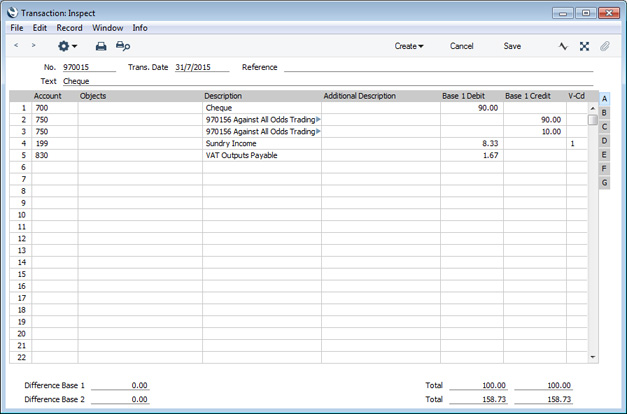
The VAT total in this equation will be taken from the VAT field in the footer of the Invoice being paid.Settlement Discount (10.00) * Invoice VAT Total (16.67) Invoice Total (including VAT) (100.00)
- The settlement discount in step 3 was calculated by applying the settlement discount percentage to the Invoice TOTAL, as follows:
- total row Amounts (83.33) + VAT (16.67) = TOTAL (100.00)
- TOTAL (100.00) * Sett. Discount (10%) = 10.00
- total row Amounts (83.33) - Sett. Discount (10%) = 75.00
- 75.00 * VAT (20%) = 15.00
- total row Amounts (83.33) + VAT (15.00) = TOTAL (98.33)
- 75.00 * VAT (20%) = 15.00
You should also remove any Settl. Discount VAT Account from the Account Usage S/L setting so that there is no VAT element in the posting of settlement discount from a Receipt (as described in steps 7 and 8 above).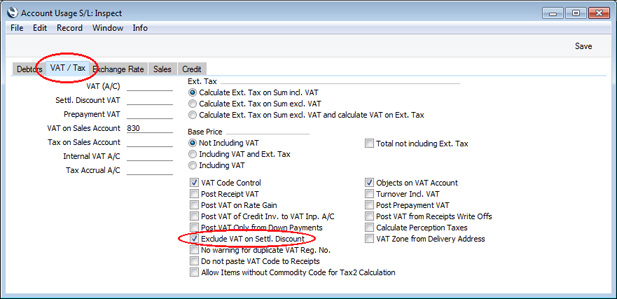
- total row Amounts (83.33) + VAT (16.67) = TOTAL (100.00)
- Illustrated below is an Invoice with a settlement discount calculated as described in the previous step:
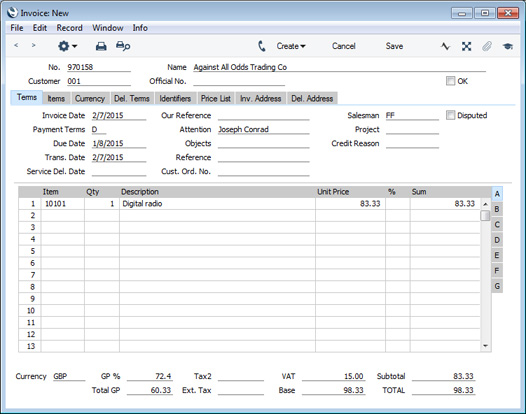
- When you receive payment from the Customer, the settlement discount will be deducted as already described in step 5:
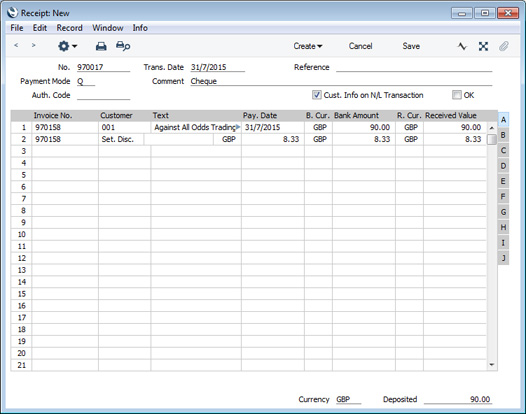
- In the Nominal Ledger Transaction resulting from the Receipt, the settlement discount will be debited to the Settlement Discount Account, again as already described. There will be no VAT element as the Settl. Discount VAT Account field in the Account Usage S/L setting should be empty:
The Invoice register in Standard ERP:
- Introduction
- Entering an Invoice
- Entering an Invoice - Examples, including:
- Settlement Discount Examples
- Controlling Prices in Invoices
- Inspecting Invoices, Marking as OK and Posting to the Nominal Ledger
- Nominal Ledger Transactions from Invoices
- Error Messages
- Printing Invoices
- Accruals in the Sales Ledger
- Cash Notes in the Sales Ledger
- Credit Notes
- Operations menu
- Create menu
- Row menu
- Home page for Sales Ledger manual
- Home page for Standard ERP manual
Entering an Invoice - Reverse Charge VAT in Sales Invoices
The calculation of VAT in an Invoice depends on its VAT Zone, which in turn depends on the VAT Zone specified for the Customer in the Contact register. When you specify the Customer in an Invoice, the VAT Zone will be set accordingly, and will be visible on the 'Inv. Address' card: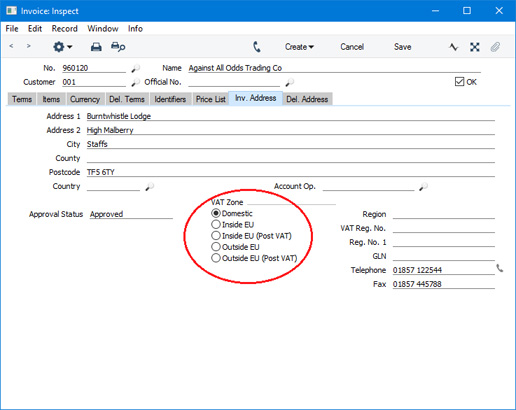
When issuing an Invoice to a Customer in the "Inside EU" Zone, you will not charge VAT. The Customer will pay VAT to their tax authority at the domestic rate that would apply had they purchased the Items from a local Supplier. This is sometimes known as the "reverse charge" procedure.
There may be occasions when you need to use the reverse charge procedure in an Invoice that you issue to a domestic Customer. You will not charge VAT in the Invoice and will not account for the VAT to the tax authority. The Customer will account for and pay the VAT. This feature is only available in Lithuania, Poland and the UK (i.e. it is available when the VAT Law in the Company Info setting is "Lithuanian", "Polish" or "Default").
To use the reverse charge procedure in a domestic Invoice, follow these steps:
- In the VAT Codes setting in the Nominal Ledger, create a VAT Code for domestic reverse charge VAT (VAT Code 7 in the illustration below). The VAT percentage in this VAT Code should be the rate at which VAT would be charged in a normal calculation.
If the use of the reverse charge procedure in an Invoice depends on the value of that Invoice, use the Min. and/or Max. Amounts on flip F to specify that value. For example, in the UK, a sale of mobile phones or computer chips can be subject to the reverse charge procedure if the value of the sale is greater than 5000.00. In this case the Minimum should be 5000.00, as shown in the illustration below:
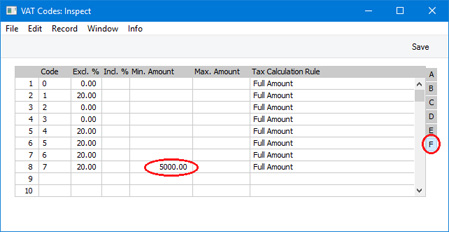
- In the Item records for the Items that you can sell on a reverse charge basis, specify the reverse charge VAT Code on the 'A/C' card:
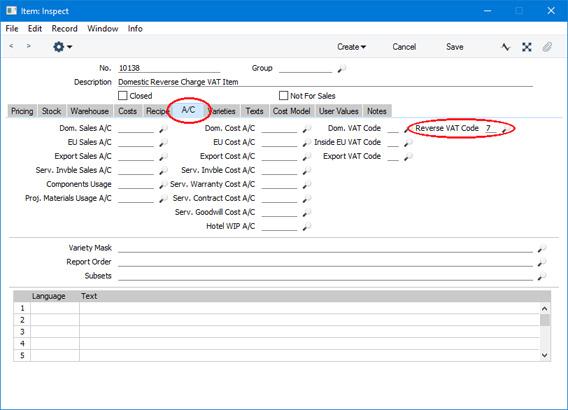
- In order to be able to issue a reverse charge Invoice to a Customer, the Contact record for that Customer must satisfy the following requirements:
- On the 'Company' card, the Type must be "Company". If the Type is "Person", VAT in Invoices will be calculated on a normal basis, not on the reverse charge basis.
- Also on the 'Company' card, you must specify a VAT Reg. No. It is a legal requirement that you must obtain a Customer's VAT registration number before you can issue a reverse charge Invoice to them.
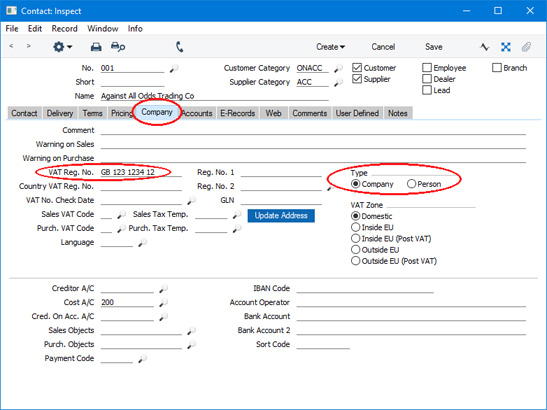
- An option is to select the Reverse VAT option on the 'Terms' card. This option will mean that the use of the reverse charge procedure in an Invoice will not be dependent on the value of the Invoice. In other words, when you sell a reverse charge Item to the Customer, the reverse charge procedure will always be used (i.e. the Min. and Max. Amounts specified in the VAT Code (step 1 above) will be ignored).
Continuing the UK mobile phone example, the reverse charge procedure can usually only be used in an individual Invoice if its value is greater than 5000.00. However, you can also use the reverse charge procedure if you have received an order whose value is greater than 5000.00 that you will deliver and invoice in stages, some or all of which have values of less than 5000.00. Selecting this option will allow you to invoice each stage using the reverse charge procedure.
You can prevent users from the changing the Reverse VAT box in Contact records using Access Groups, by denying them access to the 'Qualify for Reverse VAT' Action.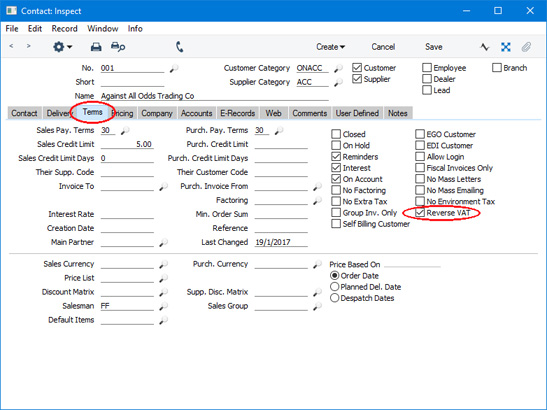
- You can only use the reverse charge procedure in a Quotation, Order or Invoice in which prices exclude VAT. So, if your default setting (specified on the 'VAT / Tax' card of the Account Usage S/L setting) is that Base Prices include VAT (or VAT and TAX), you must assign a Price List in which prices exclude VAT to the Customer.
- On the 'Company' card, the Type must be "Company". If the Type is "Person", VAT in Invoices will be calculated on a normal basis, not on the reverse charge basis.
- When you print a Quotation, Order or Invoice in which you have used the reverse charge procedure, you must have a reference printed on the document to make it clear that the reverse charge applies and that the Customer is required to account for the VAT. You can do this by including the fields listed below in your Form Template designs:
Field in Form Template Prints Header Fields (these print once per Invoice) Reverse VAT text In Lithuania, this field will be printed on an Invoice or Credit Note if every row has a Reverse VAT Code (see step 5 below). It prints the text "Atvirkštinis PVM, PVMĮ 96 str.". In Poland, this field will be printed on an Invoice or Credit Note if any row has a Reverse VAT Code (see step 5 below). It prints the text "Odwrócony VAT". In the UK, this field will be printed on an Invoice or Credit Note as follows:
- In an Invoice in which every row has a Reverse VAT Code (see step 5 below), it will print the text "Reverse charge: Customer to account to HMRC for the reverse charge output tax".
- In an Invoice in which some rows have a Reverse VAT Code, it will print the text "Reverse charge: Customer to account to HMRC for the reverse charge output tax on the VAT exclusive price of items marked reverse charge".
- In a Credit Note in which every row has a Reverse VAT Code, it will print the text "Reverse charge: Customer to account to HMRC for the output tax adjustment".
- In a Credit Note in which some rows have a Reverse VAT Code, it will print the text "Reverse charge: Customer to account to HMRC for the adjustment to reverse charge output tax on the VAT exclusive price of items marked reverse charge".
Reverse VAT amount This field will print the amount in the Reverse VAT field in the Quotation, Order or Invoice i.e. it prints the VAT amount that the Customer should pay to the tax authority. Row Fields (these print once per row, so remember to specify a Line Height and to set the Format to "Matrix") Reverse VAT Code This field will print the Reverse VAT Code in each row. Row reverse VAT text In Lithuania and the UK, this field will print the text "Subject to Reverse VAT Charge" for each row that has a Reverse VAT Code, only in Invoices and Credit Notes in which not every row has a Reverse VAT Code.
- In an Invoice in which every row has a Reverse VAT Code (see step 5 below), it will print the text "Reverse charge: Customer to account to HMRC for the reverse charge output tax".
- Enter Quotations, Orders and Invoices in the usual way. If you add an Item in which you have specified a Reverse VAT Code (step 2 above) to the transaction, that Reverse VAT Code will be brought in to the Rvrs field on flip B, providing the Sum in the row satisfies any minimum or maximum requirements specified in the VAT Codes setting (step 1 above) or providing the Customer is one where you have ticked the Reverse VAT option (step 3 iii above). The Reverse VAT field in the footer will display the VAT that the Customer should pay to the tax authority on the reverse charge basis:
If the Item has a Reverse VAT Code but the Rvrs field remains empty, this will usually be because the Sum in the row does not satisfy the minimum or maximum requirements. It could also be because the Type of the Customer is "Person" (step 2 i above). If the Rvrs field is empty, the row will not be subject to the reverse charge procedure.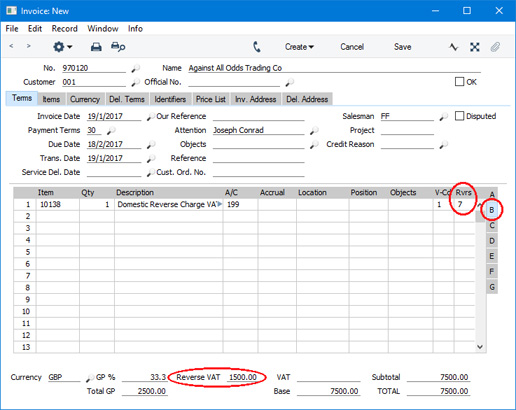
The Rvrs and Reverse VAT fields will be updated whenever you change the quantity or price in a row and as you add or remove rows (the minimum and maximum requirements in the VAT Codes setting apply to the Invoice as a whole, not to individual rows, so adding a row could cause the Rvrs field to be updated in an earlier row).
- Usually, the Customer's VAT Reg. No. will be brought in to the Quotation, Order or Invoice. If you have not specified a VAT Reg. No. in the Contact record for the Customer (step 2 ii above), the VAT Reg. No. field in the Quotation, Order or Invoice will remain empty. This will mean that it will not be possible to save the record.
- If you are entering an Invoice and you mark it as OK and save, no VAT will be posted from the rows with Reverse VAT Codes (i.e. from the rows in which the Rvrs field is not empty). The Reverse VAT Code from each Invoice row will be copied to the Rvrs field in the corresponding Transaction row:
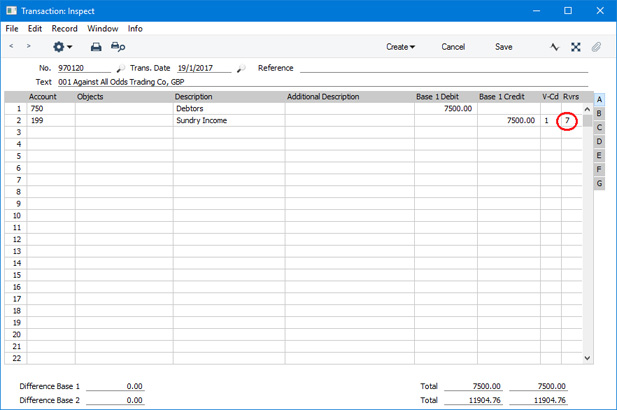
- If you need to create a Credit Note from an Invoice in which you have used the reverse charge procedure, you will not be able to change anything in the matrix in the Credit Note. In other words, you must credit such an Invoice in full, you cannot partially credit such an Invoice.
The Invoice register in Standard ERP:
- Introduction
- Entering an Invoice
- Entering an Invoice - Examples, including:
- Settlement Discount Examples
- Reverse Charge VAT in Sales Invoices
- Settlement Discount Examples
- Controlling Prices in Invoices
- Inspecting Invoices, Marking as OK and Posting to the Nominal Ledger
- Nominal Ledger Transactions from Invoices
- Error Messages
- Printing Invoices
- Accruals in the Sales Ledger
- Cash Notes in the Sales Ledger
- Credit Notes
- Operations menu
- Create menu
- Row menu
- Home page for Sales Ledger manual
- Home page for Standard ERP manual
Controlling Prices in Invoices
There are several methods that you can use to control prices in Invoices:- To prevent all changes to the Unit Price, % and Sum fields in every Quotation, Order and Invoice row, assign users an Access Group in which you have denied access to the 'Change Unit Prices' Action (i.e. in which you have set the access level to "None").
- If you need to prevent users from changing the Price List in a Quotation, Order or Invoice, assign them an Access Group in which you have denied access to the 'Change Prices' Action.
- By default, you cannot change the Discount Matrix in an Invoice. If you wish to allow users to be able to change the Discount Matrix in Invoices only, assign them an Access Group in which you have granted Full access to the 'Change Discount Matrix on Invoice' Action.
- You can prevent users from entering a price (i.e. a unit price less discount) that is below a specified minimum in any Quotation, Order or Invoice. To do this, specify a Minimum Price List in each user's Person record. If it is necessary to sell an Item at a price that is below the minimum, a manager can confirm the price using the 'Manager's Discount Override' function on the Operations menu.
- In Invoices only, you can prevent users from entering a Unit Price that is less than the cost of the Item, by assigning them an Access Group in which you have granted Full access to the 'Disallow Prices Lower than Cost Price' Action. The cost of the Item will be determined using the FIFO field on flip C of the relevant Invoice row or, if that is blank or zero, using the Cost Price of the Item. If you are using this option, you may also need to prevent users from changing the Cost Price in Invoice rows, which you can again do using Access Groups, by denying access to the 'Change Cost on Invoice Rows' Action.
- If you are using the Disallow Negative Row Sums on Sales option in the Account Usage S/L setting, you will not be able to mark an Order or Invoice as OK and save it or save a Quotation if the Sum in any row is negative. In Invoices only, you can also prevent users from entering negative Unit Prices, by assigning them an Access Group in which you have denied access to the 'Negative Unit Price on an SL Invoice' Action.
- Similarly, if you are using the Disallow Negative Totals on Sales option, also in the Account Usage S/L setting, you will not be able to mark an Order or Invoice as OK and save it or save a Quotation if the TOTAL is negative.
- By default, you cannot enter negative quantities in Invoices. If you wish to allow them, select the Allow Negative Quantities in Invoices option in the Optional Features setting in the System module. This can be useful to facilitate returns in a retail environment.
- You can have a responsible Person or Persons notified every time a sales person attempts to mark as OK and save a Sales Invoice or save a Quotation or Sales Order in which there is at least one Item with a gross profit that is lower than a specified percentage. The notification will be by Mail and Activity. Specify the percentage in the GP below minimum Alerts setting in the Business Alerts module, and specify the responsible Person or Persons in each Location record. To prevent the saving of any Invoice, Order or Quotation that would trigger such a notification, assign each sales person an Access Group in which you have granted Full access to the 'Disallow Selling Below Minimum GP' Action. Please refer to the description of the GP below minimum Alerts setting for more details.
The Invoice register in Standard ERP:
- Introduction
- Entering an Invoice
- Entering an Invoice - Examples
- Controlling Prices in Invoices
- Inspecting Invoices Marking as OK and Posting to the Nominal Ledger
- Nominal Ledger Transactions from Invoices
- Error Messages
- Printing Invoices
- Accruals in the Sales Ledger
- Cash Notes in the Sales Ledger
- Credit Notes
- Operations menu
- Create menu
- Row menu
- Home page for Sales Ledger manual
- Home page for Standard ERP manual
Inspecting and Approving Invoices
Before an Invoice is sent to a Customer, it should be checked and approved, to ensure that the Customer is charged for the correct things. The approval causes the Invoice to be inserted into your Sales Ledger.When an Invoice is approved, if so defined in the Sub Systems setting in the Nominal Ledger, a transaction is created and automatically transferred to the Nominal Ledger. This transaction will be assigned a journal number that is the same as the Invoice Number.
The Sales Ledger is organised so that only approved Invoices are available for the registration of incoming payments. There are three ways to approve an Invoice:
- With the Invoice on screen, click the OK check box.
- Select an Invoice by clicking on it in the 'Invoices: Browse' window, and select 'OK' on the Operations menu. By holding down the Shift key you can highlight a batch of Invoices to approve at a single stroke using this method.
- Use the 'OK Invoices' Maintenance function to approve a range of Invoices.
! | After approving an Invoice, only the Salesman, Last Reminder Date, Reminder Level and Comment fields may be altered. |
You can choose to have an Activity created automatically when each Invoice is approved. This is controlled using the Activity Types, Subsystems setting in the CRM module: please refer here for full details. The Task Type of each new Activity will be To Do, and the Symbol will be Other. The Start Date of the Activity will be the Due Date of the Invoice, and the Person will be the Sales Person from the Invoice. The initials of the current user will appear in the Cc field of the Activity.
Nominal Ledger Transactions from Invoices
When an Invoice is approved and saved, a Nominal Ledger Transaction will be generated automatically if you have so determined in the Sub System setting in the Nominal Ledger. Please refer here for full details of this Transaction.Once the Transaction has been generated, you can look at it straight away using the 'Open NL Transaction' function on the Operations menu.
Error Messages
When you approve Invoices, if so defined in the Sub Systems setting in the Nominal Ledger, Nominal Ledger Transactions are automatically generated and put in your Nominal Ledger journal.If an error message appears, it means that some Accounts or other settings are incorrect. All Account numbers used by the Invoice, which may have been offered as defaults from the Account Usage S/L setting, Items or Item Groups, or Customers or Customer Categories, must exist in the Account register (available in the System module and the Nominal Ledger). Number Series for the current period must also exist. The VAT Codes used must be defined.
While the Invoice is still on screen, you can correct the error by adding the missing Account(s) to the Account register or by changing the Account used in the Invoice.
The program cannot post transactions to non-existent Accounts, to prevent accounting errors.
Printing Invoices
There are several occasions when you may want to print an Invoice: to view a test print-out to check the Invoice before you finally approve it; to produce a copy for your own files, or to send the original Invoice to the Customer.To do a test print-out, save the Invoice and then click on the Printer icon in the Button Bar before you approve the Invoice. The Invoice will then be printed with the text "Test Printout" diagonally printed across the page. This is to avoid the test being confused with the final version. As you have not yet approved the Invoice by checking the OK box, you can go back and correct any errors you may find in the printout. This is also true for Credit Notes.
If you want to print a range of final Invoices, follow the instructions below:
- Select 'Documents' from the File menu or click [Documents] in the Master Control panel. Double-click 'Invoices' in the resulting list.
The 'Specify Invoices' window is shown.
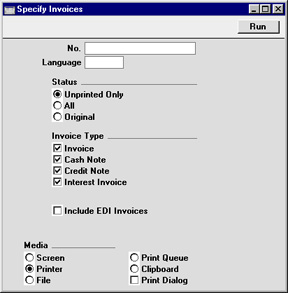
- Enter the Invoice Number for a single Invoice, or the highest and lowest Invoice Numbers of a range of Invoices separated by a colon (:). The Status setting is used to control which Invoices are printed.
- Unprinted Only
- This option ignores any Invoices in the range that have already been printed.
- All
- Prints all Invoices in the range. Any Invoices previously printed will have the word "Copy" printed diagonally across the page.
- Original
- This option also prints all Invoices in range. However, any Invoices previously printed will be printed again as though they were original copies, without the word "Copy".
- Unprinted Only
- Press [Run] in the Button Bar to start the printing, or cancel by closing the window.
Invoices can also be printed automatically on approval. This is controlled using the Auto Actions setting in the System module.
Whichever method is used, the Form used is determined as follows:
- Using the Form register in the System module, design the invoice form and name it "INVOICE". Use the 'Properties' function on the Operations menu to assign a Document Type of "Invoice". A sample Invoice Form is supplied with Hansa: this can be modified to suit your requirements.
- Select the Sales Ledger using the Modules menu.
- Click [Documents] in the Master Control panel or select 'Documents' from the File menu. The 'Documents' list window is opened: highlight 'Invoices'.
- Select 'Define Document' from the Operations menu.
- In the subsequent window, enter "INVOICE" in the Form field of the first line (you can use 'Paste Special' to ensure the spelling is correct).

- Click [Save] to save the Invoice Form definition. From now on, the invoice form that you have designed will be used from the 'Documents' function and from the Printer icon, except as described in step 7 below.
- Repeat the previous six steps in turn for the Cash Note, Credit Note, Interest Invoice and Project Invoice documents. These will be used from the 'Documents' function and the Printer icon instead of the standard Invoice document in the following circumstances:
- Cash Note
- If the Invoice has Payment Terms of the "Cash" type, the Cash Note document is always used instead of the Invoice document.
- Credit Note
- If the Invoice has Payment Terms of the "Credit Note" type, the Credit Note document is always used instead of the Invoice document.
- Interest Invoice
- If the Invoice was created using the 'Create Interest Invoices' Maintenance function, the Interest Invoice document is always used instead of the Invoice document.
- Project Invoice
- If the Project field on the 'Identifiers' card of the Invoice contains a value, the Project Invoice document is always used instead of the Invoice document.
- Cash Note
Printing Invoices - Invoices in Different Languages
If you have Customers in England and France and thus require Invoices to be printed in the appropriate Language, follow this procedure:- Using the Form register in the System module, design the English and French Invoices and name them "INVENG" and "INVFRE". Use the 'Properties' function on the Operations menu to assign a Document Type of "Invoice" (in both cases).
- Select the Sales Ledger module using the Modules menu.
- Select 'Documents' from the File menu or click [Documents] in the Master Control panel. The 'Documents' list window is opened showing a list of available documents. Highlight 'Invoices'.
- Select 'Define Document' from the Operations menu.
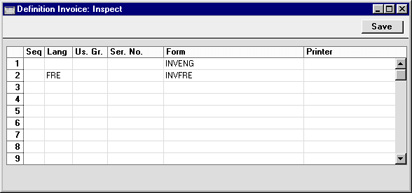
- In the first row, enter the name of the default Invoice for your local Customers ("INVENG"). Use the 'Paste Special' feature to see the available forms in your Form register and to ensure the spelling is correct. On the second line, specify French as the Language and the French Invoice ("INVFRE") as the Form.
You can use classifications other than Language in the Language field, and use this feature for other purposes. One example is if you want to use Invoices with different layouts for different types of sales. You can then define a fictitious Language Code, and use it to select the correct form. You can also enter a Delivery Mode in this field, permitting different Invoice layouts to be used depending on the Delivery Mode.
- Click [Save] to save the Invoice definition. From now on, French-speaking Customers will automatically receive Invoices using the "INVFRE" Form and others will receive the "INVENG" Form with no user intervention. This process can be repeated for virtually all documents in Hansa.
Printing Invoices - Printing Delivery Notes if you are not using Sales Orders
If you do not have the Sales Orders module, you can use the 'Define Document' screen described here to print Delivery Notes together with Invoices. If you have the Stock module, the stock levels for the Items sold will be adjusted when the Invoice is approved, providing they are Stocked Items and providing the Invoice Update Stock check box on the 'Delivery' card of the Invoice is switched on. Follow this procedure:- Using the Form register in the System module, check that you have a Form named "INVOICE" and one named "DELIVERY_NOTE". Re-design them to your requirements if necessary. Use the 'Properties' function on the Operations menu to assign a Document Type of "Invoice" (for the former) and "Delivery Note".
- Select the Sales Ledger module using the Modules menu and select [Documents] in the Master Control panel. Highlight 'Invoices' in the 'Documents' list window.
- Select 'Define Document' from the Operations menu.
- The Sequence column is used to determine the order in which the Forms will be printed. If, for example, you need a Delivery Note to be printed first, on the first line enter "1" as the Sequence Number and "DELIVERY_NOTE" as the Form (you can use 'Paste Special' from the Form field to ensure the spelling is correct). On the second line, enter "2" as the Sequence Number and "INVOICE" as the Form. The Printer column can be used to print the Forms on different printers if necessary.
- Click [Save] to save the Invoice definition. From now on, whenever the Invoice document is printed, the Invoice itself will be preceded by a Delivery Note. This feature can be used in any combination with the Language feature described here, and can be repeated for virtually all documents in Hansa.
Accruals
In normal circumstances the whole Sum for each Invoice row is posted to the Sales Account when the Nominal Ledger Transaction is generated. However, this might not be appropriate if the Invoice is for a service or contract that is spread over time. In this case, it might be appropriate for the Sum to be posted to the Sales Account gradually over the period of the service or contract.For example, you issue an Invoice for a service contract for one year to the value of 120. You might not want the Sales Account to be credited with the 120 at once: it might be more appropriate if it is credited with 10 per month over the year (the contract period), especially if the contract period crosses over into a new fiscal year.
The N/L Accruals setting in the Nominal Ledger is used to define the formulae by which Invoice amounts are gradually credited to the Sales Account. For this example, we will use a record containing twelve monthly transfers, each of 8.33% (i.e. one twelfth of the total):
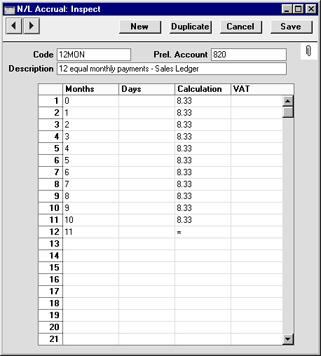
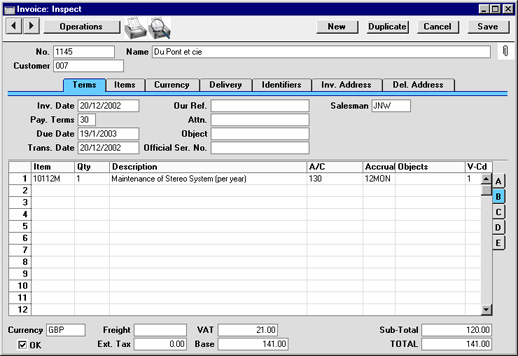
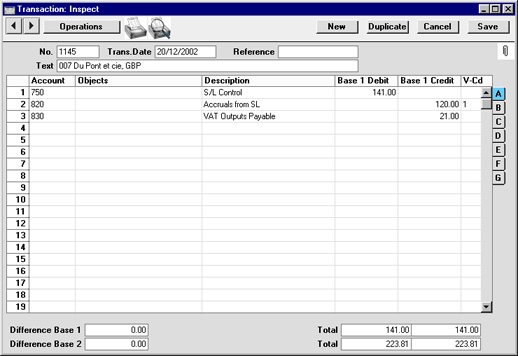
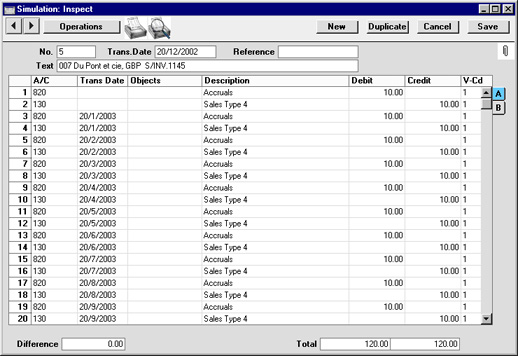
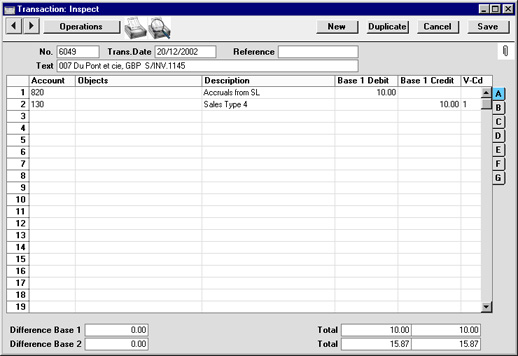
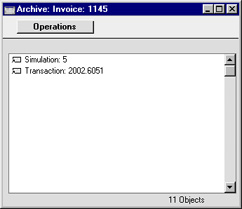
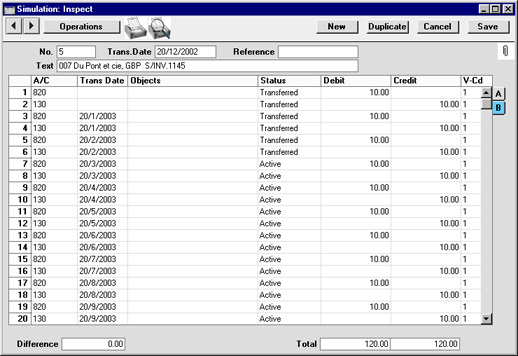
Cash Notes in the Sales Ledger
A Cash Note is an Invoice that is immediately to be treated as being paid. It differs from a normal Invoice in that it does not affect your Debtor Account or appear in any of your debt-chasing reports: instead, a debit posting for the Invoice value will be made directly to your Cash Account.To enter a Cash Note, follow the usual procedure for entering Invoices, with just one exception: change the Payment Terms (using the 'Paste Special' function if necessary) to refer to a Payment Term record of Type "Cash":
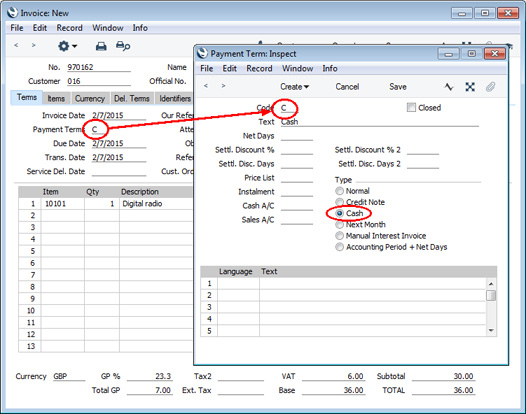
Click the OK check box when you are sure the Cash Note is correct. As with ordinary Invoices, you must approve Cash Notes by checking the OK check box and saving, for them to be posted to the Sales Ledger. In the resulting Nominal Ledger Transactions, the Cash Account will be debited:
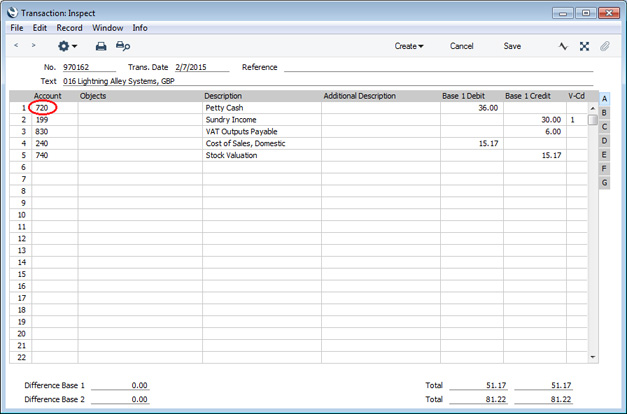
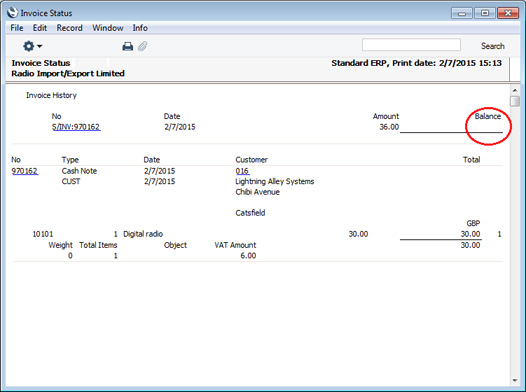
If you need to register a partial payment by cash or credit card when entering an Invoice, use the 'Add Cash Line' or 'Add Credit Card Line' functions on the Row menu.
---
The Invoice register in Standard ERP:
- Introduction
- Entering an Invoice
- Entering an Invoice - Examples
- Controlling Prices in Invoices
- Inspecting Invoices, Marking as OK and Posting to the Nominal Ledger
- Nominal Ledger Transactions from Invoices
- Error Messages
- Printing Invoices
- Accruals in the Sales Ledger
- Cash Notes in the Sales Ledger
- Credit Notes
- Operations menu
- Create menu
- Row menu
- Home page for Sales Ledger manual
- Home page for Standard ERP manual
Credit Notes
If you want to credit an Invoice that has been sent you should do as follows:- Select 'Invoices' from the Registers menu or click [Invoices] in the Master Control panel. The 'Invoices: Browse' window is opened, showing all registered Invoices.
- Click [New] or enter the appropriate keyboard command. Alternatively, find the Invoice to be credited in the list, highlight it and click [Duplicate].
Note: if the Invoice to be credited is an Interest Invoice or a Down Payment Invoice created from a Project in the Job Costing module, you must click [New]. You cannot copy Invoices of these types in order to credit them.
- The 'Invoice: New' window is opened as described here. Enter the Invoice in the normal way, but change the Payment Terms to "CN" (Credit). In the first row of the specification area, a crediting message is entered. Enter the number of the Invoice to be credited, using 'Paste Special' if necessary to bring up a list of open (unpaid) Invoices. An Invoice Number must be entered if you are using the Do Not Allow Credit Invoices Without No. option on card 1 of the Account Usage S/L setting. The Invoice to be credited must be approved.
Note: this assumes a Payment Term record with a Code of "CN" and of type "Credit Note" has been entered using the Payment Terms setting.
- On the remaining lines you can enter the Items to credit, and by what amount. If the Use Credit Sales Accounts option on card 1 of the Account Usage S/L setting is in use, credit Sales Accounts and VAT Codes will be used in place of the standard ones. These will taken from the 'Credit A/C' card of the appropriate Item Group record or from card 4 of the Account Usage S/L setting. If the Credit Note was created by copying an Invoice, changing the Payment Terms to "CN" will cause the Sales Accounts and VAT Codes of the existing Items to be changed automatically.
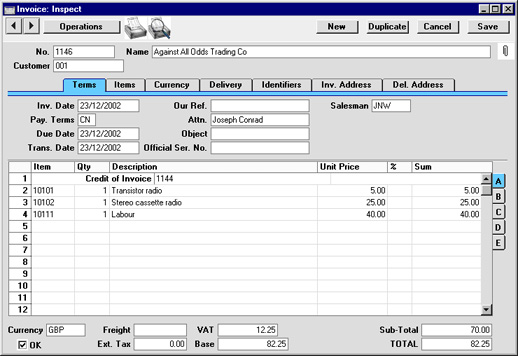
- Click the OK check box when you are sure the Credit Note is correct. As with ordinary Invoices, Credit Notes must be approved using the OK check box to be entered into the Sales Ledger and, if so defined in the Sub Systems setting in the Nominal Ledger, for Nominal Ledger Transactions to be created.
Credit Notes - Crediting Part of an Invoice
Quite often you will need to credit only a part of an Invoice, rather than the whole Invoice. In most accounting systems, it would be necessary first to remove the entire original Invoice, and then to reenter the Items that will be invoiced.Since most systems lack the option of copying an Invoice, part crediting can sometimes take a very long time. Hansa offers a very simple and intuitive way to do this.
To credit part of an Invoice, start by copying the original Invoice, and enter a "CN" in the Payment Terms field. Then proceed as follows:
- Simply remove all the rows you do not want to credit. Click on the row number to the left to highlight the whole row, and press the backspace key. You will then be left with the rows to credit.
- In the case of individual rows requiring a partial credit, simply alter the Quantity field to show the number to be credited.
- Click the OK check box when you are sure the Credit Note is correct and [Save] to save it.
Credit Notes - Including Details of the Original Invoice on a Credit Note
A Credit Note created using the method described here is a reversal of the original Invoice. In some countries (e.g. Poland), Credit Notes are not used to reverse Invoices but to correct them.If you want to make use of this feature, create the Credit Note by duplicating the original Invoice. After you have entered "CN" in the Payment Terms field, press the Tab key and then select 'Correction Invoice' from the Operations menu. The Invoice rows are duplicated and divided into two sections, labelled "Before" and "After". The "Before" section contains the rows from the original Invoice. The "After" section contains the rows to be corrected (these rows are also marked with a "K"). Change these rows as appropriate, by entering the correct quantites and/or prices. In the example illustrated below, the original Invoice was for three Item 10101s and three Item 10102s. It should have been for two 10101s and one 10102, so the "K" rows have been changed appropriately. Item 10111 was correct on the original Invoice, so no change has been made to the final "K" row:
On the first row, enter the number of the Invoice to be corrected, and approve, save and print the Correction Invoice in the usual way.
By default, a Correction Invoice will not change stock quantities and values (in this respect it is similar to a Credit Note). Please refer to the Credit Notes and Stock page for details. It is not recommended that you increase quantities in Correction Invoices, because stock values may not be updated correctly. Instead, a new Invoice for the increase should be issued.
Credit Notes - and Number Series
If you want to use a different Number Series for Credit Notes, follow these steps:- Enter the Number Series to be used for Credit Notes on the first available row of the Number Series - Invoices setting.
Note: if this setting is empty, you should enter the Number Series to be used for Invoices on the first row, and that to be used for Credit Notes on the second row.
- Enter the first number in this sequence in the Credit Notes field in the Number Series Defaults setting in the System module. You will need to quit Hansa and restart for this change to take effect.
- When you enter the Credit Note, the next number from the correct Number Series will appear when you change the Payment Term to "CN".
Credit Notes - and Stock
If you are using a FIFO stock system and/or cost accounting (maintaining stock values in the Nominal Ledger), two complications can arise from the issuing of a Credit Note:- some Credit Notes will involve the return of goods to stock, whereas others may not; and
- FIFO becomes impossible to calculate, as it is difficult to establish the actual cost of the goods being returned. For example, if you buy three Items costing 10.00, 11.00 and 12.00, and sell two of them, their FIFO costs will be 10.00 and 11.00 respectively. If one is returned, without intervention the system has no way of knowing whether it is the 10.00 Item or the 11.00 Item.
- In a case where the Item being returned was originally issued on a Delivery raised from a Sales Order, return to the Sales Order and enter a record to the Returned Goods register using the 'Returned Goods' function on the Operations menu. Once this has been done, you can either issue a replacement with another Delivery or, if no replacement is required, raise a new Invoice for a negative quantity (effectively a Credit Note) using the 'Invoice' function, again on the Operations menu of the Order. Stock levels are updated by the Returned Goods record, as are stock valuations in the Nominal Ledger if you are using cost accounting (set using the Sub Systems setting in the Nominal Ledger).
- In a case where there is no Sales Order, the Item being returned would originally have been issued using an Invoice. This Invoice should first be credited, using the process described here. When the Payment Terms field is changed to "CN", the Update Stock check box on the 'Delivery' card is switched off. This should not be switched on again as doing so will mean that the Nominal Ledger stock valuation will become inaccurate: the wrong FIFO value (that of the next stock item, 12.00 in the example above) will be used. Instead, approve the Credit Note (to update the Sales Ledger and the Debtor, VAT and Sales Accounts in the Nominal Ledger). Then, receive the Item back into stock using the Goods Receipt register in the Stock module. This will correctly update stock levels and, if you have so determined in the Sub Systems setting, the Nominal Ledger stock valuation.
Notas de Crédito - Invalidar Facturas
En algunos casos puede ser apropiado invalidar una Factura utilizando el comando 'Invalidar' del menú Registro en la ventana 'Factura: Ver'. Esta función removerá la Factura de las Cuentas por Cobrar; todas las Cuentas Contables vinculadas serán también eliminadas de la Contabilidad.. An invalidated Invoice is easily distinguished because all fields have red lines drawn through them. These red lines are also shown in the 'Invoices: Browse' window.
The function is designed for use in situations where Invoice Numbers are pre-determined (perhaps through being printed on Invoice stationery) and where it is not desirable to raise a Credit Note. It is not recommended for use where it is intended that the cancelling of an Invoice should have implications for the stock system. In these circumstances, a Credit Note should be raised, and the goods received back into stock through the Goods Receipt or Returned Goods registers, as described here.
An Invoice cannot be invalidated if it has been paid, if it has not been approved or if its Invoice Date is earlier than the Lock S/L Inv date specified in the Locking setting in the System module.
Operations Menu - Invoices
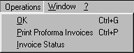

Operations Menu - Invoices - OK
This command is available on the Operations menu only from the 'Invoices: Browse' window. It permits the approving of an Invoice and is therefore the equivalent of checking the OK box in an Invoice record. You can also select several Invoices (hold down the Shift key to select a range of Invoices in the list) and approve them all at once. Remember that, if so defined in the Sub Systems setting in the Nominal Ledger, this action causes Nominal Ledger Transactions to be created for each Invoice in the selection and that therefore once it has been carried out you will no longer be able to modify those Invoices.Operations Menu - Invoices - Print Proforma Invoice
This function can be used to print a Proforma version of the Invoice on screen or highlighted in the 'Invoices: Browse' window. This might be necessary on occasions where it is necessary to get payment in advance. A Proforma Invoice differs from a normal Invoice in that the Invoice Number is preceded by the word "Proforma" and in that, even for Invoices that have not been approved, the words "Test Printout" will not appear.The Form used by this function is determined as follows:
- Using the Form register in the System module, design the proforma and name it "PROFORMA_INVOICE". A sample proforma is supplied with Hansa: this can be modified to suit your requirements.
- Select the Sales Ledger module using the Modules menu.
- Select 'Documents' from the File menu or click [Documents] in the Master Control panel. The 'Documents' list window is opened: highlight 'Proforma Invoices'.
- Select 'Define Document' from the Operations menu.
- In the subsequent window, enter "PROFORMA_INVOICE" in the Form field of the first line (you can use 'Paste Special' to ensure the spelling is correct).
- Click [Save] to save the Proforma Invoice Form definition. From now on, the proforma invoice form that you have designed will be used, from the 'Documents' function and from the Operations menu function.
Operations Menu - Invoices - Invoice Status
This command creates a quick report, only available through this menu. This report summarises all aspects of the Invoice, including Items and payment history. In the illustration below, the Invoice in question has a Credit Note against it.
Operations Menu - Invoice - Customer Status
The 'Customer Status' function prints to screen a Customer Status report, which shows the account status of the Customer in the Invoice currently on screen in a record window.In its basic form, this report will first show the Customer Number, Name and telephone number. This information will be followed by a list of the Customer's Contact Classifications. The five most recently paid Invoices will then be listed, as will all open (unpaid) Invoices.
You can have much more information shown in the report, such as lists of recent Activities, Contract Quotations, Contracts, Quotations and Orders, and monthly sales figures for the past year. To have this extra information shown in the report, create a record for yourself in the Info in Customer Status Report setting in the CRM module. As you can create separate records in this setting for each user, you can control how much of this additional information will be shown to different users. You can effectively give each user a different report definition.
Simply creating a record for yourself in the Info in Customer Status Report setting will add the Customer's address, Warning on Sales if there is one, Credit Limit and turnover for the first period in the Reporting Periods setting to the top of the report. The remainder of the report will then follow the specification in your Info in Customer Status Report record. If you are using the Invoices Open until Due Date only option in the Credit Limit setting and a Customer has at least one overdue Invoice, their Credit Limit will be shown to be 0.00 in the report.
If the appearance of the Customer Status report is not as you expect (i.e. the Customer's address, Warning on Sales if there is one, Credit Limit and turnover are not shown, and the report only lists Invoices), the probable cause is you do not have a record in the Info in Customer Status Report setting.
As well as using the 'Customer Status' function described here, you can also produce a Customer Status report using the following methods:
- Activate 'Paste Special' from the Customer Number field in a record such as an Order or Invoice, highlight one or more Customers in the list and choose 'Customer Status' from the Operations menu;
- Open an Activity where the Customer field contains a Customer (not a Supplier) and choose 'Customer Status' from the Operations menu;
- Open the Contact record for a Customer and choose 'Customer Status' from the Operations menu;
- Open the 'Business Communicator' window, highlight one or more Customers in the Contact List and click the [Customer Status] button; and
- In the Sales Ledger, click the [Reports] button in the Navigation Centre and choose to produce the Customer Status report.
The Customer Status report has the Standard ERP Drill-down feature. You can open many records such as Contact Persons, Activities, Quotations and Invoices from the report by clicking in the appropriate places (i.e. on Contact Person names, on Activity Dates and on Quotation and Invoice Numbers). You can also click on a Person's Signature to open an Activities, Persons report for that Person. Text with the drill-down feature is shown underlined in the report. If you have a record in the Info in Customer Status Report setting, the report will also contain a [New Activity] text button that you can click to create an empty new Activity and a [Credit History] text button that will open a separate report showing the Customer's credit history. This is a chargeable Cloud Service: to use it you must have registered your database in Estonia using the Automatic Internet Enabler method, as described on the Enabler Key page. You must also have entered a Reg No 1 on the 'Company' card of the Contact record for the Customer whose credit history you are interested in.
---
The Invoice register in Standard ERP:
- Introduction
- Entering an Invoice
- Entering an Invoice - Examples
- Controlling Prices in Invoices
- Inspecting Invoices, Marking as OK and Posting to the Nominal Ledger
- Nominal Ledger Transactions from Invoices
- Error Messages
- Printing Invoices
- Accruals in the Sales Ledger
- Cash Notes in the Sales Ledger
- Credit Notes
- Operations menu, including:
- OK
- Print Proforma Invoices
- Invoice Status
- Customer Status
- Item Search
- Add Environment Tax
- Change to Base 1
- Connect to Prepayment
- Recalculate Discount
- Recalculate Weight and Volume
- Update Currency Price List Items
- Print Cash IN-OUT
- Send to Fiscal Device
- Edit Instalments
- Resend E-Invoice
- Open NL Transaction
- Manager's Discount Override
- Open Tax Matrix
- Request Approval
- Cancel Approval Request
- OK
- Create menu
- Row menu
- Home page for Sales Ledger manual
- Home page for Standard ERP manual
Operations Menu - Invoice - Item Search
You can use the 'Item Search' function to search for Items that you can then add to the Invoice. This function is therefore an alternative to the 'Paste Special' feature. Place the insertion point in the Item field in any row and then select 'Search' from the Operations menu. The following window opens:
- Search for
- Enter here the string (e.g. part of an Item Number or Name) that you are looking for. You must make an entry in this field, otherwise no search will be carried out.
- Classification
- Paste Special
Item Classifications setting, Sales Ledger
- If you enter an Item Classification here, the search for the string that you specified in the field above will be restricted to Items belonging to that Classification.
- Search In
- Specify the field in which you want to search.
---
The Invoice register in Standard ERP:
- Introduction
- Entering an Invoice
- Entering an Invoice - Examples
- Controlling Prices in Invoices
- Inspecting Invoices, Marking as OK and Posting to the Nominal Ledger
- Nominal Ledger Transactions from Invoices
- Error Messages
- Printing Invoices
- Accruals in the Sales Ledger
- Cash Notes in the Sales Ledger
- Credit Notes
- Operations menu, including:
- OK
- Print Proforma Invoices
- Invoice Status
- Customer Status
- Item Search
- Add Environment Tax
- Change to Base 1
- Connect to Prepayment
- Recalculate Discount
- Recalculate Weight and Volume
- Update Currency Price List Items
- Print Cash IN-OUT
- Send to Fiscal Device
- Edit Instalments
- Resend E-Invoice
- Open NL Transaction
- Manager's Discount Override
- Open Tax Matrix
- Request Approval
- Cancel Approval Request
- OK
- Create menu
- Row menu
- Home page for Sales Ledger manual
- Home page for Standard ERP manual
Operations Menu - Invoice - Add Environment Tax
Please refer to the description of the Environment Tax setting for a full description of this function.---
The Invoice register in Standard ERP:
- Introduction
- Entering an Invoice
- Entering an Invoice - Examples
- Controlling Prices in Invoices
- Inspecting Invoices, Marking as OK and Posting to the Nominal Ledger
- Nominal Ledger Transactions from Invoices
- Error Messages
- Printing Invoices
- Accruals in the Sales Ledger
- Cash Notes in the Sales Ledger
- Credit Notes
- Operations menu, including:
- OK
- Print Proforma Invoices
- Invoice Status
- Customer Status
- Item Search
- Add Environment Tax
- Change to Base 1
- Connect to Prepayment
- Recalculate Discount
- Recalculate Weight and Volume
- Update Currency Price List Items
- Print Cash IN-OUT
- Send to Fiscal Device
- Edit Instalments
- Resend E-Invoice
- Open NL Transaction
- Manager's Discount Override
- Open Tax Matrix
- Request Approval
- Cancel Approval Request
- OK
- Create menu
- Row menu
- Home page for Sales Ledger manual
- Home page for Standard ERP manual
Operations Menu - Invoice - Change to Base 1
If an Invoice has been entered in a foreign Currency, you can convert all figures to the home Currency (Base Currency 1) quickly and easily using this function.The function will have no effect if the Invoice has been approved, or if you have not defined a Base Currency 1 in the Base Currency setting in the System module.
Operations Menu - Invoice - Connect to Prepayment
Please refer to the On Account Receipts and Prepayments page for a full description of this function.Operations Menu - Invoice - Recalculate Discount
When an Item and Quantity are specified in a row, if a Discount Matrix that includes that Item has been allocated to the Customer, a discount percentage is placed in the % field. This is used when calculating the Sum. If there is a Discount Matrix applying to the Invoice, it will be shown on the 'Delivery' card.Discount Matrices are used to apply quantity discounts automatically, based on value, quantity, weight or volume. If the Discount Matrix is one that uses Item Groups rather than Items and more than one Item from the same Item Group has been used in the Invoice, the discount for those Items should be calculated from the overall quantity for that Item Group. To do this, select 'Recalculate Discount' from the Operations menu once the Invoice is complete. This function can also be used if the Discount Matrix record itself is changed before the Invoice is approved.
Operations Menu - Invoice - Recalculate Weight and Volume
As Items are added to an Invoice, the Total Quantity and their total Weight and Volume are shown on the 'Delivery' card, calculated from the Invoice Quantity and from the Item records. If the Weight or Volume of an Item is changed or if these figures become inaccurate for any other reason, they can be recalculated using this function.Operations Menu - Invoice - Update Currency Price List Items
Occasionally, a complex Invoice might be entered with the wrong Currency, exchange rate or Price List, or the exchange rate might change significantly in the time between entry and approval. In such a situation, it is not necessary to re-enter the Invoice. Amend the Currency, exchange rate or Price List as appropriate, save the Invoice and then select this function. All the prices will be converted correctly.This function cannot be applied to approved Invoices.
Operations Menu - Invoice - Print Cash IN-OUT
The 'Print Cash IN-OUT' command will usually be used for Invoices which are Cash Notes (i.e. their Payment Terms are of the "Cash" Type). It prints a cash receipt for your records and/or for handing to the Customer. There is a legal requirement in the Baltic States to keep printed records of all cash transactions. The function requires the Cash Book module to be present.To print cash receipts in batches, first change to the Cash Book module using the Modules menu. Then, click the [Documents] button in the Master Control panel or select 'Documents' from the File menu. Double-click 'Cash In Invoices' in the 'Documents' list window. Indicate the Invoice Number (or range of Numbers) to be printed and press [Run].
Whether printing singly or in batches, the Form used is determined as follows:
- Using the Form register in the System module, design the cash document and name it "CASH_IN_INV". Use the 'Properties' function on the Operations menu to assign a Document Type of "Cash In Invoices".
- Select the Cash Book module using the Modules menu.
- Click the [Documents] button in the Master Control panel or select 'Documents' from the File menu. The 'Documents' list window is opened: highlight 'Cash In Invoices'.
- Select 'Define Document' from the Operations menu.
- In the subsequent window, enter "CASH_IN_INV" in the Form field of the first line (you can use 'Paste Special' to ensure the spelling is correct).
- Click [Save] to save the Form definition. From now on, the Form that you have designed will be used, from the 'Documents' function in the Cash Book module and from the Operations menu item on the Invoice screen.
Operations Menu - Invoice - Send to Fiscal Device
A fiscal printer is a device that prints receipts from point-of-sale and cash transactions, as well as recording those transactions in an internal memory. This information can later be read by tax authorities to ensure that a shop's sales have been registered and reported correctly. In countries where fiscal printers are used, they should be attached to every cash machine and till in a point-of-sale environment.When you enter an Invoice that should be printed on a Fiscal Printer, you should tick the Fiscal Invoice box on the 'Del. Terms' card. This will usually be the case if the Type of the Payment Term is "Cash". This box will be ticked by default in an Invoice if you have ticked the Fiscal Invoices Only box on the 'Terms' card of the Contact record for the Customer.
When you mark as OK and save an Invoice in which you have ticked the Fiscal Invoice box, it will be sent to, printed by and recorded in the fiscal printer. If for some reason this process fails, you can repeat it by selecting this 'Send to Fiscal Device' function from the Operations menu.
In Sweden, it is a legal requirement that all cash or credit card payments in shops should be made through a certified POS solution that contains a fiscal control unit (CleanCash). Each time you approve and save a Cash Note, it will be sent to and recorded in the CleanCash device. The device will send back a control code that will be stored in the Official No. field. The Cash Note will then be printed automatically. The law allows you to print a single copy of a Cash Note. To print this copy, open the Cash Note and choose 'Send to Fiscal Device' from the Operations menu. The Cash Note will again be sent to the CleanCash device (this time with type "kopia"). The device will send back a second control code, which will be saved in the Official No. 2 field. The copy of the Cash Note will then be printed, with the second control code being printed in the "Official Serial Number" field. No further printing of the Cash Note will be possible.
You can use Access Groups to prevent certain users from reprinting Fiscal Invoices. To do this, deny them access to the 'Print to Fiscal Printer' Action.
Please refer to your HansaWorld representative for details about which fiscal printers are supported and about configuring Standard ERP so that it will communicate with fiscal printers.
---
The Invoice register in Standard ERP:
- Introduction
- Entering an Invoice
- Entering an Invoice - Examples
- Controlling Prices in Invoices
- Inspecting Invoices, Marking as OK and Posting to the Nominal Ledger
- Nominal Ledger Transactions from Invoices
- Error Messages
- Printing Invoices
- Accruals in the Sales Ledger
- Cash Notes in the Sales Ledger
- Credit Notes
- Operations menu, including:
- OK
- Print Proforma Invoices
- Invoice Status
- Customer Status
- Item Search
- Add Environment Tax
- Change to Base 1
- Connect to Prepayment
- Recalculate Discount
- Recalculate Weight and Volume
- Update Currency Price List Items
- Print Cash IN-OUT
- Send to Fiscal Device
- Edit Instalments
- Resend E-Invoice
- Open NL Transaction
- Manager's Discount Override
- Open Tax Matrix
- Request Approval
- Cancel Approval Request
- OK
- Create menu
- Row menu
- Home page for Sales Ledger manual
- Home page for Standard ERP manual
Operations Menu - Invoice - Edit Instalments
When you mark as OK and save an Invoice in which the Payment Term refers to a record in the Instalments setting, the relevant number of Instalments will be created automatically. This function allows you to edit those Instalments (e.g. change a value or a date). Please refer to step 7 in the example on the Instalments page for more details.---
The Invoice register in Standard ERP:
- Introduction
- Entering an Invoice
- Entering an Invoice - Examples
- Controlling Prices in Invoices
- Inspecting Invoices, Marking as OK and Posting to the Nominal Ledger
- Nominal Ledger Transactions from Invoices
- Error Messages
- Printing Invoices
- Accruals in the Sales Ledger
- Cash Notes in the Sales Ledger
- Credit Notes
- Operations menu, including:
- OK
- Print Proforma Invoices
- Invoice Status
- Customer Status
- Item Search
- Add Environment Tax
- Change to Base 1
- Connect to Prepayment
- Recalculate Discount
- Recalculate Weight and Volume
- Update Currency Price List Items
- Print Cash IN-OUT
- Send to Fiscal Device
- Edit Instalments
- Resend E-Invoice
- Open NL Transaction
- Manager's Discount Override
- Open Tax Matrix
- Request Approval
- Cancel Approval Request
- OK
- Create menu
- Row menu
- Home page for Sales Ledger manual
- Home page for Standard ERP manual
Operations Menu - Invoice - Resend E-Invoice
In some countries and depending on configuration, you can have Invoices sent electronically automatically when you mark them as OK and save.It is recommended that you check regularly to ensure that this process has been successful for every Invoice. You can do this using the following methods:
- Open an individual Invoice and choose 'Invoice Status' from the Operations menu. The stage that the Invoice has reached in the process will be displayed towards the top of the resulting report (no status will be displayed if the Invoice has not yet been sent).
- In Argentina only, open an individual Invoice and open the Link Manager. The relevant Electronic Record Status records will have been attached automatically.
- Produce the Detailed version of the Electronic Invoice Status report.
- Produce an Invoice Media Status report. If you choose 'E-Invoices' as the Function and select the Not Received by Recipient E-Invoices Only option, the report will only list E-Invoices that have not been received (you must choose at least one Invoice Type option as well).
Note: this function should not be used in Argentina or Mexico. Instead, you should use 'Send Argentinean E-Invoice' or 'Send Mexican E-Invoice' as appropriate. These functions will be added to the Operations menu if the VAT Law in the Company Info setting is "Argentinean" or "Mexican".
Sending Invoices electronically is a chargeable Cloud Service: please refer to your local HansaWorld representative for details.
---
The Invoice register in Standard ERP:
- Introduction
- Entering an Invoice
- Entering an Invoice - Examples
- Controlling Prices in Invoices
- Inspecting Invoices, Marking as OK and Posting to the Nominal Ledger
- Nominal Ledger Transactions from Invoices
- Error Messages
- Printing Invoices
- Accruals in the Sales Ledger
- Cash Notes in the Sales Ledger
- Credit Notes
- Operations menu, including:
- OK
- Print Proforma Invoices
- Invoice Status
- Customer Status
- Item Search
- Add Environment Tax
- Change to Base 1
- Connect to Prepayment
- Recalculate Discount
- Recalculate Weight and Volume
- Update Currency Price List Items
- Print Cash IN-OUT
- Send to Fiscal Device
- Edit Instalments
- Resend E-Invoice
- Open NL Transaction
- Manager's Discount Override
- Open Tax Matrix
- Request Approval
- Cancel Approval Request
- OK
- Create menu
- Row menu
- Home page for Sales Ledger manual
- Home page for Standard ERP manual
Operations Menu - Invoice - Open NL Transaction
Once an Invoice has been approved and saved, if so defined in the Sub System setting in the Nominal Ledger, a Nominal Ledger Transaction is created. This function allows you to view that Transaction.On selecting the function, the Transaction will be opened in a new window.
Operations Menu - Invoice - Manager's Discount Override
You can prevent users from saving an Invoice if they have entered a price (i.e. a unit price less discount) in any row that is below a specified minimum for the Item. To do this, follow these steps:- Create a Price List (using the Price List register in the Pricing module).
- Create records in the Price register for each Item that is to have a minimum price, and specify the minimum price in the Price field in each one. Assign each Price record to the Price List from step 1.
- Open the Person records for each sales person and specify the Price List in the Minimum Price List field on the 'Sales' card.
In some circumstances, you may wish to allow the saving of an Invoice with at least one row in which the Unit Price less Discount is below the minimum. In order to allow the Invoice to be saved, a manager must approve the price. A manager in this context is a Person with a Discount Password, set using the 'Change Discount Password' function on the Operations menu of the 'Persons: Browse' window.
To approve the price, the manager should follow these steps:
- Click in any field in the row in which the Unit Price less Discount is less than the minimum.
- Select this 'Manager's Discount Override' function from the Operations menu. The 'Manager's Override for Discount' window will open:
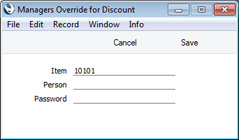
- Enter their Signature and Discount Password (not log-in password) and click the [Save] button.
- Repeat the previous steps for each row in which the Unit Price less Discount is less than the minimum.
You can also specify a Minimum Price List in the manager's Person record. This will have two consequences:
- The manager will not be able to use the 'Manager's Discount Override' function to approve a price that is lower than the minimum specified in their Minimum Price List; and
- After the manager has approved a price in an Invoice row, the price specified in their Minimum Price List will become the new minimum for that row.
---
The Invoice register in Standard ERP:
- Introduction
- Entering an Invoice
- Entering an Invoice - Examples
- Controlling Prices in Invoices
- Inspecting Invoices, Marking as OK and Posting to the Nominal Ledger
- Nominal Ledger Transactions from Invoices
- Error Messages
- Printing Invoices
- Accruals in the Sales Ledger
- Cash Notes in the Sales Ledger
- Credit Notes
- Operations menu, including:
- OK
- Print Proforma Invoices
- Invoice Status
- Customer Status
- Item Search
- Add Environment Tax
- Change to Base 1
- Connect to Prepayment
- Recalculate Discount
- Recalculate Weight and Volume
- Update Currency Price List Items
- Print Cash IN-OUT
- Send to Fiscal Device
- Edit Instalments
- Resend E-Invoice
- Open NL Transaction
- Manager's Discount Override
- Open Tax Matrix
- Request Approval
- Cancel Approval Request
- OK
- Create menu
- Row menu
- Home page for Sales Ledger manual
- Home page for Standard ERP manual
Operations Menu - Invoice - Open Tax Matrix
In some countries, Tax Templates are used instead of VAT Codes. VAT Codes should be used where each sales and purchase transaction (e.g. each row in an Invoice) is taxed at a single rate, while Tax Templates should be used where different taxes and/or several tax rates are applied to one transaction (e.g. to one row).If you need to use Tax Templates, you should first choose the Use Tax Templates for Tax Calculation option in the Transaction Settings setting in the Nominal Ledger. This option will cause a Tax Template field ("T-Cd") to appear on flip B of the matrix instead of the VAT Code field ("V-Cd").
Because a particular Tax Template can include several tax rates, it can be difficult to see at a glance how the tax figure in an Invoice is calculated. Selecting this function will cause a new window to be opened, displaying the tax calculation, as follows:
- If you place the insertion point in an Invoice row, the function will display the tax calculation for that row.
- If you place the insertion point in a header field, the function will display the tax calculation for the Invoice as a whole. This is shown in the illustration below.

---
The Invoice register in Standard ERP:
- Introduction
- Entering an Invoice
- Entering an Invoice - Examples
- Controlling Prices in Invoices
- Inspecting Invoices, Marking as OK and Posting to the Nominal Ledger
- Nominal Ledger Transactions from Invoices
- Error Messages
- Printing Invoices
- Accruals in the Sales Ledger
- Cash Notes in the Sales Ledger
- Credit Notes
- Operations menu, including:
- OK
- Print Proforma Invoices
- Invoice Status
- Customer Status
- Item Search
- Add Environment Tax
- Change to Base 1
- Connect to Prepayment
- Recalculate Discount
- Recalculate Weight and Volume
- Update Currency Price List Items
- Print Cash IN-OUT
- Send to Fiscal Device
- Edit Instalments
- Resend E-Invoice
- Open NL Transaction
- Manager's Discount Override
- Open Tax Matrix
- Request Approval
- Cancel Approval Request
- OK
- Create menu
- Row menu
- Home page for Sales Ledger manual
- Home page for Standard ERP manual
Operations Menu - Invoice - Request Approval
If an Invoice has to pass through an approval process before you can mark it as OK (and before you can print it), use this function to begin that approval process. Please refer to the description of the Approval Status field on the 'Inv. Address' card of the Invoice window for brief details about the approval process and here for full details.---
The Invoice register in Standard ERP:
- Introduction
- Entering an Invoice
- Entering an Invoice - Examples
- Controlling Prices in Invoices
- Inspecting Invoices, Marking as OK and Posting to the Nominal Ledger
- Nominal Ledger Transactions from Invoices
- Error Messages
- Printing Invoices
- Accruals in the Sales Ledger
- Cash Notes in the Sales Ledger
- Credit Notes
- Operations menu, including:
- OK
- Print Proforma Invoices
- Invoice Status
- Customer Status
- Item Search
- Add Environment Tax
- Change to Base 1
- Connect to Prepayment
- Recalculate Discount
- Recalculate Weight and Volume
- Update Currency Price List Items
- Print Cash IN-OUT
- Send to Fiscal Device
- Edit Instalments
- Resend E-Invoice
- Open NL Transaction
- Manager's Discount Override
- Open Tax Matrix
- Request Approval
- Cancel Approval Request
- OK
- Create menu
- Row menu
- Home page for Sales Ledger manual
- Home page for Standard ERP manual
Operations Menu - Invoice - Cancel Approval Request
If an Invoice needs to go through an approval process before you can mark it as OK (and before you can print it) and you have started that approval process by selecting 'Request Approval' from the Operations menu, you will no longer be able to modify the Invoice. So, if you realise the Invoice contains an error, you must cancel the approval process before you can correct the error. To do this, open the Invoice and choose 'Cancel Approval Request' from the Operations menu. You will now be able to amend the Invoice and then restart the approval process by once again choosing 'Request Approval'.If you cannot cancel the approval process, the probable reasons are:
- The Approval Status of the Invoice (visible on the 'Inv. Address' card) is not Pending.
- You may have configured the approval process (using the Approval Rules register in the Business Alerts module) so that it does not allow cancellation.
- You cannot cancel the approval process if at least one Approval Person has approved the Invoice.
---
The Invoice register in Standard ERP:
- Introduction
- Entering an Invoice
- Entering an Invoice - Examples
- Controlling Prices in Invoices
- Inspecting Invoices, Marking as OK and Posting to the Nominal Ledger
- Nominal Ledger Transactions from Invoices
- Error Messages
- Printing Invoices
- Accruals in the Sales Ledger
- Cash Notes in the Sales Ledger
- Credit Notes
- Operations menu, including:
- OK
- Print Proforma Invoices
- Invoice Status
- Customer Status
- Item Search
- Add Environment Tax
- Change to Base 1
- Connect to Prepayment
- Recalculate Discount
- Recalculate Weight and Volume
- Update Currency Price List Items
- Print Cash IN-OUT
- Send to Fiscal Device
- Edit Instalments
- Resend E-Invoice
- Open NL Transaction
- Manager's Discount Override
- Open Tax Matrix
- Request Approval
- Cancel Approval Request
- OK
- Create menu
- Row menu
- Home page for Sales Ledger manual
- Home page for Standard ERP manual
Create Menu - Invoices
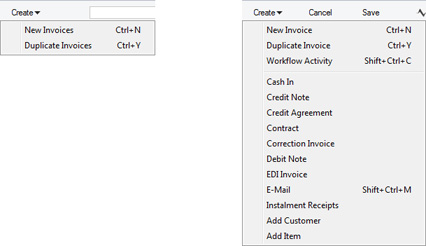
'New' and 'Duplicate' are standard functions provided on the Create menu on every window that allow you to create new records, in this case in the Invoice register. Please click the links below for details about the other functions:
- Workflow Activity
- Cash In
- Credit Note
- Credit Agreement
- Contract
- Correction Invoice
- Debit Note
- EDI Invoice
- E-Mail
- Instalment Receipts
- VAT Correction S/L
- Add Customer
- Add Item
The Invoice register in Standard ERP:
- Introduction
- Entering an Invoice
- Entering an Invoice - Examples
- Controlling Prices in Invoices
- Inspecting Invoices, Marking as OK and Posting to the Nominal Ledger
- Nominal Ledger Transactions from Invoices
- Error Messages
- Printing Invoices
- Accruals in the Sales Ledger
- Cash Notes in the Sales Ledger
- Credit Notes
- Operations menu
- Create menu
- Row menu
- Home page for Sales Ledger manual
- Home page for Standard ERP manual
Create Menu - Invoice - Workflow Activity
The 'Workflow Activity' function allows you to create Activities from Invoices. This can be useful if, for example, you need to schedule a call as the Due Date of an Invoice approaches, to check that it will be paid.When you select the function, the following screen appears, where you can create a new Activity:
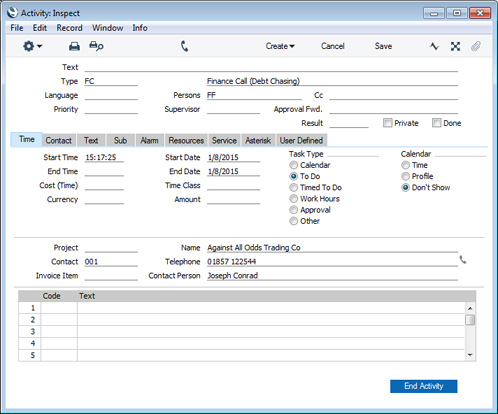
- The Activity Type will be taken from the Activity Types, Subsystems setting in the CRM module.
- The setting of the Done check box will also be taken from the Activity Types, Subsystems setting.
- The Task Type will be To Do.
- The Symbol will be Other.
- The Start and End Dates will be the Due Date of the Invoice.
- Customer details will be taken from the Invoice.
- The Person will be the Salesman from the Invoice, and the Signature of the current user (if the current user is not the Salesman) will appear in the Cc field. As the Task Type will be To Do, the Activity will be placed in the Salesman's and the current user's Task Managers.
The Invoice and the Activity will be connected to each other through the Link Manager and Workflow Manager. When reviewing the Activity, you can return to the Invoice quickly and easily using the Link Manager in the Activity, while you can open the Activity from the Invoice using the Workflow Manager.
You must save an Invoice at least once before you can create an Activity from it. This is to ensure that the links mentioned in the previous paragraph can be established.
You can choose to have Activities created automatically from Invoices when you save them after marking them as OK. This is controlled using the Activity Types, Subsystems setting in the CRM module. In the Generate Activities column in that setting, choose the Automatically option for Sales Invoices, and specify the Activity Type to be used:
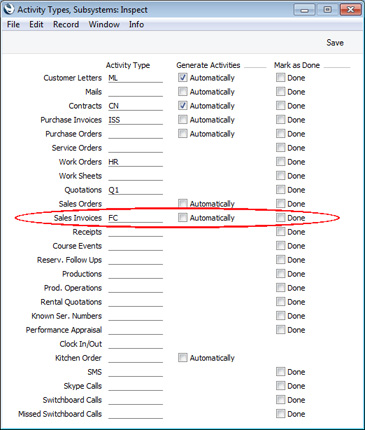
---
The Invoice register in Standard ERP:
- Introduction
- Entering an Invoice
- Entering an Invoice - Examples
- Controlling Prices in Invoices
- Inspecting Invoices, Marking as OK and Posting to the Nominal Ledger
- Nominal Ledger Transactions from Invoices
- Error Messages
- Printing Invoices
- Accruals in the Sales Ledger
- Cash Notes in the Sales Ledger
- Credit Notes
- Operations menu
- Create menu, including:
- Workflow Activity
- Cash In
- Credit Note
- Credit Agreement
- Contract
- Correction Invoice
- Debit Note
- EDI Invoice
- E-Mail
- Instalment Receipts
- VAT Correction S/L
- Add Customer
- Add Item
- Workflow Activity
- Row menu
- Home page for Sales Ledger manual
- Home page for Standard ERP manual
Operations Menu - Invoice - Create Cash In
In some countries, cash transactions need to be recorded using a sequential number series. This function is used to record such transactions in the Cash In register in the Cash Book module. When it is selected, the following window appears, by which a new Cash In record can be created:
If you check the OK box before saving, this approves the Cash In record. If you have determined that Nominal Ledger Transactions are to be created from Cash In records, one will now be raised (this is specified in the Sub System setting in the Nominal Ledger). You will no longer be able to modify the Cash In record. The Transaction will not include a VAT element even if the Post VAT box in the Cash Book Settings setting has been checked, because VAT will already have been posted from the Invoice.
The Invoice must be saved and approved before a Cash In record can be created.
Cash In records can be created from Invoices of all kinds, but if you want them to be created from Cash Notes (Invoices with Payment Terms of the "Cash" type) only, switch on the Cash Collection option in the Cash Book Settings setting. The Cash Collection option also prevents the creation of more than one Cash In record from an Invoice, and prevents the value of the Cash In record from being changed (i.e. the values of the Invoice and the Cash In record must be the same).
Please click for full details of the Cash In window and of the 'Create Collection Cash In' Maintenance function. This function can be used to create Cash In records from Invoices in batches. It will only create Cash In records from Invoices that are Cash Notes.
The function requires the Cash Book module to be present.
Create Menu - Invoice - Credit Note
Use this function to create a Credit Note from an Invoice. Please refer to the Credit Notes page for details.---
The Invoice register in Standard ERP:
- Introduction
- Entering an Invoice
- Entering an Invoice - Examples
- Controlling Prices in Invoices
- Inspecting Invoices, Marking as OK and Posting to the Nominal Ledger
- Nominal Ledger Transactions from Invoices
- Error Messages
- Printing Invoices
- Accruals in the Sales Ledger
- Cash Notes in the Sales Ledger
- Credit Notes
- Operations menu
- Create menu, including:
- Workflow Activity
- Cash In
- Credit Note
- Credit Agreement
- Contract
- Correction Invoice
- Debit Note
- EDI Invoice
- E-Mail
- Instalment Receipts
- VAT Correction S/L
- Add Customer
- Add Item
- Workflow Activity
- Row menu
- Home page for Sales Ledger manual
- Home page for Standard ERP manual
Create Menu - Invoice - Credit Agreement
You can use this function to create a Credit Agreement from an Invoice. Please refer to your local HansaWorld representative for more details.---
The Invoice register in Standard ERP:
- Introduction
- Entering an Invoice
- Entering an Invoice - Examples
- Controlling Prices in Invoices
- Inspecting Invoices, Marking as OK and Posting to the Nominal Ledger
- Nominal Ledger Transactions from Invoices
- Error Messages
- Printing Invoices
- Accruals in the Sales Ledger
- Cash Notes in the Sales Ledger
- Credit Notes
- Operations menu
- Create menu, including:
- Workflow Activity
- Cash In
- Credit Note
- Credit Agreement
- Contract
- Correction Invoice
- Debit Note
- EDI Invoice
- E-Mail
- Instalment Receipts
- VAT Correction S/L
- Add Customer
- Add Item
- Workflow Activity
- Row menu
- Home page for Sales Ledger manual
- Home page for Standard ERP manual
Operations Menu - Invoice - Create Contract
This function will create a Contract from an Invoice. This will be useful in businesses who sell both goods and the service contracts to maintain them: whenever goods are sold, service contracts for those goods can be created immediately or at any later time. This function will transfer all relevant information (Customer, Items and Serial Numbers) to the Contract register, thus saving time and reducing the possibility of error. For the function to have any effect, all changes to the Invoice must first have been saved (use the [Save] button), although the Invoice does not have to be approved.When the function is selected, a new record is created in the Contract register (in the Contracts module). It is opened in a new window, entitled 'Contract: Inspect'. This means that it has been created and saved and is being opened for amendment and approval.

Each Item in the Item register can have a Contract Item specified on the 'Recipe' card of their Item record. The Contract Item should be a separate record in the Item register representing the cost of the maintenance charge for that Item. Only those Items on the Invoice that have a Contract Item specified are used in the new Contract. For each such Item, their Contract Item will be included in the list on the 'Items' card of the new Contract, together with the Serial Number of the invoiced Item (on flip E). The Invoice Quantity is also transferred to the Contract. If there are no Items on the Invoice with a Contract Item specified, no Contract will be created.
Note that the new Contract is unapproved and is not given a Start Date, so Invoices cannot immediately be raised from it.
Please click for full details of the Contract window and of creating Invoices for Contracts.
Operations Menu - Invoice - Correction Invoice
Please refer to the Credit Notes page for a description of this function.Create Menu - Invoice - Debit Note
This function is designed for use in Argentina. A Debit Note is an Invoice that a company can issue when it needs to charge a Customer for costs such as finance costs for bounced cheques and charges for freight if they should be paid by the Customer. Usually a Debit Note will be related to a previous Invoice. A company can also issue a Debit Note if the prices in the previous Invoice were lower than they should have been.Before using this function, you should first create a Payment Term in which the Type is "Manual Interest Invoice".
To create a Debit Note from an Invoice, first open the Invoice in a record window and then select 'Debit Note' from the Create menu. A new Debit Note will be created and opened in a window entitled 'Invoice Inspect'. This means that it has already been saved and is being opened for checking.
- A new row containing the phrase "Debit of Invoice" will have been inserted as the first row of the grid on the 'Items' card, pushing any existing rows down. The field to the right of this phrase will contain the Number of the original Invoice.
- The Payment Term will be the first record alphabetically with the Type "Manual Interest Invoice" in the Payment Terms setting.
- If you have specified in the Number Series Defaults setting in the System Module that Interest Invoices will use a different Number Series to standard Invoices, the Invoice Number will be taken from that Number Series. Otherwise it will be taken from the first valid number sequence in the Number Series - Invoices setting as normal.
Click the OK check box when you are sure the Debit Note is correct and save it. As with ordinary Invoices, this will cause the Sales Ledger to be updated and, if so defined in the Sub Systems setting in the Nominal Ledger and in the Number Series - Invoices setting, a Nominal Ledger Transaction to be created.
As a Debit Note has a "Manual Interest Invoice" Payment Term, it will be printed using the Interest Invoice Form Template instead of the standard Invoice Form Template. Please refer to the Printing Invoices page for more details.
If the function does not create a Debit Note when expected, the probable reason is that the original Invoice has not yet been marked as OK.
---
The Invoice register in Standard ERP:
- Introduction
- Entering an Invoice
- Entering an Invoice - Examples
- Controlling Prices in Invoices
- Inspecting Invoices, Marking as OK and Posting to the Nominal Ledger
- Nominal Ledger Transactions from Invoices
- Error Messages
- Printing Invoices
- Accruals in the Sales Ledger
- Cash Notes in the Sales Ledger
- Credit Notes
- Operations menu
- Create menu, including:
- Workflow Activity
- Cash In
- Credit Note
- Credit Agreement
- Contract
- Correction Invoice
- Debit Note
- EDI Invoice
- E-Mail
- Instalment Receipts
- VAT Correction S/L
- Add Customer
- Add Item
- Workflow Activity
- Row menu
- Home page for Sales Ledger manual
- Home page for Standard ERP manual
Operations Menu - Invoice - Create EDI Invoice
The EDI (Electronic Data Interchange) module can be used to receive Orders and issue Invoices electronically in particular formats. If you have this module, use this function to convert an Invoice into an EDI Invoice. The Customer must be marked as an EDI Customer using the check box on the 'Terms' card of the Customer screen. Please refer to your local representative for full details.Create Menu - Invoice - E-Mail
You can use this function to create a Mail containing details of the Invoice, which you can use to send the Invoice to the Customer by email.When you select the function, the following screen appears, in which you can create a new Mail:
- The sender of the Mail will be the current user. If the current user doesn't have a Mailbox, the sender will be the From System Mailbox specified in the Mail and Conference Settings setting in the E-mail and Conferences module. If there is no From System Mailbox, no Mail will be created.
- The Recipient of the Mail will be chosen as follows:
- If the Customer in the Invoice has a record in the Additional Email Recipients setting in the CRM module, the Mail will be sent to the Contact Persons listed with the Form Type "Invoice" in that record.
- If the Customer does not have a record in the Additional Email Recipients setting or its record in that setting has no Contact Persons with the Form Type "Invoice", the Mail will be sent to the Email Address of the Contact Person quoted in the Attention field in the Invoice.
- If the Contact Person quoted in the Attention field in the Invoice does not have an Email Address or there is no Contact Person in the Attention field, the Mail will be sent to the Email Address specified in the Contact record for the Customer.
- If the above points are not satisfied, no Mail will be created.
- If the Customer in the Invoice has a record in the Additional Email Recipients setting in the CRM module, the Mail will be sent to the Contact Persons listed with the Form Type "Invoice" in that record.
- The Subject and Text of the Mail will be taken from the record in the Mail Texts setting in the E-mail and Conferences module in which the Form is "Invoices". If the Invoice has a Language and the Mail Text record contains a row for that Language, the Subject and Text will be determined by the fields in that row. Otherwise, they will be determined by the fields in the Mail Text header, as follows:
- The Subject in the mail will be composed from the Subject in the Mail Text record (which should have a trailing space), the text "Invoice" or "Credit Note" and the Invoice Number. For example, if the Subject in the Mail Text record is "Please find attached " (with trailing space), the Subject of the Mail will be "Please find attached Invoice XXXX" (where XXXX is the Invoice Number).
- The Text of the Mail will be built up as follows:
- The initial text will be taken from the Standard Text record quoted in the First Text field in the Mail Text record.
- Depending on the Do not put Record Details in Mail Body option in the Mail Text record, the Items in the Invoice will then be listed, followed by the Invoice totals and the Payment Term.
- The final text will be taken from the Standard Text record quoted in the Last Text field in the Mail Text record. It is recommended that the first line in this Standard Text record should be a carriage return, to ensure that the text in the mail is neatly spaced.
- The initial text will be taken from the Standard Text record quoted in the First Text field in the Mail Text record.
If there is no suitable record in the Mail Texts setting, the Subject and Text will be taken from the Invoice Mail Settings setting in the Sales Ledger, in the same way as described above, The Subject in this setting should not have a trailing space. If the Invoice Mail Settings setting is empty, the Subject of the Mail will be "Invoice XXXX" or "Credit Note XXXX" (where XXXX is the Invoice Number). The Text of the Mail will be constructed as described in step ii above.
- The Subject in the mail will be composed from the Subject in the Mail Text record (which should have a trailing space), the text "Invoice" or "Credit Note" and the Invoice Number. For example, if the Subject in the Mail Text record is "Please find attached " (with trailing space), the Subject of the Mail will be "Please find attached Invoice XXXX" (where XXXX is the Invoice Number).
- A PDF version of the Invoice will be attached to the Mail, accessible through the Document Manager. This requires you to have designed Form Templates to be used by each type of Invoice (i.e. Invoice, Credit Note, Cash Note, Interest Invoice and Project Invoice), and to have assigned those Form Templates to each Invoice Form using the 'Define Form' function. When you design the Form Templates, you may need to use Styles that will embed fonts in PDF files (this will depend on the fonts you use). You may also need to choose a code page and page setup, which you can do in the Form Template Properties. Please refer here for details about designing Form Templates, and here for a list of the fields you can include in the Form Templates used by the various Invoice forms.
- The Invoice record itself will also be attached to the Mail through its Link Manager, and similarly the Mail will be attached to the Invoice. This allows you to open the Mail quickly and easily when reviewing the Invoice, or to open the Invoice from the Mail.
- The status of the Invoice will change to Printed. So, if you send it by email again or print it, the word "Copy" will be printed diagonally across the page as a watermark (unless you are using the No Test Printout option in the Optional Features setting in the System module).
If the function does not create a Mail, the probable causes are:
- The current user does not have a Mailbox.
- No suitable recipient email address was found.
- The Invoice has not been saved.
- The Approval Status of the Invoice does not allow a Mail to be created from it. If you need Invoices to pass through an approval process before you can create Mails from them, you can configure such a process using the Approval Rules register in the Business Alerts module. Please refer to the description of the Approval Status field on the 'Inv. Address' card for brief details about the approval process and here for full details.
If you are using the Use External Mail Software option in the Mail and Conference Settings setting, the Mail will not be created inside Standard ERP as described above. Instead, it will be created in your default mail application (e.g. Eudora, Outlook, etc).
If you need to send several Invoices by email, use the 'Create Mails from Invoices' Maintenance function.
---
The Invoice register in Standard ERP:
- Introduction
- Entering an Invoice
- Entering an Invoice - Examples
- Controlling Prices in Invoices
- Inspecting Invoices, Marking as OK and Posting to the Nominal Ledger
- Nominal Ledger Transactions from Invoices
- Error Messages
- Printing Invoices
- Accruals in the Sales Ledger
- Cash Notes in the Sales Ledger
- Credit Notes
- Operations menu
- Create menu, including:
- Workflow Activity
- Cash In
- Credit Note
- Credit Agreement
- Contract
- Correction Invoice
- Debit Note
- EDI Invoice
- E-Mail
- Instalment Receipts
- VAT Correction S/L
- Add Customer
- Add Item
- Workflow Activity
- Row menu
- Home page for Sales Ledger manual
- Home page for Standard ERP manual
Operations Menu - Invoice - Create Instalments
This function is used when it has been agreed with the Customer that an Invoice is to paid in instalments. When it is selected, the following dialogue box appears:
The Invoice must first have been approved before the function can be used.
Operations Menu - Invoice - VAT Correction
In some countries (e.g. Poland and Ukraine), once an Invoice has been posted to the Nominal Ledger, the posting to the VAT Output Account can be moved to a later month. This might be appropriate if the Invoice has been raised before the goods have been delivered. This is known as a "VAT Correction" or "VAT Movement". This function provides an easy way of doing this.For the function to have any effect, all changes to the Invoice must first have been saved (use the [Save] button), and the Invoice must have been approved. You should also have defined an Output A/C Corr. (Output Correction Account) on flip C of each VAT Code used in the Invoice.
When the function is selected, a new record is created in the VAT Corrections setting. It is opened in a new window, entitled 'VAT Correction: New'. This means that it has not yet been saved.
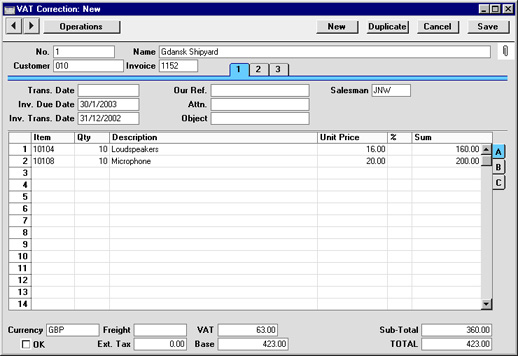
The results in the Nominal Ledger are twofold:
- In the Transaction created from the original Invoice, the posting to the Output VAT Account is replaced by one to the Output VAT Correction Account.
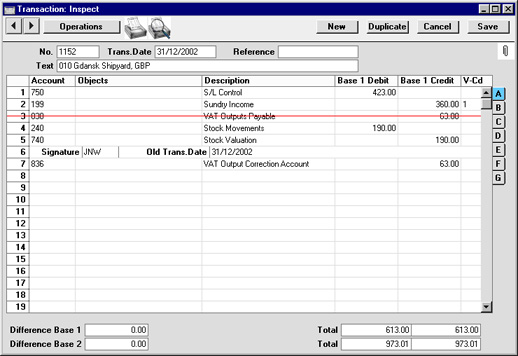
- A new Transaction is created from the VAT Correction record, reversing the posting to the VAT Correction Account and crediting the Output VAT Account.
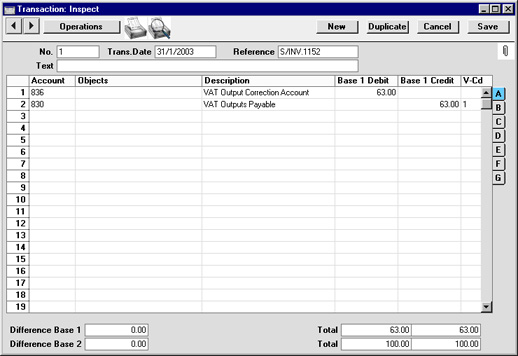
Once the VAT Correction has been approved, its date can also be changed if necessary. To do this, open it, choose 'Update Trans. Date' from the Operations menu and enter the new date in the Trans. Date field.
Create Menu - Invoice - Add Customer
The 'Add Customer' function provides an easy way of creating a new Customer record in the Contact register while looking at an Invoice. When you select the function, the 'Contact: New' window will be opened immediately. The Customer check box will be ticked by default. Enter the new Customer's details and click [Save]. The new Customer will be saved, the window will be closed and the new Customer Number and other details will be entered in the Invoice. Please refer here for full details about the Contact register.---
The Invoice register in Standard ERP:
- Introduction
- Entering an Invoice
- Entering an Invoice - Examples
- Controlling Prices in Invoices
- Inspecting Invoices, Marking as OK and Posting to the Nominal Ledger
- Nominal Ledger Transactions from Invoices
- Error Messages
- Printing Invoices
- Accruals in the Sales Ledger
- Cash Notes in the Sales Ledger
- Credit Notes
- Operations menu
- Create menu, including:
- Workflow Activity
- Cash In
- Credit Note
- Credit Agreement
- Contract
- Correction Invoice
- Debit Note
- EDI Invoice
- E-Mail
- Instalment Receipts
- VAT Correction S/L
- Add Customer
- Add Item
- Workflow Activity
- Row menu
- Home page for Sales Ledger manual
- Home page for Standard ERP manual
Create Menu - Invoice - Add Item
The 'Add Item' function provides an easy way of creating a new Item record while looking at an Invoice. When you select the function, the 'Item: New' window will be opened immediately. Enter the new Item's details and click [Save]. The new Item will be saved, the window will be closed and the new Item Number and other details will be entered in the first empty row in the Invoice. Please refer here for full details about the Item register.---
The Invoice register in Standard ERP:
- Introduction
- Entering an Invoice
- Entering an Invoice - Examples
- Controlling Prices in Invoices
- Inspecting Invoices, Marking as OK and Posting to the Nominal Ledger
- Nominal Ledger Transactions from Invoices
- Error Messages
- Printing Invoices
- Accruals in the Sales Ledger
- Cash Notes in the Sales Ledger
- Credit Notes
- Operations menu
- Create menu, including:
- Workflow Activity
- Cash In
- Credit Note
- Credit Agreement
- Contract
- Correction Invoice
- Debit Note
- EDI Invoice
- E-Mail
- Instalment Receipts
- VAT Correction S/L
- Add Customer
- Add Item
- Workflow Activity
- Row menu
- Home page for Sales Ledger manual
- Home page for Standard ERP manual
Create Menu - Invoice - Receipt
This page describes the 'Receipt' function on the Create menu in the Invoice record window. If you are using iOS or Android, the 'Receipt' function is on the + menu.---
The 'Receipt' function allows you to create a Receipt from an Invoice. This Receipt will record the receiving of a payment against the Invoice from the Customer.
Before you can create a Receipt from an Invoice, you must mark the Invoice as OK and save. Then select 'Receipt’ from the Create menu (Windows/macOS) or + menu (iOS/Android). The following window will appear, in which you can create a new Receipt:
- The Trans. Date in the header and the Pay. Date in the row will be the current date.
- The Payment Mode will be the first Payment Mode listed in the Payment Modes setting.
- The Receipt will contain a single row in which the Bank Amount and Received Value fields contain the full outstanding value of the Invoice. The Bank Currency will be the Currency specified in the Payment Mode Account, or Base Currency 1. The Received Currency will be the Invoice Currency.
If you want to prevent particular users from creating Receipts from Invoices using this function, assign them to an Access Group in which you have denied access to the 'Invoice to Receipt' Action.
Please refer here for full details about the Receipt register.
---
The Invoice register in Standard ERP:
- Introduction
- Entering an Invoice
- Entering an Invoice - Examples
- Controlling Prices in Invoices
- Inspecting Invoices, Marking as OK and Posting to the Nominal Ledger
- Nominal Ledger Transactions from Invoices
- Error Messages
- Printing Invoices
- Accruals in the Sales Ledger
- Cash Notes in the Sales Ledger
- Credit Notes
- Operations menu
- Create menu, including:
- Workflow Activity
- Cash In
- Credit Note
- Credit Agreement
- Contract
- Correction Invoice
- Debit Note
- EDI Invoice
- Email
- Instalment Receipts
- VAT Correction S/L
- Add Customer
- Add Item
- Receipt
- Row menu
- Home page for Sales Ledger manual
- Home page for Standard ERP manual
Row Menu - Invoice
The matrix in the Invoice window has its own menu, which contains functions that refer to or affect an individual row in the matrix. This is sometimes known as the "Row Menu".
To use the Row menu, first click in any field in the row in question (i.e. the row to which the function is to be applied), and then right-click (Windows) or Ctrl-click (Mac OS X) the row number (on the left of the row). A menu will appear, where you can select the function that you need:
Please click the links below for details about each function on the Row menu:
- Item Status
- Previous Sales Prices
- Add Header Line
- Add Hidden Line
- Add Cash Line
- Add Credit Card Line
- Add Subtotal
The Invoice register in Standard ERP:
- Introduction
- Entering an Invoice
- Entering an Invoice - Examples
- Controlling Prices in Invoices
- Inspecting Invoices, Marking as OK and Posting to the Nominal Ledger
- Nominal Ledger Transactions from Invoices
- Error Messages
- Printing Invoices
- Accruals in the Sales Ledger
- Cash Notes in the Sales Ledger
- Credit Notes
- Operations menu
- Create menu
- Row menu
- Home page for Sales Ledger manual
- Home page for Standard ERP manual
Operations Menu - Invoice - Item Status
This function provides instant feedback for the Item shown in the Invoice row containing the cursor or highlighted in the 'Paste Special' window listing Items. Information displayed in a new window includes the quantity in stock, the quantity on order and the quantity shippable.
Please click here for full details of this function.
Operations Menu - Invoice - Previous Sales Prices
This function produces a report showing the prices previously charged to the Customer for one of the Items on the Invoice. Place the cursor in one of the rows of the Invoice and then select this function from the Operations menu. The report shows the most recent Invoice for each different price.Row Menu - Invoice - Add Header Line
You can use the 'Add Header Line' function when you need to insert a row above the Invoice Items where you can enter some descriptive text. You can use this function at any time while entering the Invoice, as follows:
- Place the insertion point anywhere in a row in the grid on the 'Items' card (or highlight the entire row by clicking on the row number). Open the Row menu by right-clicking (Windows) or ctrl-clicking (Mac OS X) the row number, and select this function. A special "Header" row will be inserted in the grid above the row containing the insertion point.
- Place the insertion point in any field outside the grid on the 'Items' card and select this function. A special "Header" row will be inserted in the grid as the first row.
When you design the Form Template to be used when printing Invoices, you can specify that the special "Header" row will be printed in a different Style to the rows containing the Items (e.g. font, font size, etc). To do this, use the 'Row Styles' function on the Operations menu of the Form Template window.
---
The Invoice register in Standard ERP:
- Introduction
- Entering an Invoice
- Entering an Invoice - Examples
- Controlling Prices in Invoices
- Inspecting Invoices, Marking as OK and Posting to the Nominal Ledger
- Nominal Ledger Transactions from Invoices
- Error Messages
- Printing Invoices
- Accruals in the Sales Ledger
- Cash Notes in the Sales Ledger
- Credit Notes
- Operations menu
- Create menu
- Row menu, including:
- Home page for Sales Ledger manual
- Home page for Standard ERP manual
Operations Menu - Invoice - Add Hidden Line
This function can be used to ensure certain rows do not appear when the Invoice is printed.
Enter the Invoice so that the rows to be printed are above those that are not to be printed. Then, place the cursor in the first row that is not to be printed. This cannot be the first row of the Invoice. Select this function and a new row is inserted. This new row and all those below it will not be printed.
Row Menu - Invoice - Add Cash Line
The 'Add Cash Line' function allows you to register a cash payment against an Invoice. This function is therefore an alternative to entering the Invoice as a Cash Note, with these advantages:
- You can use the 'Add Cash Line' function when the Invoice has only been partially paid.
- A cash payment registered using the 'Add Cash Line' function will appear in the Cash Receipts report (a Cash Note will not appear in that report as it is not possible to assign a Payment Mode to a Cash Note).
By default, the "Cash" line will assume that the cash payment is for the full value of the Invoice. You can change the value of the payment if necessary.
The Payment Mode in the "Cash" line will be chosen as follows:
- It will be taken from the relevant row in the Local Machine Payment Modes setting in the Point of Sales and Restaurant modules. The relevant row is the first row in the setting in which the Currency/Local Machine combination matches the Invoice and in which the Payment Type is "Cash".
- The Cash Pay. Mode in the Default Payment Modes setting will be used.
When you mark the Invoice as OK and save, the value of the payment will be debited to the Account specified in the Payment Mode. If the payment was for the full value of the Invoice, the Invoice will be treated as fully paid and so will not appear in any of your debt-chasing reports. If the payment was partial, the remaining value will be debited to the Debtor Account, and the Invoice will be regarded as open to that extent.
---
The Invoice register in Standard ERP:
- Introduction
- Entering an Invoice
- Entering an Invoice - Examples
- Controlling Prices in Invoices
- Inspecting Invoices, Marking as OK and Posting to the Nominal Ledger
- Nominal Ledger Transactions from Invoices
- Error Messages
- Printing Invoices
- Accruals in the Sales Ledger
- Cash Notes in the Sales Ledger
- Credit Notes
- Operations menu
- Create menu
- Row menu, including:
- Home page for Sales Ledger manual
- Home page for Standard ERP manual
Row Menu - Invoice - Add Credit Card Line
The 'Add Credit Card Line' function allows you to register a credit card payment against an Invoice. This function is therefore an alternative to entering the Invoice as a Cash Note, with these advantages:
- You can use the 'Add Credit Card Line' function when the Invoice has only been partially paid.
- A credit card payment registered using the 'Add Credit Card Line' function will appear in the Cash Receipts report (a Cash Note will not appear in that report as it is not possible to assign a Payment Mode to a Cash Note).
By default, the "CC" line will assume that the cash payment is for the full value of the Invoice. You can change the value of the payment if necessary.
The Payment Mode in the "CC" line will be chosen as follows:
- It will be taken from the relevant row in the Local Machine Payment Modes setting in the Point of Sales and Restaurant modules. The relevant row is the first row in the setting in which the Currency/Local Machine combination matches the Invoice and in which the Payment Type is "Credit Card".
- The Cred. Card Pay. Mode in the Default Payment Modes setting will be used.
When you mark the Invoice as OK and save, the value of the payment will be debited to the Account specified in the Payment Mode. If the payment was for the full value of the Invoice, the Invoice will be treated as fully paid and so will not appear in any of your debt-chasing reports. If the payment was partial, the remaining value will be debited to the Debtor Account, and the Invoice will be regarded as open to that extent.
Note that this function only registers the credit card payment against the Invoice. It does not process the payment with your credit card processing partner or your bank. To do this, use this function to add the credit card line, save the Invoice but do not mark it as OK and then use the 'Credit Card Payment' function on the Operations menu.
---
The Invoice register in Standard ERP:
- Introduction
- Entering an Invoice
- Entering an Invoice - Examples
- Controlling Prices in Invoices
- Inspecting Invoices, Marking as OK and Posting to the Nominal Ledger
- Nominal Ledger Transactions from Invoices
- Error Messages
- Printing Invoices
- Accruals in the Sales Ledger
- Cash Notes in the Sales Ledger
- Credit Notes
- Operations menu
- Create menu
- Row menu, including:
- Item Status
- Previous Sales Prices
- Add Header Line
- Add Hidden Line
- Add Cash Line
- Add Credit Card Line
- Add Subtotal
- Item Status
- Home page for Sales Ledger manual
- Home page for Standard ERP manual
Row Menu - Invoice - Add Subtotal
The 'Add Subtotal' function allows you to add rows displaying subtotals to an Invoice.
First, place the insertion point anywhere in a row in the grid on the 'Items' card (or highlight the entire row by clicking on the row number). Then, open the Row menu by right-clicking (Windows) or ctrl-clicking (Mac OS X) the row number and select this function. A special "Subtotal" row will be inserted in the grid above the row containing the insertion point (row 8 in the illustration below). A subtotal will be placed in the Sum field in this new row, the sum of the previous rows. In the field to the left of the Sum you can type some explanatory text, which will be shown on the Invoice when it is printed. If the Invoice already has a "Subtotal" row, only the Items below that row will be included in the new subtotal.
When you design the Form Template to be used when printing Invoice, you can specify that the special "Subtotal" row will be printed in a different Style to the rows containing the Items (e.g. font, font size, etc). To do this, use the 'Row Styles' function on the Operations menu of the Form Template window.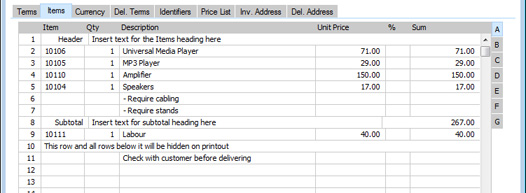
---
The Invoice register in Standard ERP:
- Introduction
- Entering an Invoice
- Entering an Invoice - Examples
- Controlling Prices in Invoices
- Inspecting Invoices, Marking as OK and Posting to the Nominal Ledger
- Nominal Ledger Transactions from Invoices
- Error Messages
- Printing Invoices
- Accruals in the Sales Ledger
- Cash Notes in the Sales Ledger
- Credit Notes
- Operations menu
- Create menu
- Row menu, including:
- Home page for Sales Ledger manual
- Home page for Standard ERP manual
- Workflow Activity