Persons
One of your first tasks in creating a new database should be to record details of yourself and anyone else that you want to be able to use your copy of FirstOffice. You will do this using the Persons setting. One reason for doing this is to protect your data: the Persons setting allows you to assign a password to each user. It's a good idea to do this even in a single-user system like FirstOffice: protecting your database with a password might prove to be a wise precaution if your computer is stolen.
To enter your details (and those of anyone else that will be able to use your copy of FirstOffice) to the Persons setting, follow these steps:
- Open the Persons setting by clicking the [Settings] button in the Master Control panel and double-clicking 'Persons' in the subsequent list. If you are using a new database, a blank browse window will appear. Otherwise, it will list all Persons previously entered.
- Click the [New] button in the Button Bar at the top of the browse window.
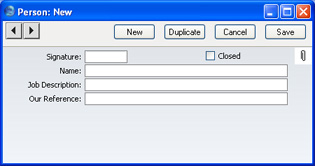
Use the 'Person: New' window shown below to enter information about a member of staff. For full details about each field on the screen, please refer to the description of the Persons setting.
When you enter a Person's initials in the Signature field, note that where there is more than one Company in the database, records in the Persons setting are specific to the Company in which they were entered. If you will be using the Personal Desktop, you should enter Person records for yourself in each Company with the same Signature (initials). This will allow you to see your Personal Desktop in each Company. If there are two or more different Persons in different Companies with the same Signature, they will not be able to have their own Personal Desktop.
- Click the [Save] button in the top right-hand corner of the window. The record is saved in the Persons setting.
- The window title changes to 'Person: Inspect', giving you a chance to check you have not made any mistakes in entering the record.
- Close the record by clicking the close box or using the Ctrl-F4 (Windows and Linux) or ⌘-W (Macintosh) keyboard shortcut.
- If you have a number of personnel to enter, click [New] instead of [Save] at step 3 above (or use the Ctrl-N/⌘-N keyboard shortcut). The Person record is saved and closed, and a blank window is opened, allowing you to enter another record straight away.
- When you close the last Person record at step 5 above, you will be returned to the 'Persons: Browse' window, which now lists the members of staff that you have just registered. Click on each one in turn and allocate a password by selecting 'Change Password' from the Operations menu.
If you want to use the Personal Desktop, you should now activate it for each Person. With the 'Persons: Browse' window still open, click on each Person in turn and then select 'Activate Personal Desktop' from the Operations menu. The Personal Desktop is fully described
here.