Transactions
This Export function in the Integration module allows you to export a selection of Transactions to an archive file. Double-click 'Transactions' in the 'Export' list to open the 'Specify Transaction Export' window.
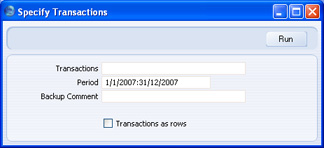
- Transactions
- Enter the first and last of the Transaction Numbers you want to export. The Transaction Number must include the prefix as shown in the 'Transactions: Browse' window. To export a Transaction that was entered directly to the Nominal Ledger, enter, for example, "2007.3" or, for a range, "2007.3:2007.10". To export a Transaction that was created from a Sub System, enter, for example, "S/INV.070003" or "S/INV.070003:S/INV.070010" for a range.
- Period
- Paste Special
Reporting Periods setting, System module
- Specify a period for which Transactions are to be exported.
- Backup Comment
- Use this field to enter a description of the back-up file (up to 40 characters are permitted). This description will be shown in the list of importable files shown by the 'Imports' function.
- Transactions as rows
- By default, this function will create a text file in which one line will be devoted to the header information of a Transaction, the next line to the first Transaction row, the next line to the second Transaction row, and so on. You will be able to import this file to another HansaWorld Enterprise database using the 'Automatic' or 'Automatic manual file search' import functions in the System module. It can be difficult to edit this text file in a spreadsheet or text editor, because some lines contain header information and some lines contain row information.
- If you use this option, the function will create a text file in which each line will contain the same information, making it easy to edit. The first line in the file will contain the header information of a Transaction and its first row, the second row will contain the header information of a Transaction and its second row, and so on. You can import this file to another HansaWorld Enterprise database using the 'Transaction as rows' import function in the Integration module.
Click [Run] in the Button Bar: a dialogue box will open, where you can name the export file and specify where it is to be saved.
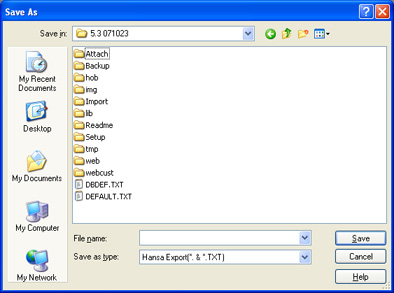
Enter a name for the file, and click [Save] or press the Enter key.