Jewellery Workflow - Sales - Layaway Orders
This page describes Layaway Orders (used with the Jewellery module).
---
A "Layaway" Order (or "Lay By" Order) is an Order whereby you will reserve a piece for a Customer, issue an Invoice that may or not be payable in instalments and retain possession until the Customer pays in full. Follow these steps:
- Create a Layaway Order by entering a record in the Sales Orders register in the Sales Orders module. After entering the Customer's details, go to flip E on the 'Items' card to enter or scan the Serial Number of the piece. If the piece is not Serial Numbered, enter the Item Number, Alternative Code or Barcode in the Item field.
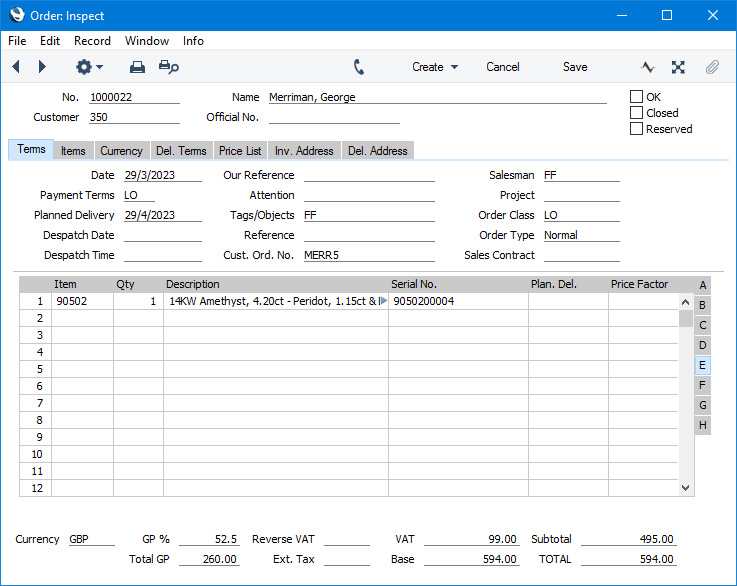
You may choose to use a dedicated Order Class for Layaway Orders. This will help with reporting, and also allows you to use different Debtor and Deposit Accounts for Layaway Orders.
- After saving the Order, create the Invoice for the deposit (which can be for the full value of the piece) by selecting 'Down Payment Invoice' from the Create menu (Windows/macOS) or + menu (iOS/Android):
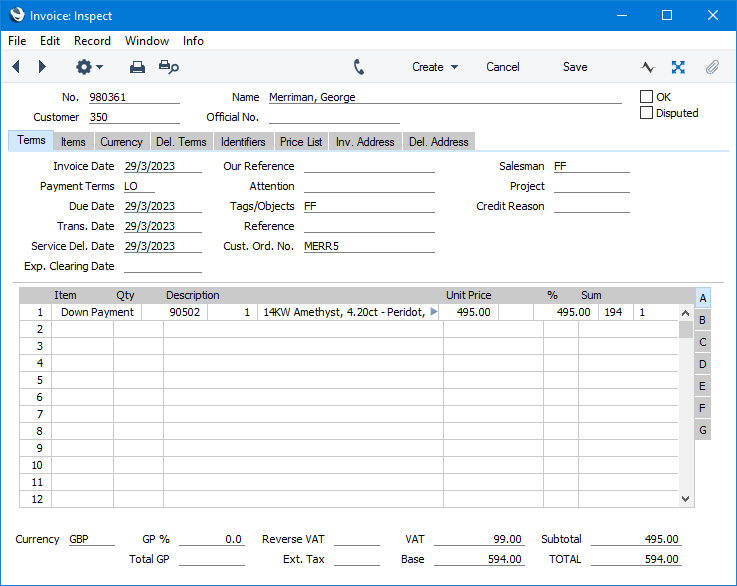
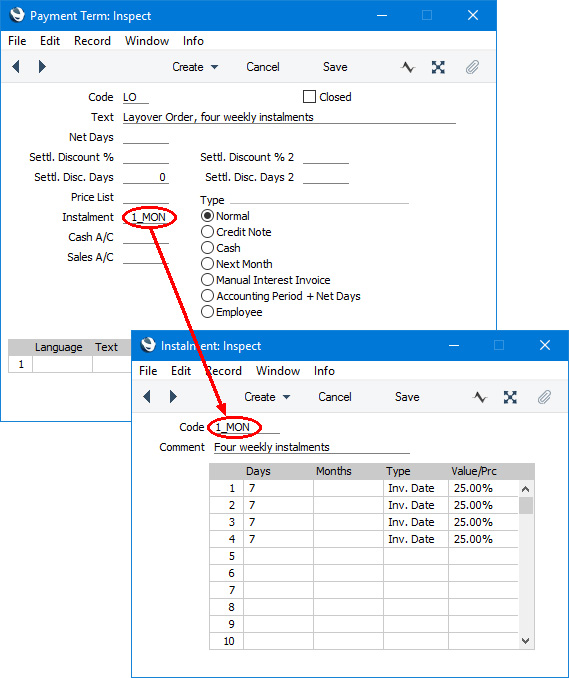
If the Customer will pay the deposit in instalments, assign a Payment Term that you have linked to an instalment plan to the Invoice.
If the Customer pays a sum immediately, you can add the payment to the Invoice using the 'Add Cash Line' or 'Add Credit Card Line' functions, then mark the Invoice as OK and save. Alternatively, mark the Invoice as OK and save and then create a Receipt from the Invoice as described in step 4 below. Print both Order and Invoice for handing to the Customer.
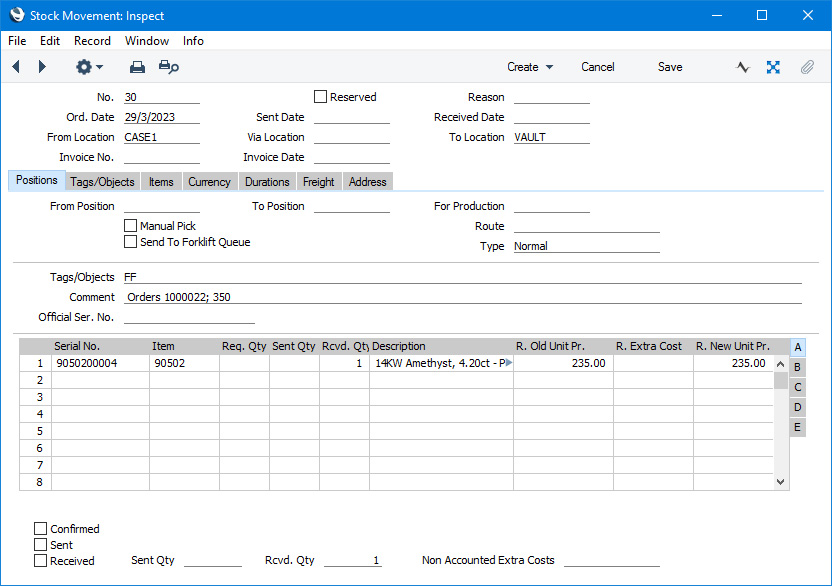
- If you will move the piece from the store to a vault or other Layaway Location, return to the Order and select 'Stock Movement' from the Create or + menu. Use the Stock Movement to record the moving of the piece from the store or display case Location (the "From Location" in the Stock Movement) to the vault or Layaway Location (the "To Location"). When you mark the Stock Movement as Received and save, stock levels in both Locations will be updated.
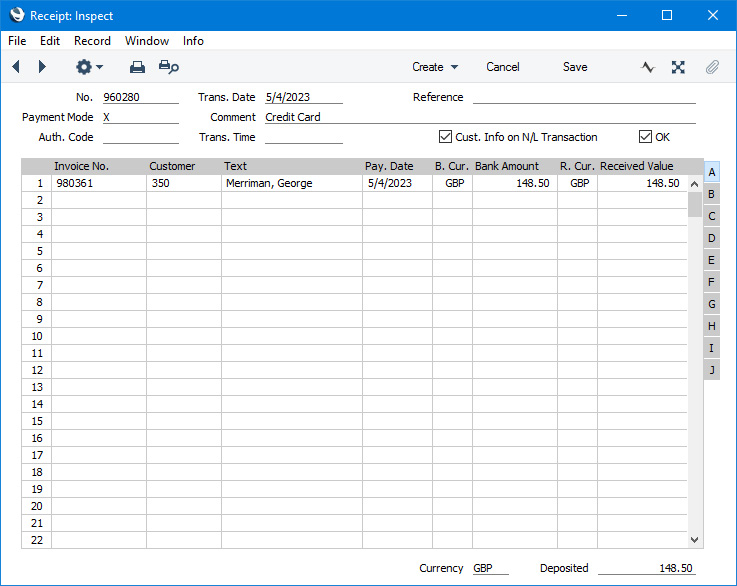
- When the Customer makes a payment, you should record it by creating a Receipt in the Sales Ledger. You can do this by entering a Receipt directly to the Receipt register, or you can find the original Invoice and select 'Receipt' from the Create or + menu. Specify the correct Payment Mode (payment method) and, when entering directly to the Receipt register, enter the Invoice Number of the Down Payment Invoice in the Invoice No. field in the matrix. This will be done for you if you create the Receipt from the Invoice. The outstanding balance of the Invoice will be brought in to the Received Value field: you can change this figure if the Customer is paying less. If the Invoice is payable using an instalment plan, specify the Instalment being paid on flip G: the Received Value will be adjusted to the outstanding value of the Instalment. Use additional rows in the Receipt if the Customer is paying more than one Instalment at the same time. Mark the Receipt as OK, save and print it for the Customer. If you have included the "Open Invoice Value after payment" field in the Form Template that will be used by the Receipt Form document, the printed Receipt will show the remaining outstanding amount.
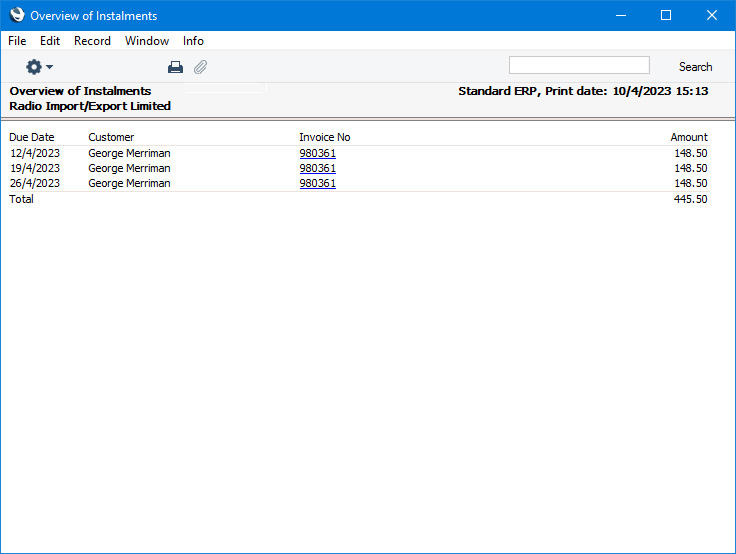
- You can monitor the remaining outstanding amount using the following methods:
- If you used a Payment Term with Instalments in the Down Payment Invoice, the Overview of Instalments report in the Sales Ledger will show the payment progress.
- Printing an Open Invoice Customer Statement (report or form) for the Customer (again from the Sales Ledger) will display the remaining outstanding amount.

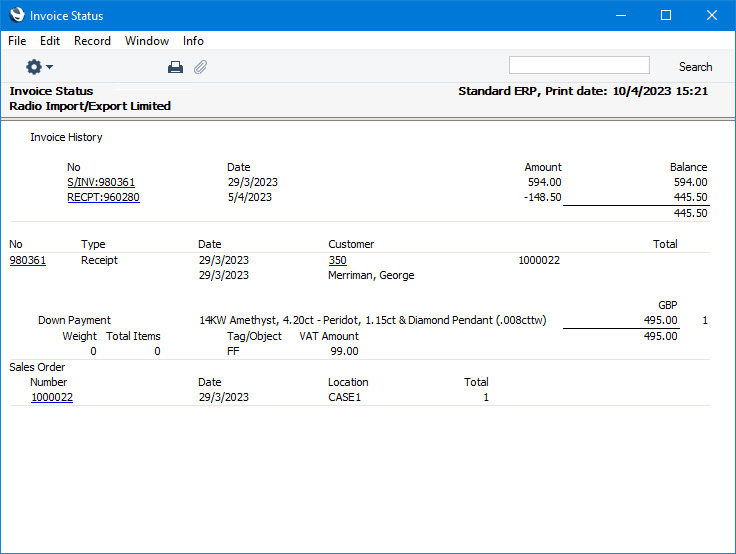
- Open the original Invoice and select 'Invoice Status' from the Operations menu (Windows/macOS) or Tools menu (iOS/Android). The resulting report will display the remaining outstanding amount.
- When the Customer has paid in full and needs to take delivery of the piece, return to the Order and create a Delivery by selecting 'Delivery' from the Create or + menu. If you used a Stock Movement to move the piece to a vault or Layaway Location, you will need to change to that Location either in the Delivery or in the Order before creating the Delivery. When you are sure the details in the Delivery are correct, mark it as OK and save. Then go back to the Order and use the Create or + menu again to create the final Invoice. The Down Payment value will be deducted from the final Invoice amount, so if the Down Payment was for the full value of the Order there will be no extra payment needed. If the value of the Down Payment was less than the full Order value and the Customer pays the balance on delivery or collection, add a payment to the Invoice using the 'Add Cash Line' or 'Add Credit Card Line' functions, then mark the Invoice as OK and save. Alternatively, mark the Invoice as OK and save and then create a Receipt from the Invoice as described in step 4 to record the Customer's final payment.
—
Jewellery workflow in Standard ERP:
Go back to: