Stock Balance
This page describes the 'Stock Balance' Export function in the Stock module.
---
The 'Stock Balance' Export function will export stock levels for every Item in the system or in a specified Location. This information will be exported in a format that will cause a new Goods Receipt to be created if you import the resulting file into a new Company or database at the start of a financial year. This Goods Receipt will contain the stock levels. Separate Goods Receipts will be created for each Location.
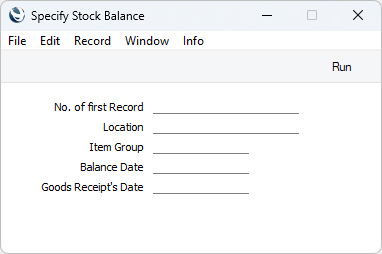
- No. of first record
- When you import the exported file into a new Company or database, separate new Goods Receipts will be created for each Location, containing the stock levels. Specify here the Goods Receipt Number that you want to be used in the first of these new Goods Receipts. If you leave this field blank, the first Goods Receipt Number will be 1.
- Location
- Paste Special
Locations setting, Stock module
- Range Reporting Alpha
- If you need to export stock levels from a specific Location, specify that Location here. If you specify a range of Locations, create an export file and import it to a new Company or database, separate Goods Receipts will be created in the new Company or database for each Location. Similarly, if you leave this field empty and you have several Locations, separate Goods Receipts for each Location will be created.
- Item Group
- Paste Special
Item Group register, Sales Ledger
- If you need to export stock levels of Items belonging to a specific Item Group, specify that Item Group here.
- Balance Date
- Paste Special
Choose date
- Enter a date here if you need to export stock levels as they were on a specific date. If you leave the field blank, the current date will be used.
- G. Receipt's Date
- Paste Special
Choose date
- Enter the date that you want to be used in the Goods Receipts in the new Company or database. If you leave this field empty, the new Goods Receipts will be created without dates. You will need to specify dates in the new records the first time you update and save them.
Click the [Run] button in the Button Bar to proceed. A dialogue box will open, allowing you to name the export file and specify where it is to be saved. Enter a name for the file, and click [Save] or press the Enter key. A message window will inform you about the progress of the export process. When the export finishes, you can close the 'Export' window using the close box.
---
Go back to: