
 Introduction to Settings in the Stock Module
Account Usage Stock
Barcodes
Base Price Changes
Batch Specifications
Cost Accounting - Part 1
Cost Accounting - Part 2
Delivery Packages
Freight Companies
Item Varieties
Item Variety Groups
Items
Location Accounts
Location Classification Types
Location Classifications
Location Groups
Locations
Minimum Stock Levels
Number Series - Deliveries
Number Series - Goods Receipts
Number Series - Returned Goods
Number Series - Returned Goods to Supplier
Number Series - Stock Depreciations
Number Series - Stock Movement Invoices
Number Series - Stock Movements
Number Series - Stock Revaluations
Number Series - Stocktaking
Pack Types
Positions
Picking Lists
Recipes
Returned Goods Settings
Routes, Routes/Locations
Serial Number Tracking
Sources
Stock Movement Durations
Stock Revaluation Settings
Stock Settings - Part 1
Stock Settings - Part 2
Structured Items
Supersession Items
User Defined Field Labels - Extra Costs
Variety Masks
Variety Sets
Variety Settings
Variety Subsets
Weighted Average
Winedi Introduction to Settings in the Stock Module
Account Usage Stock
Barcodes
Base Price Changes
Batch Specifications
Cost Accounting - Part 1
Cost Accounting - Part 2
Delivery Packages
Freight Companies
Item Varieties
Item Variety Groups
Items
Location Accounts
Location Classification Types
Location Classifications
Location Groups
Locations
Minimum Stock Levels
Number Series - Deliveries
Number Series - Goods Receipts
Number Series - Returned Goods
Number Series - Returned Goods to Supplier
Number Series - Stock Depreciations
Number Series - Stock Movement Invoices
Number Series - Stock Movements
Number Series - Stock Revaluations
Number Series - Stocktaking
Pack Types
Positions
Picking Lists
Recipes
Returned Goods Settings
Routes, Routes/Locations
Serial Number Tracking
Sources
Stock Movement Durations
Stock Revaluation Settings
Stock Settings - Part 1
Stock Settings - Part 2
Structured Items
Supersession Items
User Defined Field Labels - Extra Costs
Variety Masks
Variety Sets
Variety Settings
Variety Subsets
Weighted Average
Winedi
 Tutorials for Standard Accounts Tutorials for Standard Accounts
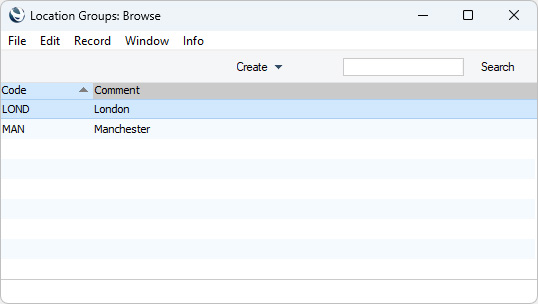
Search HansaManuals.com HansaManuals Home >> Standard ERP >> Varulager >> Inställningar Föregående Nästa Skriv ut hela kapitlet Sök Detta avser program version 2026-06-25 Location Groups This page describes the Location Groups setting in the Stock module.--- Together with Location Classifications, you can use Location Groups to classify Locations. You can allocate several Location Classifications to each Location, but only one Location Group. An example use for Location Groups will be to group Locations geographically, perhaps with a separate Location Group for each city. After defining your Location Groups, you can assign them to your Locations using the Group field in the header of the Location record. You can use the Location Group as a search criterion in the Delivery Journal, Goods Receipt Journal, Item History and Stock List reports in the Stock module. For example, if you specify an Item Number and a Location Group when running the Stock List report, the report will show how many units of the Items are held in each Location belonging to the Location Group. To work with Location Groups, first use the [Switch Module] button in the Home Screen to ensure you are in the Stock module. Then, if you are using Windows or macOS, click the [Settings] button, also in the Home Screen, and double-click 'Location Groups' in the resulting list. If you are using iOS or Android, select 'Settings' from the Tools menu (with 'wrench' icon) and tap 'Location Groups' in the 'Settings' list. The 'Location Groups: Browse' window opens, listing the Location Groups that you have already entered:
--- Go back to:
|