Webshop - Shopping Basket (Cart)
This page describes the shopping basket or cart area of the webshop in Standard ERP. All the settings and registers mentioned on this page are located in the Webshop and CMS module unless otherwise specified.
---
The Shopping Basket is a separate sub-node built in to the "Webshop App" Node. The basket will be displayed in the Webshop Area (i.e. the <div id="webapp">) inside the webshop. The name of the sub-node is hard-coded to be "/basket": the URL when the Webshop Area is displaying the contents of the shopping basket will be Webshop_App_Web_structure_name/basket (e.g. http://domainname/shop/basket).
A browser user can add Products to a basket using the following methods:
- They can press the [Add to basket] button in a Product listing or listing of search results. If the user has left the Quantity field empty, one unit of the relevant Product will be added to the basket. Otherwise, the quantity that the user specifies in the Quantity field will be added. The button label "Add to basket" is Web Text 25510.
- You can provide a button based around a "WebShop - Add to Basket Link" Element (usually this will be in a More Info Link that you have specified in a Product record). Remember that a "WebShop - Add to Basket Link" Element is specific to an individual Product. This Element will add one unit of the relevant Product to the basket. Please refer here for more details about "WebShop - Add to Basket Link" Elements.
A user can view their basket using any of the following methods (in addition to typing the URL):
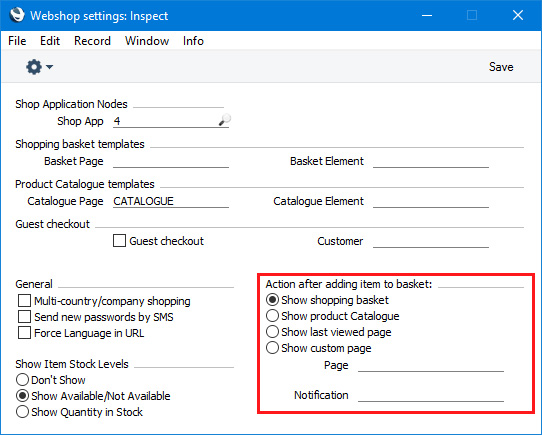
- If you would like the user to be taken to their basket automatically whenever they add a Product to it, select the Show shopping basket option in the Webshop Settings setting:
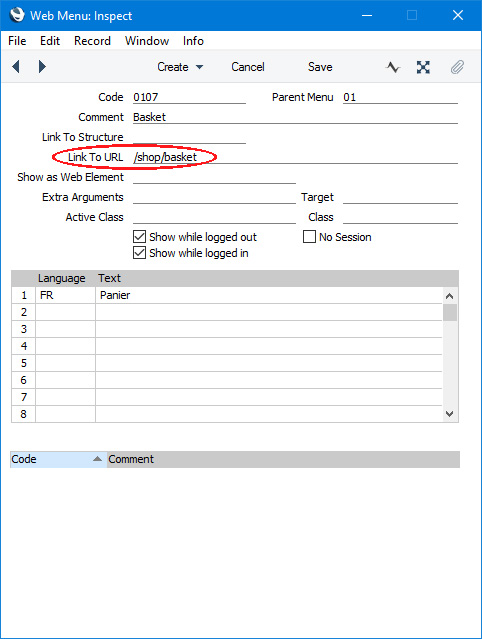
- You can provide a button or menu item that will take the user to their basket. Specify /Webshop_App_Web_structure_name/basket (e.g. /shop/basket) as the anchor (using the Link to URL field if you are providing a menu item):
A user does not have to be logged in to add Products to their basket or to view their basket.
Behind the scenes, when a user first adds a Product to a basket, a record will be created in the Webshop Baskets setting:
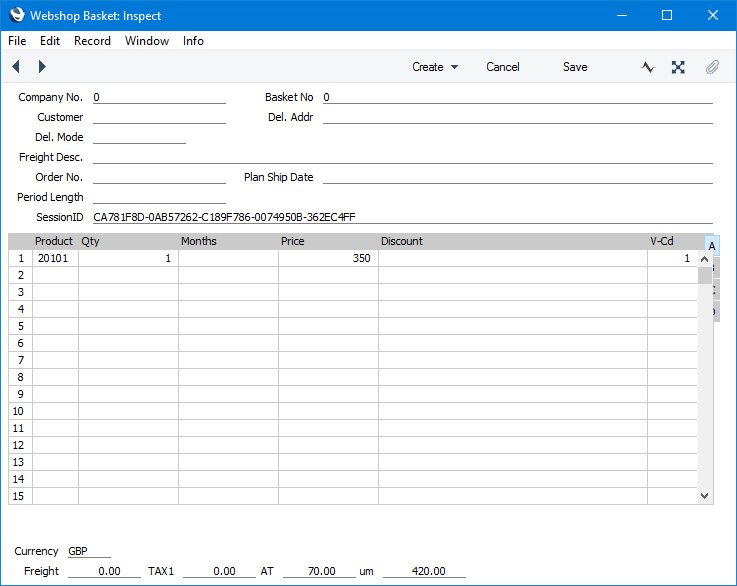
If the user is not logged in, this record will be identified by a SessionID. If the user logs in, the SessionID will be removed and the user's Contact Number will be placed in the Customer field.
Whether or not the user has logged in, the Webshop Basket record will be updated when the user adds subsequent Products to the basket, or adjusts the quantity, etc.
Basket records will not expire. The lifetime of baskets created by users who have not logged in will be limited by the life of the SessionID. A basket containing a user's Contact Number will only expire when the user proceeds to the checkout and pays, at which point the basket record will be deleted. If a user with an open basket adds Products to a basket while not logged in, a new Basket record will be created, containing the SessionID. If that user then logs in, that new Basket will be merged with their existing open Basket.
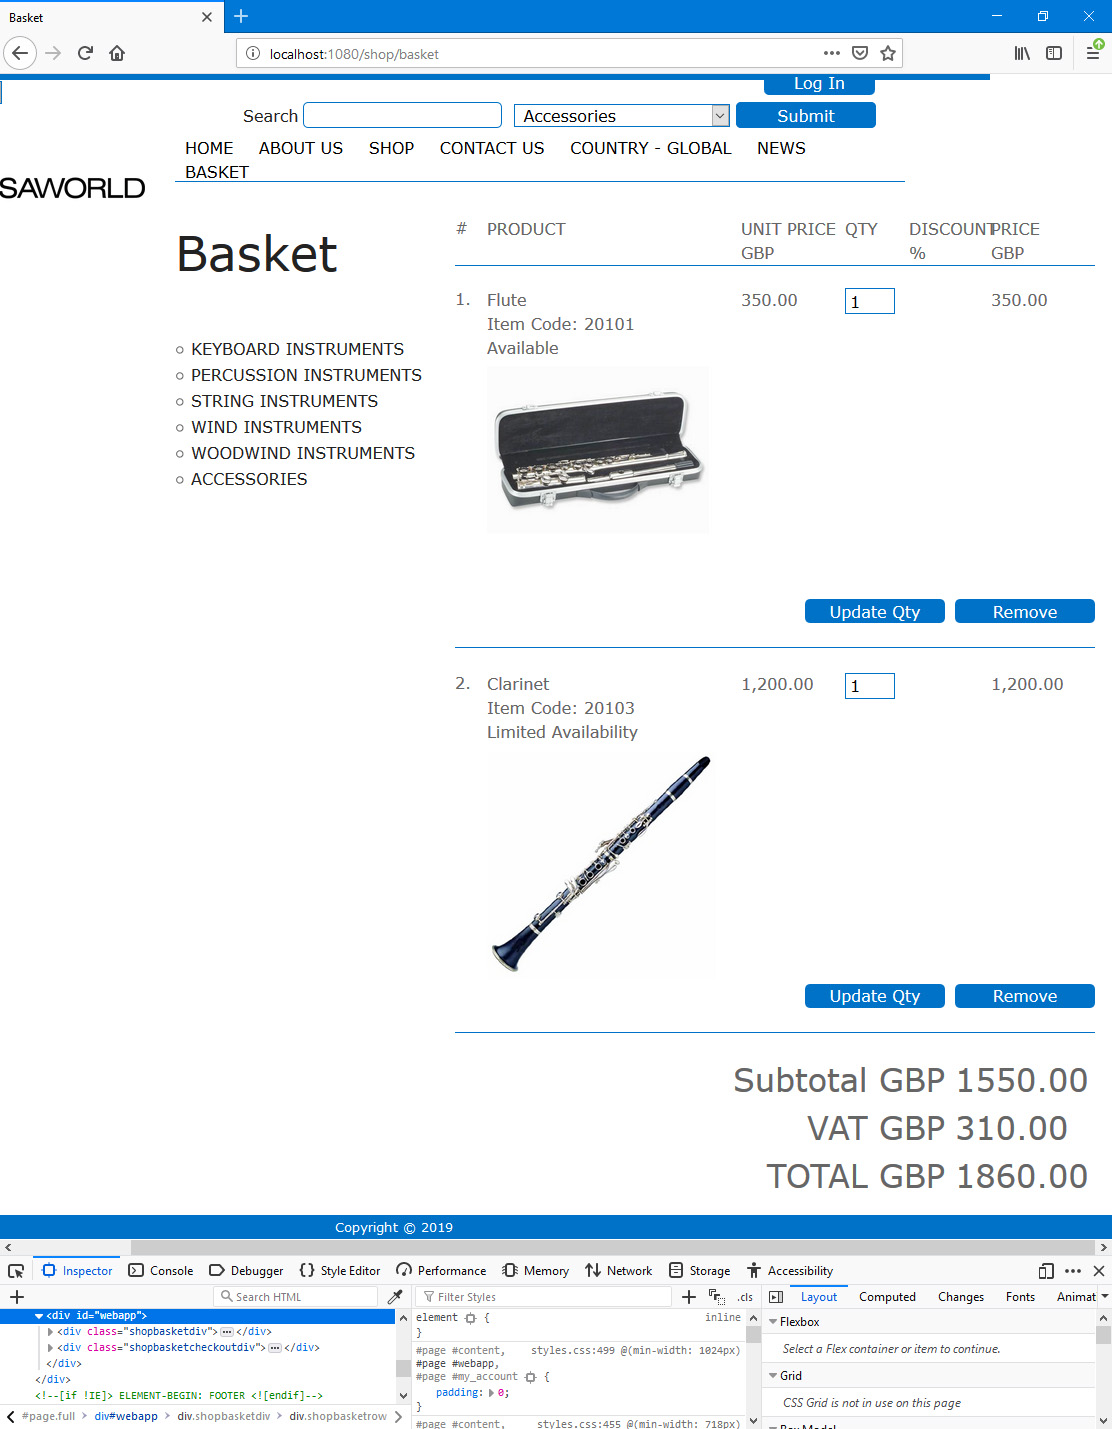
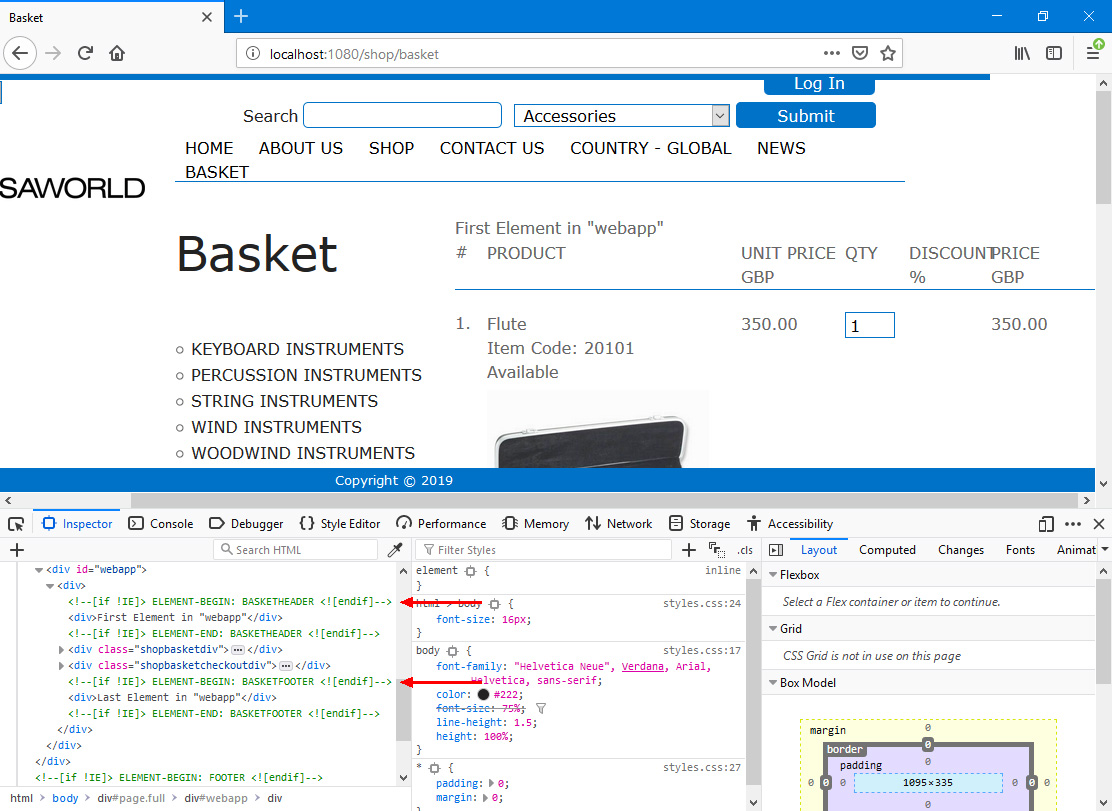
When a browser user views their basket, it will be displayed in the Webshop Area (i.e. in the <div id="webapp">). Inside this <div>, the entire basket will be wrapped in a second <div> with Class "shopbasketdiv", with the final button ([Proceed to Checkout]) in its own <div> with Class "shopbasketcheckoutdiv":
When the Webshop Area displays the contents of a basket (i.e. when the /basket sub-node of the
"Webshop App" Node is being displayed), the page will be based on the Basket Page specified in the Webshop Settings setting or, if you have not specified a Basket Page, on the Page specified in the Structure record for the "Webshop App" Node (steps 4 and 1 respectively on the
Webshop page). The various sections of the basket listing are described below. If you don't need an individual section to be displayed, you may be able to hide them using an option in Standard ERP, or you can apply a
display: none attribute to the relevant
<div> id or class in your .css file.
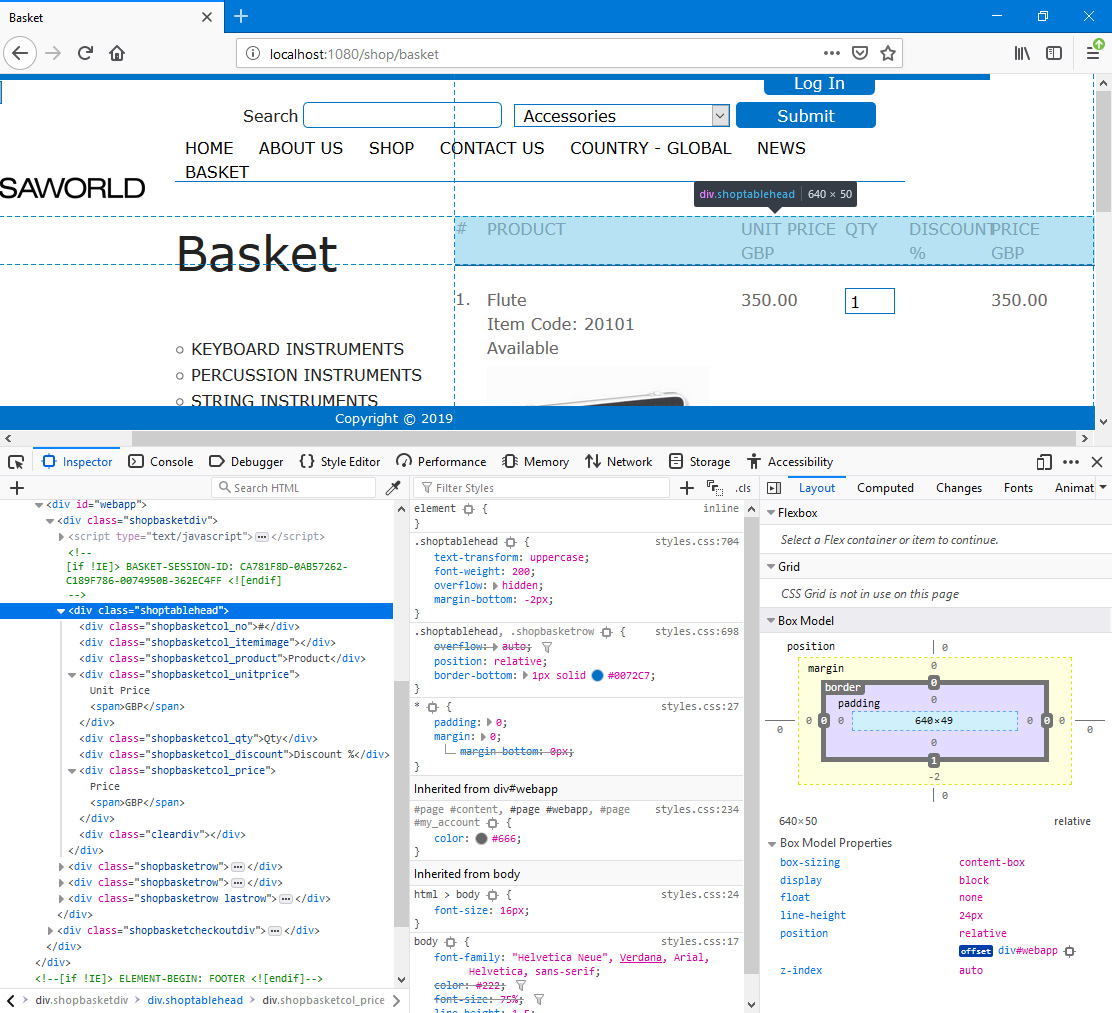
- Column Headings
- The column headings will be wrapped in an overall <div> with Class "shoptablehead". Inside that <div>, each heading will be a Web Text in its own <div> as follows:
| Default Heading | Web Text | <div> Class |
| | |
| # | (none) [hard-coded] | shopbasketcol_no |
| Product | 25306 | shopbasketcol_product |
| Unit Price | 25307 | shopbasketcol_unitprice |
| Qty | 25308 | shopbasketcol_qty |
| Discount % | 25331 | shopbasketcol_discount |
| Price | 25309 | shopbasketcol_price |
- The data in each column will use the same <div> Class as the relevant heading.
- If the user has not logged in, the Currency will be the Sales Currency of the Default Customer specified in the Webshop Company Settings setting. If the user has logged in, the Currency will be the Sales Currency from their Contact record. In either case, if you have not specified a Sales Currency, the Currency will be your home Currency.
- Basket Listing (Product Listing)
- Each Product in the basket is wrapped in a <div class="shopbasketrow">.

- Position Numbering
- <div class="shopbasketcol_no"> (inside <div class="shopbasketrow">).
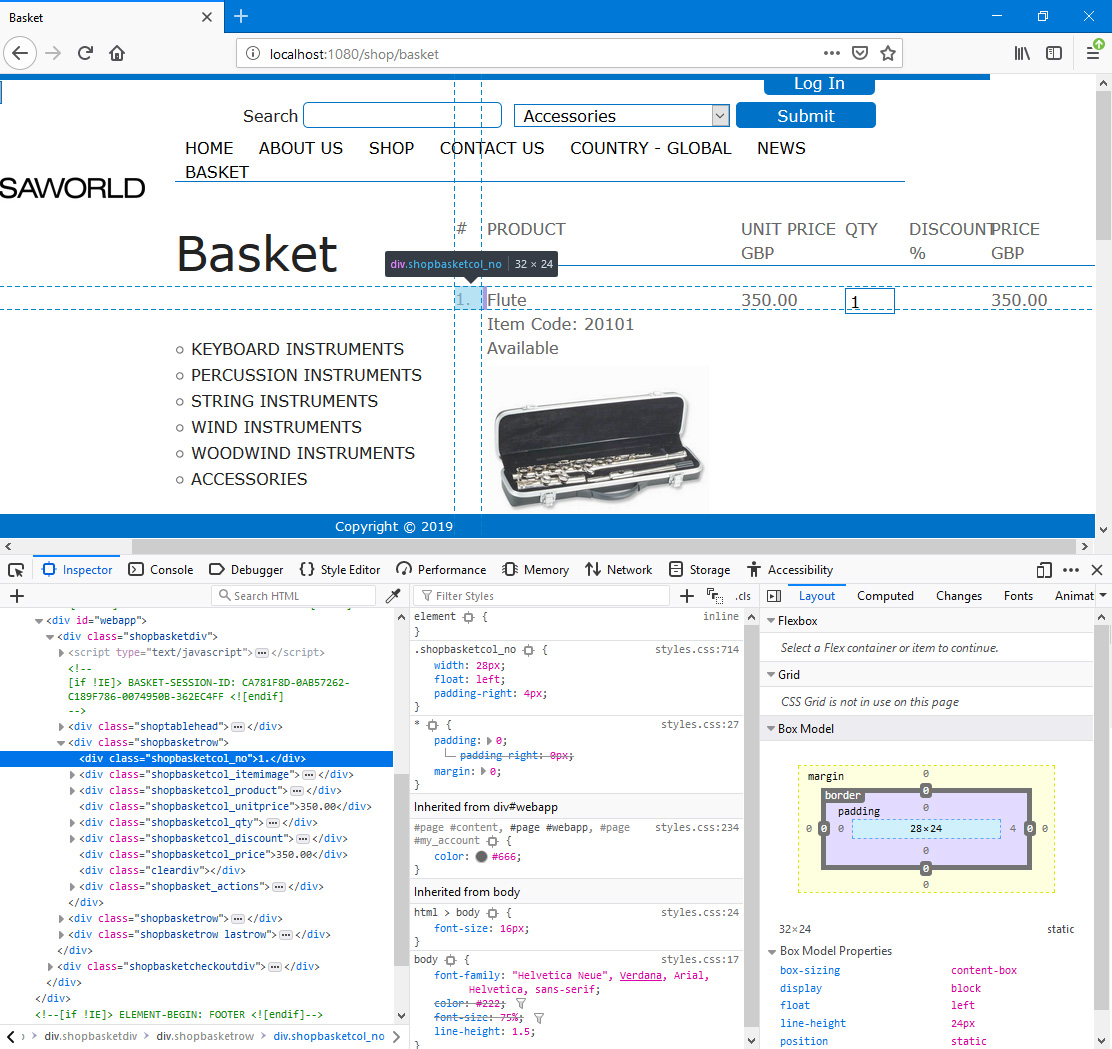
- Numbers signifying the position of each Product in the list will be generated automatically.
- Product Image
- <div class="shopbasketcol_itemimage"> (inside <div class="shopbasketrow">).
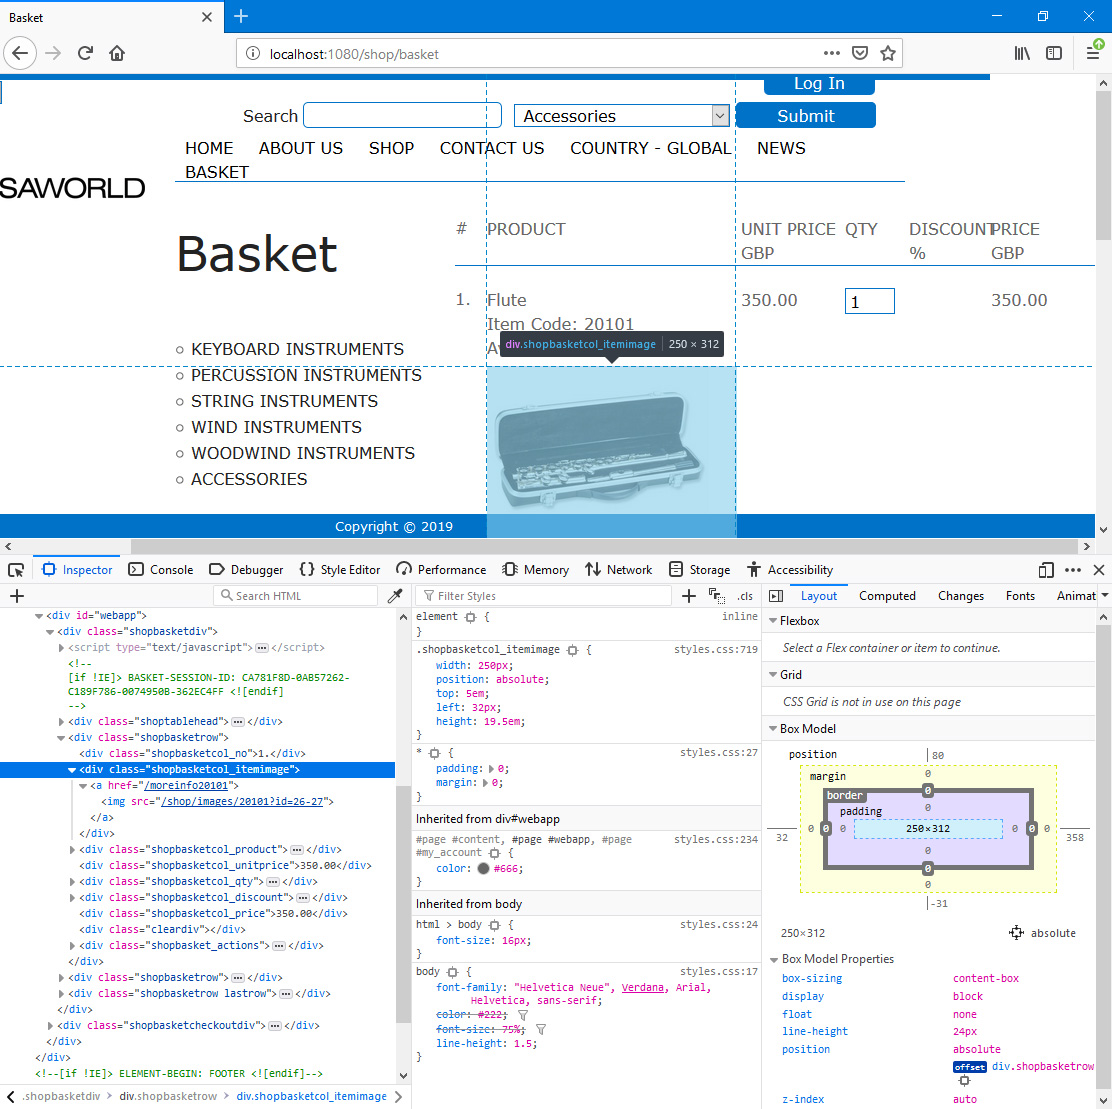
- The same Product images will be displayed in the basket and in the Product listing. If a Product does not have an image, an additional <div class="shopcatalog_itemimage_replace"> will be inserted where the image would otherwise be (i.e. inside <div class="shopbasketcol_itemimage">).
- Browser users can go to the "More Info" page for a Product by clicking or tapping the image (or the Product Name).
- Product Listing
- Inside <div class="shopbasketrow">, the Product details will be enclosed in <div class="shopbasketcol_product">.
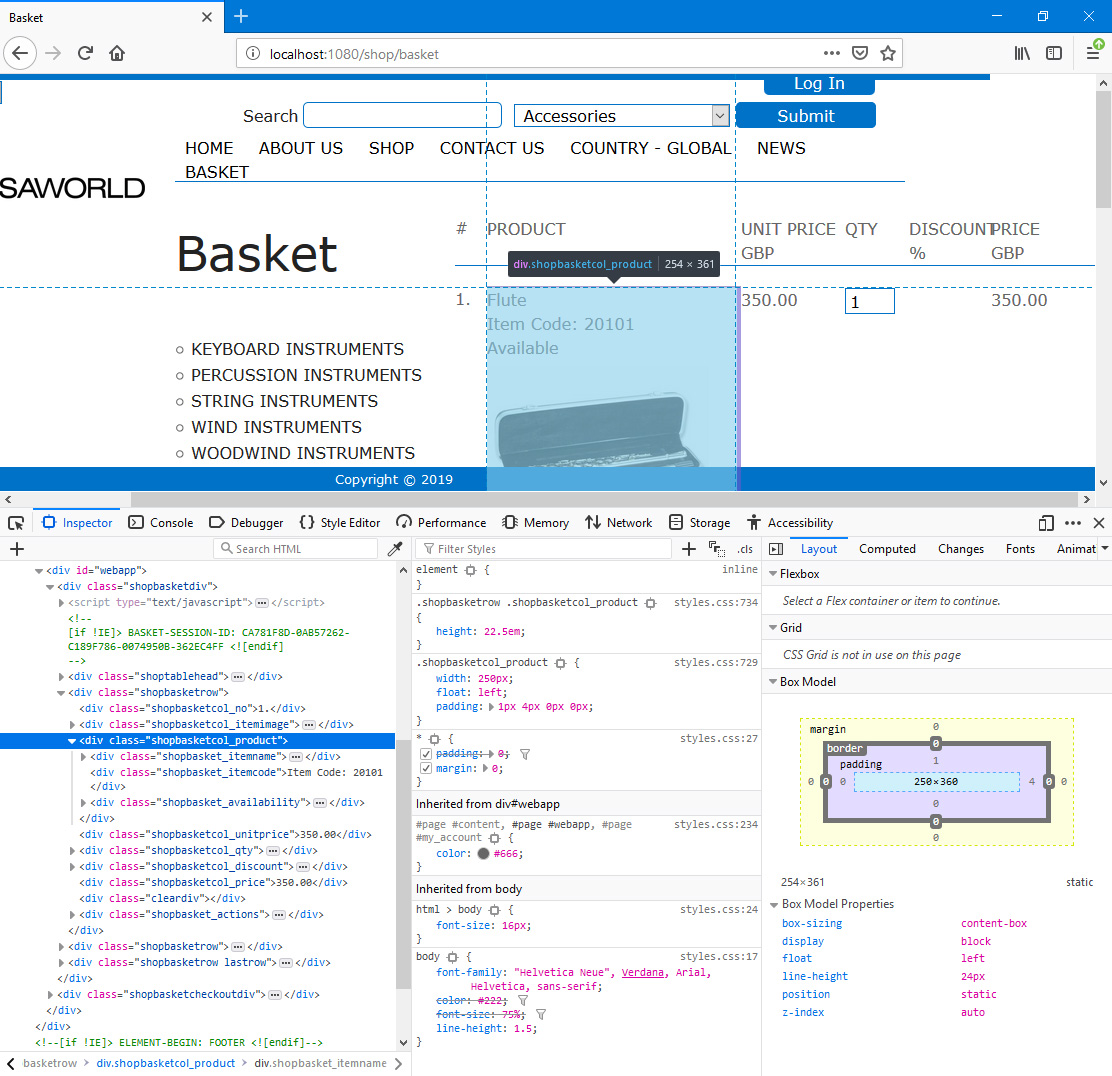
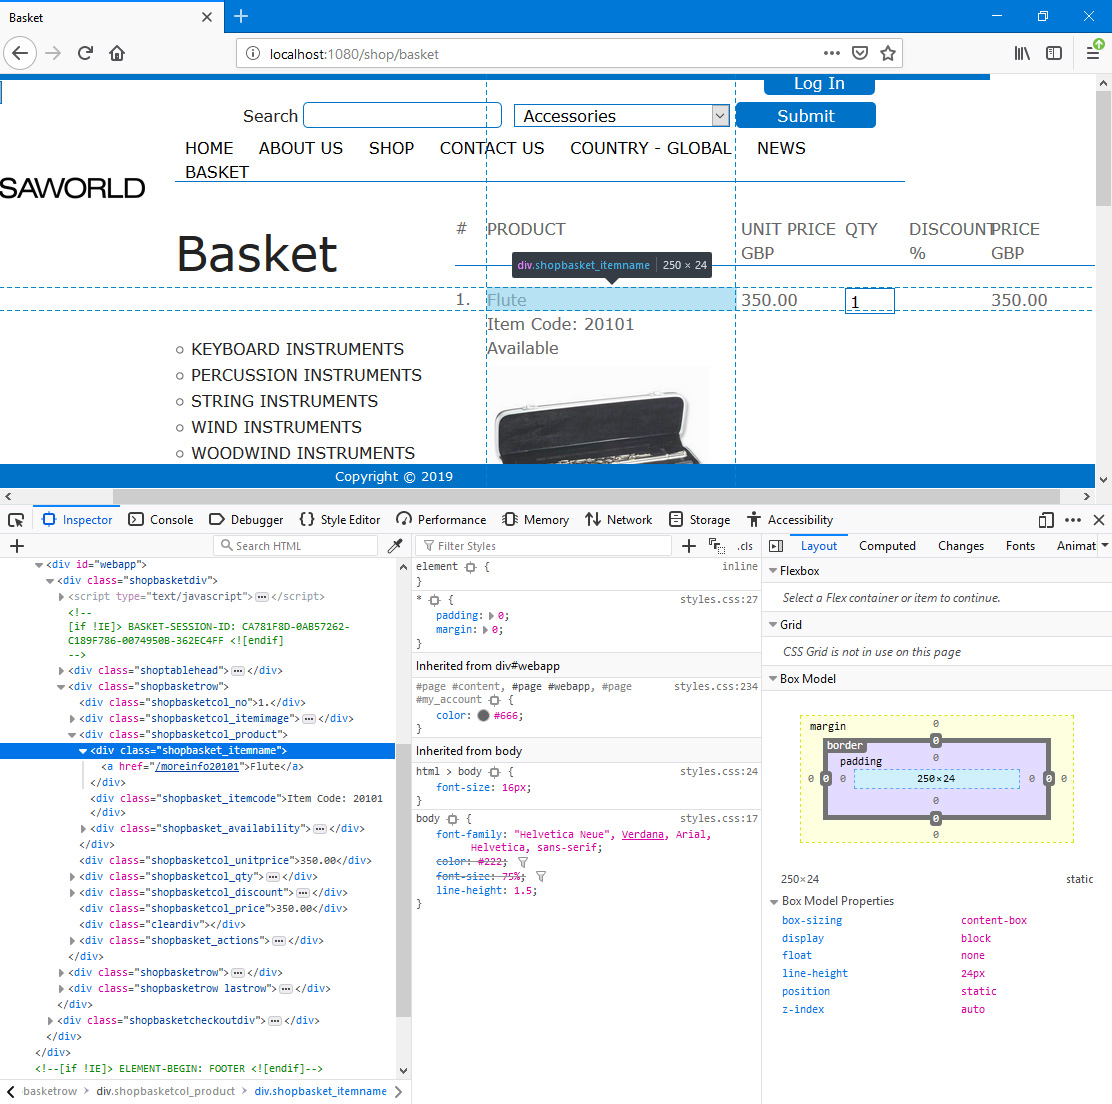
- Product Name
- Inside <div class="shopbasketcol_product">, the Product Name is wrapped in <div class="shopbasket_itemname">.
- The Product Names shown in the basket will be chosen in the same way as the Product Names in the Product listing.
- Browser users can go to the "More Info" page for a Product by clicking or tapping the Product Name (or the image).
- More than in stock
- <div class="shopbasket_stocklevels"> inside <div class="shopbasketcol_product">.
- This line will only be displayed if the user has ordered a quantity of a Product that is greater than you have in stock and you have disallowed the sale of such quantities. Please refer to the Stock Levels page for details.
- Item Code
- <div class="shopbasket_itemcode"> inside <div class="shopbasketcol_product">.
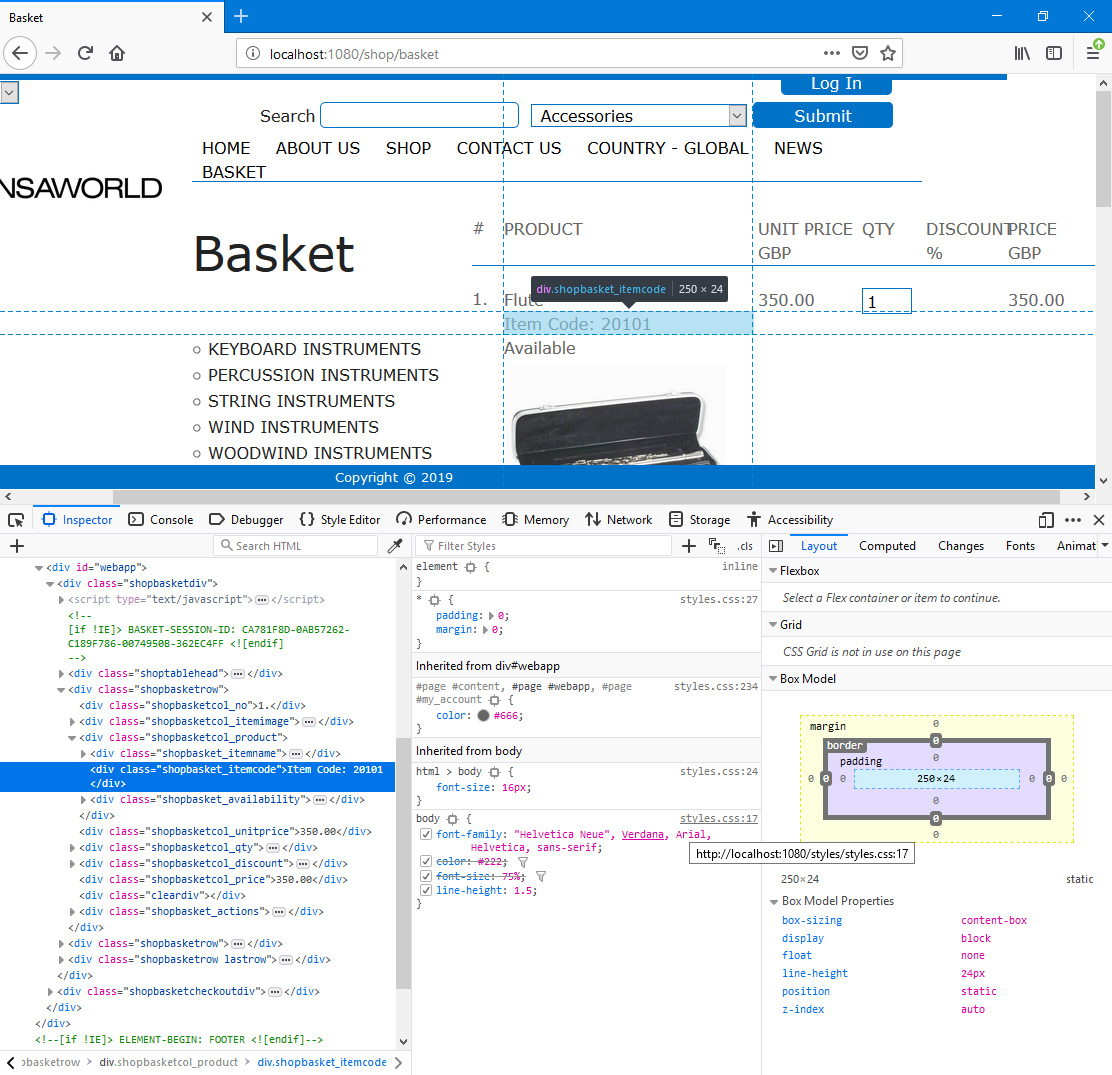
- The "Item Code" text is Web Text 32433 (the colon and trailing space will be added automatically).
- Stock Availability
- <div class="shopbasket_availability"> inside <div class="shopbasketcol_product">.
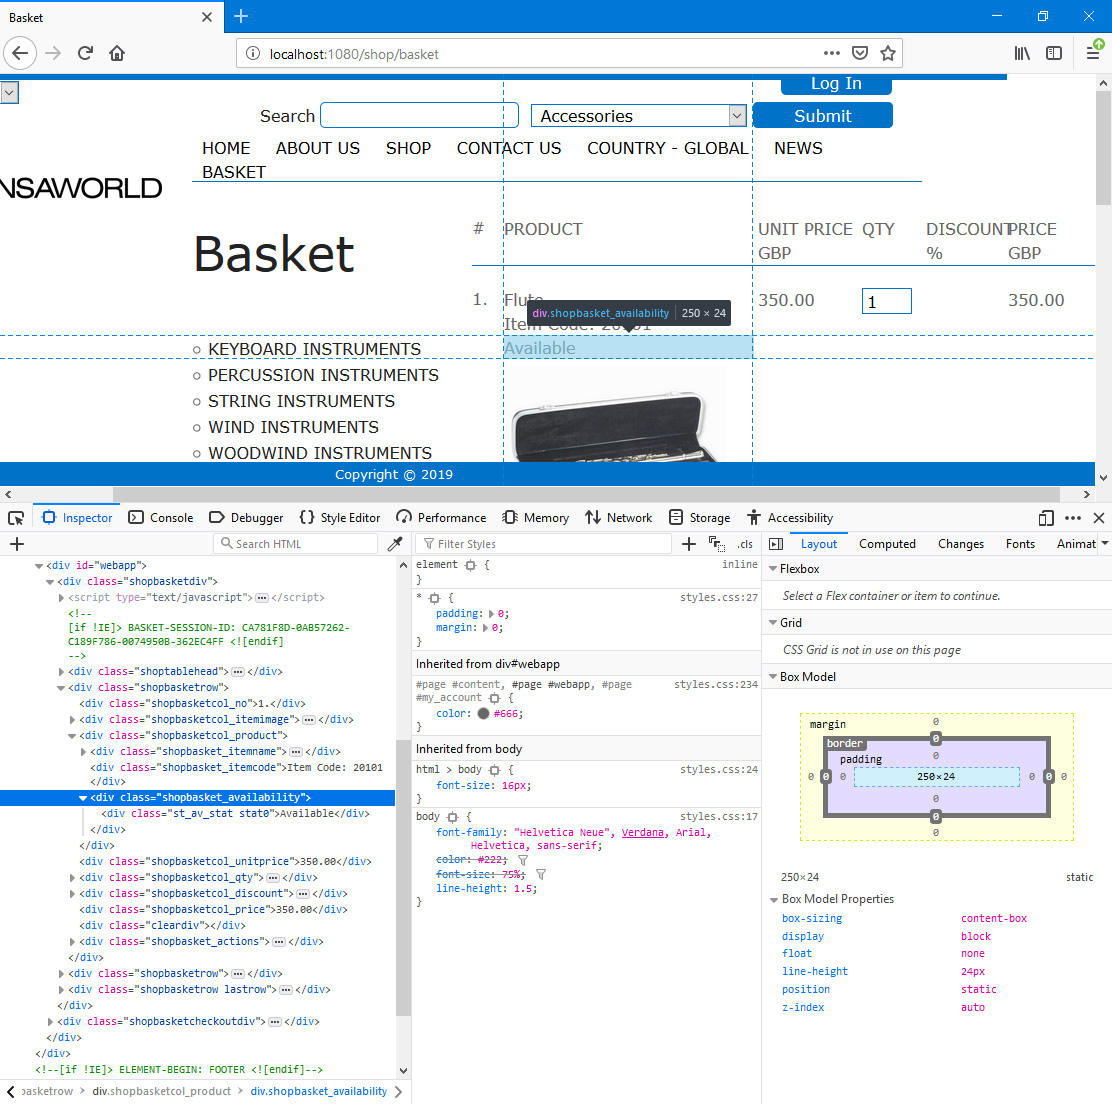
The display of stock levels will depend on the Show Item Stock Levels options in the Webshop Settings setting, as described on the Stock Levels page. This page also includes details about preventing the sale of Products that are out of stock.
- Unit Price
- <div class="shopbasketcol_unitprice"> inside <div class=shopbasketrow">.
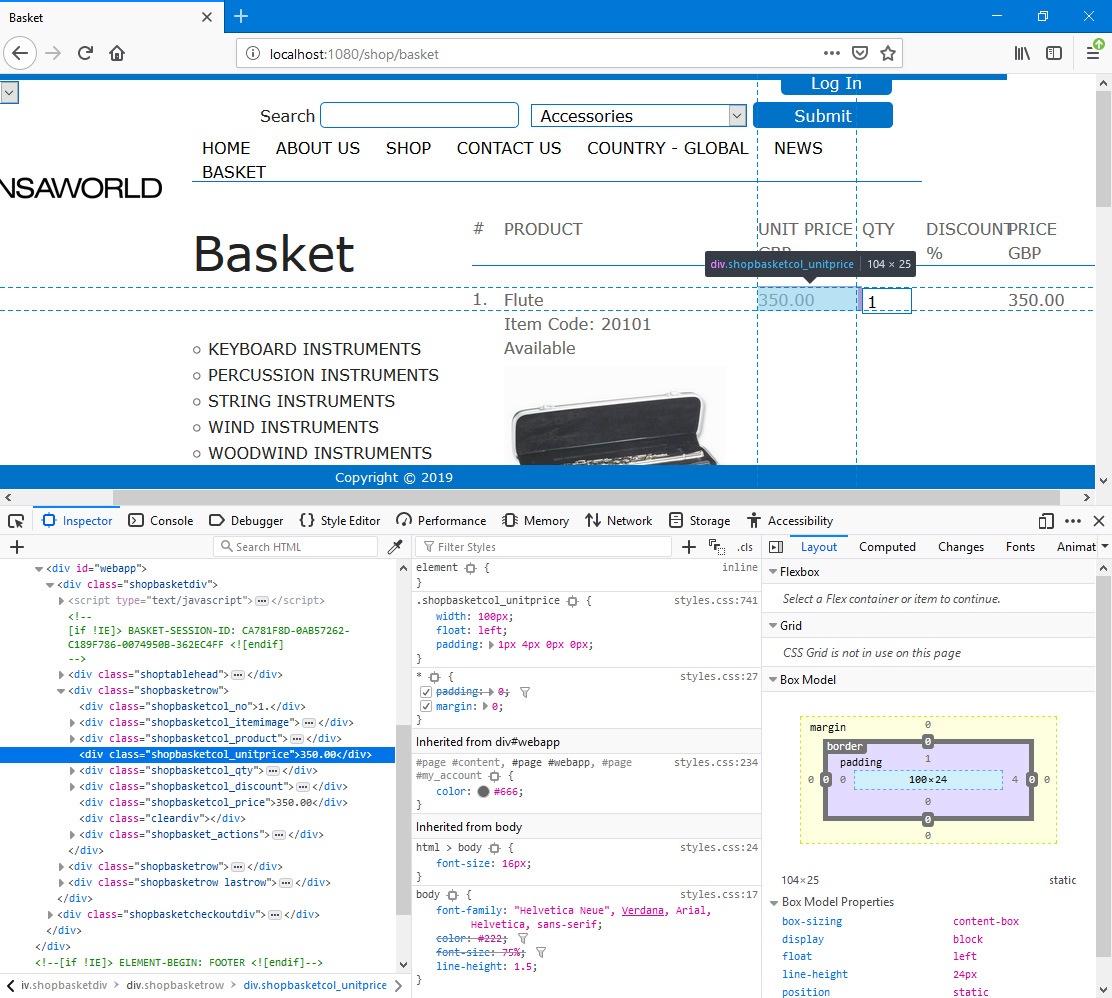
- The Prices displayed will the same as those shown in the Product listing. If you have used the Show Prices options in the Webshop Company Settings setting to hide Unit Prices or to show them only to browser users who have logged in, that choice will be applied to the basket as well as to the Product listing.
- Quantity field
- <div class="shopbasketcol_qty"> inside <div class=shopbasketrow">.
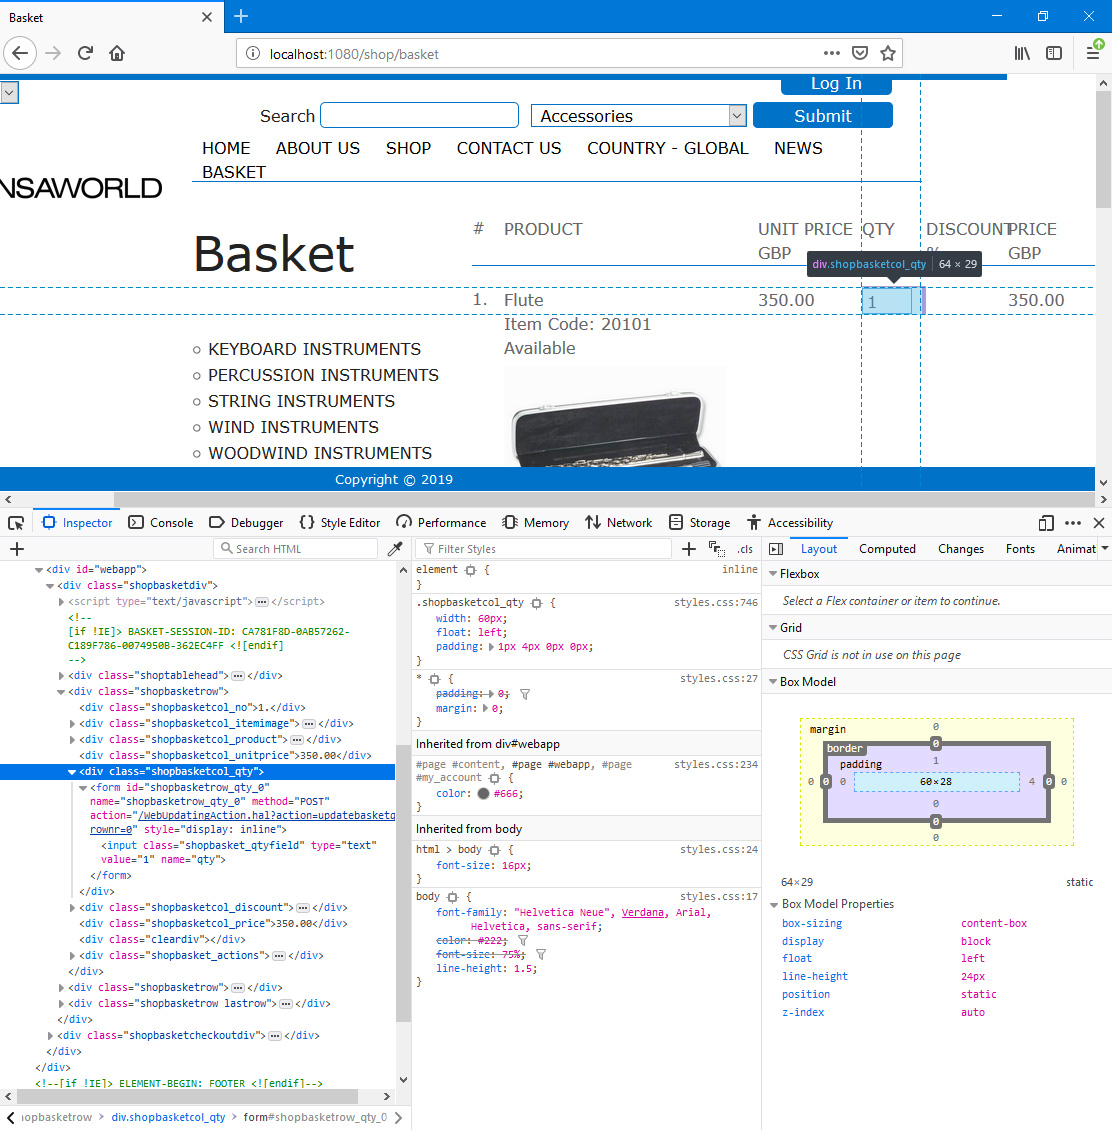
- The Quantity field allows browser users to adjust the quantity in the basket. After changing the quantity, a user should press the [Update Qty] button to update the basket.
- The [Update Qty] button will not update the basket if you have prevented the ordering of a quantity that is greater than is in stock and the new Quantity entered by the user is too high. Instead the Quantity will be reverted and Web Text 25330 "More than in stock" will be displayed in <div class="stocklevels">. Please refer to the Stock Levels page for details about the stock level check.
- Discount %
- <div class="shopbasketcol_discount"> inside <div class=shopbasketrow">.
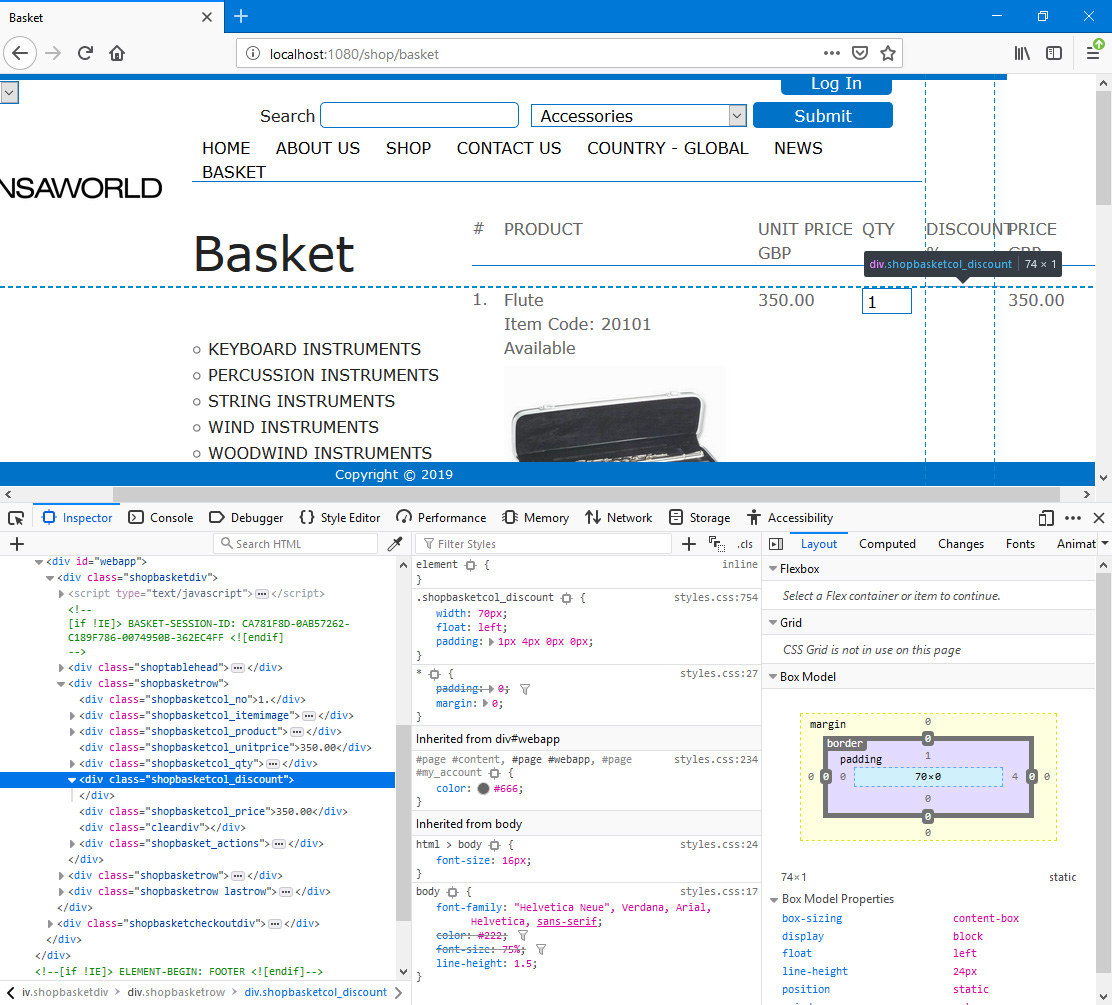
- Discounts will be calculated automatically if you have assigned a Discount Matrix to the Default Customer or to the user's Customer record in the Contact register (depending on whether the browser user has logged in).
- Price
- <div class="shopbasketcol_price"> inside <div class=shopbasketrow">.
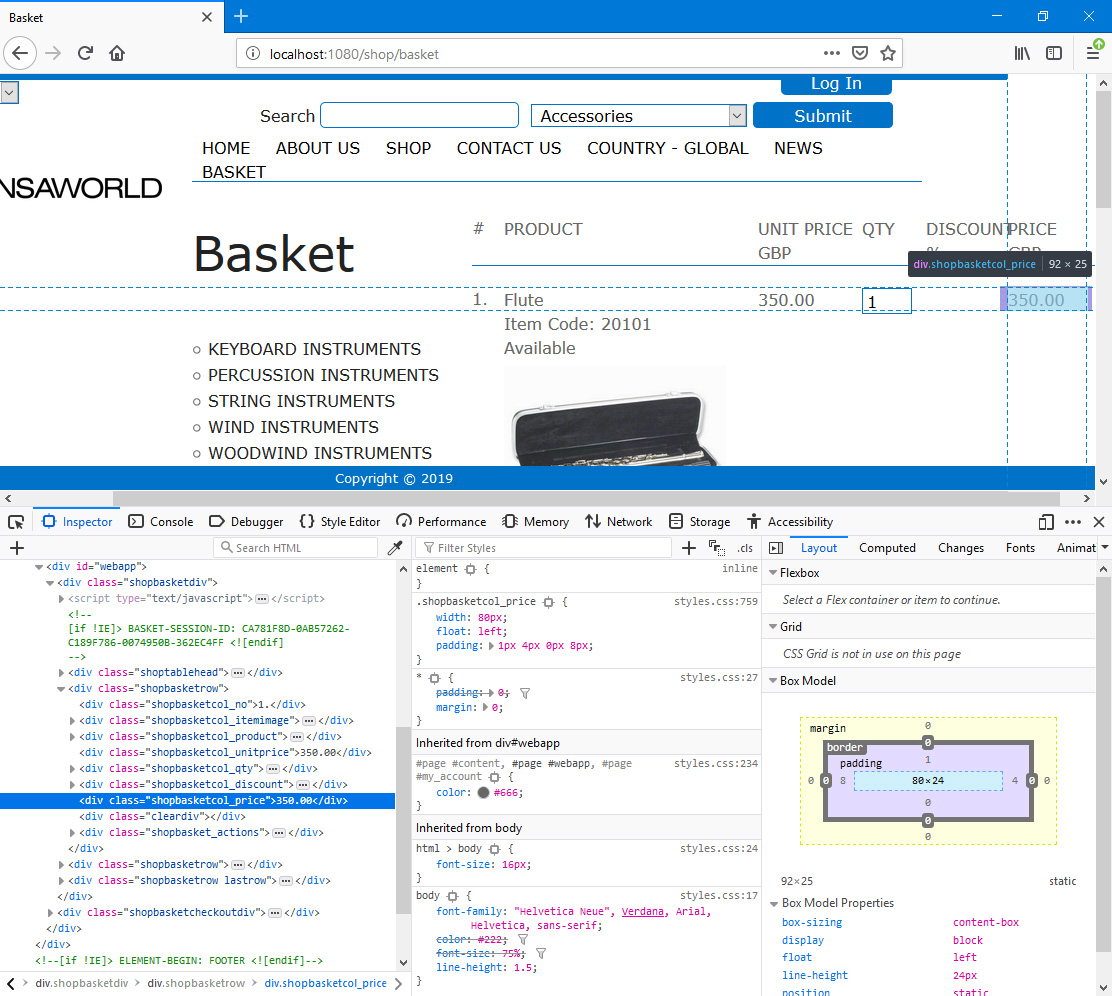
- The sum for the row.
- Buttons
- <div class="shopbasket_actions"> inside <div class=shopbasketrow">.
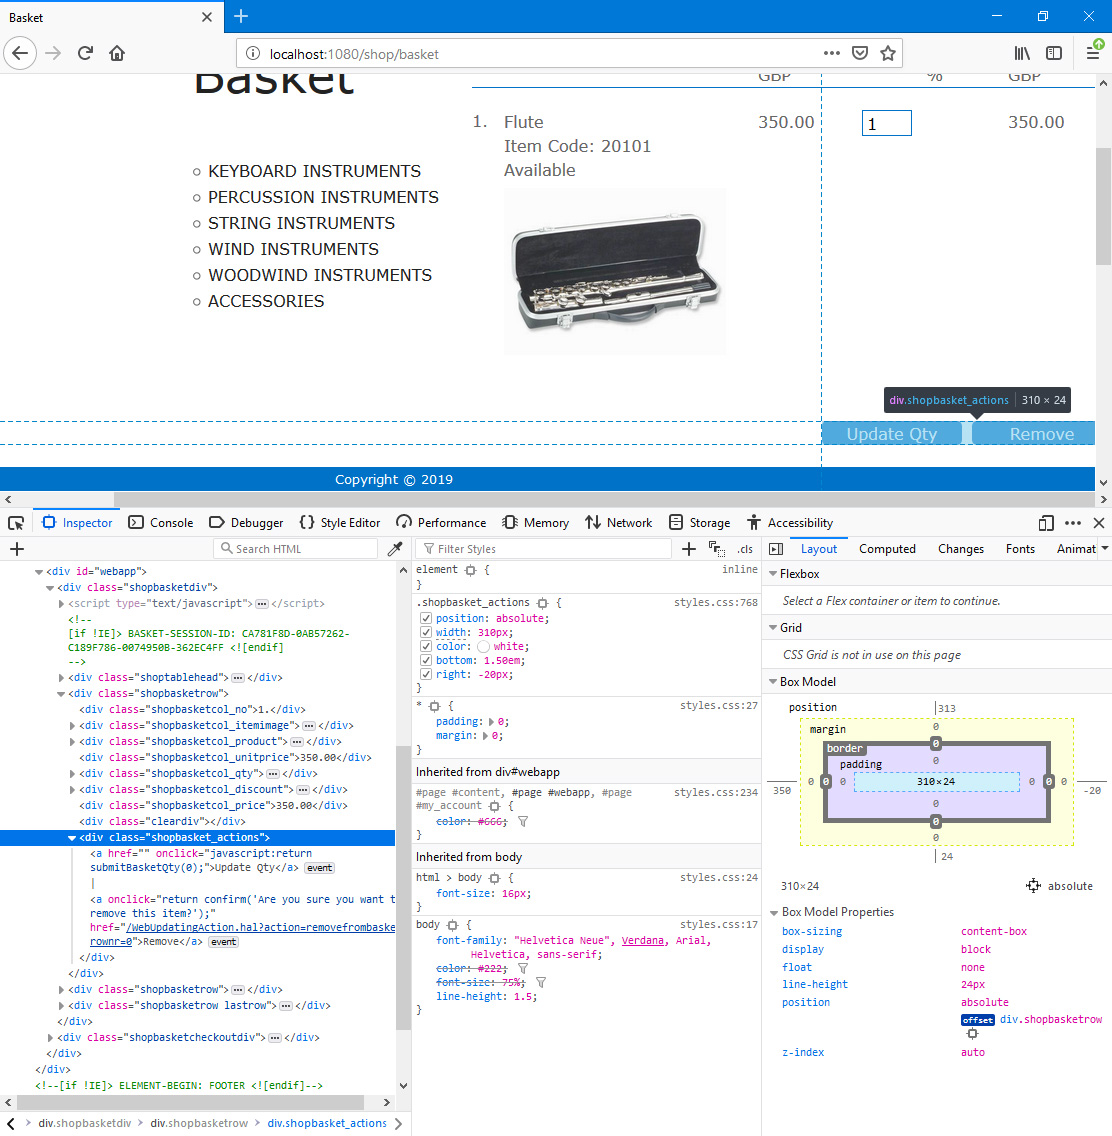
- [Update Qty]
- If the user changes the figure in the Quantity field, they should then press this button to update the basket. The button label "Update Qty" is Web Text 25507.
- [Remove]
- This button allows the user to remove the Product from the basket. The button label "Remove" is Web Text 25504. When the user presses the button, they will be asked to confirm that they want to remove the Product ("Are you sure you want to remove this item?", Web Text 25408).
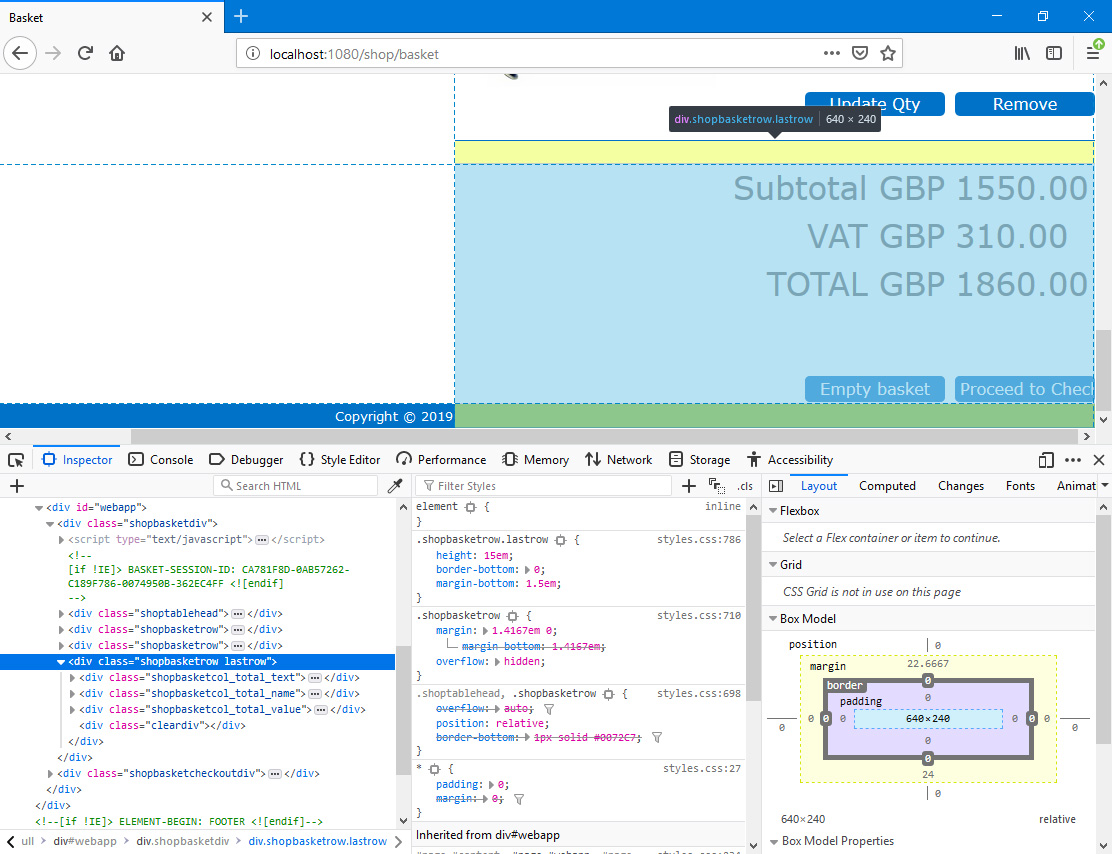
- Totals
- The [Empty basket] button and overall basket totals are enclosed in a <div class="shopbasketrow lastrow"> inside <div class=shopbasketdiv">.
- [Empty basket]
- <div class="shopbasketcol_total_text>
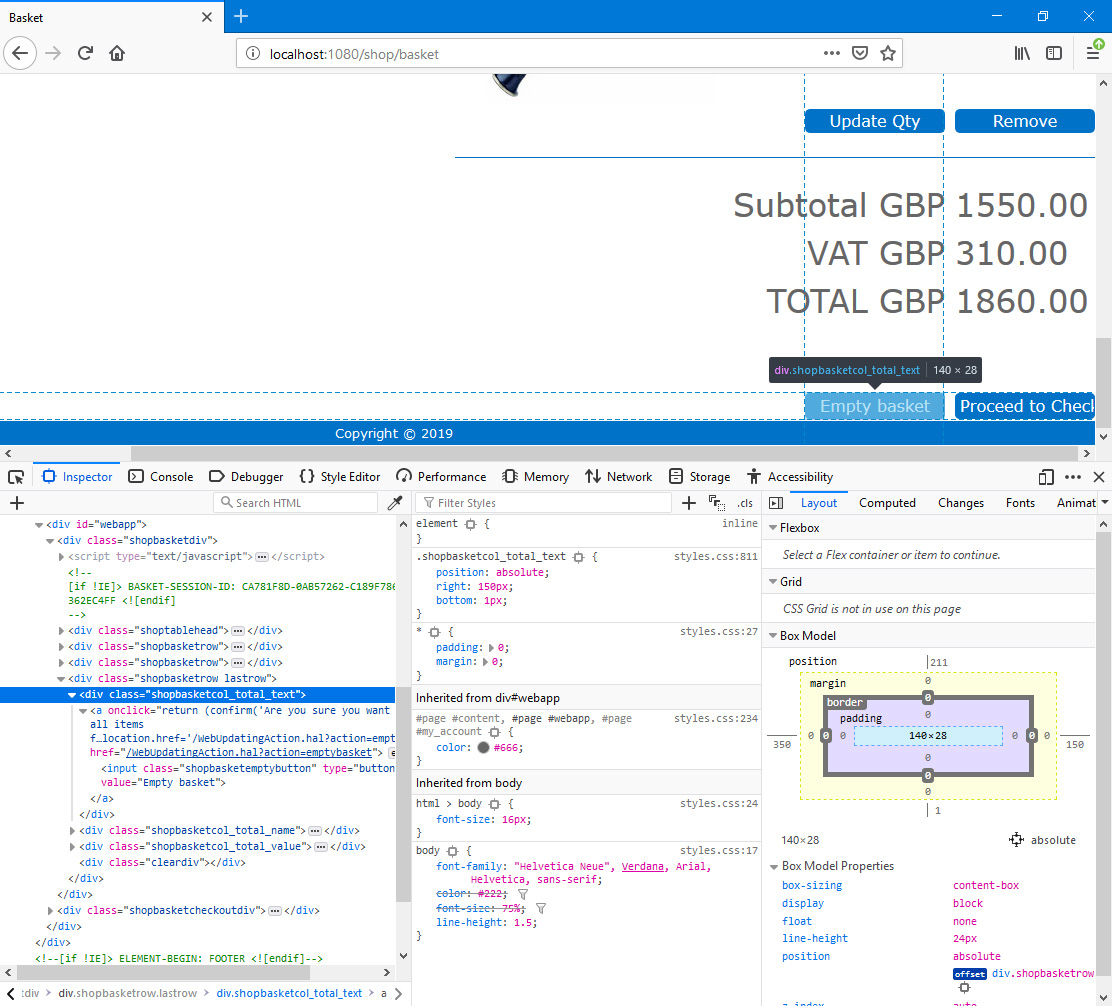
- This button allows the user to remove every Product from the basket. The button label "Empty basket" is Web Text 25503. When the user presses the button, they will be asked to confirm that they want to remove the Product ("Are you sure you want to remove all items from the basket?", Web Text 25405).
- Labels for Totals
- <div class="shopbasketcol_total_name>
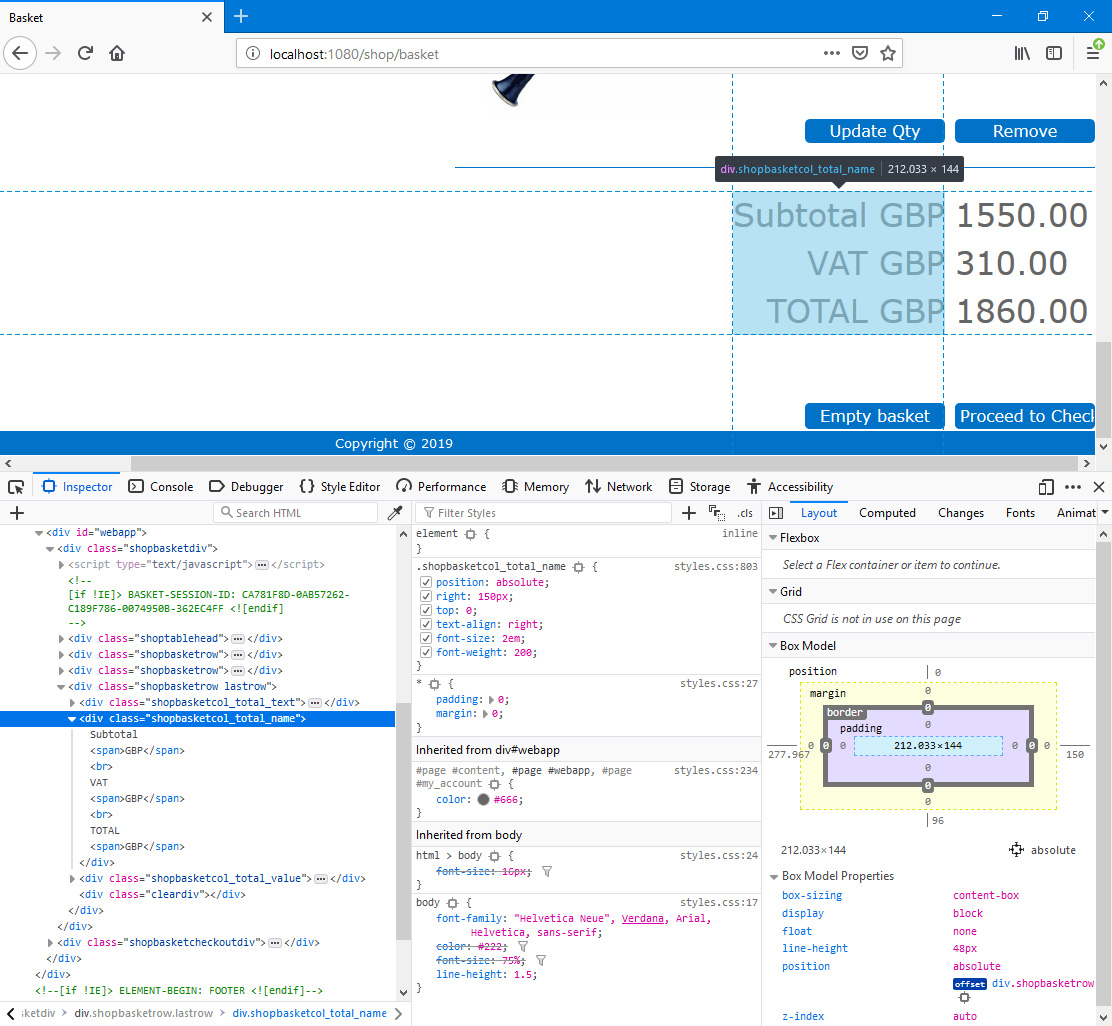
- The default labels are "Subtotal" (Web Text 25328), "VAT" (Web Text 25304) and "TOTAL" (Web Text 25305). Not shown in the illustration, "FREIGHT" is Web Text 25303: please refer to the Delivery Methods and Delivery Charges below for details about freight calculations. Do not include the trailing space or the Currency in your Web Texts.
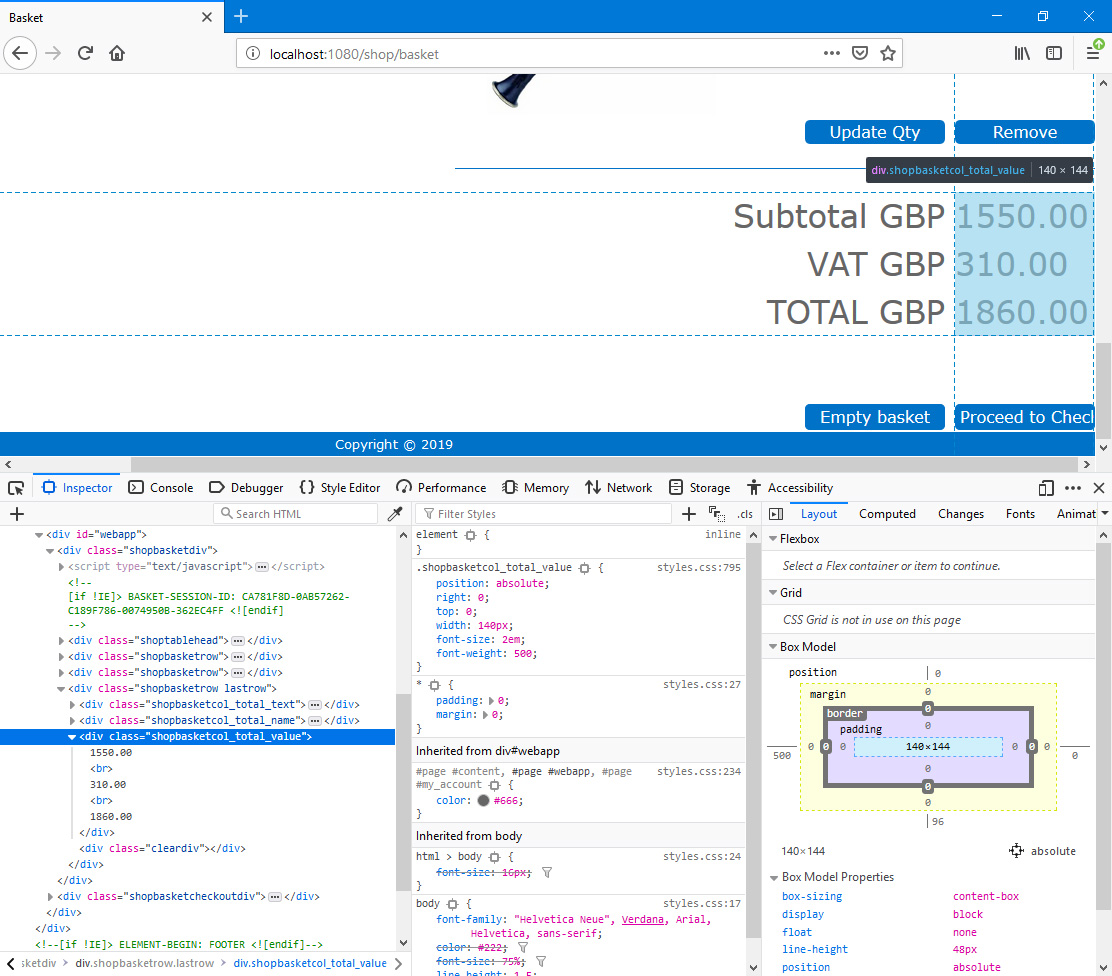
- Totals
- <div class="shopbasketcol_total_value>
- [Proceed to Checkout]
- <div class="shopbasketcheckoutdiv>

- This button will take the user to the check-out page. They will be asked to log in if they have not already done so (i.e. they will be taken to the Login Page specified in the Sites setting). The button label "Proceed to Checkout" is Web Text 25508.
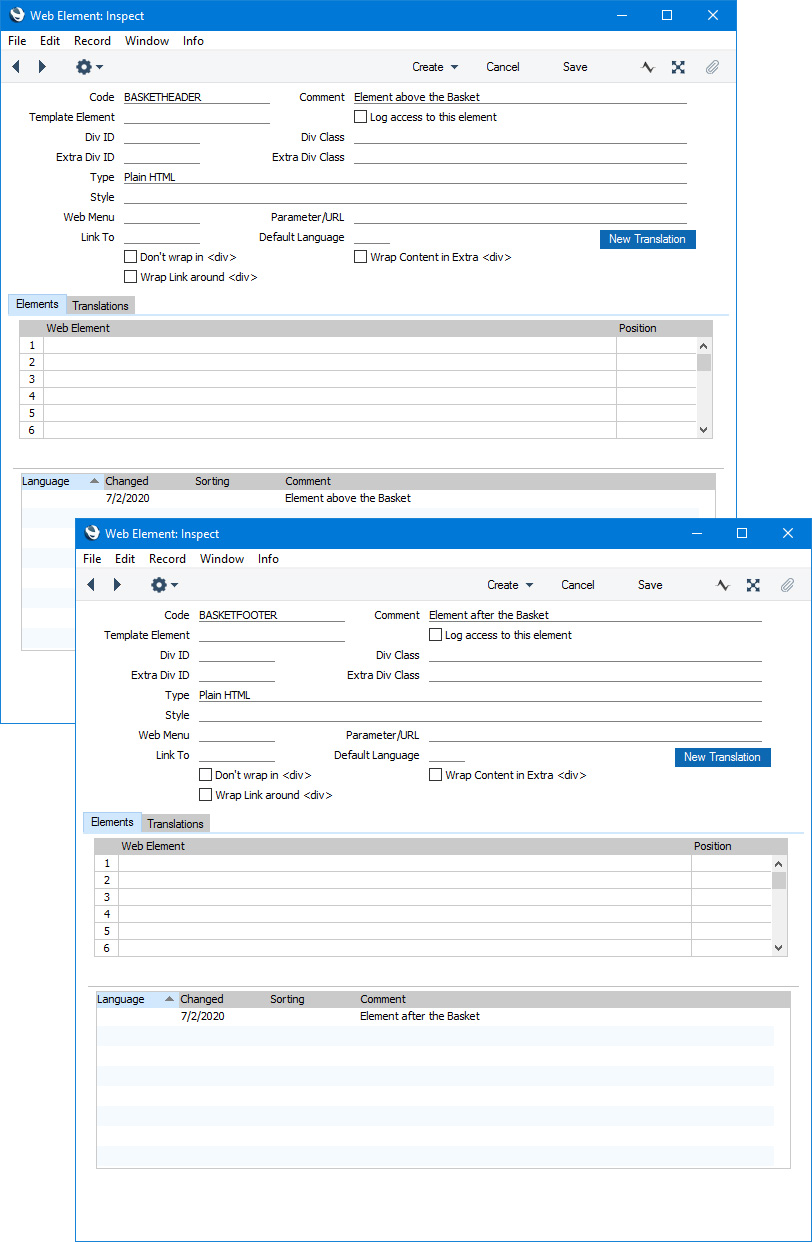
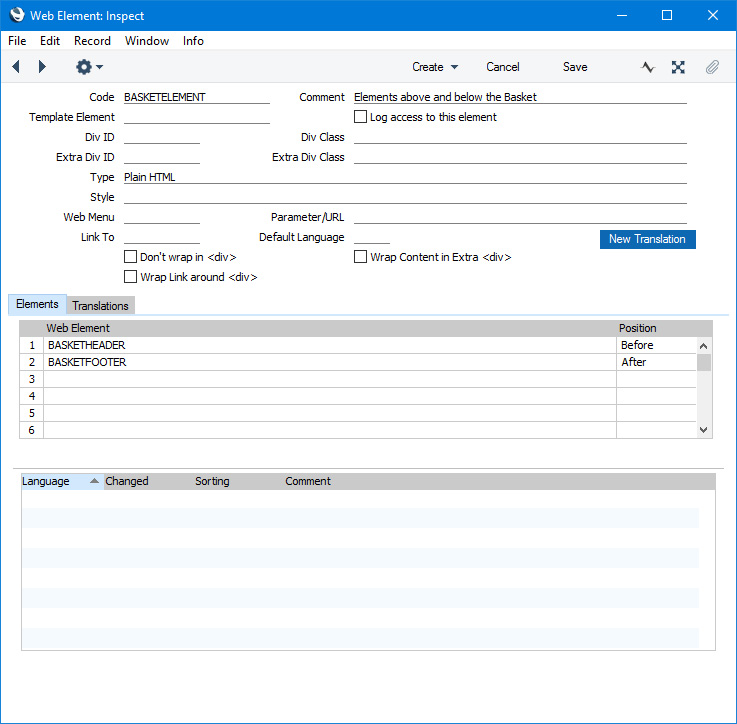
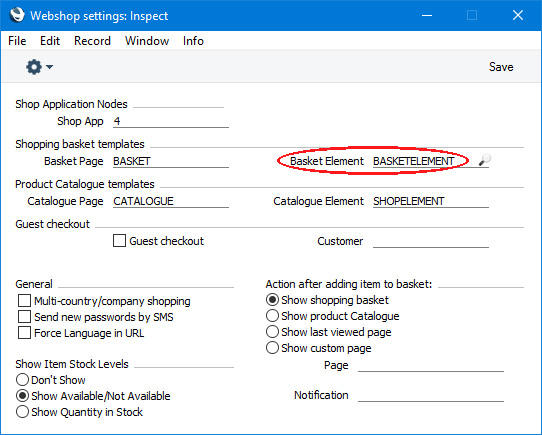
- Header and Footer
- You can add a header and/or footer to the basket. They will be the first and last Elements in the <div id="webapp">. Follow these steps:
- Create separate Elements (with associated Translations) for the header and the footer:
- Create a wrapper Element. In this wrapper Element, list the header and footer Elements from step 1 and place them in the "Before" and "After" Positions respectively:
- Specify the wrapper Element in the Basket Element field in the Webshop Settings setting:
- This is the result in a browser:
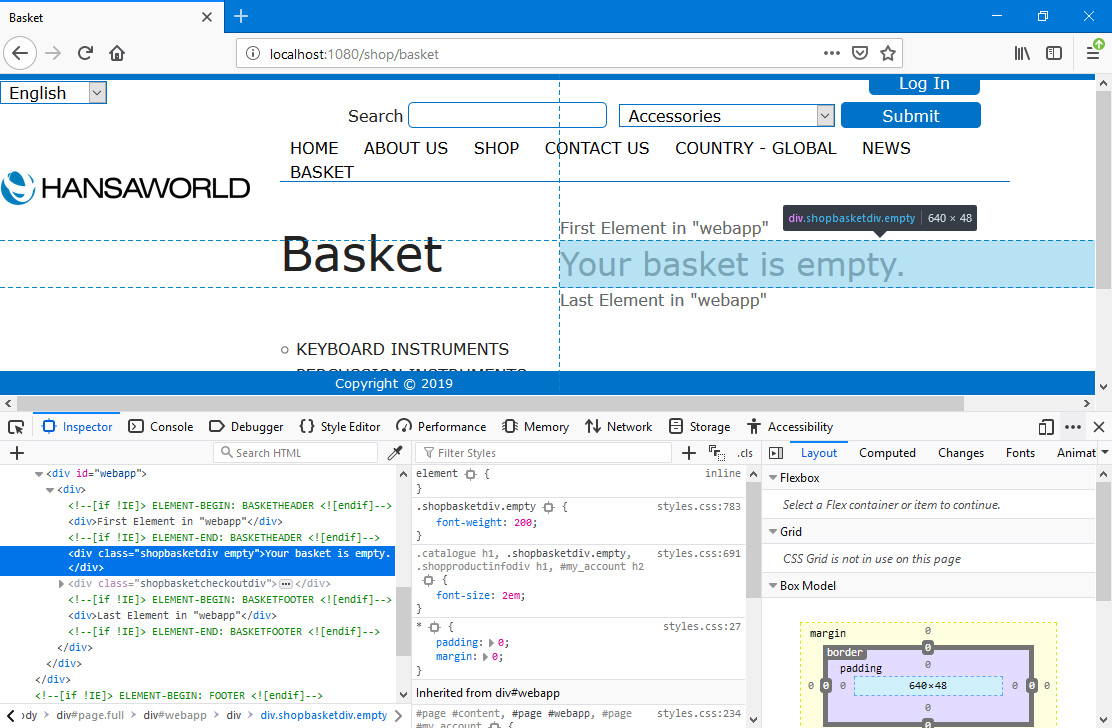
- Empty Basket
- If the basket is empty, the only content of the <div id="webapp"> (apart from any header and footer you may have specified) will be a <div class="shopbasketdiv empty> containing Web Text 25406 (by default, "Your basket is empty."). Note that the [Proceed to Checkout] button will not be visible when the basket is empty.
---
The Webshop in Standard ERP:
Go back to: