Entering an Approval Rules record
To enter a new record in the Approval Rules register, first ensure you are in the Business Alerts module and then click (Windows/macOS) or tap (iOS/Android) the [Registers] button in the Navigation Centre. Then, double-click or tap 'Approval Rules' in the resulting list. The 'Approval Rules: Browse' window will be opened, showing the Approval Rules records that you have already entered.
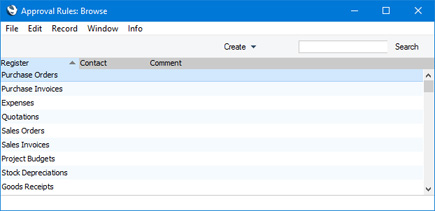
If you are using Windows or macOS, you can change sort order by clicking on the column headings. To reverse any sort, simply click once again on the column heading. The current sort order is marked by the column heading being coloured blue. If you are using iOS or Android, tap on the column heading and choose the sort order you need. Repeat the procedure to reverse the sort.
Searching for a particular record depends on whether you are using the Browse Filtering option in the Optional Features setting in the System module, as follows:
- If you are not using the Browse Filtering option, first sort the list by the column that you want to use for the search. Then, enter the text that you want to find in the Search field in the top of the window (in the top right-hand corner if you are using Windows/macOS) and press the Return key (macOS) or Search (iOS/Android). The first record containing a match for your search string will be highlighted (if you are using Windows, a match will be highlighted as you type each character). For example, to search for a particular Contact, sort by Contact before entering a Contact Code (or the first few characters) in the Search field.
- If you are using the Browse Filtering option, all you need to do is to start typing a letter, word or number in the Search field (there is no need to click in the field before typing). As you type each character, non-matching records will be removed from the list. There is no need to sort the list first.
To enter a new Approval Rules record, select 'New' from the Create menu (Windows/macOS) or + menu (iOS/Android). You can also use the Ctrl-N (Windows) or ⌘-N (macOS) keyboard shortcuts. Alternatively, highlight an Approval Rules record similar to the one you want to enter and select 'Duplicate' from the Create or + menu.
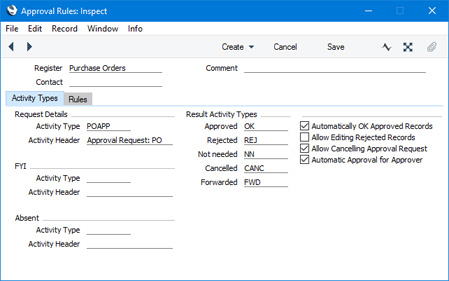
The 'Approval Rules: New' window is opened, empty if you selected 'New' or containing a duplicate of the highlighted Approval Rules record.
When the Approval Rules record is complete, press the [Save] button to save it. This will have the following effects:
- New records in the register in question (i.e. records that are saved for the first time after you save the Approval Rules record) will be subject to the approval process.
- The Approval Status of existing records that have been marked as OK will be set to Approved, and the Approval Status of existing records that have been invalidated will be set to Rejected. Other existing records will become subject to the approval process. You will need to save each one again so that their Approval Status changes from Not Required to Not Requested, thus making them subject to the approval process.
- An extra column will be added to the browse window for that register, displaying the Approval Status of each record:
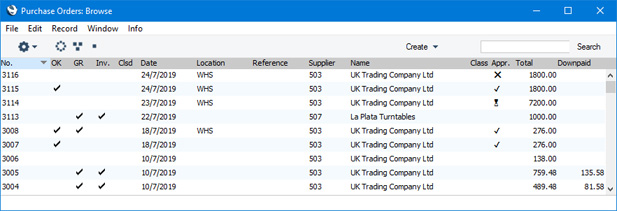
This column can contain the following symbols:
- (blank)
- Not Required

- Not Requested

- Pending

- Approved

- Rejected
Since the amount of information stored in each Approval Rules record will not fit on a single screen, the Approval Rules window has been divided into two cards. At the top of each is the header. There are two named buttons ('tabs') in the header.

By clicking the tabs you can navigate between cards. The header is always visible, as a reminder of the Approval Rules record you are working with.
If you are using iOS or Android, the 'Activity Types' card will be named 'Details', and the 'Rules' card will be named 'Items'.
Please refer to the following pages for details about each card:
---
The Approval Rules register in Standard ERP:
Go back to: