Row Menu - Quotation - Add Header Line
This page describes the 'Add Header Line' function on the
Row menu in the Quotation record window. If you are using iOS or Android, the 'Add Header Line' function is on the Tools menu (with 'wrench' icon).
---
You can use the 'Add Header Line' function in a Quotation when you need to insert a row above the Quotation Items where you can enter some descriptive text. You can use this function at any time while entering the Quotation, as follows:
- Place the insertion point anywhere in the Quotation row that is to be the first row after the header row. Open the Row menu by right-clicking (Windows) or ctrl-clicking (Mac OS X) the row number, and select the 'Add Header Line' function. If you are using iOS or Android, select 'Add Header Line' from the Tools menu (with 'wrench' icon). A special "Header" row will be inserted in the grid above the row containing the insertion point.
- Place the insertion point in any field outside the grid on the 'Items' card and select this function (if you are using Windows or Mac OS X, right-click or ctrl-click any row number). A special "Header" row will be inserted in the grid as the first row.
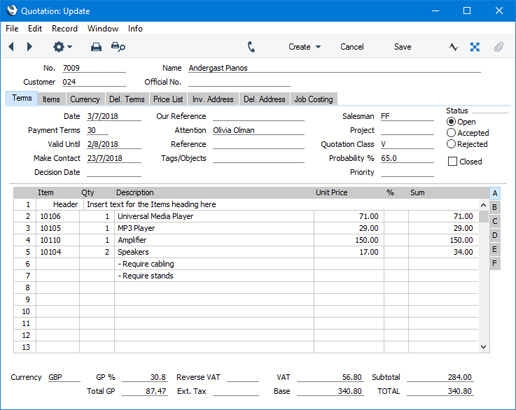
In this "Header" row, you can type the descriptive text in the field to the right of the "Header" text, as has been done in row 1 in the illustration below:
When you design the Form Template to be used when printing Quotations, you can specify that the special "Header" row will be printed in a different Style to the rows containing the Items (e.g. font, font size, etc). To do this, use the
'Row Styles' function on the Operations menu of the Form Template window.
The special "Header" row will be transferred to all Orders and Invoices created from the Quotation.
---
The Quotation register in Standard ERP:
Go back to: