User Accounts (Concurrent Users without Mailboxes)
The procedure described on the
User Accounts (Named Users and Concurrent Users with Mailboxes) page will create a new User Account that consists of a Person record, a Contact record and a Mailbox. Therefore, you cannot use it if you need to create a new User Account for a Concurrent User who will not have a Mailbox. In this case, you need to create the Person and Contact record components separately, and then connect them together yourself. Follow these steps:
- If you are not already in the System module, select it using the [Module] button in the Master Control panel or the Ctrl-0 (zero) (Windows and Linux) or ⌘-0 (Mac OS X) keyboard shortcut.
- Open the Person register by clicking the [Persons] button in the Master Control panel. The 'Persons: Browse' window will open, listing the Persons (i.e. the User Accounts) that already exist.
- Click the [New] button in the Button Bar at the top of the browse window.
The 'Person: New' window opens, allowing you to open a new Person record. A Person record is the most basic component of a User Account: once created, it will allow the User to log in to your HansaWorld Enterprise system.
You must enter a Signature and a Name as shown in the illustration below. The Signature is the name that will be used as the log-in identity code each time the User logs in to HansaWorld Enterprise. You can assign an Access Group and Start Access Level to the Person, as described in step 7 on the User Accounts (Named Users and Concurrent Users with Mailboxes) page. Choose "Concurrent" as the User Type.

- Click the tabs (named 'Access', 'Serial Nos', 'Sales', etc) to enter more information about the member of staff. For full details of each field, please refer here.
- Click the [Save] button in the top right-hand corner of the window. The record is saved in the Person register.
- The window title changes to 'Person: Inspect', giving you a chance to check you have not made any mistakes in entering the record.
- Close the record by clicking the close box or using the Ctrl-F4 (Windows and Linux) or ⌘-W (Mac OS X) keyboard shortcut.
- If you have a number of personnel to enter, click [New] instead of [Save] at step 5 above (or use the Ctrl-N/⌘-N keyboard shortcut). The Person record is saved and closed, and a blank window is opened, allowing you to enter another record straight away.
- When you close the last Person record at step 7 above, you will be returned to the 'Persons: Browse' window, which now lists the members of staff that you have just registered. Click on each one in turn and allocate a password by selecting 'Change Password' from the Operations menu, as described in step 6 on the User Accounts (Named Users and Concurrent Users with Mailboxes) page. If you do not allocate a password to each new User, they or anyone happening upon one of the new Signatures can log in without specifying a password.
- If any of the new Users will use HansaWorld Enterprise to send text (SMS) messages, to place calls on their mobile phones and/or make calls through an Asterisk-based switchboard, you need to create records in the Contact register for them. For example, if they will send text (SMS) messages, the mobile phone number in their Contact record will be used as the source of their text (SMS) messages.
Use the [Module] button or the Ctrl-0 (zero) (Windows and Linux) or ⌘-0 (Mac OS X) keyboard shortcut to change to a module containing the Contact register (e.g. the Sales Ledger or the CRM module). Open the Contact register by clicking the [Contacts] button in the Master Control panel. The 'Contact: New' window opens, allowing you to enter a new Contact record:
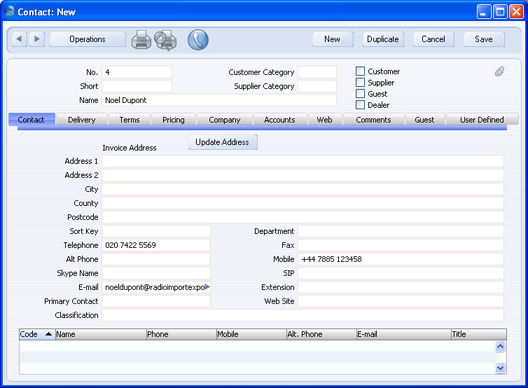
Enter the User's name and their contact details (telephone and mobile numbers, Skype name, SIP user name, etc). Do not mark any of the Customer, Supplier, Guest or Dealer boxes in the top right-hand corner. Click the [Save] button in the top right-hand corner of the window. The record is saved in the Contact register.
Make a note of the Contact Number (4 in the illustration above), return to the Person record and enter this number in the Contact Code field. This connects the Person record to the Contact record:

---
In this chapter: