Operations Menu - Purchase Invoice - Add Retention
This page describes the 'Add Retention' function on the
Operations menu in the Purchase Invoice record window. If you are using iOS or Android, the 'Add Retention' function is on the Tools menu (with 'wrench' icon).
---
In a long-term Project, there can be an agreed provision that part or all of an invoiced amount will not be paid until a specified point has been reached. This is known as "Retention". On the purchase side, a Supplier can send you a Purchase Invoice in which part or all of the value is subject to retention. You may have a simple Customer-Supplier relationship with the Supplier (i.e. they are carrying out work for you), or it may be that you have sub-contracted work to them (i.e. they are carrying out work that you will invoice to a Customer as part of a Project).
To process a Purchase Invoice with an element of retention, follow these steps:
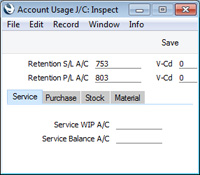
- Specify a Retention P/L Account and Retention P/L VAT Code in the Account Usage J/C setting in the Job Costing module:
- All retained amounts must be registered against a Project. If you have a simple Customer-Supplier relationship with the Supplier, this will be a Project whose purpose is to keep track of the costs involved. If the Supplier is a sub-contractor, the Project will also track the work done for the Customer and also provide the basis for invoicing. Remaining in the Job Costing module, enter the Project in the Project register.
- Changing to the Purchase Ledger, enter the Purchase Invoice in the normal way. Remember to specify the Project and Item on flip B of each row so that Project Transactions will be created, assigning the costs to the Project and, if necessary, allowing them to become invoiceable to the Customer.
When the time comes to enter the element of retention, choose 'Add Retention' from the Operations menu (Windows/Mac OS X) or Tools menu (iOS/Android). The following window will open:
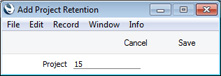
- Enter the Project Number (you can use 'Paste Special' to help you choose the correct one) and click the [Save] button (Windows/Mac OS X) or tap √ (iOS/Android).
- A special "Retention" row will be added to the Purchase Invoice containing the Project Number and the Retention P/L Account and Retention P/L VAT Code from the Account Usage J/C setting. You can change the Account and VAT Code if necessary, and even the Project if you realise you made a mistake with your choice in step 4. Enter the retained amount as a negative figure in the Amount column:
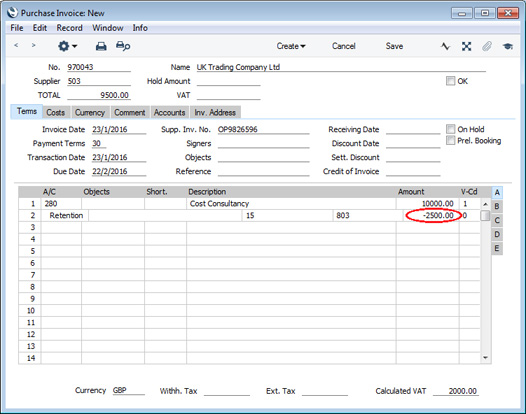
- For the Invoice to balance, the TOTAL in the header should not include the retained amount. In the example illustrated above, 10000.00 + 2000.00 VAT - 2500.00 Retention = 9500.00. When the Invoice is complete, mark it as OK and save it in the usual way. In the resulting Nominal Ledger Transaction, the retained amount is credited to the Retention P/L Account, and the TOTAL is credited to the Creditor Account as normal. The retained amount is not included in the posting to the Creditor Account as it is not yet payable.

- The retained amount will be registered against the Project. You can check Supplier retentions by opening the Project record and choosing 'Project Info' from the Operations or Tools menu. A report will be printed to screen, at the bottom of which there will be a section listing Supplier retentions.[NT2]
- When the retained amount becomes payable, you will receive a second Purchase Invoice from the Supplier. Again, use the 'Add Retention' Operations/Tools menu function to add the special "Retention" row, and this time enter the retained amount as a positive figure:
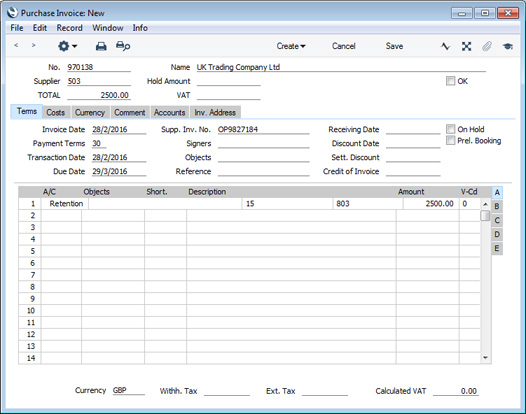
- The Nominal Ledger Transaction from this Invoice will move the retained amount from the Retention P/L Account to the Creditor Account, as it is now payable:

---
The Purchase Invoice register in Standard ERP:
Go back to: