User Accounts (Named Users and Concurrent Users with Mailboxes)
When you create a new Enterprise by HansaWorld database as described
here, you will create at least one User Account, consisting of a Person record, a Mailbox and a Contact record. If you have a single Company in your database, follow the steps below to create similar additional User Accounts for Named Users and for Concurrent Users with Mailboxes. If you have more than one Company, you should read this page in combination with the
User Accounts when you have more than one Company page.
Before following these steps, you should first make sure that you have recorded the correct number of Users (Names plus Concurrent) (in the Named Users field), Concurrent Users (in the Concurrent Enablers field) and Mailboxes for Concurrent Users (in the Extra Concurrent Mailboxes field) in the Configuration setting in the System module. Named Users by definition include Mailboxes, so there is no separate field for the number of Mailboxes for Named Users.
- If you are not already in the System module, select it using the [Module] button in the Master Control panel or the Ctrl-0 (zero) (Windows and Linux) or ⌘-0 (Mac OS X) keyboard shortcut.
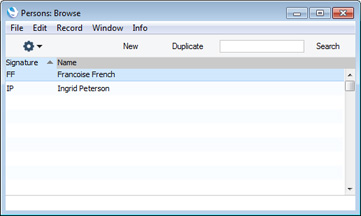
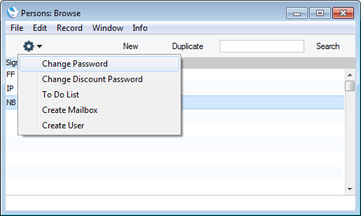
- Open the Person register by clicking the [Persons] button in the Master Control panel. The 'Persons: Browse' window will open, listing the Persons (i.e. the User Accounts) that already exist:
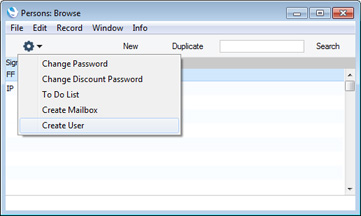
- Choose 'Create User' from the Operations menu:
The 'Create User' window appears:
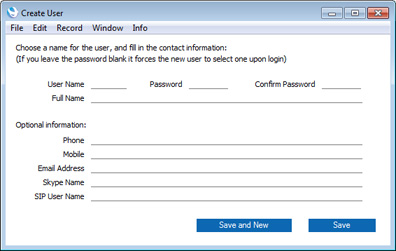
- You must enter a User Name and Full Name to create a new User Account and you should enter a password, but the other information is optional. The User Name is the log-in identity code the User should enter when logging in to Enterprise by HansaWorld.
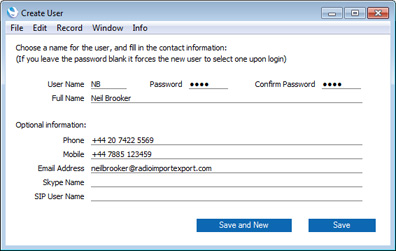
- When you click the [Save] or [Save and New] buttons, a new User Account will be created. In the case of [Save], the 'Create User' window will be closed, returning you to the 'Persons: Browse' window. In the case of [Save and New], a new User Account will be created and a new 'Create User' window will be opened, allowing you to begin creating another User Account.
When you click [Save] or [Save and New], behind the scenes the process of creating a new User Account includes the following:
- a new record for the User will be created in the Person register;
- a new Mailbox will be created for that User; and
- a new record for the User will be created in the Contact register, containing the information that you entered in the optional section of the 'Create User' window. You may want to edit this record, as described in step 7 on the User Accounts (Concurrent Users without Mailboxes) page.
The Person record, Mailbox and Contact record will be correctly linked together, so the User Account will be fully operational when the User logs in for the first time.
- The User Account will now be fully operational, and the User will be able to log in and begin work.
At any time, you can change the User's password. Highlight the new User in the 'Persons: Browse' window (you may need to close and re-open the 'Persons: Browse' window (step 2 above) before the new User is included in the list), and choose 'Change Password' from the Operations menu:
The 'Change Password' window opens:
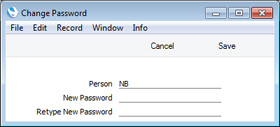
Enter the Password twice to ensure that it is correct. Click the [Save] button or use the Shift-Enter key combination to close the window and save: use the close box if you do not want to save changes. The password is case-sensitive. Note that to change the User's password using this method it is not necessary to know the old password. This method is intended for system administrators and you should therefore use Access Groups to ensure that only system administrators have access to the Person register.
The User can also change their own password at any time. This is described here. You may want to use the Password Security setting in the System module to ensure Users regularly change their passwords, and to ensure they use passwords that meet certain requirements.
- The User Account is now fully operational and protected by a password. But before the User logs in for the first time, you may want to give them an Access Group, to restrict the access they have to your Enterprise by HansaWorld system.
Double-click the User's name in the 'Persons: Browse' window. The 'Person: Inspect' window opens:
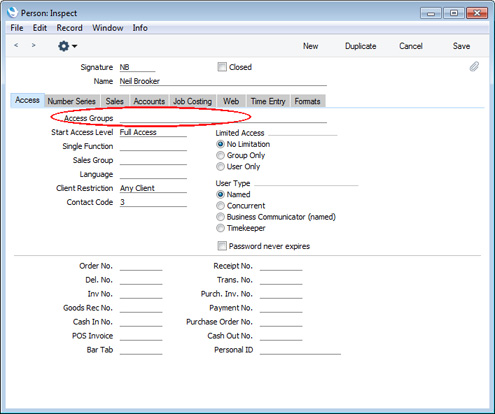
Click in the Access Groups field and open the 'Paste Special' list using the Ctrl-Enter/⌘-Enter key combination. A list of the Access Groups that you created following the instructions here will appear. Choose one by double-clicking. If necessary, you can enter more than one Access Group, separated by commas.
Use the Start Access Level field to specify whether the User will start from No Access or from Full Access. Please refer to step 4 on the Access Groups page for details.
By default, it will be assumed that the User is a Named User. If this is not the case (i.e. the User is a Concurrent User with Mailbox), choose "Concurrent" as the User Type.
While the Person record is open, you may want to attach a picture of the User to the record. This is described on the Pictures page.
Save the record by clicking the [Save] button in the top right-hand corner of the window or using the Shift-Enter key combination. Now, when the User logs in, their access to your Enterprise by HansaWorld system will be controlled by the Access Group you have just assigned to them.
Remember to assign the system administrator's Access Group (illustrated on this page) to the appropriate User(s).
---
In this chapter:
Go back to: