|
Search HansaManuals.com HansaManuals Home >> Discontinued Products >> Standard Invoicing >> Invoices Previous Next Entire Chapter in Printable Form Search This text refers to program version 6.3 Entering an Invoice There are several shortcuts that you can use to simplify your work when entering Invoices. You can for example bring a date into a date field using the 'Paste Special' function. You can also use this function to simplify the entering of Item Numbers, Customer Numbers, Payment Terms etc.To enter a new Invoice, first open the 'Invoices: Browse' window as described here. Then click [New] in the Button Bar or use the ⌘-N keyboard shortcut. Alternatively, select an Invoice similar to the one you want to enter and click [Duplicate] on the Button Bar. The 'Invoice: New' window is opened, empty if you clicked [New] or containing a duplicate of the highlighted Invoice. In the case of the duplicate, the Invoice and Transaction Dates of the new Invoice will be the current date, not the date of the duplicated Invoice, and the Due Date will be recalculated accordingly. Complete the Invoice record as described below, then save it using the [Save] button and close the window by clicking the close box. Then, close the browse window using the close box again.
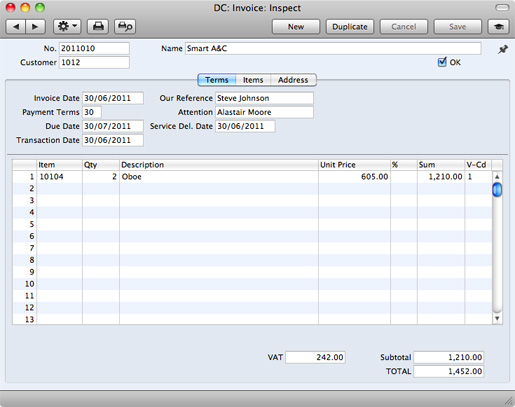
Since the amount of information stored about each Invoice will not fit on a single screen, the Invoice window has been divided into three cards. At the top of each is the header. This contains the Invoice Number, the Customer Number and Name, and the OK check box. At the bottom of the screen is the footer, which contains various totals. There are three named buttons ('tabs') in the header.
When you have added every Item to the Invoice, you may want to check the Invoice. Click the [Save] button to save it and then click the Printer icon in the Button Bar to print a sample Invoice document. If you want to print to screen, click the Preview icon. You will still be able to make changes until you approve the Invoice by checking the OK check box and saving. Approving the Invoice will cause it to be entered to your Sales Ledger, and it will no longer be modifiable. --- In this chapter:
|