|
Search HansaManuals.com HansaManuals Home >> Standard Accounts >> Customers, Suppliers and Contact Persons Previous Next Entire Chapter in Printable Form Search This text refers to program version 6.3 Entering a Contact The Contact register is available in the Sales and Purchase Ledgers. To work with Contacts, use the [Module] button in the Master Control panel to enter either of these modules, and then open the Contact register by clicking the [Contacts] button, also in the Master Control panel. The 'Contacts: Browse' window is opened, showing a list of Contacts already entered. To create a new Contact, click the [New] button above the list or use the ⌘-N keyboard shortcut. Alternatively, highlight a Contact similar to the one you want to enter and click [Duplicate] (or use ⌘-Y).
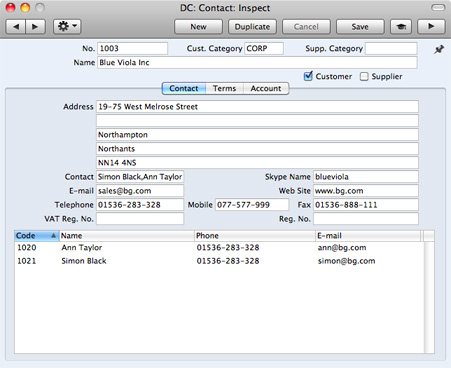
Since the amount of information stored about each company will not fit in a single window, the 'Contact: New' window is divided into three cards. At the top of each is the header. This contains the Contact Number and Name, the Customer and Supplier Categories, and the Customer and Supplier check boxes. There are three named buttons ('tabs') in the header.
--- In this chapter:
|