Creating a Report Generator Report - Blocks - Multi-Row Blocks
This page describes using information in multi-row blocks in Report Generator reports.
---
A multi-row block contains a single record with a number of rows. Examples are the Payment Modes and VAT Codes settings. Using the Report Generator, you can design a report that lists the contents of a multi-row block. To do this, you should add the block to the beginning of the report definition as a matrix. In effect, the matrix will be the primary register. Follow these steps:
- Create a new record in the Report register in the Report Generator module. On the 'Data' card of the 'Report Definition: New' window, click the [Matrix] button above the report display area. Complete the 'Matrix Rows' dialogue box as shown below (the example shows a report listing VAT Codes):
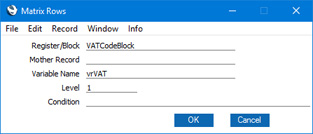
- Register/Block
- Specify the block that is to provide the basis of the report.
- You should refer to the block using its internal name ("VATCodeBlock" in the illustration above). To find the internal name of a block, run the Export/Import Format report in the Technics module with the Include Blocks option selected.
- Mother Record
- Leave this field blank when adding a block to a report.
- Variable Name
- Enter a name for the variable that will hold the contents of the block.
- Level
- Enter the appropriate level for the report. In a simple list as in the example, the block is effectively the primary register and therefore the level should be 1.
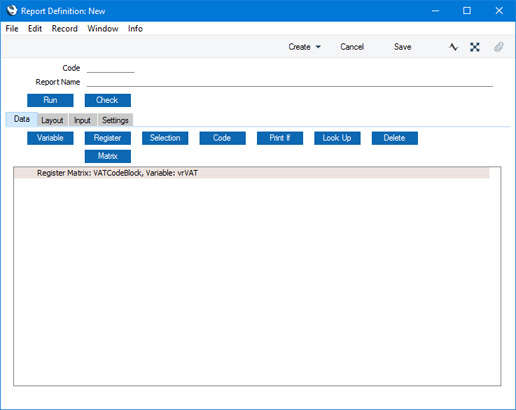
- Click the [OK] button. The block is shown in a "Register Matrix:" line in the report display area:
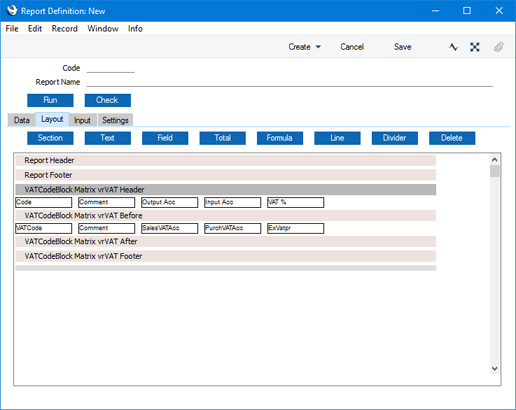
- You can add other features to the report in the normal way. For example, you can add a search using the [Selection] button. Design the report output on the 'Layout' card as usual:
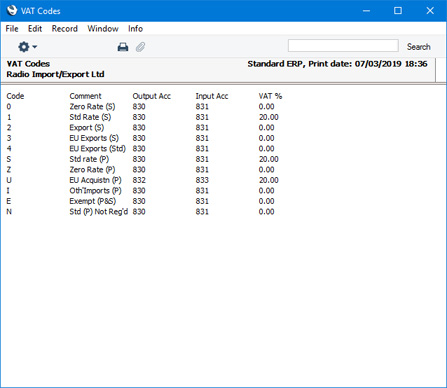
- This is the result:
There may be occasions where it will be useful to loop through the rows in a multi-row block and to print the records in another register that are connected to each row in the block. For example, it might be useful to loop through the rows in the
Project Classes setting and to list the
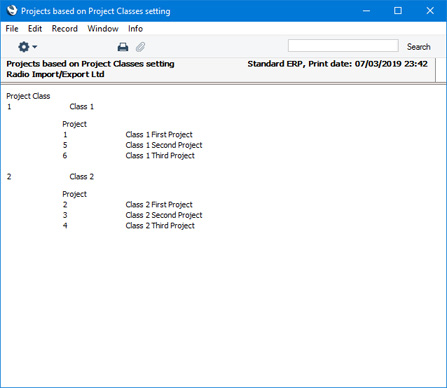
Projects belonging to each Class. The report output will be as follows:
- Project Class 1
- First Project belonging to Class 1
- Second Project belonging to Class 1
- Third Project belonging to Class 1
- Project Class 2
- First Project belonging to Class 2
- Second Project belonging to Class 2
- Third Project belonging to Class 2
- Project Class 3
- First Project belonging to Class 3
- Second Project belonging to Class 3
- Third Project belonging to Class 3
To achieve this, you can use the technique that you used to link primary and secondary registers as described
here. In this case, the Project Classes block will be the primary register (as a matrix) and the Project register will be the secondary register. As the report loops through the Project Classes block, you need to search for Projects belonging to the current Project Class. Follow these steps:
- On the 'Data' card in the Report Definition window, use the [Matrix] button to add the Project Classes block as the primary register as described earlier on this page:
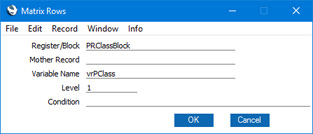
PRClassBlock is the internal name for the Project Classes setting.
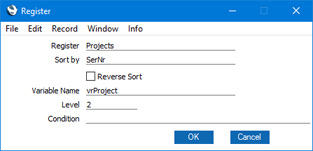
- Use the [Register] button to add the Project register as the secondary register:
- Click on the register line for the Project register that was added in step 2 and use the [Selection] button to add a search for Projects belonging to the current Project Class:
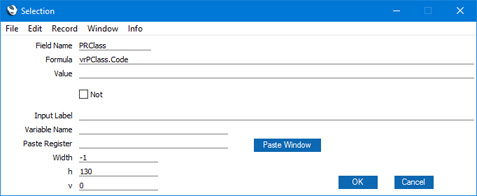
Enter "PRClass" as the Field Name, or choose it using 'Paste Special'. This is the internal name for the Project Class field in the Project register.
Then enter "vrPRClass.Code" as the Formula. This expression refers to the Code field in the Project Classes block.
The Field Name and the Formula state that there will be a search in the Project Class field in the Project register for Projects whose Class is the same as the Code of the current Project Class.
- Change to the 'Layout' card and design the report output as required. This is an example:
Please refer
here for details about using single record blocks in reports.
---
Go back to: